

It has been long I have not blogged a recipe and the last one was this Chocolate sponge cake that I had posted on Feb 6th. It was a special cake close to my heart (many reasons that this page won’t be enough if I start writing about it 😄) and I had posted it with so much love. ❤️ How glad I am now that many of my readers have tried and loved it too. Thank you dear readers. Your feedbacks make all the efforts of blogging worthwhile. 🙏
Along with the feedback messages that I keep receiving, if there is something I get regularly, it is doubts regarding baking. Since I have been baking for about a decade now, I can understand what went wrong when readers message me. So I try my maximum to help them as much as I can. Helping people gives me a kind of peace and happiness which nothing else can give (simple but precious joys of life). ❤️
So, no matter what doubt you have, even if you feel it’s a very silly one, Ask away.( I get that quite often that people think their doubt is very silly). I would not mind at all and will surely reply when I find time. No doubt is small and clearing it will ensure you get the recipes well and your ingredients/ time is not wasted.
Today, I got a baking doubt from my reader and after I replied, she asked me if I have written a blog regarding oven basics. That’s when I realized I had not blogged an article dedicated to it and how helpful it would be for all of you if I write a detailed one explaining what all I have learnt in these 10 years of baking. Have a long way to go and so much to learn but still will try to jot down whatever I know.
So, here goes the article. I will write as Q and A so that it’s easier for you all to read. Also, will keep updating whenever I get new doubts and I feel it will help you all.
My Oven –

Q : Which oven do you use?
A : This is the picture of the oven that I use. It is an OTG and I have not bought it. Since we live in a company provided accomodation, we were provided with all electronic appliances too and this came along with it. It is a INDESIT oven plus glass top cooking range. I have been using the same since 10 years now and very happy with it. I can say it is my best friend and my favorite appliance in the kitchen since I both cook and bake in it. 😍😍
Q : Which oven is better to buy? OTG or conventional oven?
A : As I mentioned above, I did not buy the oven. But I have always baked in this OTG only and love how evenly it bakes. My parents have a microwave with conventional mode oven and I love how user friendly it is. Yes, the space inside is less when compared to OTG which brings to the point that if you want to bake in large batches, OTG is for you while if you want to bake just for your family, microwave with conventional mode oven is very easy to use. Here is the inside picture of my OTG. Love how spacious it is.
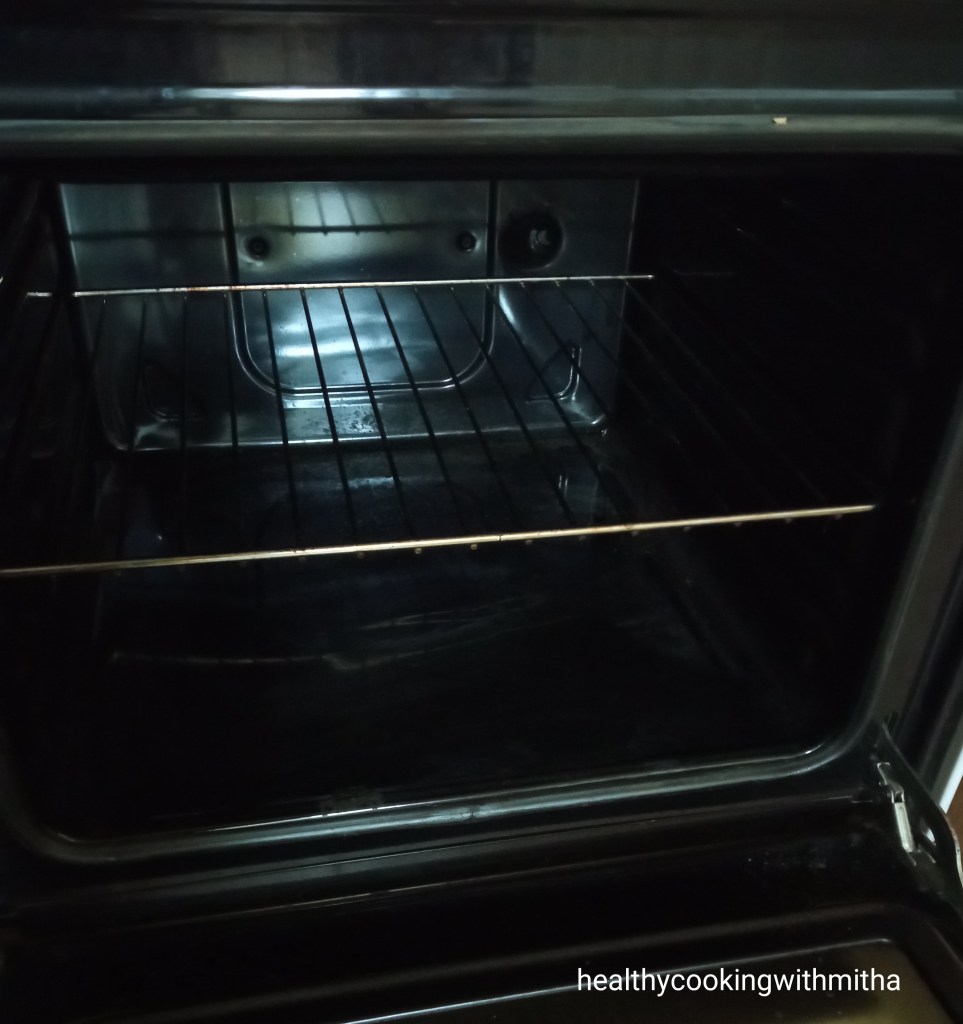
Q – Which rack to use in my oven for baking? It has three racks.
A – I have always used only the center rack as shown above in the picture for all my bakes. This ensures even baking and I get good results with it. But it sometimes depends on your oven. Some readers say they only have two racks. In that case, place in the bottom rack and bake longer (it’s better than keeping in the top rack which can cause the cake to burn). Once you start baking, with experience you will know which rack of your oven works best for you. (For people owning microwave conventional oven, this is not for you as you have just one rack to place your bakes. In your case, just bake in conventional mode or with two rods on as per your type of oven.)
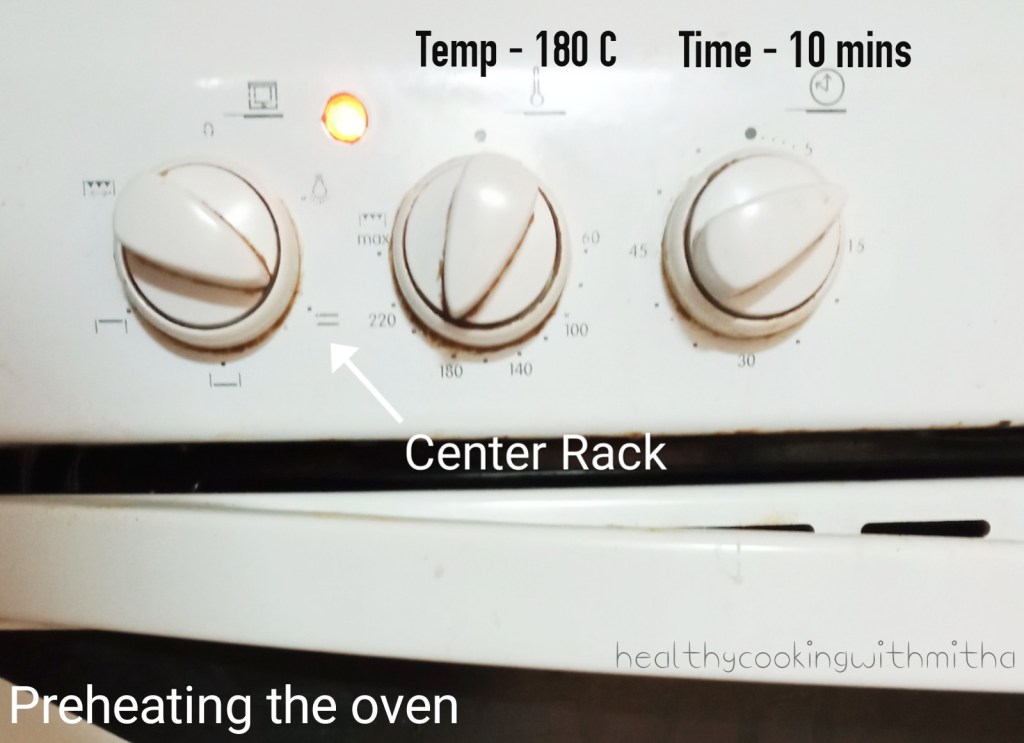
Q – How to preheat the oven?
A – Preheating the oven to the mentioned temperature is very important to get perfect bakes. Almost all of my recipes require pre heating to 180 C for 10 mins atleast. This ensures you are placing the cake batter or cookie/ bread dough in a hot oven which is the first important step in baking. So before you start making the batter or while making, don’t forget to preheat the oven. Most cake recipes need only sifting the dry ingredients, mixing the wet ingredients and then the batter is done which hardly takes 10 to 15 mins. So preheat the oven during that time. Here is the picture of the knobs from my oven.
My Baking accessories –
I am someone who believes in not hoarding stuffs unnecessarily and all my baking equipments are from the time I started baking. I am happy that these bake wares have lasted all these years inspite of me using them so often. Here is a picture of some of my most used ones.
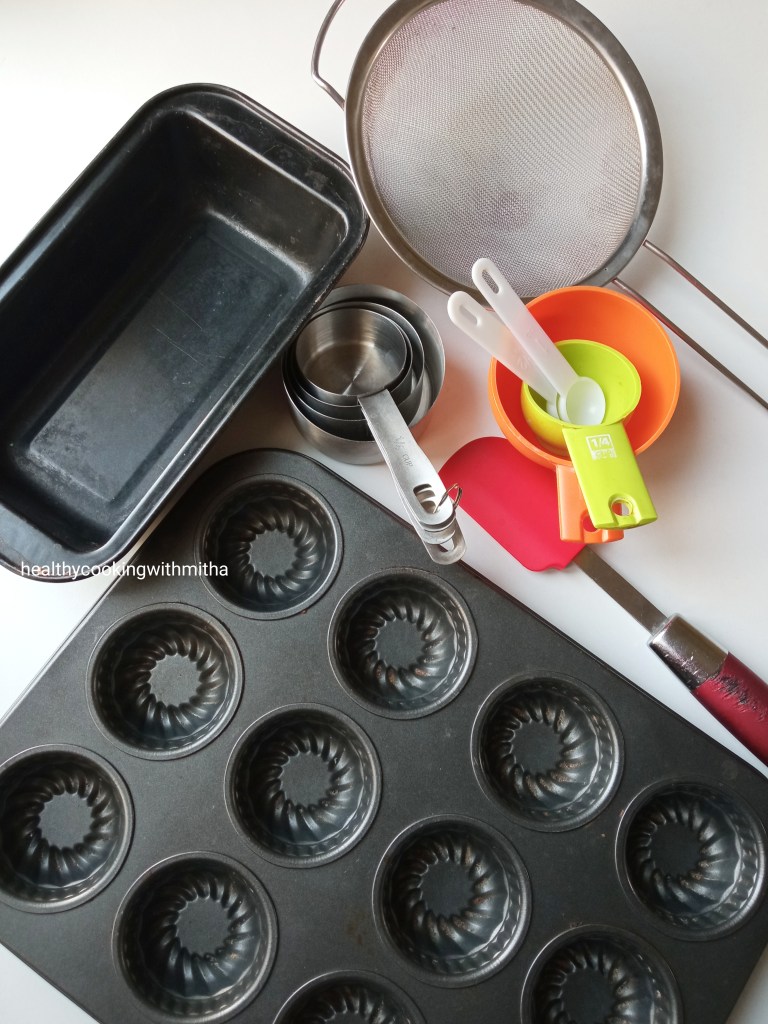
The nonstick loaf pan and the colourful measuring cups were my first buys when I started baking.
Measuring cups are the most important when you bake as no matter what anyone says, baking is definitely a science. You can’t just add ingredients in any ratio blindly and expect perfect results unless you are that experienced a baker. As for me, I can’t imagine baking without measuring cups. I have also been getting requests from readers for measurements in grams and I am planning to buy a kitchen weighing scale soon for this purpose. Weighing scales gives even better results as measuring cups comes in various sizes. Mine is a 250 ml one but it also comes in 200 ml cups.
Nonstick loaf pan that I use measures 20 cm in length and 4 cm in width. I have baked all my cakes, bread and pav in it. I also don’t use parchment paper. I just grease it with oil or ghee and the bakes come out clean. One of the best baking buys ever!
Muffin pan is useful if you like baking cupcakes. I use it while making cupcakes for my kids.
Sieve is essential in baking for me as I bake without eggs and using whole wheat flour. So to make the batter airy and light, I sieve the dry ingredients using the sieve shown above.
Spatula – While mixing the dry and wet ingredients, a spatula is required as you can mix without the batter sticking on it and also ensures that you don’t over mix the batter.

If you are my regular reader, you must have noticed this baking plate on which I bake my cookies, pizzas and also my falafel bread. It has been 10 years I am using it and so it’s not as beautiful (😬😅) but still I love how my bakes do not stick on it with very little greasing with ghee and bakes evenly. Can’t count the number of times I have baked on this plate. My best friend in baking for sure. 😍 It is a oven proof plate/ tray available in any bake ware stores.
Healthier Ingredients that I use –
Q – Which brand of wheat flour do you use?
A – This is the question I had been getting a lot of times. So I started mentioning the brand that I use which is Pillsbury Atta in my recent posts. I have used many brands of wheat flour but the flavours and texture that Pillsbury gives is the best. I get queries specially with whole wheat bread and whole wheat Pav that they did not get the desired taste nor softness even though they followed the recipe properly. When I ask them, I find they have used some other brand of Atta. So if you can find, use Pillsbury only as that is what gives the best results from my recipes.
Q – Which brand and kind of jaggery do you use? Also, can I use liquid jaggery?
A – I used to buy jaggery blocks, melt in water and then use in my initial baking recipes. After that, we started getting Jaggery powder from Goodness foods company ( here in Qatar) and my life changed. It is so easy to add to cakes and cookies. Apart from being healthier than refined sugar, it is also a lot more flavourful which gives amazing bakes.
About liquid jaggery, I have never used them in my bakes but you can add with wet ingredients a little lesser in quantity as liquid jaggery is more concentrated in taste.
Baking soda and Baking powder –
Do make sure of two points with these:
1. Make sure to check the expiry date as the bakes won’t come out as soft and spongy if the baking soda or powder is expired.
2. They usually form tiny lumps even if stored in a dry place. So do sieve before using in cakes and cookies. Else you will get those tiny lumps in the baked goodies which spoils the taste.
Same is the case with Cocoa powder too. I freeze my cocoa powder as it lasts well for many months that way. Sieve to remove any lumps that form.

Ghee or Butter instead of Oil –
I use Ghee or Butter in my bakes instead of Oil as I mostly bake for my kids and they need the fats since we are Vegetarians. Another reason why I don’t use oil is the flavour and aroma of the oil in the cakes which my kids don’t like. You can substitute with a neutral flavoured oil like Sunflower or Canola oil if you want to make the bakes free from Ghee or Butter. Using Olive oil or Coconut oil means the bakes will taste and smell of the oils as they have their own strong aroma and flavour.
I use Amul Ghee and Lurpak salted butter which are readily available here in Qatar.
Tips while Baking – Cakes
* Always preheat the oven at 180 C for atleast 10 mins (unless it is mentioned to preheat at a higher temperature).
* Sieve the dry ingredients to remove lumps and to ensure the flour mixture is airy and light.
* Always use all wet ingredients like milk and curd at room temperature unless otherwise mentioned like hot milk or hot water.
* Mix both the dry and wet ingredients using a spatula till the mixture is free from flour specks. But do NOT overmix as it leads to dense cakes. Just mix with light hands till the ingredients combine and you are done.
* You can use parchment paper to line your cake tin and cookie tray but I grease them with ghee or butter. It ensures that the cake comes out clean and cookies do not stick to the plate after baking.
* Do NOT open the oven door atleast till three fourth of the bake time. If you keep opening the door, the temperature varies drastically and it will lead to imperfect bakes. So if the bake time is 30 mins, open the door only after about 20 mins.
* Check for doneness using a toothpick or skewer inserted in the center of the cake. If it comes out clear or with little crumbs, the cake is done. If it comes out sticky and with batter in it, bake for 5 mins more and then check again.
* When you check and see that the top portion of the cake is done and turning dark brown but inside has to bake, cover the tin with aluminum foil during the last 5 to 10 mins of bake. This is ensure that the cake does not burn or turn black on surface and the inside with bake well too.
* Allow the cake to cool completely before running the knife along the sides and trying to unmold it. Best is to leave the cake covered at room temperature overnight. I have noted that cakes always taste best the next day.
* For easy frosting recipes without whipping cream, you can check my Ragi Chocolate Cake and Dates Chocolate Brownie recipes.

* You can keep the cake at room temperature for 24 hours and then leftovers can be refrigerated in a airtight container. Microwave before use and get the same softness when you eat each time.
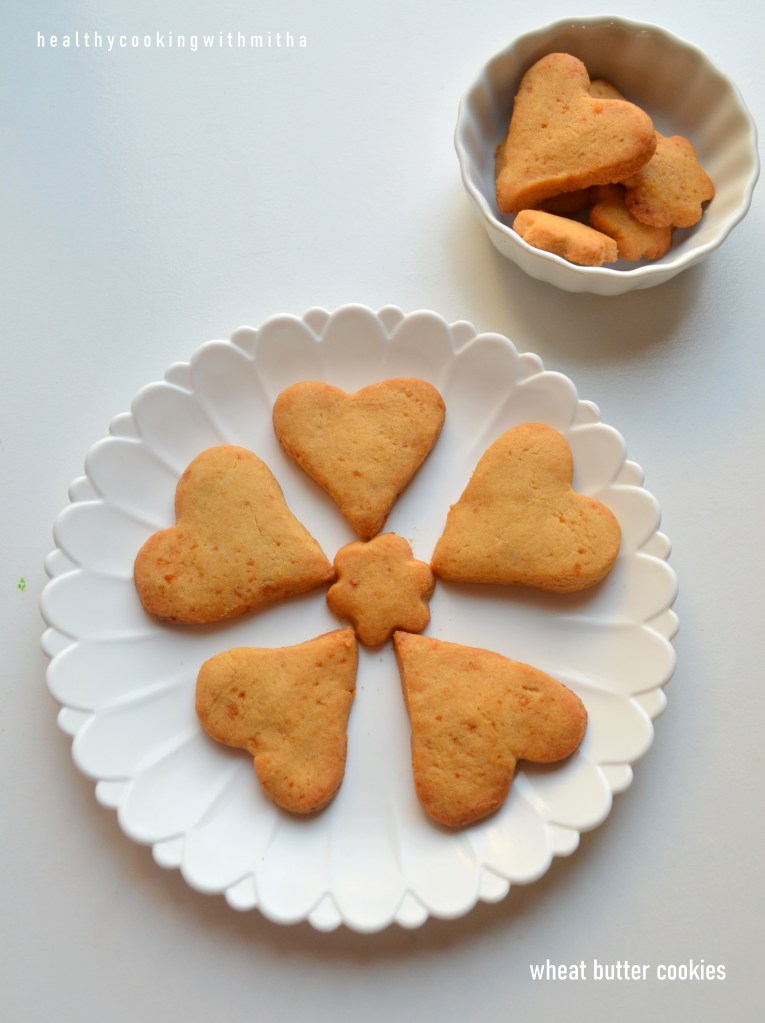
Tips while Baking – Cookies
* Remember to refrigerate the cookie dough for atleast 10 mins so that the cookies can be shaped perfectly.
* Also, remember to grease the tray well with ghee or butter so that the cookies don’t stick on it.
* Don’t make the cookies very thick and pat them into thin discs. Else the insides of the cookies can remain underbaked.
* Space the cookies with some distance in between them as they increase in width after baking.
* Cookies get baked very quickly than cakes. Takes only about 15 mins. So keep an eye after 10 mins so that the cookies don’t burn.
* When the cookies get slightly brown streaks, it means they are done. If they turn too much brown on the surface, they turn very crispy. So if you want soft cookies, remove as soon as it starts turning dark brown. Else it turns crispy.
* Store in an airtight container at room temperature and the cookies last well for atleast 5 days.
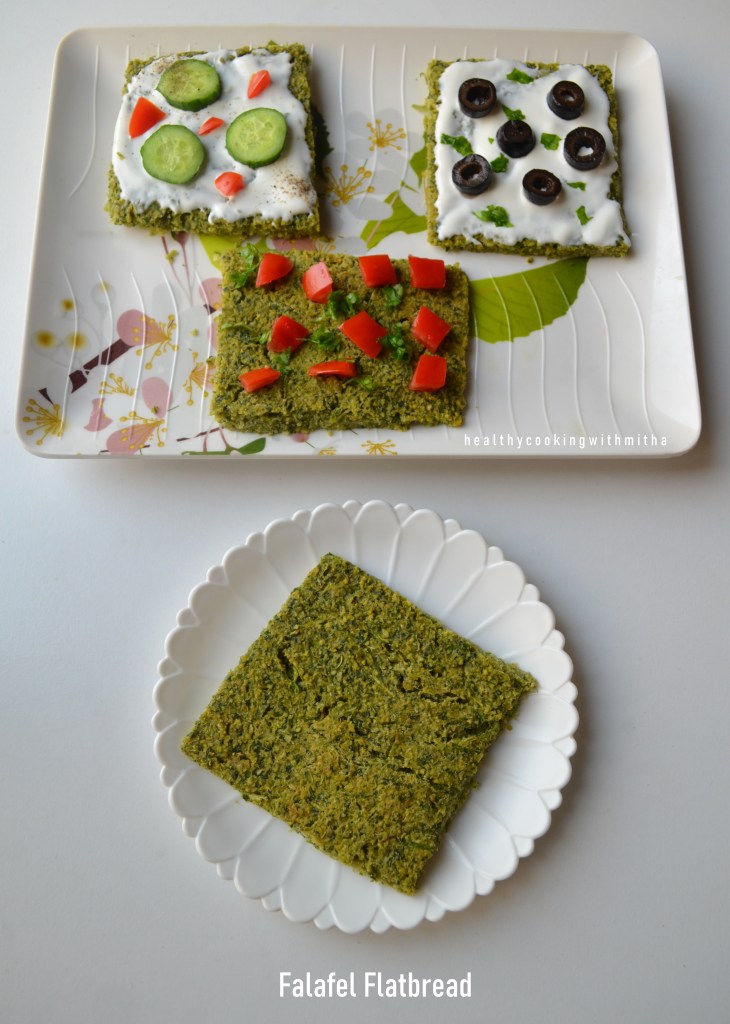
Tips while Baking – Pizza and Falafel bread
* The main point to note while baking both the pizzas and Falafel bread is to grease the plate well and spread the dough as thinly as possible so that the dough cooks inside and bakes evenly.
* Here are all 4 recipes. I have mentioned the tips in detail with step by step pictures in all the four recipes.
** Whole wheat Vegetable Pizza
** Whole wheat Cheesy Garlic bread
** Vegan, Gluten free Falafel flatbread
Tips while Baking – Whole wheat Pav and Breads
I have made a step by step pictorial with tips in notes in these posts below. You can check to make soft wheat Pav and assorted wheat breads at home easily.
** Whole wheat Tutti Frutti Bread
Also, here is the compilation of all my Healthy cakes and cookies recipes in one page.

Okay, so finally ending this post as I think I have finished noting all the points (had put up a huge thinking cap on 😂). Though this turned out to be a very long one, I know it will very useful for beginners. Do let me know here in comments or on my Facebook page or Instagram if you still have any doubts. Happy and healthy baking! ❤️
On request from my readers, here is the post on Pinterest. Find the Pin here.

Thanks for the detailed tips.
LikeLike
After 1st proof..
We need to roll the dough?
Like we did for apf bread?
LikeLike
Is it for wheat bread? Yes you can roll or not. I just made it simpler for people trying it by not rolling. If you roll apf dough, do for this too. It will have better shape and texture.
LikeLike