Click on the picture to save the recipe on Pinterest
I had always wanted to bake gluten free cakes as it had been the most requested recipe by my readers. But somehow I never got the confidence to shift from wheat flour to a millet flour completely.
Since few months, Jowar flour had become my best friend as I regularly make dosas, idlis and ladoos with it. So when I saw that people have been using it for baking too, I just could not resist trying it out.
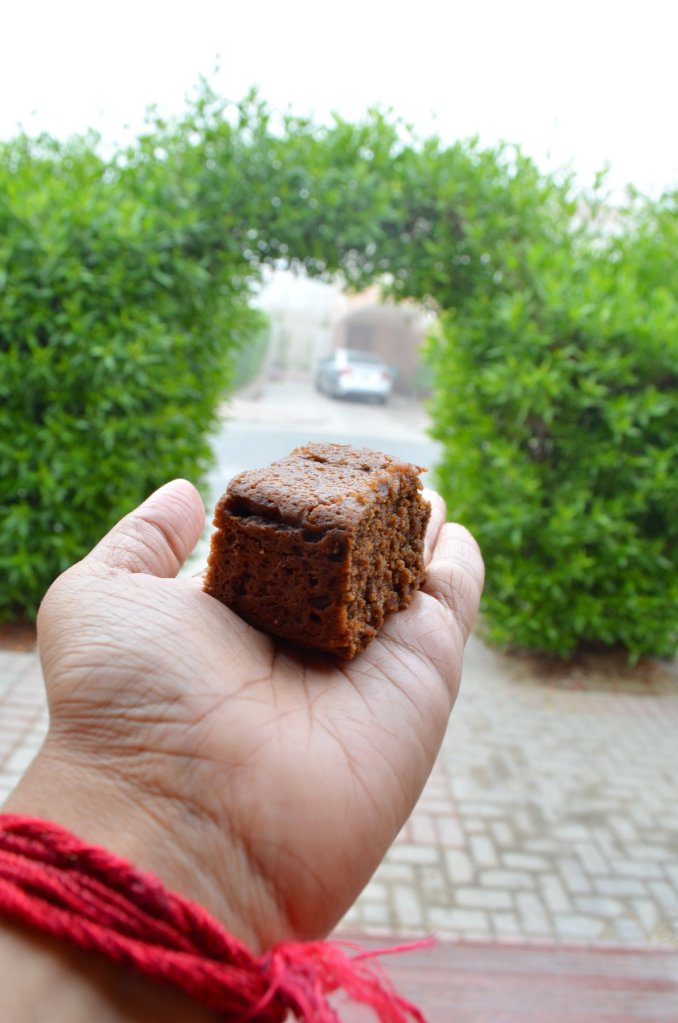
Even the first time I tried this cake, it came out so well that I could not believe my eyes. I cut it in squares and asked my family to taste it. As they ate it, they asked for more and more and finally finished off the cake within a day. It was really that tasty. My son even gave me a million marks for it and always asks me to bake it whenever he has craving for cake.
Click on the picture to save the recipe on Pinterest
This morning the weather is so beautiful and foggy here in Qatar that I felt like baking. Baking is truly a therapy for me ❤️ and what better cake than this Jowar chocolate cake, which I had to share with all of you too. So I took the pictures and dedicated it to the beautiful weather 😍
Hope you all try and love this healthy and tasty cake too. Do let me know if any doubts and it will be a pleasure to help. Happy and healthy cooking ❤️
RECIPE:
Ingredients:
My 1 Cup = 240 ml and even though I usually measure using cups, this time I also measured using my measuring scale for those readers who want accurate measurements.
Dry Ingredients:
1 Cup Jowar flour (Sorghum flour) {106 grams}
2 Tbsp unsweetened Cocoa powder {10 grams}
1/2 tsp Baking powder
1/4 tsp Salt
Wet ingredient mix:
1/4 Cup thick Curd or Yogurt {60 ml}
1/4 tsp Baking soda
1/2 Cup Jaggery powder {66 grams}
1/2 Cup Milk {100 ml}
1/4 Cup Ghee {54 ml}
Step by step recipe:
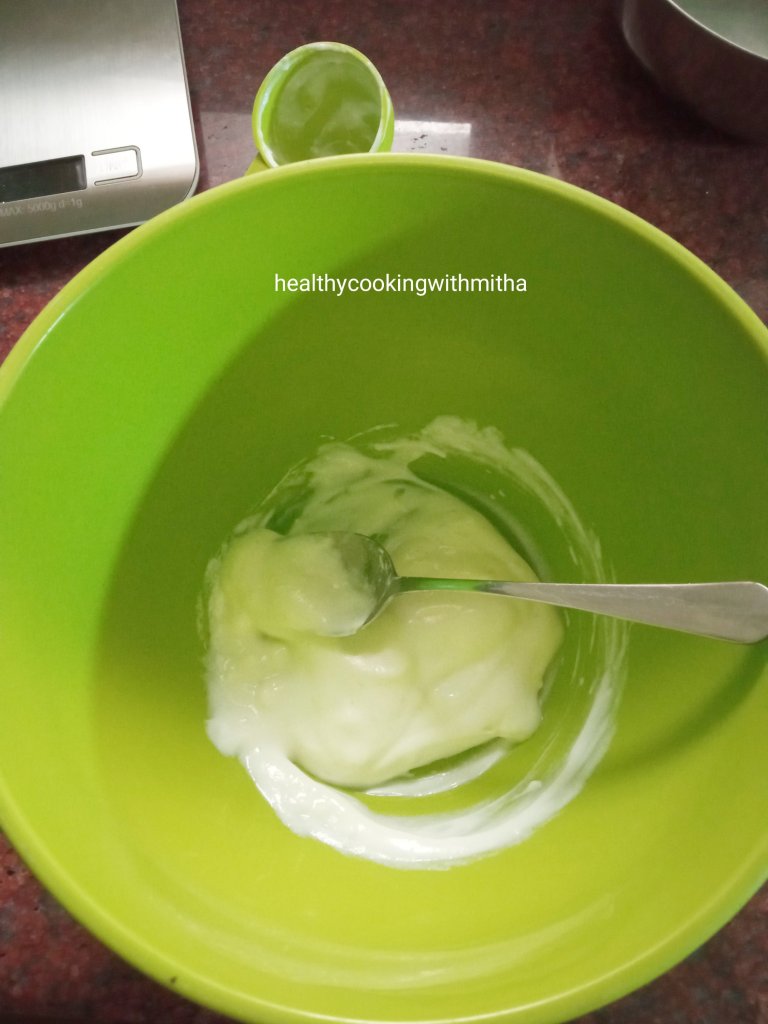
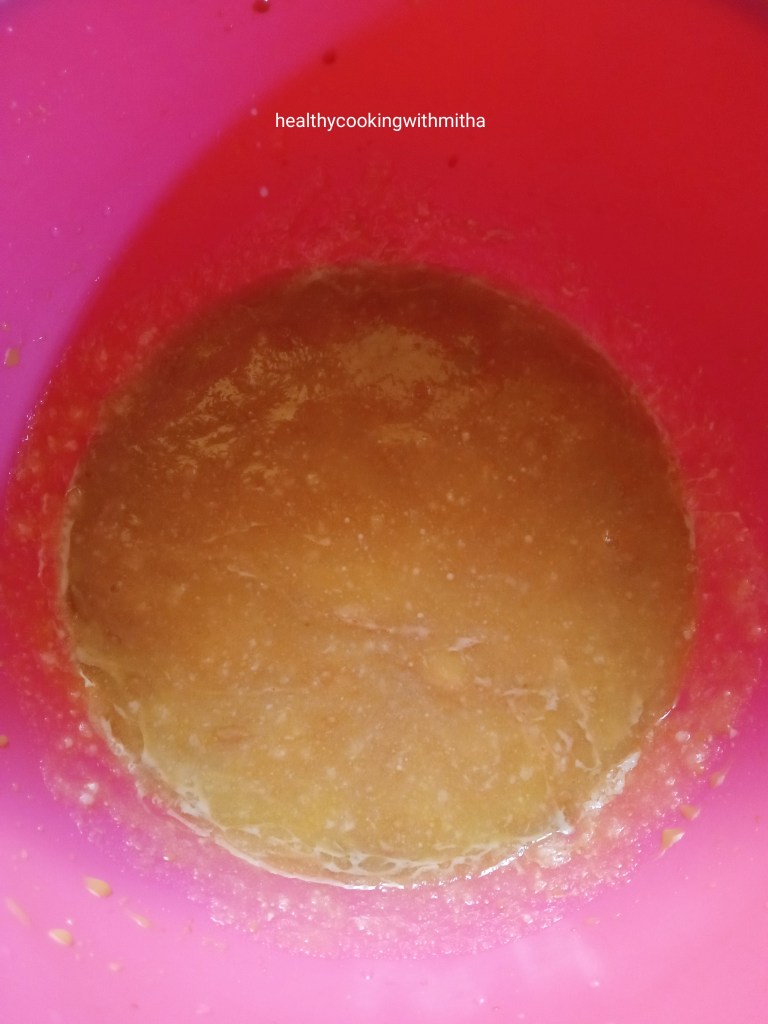
1. Take yogurt and baking soda in a bowl. Mix well. Keep aside. Also preheat the oven in the center rack at 180 C for 10 minutes.
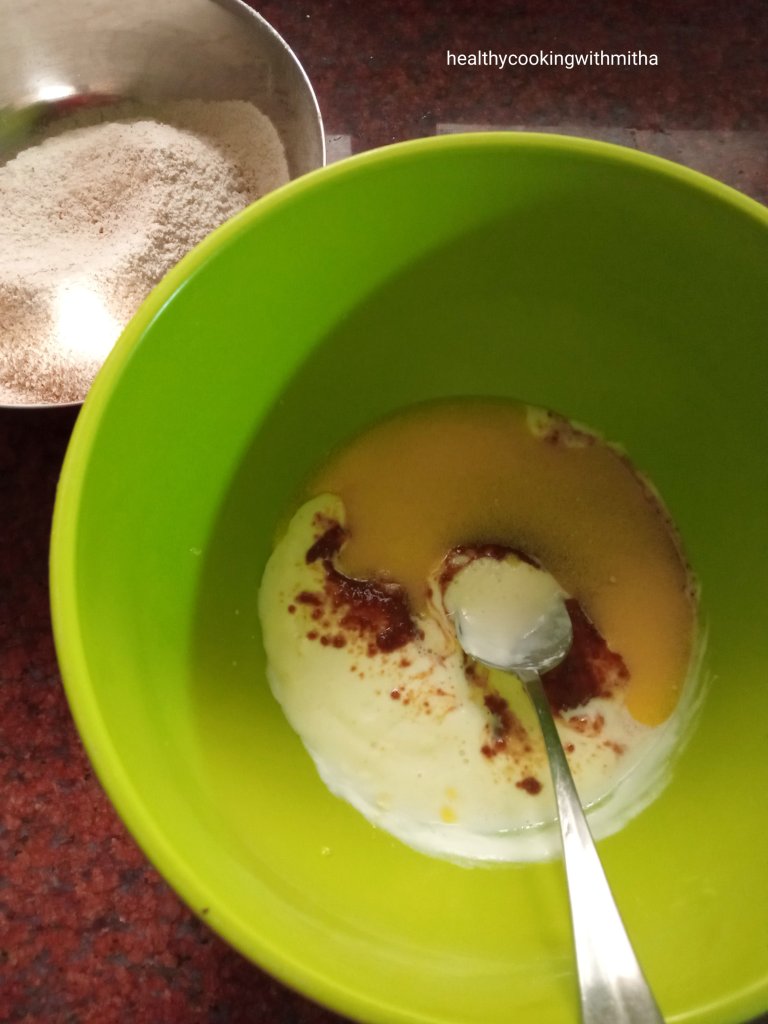
2. Now sieve together all the dry ingredients – Jowar flour, cocoa powder, baking powder and salt.
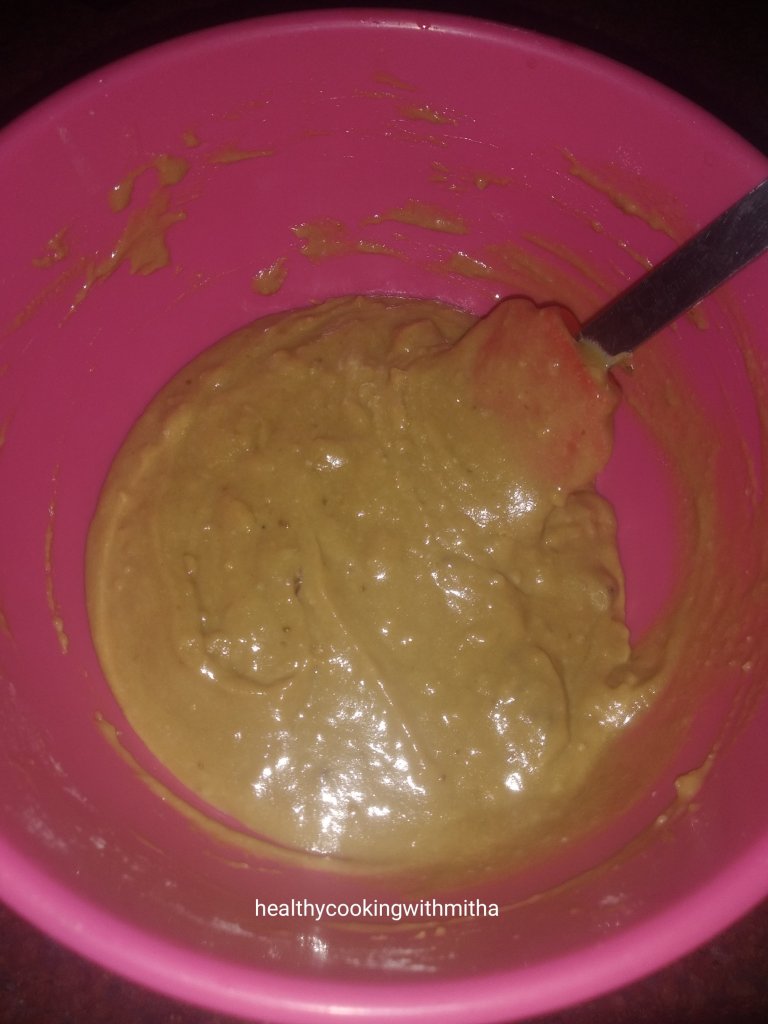
3. Keep the dry ingredient mix aside. Now to the yogurt- baking soda mix, add jaggery powder, milk and ghee. Mix well.
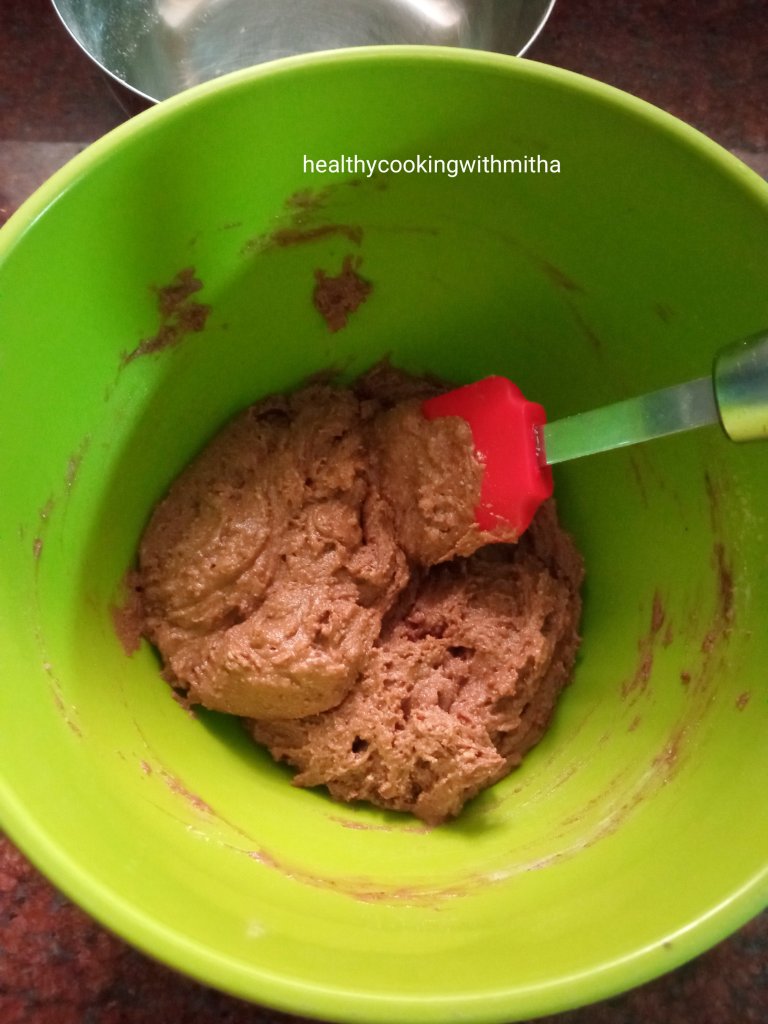
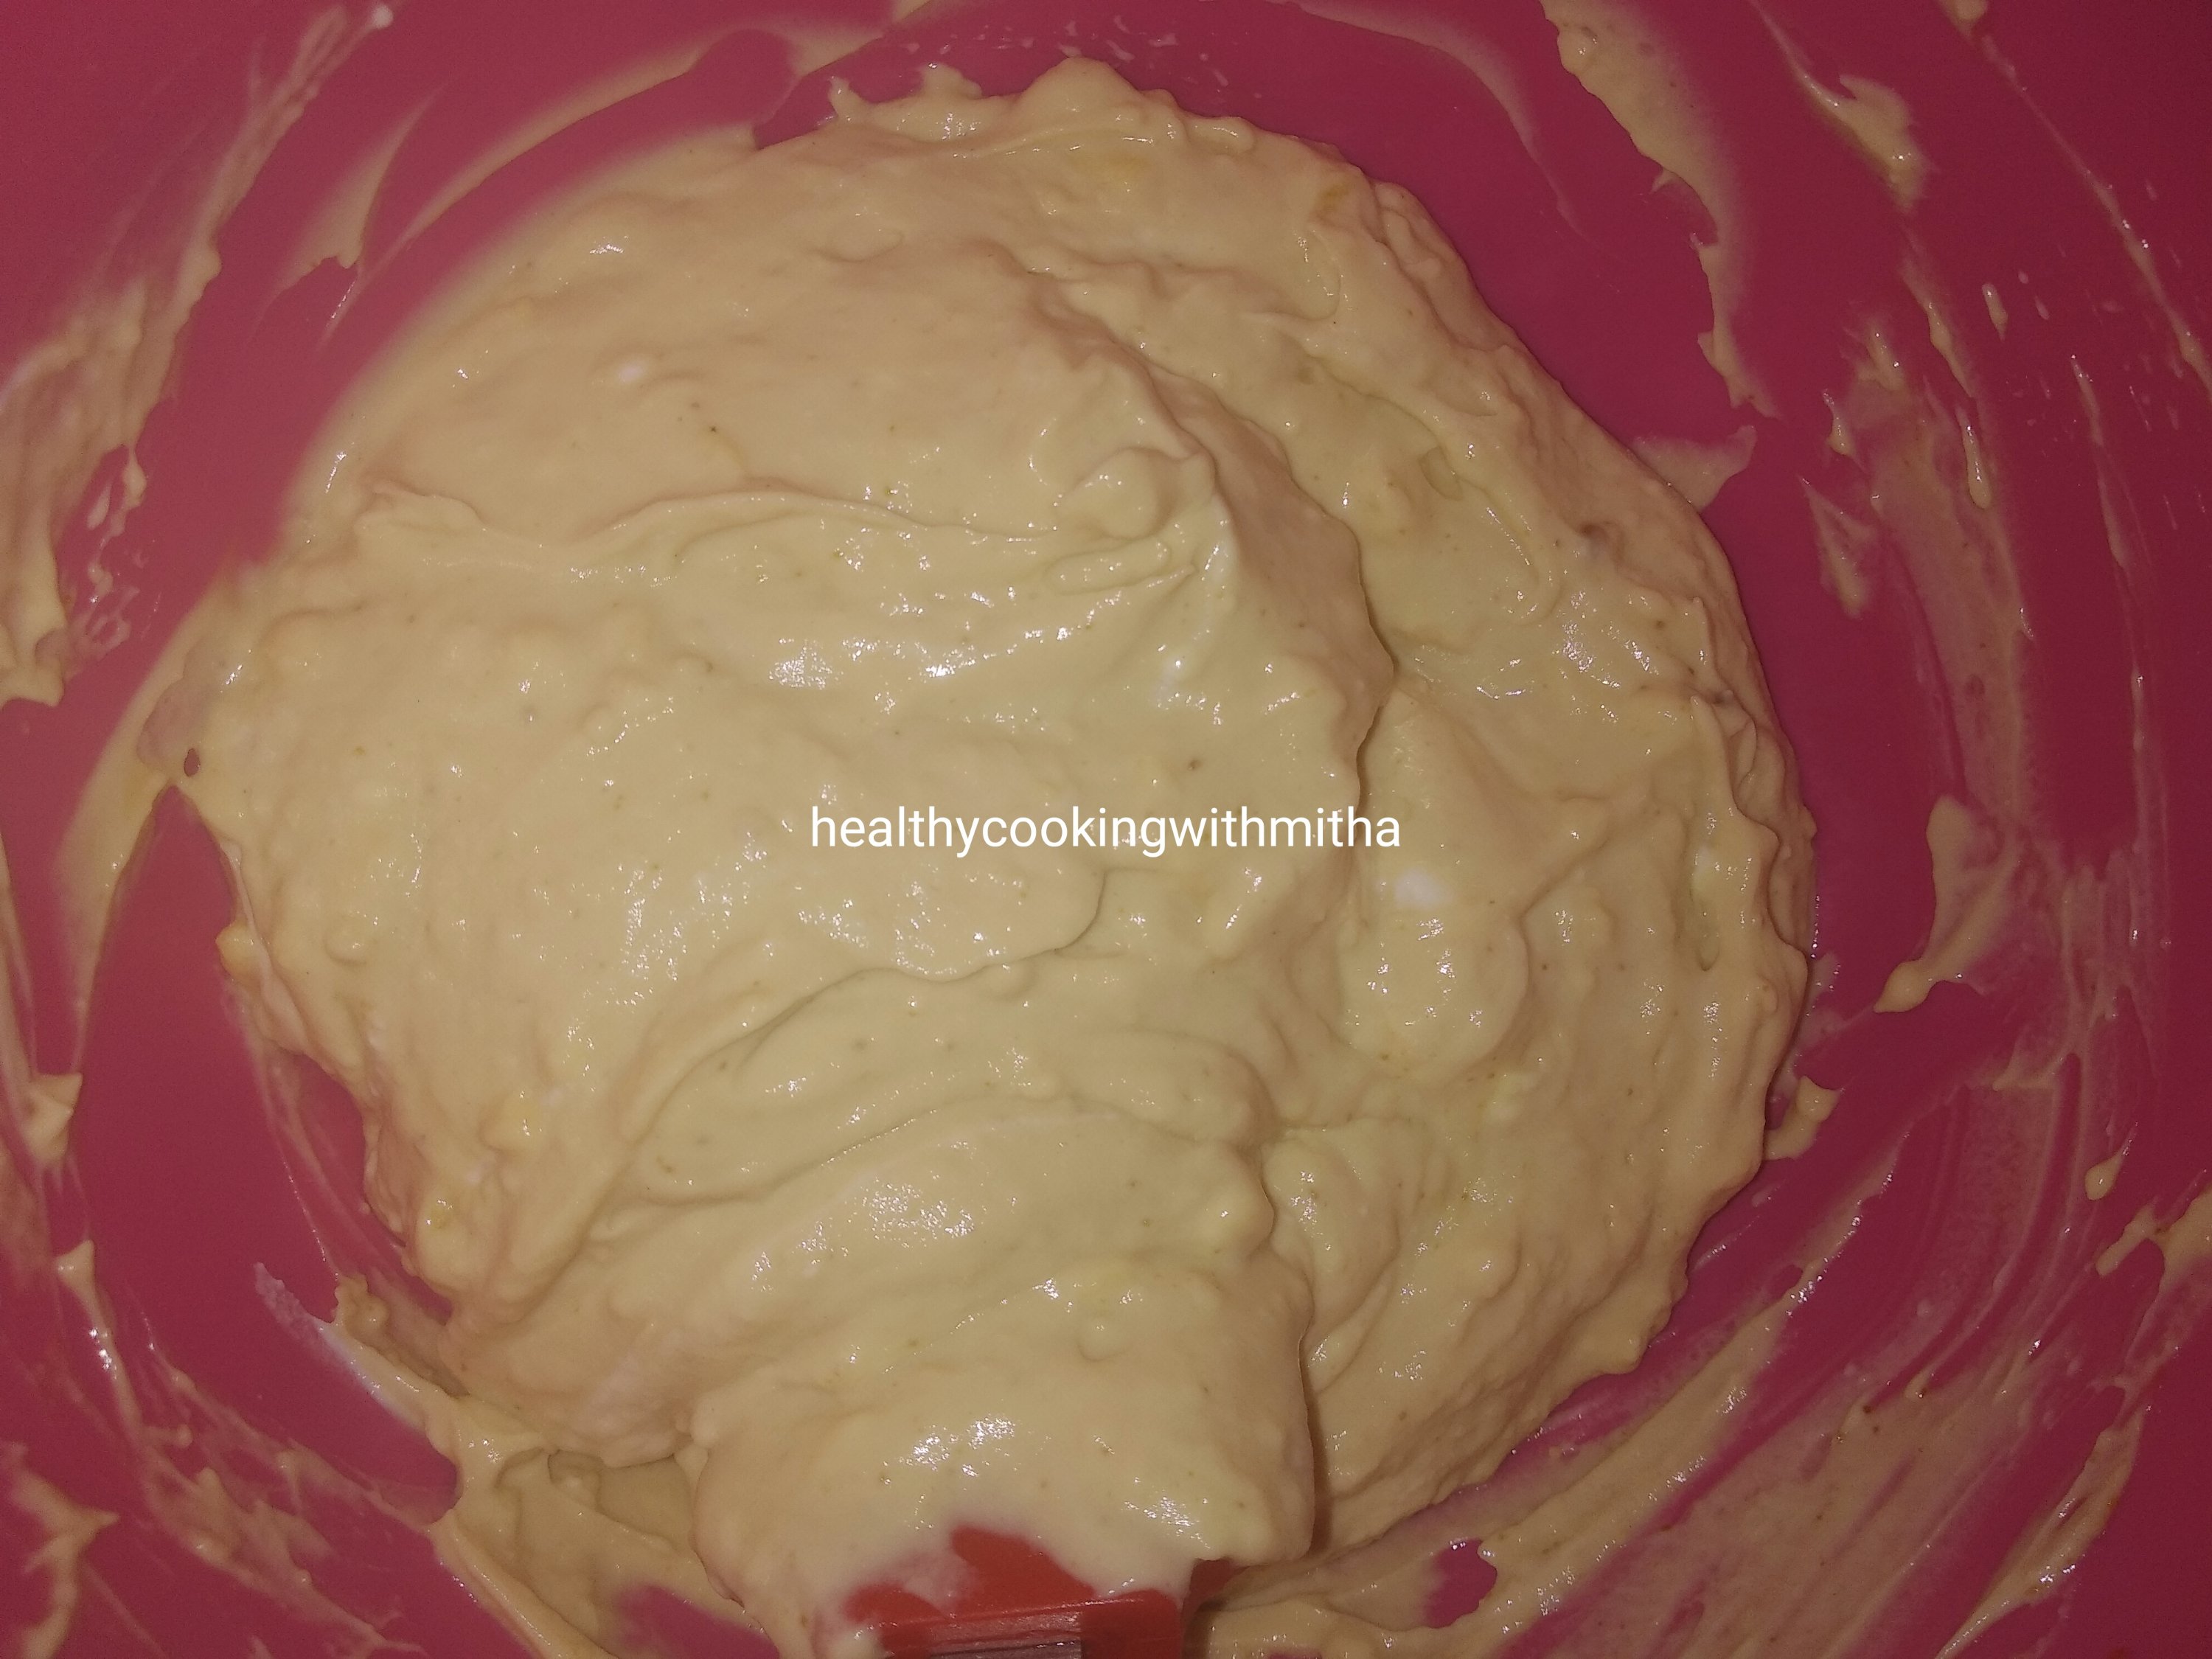
4. Now add the dry ingredient mix to the wet ingredients and mix using spatula. Don’t over mix and just fold until you can’t see any dry flour specks.
5. Now add the batter to the cake pan. I used a loaf pan of length 20 cm and width 7 cm. You can also use a square or round pan. Either grease with butter or ghee or use parchment/ baking paper. Spread the batter as evenly as possible.
6. Now add the pan to a preheated oven(read step 1) and bake at 180 C for 15 to 18 mins. In my square cake pan, it takes 15 mins as cake height is less but in my loaf pan it takes 18 mins since the cake has more height. So keep an eye after 15 mins.
Check for doneness by inserting a toothpick in the center. If comes out clear or with crumbs, cake is done. If it comes out wet, bake again for two mins or till done.
7. Allow it to cool. Once cooled, invert onto a plate.
Click on the picture to save the recipe on Pinterest
8. Cut into squares and serve. Store in a moisture free container.
Click on the picture to save the recipe on Pinterest
Notes:
* Lasts well at room temperature for a day. After that, I refrigerate since it has milk in it, it may spoil. While serving, I microwave for few seconds and it becomes soft again.
* I use Datar or Amlark brand of Jowar flour as it’s readily available in Lulu and other supermarkets here in Qatar.
* I had got many requests for measurements using scale, so I got one and measured the ingredients using the scale for this recipe. But I feel using Cup is so much easier and I recommend using Cups for just the ease of baking. Just make sure you have 1 Cup = 240 ml measuring cup set and you can use that for all my baking recipes without the need of measuring scale.
* This cake batter is a little thicker but the cake comes out very soft and spongy.
* I use both square and loaf pan for this cake and it bakes quicker in square pan at 15 mins. Loaf pan takes few minutes more as the cake height is more.
* Please remember to preheat the oven at 180 C for atleast 10 mins and don’t open over door for atleast 15 mins into the baking time. These are small but important tips while baking. If you are new to baking, I have written an article on the basics of baking. You can read it here: Baking basics for Beginners
Click on the image to save the recipe on Pinterest
I have been baking cakes and cupcakes with wheat flour, jaggery and ghee since many years now and I am happy to say that my kids too have got so much used to this flavour that they love it much more than store bought maida based cupcakes. I bake them for their school tiffin box and also as an evening snack before they go out to play. ❤️
Now that they are at home whole day (demanding for food quite often 😅), my cooking has also increased and while I was about to make these banana cupcakes, I realized I had not shared the recipe on the blog. So quickly took some pictures and here I am writing this recipe while they are enjoying the cupcakes. ❤️
Cinnamon gives a wonderful aroma and flavour to these cupcakes and that makes these cupcakes super tasty too. They come out so soft too and you can never say it does not have eggs in it.
Hope you all try these delicious, filling cupcakes too and I am sure you will love it too. Happy and healthy baking! ❤️
RECIPE:
Ingredients: { Makes 6 medium sized muffins }
1 Cup = 240 ml
Dry Ingredients:
1 Cup Whole Wheat flour / Atta
1/4 tsp Cinnamon powder (or Vanilla essence)
1/4 tsp Baking soda
A pinch of salt
Wet Ingredients:
1/4 Cup Mashed Bananas ( I took 2 small overripe Indian bananas)
1/2 Cup Jaggery powder
1/4 Cup Water
1/4 Cup Ghee
1 tsp Vinegar (or lemon juice)
Step by step recipe:
1. Sift together using a sieve 1 Cup wheat flour, 1/4 tsp Cinnamon powder, 1/4 tsp Baking soda and a pinch of salt. Keep aside.
Note: If using Vanilla essence, you can mix with wet ingredients.
2. In another mixing bowl, take 1/4 Cup mashed bananas, 1/2 Cup Jaggery powder, 1/4 Cup Water, 1/4 Cup Ghee and 1 tsp Vinegar. Mix very well using a spatula.
Note: I mashed two overripe Indian bananas and got 1/4 Cup of mashed bananas. Even if you use three Indian bananas, it’s fine. Cupcakes will come out well. Just take care to mash really well.
3. Now add the dry ingredients mix to the wet ingredients mix and fold using the spatula. Do NOT overmix. Just mix so that you don’t see any dry flour specks in the mixture.
4. Preheat the oven at 180 C for 10 to 15 mins in the center rack of the oven. If using microwave convection oven, choose the option of turning both rods on.
5. Meanwhile line the muffin pan with liners or just grease well with ghee or butter. Add a spoonful or two of the batter into each mold.
6. Bake at 180 C for 18 to 20 mins. Mine gets done exactly at 18 mins. Keep an eye after 15 mins into baking time so that the cupcakes don’t turn brown on the surface. Allow them to cool and then enjoy!
Note: To check if done, insert a toothpick in the center most cupcake. If it comes out clear or with tiny crumbs and is not wet, then the cupcakes are well baked. If it comes out wet, bake for few minutes more.
Click on the image to save the recipe on Pinterest
Notes:
* These cupcakes lasts well at room temperature for a day. Just keep in a moisture free container. After a day, refrigerate it and then microwave for few seconds before consuming.
* I have used 1/4 Cup mashed Bananas to 1/2 Cup mashed Bananas in this recipe and it does not make much difference. It depends on how many overripe bananas I have. If I have two, I add two and if I have three, I add all three. Just make sure to not increase the quantity more than 1/2 Cup though.
* I recommend using Cinnamon powder for this recipe as it gives such a wonderful aroma and flavour. But if you don’t have, you can use vanilla essence or even Cardamom powder too.
* Always remember to sieve the dry ingredients to get soft muffins, specially when using whole wheat flour.
* Ghee can be substituted with melted butter, Jaggery can be substituted with brown sugar or regular sugar and Vinegar can be substituted with lemon juice, all of same quantity.
* Don’t overmix both the dry and wet ingredients. Just mix well once. Overmixing can lead to hard muffins.
* Preheating the oven before placing the muffin pan is a very important step. Don’t forget it. Preheat at 180 C for 10 to 15 mins.
* Bake in the center rack of OTG or with both rods on in a microwave convection oven. Keep an eyes after 15 mins into baking time but don’t keep opening oven door before that. Mine gets done exactly at 18 mins in OTG.
* To check if done, insert a toothpick in the center most cupcake. If it comes out clear or with tiny crumbs and is not wet, then the cupcakes are well baked. If it comes out wet, bake for few minutes more.
* You can give this to kids as evening snack or in their tiffin box for a filling, tasty treat.
For more Healthy cakes, cupcakes and cookies recipes, you can check my collection:
Click on the image to save the recipe on Pinterest.
Bananas are the most brought fruit in our grocery shopping as my darling daughter loves it. 😍 She eats one daily after breakfast and also when she’s hungry in the evenings. But even then, due to the onset of summers here in Qatar, the bananas turn black and overripe very quickly. Though it is still tasty on the inside, they are slightly sticky to hold and I don’t feel like giving her to eat as it is (don’t want her love for bananas to diminish away 😍). But what to do with those bananas now? 😄
That’s when this mommy puts on her thinking caps (my brains work overtime now 🤣) as to how to use the leftover bananas who stare at me, pleading to be used up whenever I pass through them (dramatic much?? 😅 That’s me 😂). So one week it’s Jaggery Sheera with the bananas and the next week it’s banana chocolate cupcakes or Vastad rottis or the easiest wheat banana pancakes with them. Finally, when all these options got exhausted, I found out a new way of using the bananas.
Substituted mango pulp with mashed bananas in my Mango Rava Cupcake recipe and it came out so well that it has become a regular at my place (as of now 😅). So much that the bananas are purposely left to turn black 😅 to make these delicious cupcakes. 😍
By the way, did you notice the toy bananas in my picture? It is from my daughter’s food toy collection, which her brother too loves a lot and they both play in this set up which I have made for them. 😍 Though the places for the toys keeps changing throughout the day, before sleeping, I set it up like this so that our mornings are welcomed by this beautiful, cute scene. ❤️
You can also see my son’s vehicle collection which me and him arrange in various ways. We spend hours sitting there and I don’t realize how time passes with this little boy. ❤️
Anyhow, hope you all try these cupcakes and I am sure you will like it. Do let me know if any doubts and it will be a pleasure to help. Happy and healthy cooking! ❤️
RECIPE: { 1 Cup = 250 ml }
Ingredients: { Makes 7 cupcakes }
1 Cup mashed Bananas { I took 5 overripe small variety Indian Bananas }
1 Cup Semolina/ Rava / Sooji { regular variety }
1/2 Cup Jaggery powder
1/4 Cup Ghee
1 tsp Baking powder
1/4 tsp Salt
1/4 tsp Cardamom powder
Step by step recipe:
1. Preheat the oven at 180 C for 10 mins.
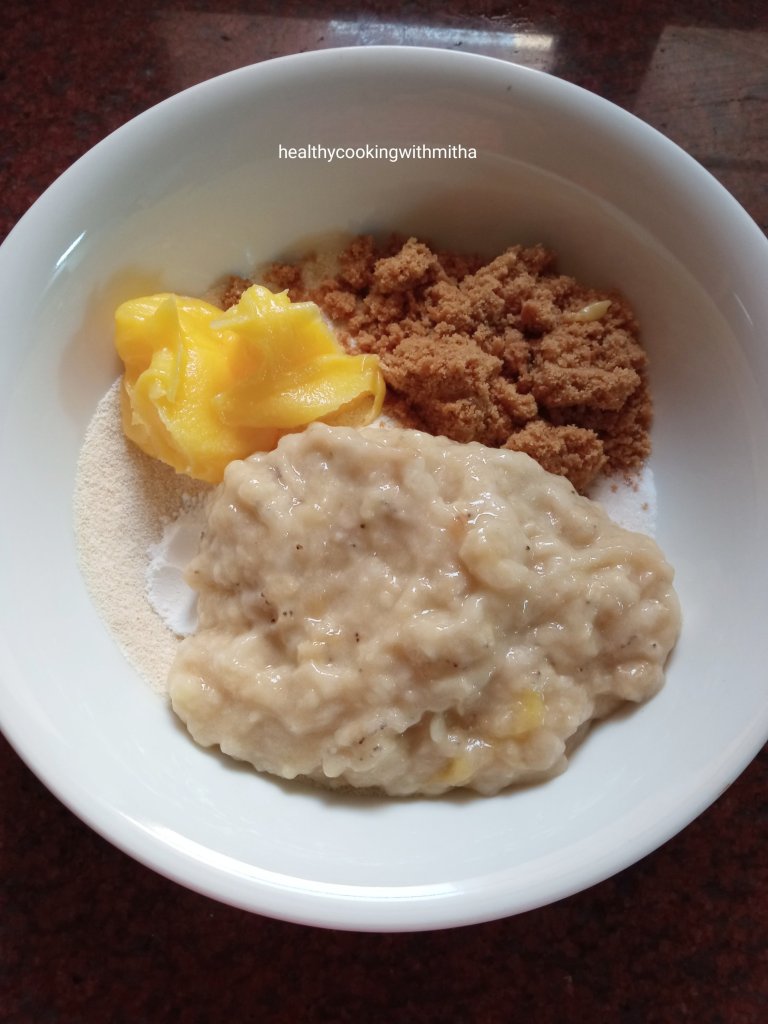
2. Take 1 Cup rava in a large mixing bowl. Add 1/2 Cup jaggery powder to it. Keep mashed bananas and other ingredients ready as well.
3. Now add the 1 Cup mashed bananas along with 1/4 Cup ghee, 1 tsp Baking powder, 1/4 tsp each of salt and cardamom powder.
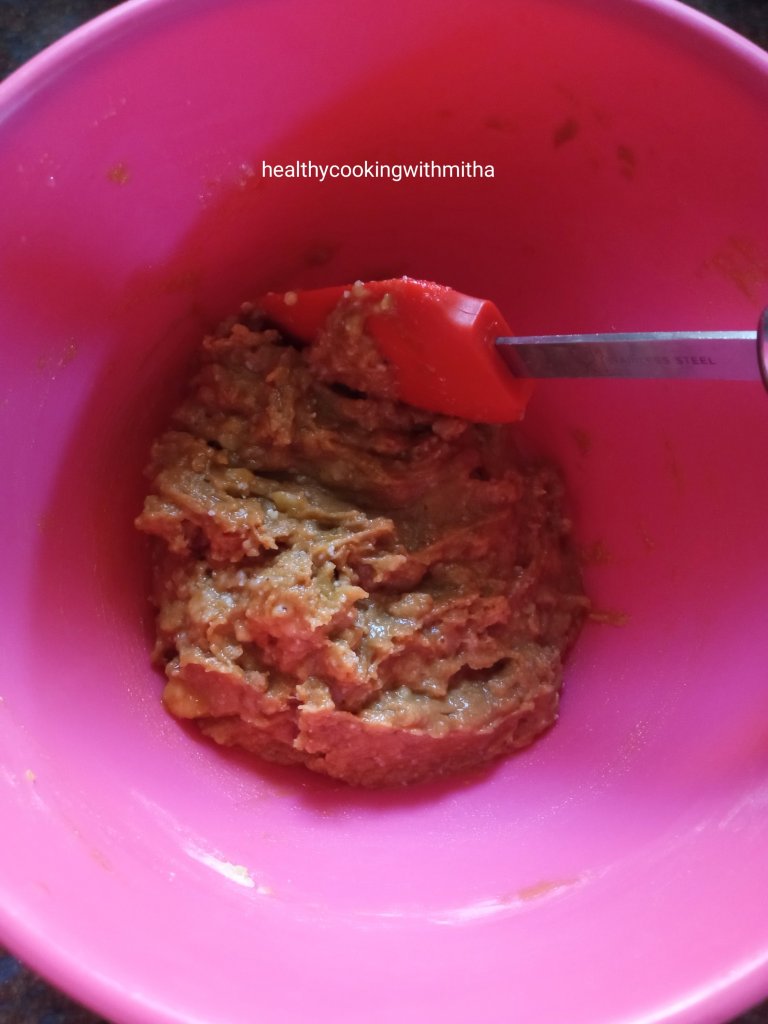
4. Mix well into a even mixture using a spatula.
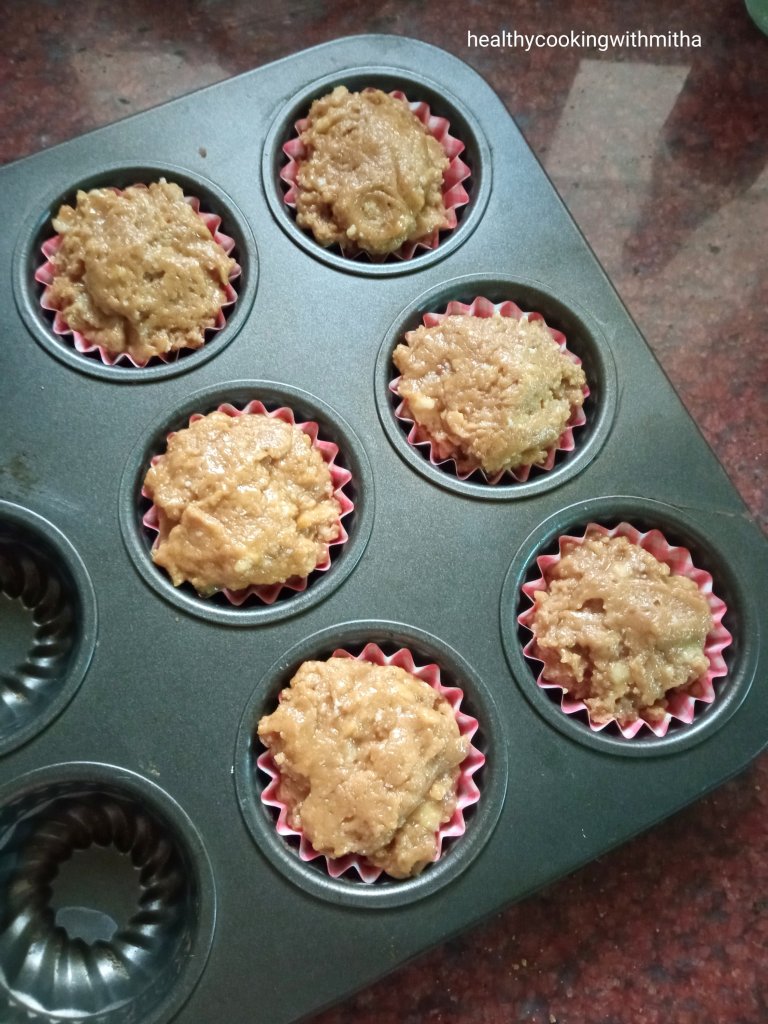
5. Now take a muffin pan ready and line with cupcake liners. If you don’t have liners, just grease well with ghee. Fill three fourth of the mould with the batter.
6. Bake in the preheated oven (which has been heated at 180 C for 10 mins) in the center rack of the oven at 180 C for 25 to 30 mins. Mine gets done at 25 mins exactly. Insert a toothpick in the center of the center most cupcake to see if done. If the toothpick comes out clear, it’s done. Else bake for couple of mins more or till done.
Click on the image to save the recipe on Pinterest.
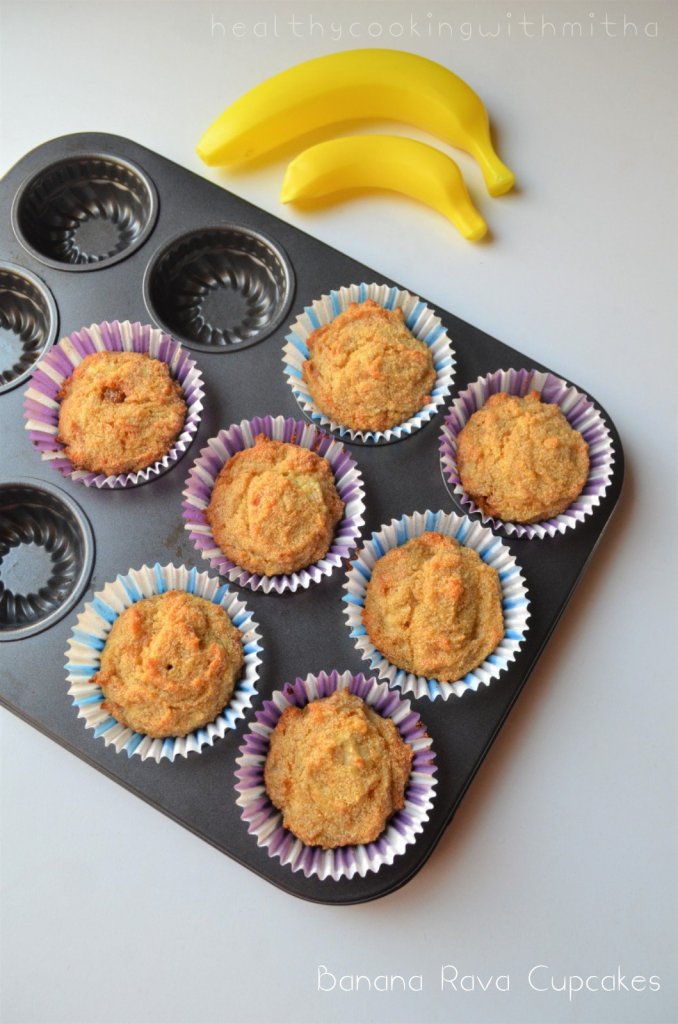
7. Allow it to cool slightly. Then serve warm or at room temperature.
Notes:
* I keep in an airtight container for a day and it lasts well at room temperature for a day. Refrigerate after that and microwave slightly before consuming.
* I use the small variety Indian bananas which have turned overripe. You can use any variety of bananas but just make sure they are really ripe and mashed well.
* I used the rava that I use for making upma. It is not very fine but regular semolina size. Just don’t use very coarse semolina. If you only have coarse variety, powder it in a mixer first and then use.
* Grate jaggery finely and use if you don’t have jaggery powder.
* Ghee and cardamom powder gives the cupcakes a wonderful flavour. So don’t skip or replace it.
* 25 mins got my cupcakes to bake perfectly and 30 mins made the top part slightly crisp. So please check at 25 mins and if done in the center, remove from the oven.
* I got this idea of using mashed bananas from my Mango Rava Cupcakes where I use mango pulp instead.
* I also make these three recipes with leftover overripe bananas:
# Jaggery Sheera – I add mashed bananas towards and end along with jaggery water, mix well. Tastes very delicious. This tastes like Sapath which is made for Satyanarayana vrath prasad in many households.
In fact these Banana Rava cupcakes are a cake version of the Sapath prasad. The taste is quite similar to it.
# Vastad rotti – Tawa fried version of Mangalore Buns
As I write this, I am sitting on our sofa with my son sleeping soundly in my arms, completing his evening nap. I have had many people tell me that it’s not a good habit and I should practice him by putting him down on the bed during nap time so that I can be free then. I usually say “okay, I will try” to them as I know they won’t understand that the peace I get when my son sleeps in my arms 😍 is incomparable to any free time I may get after putting him on the bed. Also, he too naps much better, very peacefully when he sleeps in my arms. ❤️
What I do is, finish all my chores before his nap time and while he sleeps on me, I either chat with Amma or listen to my favorite songs or like I am doing now, blog a new recipe. I feel relaxed then and his nap turns into my rest time too. ❤️
Also, I know this won’t last long as I used to do the same with my daughter too. Now at 6 years, she no longer sleeps next to me while my son who is 2.5 years needs all the cuddles in the world at night too. So I just tell myself to enjoy this bliss of motherhood, the love, the attachment, the “mogu mogu“, his hugs, his caressing, his kisses, his tight embraces while it lasts. ❤️
I just hope that even if he grows, he will still love me the same, if not show it physically but still the affection remain the same. That’s all a mother wants and this motherhood journey has taught that to me. ❤️
Here’s sharing the Oats recipes which I make always to include the super food in our diet. Hope you all try and like it. Happy and healthy cooking!
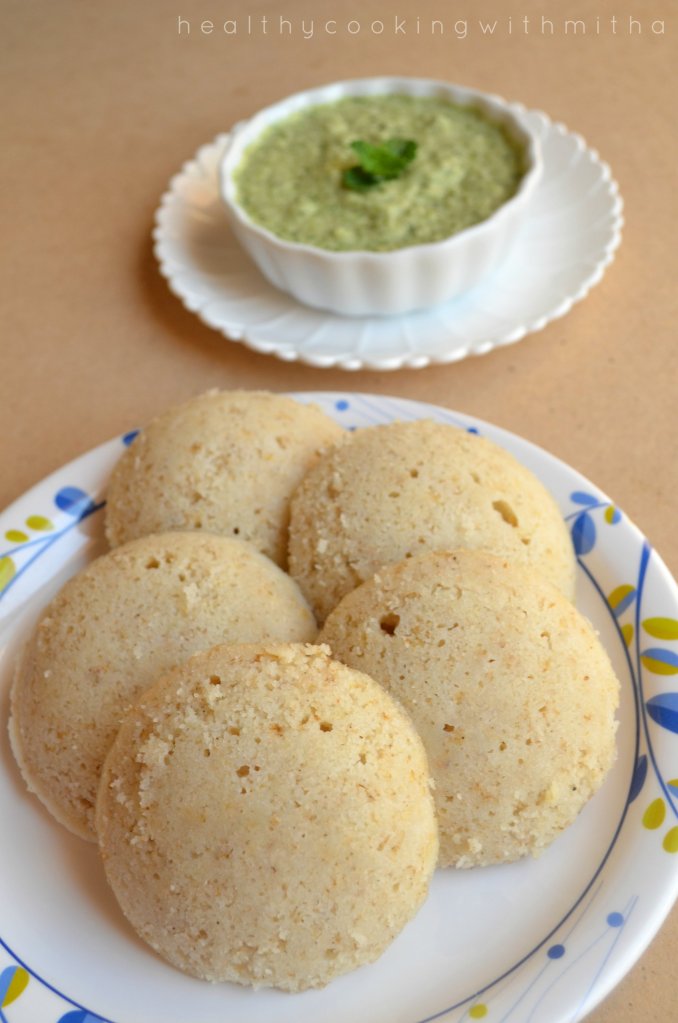
1. Instant Oats Idlis : This was one of the first recipes that I learned with oats many years back and has been my regular specially when I have not planned ahead or don’t know what to make for breakfast.
4. Moong sprouts Oats dosa : Yet another healthy dosa combining sprouts and Oats which comes out very tasty. I make this to include sprouts in my kids’ diet who don’t eat sprout as it is.
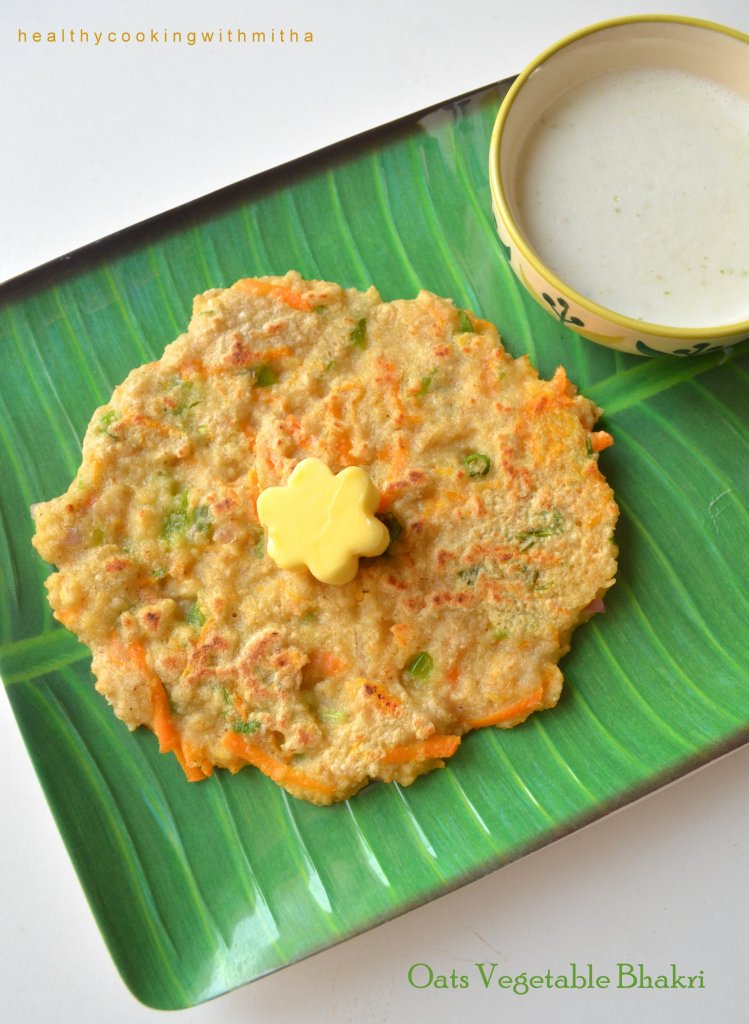
5. Instant Oats Vegetable Bhakri : This is hands down my favorite breakfast with oats. Combining so many veggies and oats, this Bhakri or thick dosa does not even need an accompaniment. Tastes so delicious with butter. Hardly takes time to make the batter and is so filling that it can be a meal in itself too.
6. Masala Oats Paratha : This unique and super delicious parathas are a must try. Learnt it from a friend many years back and I make it for a change from regular chapatis. My kids love it a lot and eat more than usual when I make it, making me a happy mommy. 😍
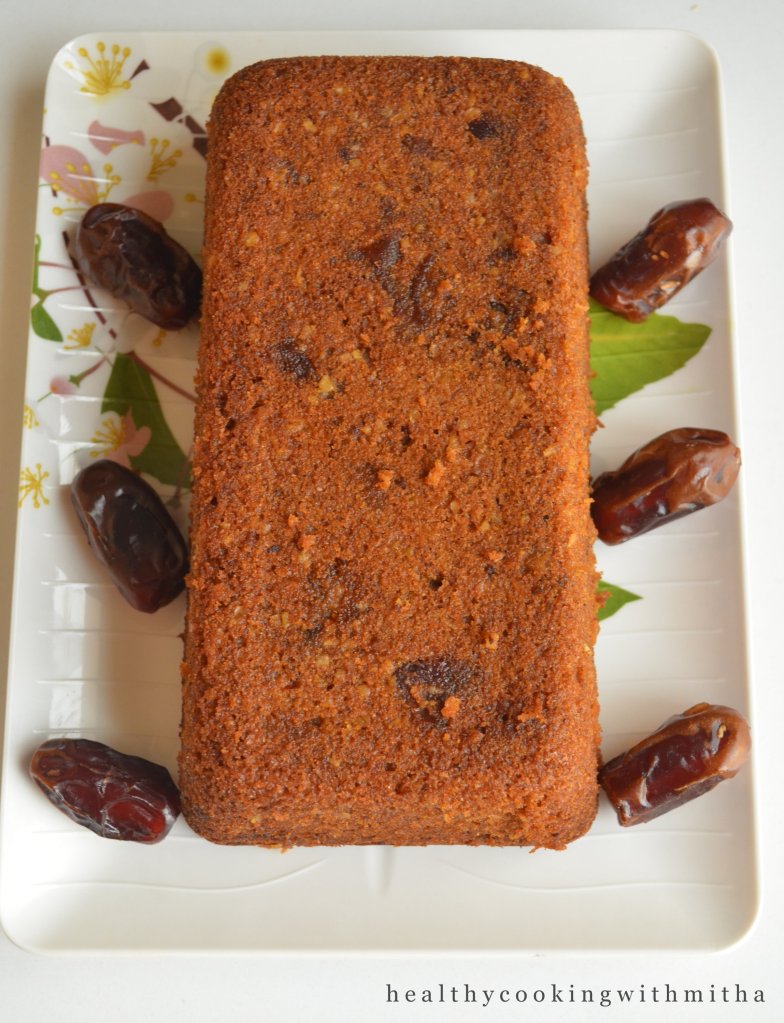
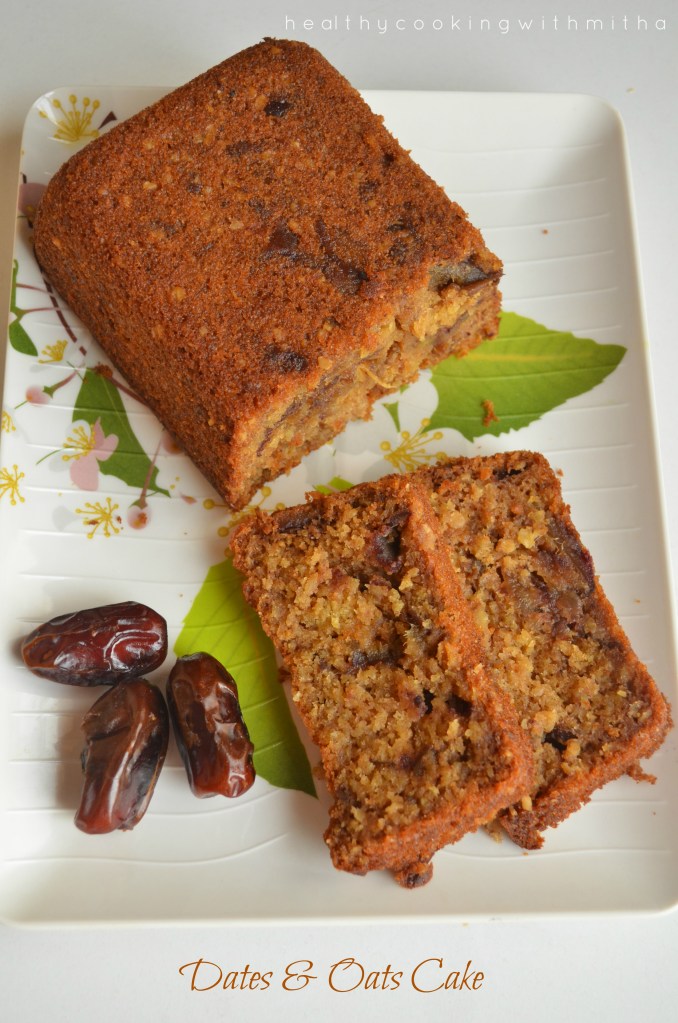
7. Dates and Oats Cake : A healthy and yummy cake combining the goodness of dates and Oats. You can never say it has oats in it and trust me, comes out very delicious. One among the most tried cake recipes from my blog after Sugar free Dates Carrot Cake.
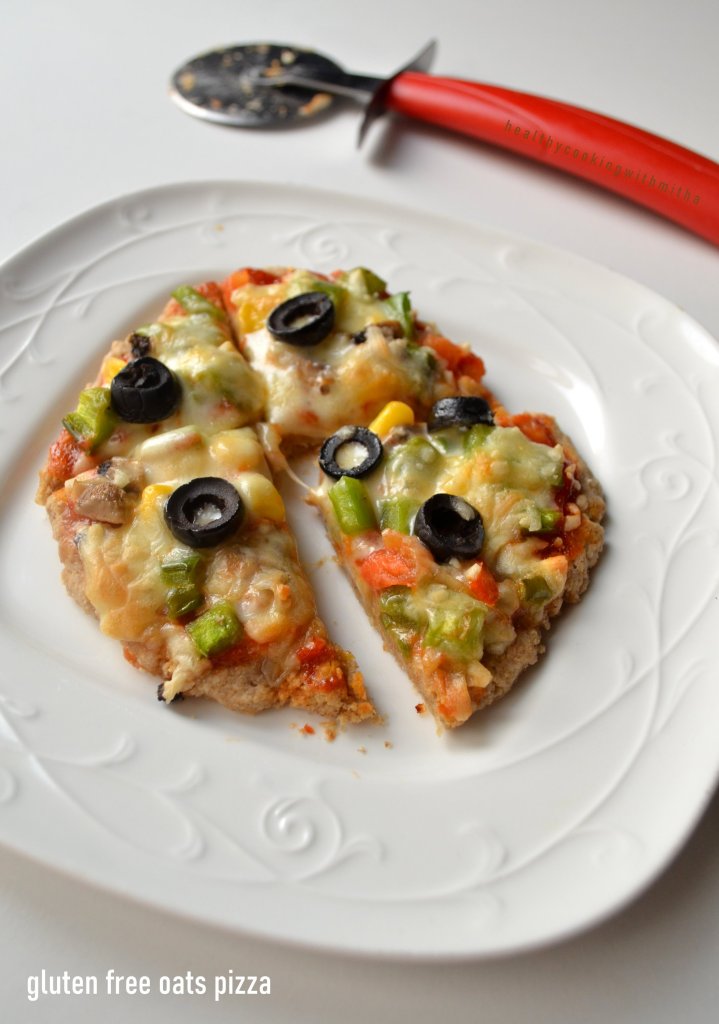
8. Gluten free Oats Pizza : I usually make whole wheat Vegetable Pizza at home as evening snack for my kids. Apart from that, I have learned to make this Oats pizza which only has oats in the base. Comes out very soft and super tasty too. A must try pizza specially for those looking to bake gluten free pizza at home.
It has been long I have not blogged a recipe and the last one was this Chocolate sponge cake that I had posted on Feb 6th. It was a special cake close to my heart (many reasons that this page won’t be enough if I start writing about it 😄) and I had posted it with so much love. ❤️ How glad I am now that many of my readers have tried and loved it too. Thank you dear readers. Your feedbacks make all the efforts of blogging worthwhile. 🙏
Along with the feedback messages that I keep receiving, if there is something I get regularly, it is doubts regarding baking. Since I have been baking for about a decade now, I can understand what went wrong when readers message me. So I try my maximum to help them as much as I can. Helping people gives me a kind of peace and happiness which nothing else can give (simple but precious joys of life). ❤️
So, no matter what doubt you have, even if you feel it’s a very silly one, Ask away.( I get that quite often that people think their doubt is very silly). I would not mind at all and will surely reply when I find time. No doubt is small and clearing it will ensure you get the recipes well and your ingredients/ time is not wasted.
Today, I got a baking doubt from my reader and after I replied, she asked me if I have written a blog regarding oven basics. That’s when I realized I had not blogged an article dedicated to it and how helpful it would be for all of you if I write a detailed one explaining what all I have learnt in these 10 years of baking. Have a long way to go and so much to learn but still will try to jot down whatever I know.
So, here goes the article. I will write as Q and A so that it’s easier for you all to read. Also, will keep updating whenever I get new doubts and I feel it will help you all.
My Oven –
Q : Which oven do you use?
A : This is the picture of the oven that I use. It is an OTG and I have not bought it. Since we live in a company provided accomodation, we were provided with all electronic appliances too and this came along with it. It is a INDESIT oven plus glass top cooking range. I have been using the same since 10 years now and very happy with it. I can say it is my best friend and my favorite appliance in the kitchen since I both cook and bake in it. 😍😍
Q : Which oven is better to buy? OTG or conventional oven?
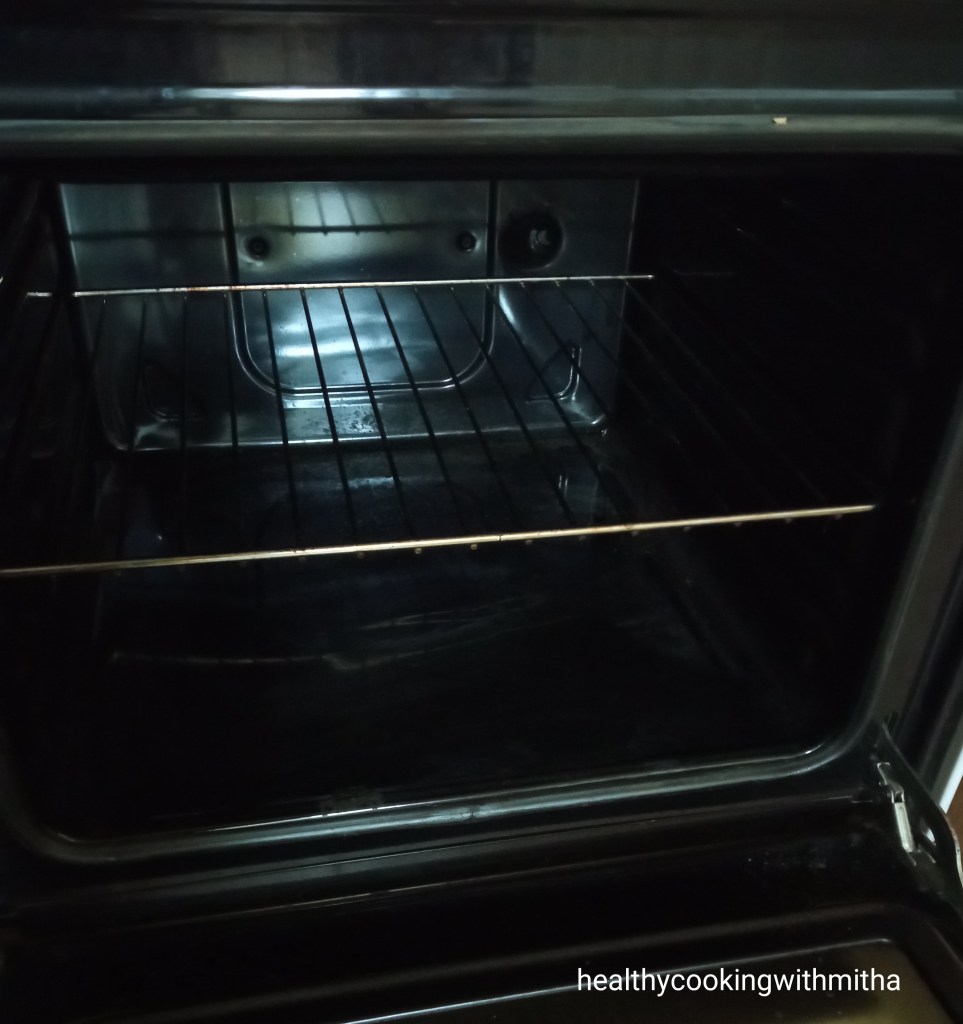
A : As I mentioned above, I did not buy the oven. But I have always baked in this OTG only and love how evenly it bakes. My parents have a microwave with conventional mode oven and I love how user friendly it is. Yes, the space inside is less when compared to OTG which brings to the point that if you want to bake in large batches, OTG is for you while if you want to bake just for your family, microwave with conventional mode oven is very easy to use. Here is the inside picture of my OTG. Love how spacious it is.
Q – Which rack to use in my oven for baking? It has three racks.
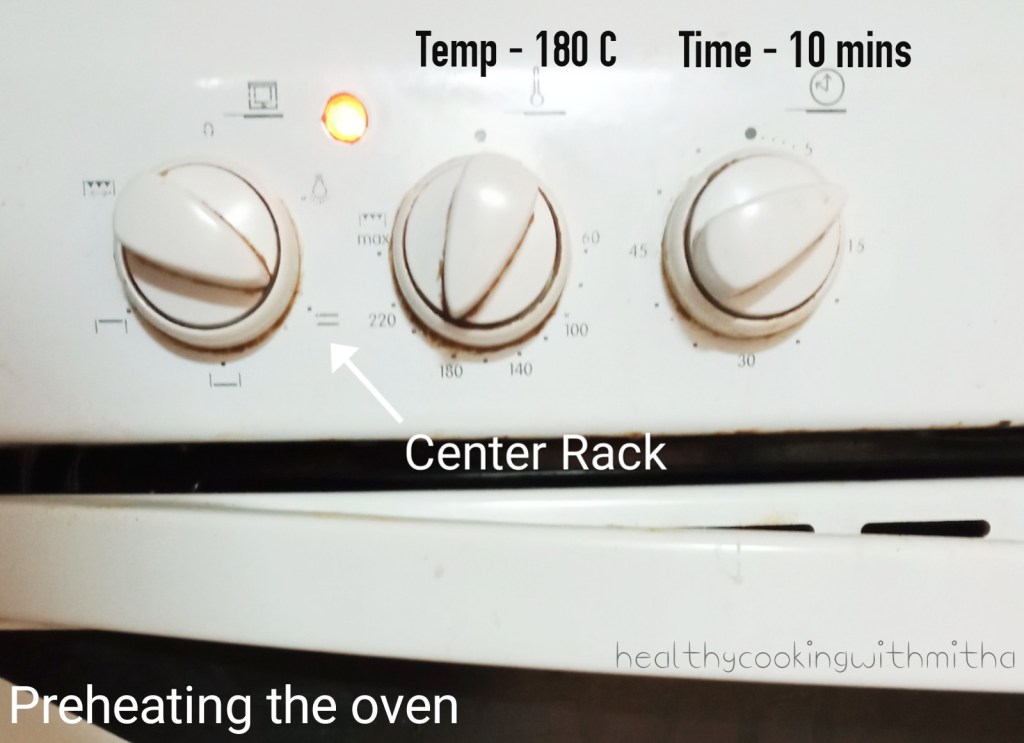
A – I have always used only the center rack as shown above in the picture for all my bakes. This ensures even baking and I get good results with it. But it sometimes depends on your oven. Some readers say they only have two racks. In that case, place in the bottom rack and bake longer (it’s better than keeping in the top rack which can cause the cake to burn). Once you start baking, with experience you will know which rack of your oven works best for you. (For people owning microwave conventional oven, this is not for you as you have just one rack to place your bakes. In your case, just bake in conventional mode or with two rods on as per your type of oven.)
Q – How to preheat the oven?
A – Preheating the oven to the mentioned temperature is very important to get perfect bakes. Almost all of my recipes require pre heating to 180 C for 10 mins atleast. This ensures you are placing the cake batter or cookie/ bread dough in a hot oven which is the first important step in baking. So before you start making the batter or while making, don’t forget to preheat the oven. Most cake recipes need only sifting the dry ingredients, mixing the wet ingredients and then the batter is done which hardly takes 10 to 15 mins. So preheat the oven during that time. Here is the picture of the knobs from my oven.
My Baking accessories –
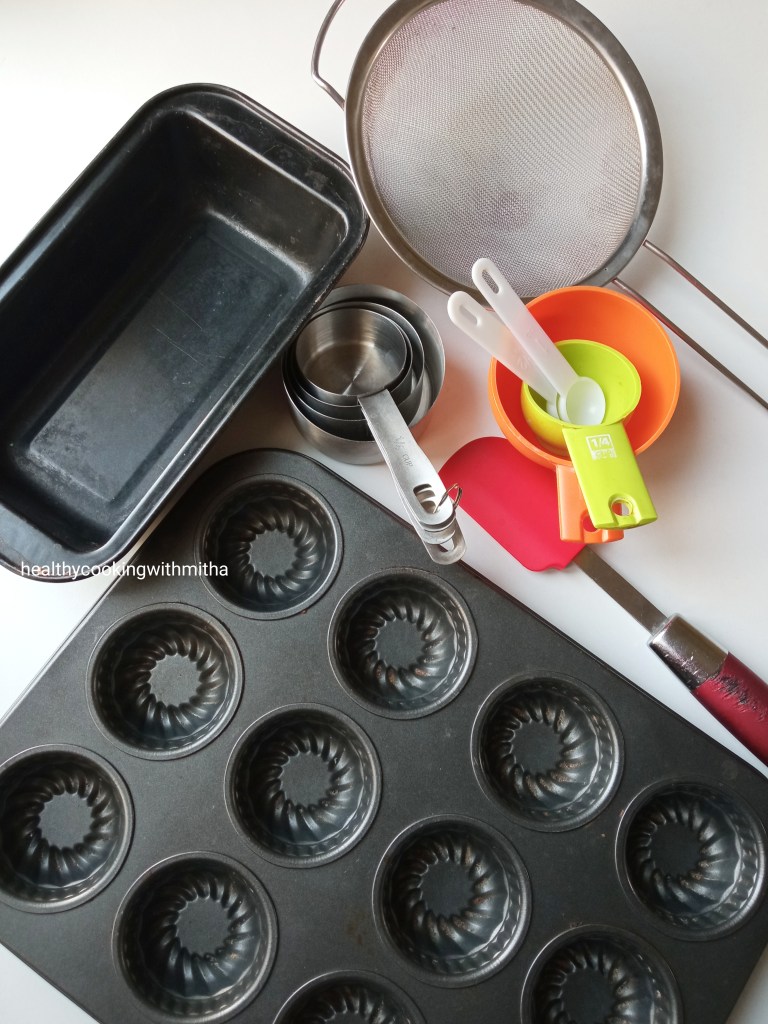
I am someone who believes in not hoarding stuffs unnecessarily and all my baking equipments are from the time I started baking. I am happy that these bake wares have lasted all these years inspite of me using them so often. Here is a picture of some of my most used ones.
The nonstick loaf pan and the colourful measuring cups were my first buys when I started baking.
Measuring cups are the most important when you bake as no matter what anyone says, baking is definitely a science. You can’t just add ingredients in any ratio blindly and expect perfect results unless you are that experienced a baker. As for me, I can’t imagine baking without measuring cups. I have also been getting requests from readers for measurements in grams and I am planning to buy a kitchen weighing scale soon for this purpose. Weighing scales gives even better results as measuring cups comes in various sizes. Mine is a 250 ml one but it also comes in 200 ml cups.
Nonstick loaf pan that I use measures 20 cm in length and 4 cm in width. I have baked all my cakes, bread and pav in it. I also don’t use parchment paper. I just grease it with oil or ghee and the bakes come out clean. One of the best baking buys ever!
Muffin pan is useful if you like baking cupcakes. I use it while making cupcakes for my kids.
Sieve is essential in baking for me as I bake without eggs and using whole wheat flour. So to make the batter airy and light, I sieve the dry ingredients using the sieve shown above.
Spatula – While mixing the dry and wet ingredients, a spatula is required as you can mix without the batter sticking on it and also ensures that you don’t over mix the batter.
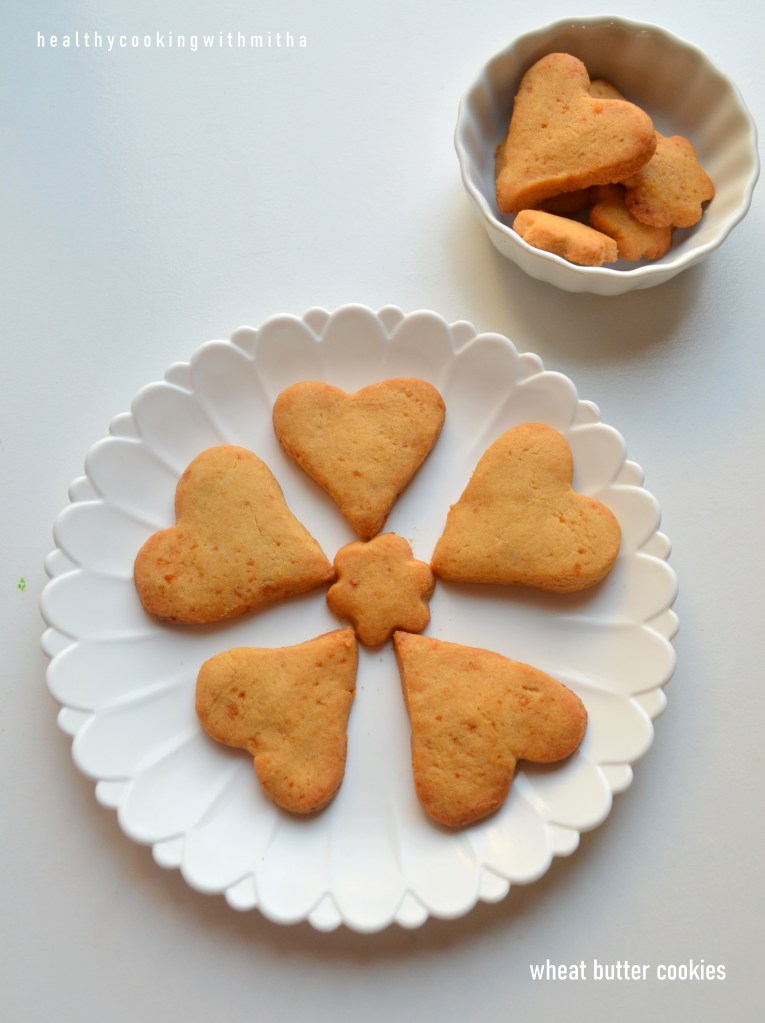
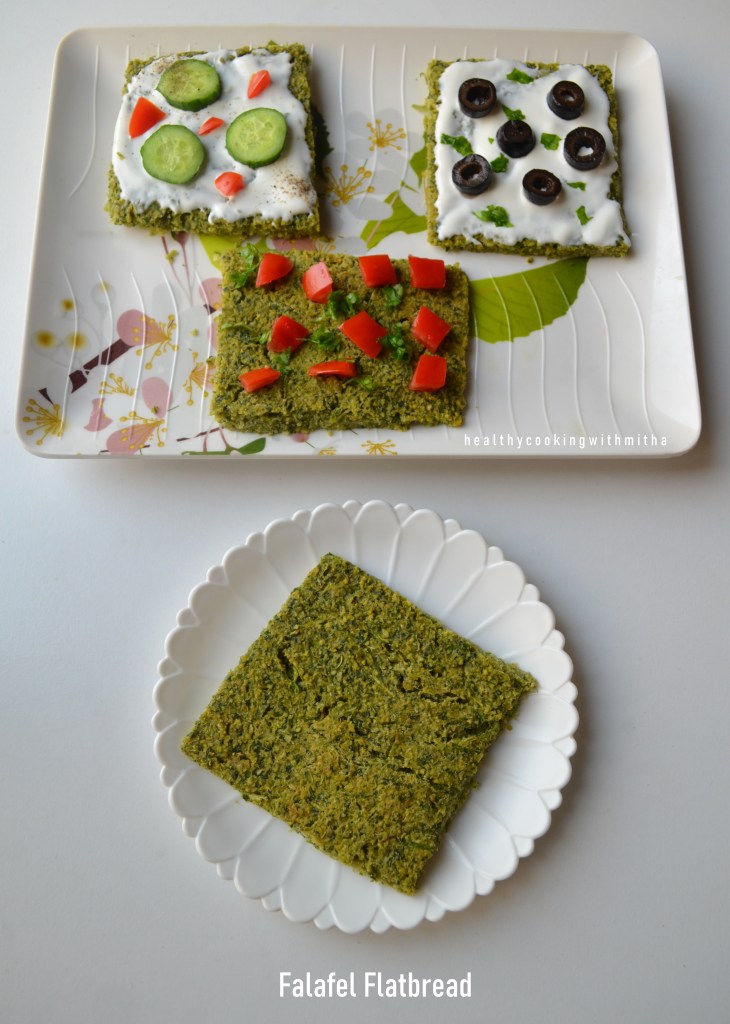
If you are my regular reader, you must have noticed this baking plate on which I bake my cookies, pizzas and also my falafel bread. It has been 10 years I am using it and so it’s not as beautiful (😬😅) but still I love how my bakes do not stick on it with very little greasing with ghee and bakes evenly. Can’t count the number of times I have baked on this plate. My best friend in baking for sure. 😍 It is a oven proof plate/ tray available in any bake ware stores.
Healthier Ingredients that I use –
Q – Which brand of wheat flour do you use?
A – This is the question I had been getting a lot of times. So I started mentioning the brand that I use which is Pillsbury Atta in my recent posts. I have used many brands of wheat flour but the flavours and texture that Pillsbury gives is the best. I get queries specially with whole wheat bread and whole wheat Pav that they did not get the desired taste nor softness even though they followed the recipe properly. When I ask them, I find they have used some other brand of Atta. So if you can find, use Pillsbury only as that is what gives the best results from my recipes.
Q – Which brand and kind of jaggery do you use? Also, can I use liquid jaggery?
A – I used to buy jaggery blocks, melt in water and then use in my initial baking recipes. After that, we started getting Jaggery powder from Goodness foods company ( here in Qatar) and my life changed. It is so easy to add to cakes and cookies. Apart from being healthier than refined sugar, it is also a lot more flavourful which gives amazing bakes.
About liquid jaggery, I have never used them in my bakes but you can add with wet ingredients a little lesser in quantity as liquid jaggery is more concentrated in taste.
Baking soda and Baking powder –
Do make sure of two points with these:
1. Make sure to check the expiry date as the bakes won’t come out as soft and spongy if the baking soda or powder is expired.
2. They usually form tiny lumps even if stored in a dry place. So do sieve before using in cakes and cookies. Else you will get those tiny lumps in the baked goodies which spoils the taste.
Same is the case with Cocoa powder too. I freeze my cocoa powder as it lasts well for many months that way. Sieve to remove any lumps that form.
Ghee or Butter instead of Oil –
I use Ghee or Butter in my bakes instead of Oil as I mostly bake for my kids and they need the fats since we are Vegetarians. Another reason why I don’t use oil is the flavour and aroma of the oil in the cakes which my kids don’t like. You can substitute with a neutral flavoured oil like Sunflower or Canola oil if you want to make the bakes free from Ghee or Butter. Using Olive oil or Coconut oil means the bakes will taste and smell of the oils as they have their own strong aroma and flavour.
I use Amul Ghee and Lurpak salted butter which are readily available here in Qatar.
Tips while Baking – Cakes
* Always preheat the oven at 180 C for atleast 10 mins (unless it is mentioned to preheat at a higher temperature).
* Sieve the dry ingredients to remove lumps and to ensure the flour mixture is airy and light.
* Always use all wet ingredients like milk and curd at room temperature unless otherwise mentioned like hot milk or hot water.
* Mix both the dry and wet ingredients using a spatula till the mixture is free from flour specks. But do NOT overmix as it leads to dense cakes. Just mix with light hands till the ingredients combine and you are done.
* You can use parchment paper to line your cake tin and cookie tray but I grease them with ghee or butter. It ensures that the cake comes out clean and cookies do not stick to the plate after baking.
* Do NOT open the oven door atleast till three fourth of the bake time. If you keep opening the door, the temperature varies drastically and it will lead to imperfect bakes. So if the bake time is 30 mins, open the door only after about 20 mins.
* Check for doneness using a toothpick or skewer inserted in the center of the cake. If it comes out clear or with little crumbs, the cake is done. If it comes out sticky and with batter in it, bake for 5 mins more and then check again.
* When you check and see that the top portion of the cake is done and turning dark brown but inside has to bake, cover the tin with aluminum foil during the last 5 to 10 mins of bake. This is ensure that the cake does not burn or turn black on surface and the inside with bake well too.
* Allow the cake to cool completely before running the knife along the sides and trying to unmold it. Best is to leave the cake covered at room temperature overnight. I have noted that cakes always taste best the next day.
* You can keep the cake at room temperature for 24 hours and then leftovers can be refrigerated in a airtight container. Microwave before use and get the same softness when you eat each time.
Tips while Baking – Cookies
* Remember to refrigerate the cookie dough for atleast 10 mins so that the cookies can be shaped perfectly.
* Also, remember to grease the tray well with ghee or butter so that the cookies don’t stick on it.
* Don’t make the cookies very thick and pat them into thin discs. Else the insides of the cookies can remain underbaked.
* Space the cookies with some distance in between them as they increase in width after baking.
* Cookies get baked very quickly than cakes. Takes only about 15 mins. So keep an eye after 10 mins so that the cookies don’t burn.
* When the cookies get slightly brown streaks, it means they are done. If they turn too much brown on the surface, they turn very crispy. So if you want soft cookies, remove as soon as it starts turning dark brown. Else it turns crispy.
* Store in an airtight container at room temperature and the cookies last well for atleast 5 days.
Tips while Baking – Pizza and Falafel bread
* The main point to note while baking both the pizzas and Falafel bread is to grease the plate well and spread the dough as thinly as possible so that the dough cooks inside and bakes evenly.
* Here are all 4 recipes. I have mentioned the tips in detail with step by step pictures in all the four recipes.
I have made a step by step pictorial with tips in notes in these posts below. You can check to make soft wheat Pav and assorted wheat breads at home easily.
Okay, so finally ending this post as I think I have finished noting all the points (had put up a huge thinking cap on 😂). Though this turned out to be a very long one, I know it will very useful for beginners. Do let me know here in comments or on my Facebook page or Instagram if you still have any doubts. Happy and healthy baking! ❤️
On request from my readers, here is the post on Pinterest. Find the Pin here.
Click on the image to save the recipe on Pinterest
As a kid, I was always excited about my birthday (was pampered a lot by my parents and my bday was celebrated the whole of December 😅). And now there is a “mini me” here, (everyone says she’s just like me – super hyper talkative 😂) who’s even more excited about her birthday. So much that she’s been waiting for it since last year. Everyday I used to get the same question, how long for February, Amma? 😄
So now, when Mr Feb is finally here, I decided to announce it to her that her birthday month has finally arrived (much to my relief 😅) by baking her favorite chocolate sponge cake. Just like me, she too loves chocolate cake very much and this cake tastes as yummy as the McCafe ones here in Qatar (my fav chocolate cake is theirs and I go mmm yummm when I take each bite 😂😂 When will I grow up? 😅). Baking a similar one at home was my goal but did not know I would get the exact same taste and texture even with wheat flour. One of the bakes that I am very happy about and the way my kids enjoy it, it increases my confidence in the recipe each time I bake it. ❤️❤️
My daughter loved this surprise cake and even took it in her snack box to school to show her friends. She’s now eagerly waiting for her birthday on Feb 15th (right after Valentine’sday😍) which she will celebrate with her small kiddo gang from our lane (her daily evening playmates, her source of joy ❤️). Now that Feb has arrived, her next question is when will 15th come (the never ending story 😁). My solution to that – I have made a small calendar and stuck it on the wall. Have asked her to strike off each day and countdown till her birthday. #momideas 💡😄
Anyhow while I find solutions to her queries, hope you bake and enjoy this cake. Do let me know if you have any doubts. Will be a pleasure to help. Happy and healthy cooking! ❤️
RECIPE:
Ingredients: { 1 Cup = 250 ml }
Dry ingredients:
1 Cup Whole wheat flour or Atta
1/4 Cup unsweetened Cocoa powder
1/2 tsp Baking powder
1/2 tsp Baking soda
1/4 tsp Salt
Wet ingredients:
3/4 Cup Jaggery powder
1/2 Cup Hot water
1/2 Cup Milk
1/4 Cup Ghee
1/2 Tbsp Vinegar
Step by step recipe:
1. Preheat the oven at 180 C for 10 mins.
2. Sift the dry ingredients together in a bowl using a sieve.
3. Keep it aside.
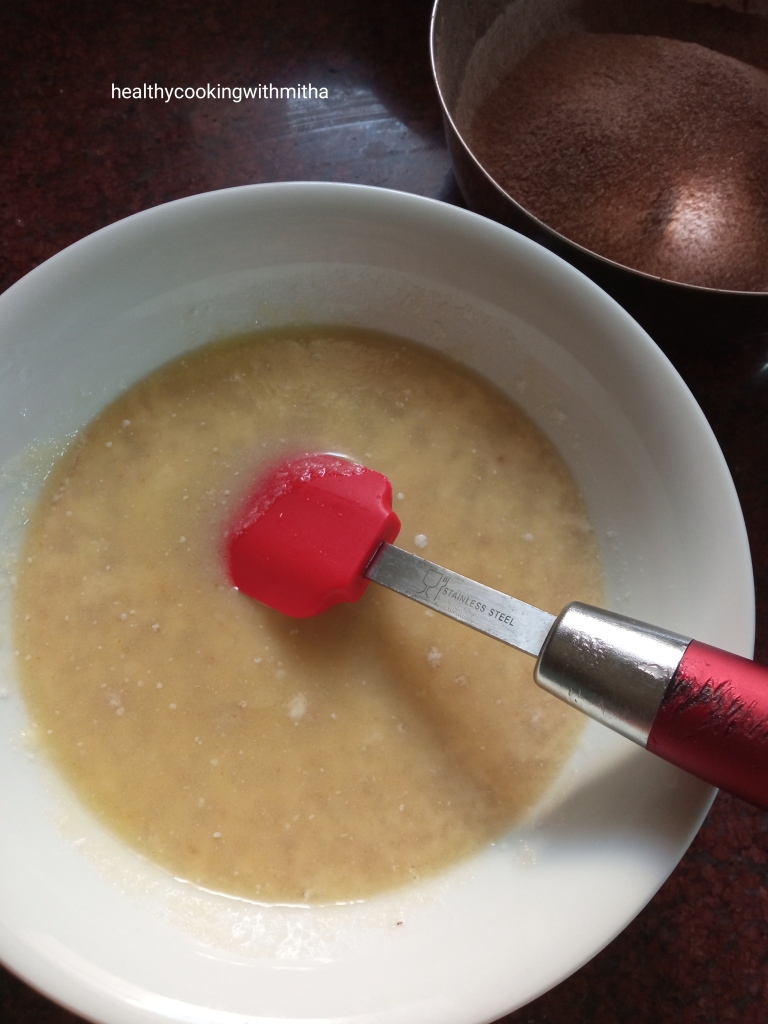
4. In another bowl, add jaggery powder, hot water, milk (at room temperature), ghee and vinegar. Mix using a spatula.
5. Now add the dry ingredients to the wet ingredients. Mix only till you can’t see any dry flour specks. Do NOT over mix the batter as it can lead to dense cakes.
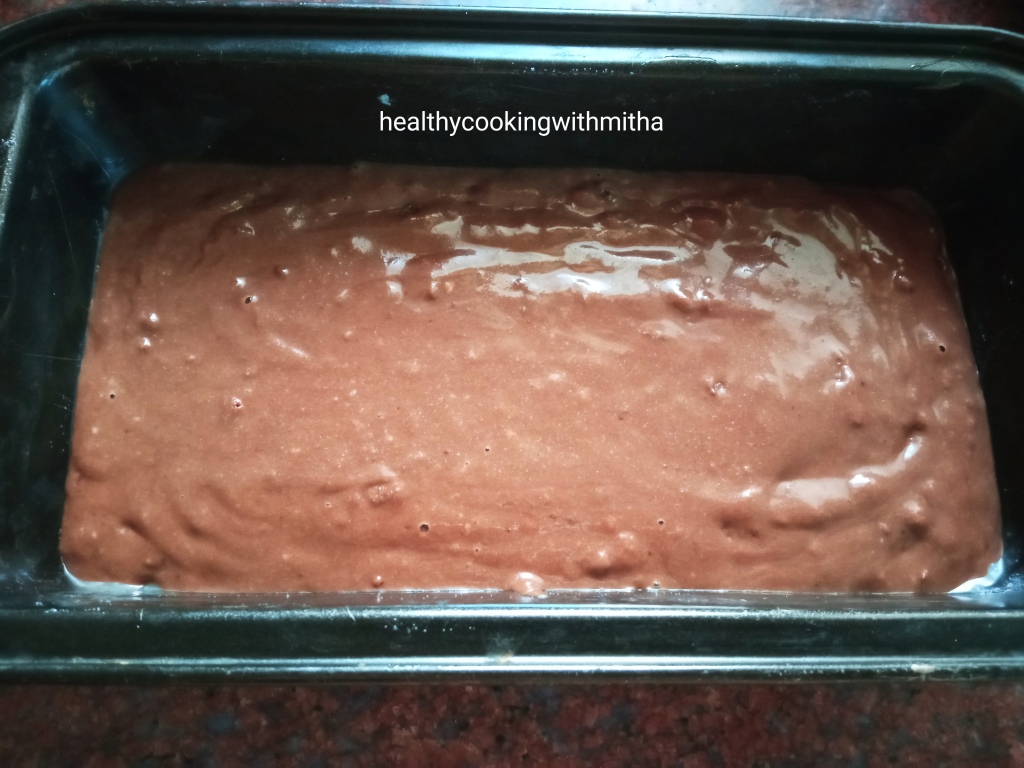
6. Add the batter to a greased cake pan (or lined with parchment paper). My rectangular loaf pan is 20 cm * 4 cm. Level the batter using a spatula.
7. Bake in a preheated oven at 180 C for 30 to 35 mins in the center rack of your OTG or with both rods on or bake mode in conventional oven. In my oven it took exactly 30 mins. Might vary depending on your oven type. Once done, a toothpick inserted in the center of the cake must come out clear or with crumbs. Should not be wet.
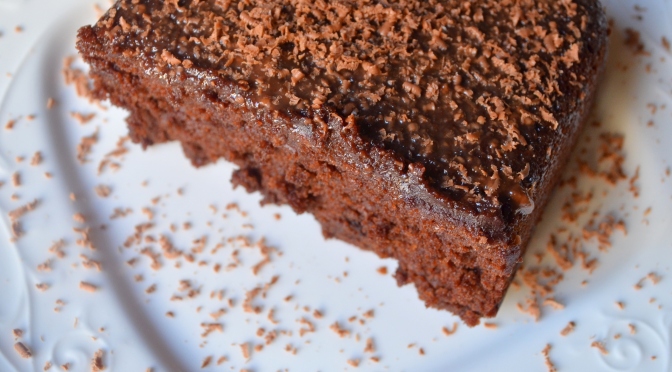
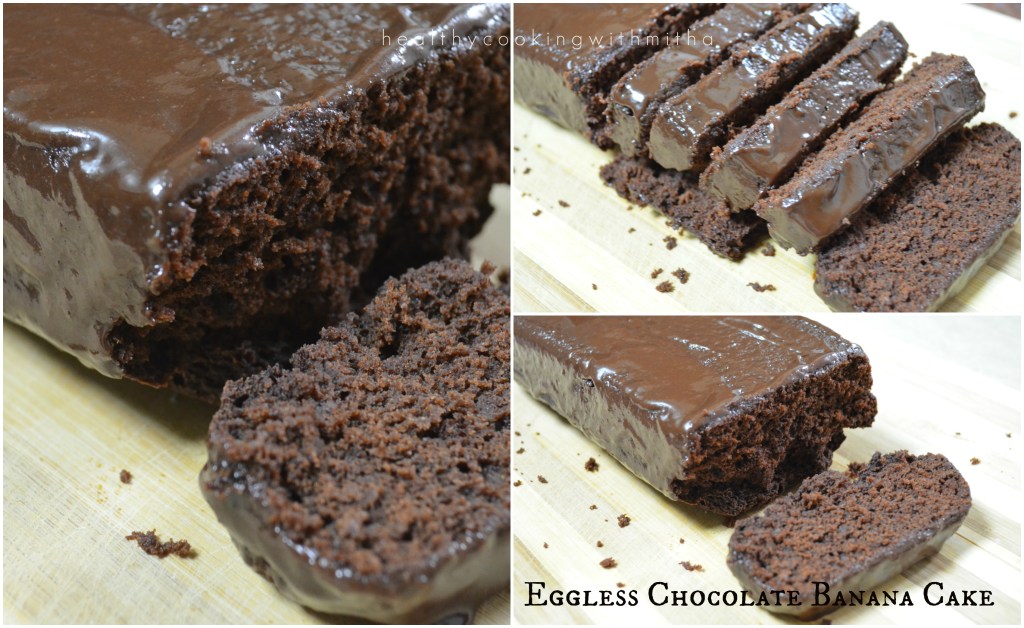
8. Allow it to cool. Invert onto a plate. Frost with melted chocolate- milk mixture. Have shared the process to do it in this Chocolate brownie recipe. Then grate chocolate over it. Slice and serve.
I had cut it into two halves. This is one of the halve.
Notes:
* I use Pillsbury brand of wheat flour for all my bakes. It really comes well with Pillsbury. I have tried with other brands but the texture of cakes, bread, pav and cookies is best with this.
* Please use milk at room temperature and not cold.
* If you don’t have jaggery powder, you can also substitute with cane sugar or brown sugar. Else just grate and powder jaggery in a mixer.
* When you add vinegar to the mixture, it will curdle. Don’t worry about it as it will give very spongy cake.
* When the cake is hot, it will crumble easily on slicing. Allow it to cool well atleast for an hour and then slice for firm slices.
* If frosting, check this Dates Chocolate brownie for easy melted chocolate frosting recipe which I have shared at the end of the step by step pictorial.
* If you are new to baking, here are some tips:
# Always preheat your oven at 180 C for atleast 10 mins. Temperature might be 200 C also. It varies according to the recipe but for cake, it’s usually 180 C.
# For whole wheat cakes, do sift the dry ingredients using a sieve for a soft texture of the cake.
# Do NOT overmix the batter. Just mix till you don’t see dry flour specks. Over mixing can lead to dense cakes.
# Do NOT open the oven door atleast till 25 mins into the baking time. Opening the oven door in between can lead to temperature variations leading to uneven baking.
# Always insert the toothpick or skewer in the center of the cake for accuracy. It should come out clear or with crumbs. Wet means it’s not done yet.
I have tried to note down as much points as possible so that it’s easy for you all to follow but if you still have any doubts, either comment here or message me on my Facebook page Healthy cooking with mitha or on my Instagram handle and I would be happy to help.
Update: I just baked chocolate cupcakes with this batter and it comes out perfect with flat top, super spongy, soft and delicious. It gets done in 20 mins at 180 C in my oven and yields 10 cupcakes with the measurement given above. Look at how excited my kids were to see their favorite cupcakes. They loved it a lot. ❤️❤️
It’s Christmas time and the official “bake at home” time too 😄. I have been seeing so many wonderful bakes on various Facebook food groups that I am part of and it is really amazing that now, everyone bakes so many varieties at home itself. So I thought I too should compile my healthy cakes and cookies in one page for those who want to bake guilt free goodies even for Xmas (if you are like me 😀).
For me, Christmas brings back two memories of my childhood. One is my dad bringing me Plum cake from our nearby bakery and I used to wait so eagerly for it. The aroma and flavour of the cake is still in my taste buds that it brings so much nostalgia. 😍
Second memory is singing Christmas carol at school (yes, I used to sing too 😅). We all used to wear white top and black skirt, practice so much for weeks and finally when standing on the stage singing the choir together with friends, it felt so good. ❤️ Though I don’t have a picture of the carol singing, here is a picture of the dress, which was my favourite as a 12 year old. This is from Amma’s album which is a treasure trove of old memories (love looking at them remembering old times 😍).
A part of the album page for the memory of old style albums. Nothing can replace the pleasure of looking through those albums. ❤️
Though after school, I never sang on stage, I still sing bhajans and songs for my kids when putting them to sleep and record them to send Amma who loves to listen to them. 😍 The best part is I still remember the lyrics and tune of the Christmas carols, much to the amazement of my daughter (she loves Christmas 🎄). So we have been singing carols together, making cards for her friends while baking some goodies to enjoy this season.
Hope you all try some of them too. Happy and healthy Baking! Merry Christmas to all of you in advance! ❤️
3. Dates and Oats Cake – My idea to sneak some oats in the cake as well. Because you can never say it has oats in it. Another of my readers’ favorite cakes. Tried and loved by so many.
5. Dates and Carrot Cake – Sugar free cake – My personal favorite as it is free from sugar or even jaggery can be skipped. Beautifully combines the natural sweetness of dates and carrots. Another of my recipe tried a lot by my readers.
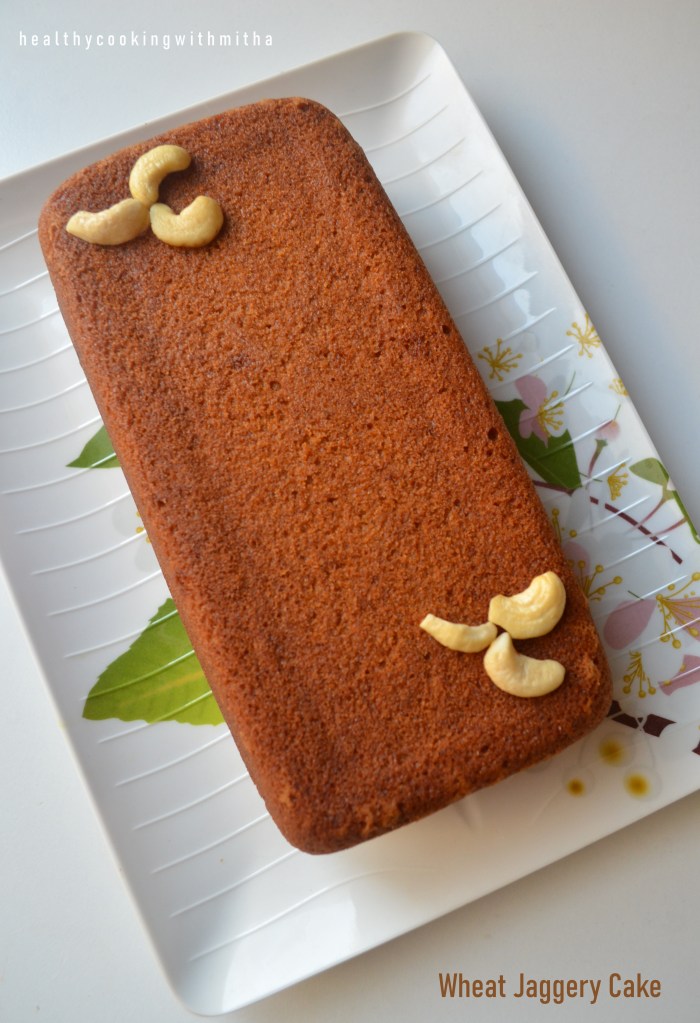
8. Wheat Jaggery Cake – Basic cake to which you can add dried fruits to make a dry fruit cake. Also can make cupcakes with this. Have been making this cake for years now for my kids.
9. Wheat Chocolate Sponge Cake – You can never say it is made with wheat flour and jaggery. Comes out super soft and delicious. I make cupcakes with this batter regularly for my kids as they love it. ❤️
10. Eggless Banana Rava Cupcakes – This is my go to recipe when I have over ripe bananas. Super easy to make, one bowl recipe which tastes heavenly due to the combination of Rava, banana, Jaggery, ghee and cardamom powder.
11. Eggless Dry Fruit Cake – A great way to add dry fruits in your kids snack. With the addition of orange juice, this cake tastes absolutely delicious. A regularly made cake at my place.
12. Eggless Wheat Banana Cupcakes: I make these cupcakes for my kids’ evening snack during vacations and also for their tiffin box to school. A great way to finish up those over ripe bananas too. Comes out soft and delicious.
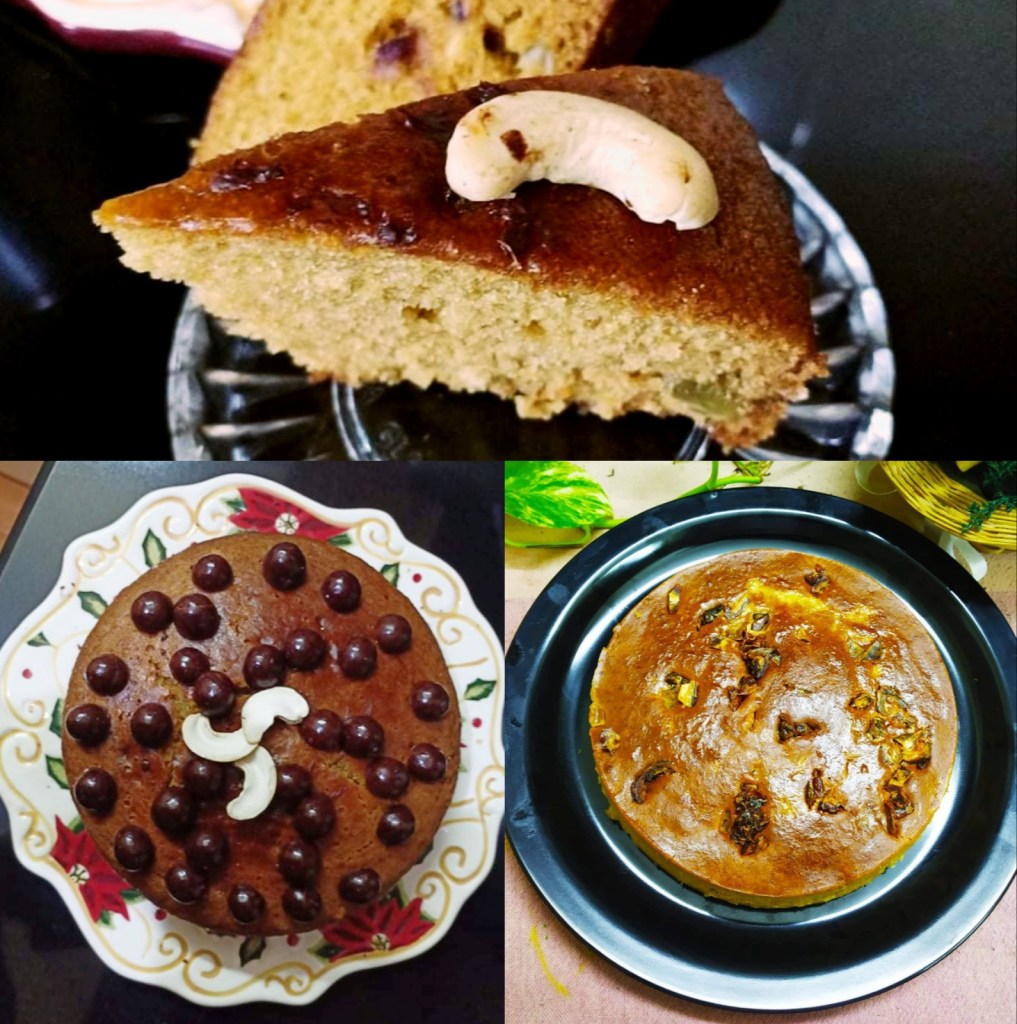
Jowar Chocolate Sponge Cake – Gluten free and eggless, this cake baked with Jowar flour is a perfect example of being healthy as well as tasty. Comes out very soft and spongy too..
This is another easy, healthy sweet recipes collection that I made last time. You can find the recipes here. They are sweets that can be made under 15 mins.
When I became a newbie mother in 2015, it was really overwhelming for me as I did not know most things (babies don’t come with manuals 😄). Though my mother helped me a lot with her experiences, I hardly got time to talk to her in detail then (from talking for hours together on the phone to just few minutes, motherhood changes everything 😬).
So most of the time when my daughter slept, I used to read about nutrition and how babies really don’t need separate purees and porridges. Hence, when she started her solids at 6 months, I gave her whatever we ate (minus sugar and salt till one year) which she accepted without any issues. That is the reason why even now, she accepts almost all kind of foods at 6 years of age and after that, I am now following the same with my 2 year old son too. No purees or baby foods.
When she turned a toddler, I saw how she loved store bought sponge cakes. But somehow, I did not want to give her the maida, oil based sugary ones. So that’s how I started baking wheat flour jaggery ghee cakes in 2016 and that cake has now become both kiddos’ favorite cake. I bake this when they crave for cakes and their happiness while enjoying the cake is worth watching. Here is my daughter presenting a piece of her favorite cake.
This recipe is exactly same as my Cherry Wheat Jaggery muffins recipe. Just skip cherry in it and bake in a cake pan. You get this cake. I am adding this as a separate post so that it is easier for my readers when they search for basic wheat cake.
I also thank my idols Asha Satish Philar mai and Sujatha Umesh mai for skipping cherries from the muffins recipe and baking beautiful cakes. Here are their pictures of the cake.
Hope you all try this cake for your tea time or for your hungry kiddos this vacation. I just baked them yesterday again and the way my kids relish them makes me so happy. Happy and healthy Baking!
Important Note: I understand that wheat flour is also a refined flour but definitely more nutritive than maida/ all purpose flour. Also I know that jaggery has the same calorie count than refined sugar. But it has more nutrition than the bleached sugar and also the flavour is more delicious than sugar. Mainly my kids prefer jaggery than sugar. Finally it’s upto to you to read, be aware and decide.
Sharing the recipe with all of you..
RECIPE:
Ingredients: { 1 Cup = 250 ml }
1 and 1/2 Cups Wheat flour or Atta (I use Pillsbury brand)
1 tsp Baking soda
1/4 tsp Salt
Wet ingredients:
1 Cup Milk, at room temperature
1 Cup powdered Jaggery
1/4 Cup Ghee
1 tsp Vanilla essence
Step by step recipe:
1. Preheat the oven at 180 C for 10 mins.
2. Sieve together wheat flour, baking soda and salt in a bowl.
3. Now mix together milk and jaggery using a whisk till the jaggery melts in the milk. Add ghee and vanilla essence. Mix well using whisk.
4. Slowly add the dry ingredients to the wet ingredients and fold both the ingredients using a spatula just till no flour specks are seen. Do NOT overmix the batter as it can lead to dense cakes.
5. Now add the batter to a greased (with oil or ghee) cake pan and level using spatula. { My loaf pan is of 20 cm in length and 4 cm in width}
6. Bake in the center rack of your OTG ( or if using a microwave conventional mode oven, just keep both rods on option) at 180 C for 25 to 30 mins till a toothpick inserted in the center of the cake comes out clean and not sticky. Mine gets done at 30 mins exactly.
7. Allow it to cool down completely. Loosen the sides using a knife. Invert, slice and serve.
Notes:
* This cake tastes best the next day. So I always bake at night, for the kids to enjoy the next day. Soon after it bakes, the crust with be slightly hard but as it stays at room temperature, the crust turns very soft.
* Ghee can be substituted with melted butter or oil but when using oil, always remember that the cake will have that aroma of the oil.
* Store in an air tight container free from moisture and the cake lasts well for two days at room temperature. After that, refrigerate and microwave before serving.
* If you don’t like eating cakes as it is, top a slice of this cake up with some fresh cream cheese spread. It tastes heavenly, trust me! {Tried and tested by yours truly! 😬}
* While mixing both dry and wet ingredients, make sure you just fold using spatula and don’t over mix the batter. It will lead to dense cakes. Just mix till you can’t see anymore flour specks.
* I get many questions about ovensettings. I always bake in the center rack of my OTG with two rods option at the temperature and time varying according to each recipe.
* If you use a conventional microwave oven, just use bake option (or two rods option) at the temperature and time mentioned in the recipe.
* I have used my loaf pan of length 20 cm and width 4 cm. You can use round pan too.
* Timing varies according to each oven. So keep an eye after 20 mins into the baking time. But don’t keep opening the door before that as it will lead to uneven baking.
I have tried to note down as much points as possible so that it’s easy for you all to follow but if you still have any doubts, either comment here or message me on my Facebook page Healthy cooking with mitha or on my Instagram handle and I would be happy to help.
Twice a week when my husband is on his day shift, he eats his lunch at his company’s “restaurant”. He calls it canteen but I call it restaurant because of the wonderful spread they put out which sounds so scrumptious especially for me as I love buffets.
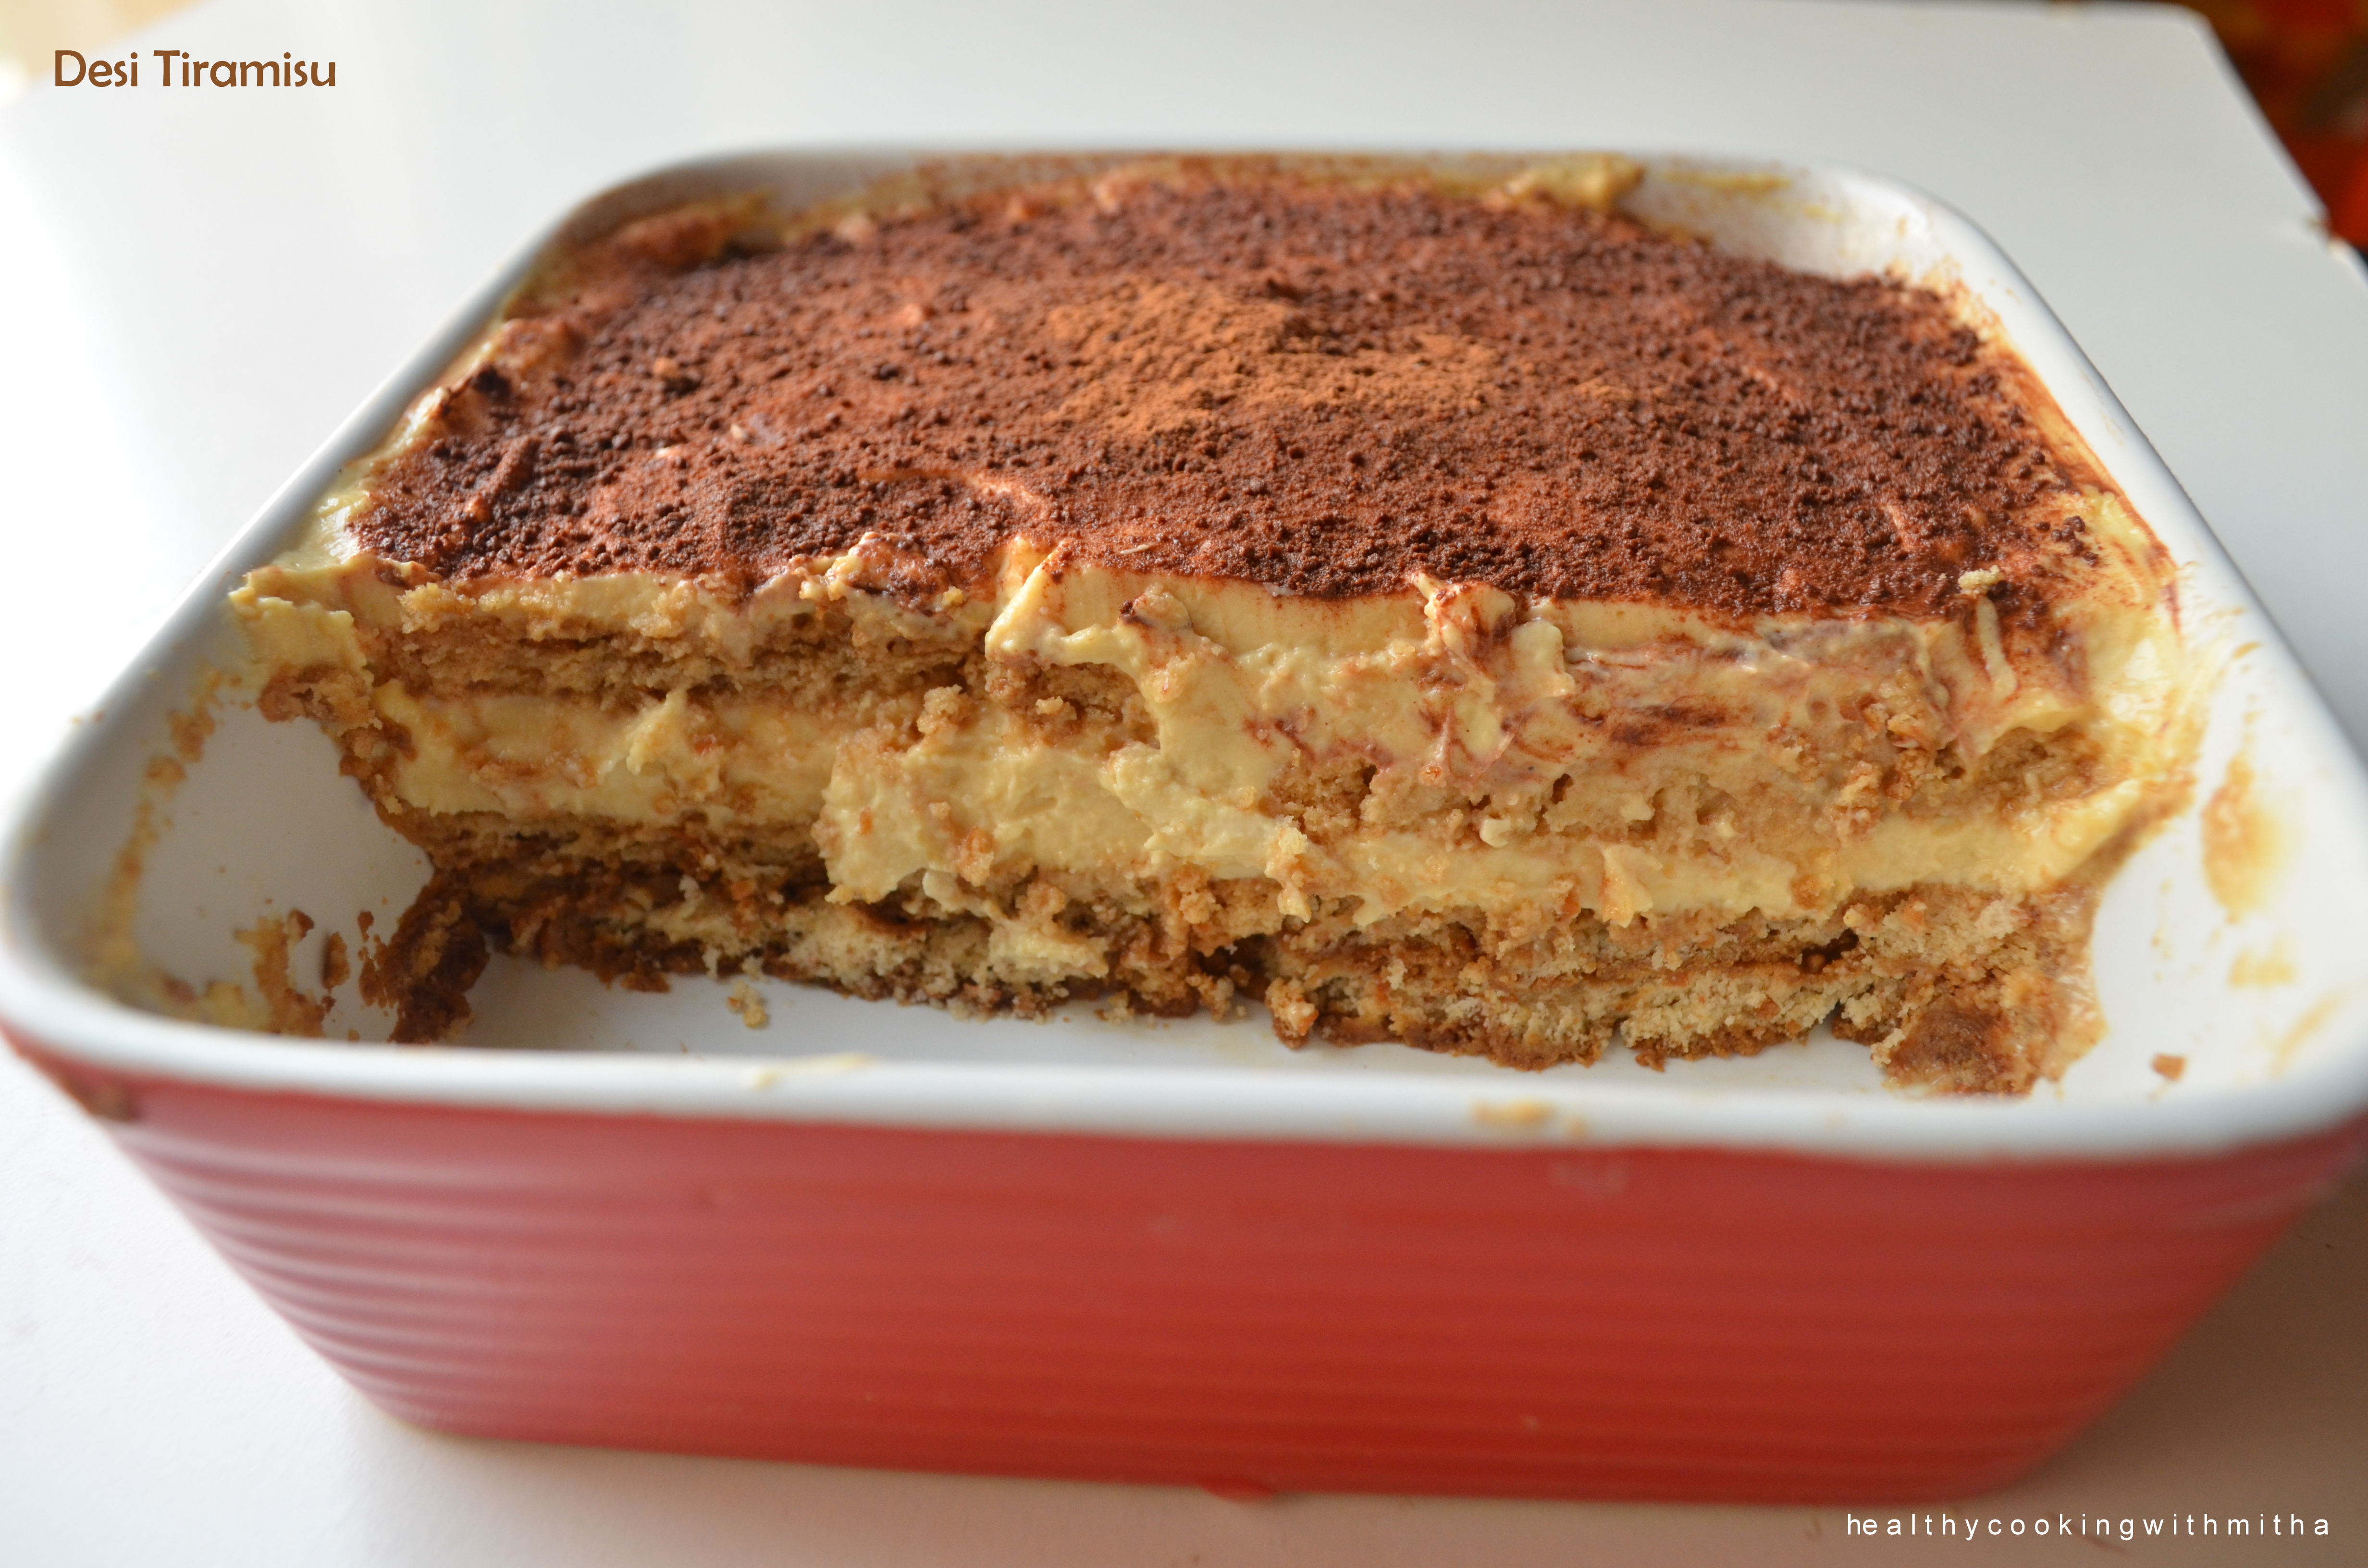
So he comes back home and gives details of what he ate there (much to my dismay 😅) which includes starters, variety salads, main course dishes and my favourite part – Desserts 😍. Tiramisu is one among them and my mouth waters when I hear it. If it was before, we would have gone out and enjoyed it, but now since everything is homemade, even the famous dessert had to made at home too.
And imagine my happiness when it turns out so delicious that all my cravings got satiated. I referred a lot of recipes online and understood that many had made Tiramisu using hung curd. So I made it even healthier by using jaggery and digestive biscuits.
Main point is all these ingredients are easily available as compared to the original Tiramisu where most are exotic ingredients.
So hope you all try and love it too. Happiness is definitely indulging in this delicious Tiramisu! ❤️
RECIPE:
Ingredients:
3 Cups Hung Curd
2 Cups thick Custard
3/4 Cup powdered Jaggery or Cane sugar
For the biscuit layer:
Approx 12 Whole wheat Digestive biscuits
4 tsp Instant coffee powder mixed with 2 Tbsp water (or as needed)
For dusting: 2 tsp Cocoa powder or grated chocolate
Step by step recipe:
1. For making hung curd, follow the stepwise pictorial that I have shared here.
2. For making custard, follow the instructions given in the packet of custard powder. In my packet it said, take 500 ml of milk and boil it with 2 Tbsp of sugar. Mix 2 Tbsp Custard powder with 2 Tbsp Milk so that it is free from lumps. Then add the boiling milk to the custard paste while whisking well (off the flame). Then heat the mixture on low flame till the custard turns very thick. Cool it completely. This gave me 2 Cups of thick Custard.
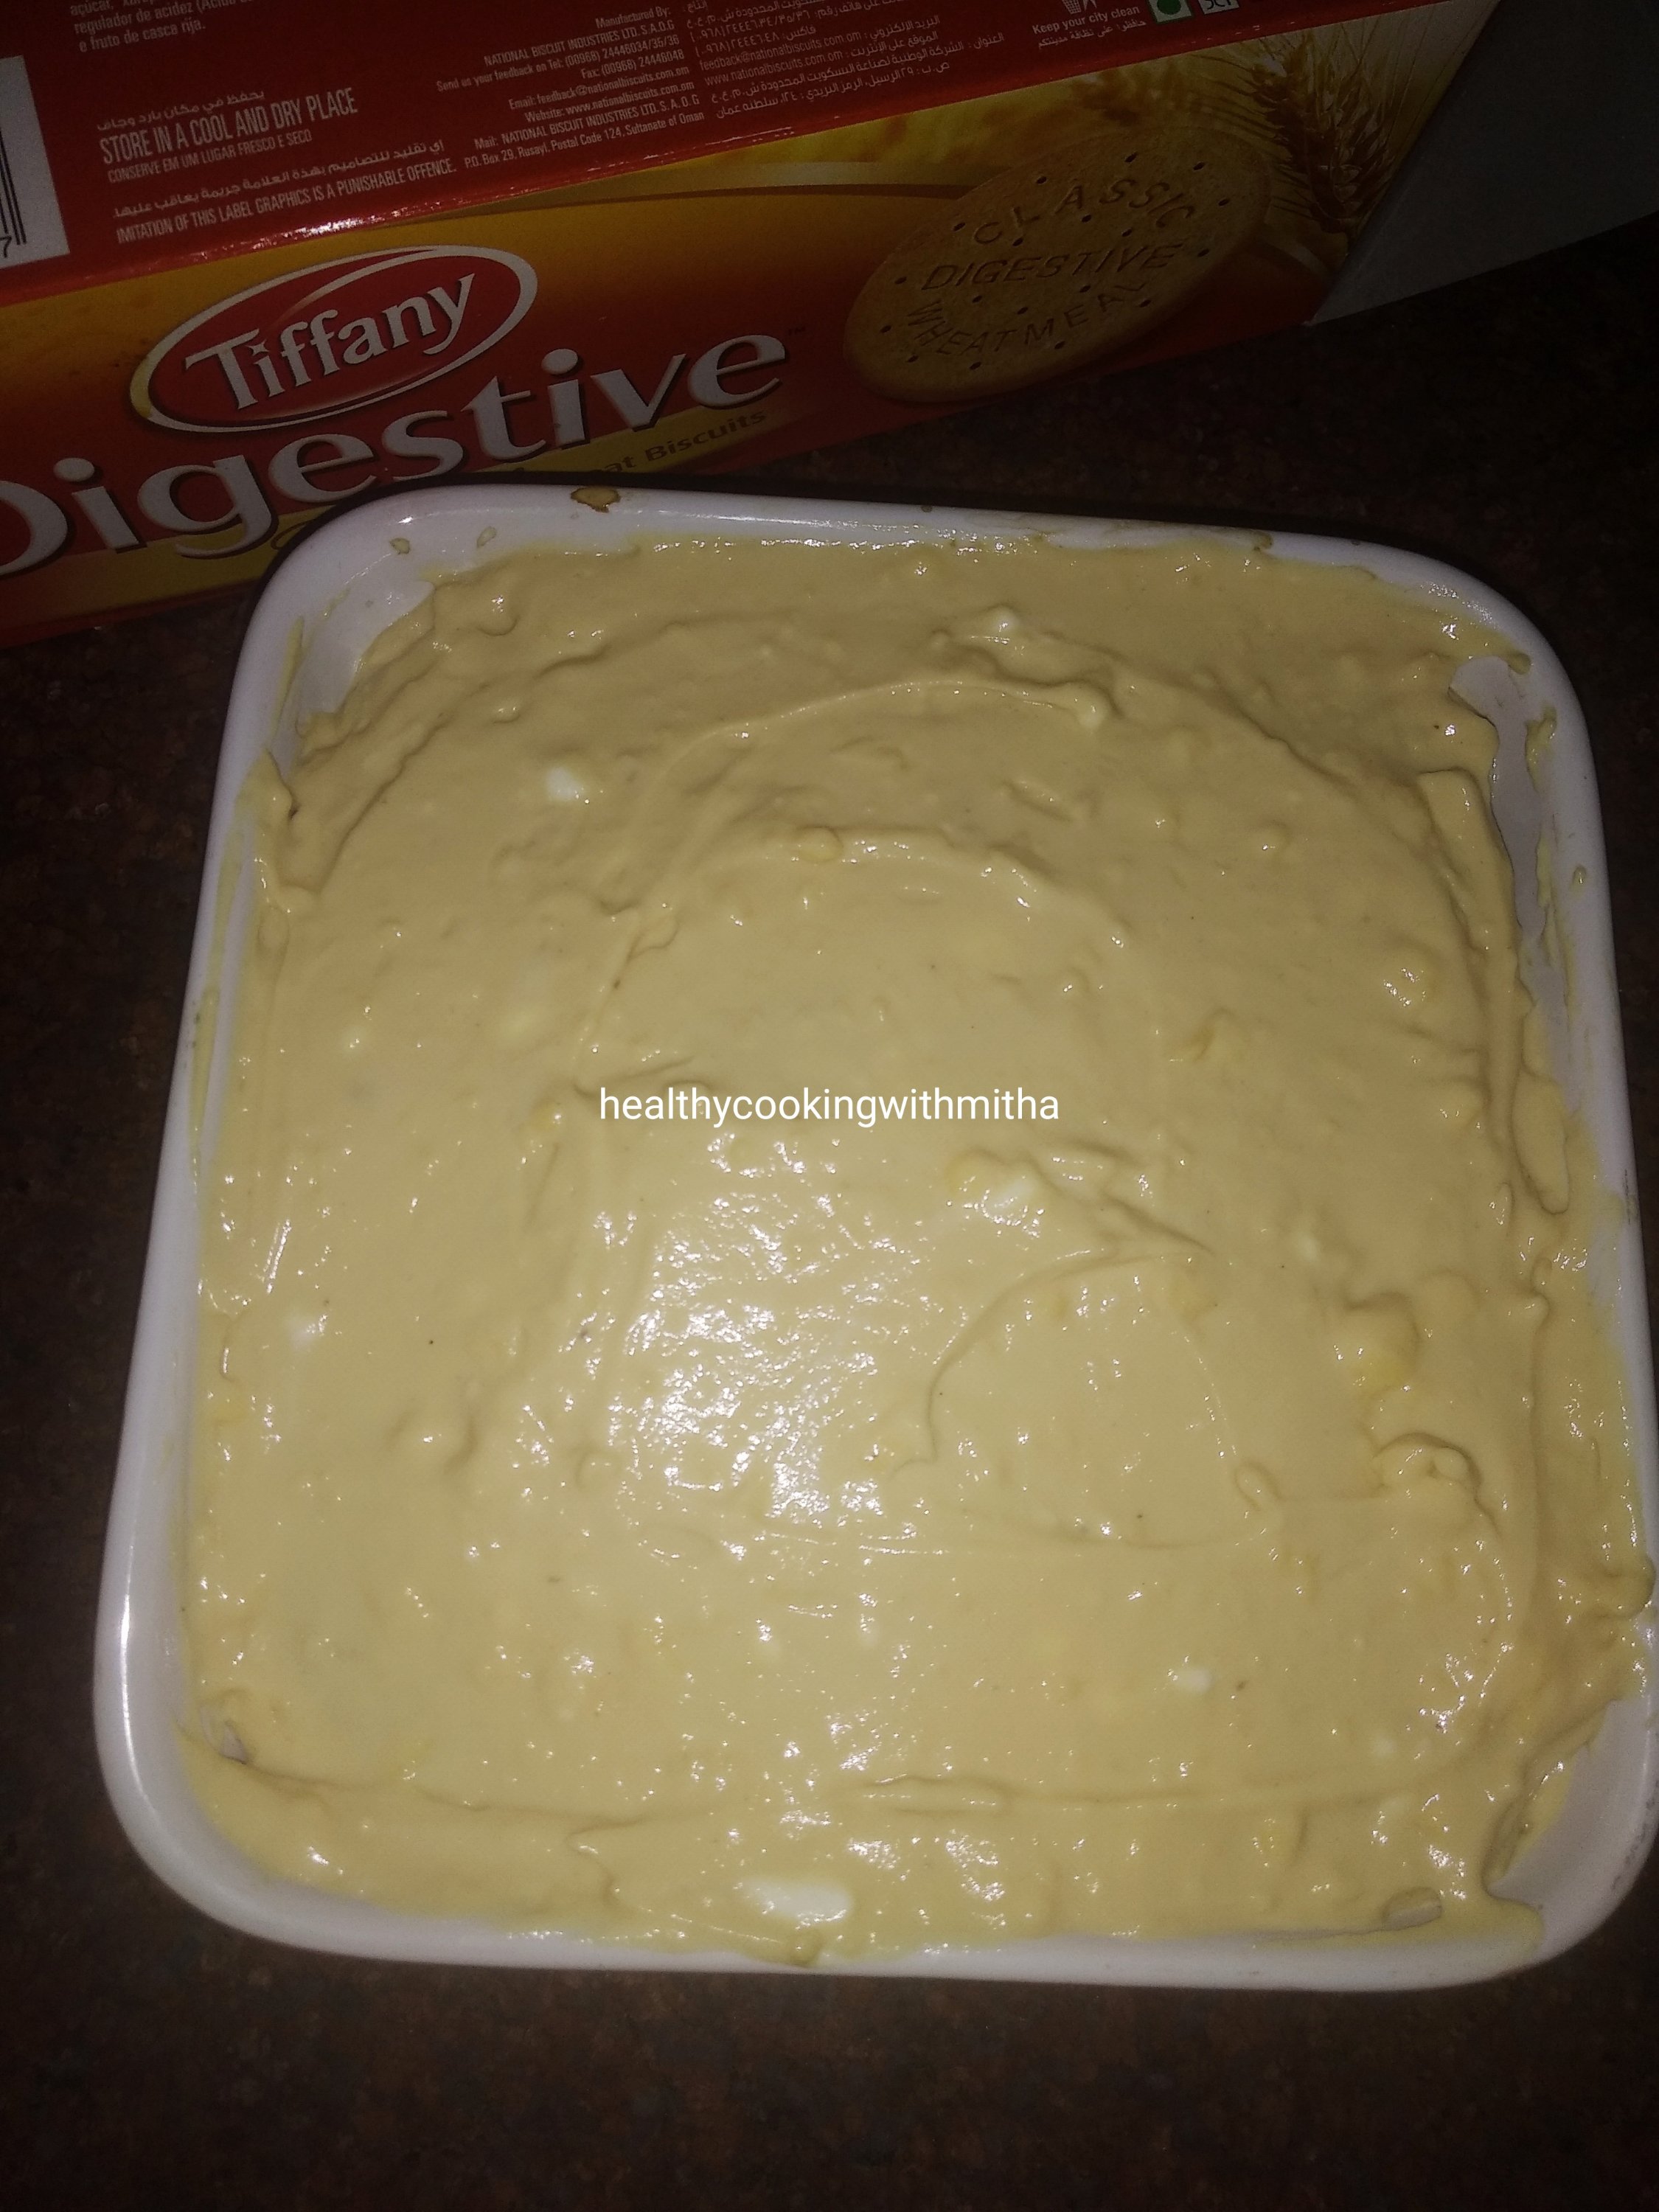
3. For the Tiramisu, take hung curd, the cooled custard and sieved jaggery powder (remember to sieve) in a bowl.
Note: Check how thick I have made the custard. It should resemble hung curd texture. Only then you will get a perfect tiramisu.
4. Mix well using a spatula so that they are combined well. Keep aside.
5. Now mix together instant coffee powder with water to make a coffee solution. Dip the digestive biscuits one by one and arrange in a rectangular pan as shown.
6. Keep two layers of biscuits in the bottom most layer so that it gives a good base while cutting the Tiramisu. Now layer with the hung curd mixture.
7. Again layer with biscuits dipped in coffee solution.
I did not waste the broken biscuit too 😅
8. Again layer with the hung curd mixture. Refrigerate overnight or for about 10 to 12 hours to get perfectly set Tiramisu.
9. After it sets, dust with cocoa powder using a sieve and serve. Too delicious for words! ❤️
Notes:
* Be careful to get the texture of the hung curd and Custard really thick. Else you won’t get perfect texture of Tiramisu.
* Although regular Tiramisu uses cream, sugar and mascarpone cheese, we found hung curd, custard and jaggery combination works superbly well and gives such a delicious Tiramisu which is a lot healthier too.
* Also substituting with digestive biscuits makes it so healthy and undoubtedly tasty too. Don’t forget to dip it in instant coffee solution.
* The layers are: Biscuit layer 1, Biscuit layer 2, Hung curd layer 1, Biscuit layer 3, Hung curd layer 2. After chilling cocoa powder dusting or chocolate gratings.
* I usually make this at night and it sets perfectly by next day afternoon.
* The slices are not super perfect but the taste and texture is. I can guarantee you will love it. We just could not have enough of it. So delicious! Just look at the layers. 😍
I have tried to note down as much points as possible so that it’s easy for you all to follow but if you still have any doubts, either comment here or message me on my Facebook page Healthy cooking with mitha or on my Instagram handle and I would be happy to help.
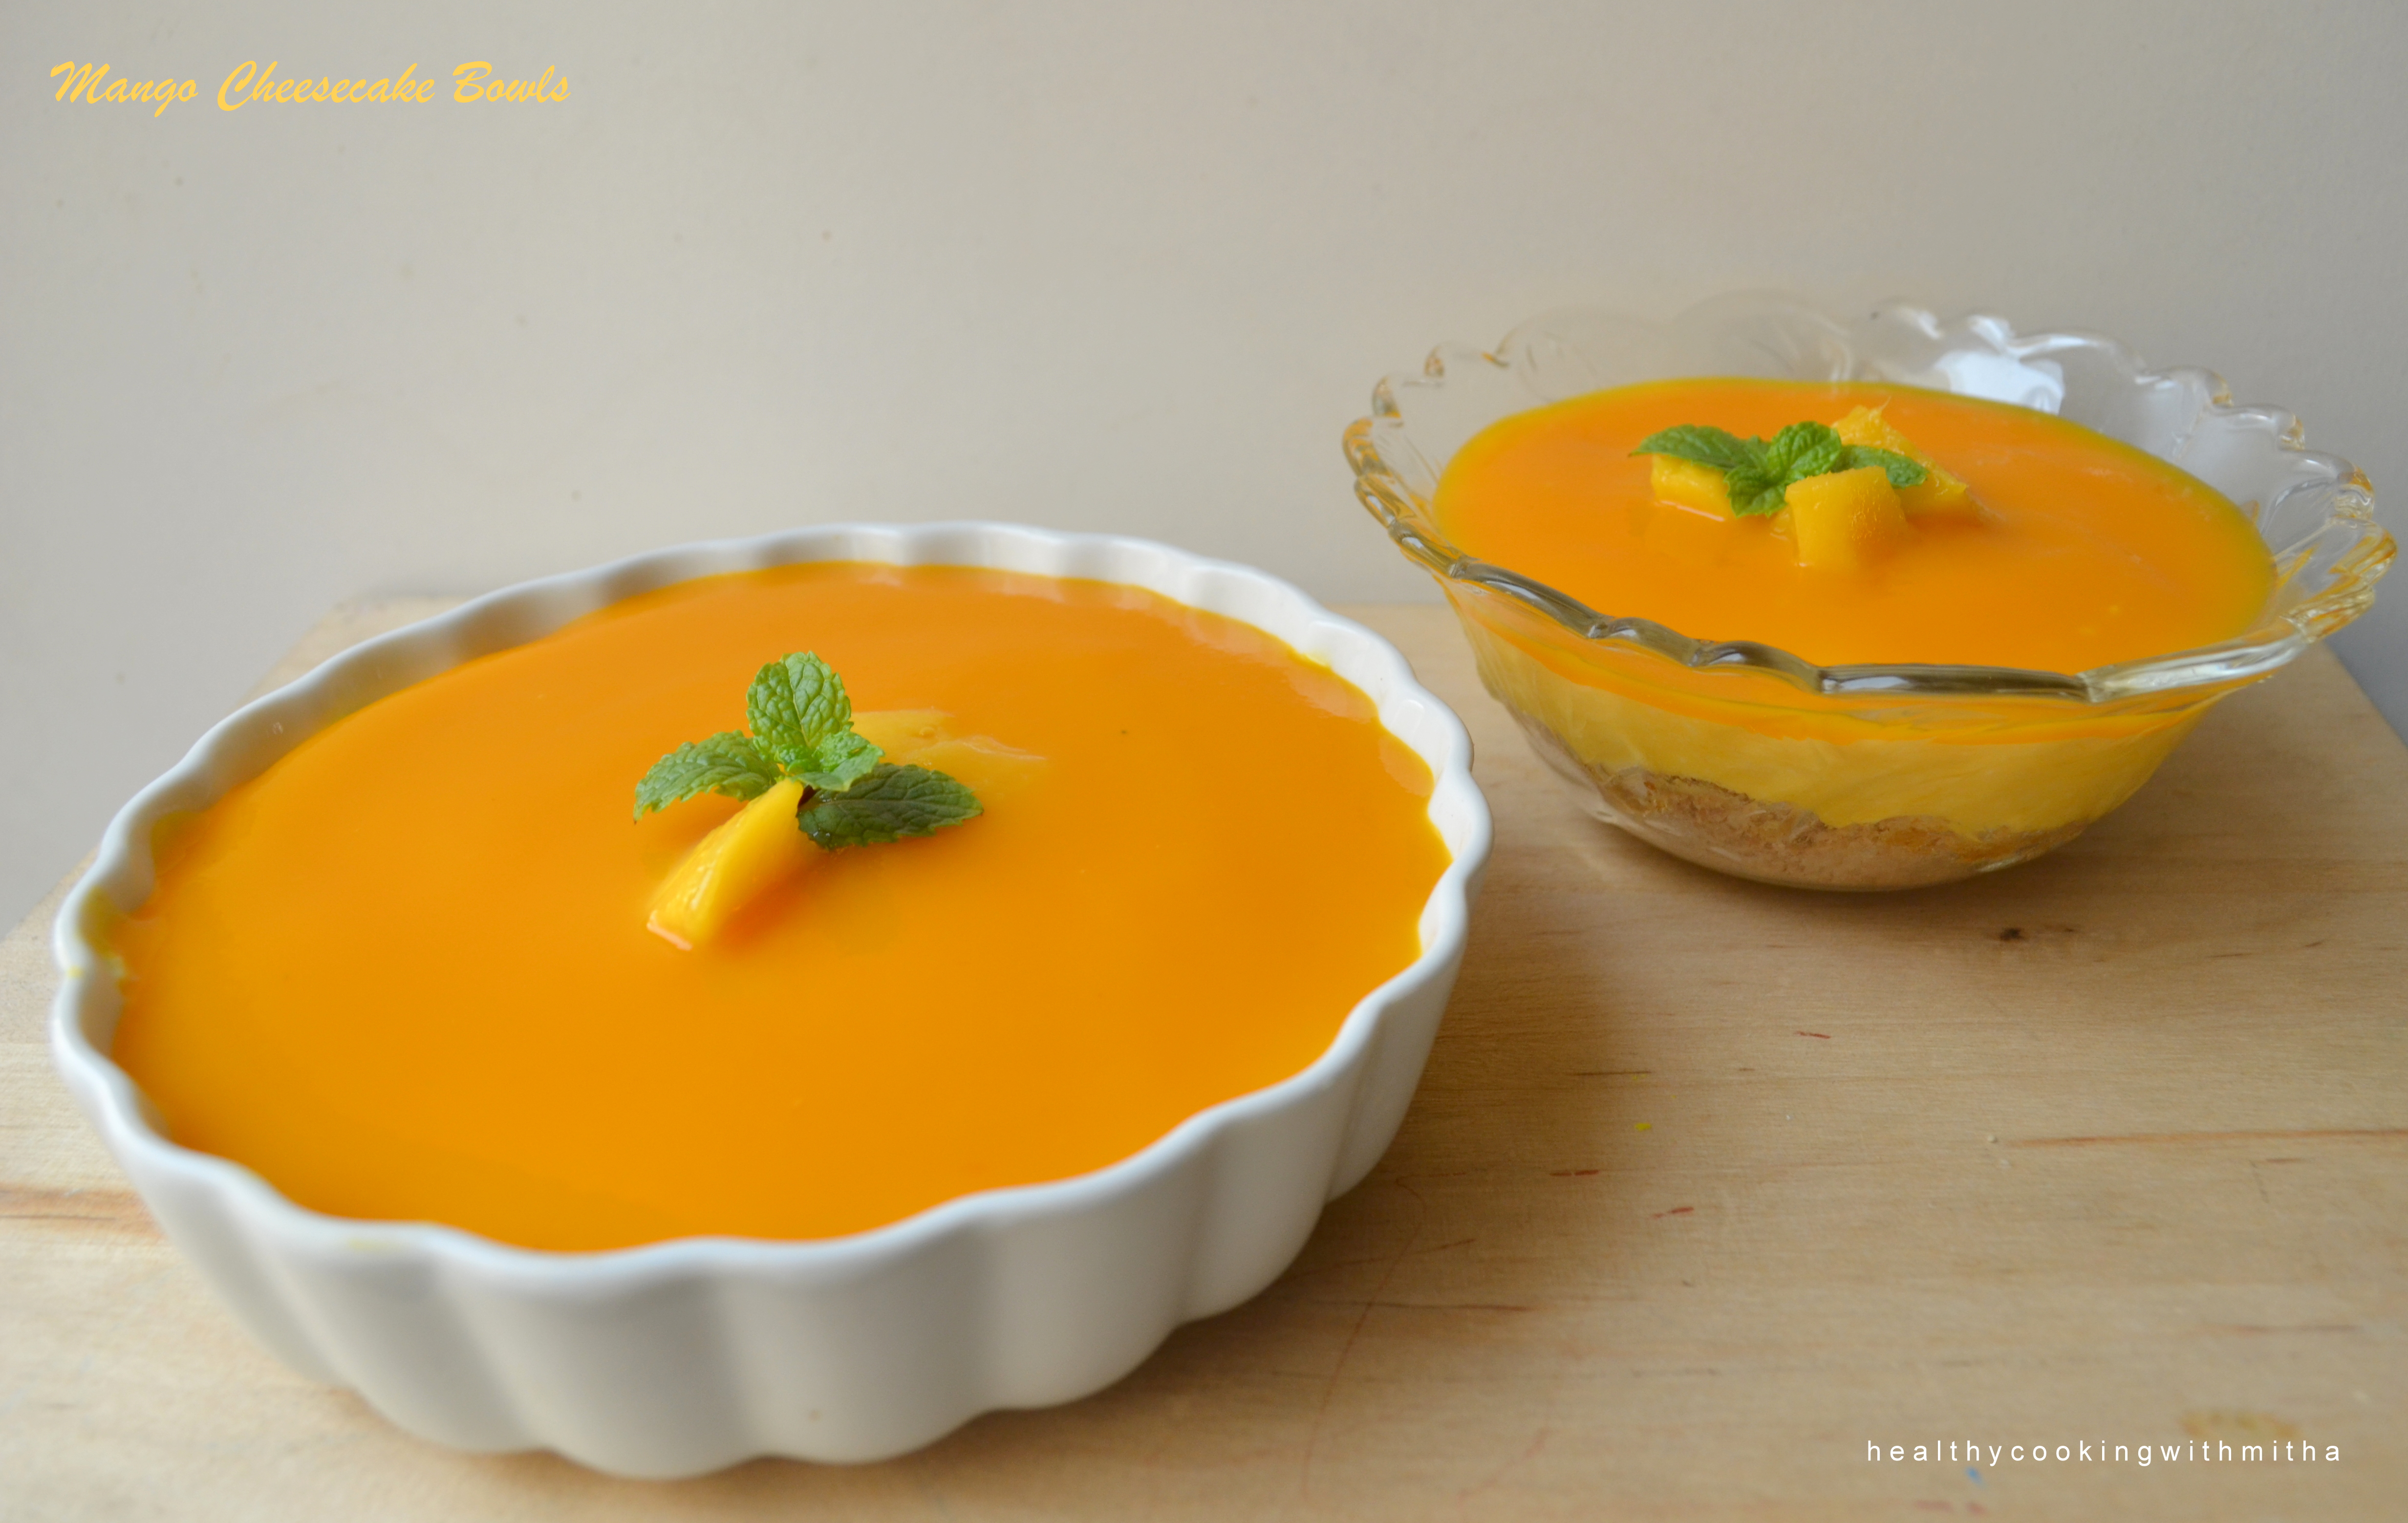
Here is the easiest cheesecake ever and definitely the tastiest too since it has mango in it. How can anything with mango not taste delicious?
Btw did you notice those hands holding the cheesecake? It is my husband’s and it is his photography too. I am very bad at pictures such as this and he helps me by clicking such unique captures.
I make Chocolate cheesecake well and he wanted me to make a mango version of it to see how it will come out. Even though I was hesitant as I was unsure whether it will set or not but it set so beautifully and tasted so yummy that we had a great time enjoying it for our weekend dessert (though we could not move out of our couch after that 😂).
But I guess some days are meant to be like that. To enjoy such sinful desserts just for a wonderful change from being health conscious always. Hope you all try and love it too. Happy cooking!
RECIPE:
Ingredients:
For the biscuit base:
100 grams Digestive biscuits (I used 8 McVities biscuits)
2 Tbsp Butter
For the cheesecake layer:
225 grams Cream cheese (can be substituted with hung curd)*check notes
1 tin sweetened condensed milk (397 grams)
1/3 Cup Lemon juice
2/3 Cup Mango pulp (fresh or canned)
For the mango topping:
About 1/2 Cup Mango pulp, fresh mango pieces and mint leaves
Step by step recipe:
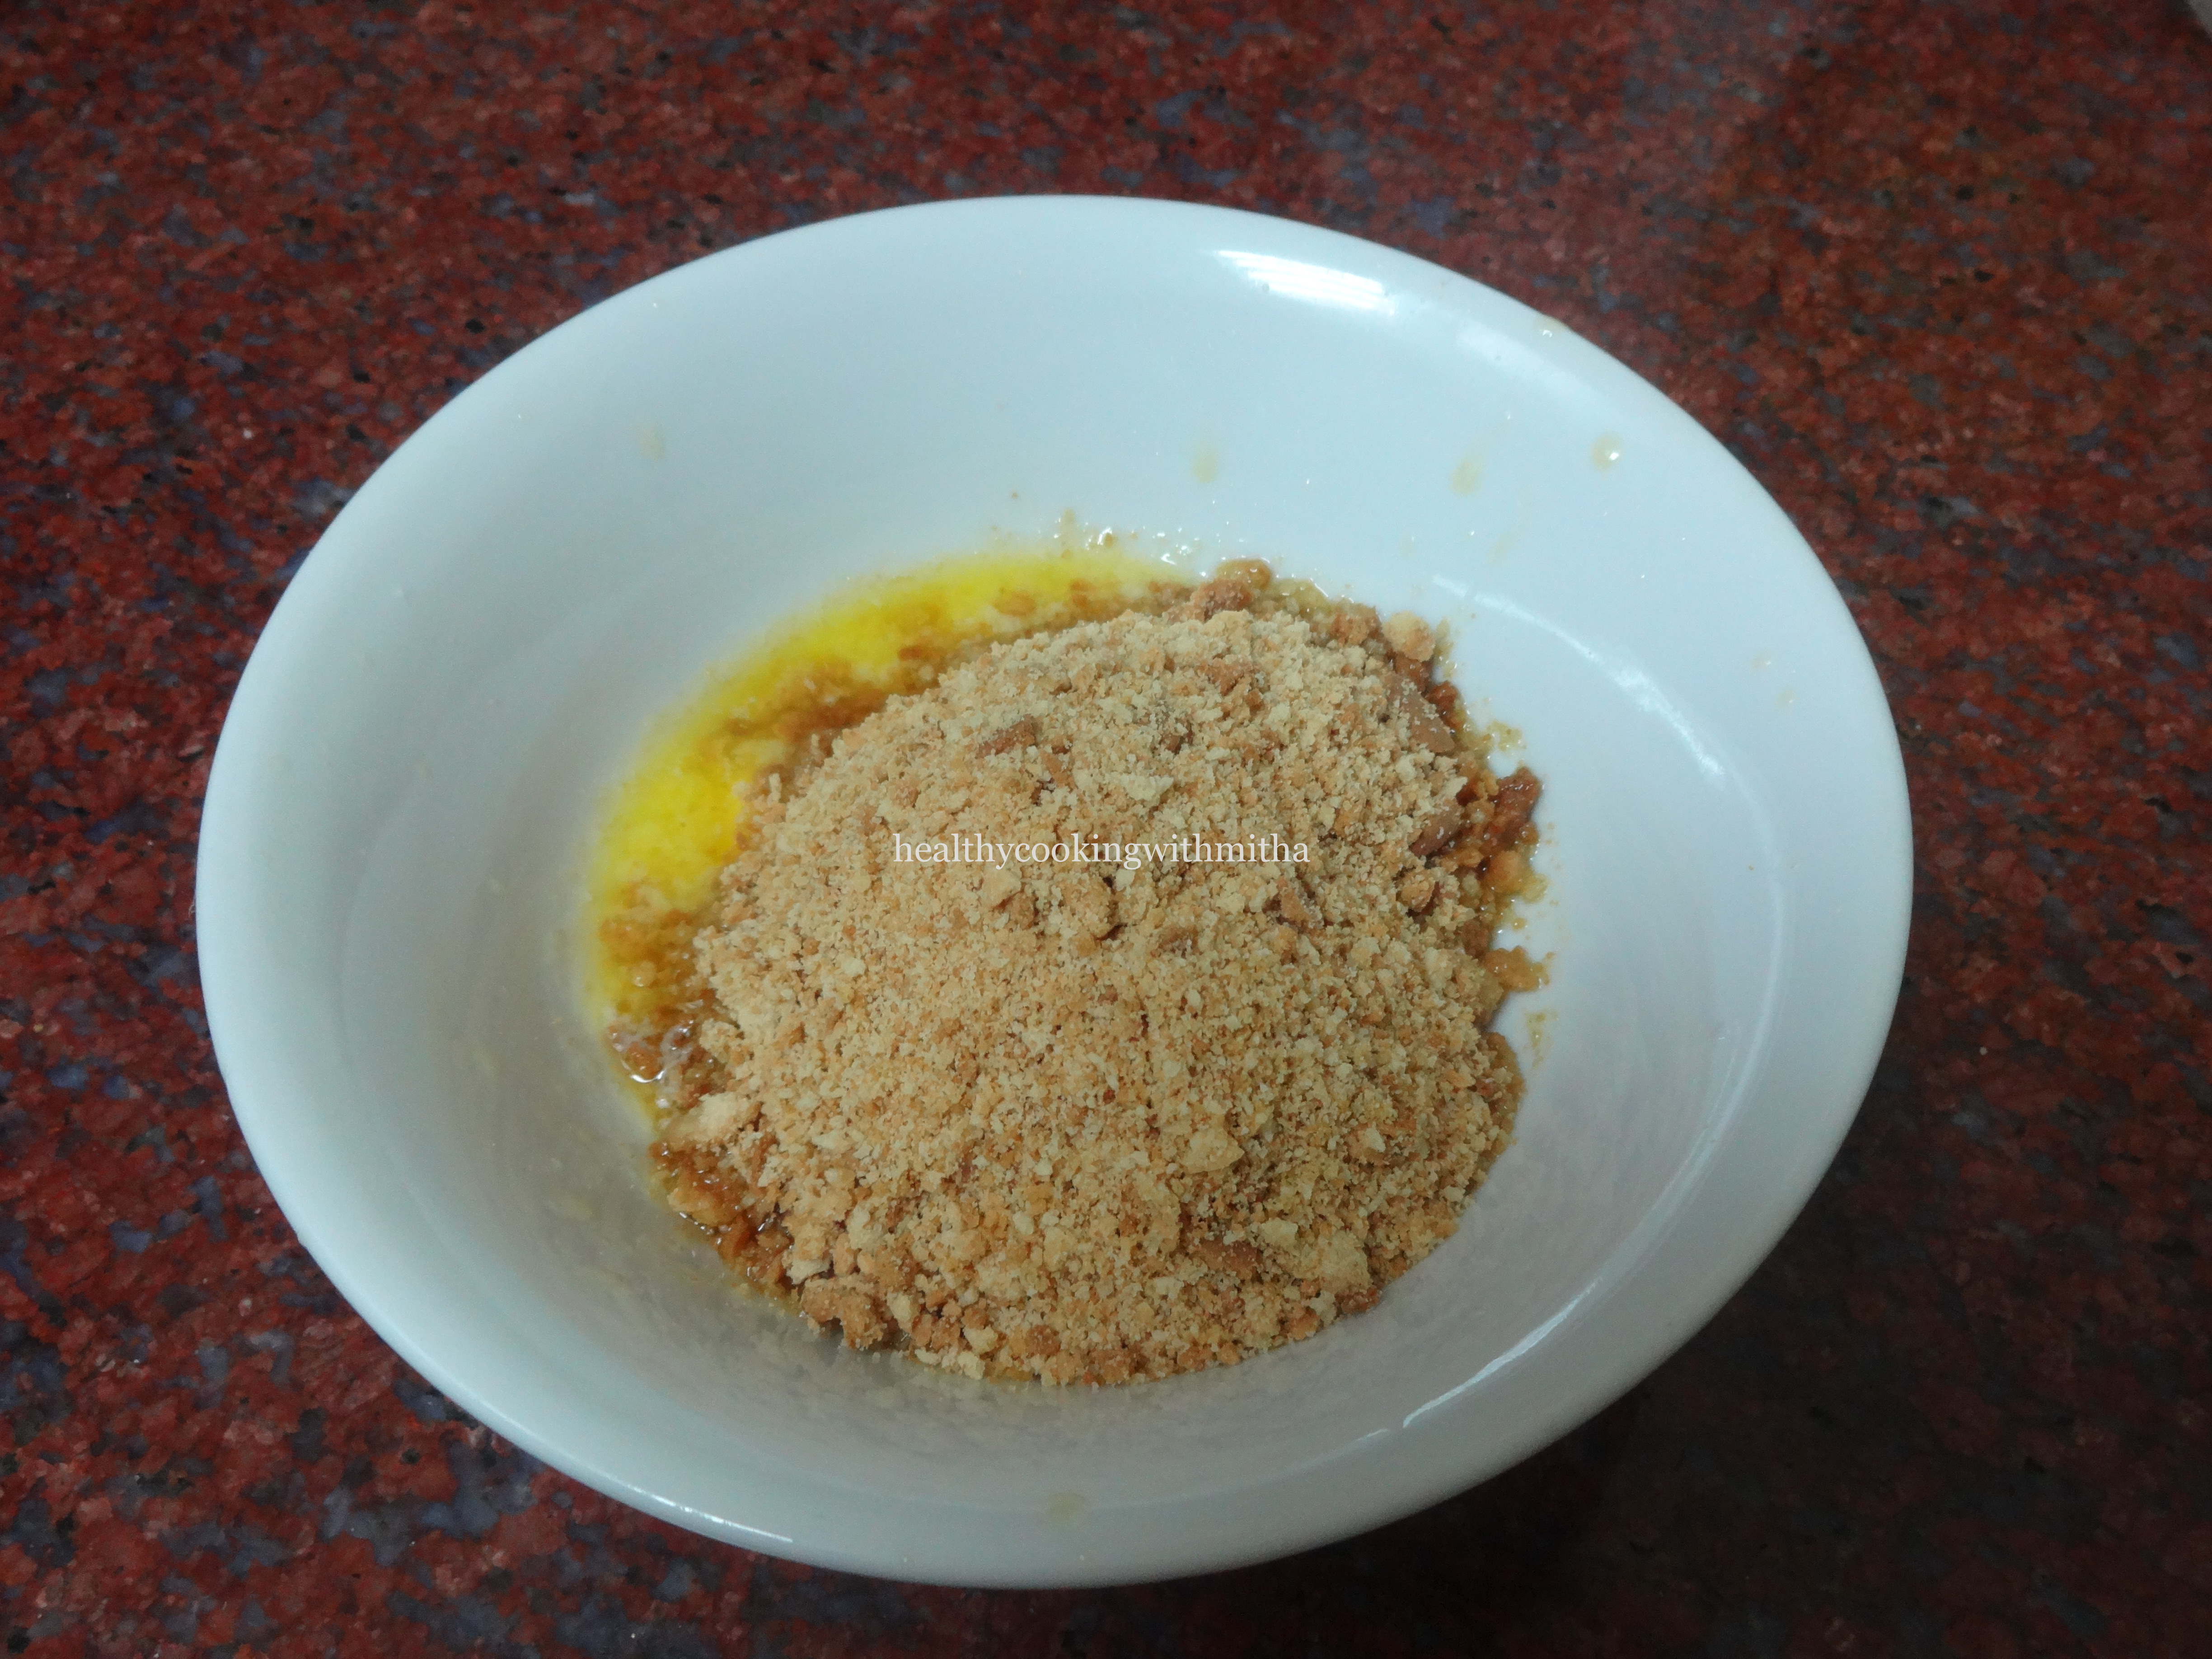
1. Powder the biscuits to a fine powder using a mixer or just add to a ziplock pouch and use a rolling pin to powder the biscuits. (My 5 year old daughter did this for me 😉)
2. Melt butter in a bowl and add this biscuit powder to it. Mix well.
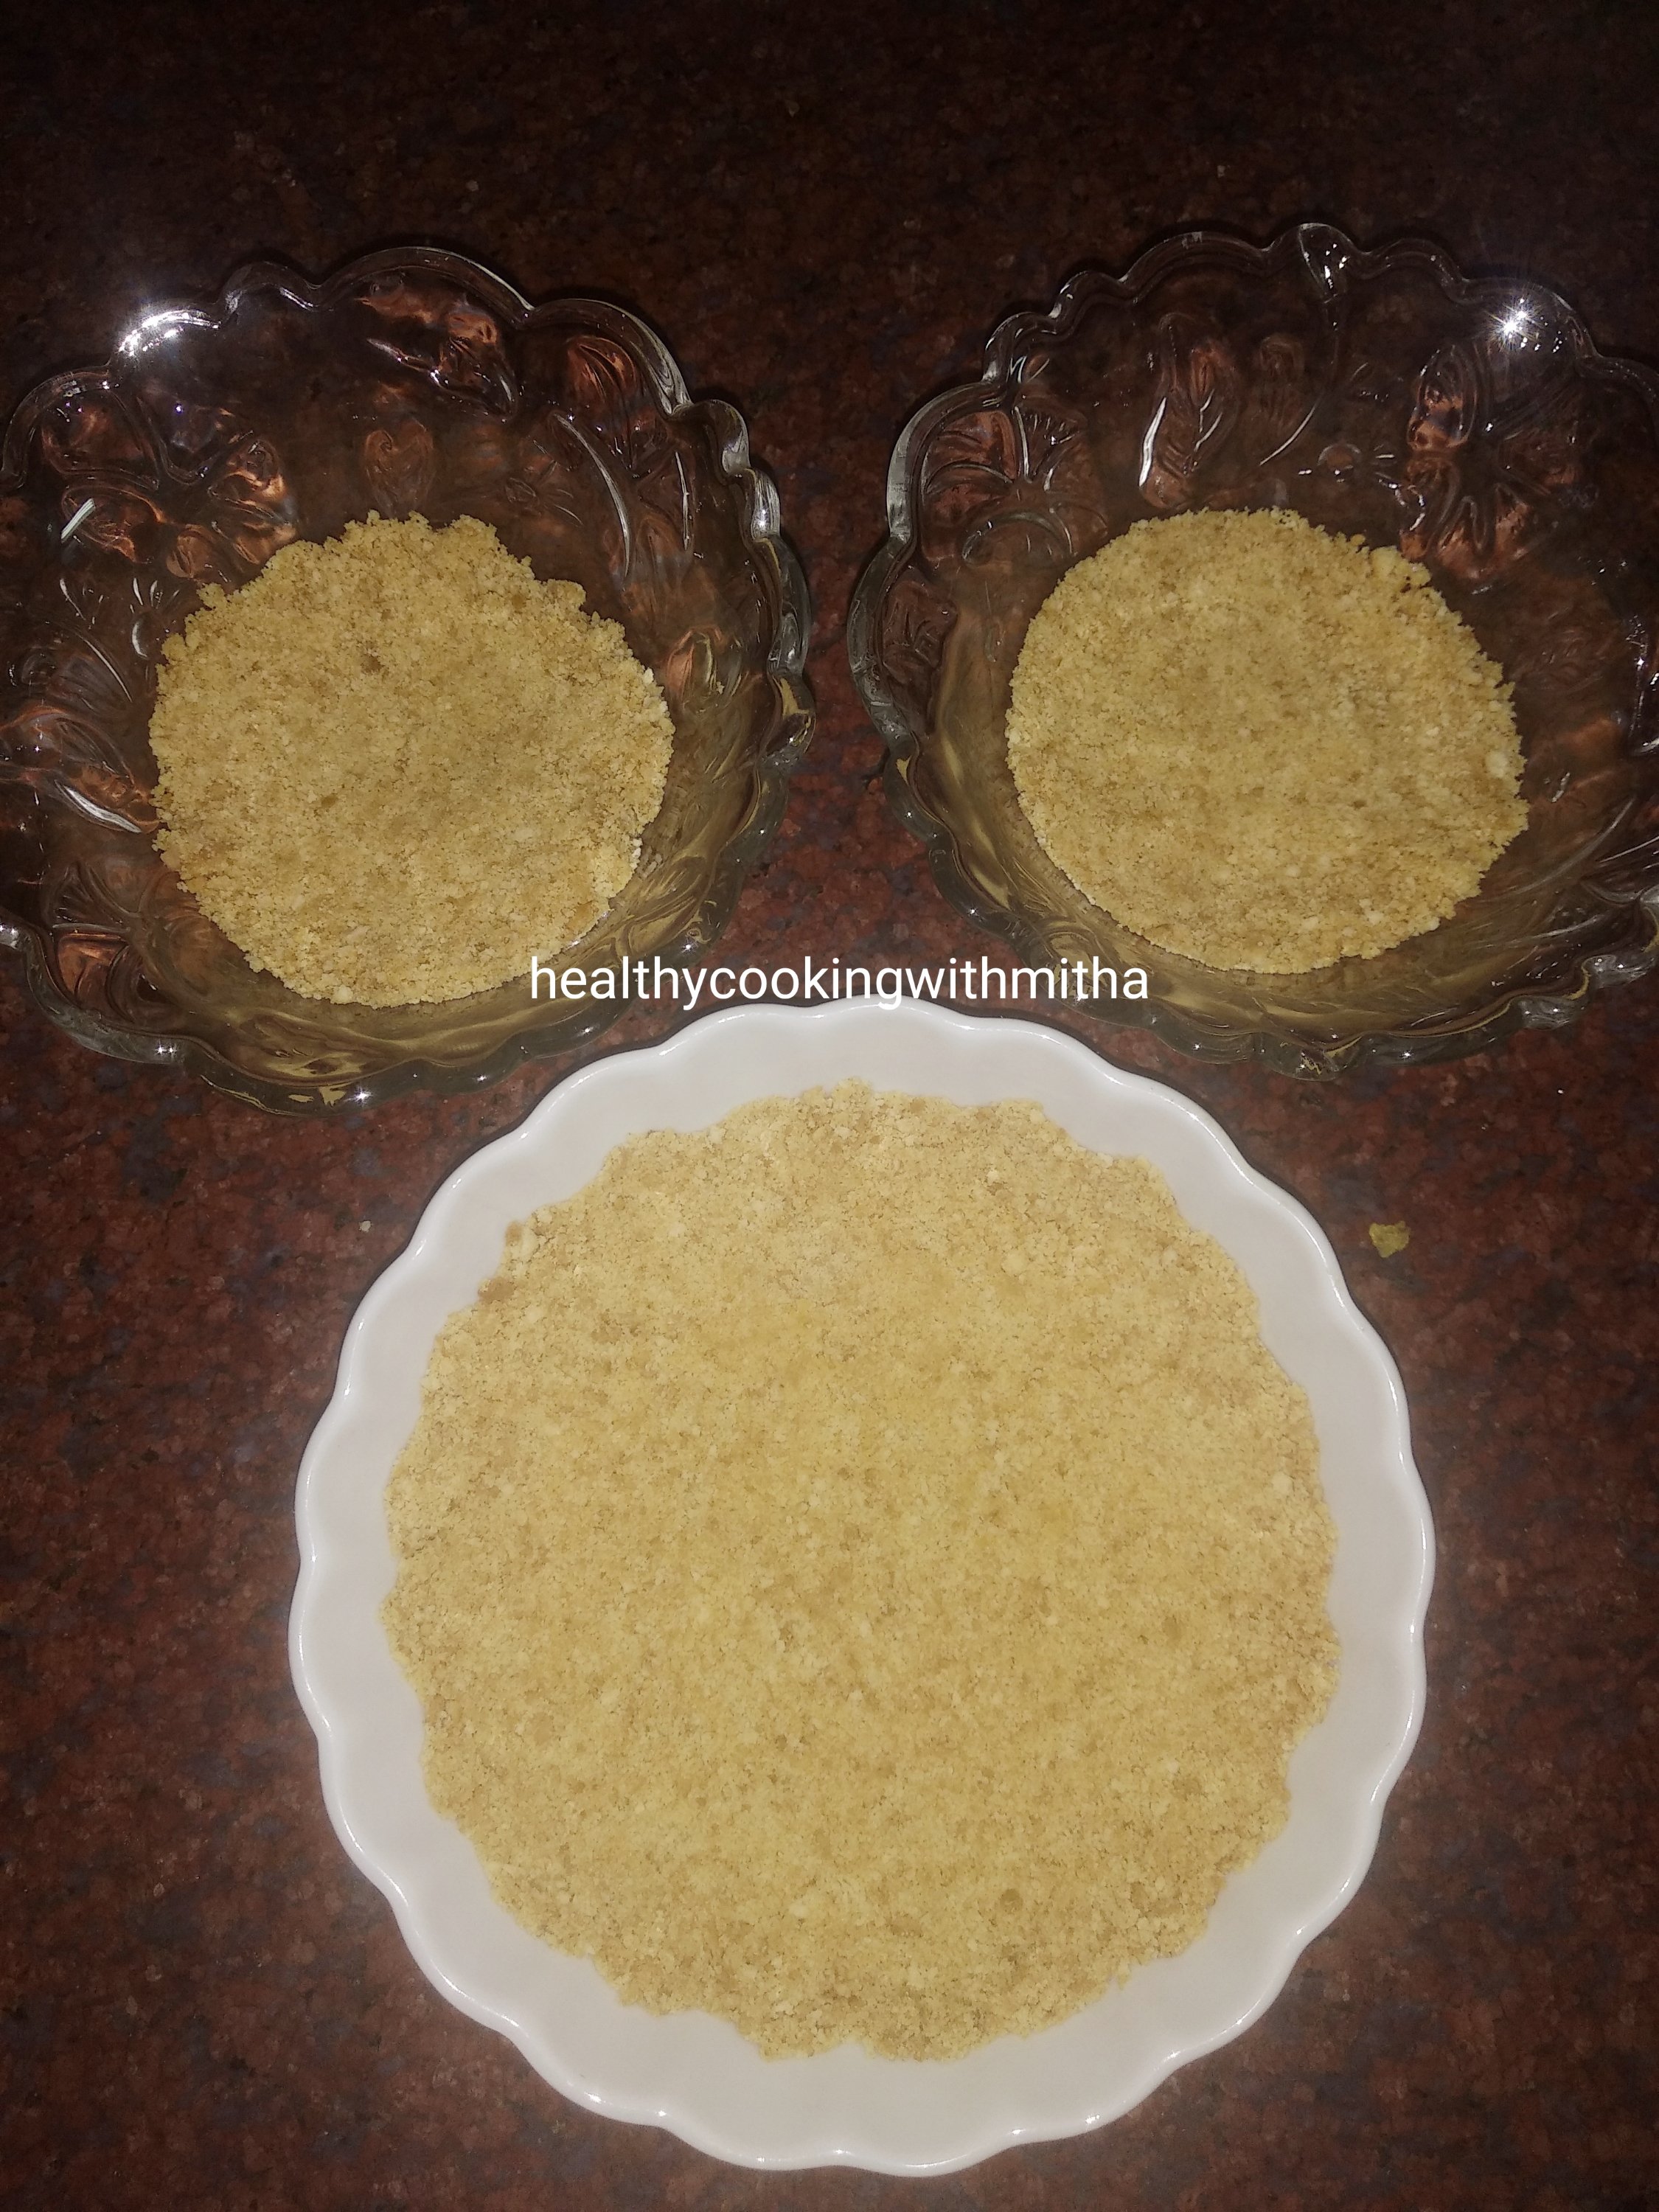
3. Put it in bowls to set as shown. Just a thin layer will do. Keep for refrigeration for 10 to 15 mins.
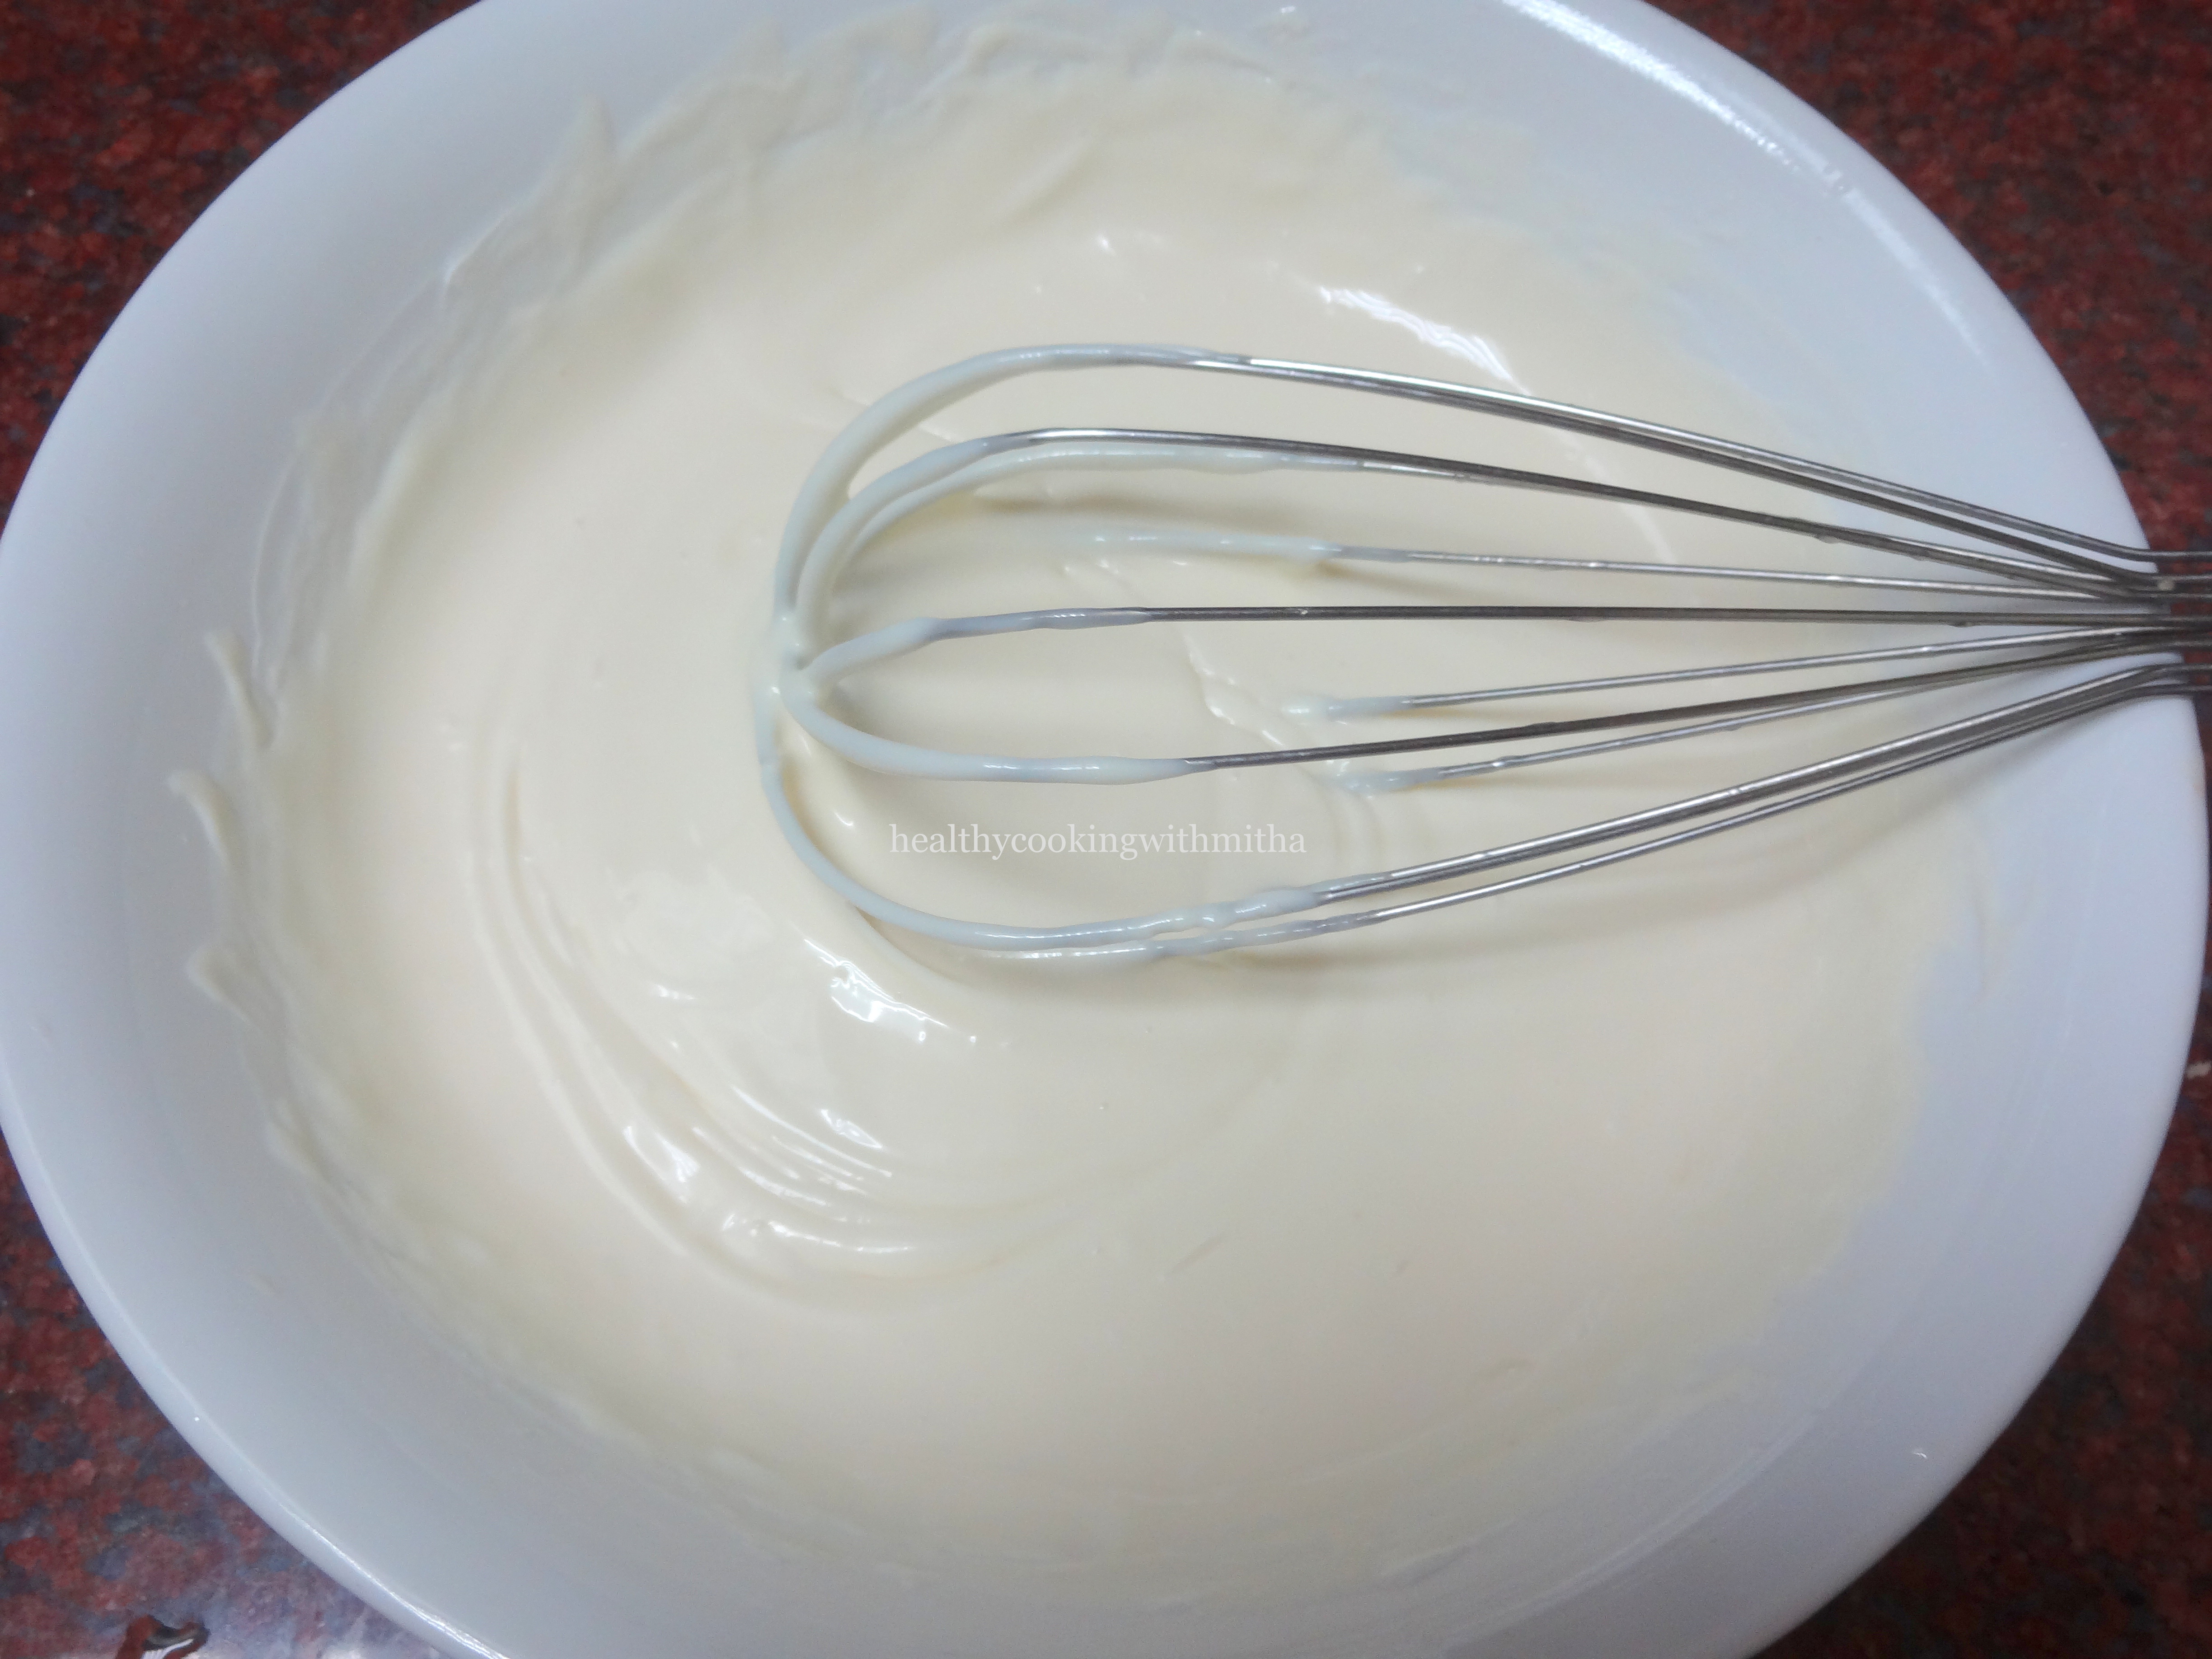
4. Meanwhile let us get the cheesecake layer ready. Whisk cream cheese till creamy just to remove lumps. No need to whisk a lot.
Note: You can also use hung curd instead of cream cheese. Whisk till smooth.
6. Now add mango pulp. Whisk again just to mix well.
7. Now remove the set biscuit mixture from the fridge. Add a layer of this cheesecake mixture evenly. Level using spatula.
8. Refrigerate for atleast 12 hours or overnight. (*Check notes) I usually set for one day or about 20 hours. See how well it sets then.
9. Now layer with mango pulp and serve chilled.
Notes:
* If you have time, refrigerate after adding the last mango pulp layer too. Else it’s okay as the last layer does not set anyhow.
* You can skip the last mango layer too if you don’t like cheesecakes very sweet.
* I usually make this a day ahead and refrigerate for 24 hours so that the cheesecake layer sets well. Then add mango pulp and refrigerate for another hour before serving.
* Lemon juice is an important ingredient for the cheesecake to set. So please don’t skip it.
* The benefit of serving in individual bowls is that you can save yourself the hassle of cutting into slices and enjoy your own cheesecake portion from a bowl.
* If you want to make a large cheesecake, double the measurements that I mentioned above, set it in a cheesecake pan and refrigerate for atleast 24 hours for the cheesecake to set. Remember that the mango pulp layer does not set. It’s just for flavour.
* My readers have successfully replaced cream cheese with hungcurd in the Chocolate cheesecake recipe. So it definitely works if cream cheese is not available and you are setting in individual bowls or glasses.
* For making hung curd, just keep a clean handkerchief or muslin cloth over a large sieve and add curd over it. Tie the cloth tightly and remove excess water. Now keep a heavy weight over it and keep it to rest in the fridge overnight till the curd becomes thick and all water drips in the bowl beneath it. The water can be used in gravies or chapati dough and hung curd can be used to make this cheesecake.
* I have used Mother’s recipe sweetened mango pulp. You can use fresh mango pulp too. Just make sure you blend well and the strands of mango are not in the pulp.
I have tried to note down as much points as possible so that it’s easy for you all to follow but if you still have any doubts, either comment here or message me on my Facebook page Healthy cooking with mitha or on my Instagram handle and I would be happy to help.
Advertisements
Join me in my journey with a foodie husband and hungry kiddos while I make them eat healthy!