It’s been exactly one year we are in India now, Udupi to be precise and I can’t explain the peace that I feel here. Life is simple in its simplest form and that’s how I like it to be. Parents and relatives are close by, temple functions keep coming up, neighbours are loving and kind, Udupi delicacies are so delicious, nature is its purest form around me, kids are enjoying a new kind of fun life.. in short, this one year has been a blessing, by Krishna’s grace.. ❤️🙏
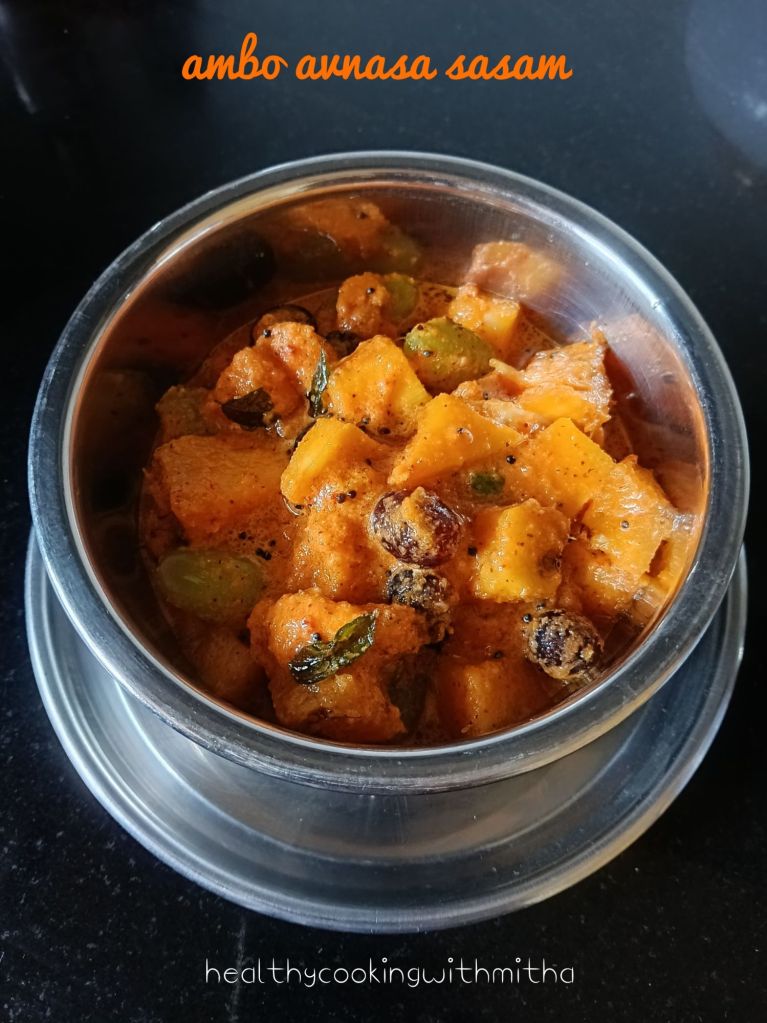
I have also been trying many Konkani dishes now as I get all kinds of ingredients easily here. One among them is this Ambo Avnasa Sasam which is famous among us Amchis specially during Mango season. Also the fresh and super sweet pineapples that we get here makes it extra special, taking it a level higher.
If you are a lover of sweet and spicy together, this dish is for you. It’s addictive and once you start eating it, the flavours will blow your mind away. It’s also a dish served at our functions regularly during Mango season.
Hope you all try and love it. Hope to post many more recipes soon. Happy and healthy cooking ❤️
RECIPE:
Ingredients: { Serves two people }
1 Large ripe Mango ( approx 1 Cup pieces )
1/4 of a large Pineapple ( approx 1 1/2 Cup pieces )
About 10 to 12 Green Grapes
About 10 to 12 Black Grapes
2 Green chillies
Salt to taste
2 Tbsp Jaggery or to taste
For the masala :
1 Cup freshly grated Coconut
2 roasted Red chillies
1 tsp mustard seeds ( raw, unroasted )
For the seasoning :
1 Tbsp Coconut oil
1 tsp mustard seeds
A sprig of curry leaves
Step by step recipe:
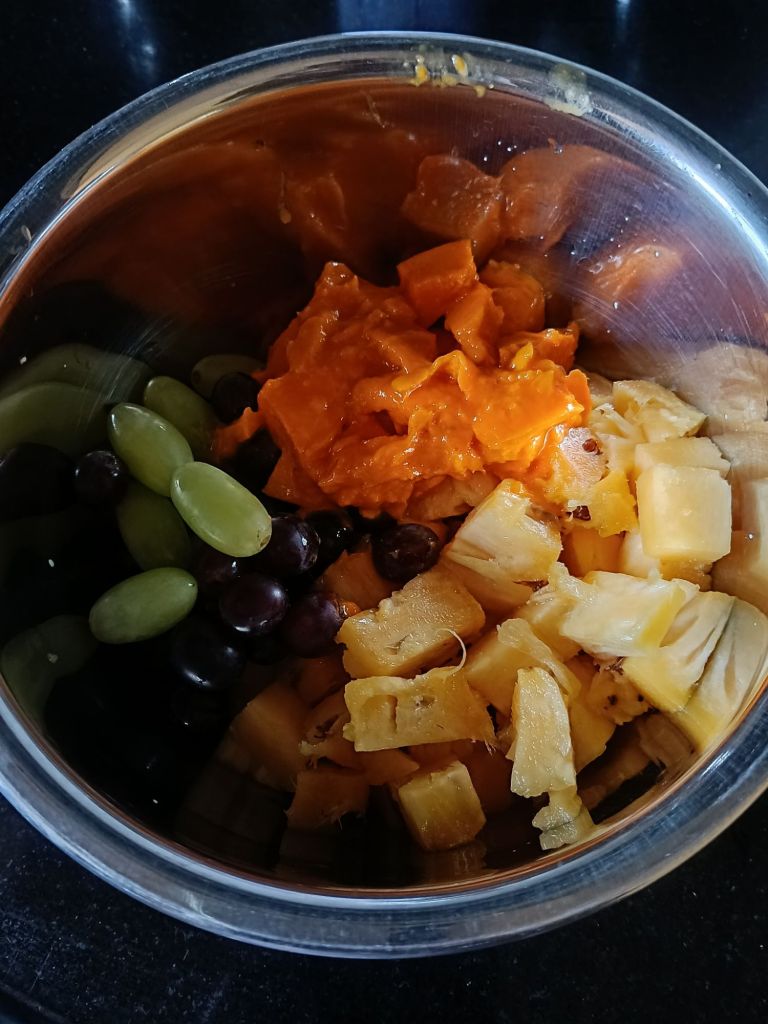
Peel and chop Mangoes and pineapple to bite sized pieces. Wash grapes well. Add to a mixing bowl.
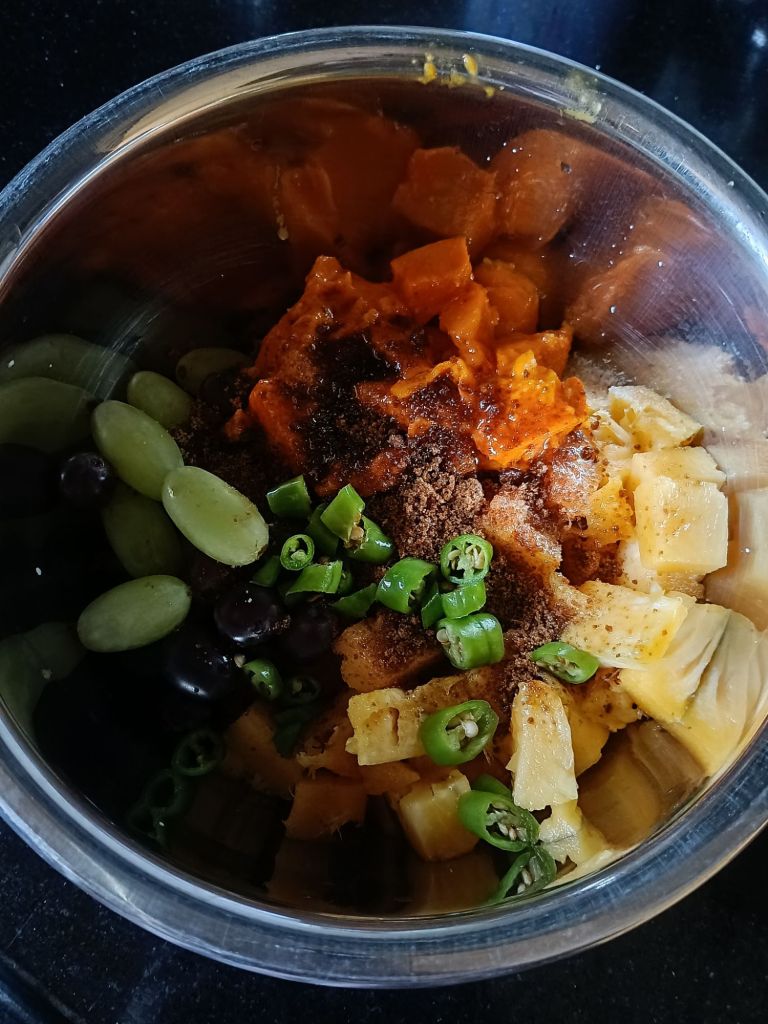
2. Now add salt, jaggery and finely chopped green chillies.
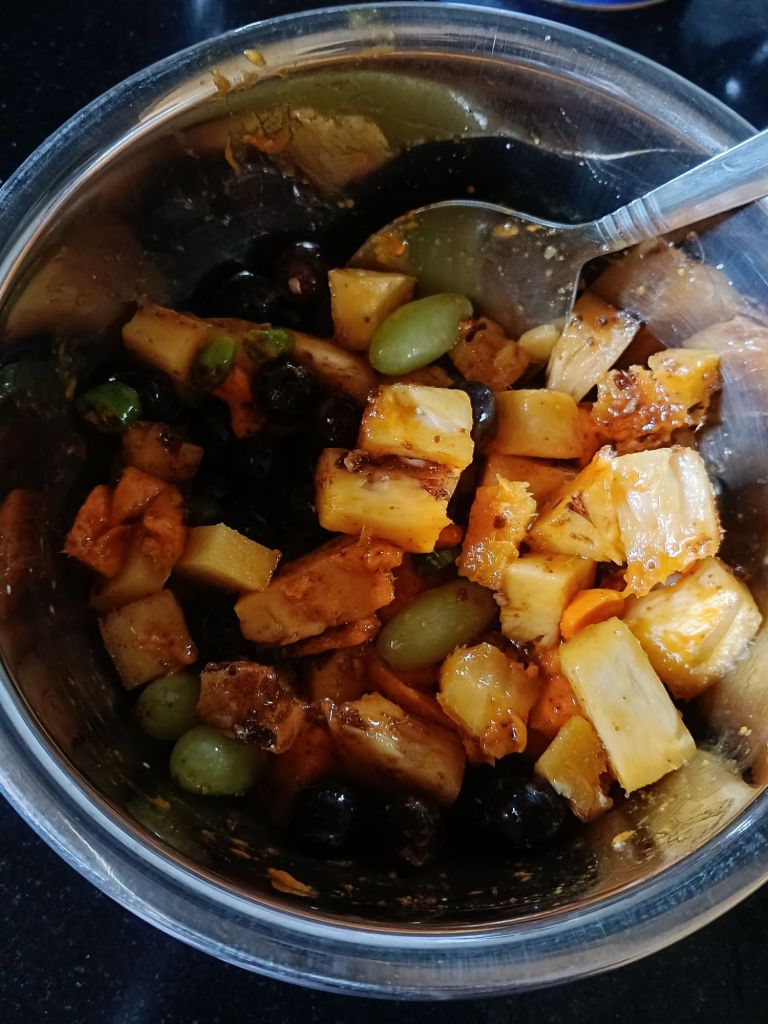
3. Mix well. Keep it aside for about 10 mins.
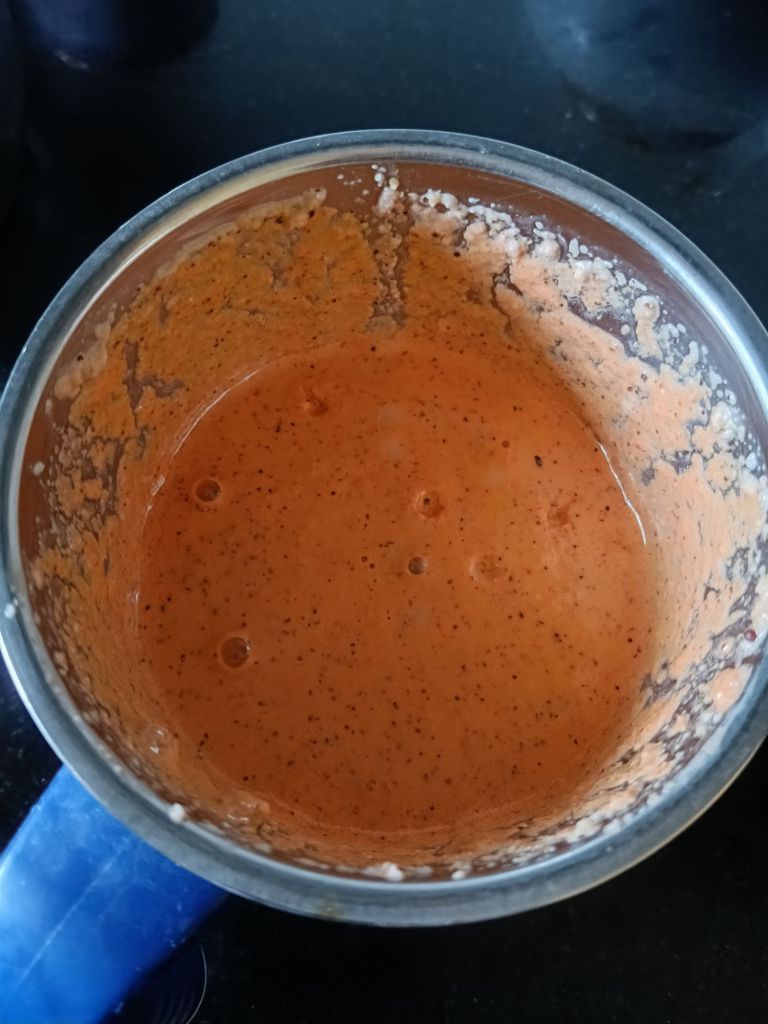
4. Now grind freshly grated coconut, red chillies and mustard seeds to smooth paste in a mixer.
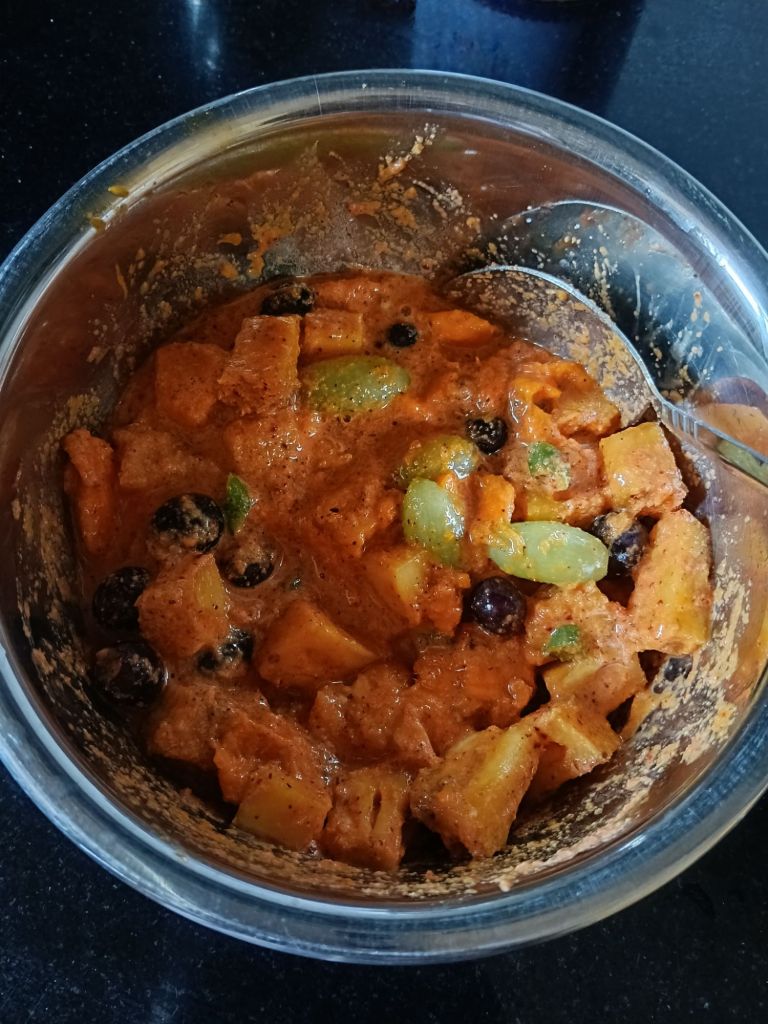
5. Now add this paste to the fruits. Mix well.
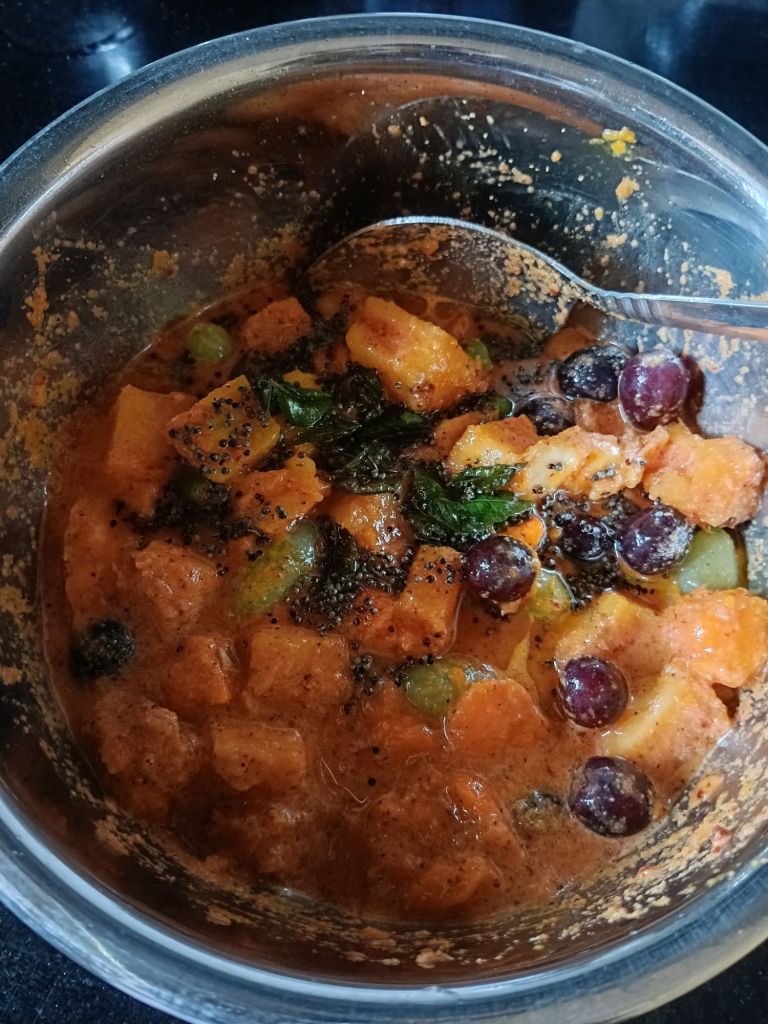
6. Heat coconut oil in a pan and add mustard seeds. When it splutters, add curry leaves. Roast for few seconds and then pour this seasoning over the fruit mix.
7. Mix well. Done 🙂 Enjoy it as a side dish with rice meals or as it is, like me 😍
Notes:
You can add any one variety of grapes of both are not available.
The ratio of fruits is upto to your taste.
If making for small kids, you can skip green chillies and adjust red chillies.
The dish leaves water once made. So don’t add extra water in the beginning or the dish will be very watery when serving.
Refrigerate the leftover as it can spoil if kept at room temperature for long since we have not cooked it and it has coconut too.
Click on the picture to save the recipe on Pinterest
A blog after long and what time better than Deepavali to make a comeback and what sweet better than ladoo (my nickname 😀) to start with.. ❤️
This recipe was shared by my dearest aunt and close friend, Mamta Baliga Shenoy mai.. She might be related to me slightly distantly but our hearts are not far apart at all.. She has been my greatest cheerleader and someone to have tried the most recipes from my blog.. So to add her recipe on the blog is a loving tribute by me to her.. ❤️
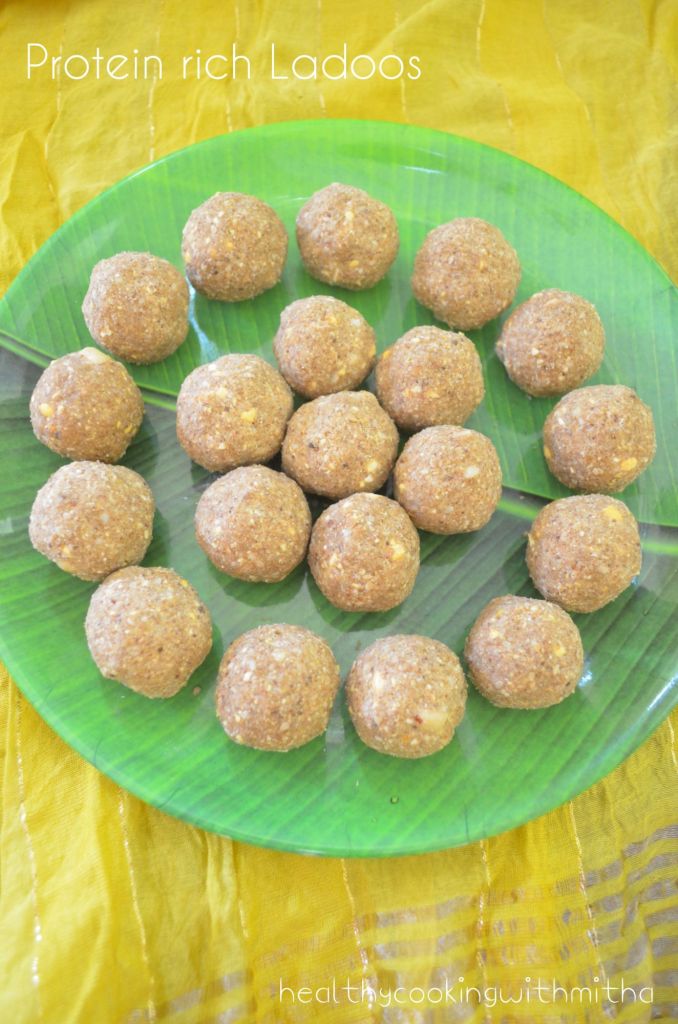
These ladoos are quite easy to make, simple to look at but very tasty and healthy too.. Combining the nutrients of roasted Bengal gram or hurikadle, peanuts and sesame seeds, they are rightly named by her, protein rich ladoos..
Thank you so much for your recipe mai..It’s an honour to add the recipe on my blog.. Love you loads and hope our friendship lasts all our life.. ❤️
RECIPE:
1 Cup = 250 ml
Ingredients: { Makes around 20 medium sized ladoos }
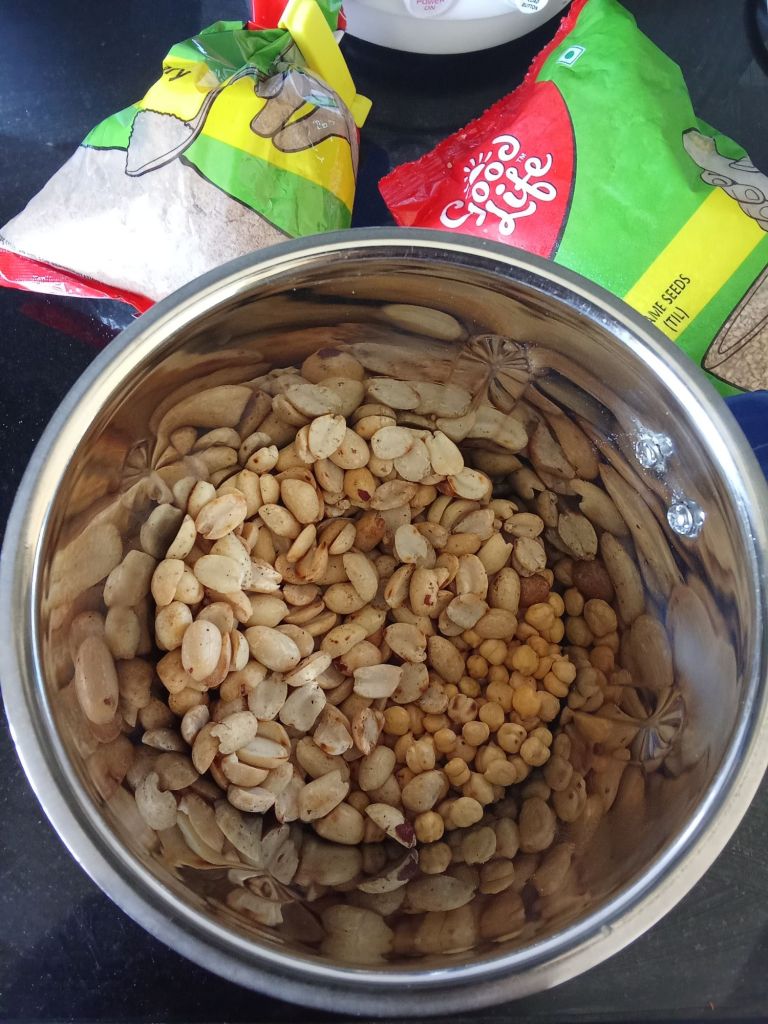
1 Cup Hurikadle / roasted Bengal gram (whole or halved), peeled
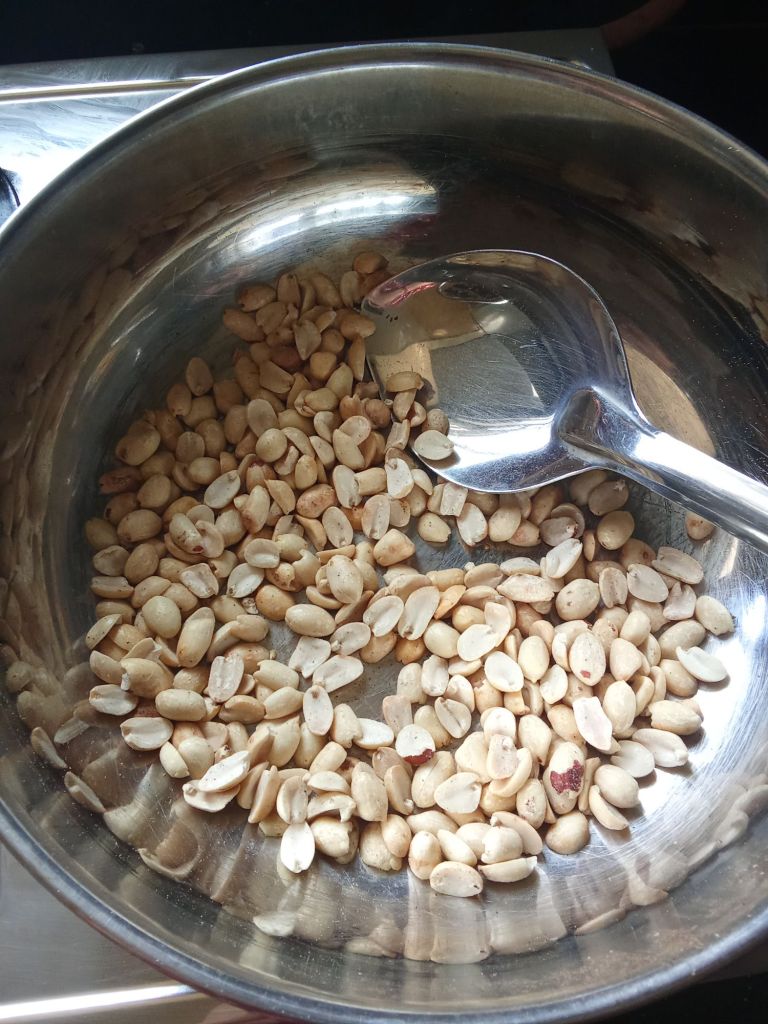
1 Cup peeled Peanuts/ Groundnuts
1/2 Cup roasted white Til or sesame seeds
1 Cup Jaggery powder
9 spoons (Tbsp) of melted Ghee
Seeds of two Cardamom pods
Step by step recipe:
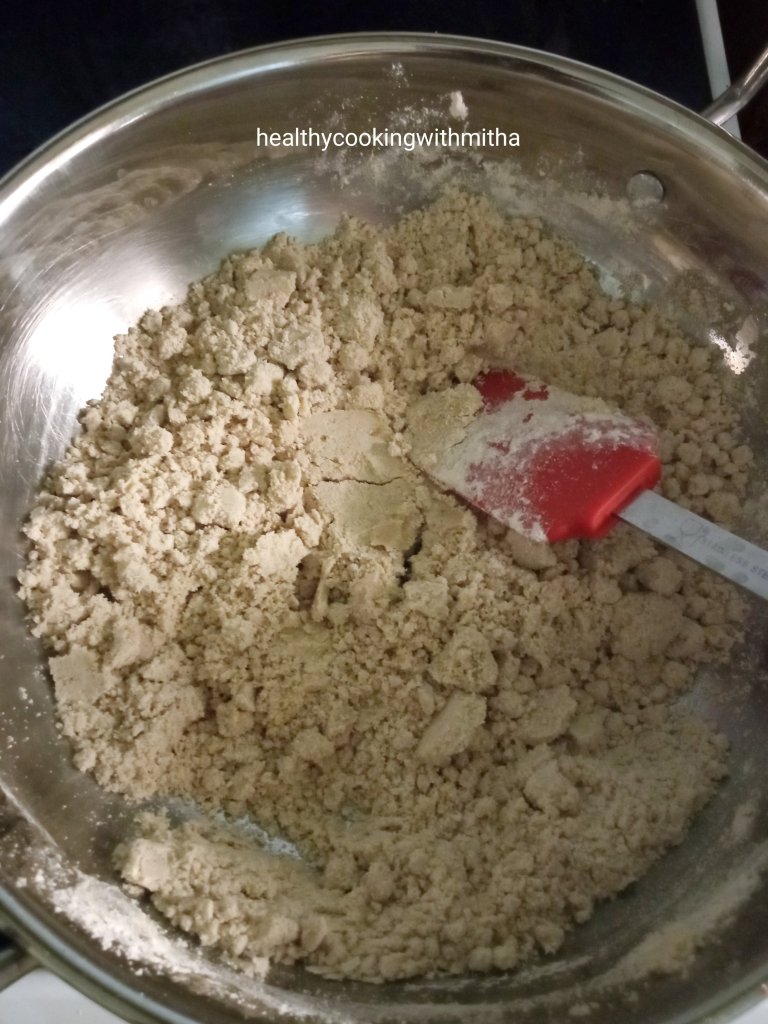
Dry roast hurikadle on low flame till it changes colour slightly and gives out an aroma.. Remove from flame and allow it to cool.. You can use both whole or halved hurikadle..
2. Now in the same pan, dry roast peanuts on low flame till it turns slightly brown.. Remove from flame and allow to cool down.. I had peeled Peanuts with me.. If you have whole unpeeled ones, roast and then remove peels..
3. Now add both roasted hurikadle and peanuts in a mixer jar and make powder of it. If it is slightly coarse, it’s fine..
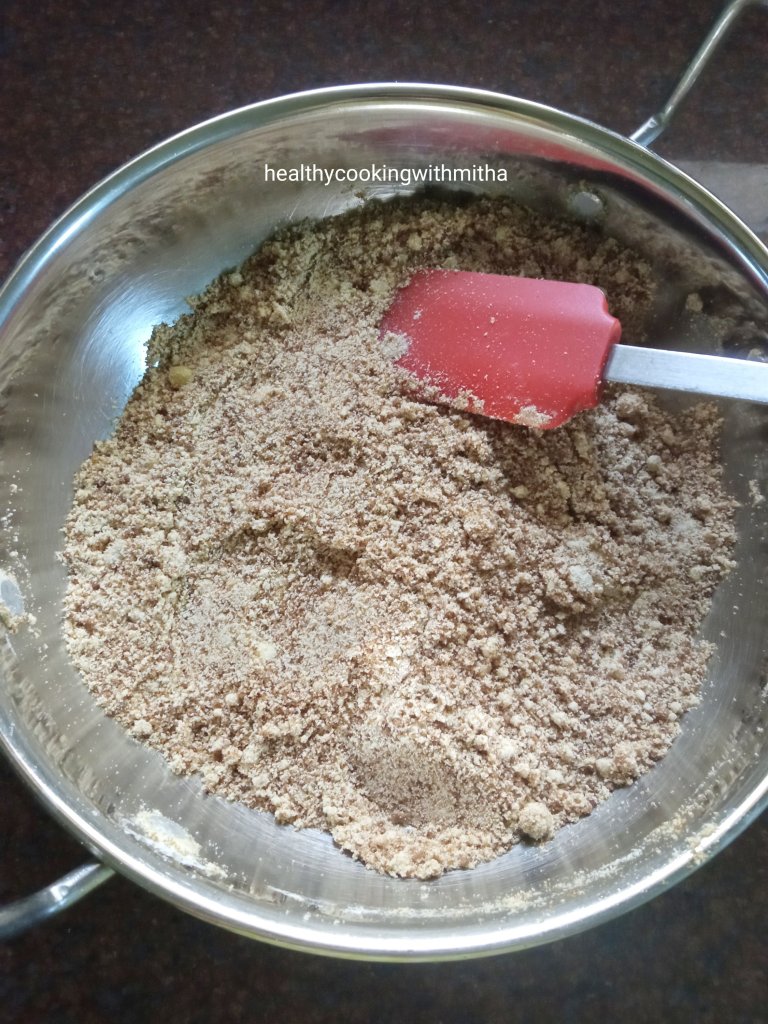
4. Now add roasted til or sesame seeds and jaggery along with Cardamom seeds.
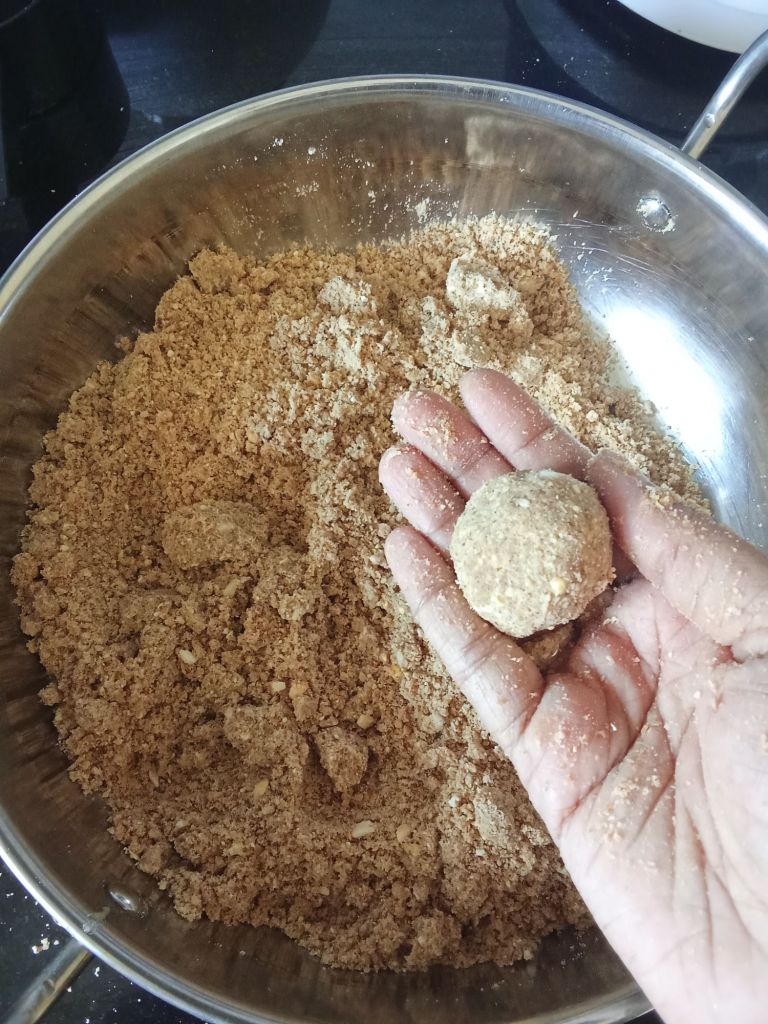
5. Make fine powder and add to a vessel.
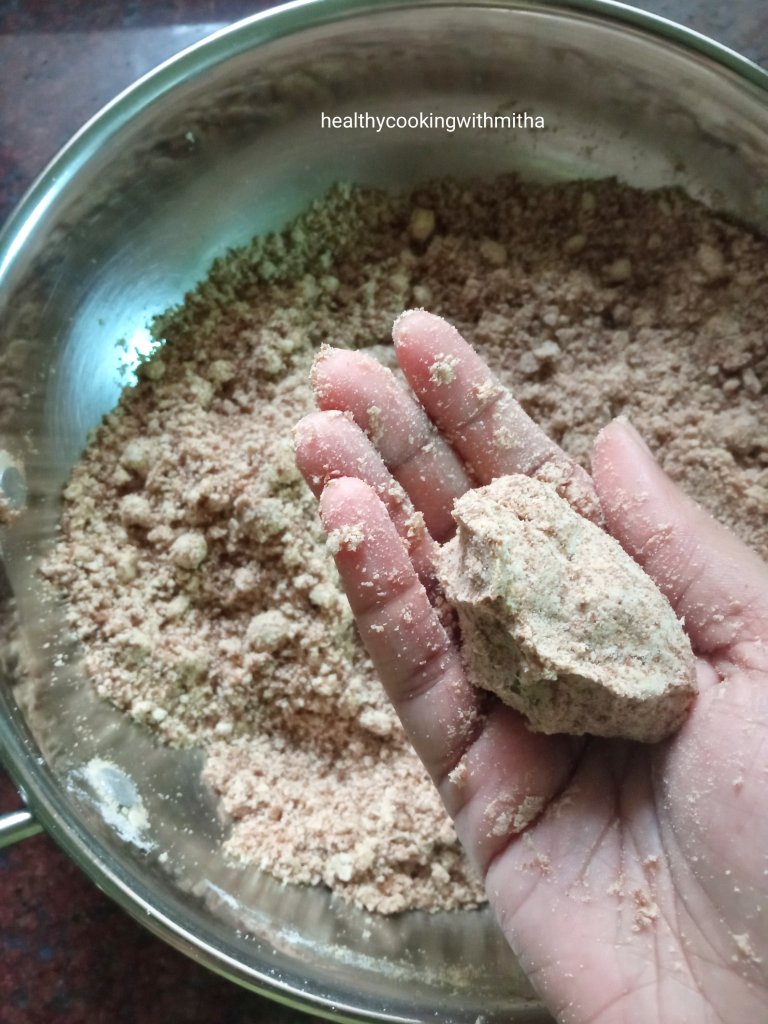
6. Now add ghee as required so that you can form ladoos from the mixture.. It took me 9 spoons of ghee.. You can add more too if needed..
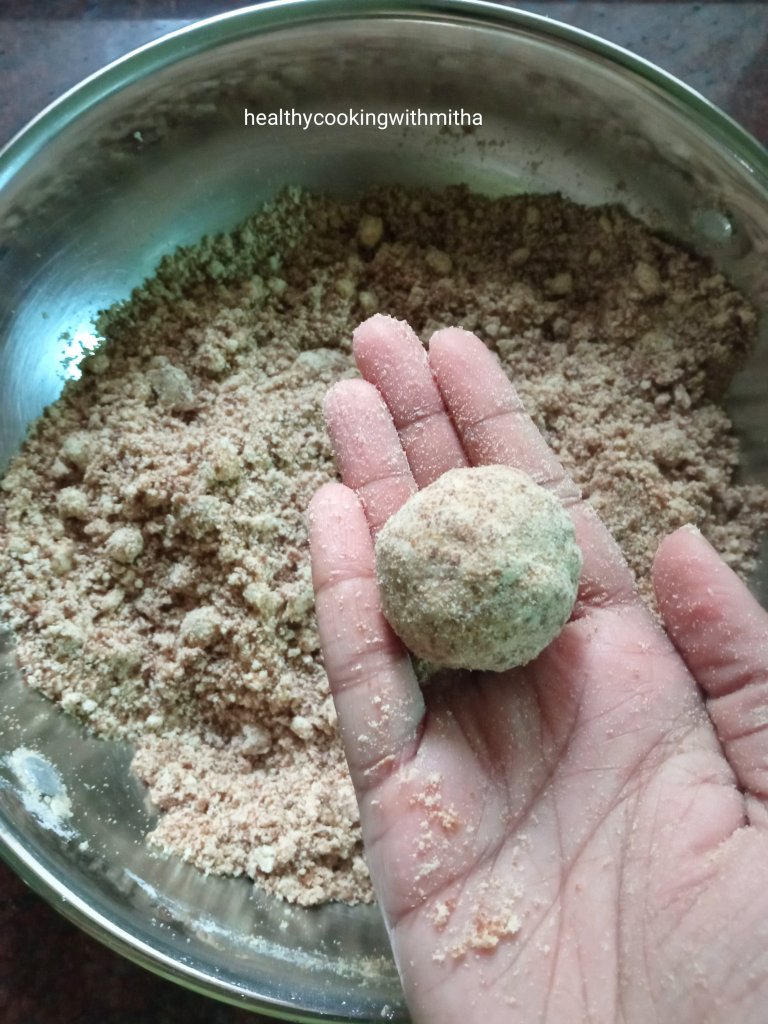
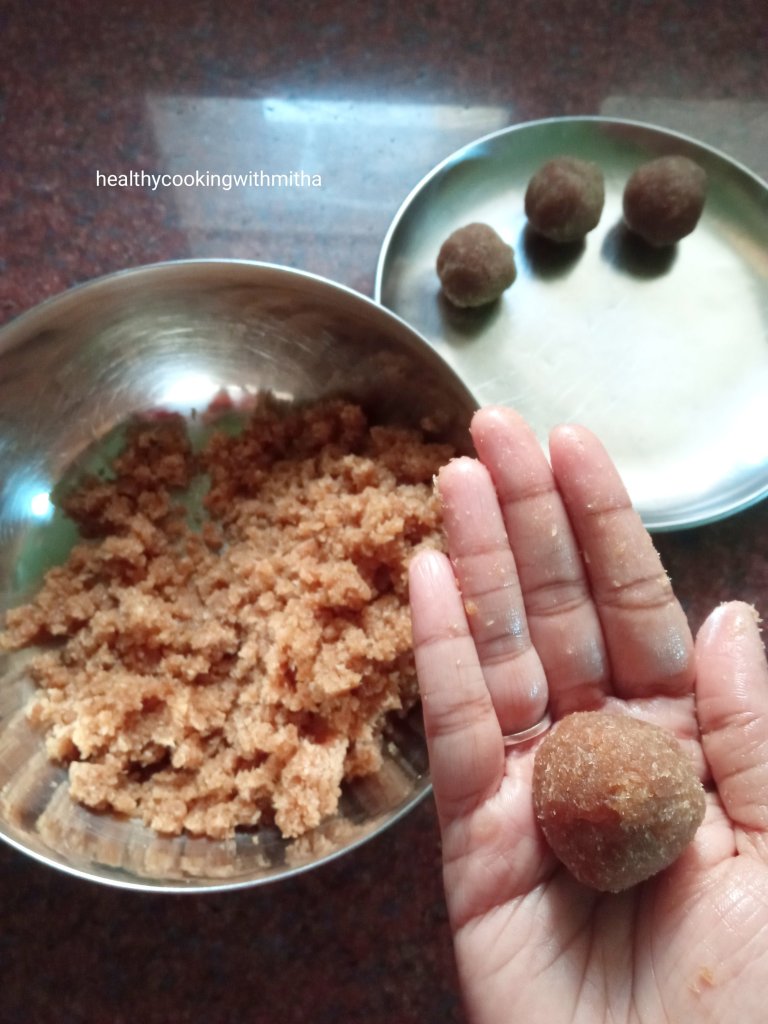
10. Taking small portions of the mixture in your palm, make ladoos as shown.. Done 🙂
Click on the picture to save the recipe on Pinterest
Notes:
Store in an air tight container, free from moisture.
Lasts well for a week atleast. Mine gets finished off by then.. 😀
If you have halved hurikadle, it’s even quicker to blend in mixer as compared to whole ones is what I noticed.
Since I had peeled halved peanuts, I used those and my job was easier. If you have whole peanuts, dry roast, peel and then use..
I had roasted white sesame seeds, so I did not roast it again. If you have plain sesame seeds, make sure to roast it lightly before using.
These ladoos are rightly sweet and not over sweet. If you are a sweet lover, add around 2 spoons more of jaggery powder if you feel like. Taste the mixture and decide accordingly.
If you are unable to bind the ladoos, add more ghee..
Click on the picture to save the recipe on Pinterest
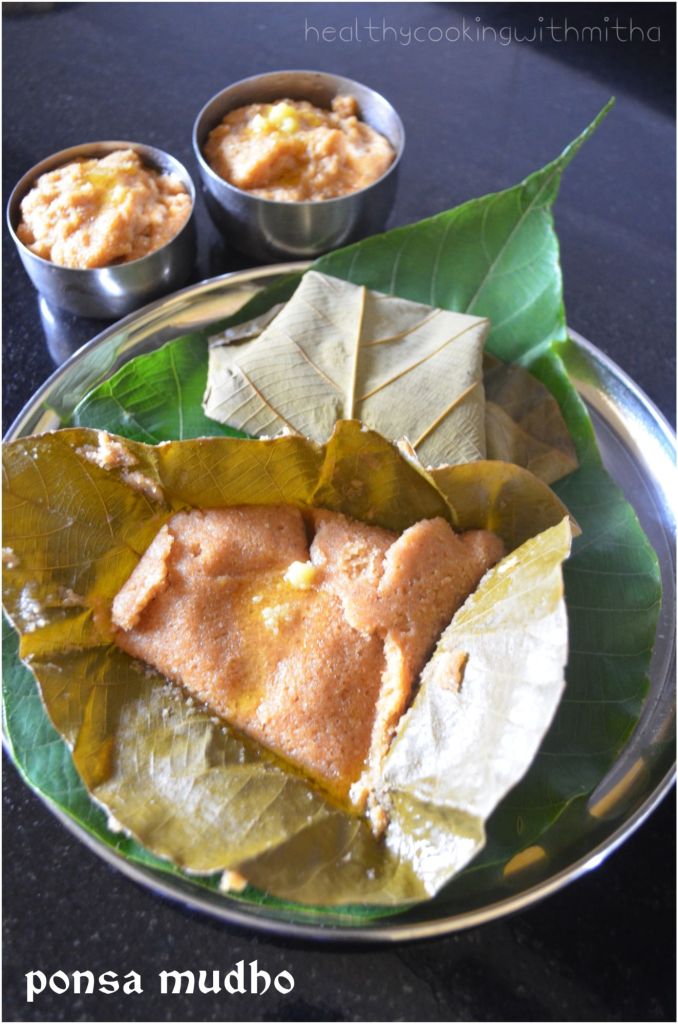
Every year during Jackfruit time, I used to crave for it but could not enjoy as it was super expensive in Qatar. My dad however used to fry it in ghee when in season and freeze it for me when I came during vacation.. Then we used to make ponsa mudho or polo (thick dosa) with it which I used to devour to my heart’s content.
Not this year though.. Being in Udupi and pampered by everyone around 😍, I am getting freshly ripened Jackfruit every now and then, which I am enjoying like someone who’s never tasted it before..😂 With what was left after eating it fresh, I made this mudho and took pictures to share it with all of you..
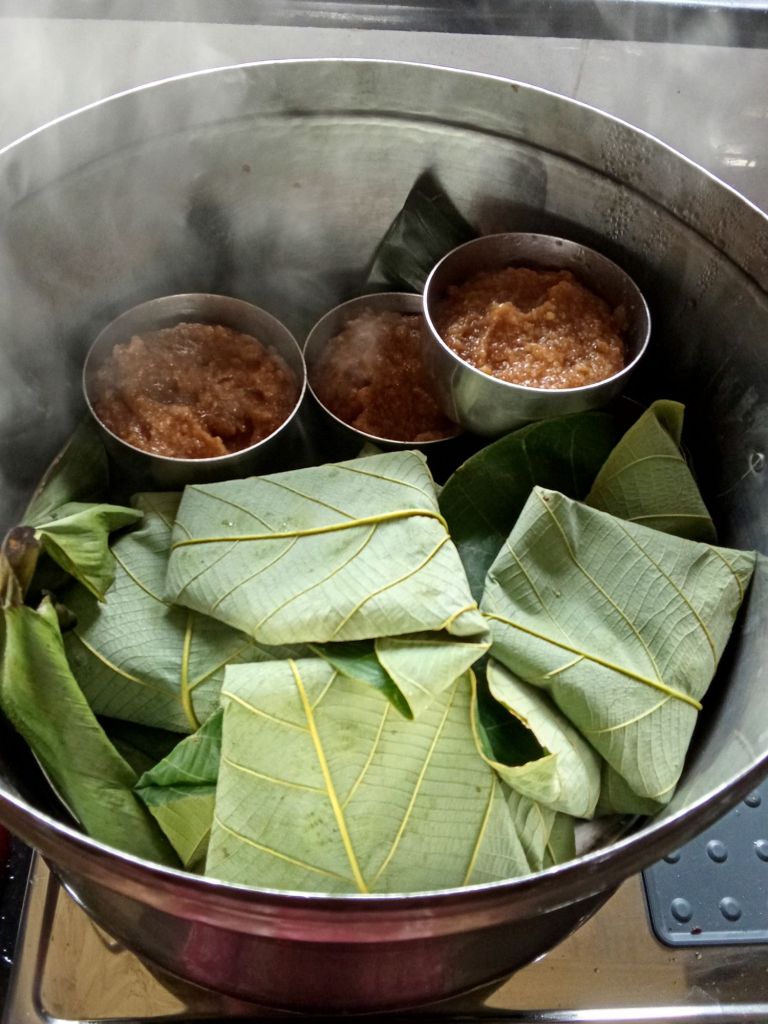
We have a Uppalige tree right in front of our house and what’s better than making ponsa mudho in uppalige leaves.. The aroma was divine and heavenly to say the least.. I steamed them in my grandma’s steamer or pedavan which Amma gave me when I came to this new house.. While it was steaming, I was reminded of the various dishes my grandmother and mother made in it and felt very nostalgic.. ❤️
Since Jackfruit is still in season, hope you will try these idlis or ponsa mudho as we call it. Happy and healthy cooking ❤️
RECIPE:
Ingredients:Makes around 12 to 15 idlis depending on how you steam it
3 Cups ripe Jackfruit segments (around 30)
1 Cup grated Coconut
1.5 Cups Jaggery powder
1.5 Cups Idli Rava or Rice Rava (can also replace with upma rava or bombay rava)
A pinch of salt
A pinch of Cardamom powder
Ghee to grease the idli container
Step by step recipe:
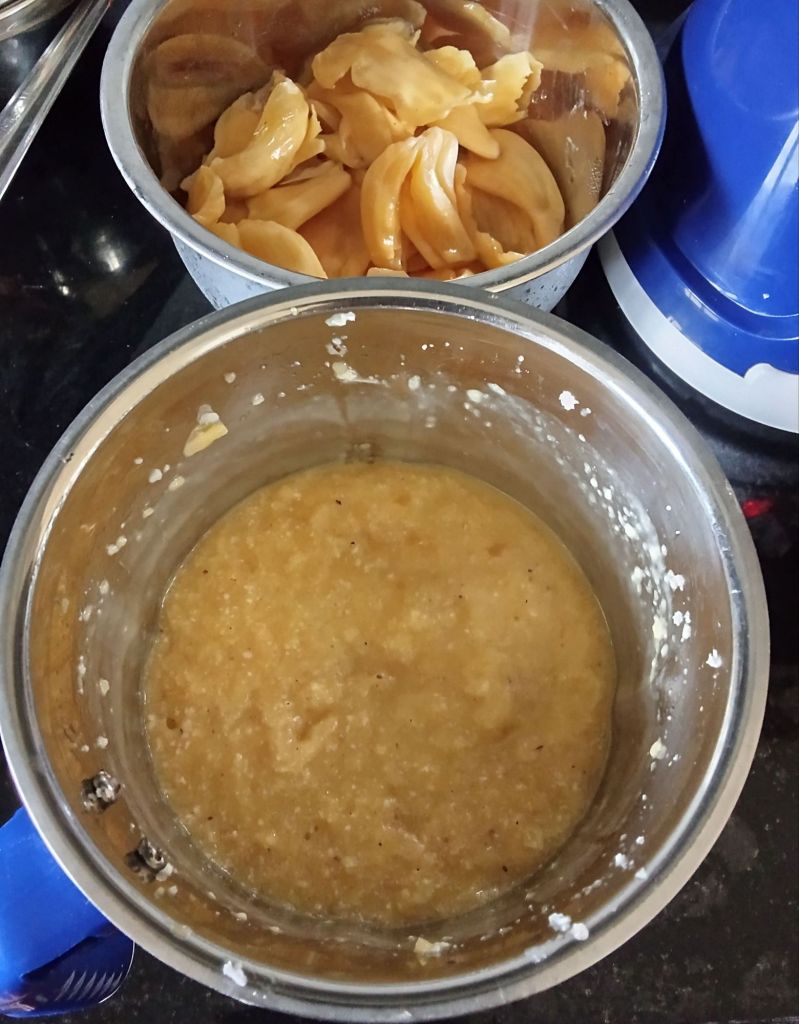
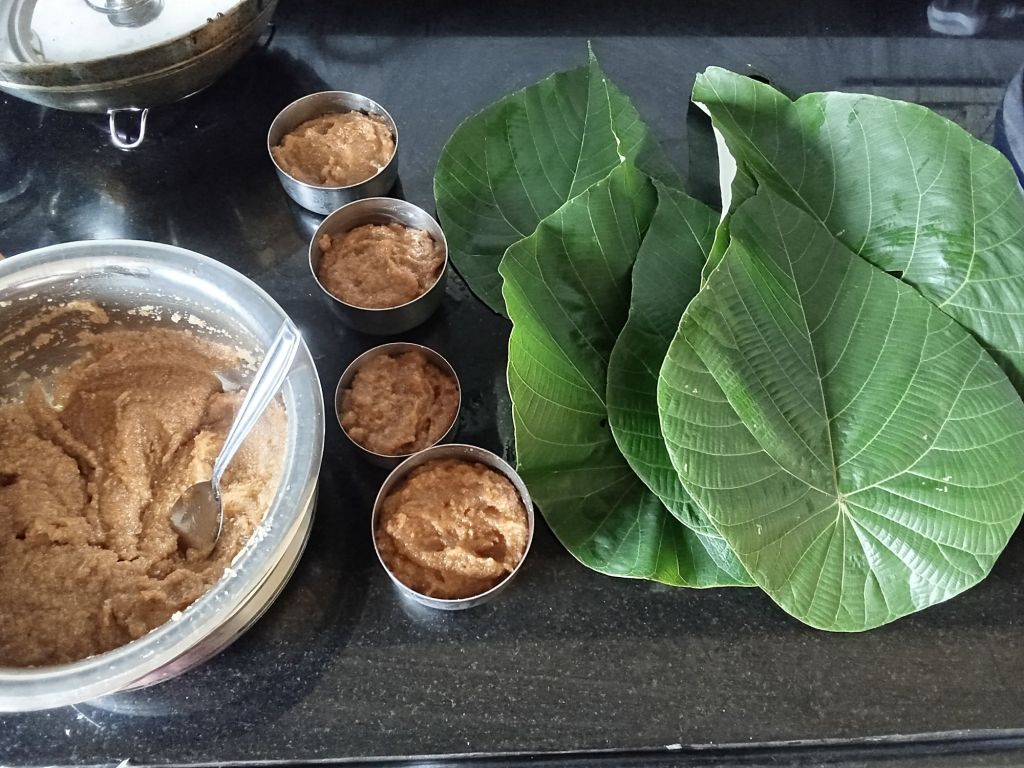
In a mixer jar, add 3 Cups or around 30 ripe Jackfruit segments along with 1 Cup grated Coconut..
2. Grind to a smooth paste adding very little water only if needed. Do NOT add a lot of water. Add water only to aid grinding.
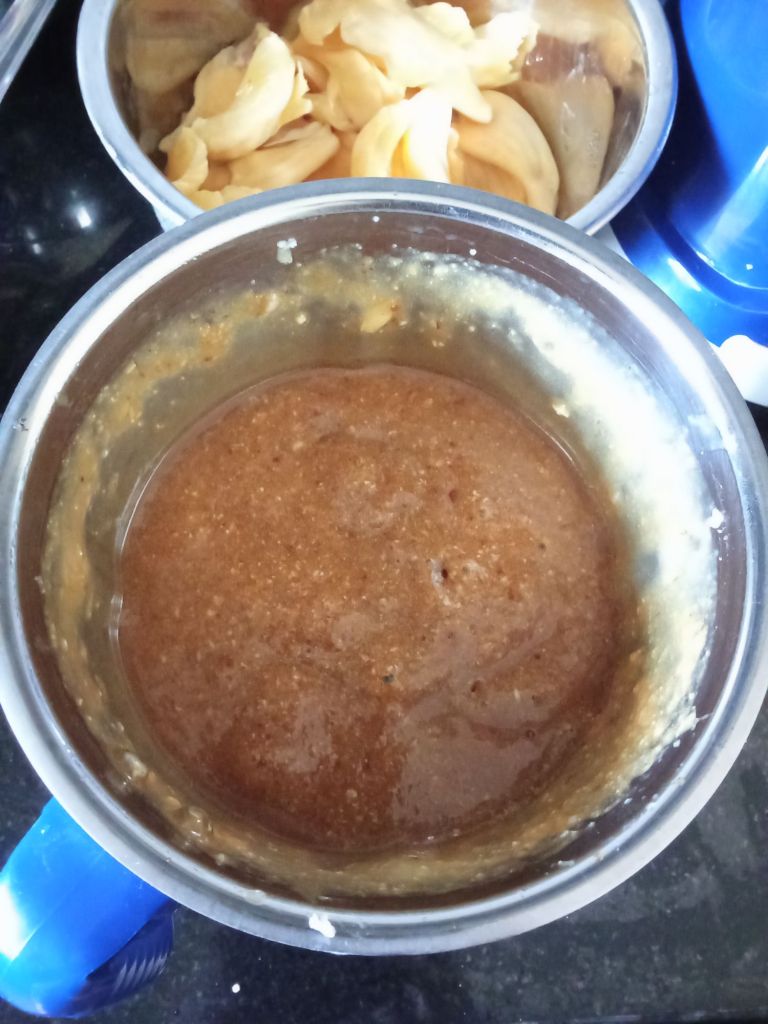
3. Now add jaggery powder and blend once again to a smooth paste.
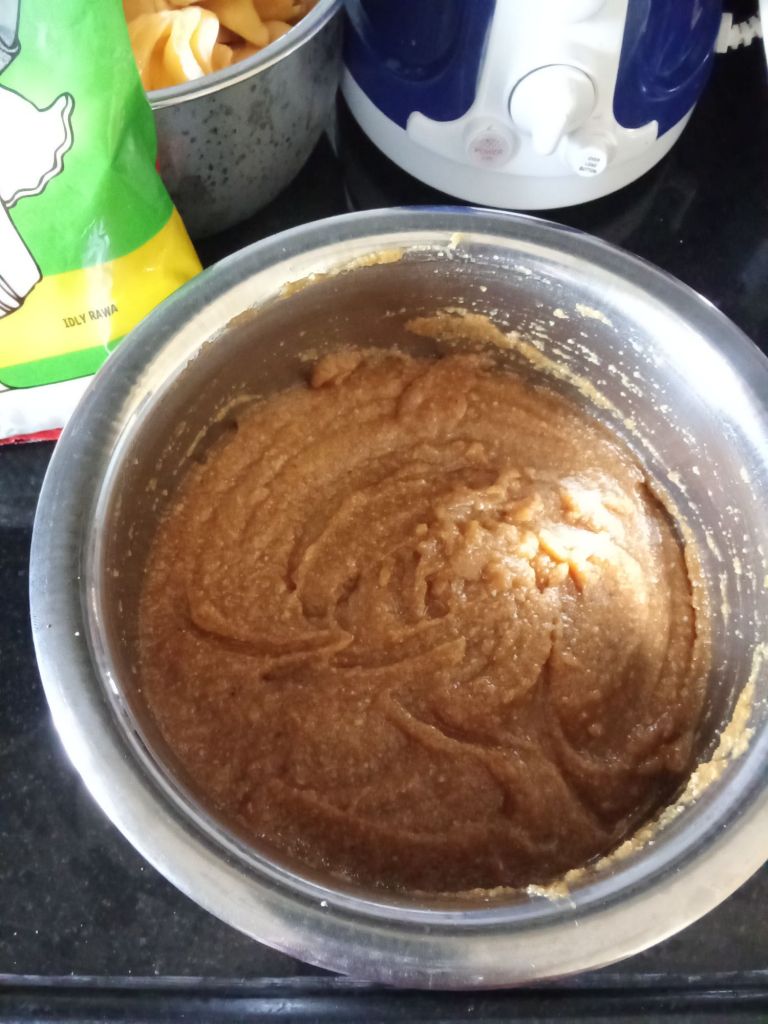
4. Add this into a bowl and add rice rava along with salt and cardamom powder. Mix well to form a thick batter.
5. Now keep water to steam in a steamer. I used a pedavan as is called in Konkani. Meanwhile grease idli container with ghee. Add the batter into it. If using uppalige leaves or banana leaves, clean it by wiping with a cloth.
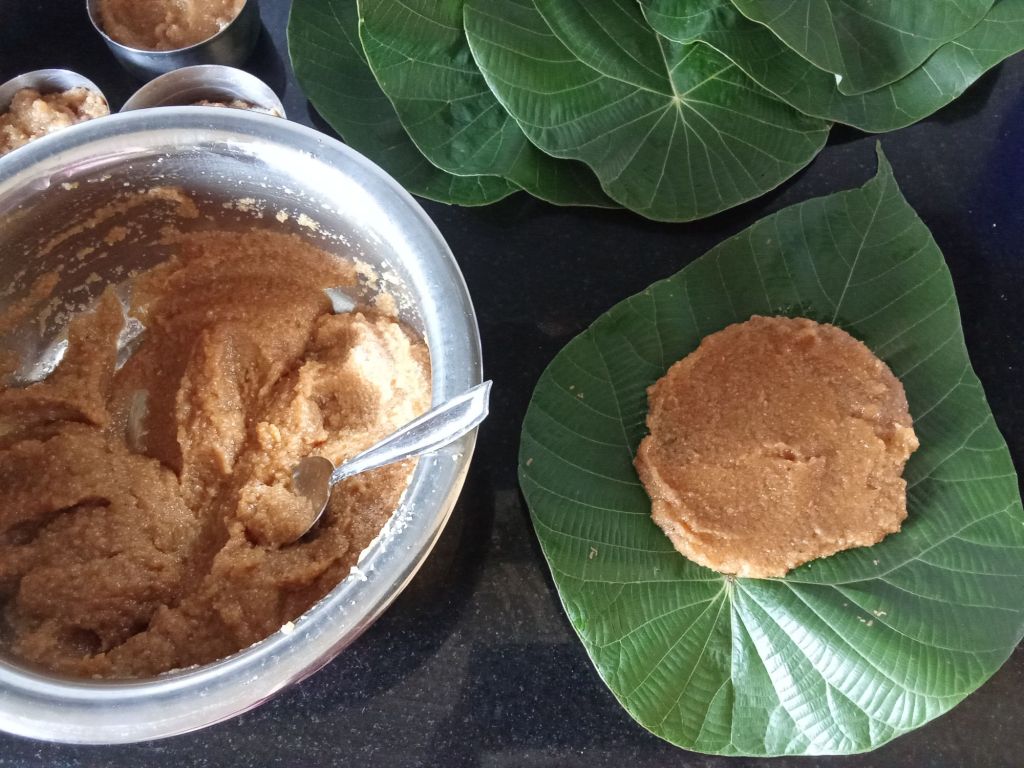
6. Now spread the batter in the center of the leaf as shown.
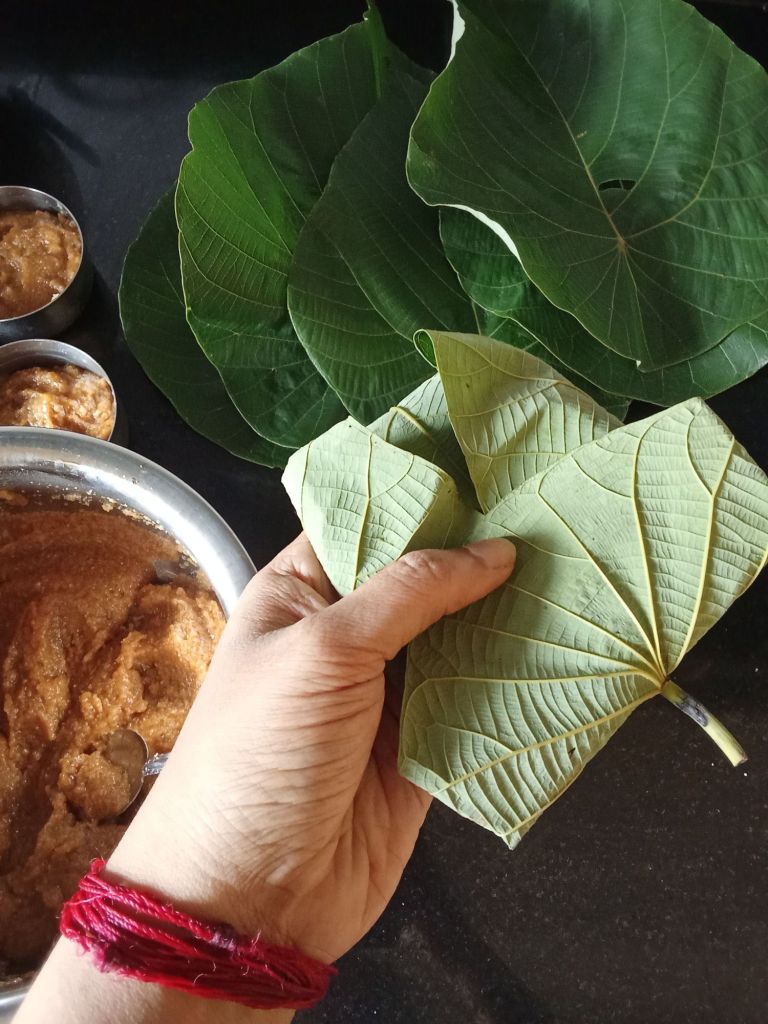
7. Fold from all sides and make like a little parcel.
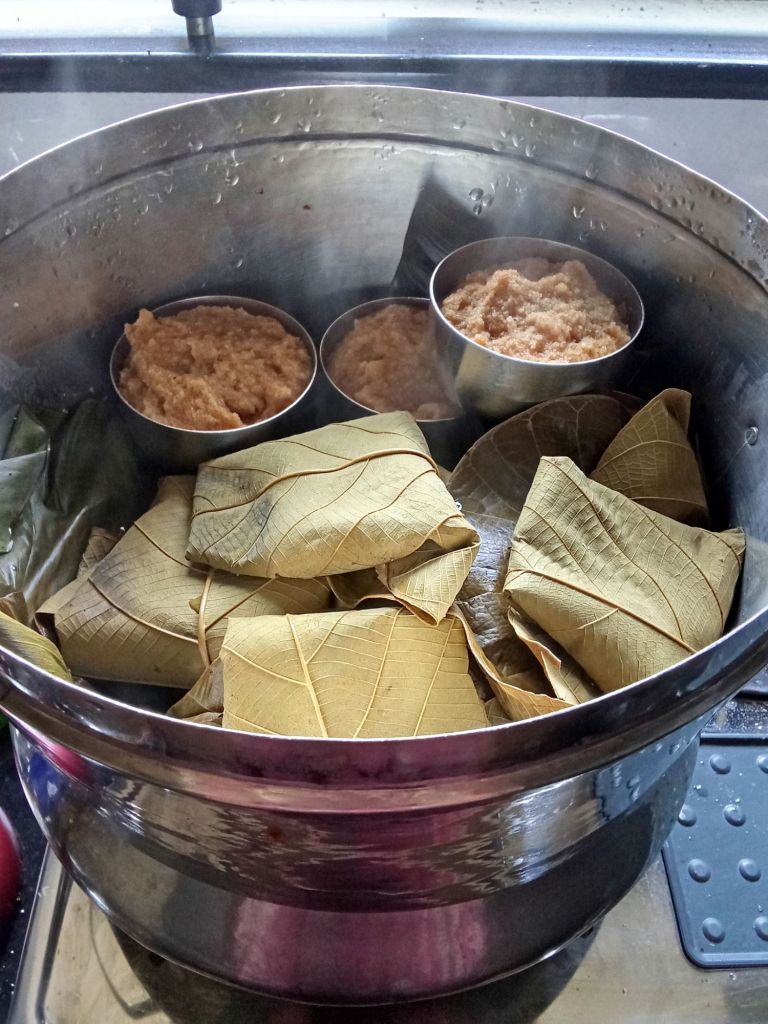
8. Place it gently in the steamer with the open side placed face down as shown. I have placed all these on a banana leaf inside the steamer. You can skip that if not available.
9. Steam covered on high flame for 20 to 25 mins.
10. Enjoy them warm with ghee.. 😍
Click on the picture to save the recipe of
Notes:
You can steam them in regular idli stand or even in banana leaves..
Idli rava or Rice Rava can be replaced by Bombay Rava or Upma Rava.. Quantity will vary slightly depending on the texture of the rava. Just make a thick batter and not very free flowing.
Jaggery powder is to taste. You can vary as per your choice.
I have compiled all my variety idli recipes in one page.. Here is the page:
Click on the picture to save the recipe on Pinterest
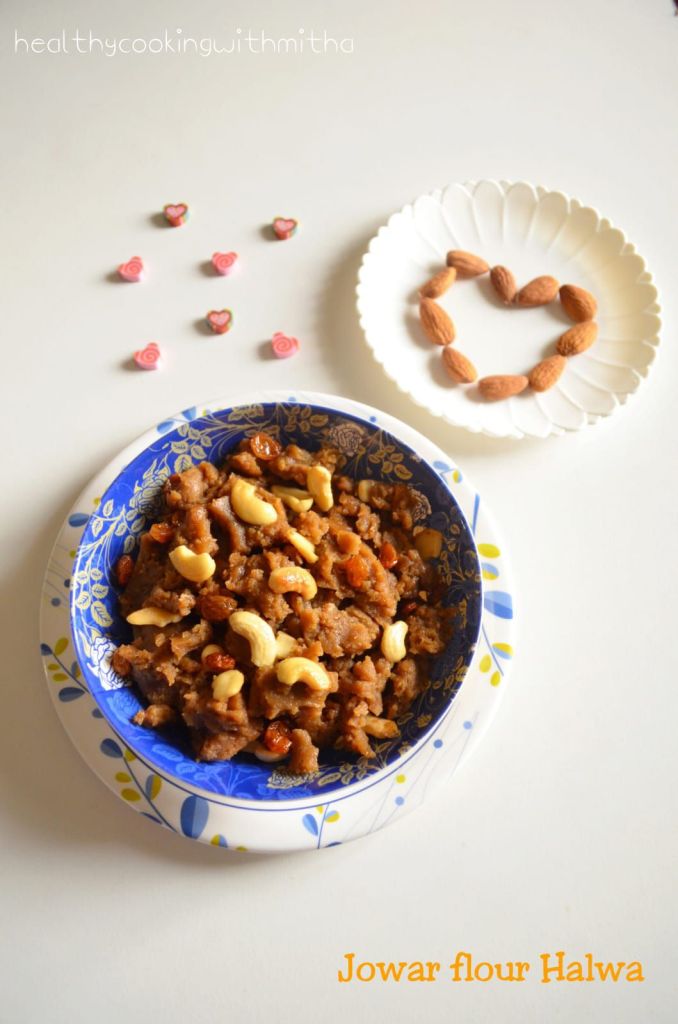
The sweet lover in me, the Meetha in Mitha 😅 always finds ways to add sweets in her life and when life (rather grand mall) gave me two kgs of Jowar flour on offer, I made Meetha out of it too.. 😂😂
Jowar flour and Ragi flour are my favorite in millet flours and I regularly make Dosa, idli, ladoos and cake with it. Halwa or Sheera as we call in Konkani tastes only good with Rava was my assumption.. until I substituted it with Jowar flour one day and this delicious Jowar Sheera was born.. 😍
Can you believe I am no longer making my childhood favorite Rava sheera as am completely smitten by this Jowar flour sheera instead.. It tastes divine and like temple prasad .. A must try for sure.. ❤️
Dedicating this to sweet lovers like me with loads of love ❤️
Happy and healthy cooking!
RECIPE:
Ingredients:{Serves about 4 people}
1 Cup = 240 ml
1 Cup Jowar flour
3/4 Cup Jaggery powder
2 Cups Water
3 Tbsp Ghee
3 Tbsp Cashews
3 Tbsp Raisins
1/2 tsp Cardamom powder
Step by step recipe:
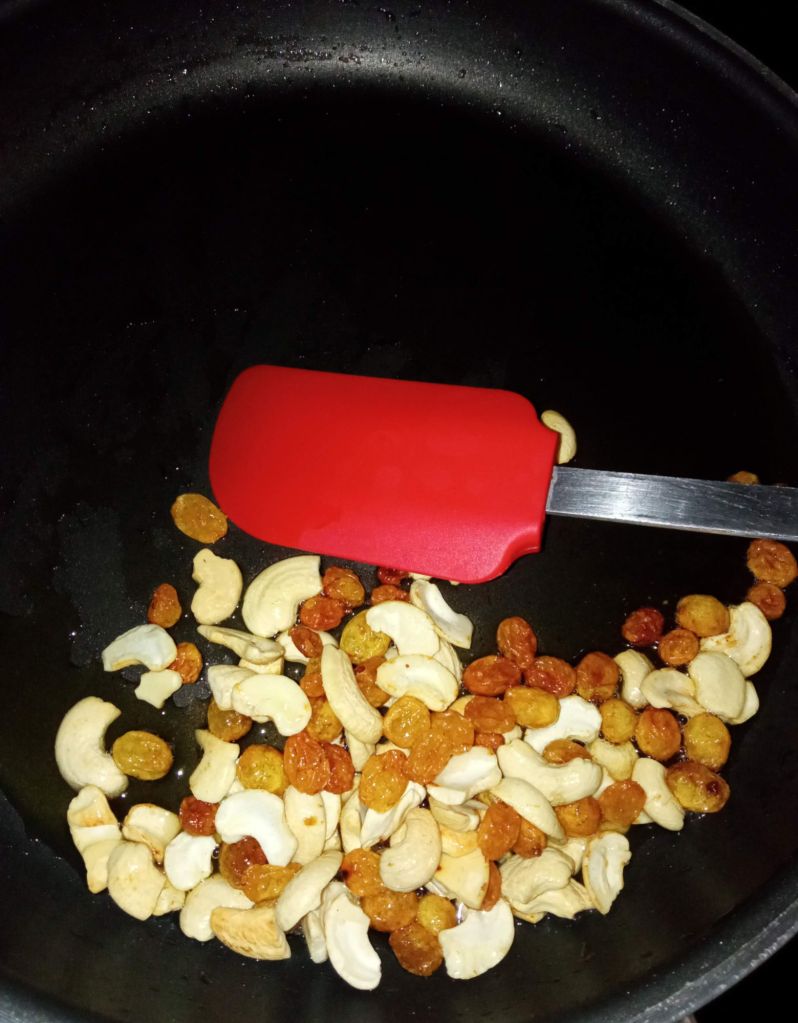
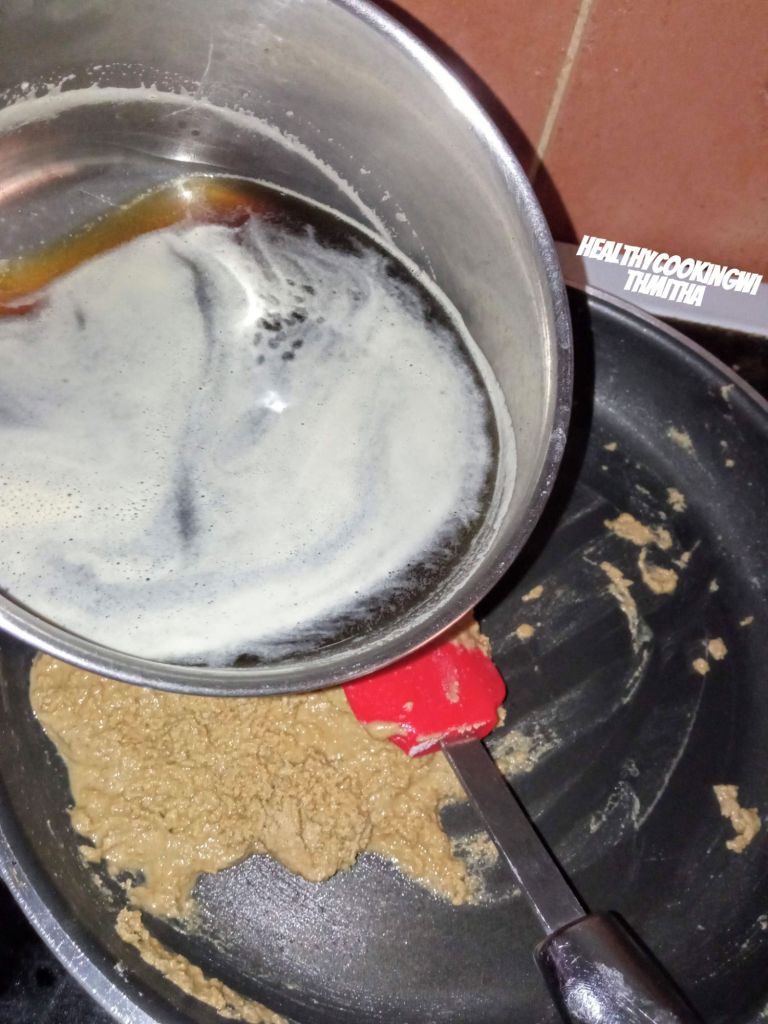
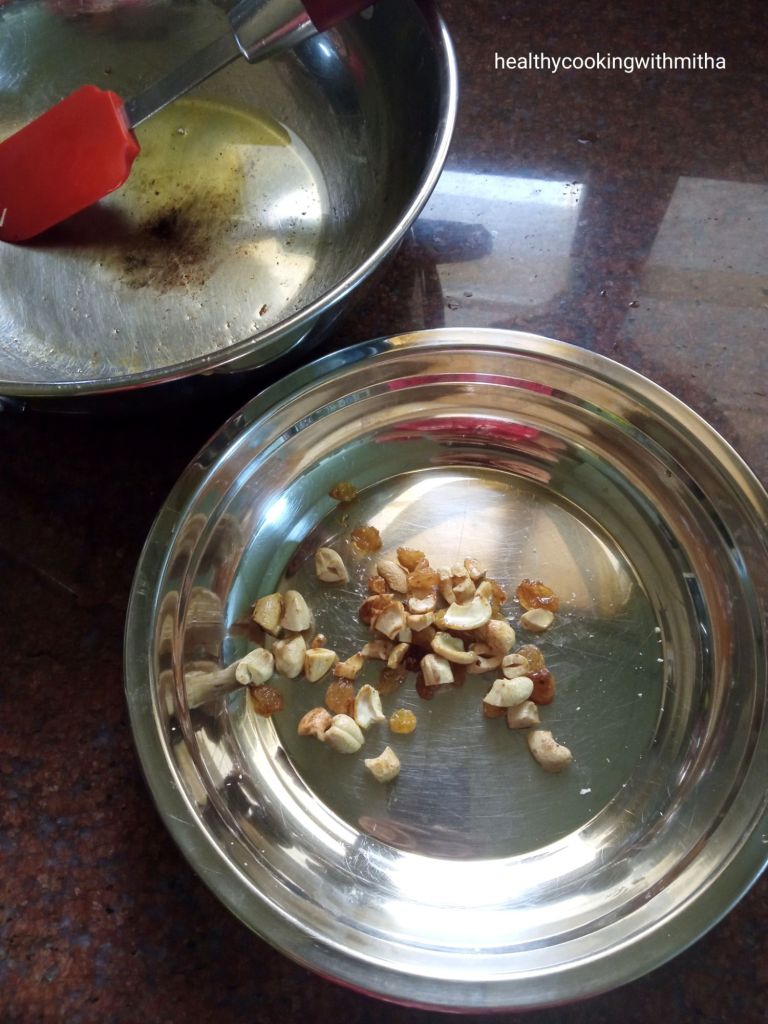
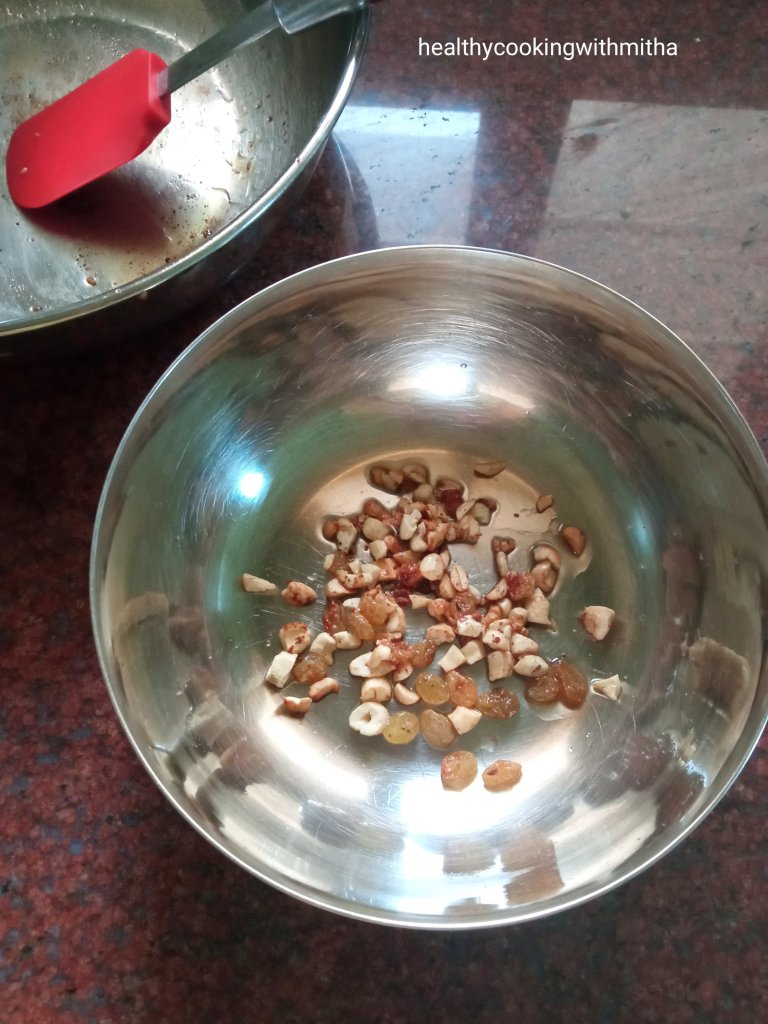
Heat 1 Tbsp Ghee in a heavy bottomed pan and fry cashews and raisins in it till cashews turn golden brown.
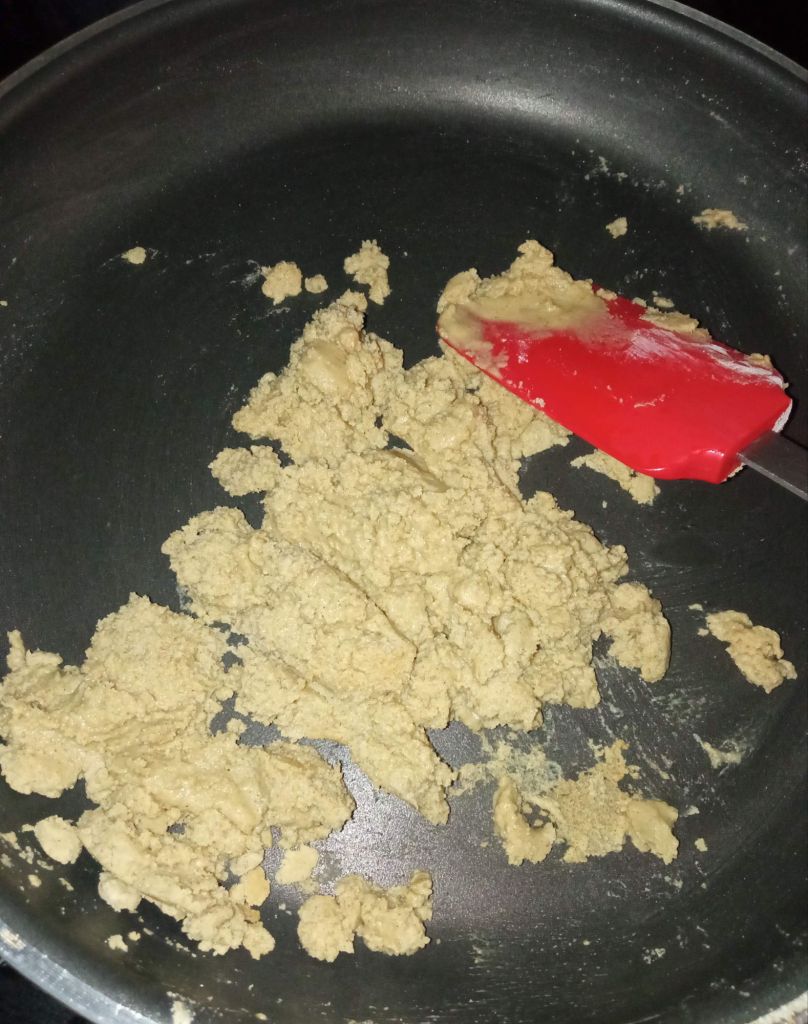
2. Now remove the cashews and raisins in a plate. In the same pan add 2 Tbsp more Ghee and add jowar flour. Start roasting it on a medium flame.
3. Roast continually till the colour changes to a darker shade and an aroma starts to come. Usually takes about 8 to 10 mins.
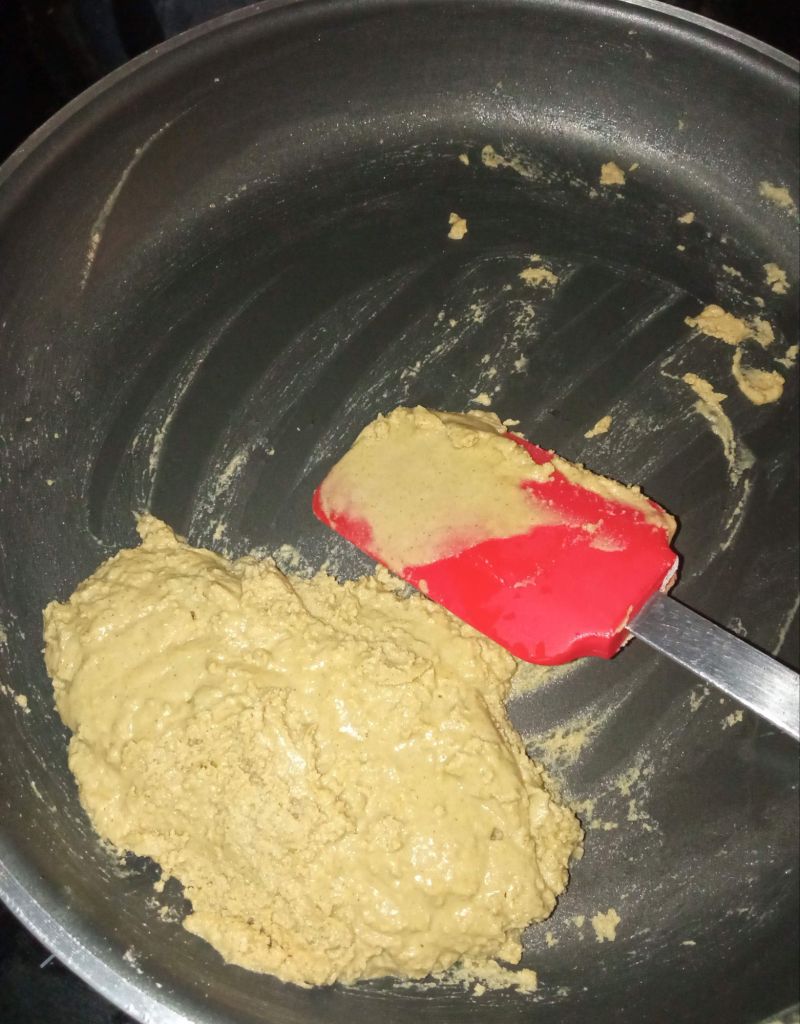
4. Now boil 2 cups water with 3/4 Cup jaggery powder in it. When the water boils, Jaggery will melt. Add this hot jaggery water to this roasted jowar flour, little by little, mixing well with spatula.
5. Keep mixing well with spatula, removing lumps if any by pressing it using the spatula. It will take another 8 to 10 mins of mixing well using the spatula till the jowar flour absorbs all the water and the mixture starts leaving the sides of the pan.
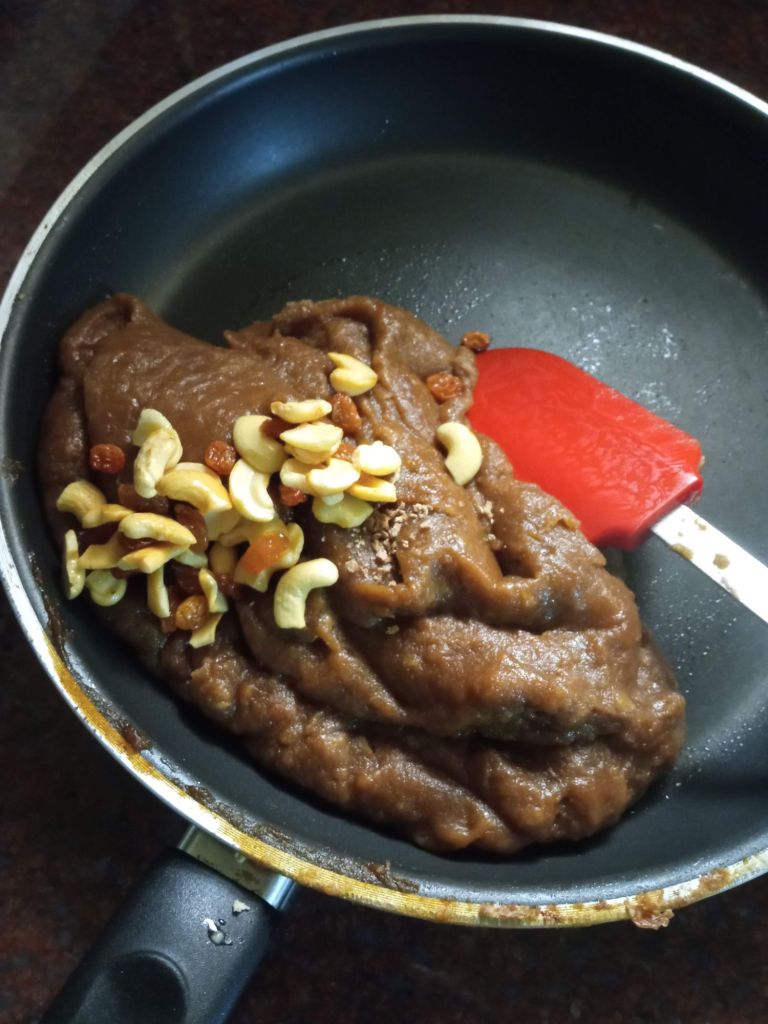
6. In this stage, add the roasted cashews and raisins and cardamom powder. Mix well.
7. Done! Serve it warm with love ❤️
Notes:
** The measurement is of perfect ratio ie 1 Cup Jowar flour to 3/4 Cup Jaggery to 2 Cups water. Don’t alter it or the consistency and taste of halwa will not come well.
** One thing to be taken care while making this halwa is when you add the hot jaggery water to the roasted jowar flour. Add little by little, mixing well to avoid lumps. Even if lumps get formed, don’t worry, just press it while mixing using spatula, the lumps will go while doing so.
** Sharing few dishes that I make regularly using Jowar flour:
Click on the picture to save the recipe on Pinterest
My first blog this year and so glad I am starting on a sweet note ❤️ I have a special relation with sweets, my name Mitha meaning sweet in Hindi, my best friends call me Ladoo and most of all, I can’t resist any kind of sweets. 😍 Be it our authentic Konkani godshe, payasams from Kerala, kesari from Tamil Nadu, Mysore pak, gulab jamun and all milk based sweets too.. I can just go on and on.. 😀 Being in Qatar since more than 12 years now, Arabic sweets have a special place in my heart ( and tummy 😅) too ❤️
Since I am such an ardent fan of sweets, I have learned to make many at home over the years. Have shared most of the recipes here on the blog. One sweet dish that I make regularly specially during winters is this Carrot halwa or lovingly called as Gajar ka halwa 😍 I rarely eat this dessert from outside and I truly love the way I make my halwa ❤️
So here’s sharing this easy yet finger licking delicious recipe with all of you so that you can try at home too. Dedicating this to all sweet lovers like me ❤️ Happy and healthy cooking ❤️
RECIPE:
Ingredients: { Makes about 4 half cup servings }
1 Cup = 240 ml
2 Cups Grated Carrot
1/2 Cup Milk
3/4 Cup Jaggery powder
3 Tbsp Ghee
About 5 to 7 Cashews
About 8 to 10 raisins
1/4 tsp Cardamom powder
Step by step recipe:
1. Take carrots, cut off the ends, wash and peel them. Grate using a grater. I took two large carrots and it gave me 2 Cups of carrot gratings. Keep it aside.
2. Heat a thick bottomed pan. Add 1 Tbsp Ghee and add chopped cashews and raisins. Fry on medium flame till cashews turn light brown and raisins plump up. Remove it onto a plate.
3. Now heat the rest of the ghee (adding around 2 Tbsp more). Add the grated Carrots and fry continually for 5 to 7 minutes till the rawness of carrots goes away.
4. Add milk and cook the carrots in milk for about 10 mins till the milk gets absorbed by the carrots. Keep the flame on medium to low always, mixing every couple of minutes.
5. When the milk gets absorbed well by the carrots, it looks like this.
6. Now add jaggery powder to this.
7. Mix well and let the carrots absorb the jaggery. Cook on medium flame till the mixture turns thick.
8. After about 10 mins, the mixture looks like this. It’s perfect halwa and you can remove the pan from the flame now.
9. Add the halwa to the fried cashews and raisins. Also add cardamom powder. Mix well. Halwa is ready.
10. Serve warm halwa. Tastes delicious in this cold weather ❤️
Click on the picture to save the recipe on Pinterest
Notes:
* I have used orange carrots as they are easily available here but you can also use the red carrots which are regularly used to make carrot halwa.
* Three most important points while making this halwa is:
1. Fry the carrots well in ghee till the rawness of the carrots goes away. This is a very important step else the carrots will have a raw flavour.
2. Secondly make sure the milk is absorbed fully by the carrots before adding jaggery. Else the jaggery can curdle the milk (depending on the brand). Also the flame should be from medium to low while the carrots are cooked in milk, else milk can stick to the bottom of the pan..
3. Thirdly, when jaggery is added, the mixture will become liquidy but keep cooking on medium flame till the mixture thickens and the jaggery is well absorbed by the carrots.
* Don’t skip cardamom powder. Gives a wonderful flavour to the carrot halwa.
Click on the picture to save the recipe on Pinterest
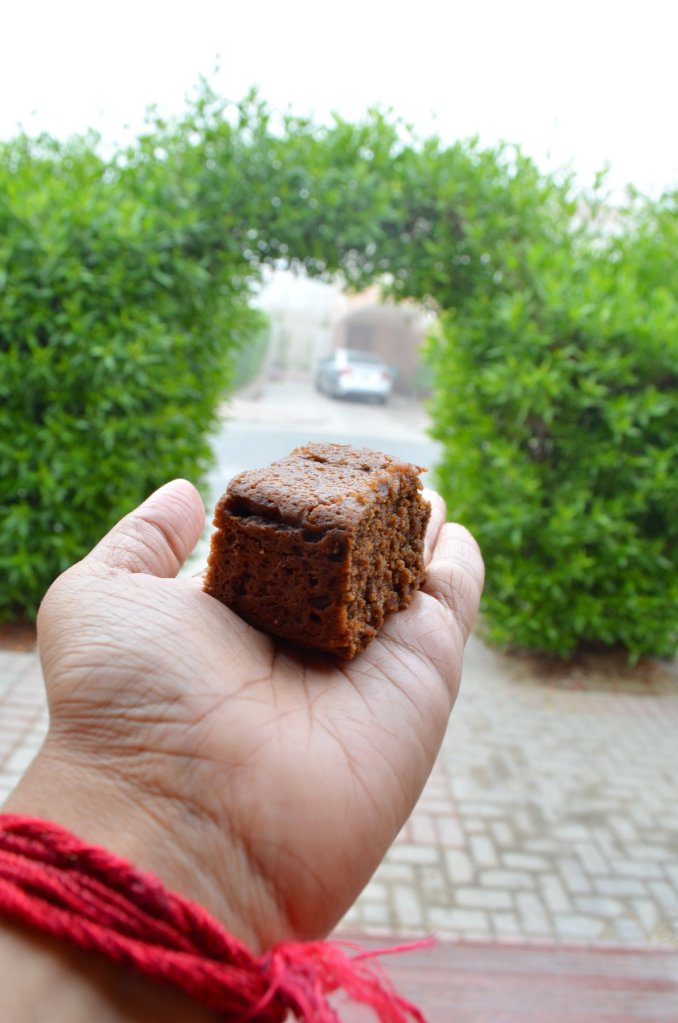
I had always wanted to bake gluten free cakes as it had been the most requested recipe by my readers. But somehow I never got the confidence to shift from wheat flour to a millet flour completely.
Since few months, Jowar flour had become my best friend as I regularly make dosas, idlis and ladoos with it. So when I saw that people have been using it for baking too, I just could not resist trying it out.
Even the first time I tried this cake, it came out so well that I could not believe my eyes. I cut it in squares and asked my family to taste it. As they ate it, they asked for more and more and finally finished off the cake within a day. It was really that tasty. My son even gave me a million marks for it and always asks me to bake it whenever he has craving for cake.
Click on the picture to save the recipe on Pinterest
This morning the weather is so beautiful and foggy here in Qatar that I felt like baking. Baking is truly a therapy for me ❤️ and what better cake than this Jowar chocolate cake, which I had to share with all of you too. So I took the pictures and dedicated it to the beautiful weather 😍
Hope you all try and love this healthy and tasty cake too. Do let me know if any doubts and it will be a pleasure to help. Happy and healthy cooking ❤️
RECIPE:
Ingredients:
My 1 Cup = 240 ml and even though I usually measure using cups, this time I also measured using my measuring scale for those readers who want accurate measurements.
Dry Ingredients:
1 Cup Jowar flour (Sorghum flour) {106 grams}
2 Tbsp unsweetened Cocoa powder {10 grams}
1/2 tsp Baking powder
1/4 tsp Salt
Wet ingredient mix:
1/4 Cup thick Curd or Yogurt {60 ml}
1/4 tsp Baking soda
1/2 Cup Jaggery powder {66 grams}
1/2 Cup Milk {100 ml}
1/4 Cup Ghee {54 ml}
Step by step recipe:
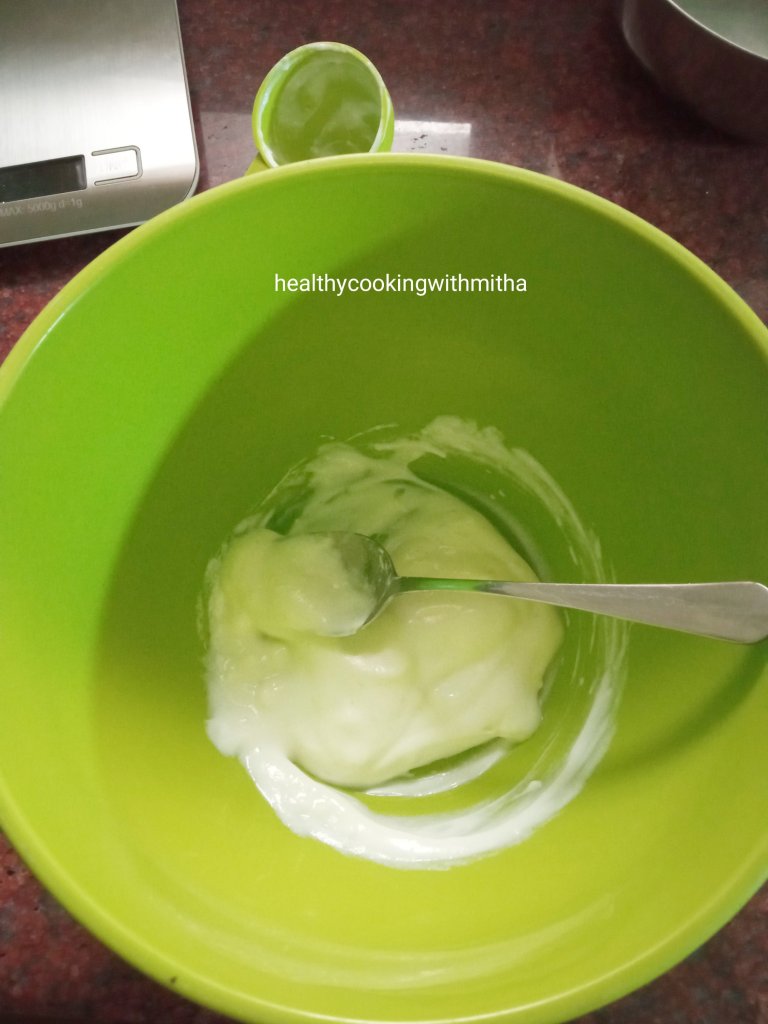
1. Take yogurt and baking soda in a bowl. Mix well. Keep aside. Also preheat the oven in the center rack at 180 C for 10 minutes.
2. Now sieve together all the dry ingredients – Jowar flour, cocoa powder, baking powder and salt.
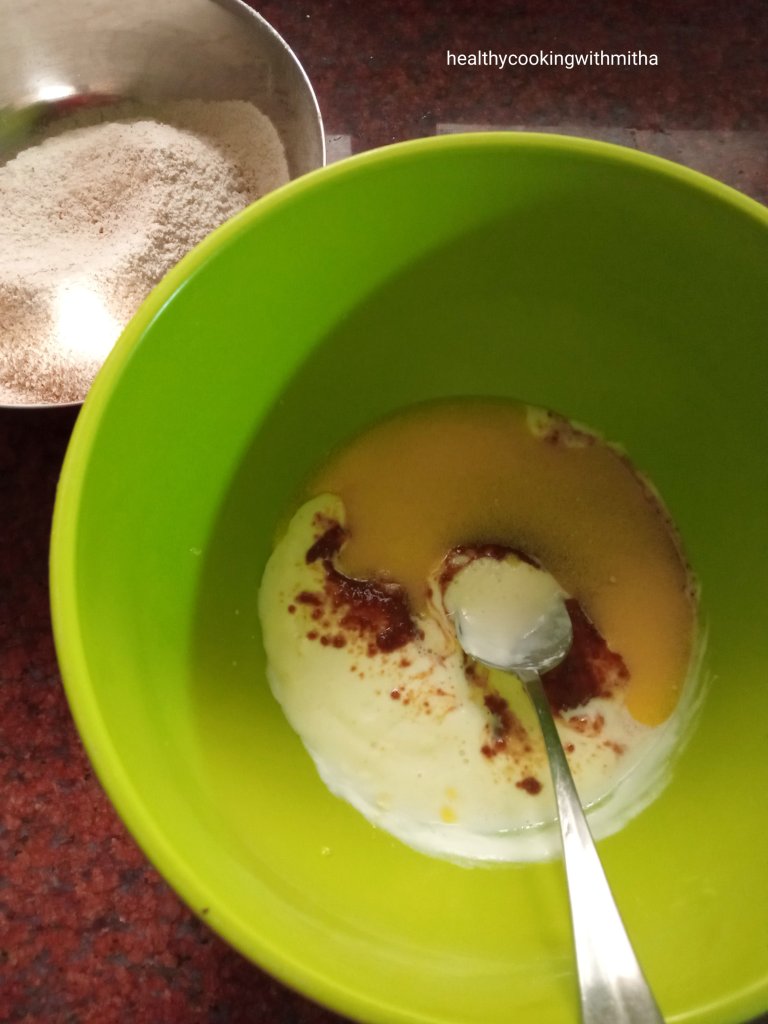
3. Keep the dry ingredient mix aside. Now to the yogurt- baking soda mix, add jaggery powder, milk and ghee. Mix well.
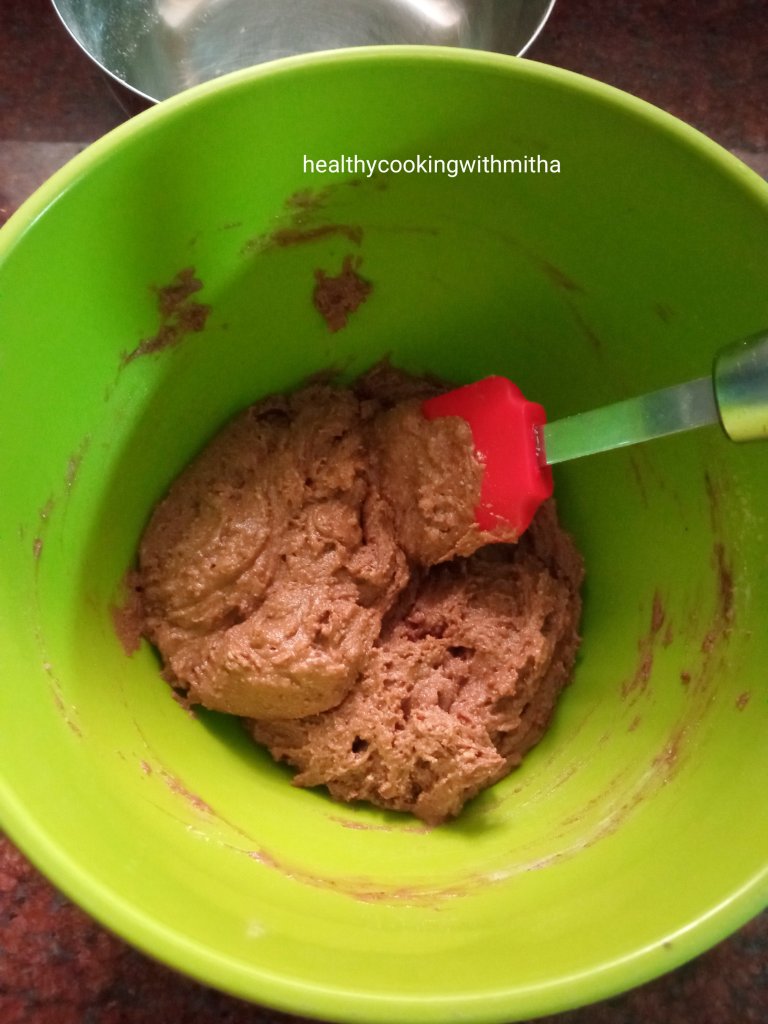
4. Now add the dry ingredient mix to the wet ingredients and mix using spatula. Don’t over mix and just fold until you can’t see any dry flour specks.
5. Now add the batter to the cake pan. I used a loaf pan of length 20 cm and width 7 cm. You can also use a square or round pan. Either grease with butter or ghee or use parchment/ baking paper. Spread the batter as evenly as possible.
6. Now add the pan to a preheated oven(read step 1) and bake at 180 C for 15 to 18 mins. In my square cake pan, it takes 15 mins as cake height is less but in my loaf pan it takes 18 mins since the cake has more height. So keep an eye after 15 mins.
Check for doneness by inserting a toothpick in the center. If comes out clear or with crumbs, cake is done. If it comes out wet, bake again for two mins or till done.
7. Allow it to cool. Once cooled, invert onto a plate.
Click on the picture to save the recipe on Pinterest
8. Cut into squares and serve. Store in a moisture free container.
Click on the picture to save the recipe on Pinterest
Notes:
* Lasts well at room temperature for a day. After that, I refrigerate since it has milk in it, it may spoil. While serving, I microwave for few seconds and it becomes soft again.
* I use Datar or Amlark brand of Jowar flour as it’s readily available in Lulu and other supermarkets here in Qatar.
* I had got many requests for measurements using scale, so I got one and measured the ingredients using the scale for this recipe. But I feel using Cup is so much easier and I recommend using Cups for just the ease of baking. Just make sure you have 1 Cup = 240 ml measuring cup set and you can use that for all my baking recipes without the need of measuring scale.
* This cake batter is a little thicker but the cake comes out very soft and spongy.
* I use both square and loaf pan for this cake and it bakes quicker in square pan at 15 mins. Loaf pan takes few minutes more as the cake height is more.
* Please remember to preheat the oven at 180 C for atleast 10 mins and don’t open over door for atleast 15 mins into the baking time. These are small but important tips while baking. If you are new to baking, I have written an article on the basics of baking. You can read it here: Baking basics for Beginners
Please click on the picture to save the recipe on Pinterest
I always make few sweets for Deepavali as we have our friends come over to wish us and they bring homemade goodies with them. It feels so happy to share our sweets and joy during festivals, specially during Deepavali where our houses are lit with lamps and lights.
Today is the last weekday here being Thursday and the next two days, my kids are at home. When they are home, my whole day gets busy cooking, with their studies and listening to them (Amma life 😀). So I decided to make the ladoos this afternoon, when the house was silent 😁 and took step by step pictures to share it with all of you. I was amazed to see how many of you liked the Instant Jowar flour Dosa recipe even though it was very simple. Hence I felt this simple recipe will be very useful to you too, during this festive season.
Jowar flour is a very tasty flour and is healthy too. I am trying to include it more in our diet and I am glad that my kids love it too. Hope you all try and love it as well. Happy and healthy cooking ❤️ Wishing all of you a very happy Deepavali. May this festival of lights bring loads of love and happiness in your lives. 🪔
RECIPE:
1 Cup = 240 ml
Ingredients: { Makes around 20 medium sized ladoos }
2 Cups Jowar flour / Sorghum millet flour
1 and 1/2 Cups Jaggery powder
1/4 Cup Ghee (plus 1/2 Tbsp to fry raisins and cashews)
10 to 12 Cashews
10 to 12 small golden raisins
Step by step recipe:
1. Heat 1/2 (half) Tbsp ghee in a pan and add finely chopped cashews and small raisins. Fry on low flame till raisins swell up and cashew bits turn golden. Remove in a bowl.
2. Now heat 1/4 Cup Ghee and add 2 Cups Jowar flour to it. Make sure the flame is medium to low, else the flour can burn. Saute the flour for about 5 to 8 mins till a nice aroma starts coming. Break the lumps using spatula while sauteing.
3. Once the aroma starts coming, saute for few more minutes (about 2 to 3 mins) till the mixture looks like in the below picture. That is when you press using spatula, it should hold shape.
4. Remove from flame and when it’s still warm, add jaggery powder and the fried cashews/raisins.
5. Now mix well till the jaggery powder blends with the jowar flour into a uniform mixture.
6. Start forming ladoos using your hands by taking a small size mixture in your palm as shown.
7. Open and close your fingers while shaping the ladoos in your palm. It is actually very easy to shape these ladoos and they hold shape quickly but if you find it difficult, you can add a little more ghee to shape the ladoos.
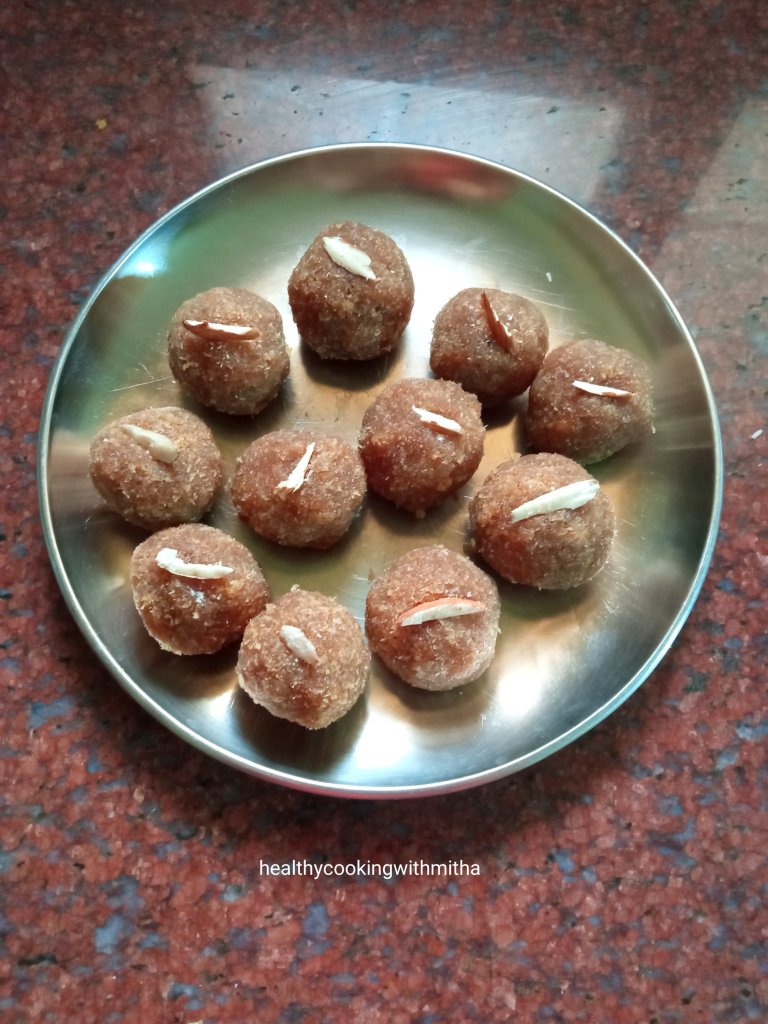
8. Repeat the same with all the mixture and the ladoos are ready to be enjoyed ❤️
Notes:
* Store it in a moisture free container. I usually store in a steel box.
* The ratio of ghee to jowar flour to jaggery works perfect for me. You can reduce jaggery powder if needed but I feel this much sweetness is necessary for these ladoos.
* You can skip cashews and raisins if you don’t like it or add more chopped nuts if you like.
* Important step is sauteing of the flour. Make sure the flame is medium to low and saute till the flour turns aromatic and starts holding shape. Don’t keep on high flame as it may burn the flour.
* If you find it difficult to bind the ladoos, you can add more ghee into the mixture or grease your hands with ghee. I do not do both as it was quite easy to bind the ladoos.
Click on the image to save the recipe on Pinterest
Kids’ schools have started after Eid holidays and days have started flying again. Waking up early, preparing their snack boxes, sending them to school, morning walk, cleaning the house, relaxing till they come back and after that hearing about their day at school, teaching them, walking again in the evening while they play outside, finally preparing for their next day at school and putting them to sleep.
Days are super busy but I would not want it any other way. I have realized being busy is actually great than sitting idle and overthinking. So it’s a blessing in disguise for me. ❤️
In midst of this, is cooking which I love and which brings me happiness. I listen to bhajans and songs while cooking which makes it so peaceful. Music is truly therapeutic. ❤️
Apart from breakfast, lunch and dinner, there is one meal of the day which is most difficult for me – Snack time. Finding a quick, healthy and tasty snack which the kids also love is very hard. So when I tried this Ragi ada inspired by my Kochi memories of the regular ada and it came out so well that we all loved it, I knew I had to share it with all of you too. ❤️
I don’t know why some people think Ragi is bitter. Ragi is such a tasty millet and I use it regularly in my cooking. It is tasty and very healthy too. Have shared all the recipes that I make using Ragi in the notes section towards the end. Do try and I think if you follow the recipe well, adapt it in your cooking, in few days, you will love Ragi too, just like we do. ❤️
Happy and healthy cooking ❤️
RECIPE:
Ingredients: { to make about 5 adas }
1 Cup = 240 ml
Banana leaves to make the ada
To make outer covering:
1 Cup Ragi flour ( finger millet powder)
Salt to taste
Approx 1 Cup hot water
To make inner filling:
3/4 Cup Jaggery
3/4 Cup freshly grated Coconut
1/4 tsp Cardamom powder
Step by step recipe:
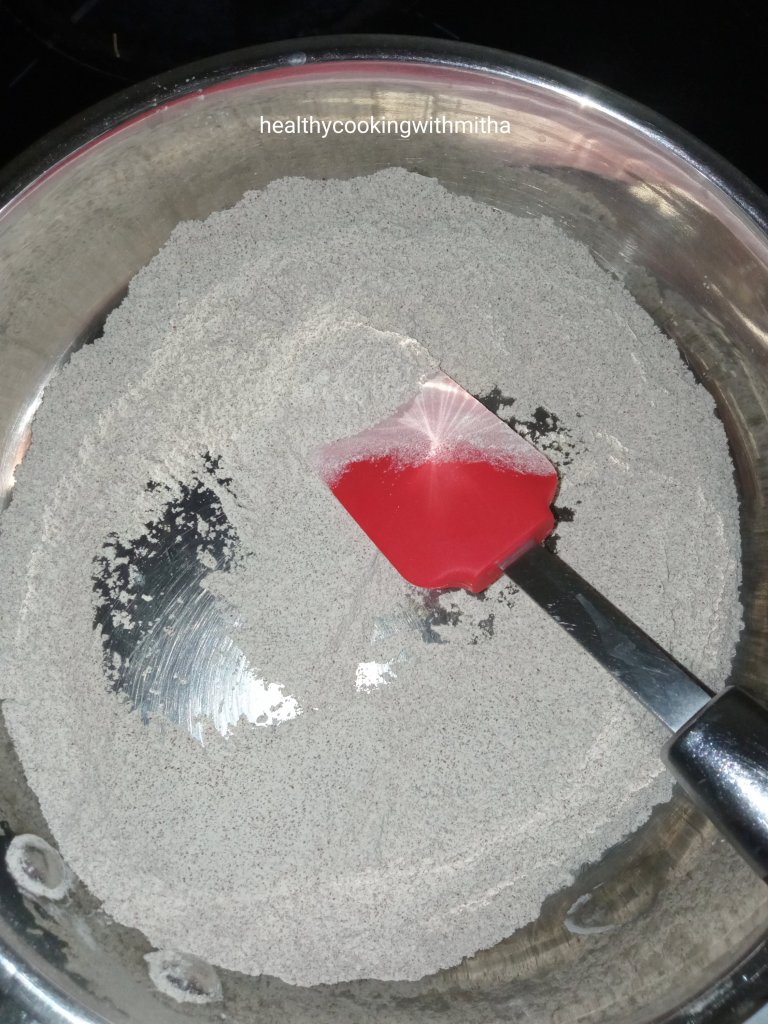
1. Dry roast Ragi flour ( do NOT add oil while roasting) on medium flame till you get an aroma of the flour and it changes colour to a darker tone.
Note: Even if you have roasted ragi flour with you, dry roast for few minutes as it enhances the flavour a lot.
2. Transfer it to a bowl. Add salt.
3. Now add hot water, little by little. Mix as you add water.
4. As you add hot water, little by little, after mixing, the dough will look like this. Do NOT add water after this.
5. Now the dough will be warm. Using hands, mix together to form a smooth and soft dough.
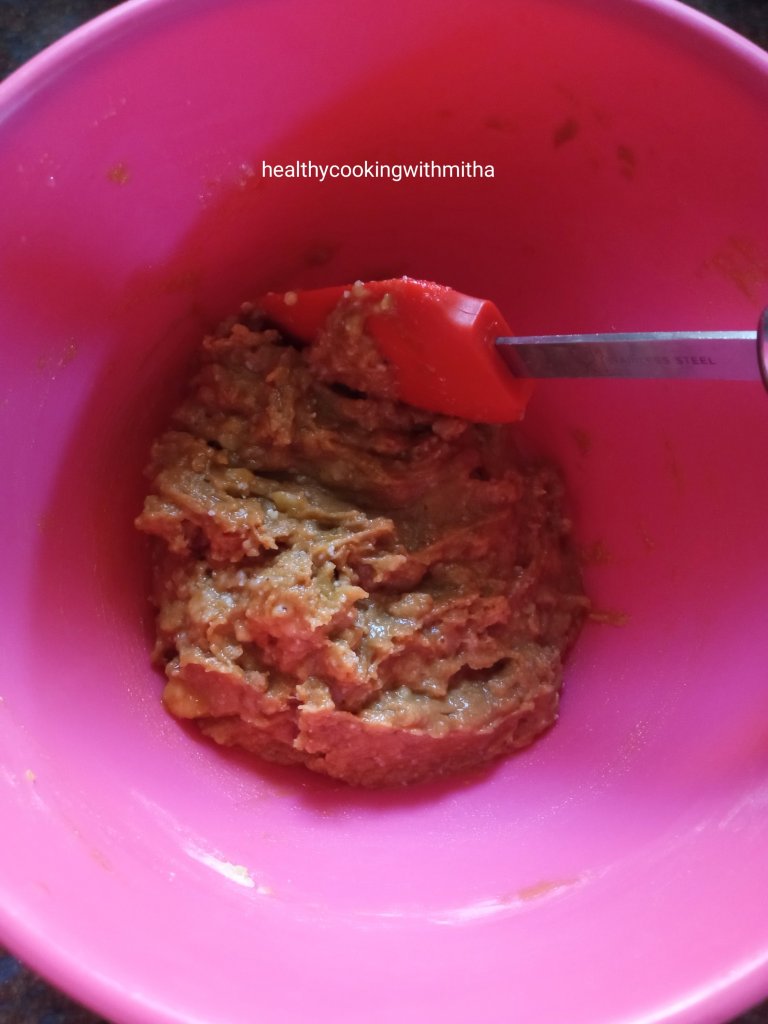
6. Now make the inner filling. Take coconut and jaggery in a pan. Heat it together on medium flame till the jaggery melts and coconut will stick to jaggery. Remove from flame. Add Cardamom powder. Mix well.
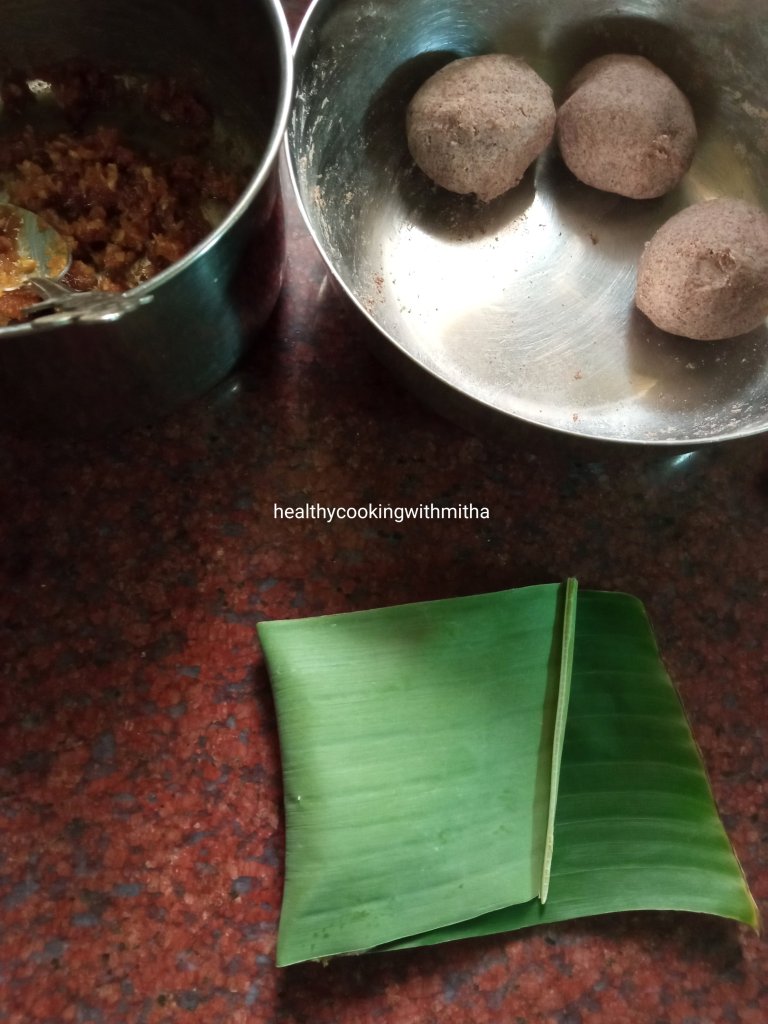
7. Now cut the banana leaf into rectangle pieces as shown. Clean it with water and wipe it dry.
Also divide the ragi dough into equal sized balls. If you have taken 1 Cup (240 ml) of Ragi flour, you will get 5 balls.
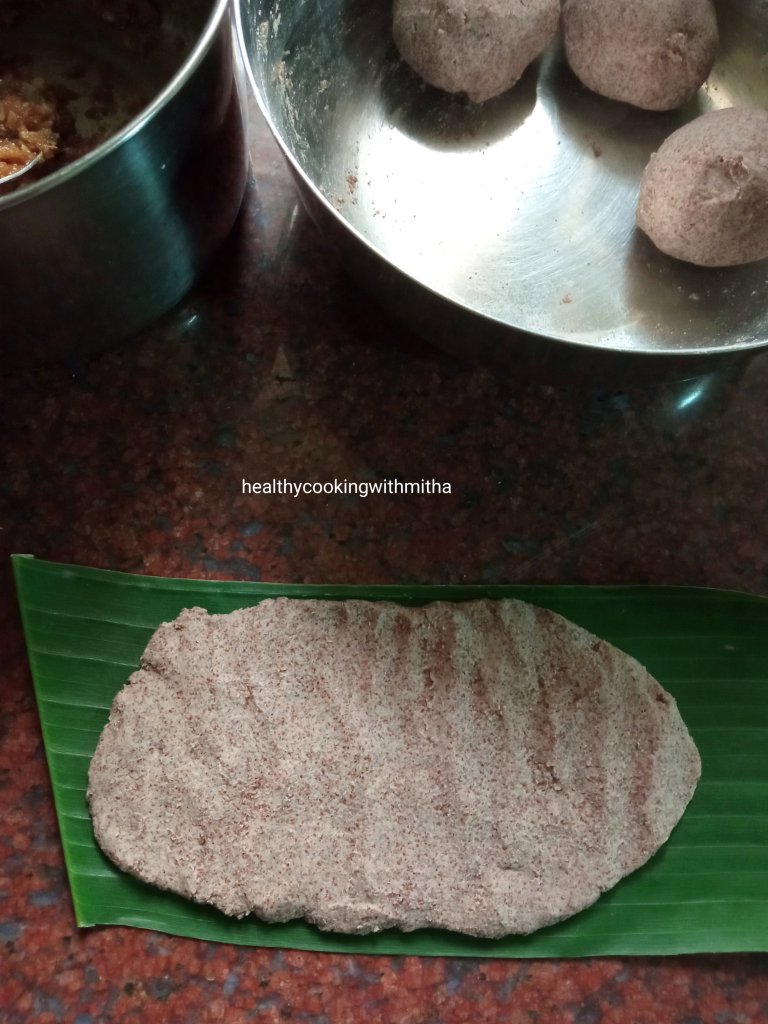
8. Take a ball of ragi dough and spread it using slightly wet fingers as thin as possible.
9. Take a spoonful of the filling and place it on one half side. Spread it on the half side using spoon as shown in the image below.
10. Fold the banana leaf while closing both the halves as shown.
11. Seal the edges of the dough using fingers so that the filling does not come out.
12. Repeat the same with the rest of the dough balls. Place it on a idli steamer.
13. Steam for 20 to 25 mins on high flame till the ada cooks thoroughly. Remove from flame. Allow it to cool for 5 mins.
14. Now peel off the banana leaf, discard it and enjoy the warm Ragi ela adas. 😍
Click on the image to save the recipe on Pinterest
Just look at the inside of the ada. Sweet, juicy and so delicious 😍
Click on the image to save the recipe on Pinterest
Notes:
* As you can see from the above picture, the ada is of the right thickness and also steamed fully. This is due to spreading the dough thin over the banana leaf and also steaming for atleast 20 mins.
* Even if you have roasted ragi flour with you, dry roast for few minutes to get perfect aromatic ragi adas.
* Do use only hot water while preparing the dough. It took me around 1 Cup hot water for 1 Cup Ragi flour. Add only 1/4 Cup at a time and mix well till you get the dough as in step number 4. Then mix using hands to form a smooth dough.
* Don’t add a lot of water while making dough. It will be difficult to spread if dough is too soft.
* For 1 Cup Ragi flour, 3/4 Cup coconut and 3/4 Cup jaggery made the right filling for me. If you add a lot of filling, it will be difficult to seal the edges. So add only a spoonful to cover half of the ada.
* I have not made this without banana leaves. So can’t say the alternative to it. Spreading the dough on the leaf is easy and the ada turns aromatic too. So try to get the leaves if you can.
* These adas are best eaten soon after they are steamed but tastes yummy even after few hours too. So you can carry it in tiffin box and during travel too.
* A similar recipe with coconut jaggery filling is this Kerala style Nendrapazham nirachathu or stuffed Nendran Bananas..
Click on the image to save the recipe on Pinterest
I have been baking cakes and cupcakes with wheat flour, jaggery and ghee since many years now and I am happy to say that my kids too have got so much used to this flavour that they love it much more than store bought maida based cupcakes. I bake them for their school tiffin box and also as an evening snack before they go out to play. ❤️
Now that they are at home whole day (demanding for food quite often 😅), my cooking has also increased and while I was about to make these banana cupcakes, I realized I had not shared the recipe on the blog. So quickly took some pictures and here I am writing this recipe while they are enjoying the cupcakes. ❤️
Cinnamon gives a wonderful aroma and flavour to these cupcakes and that makes these cupcakes super tasty too. They come out so soft too and you can never say it does not have eggs in it.
Hope you all try these delicious, filling cupcakes too and I am sure you will love it too. Happy and healthy baking! ❤️
RECIPE:
Ingredients: { Makes 6 medium sized muffins }
1 Cup = 240 ml
Dry Ingredients:
1 Cup Whole Wheat flour / Atta
1/4 tsp Cinnamon powder (or Vanilla essence)
1/4 tsp Baking soda
A pinch of salt
Wet Ingredients:
1/4 Cup Mashed Bananas ( I took 2 small overripe Indian bananas)
1/2 Cup Jaggery powder
1/4 Cup Water
1/4 Cup Ghee
1 tsp Vinegar (or lemon juice)
Step by step recipe:
1. Sift together using a sieve 1 Cup wheat flour, 1/4 tsp Cinnamon powder, 1/4 tsp Baking soda and a pinch of salt. Keep aside.
Note: If using Vanilla essence, you can mix with wet ingredients.
2. In another mixing bowl, take 1/4 Cup mashed bananas, 1/2 Cup Jaggery powder, 1/4 Cup Water, 1/4 Cup Ghee and 1 tsp Vinegar. Mix very well using a spatula.
Note: I mashed two overripe Indian bananas and got 1/4 Cup of mashed bananas. Even if you use three Indian bananas, it’s fine. Cupcakes will come out well. Just take care to mash really well.
3. Now add the dry ingredients mix to the wet ingredients mix and fold using the spatula. Do NOT overmix. Just mix so that you don’t see any dry flour specks in the mixture.
4. Preheat the oven at 180 C for 10 to 15 mins in the center rack of the oven. If using microwave convection oven, choose the option of turning both rods on.
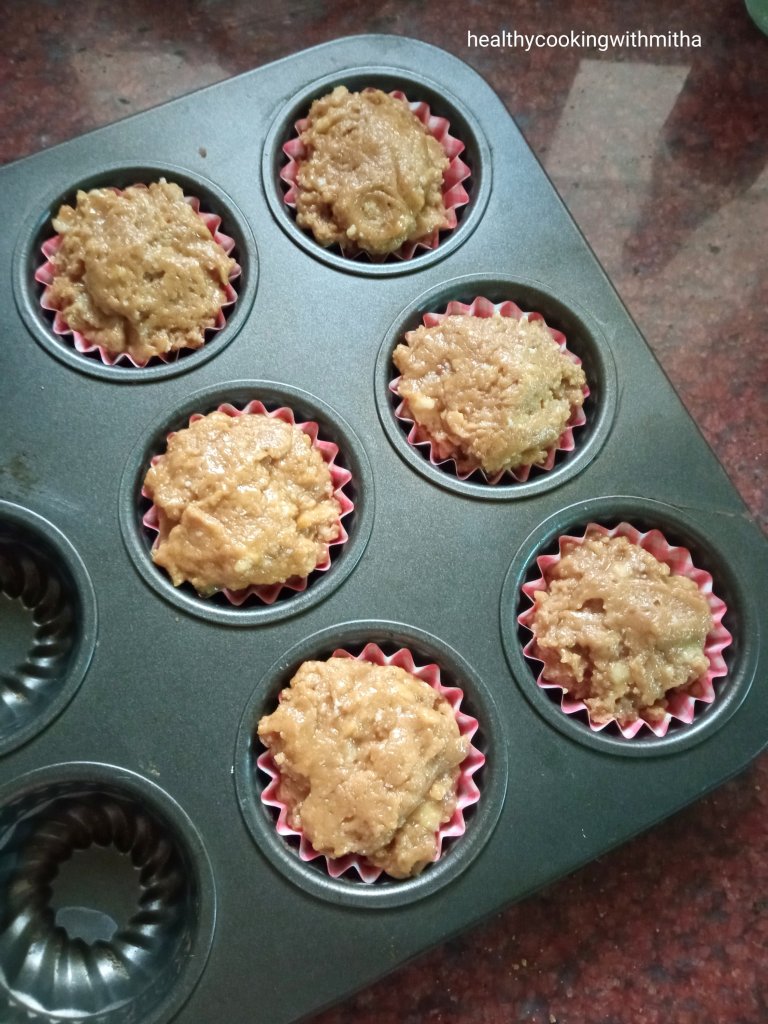
5. Meanwhile line the muffin pan with liners or just grease well with ghee or butter. Add a spoonful or two of the batter into each mold.
6. Bake at 180 C for 18 to 20 mins. Mine gets done exactly at 18 mins. Keep an eye after 15 mins into baking time so that the cupcakes don’t turn brown on the surface. Allow them to cool and then enjoy!
Note: To check if done, insert a toothpick in the center most cupcake. If it comes out clear or with tiny crumbs and is not wet, then the cupcakes are well baked. If it comes out wet, bake for few minutes more.
Click on the image to save the recipe on Pinterest
Notes:
* These cupcakes lasts well at room temperature for a day. Just keep in a moisture free container. After a day, refrigerate it and then microwave for few seconds before consuming.
* I have used 1/4 Cup mashed Bananas to 1/2 Cup mashed Bananas in this recipe and it does not make much difference. It depends on how many overripe bananas I have. If I have two, I add two and if I have three, I add all three. Just make sure to not increase the quantity more than 1/2 Cup though.
* I recommend using Cinnamon powder for this recipe as it gives such a wonderful aroma and flavour. But if you don’t have, you can use vanilla essence or even Cardamom powder too.
* Always remember to sieve the dry ingredients to get soft muffins, specially when using whole wheat flour.
* Ghee can be substituted with melted butter, Jaggery can be substituted with brown sugar or regular sugar and Vinegar can be substituted with lemon juice, all of same quantity.
* Don’t overmix both the dry and wet ingredients. Just mix well once. Overmixing can lead to hard muffins.
* Preheating the oven before placing the muffin pan is a very important step. Don’t forget it. Preheat at 180 C for 10 to 15 mins.
* Bake in the center rack of OTG or with both rods on in a microwave convection oven. Keep an eyes after 15 mins into baking time but don’t keep opening oven door before that. Mine gets done exactly at 18 mins in OTG.
* To check if done, insert a toothpick in the center most cupcake. If it comes out clear or with tiny crumbs and is not wet, then the cupcakes are well baked. If it comes out wet, bake for few minutes more.
* You can give this to kids as evening snack or in their tiffin box for a filling, tasty treat.
For more Healthy cakes, cupcakes and cookies recipes, you can check my collection:
Click on the image to save the recipe on Pinterest
In three days, it’s Deepavali and we will all soon be busy decorating our houses, lighting lamps, making sweets and savouries, enjoying this festive time with our families. Even though Deepavali is not the same here in Qatar, being far away from our dear ones, I still make sure kids don’t miss out on the essence of the festival by telling them the story of Ramayana, lighting lamps, wearing new clothes and making sweets to celebrate the festival. ❤️
Today morning I made these Coconut Badam ladoos which are the kids’ favorite as they love coconut based sweets a lot. They have holidays for the next four days and I will be busy with them, listening to their chatter. 😍 So I decided to share this recipe today itself to wish all of you a very Happy Deepavali. ❤️
Hope this beautiful festival of lights bring peace and happiness into your lives. Happy Deepavali to you and your family. Jai Shri Ram. 🙏
Do try these easy ladoos if you find time and you are sure to relish it. Happy and healthy cooking ❤️
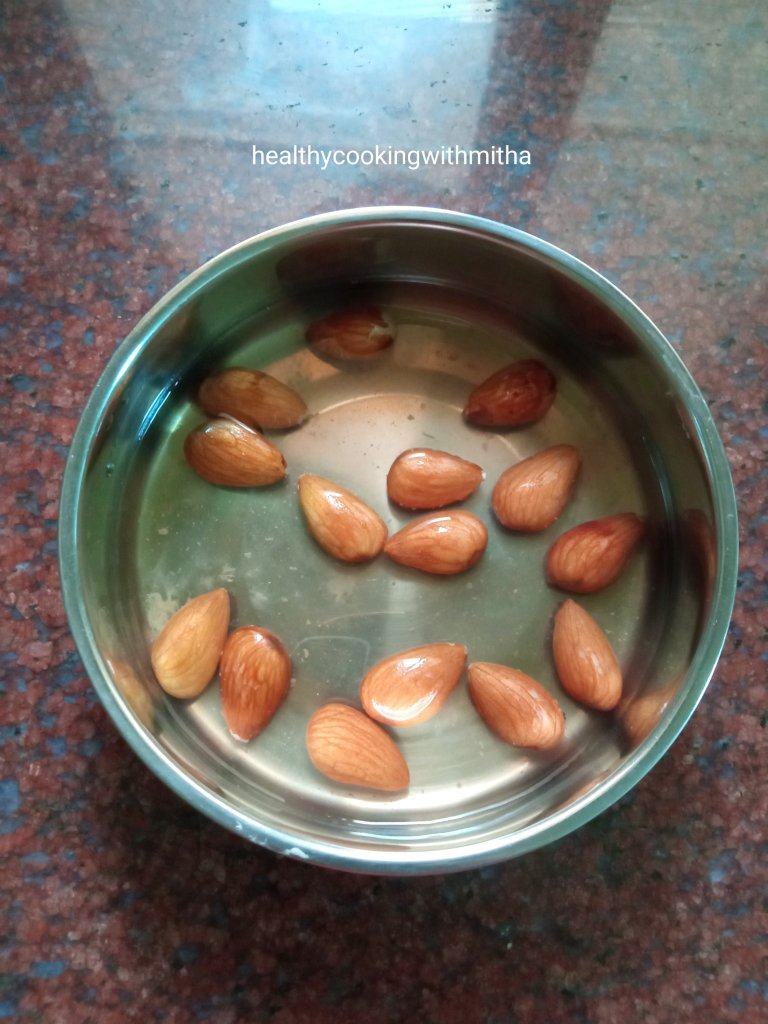
1. Soak Almonds one night before making the ladoos. Just immerse in little water for about 8 hours.
2. Drain the water and peel the almonds. The peels come off easily as they have been soaked well.
3. Add to a mixer along with 1/4 Cup water and grind to a fine paste.
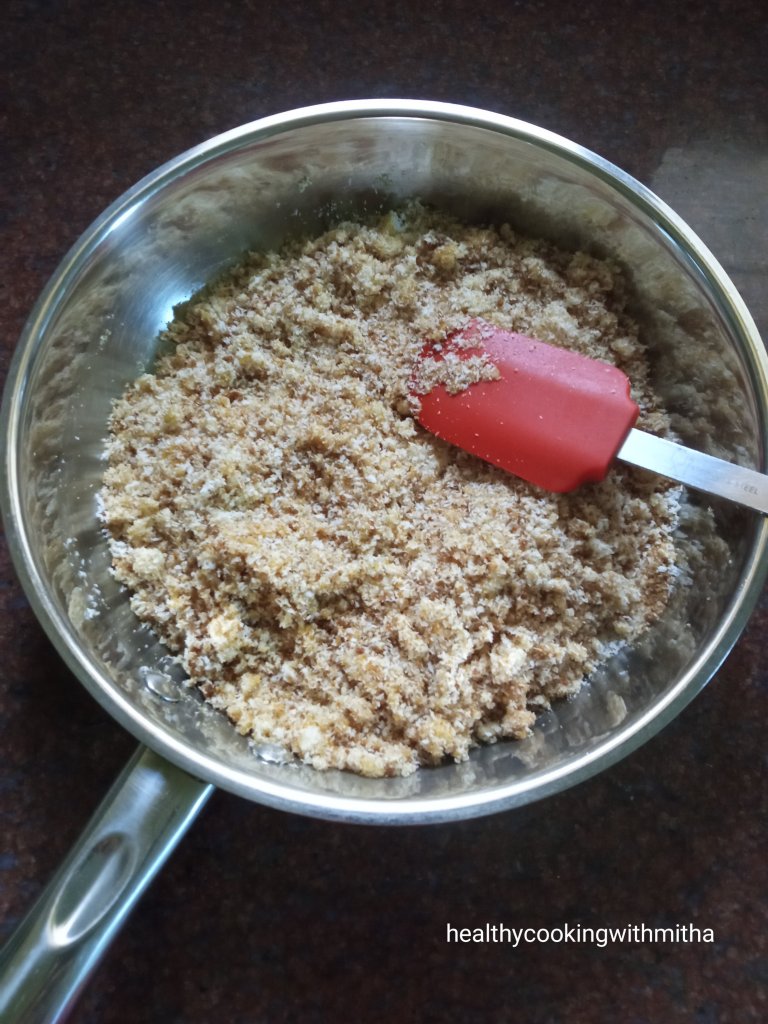
4. In a thick bottomed pan add coconut gratings or desiccated coconut, jaggery powder or grated jaggery and the almond paste. Don’t keep it on flame yet.
5. Now mix well using a spatula.
6. Now keep the pan on medium flame and start mixing using the spatula. Jaggery will melt and the mixture will start becoming soft and blend well. Keep mixing for about 8 to 10 mins. Add cardamom powder.
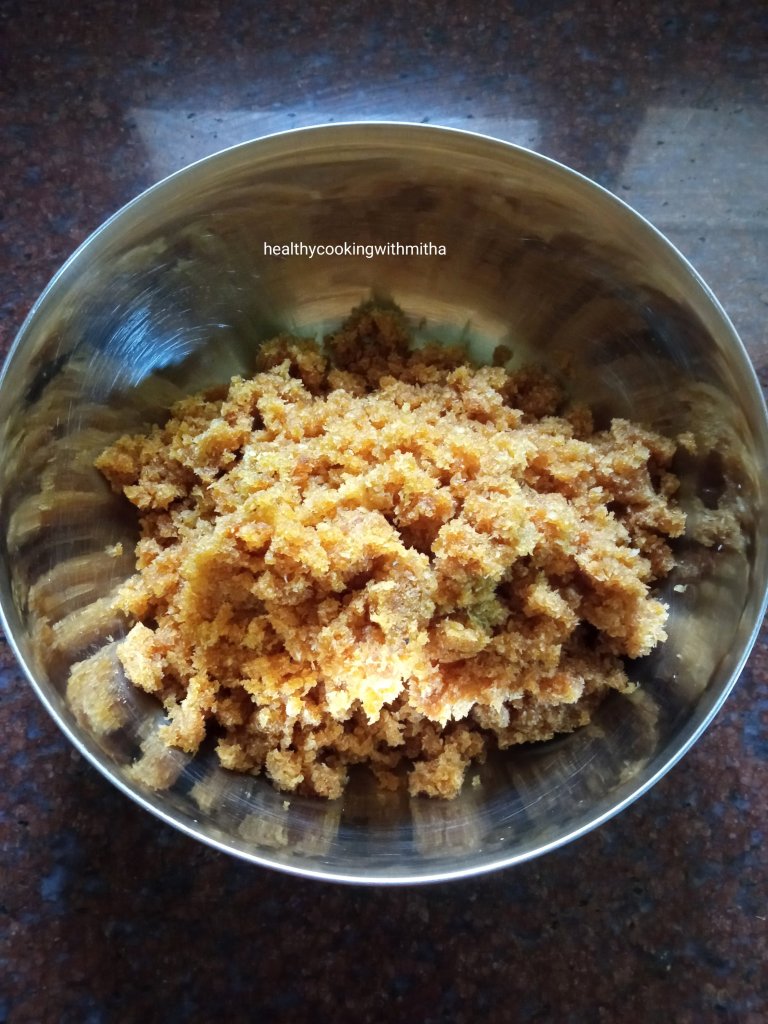
7. Mix once and remove the mixture into a bowl.
8. When the mixture is warm, start making ladoos using your hands. It is very easy to make when the mixture is warm and moist. Take a small portion and open close your right hand till the mixture binds well to form a round shaped ball.
9. Make ladoos with all of the mixture. You can also decorate the ladoos with fine sliced Almonds. Done ❤️
Notes:
* I have used desiccated coconut to make these ladoos. You can use freshly grated coconut too.
* Soaking Almonds overnight makes it easier to peel and also increases the nutrition of the Almonds.
* Once you mix coconut, jaggery and almond paste before keeping on the flame, it might seem dry but when you heat it, the jaggery will melt and help combine the mixture well.
* Heat it on medium flame though, else jaggery will burn if heated on high flame.
* When the mixture is warm and moist itself, make ladoos as it is easy that time.
* Store in a dry container for a day or two and then if leftover, you can refrigerate.
* Jaggery can be substituted with sugar too in case your family does not like jaggery flavour.
* Almonds can be substituted with Cashews too.
* I make Coconut Burfis with Cashews and sugar which I learnt many years back from Konkani Saraswat Cookbook by Asha Satish Philar mai. Here is the recipe – Coconut Burfis.