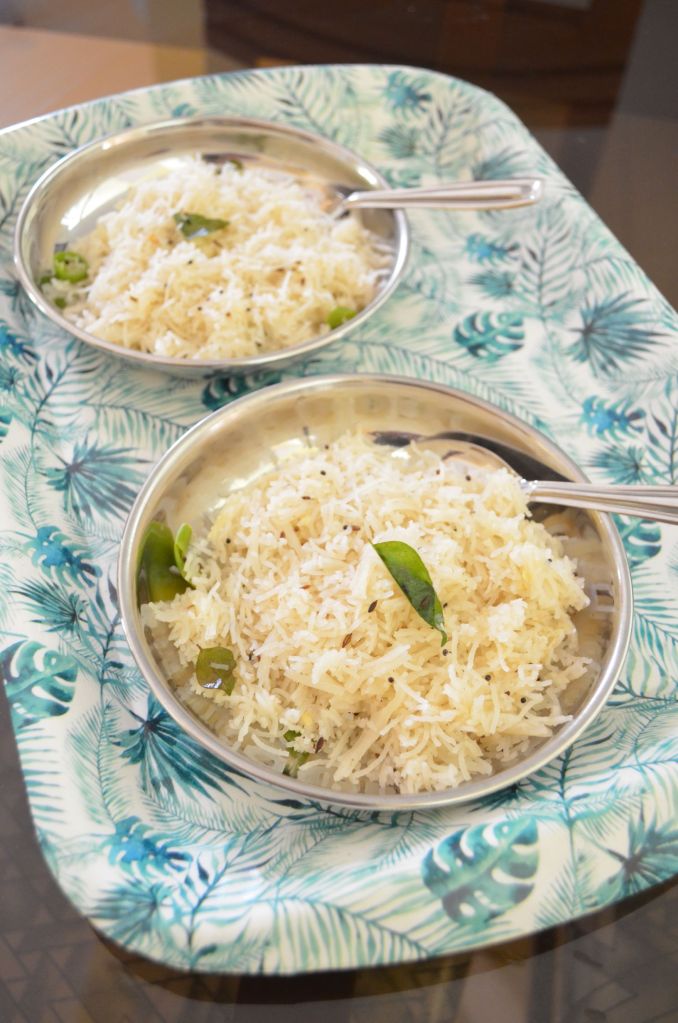
Gova Shevai is not just any dish for me.. It’s childhood, nostalgia, love and loads of memories packed together.. My favorite breakfast which I eat the whole day whenever it is made.. 😍
My parents know this and always make one big kadhai for me to devour.. ❤️ Amma’s smile when she sees me enjoy it is still in front of my eyes. 😍
And it’s not only now, Gova Shevai usli has been my favorite since as long as I can remember. But the wheat noodles or gova shevai was not available in Kochi or Qatar.. Hence was a rare treat for me.. Not anymore though.. In Udupi it’s readily available and now I enjoy it always.
I am relishing different kinds of food here after many years and it’s indeed a blessing.. Sharing my happiness with all of you too.. Happy and healthy cooking ❤️
RECIPE:
Ingredients: ( serves 4 )
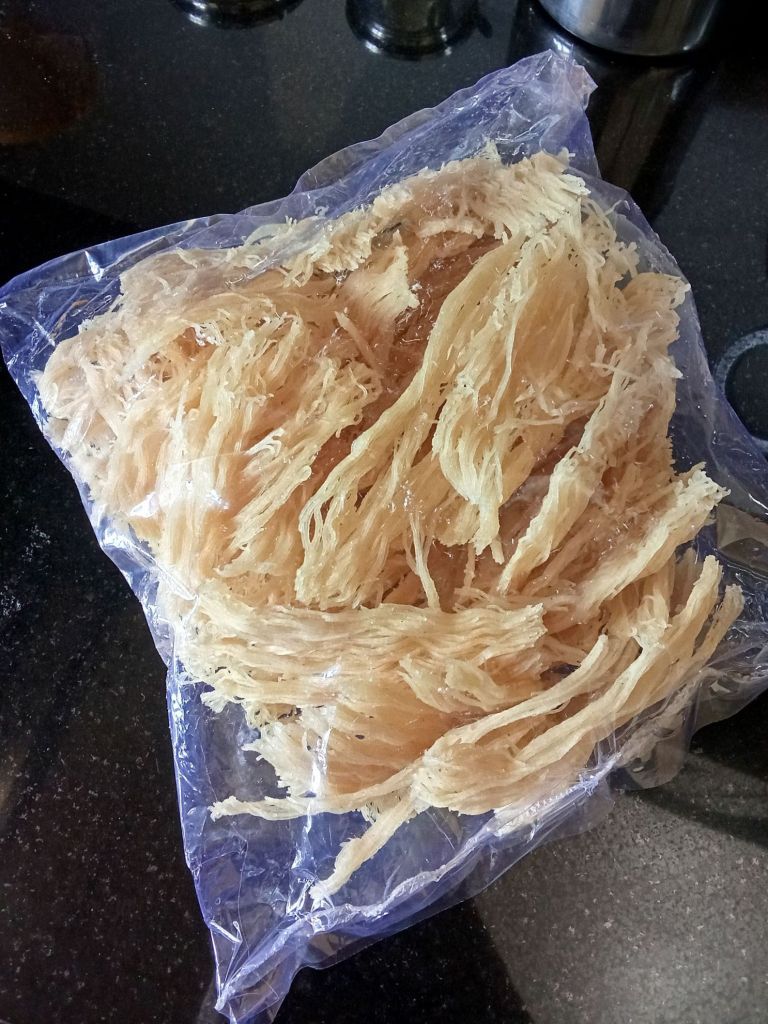
Dry wheat noodles (gova shevai) half packet
3 Green chillies
A sprig of Curry leaves
1 tsp Mustard seeds
1 tsp Cumin seeds
1 Tbsp Coconut oil
2 tsp Sugar
Salt to taste
Grated Coconut for garnishing
Step by step recipe:
Take the gova shevai packet. We get it this size here. Not sure about the weight of the packet. I take half of this packet which makes 4 servings.
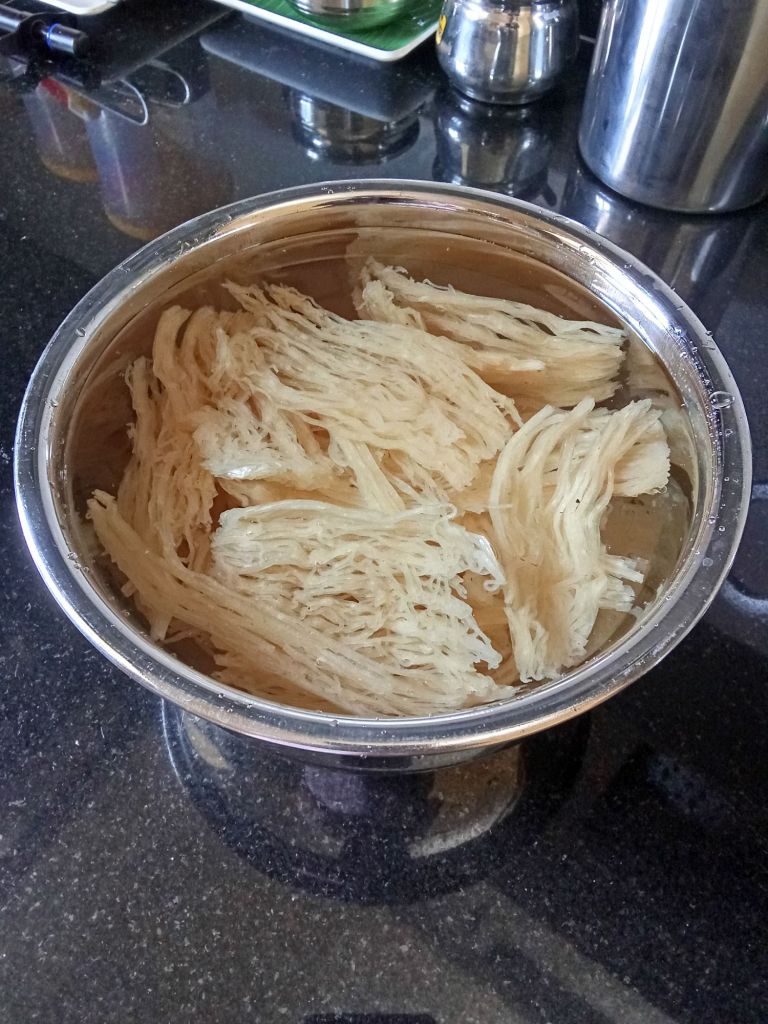
2. Soak the wheat noodles in normal water for about 30 mins.
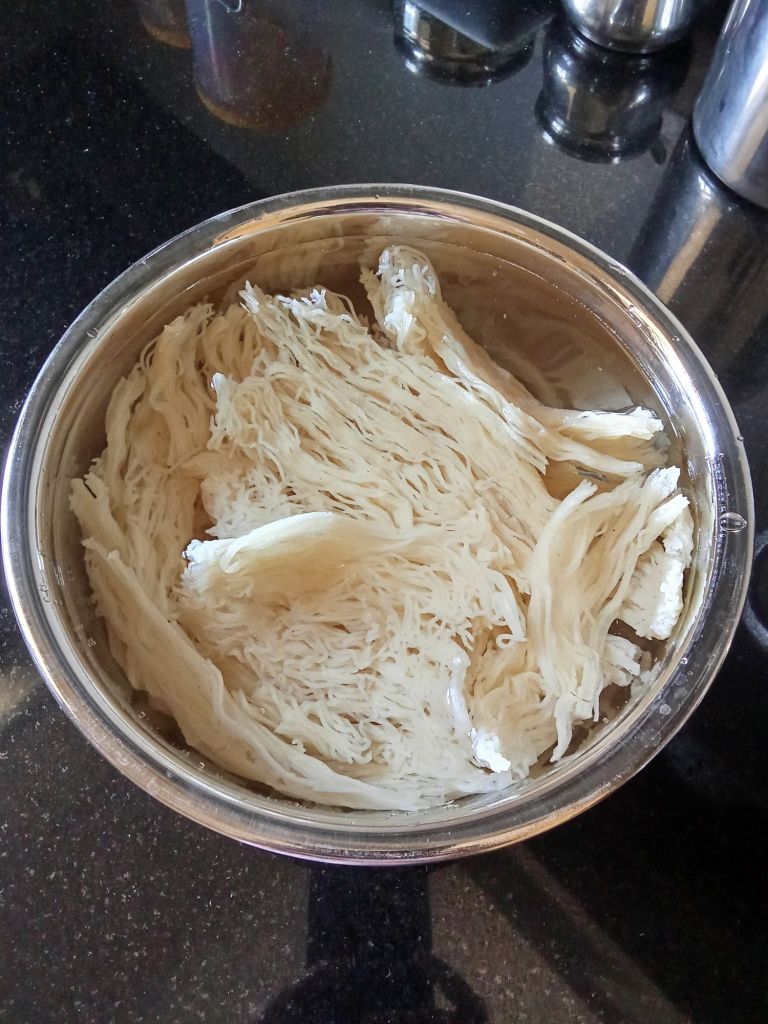
3. In 30 mins, it will turn soft in texture.
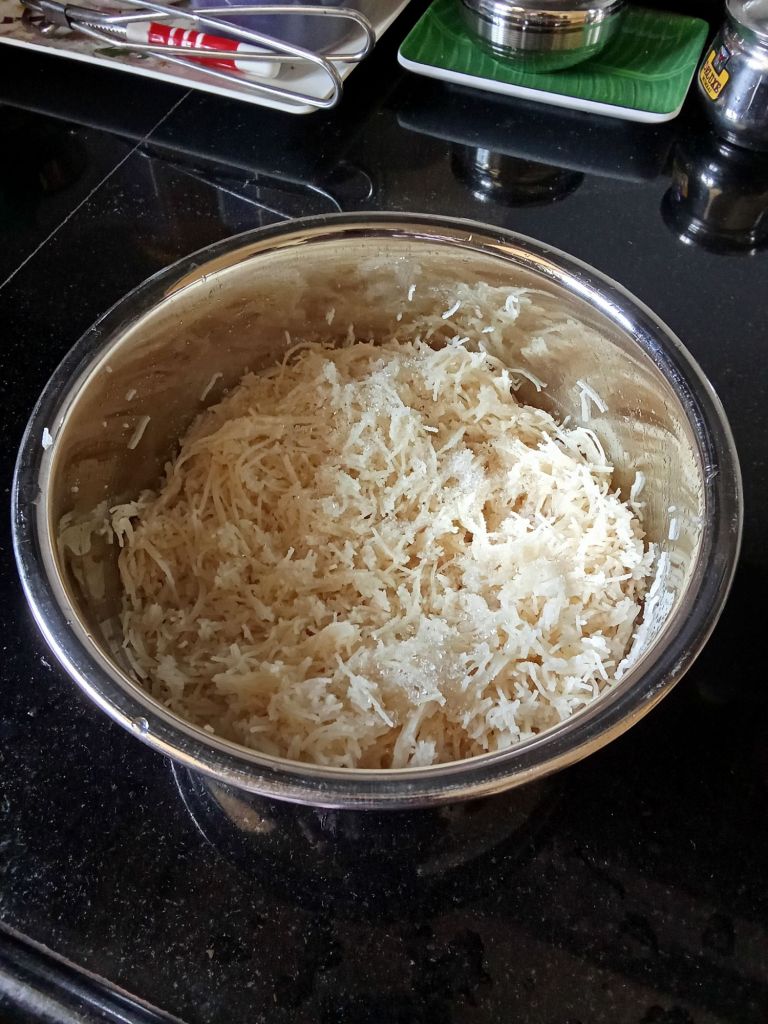
4. Drain the water completely and using fingers, crush the noodles into little pieces. Now add salt and sugar to this and mix well. (The noodles already contains little salt in it, so be mindful while adding.)
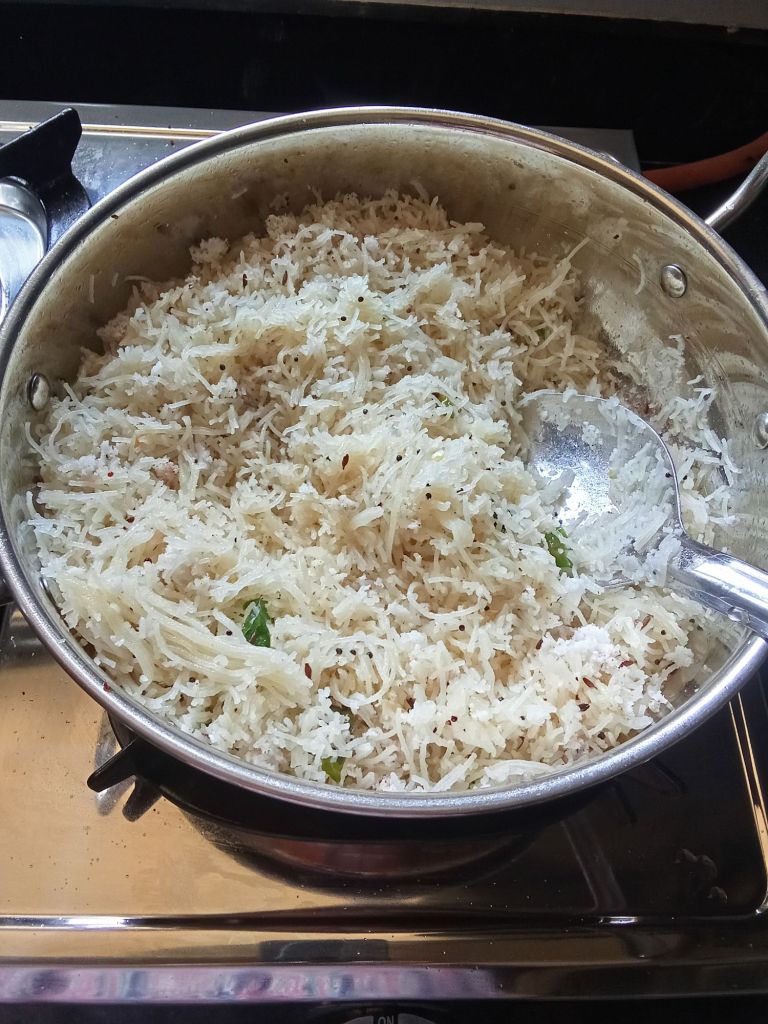
5. Heat coconut oil, add mustard seeds and cumin seeds.. When mustard seeds splutter, add curry leaves and green chillies. Fry for few seconds. Now add the crushed noodles. Mix well on medium flame. Cover and keep for 5 mins.
6. Garnish with grated coconut and serve hot.
Note : You can also add split urad dal in the seasoning.
Click on the picture to save the recipe on Pinterest
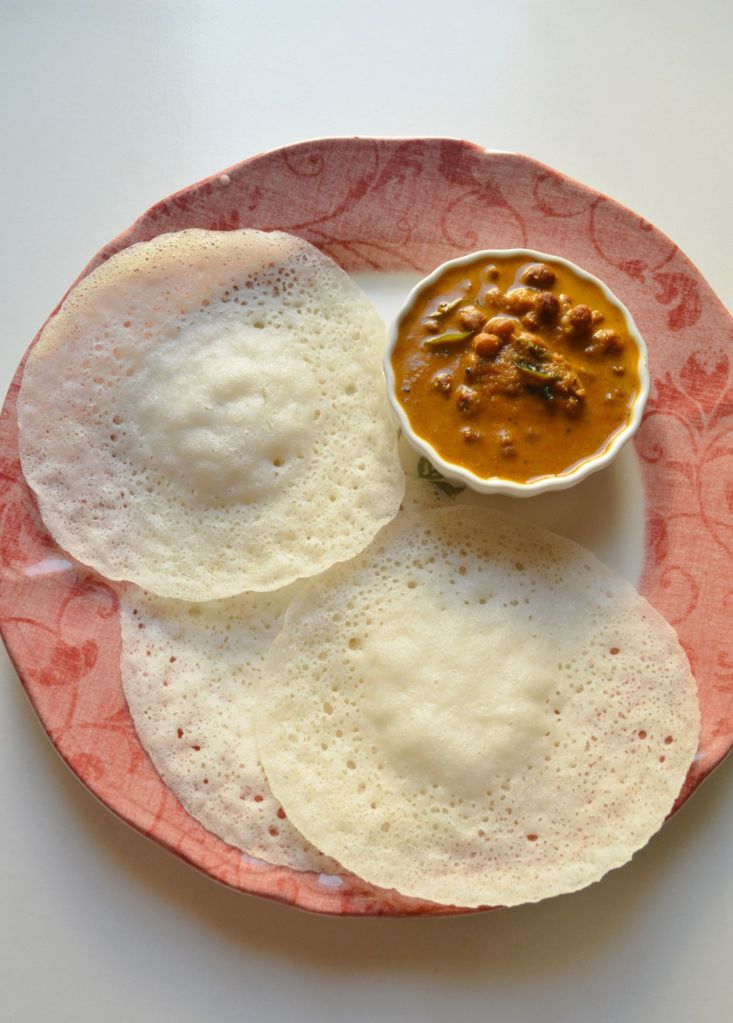
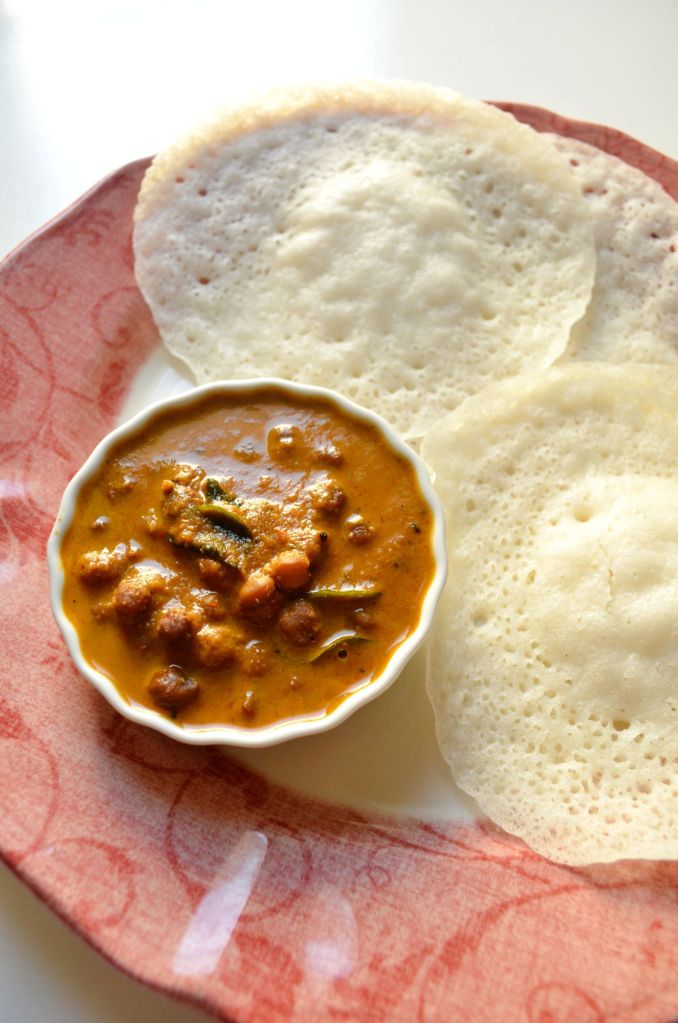
My mouth waters looking at the picture above even as I type this. That much I love Appam and Kadala curry. It’s one of my favorite breakfast combination and I feel very happy each time I make it.. Happy that finally I have learned to make perfect appam and a delicious tasting Kadala curry at home.
Growing up in Kerala, I have enjoyed Kadala curry with puttu, porotta and appams. My dad used to bring it as a treat from little hotels called thattu kadas and we used to relish it like anything. But I never thought I would learn to make it at home.
Over the years, I have tried many methods but finally with this one way, it comes out perfectly each time and I have stuck to it now. My kids love it a lot too. So I make it atleast once a week.
Sharing the recipe for those who want to make appams at home too. Hope you all try and love it. Happy and healthy cooking ❤️
RECIPE:
Ingredients:
1 Cup = 240 ml
2 Cups White Raw rice
1/2 Cup thick Poha/ Aval/ flattened rice
1/2 Cup Coconut (desiccated or fresh)
1 Tbsp Sugar
1/4 tsp Instant yeast
Salt to taste
Step by step recipe:
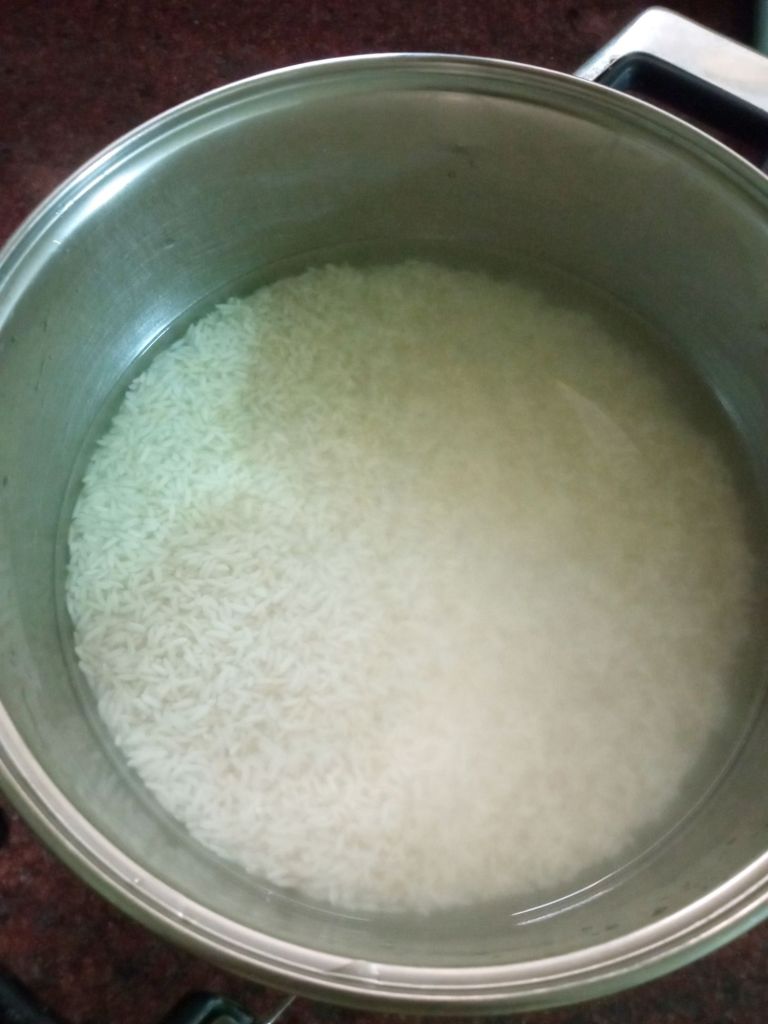
Wash well and soak raw rice in double the water for atleast 4 hours.
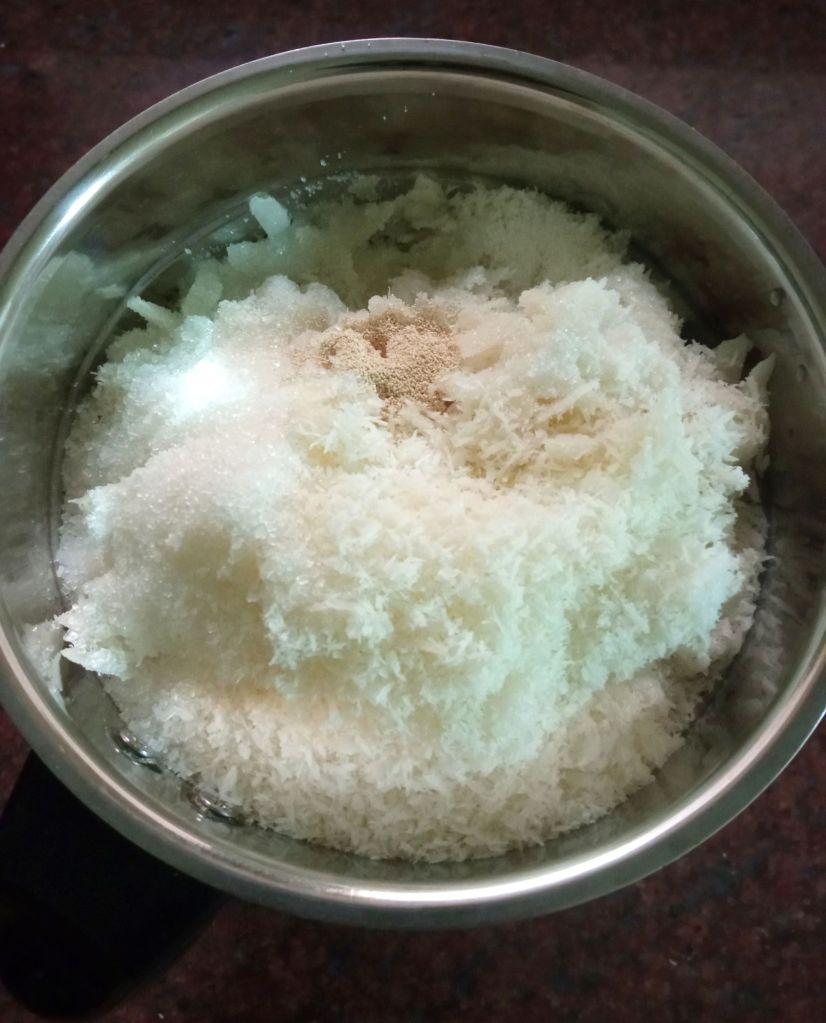
2. Once soaked, drain all the excess water and add to a mixer jar along with washed poha, coconut, sugar, salt and yeast.
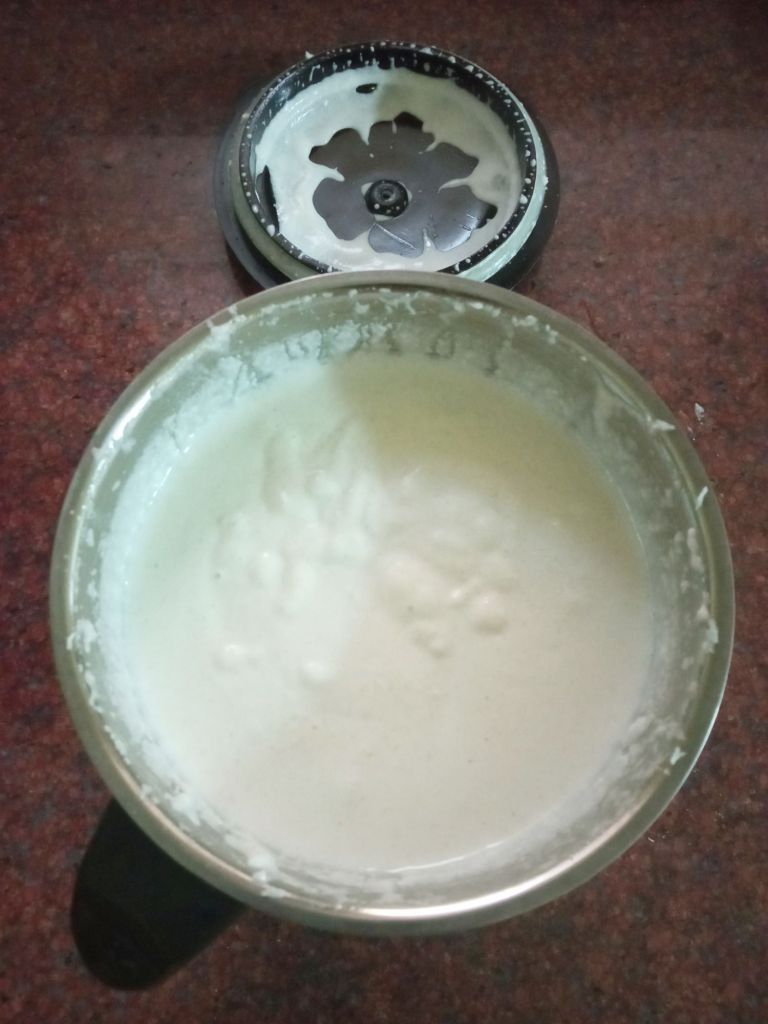
3. Add water as needed and grind to a smooth paste.
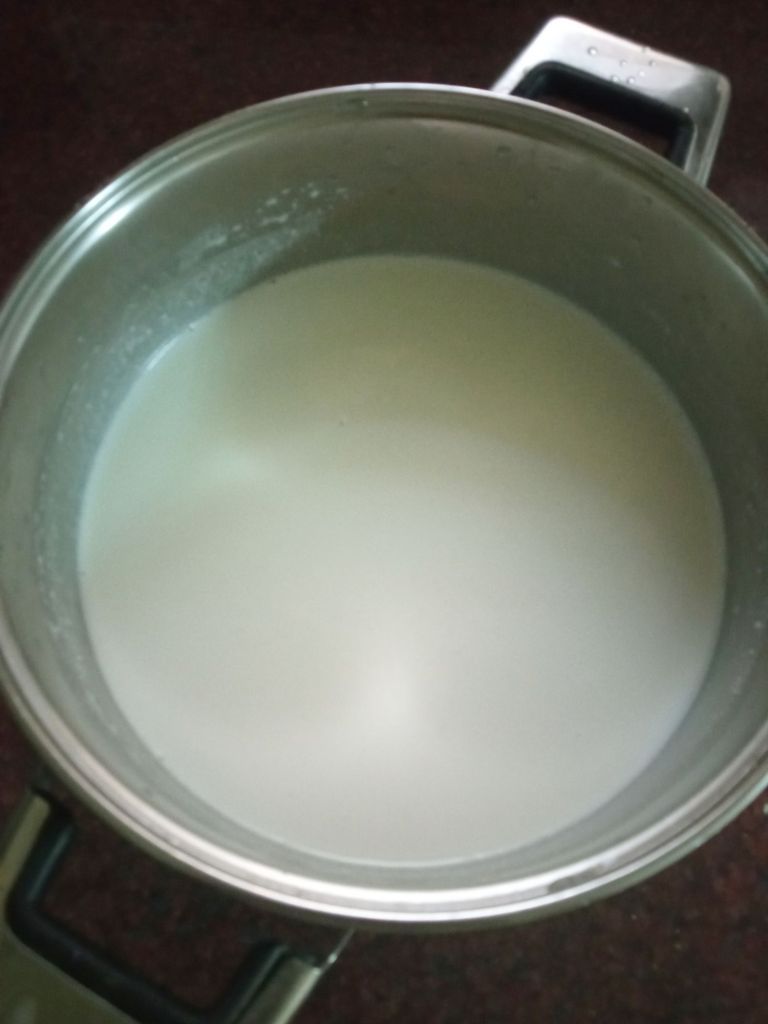
4. Now, add to a large vessel and make the batter to a consistency slightly thinner than Dosa batter. It should not be thick like dosa batter as it won’t spread well on the appam pan. Should be of free flowing consistency.
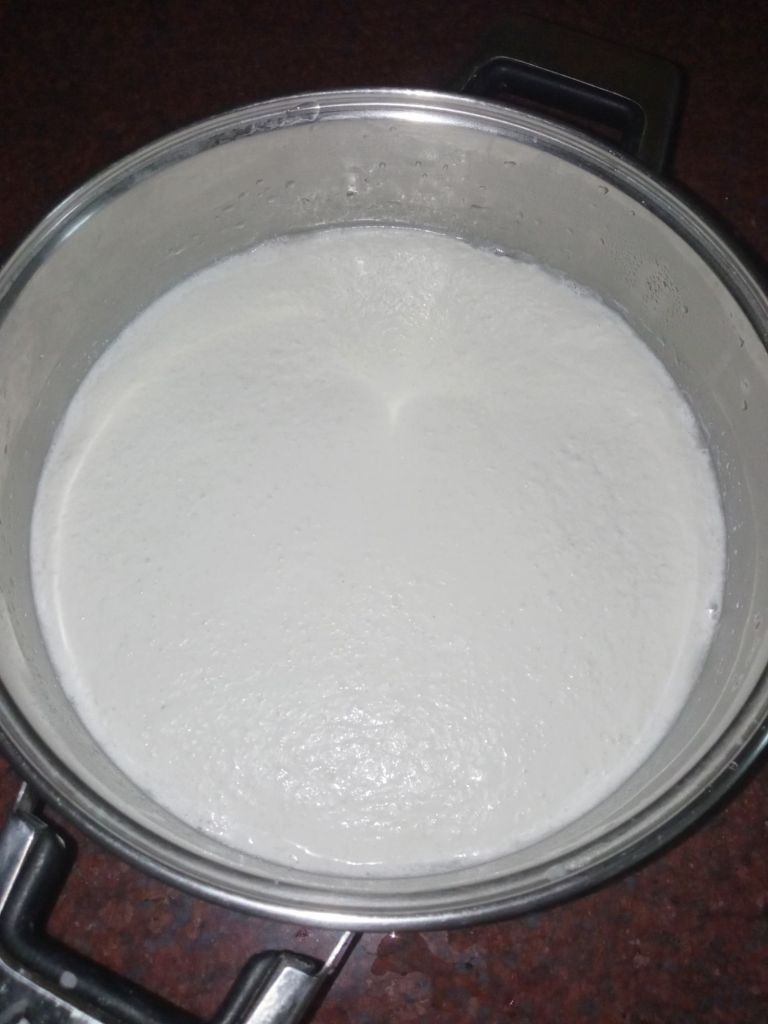
5. Now keep it covered in a warm place for 4 to 6 hours. In warm climate, the batter ferments very quickly but in cold climate, it takes 6 hours to ferment. The batter will rise as shown and you can get the fermented aroma.
6. I refrigerate the batter after this for next day morning breakfast. I soak rice in the morning, grind by noon and allow it to ferment till night. Then I refrigerate.
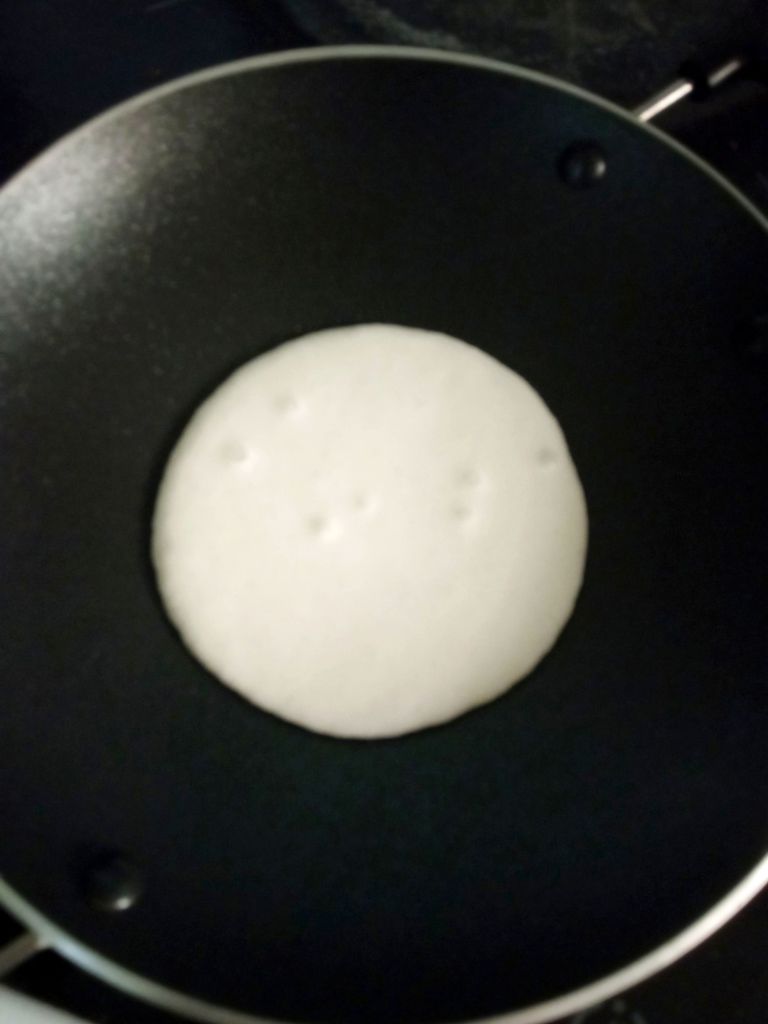
You can make appams as soon as the batter ferments. Just heat the appam pan and pour a ladle of batter in the center.
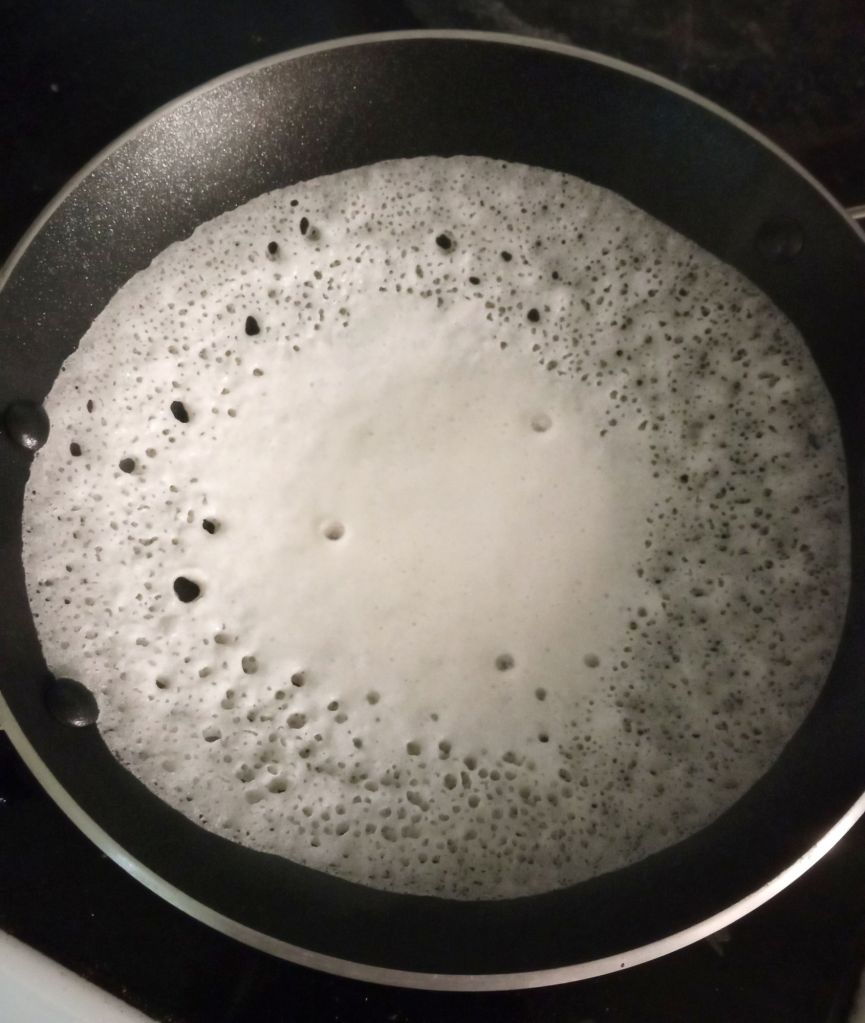
7. Now hold the pan handles and turn it in anti clockwise direction such that the batter spreads in a circle too. Center will have more batter and sides will be thin for appam.
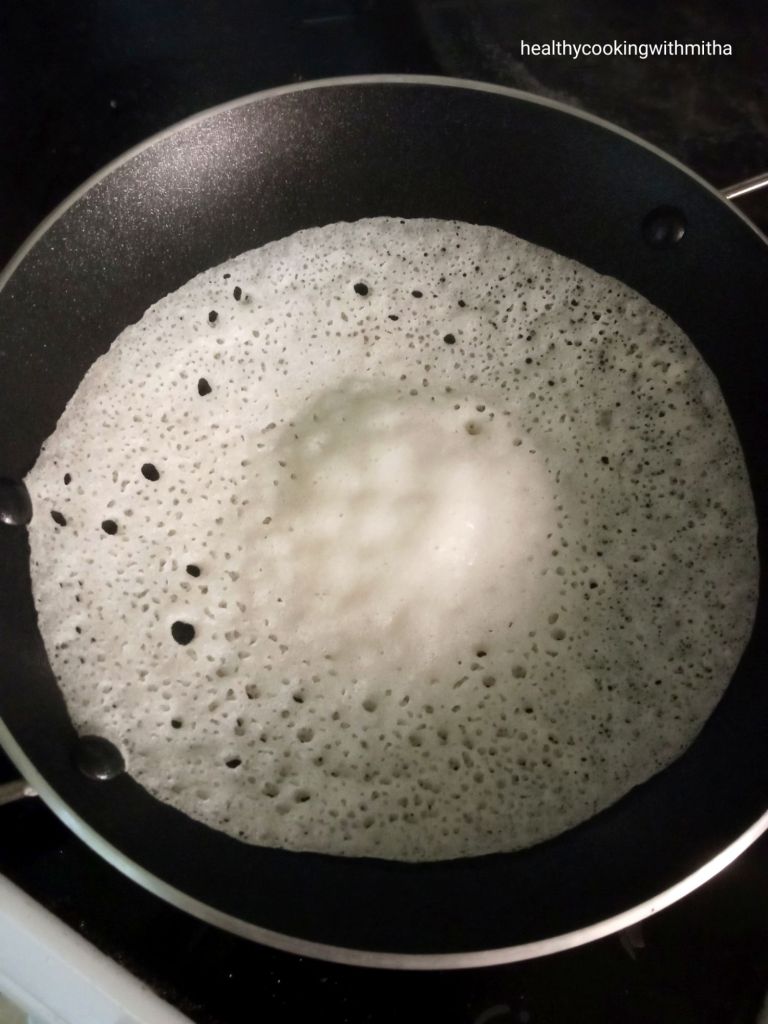
8. Cover and cook till the appam cooks well and the edges will release itself from the pan. If the center is thick, make sure it’s cooked well before removing from pan.
9. Remove from pan and enjoy appams with piping hot Kadala curry.
Click on the picture to save the recipe on Pinterest
Notes:
Any variety of white rice will work for this recipe.
I use thick poha, you can also use thin poha. Just wash before adding to the mixer jar.
Both fresh and desiccated coconut works well for making appams.
I use instant yeast while making appams. Have not used active dried yeast. So can’t say about the measurements.
If you live in a very cold place, you can also use 1/2 tsp Instant yeast in this recipe for faster fermentation of the batter.
With 1/4 tsp yeast, the batter ferments slowly but you hardly get the flavour of yeast in the appam.
The batter consistency should be thinner than regular Dosa batter. Else it will be difficult to swirl the batter in the pan.
Click on the picture to save the recipe on Pinterest
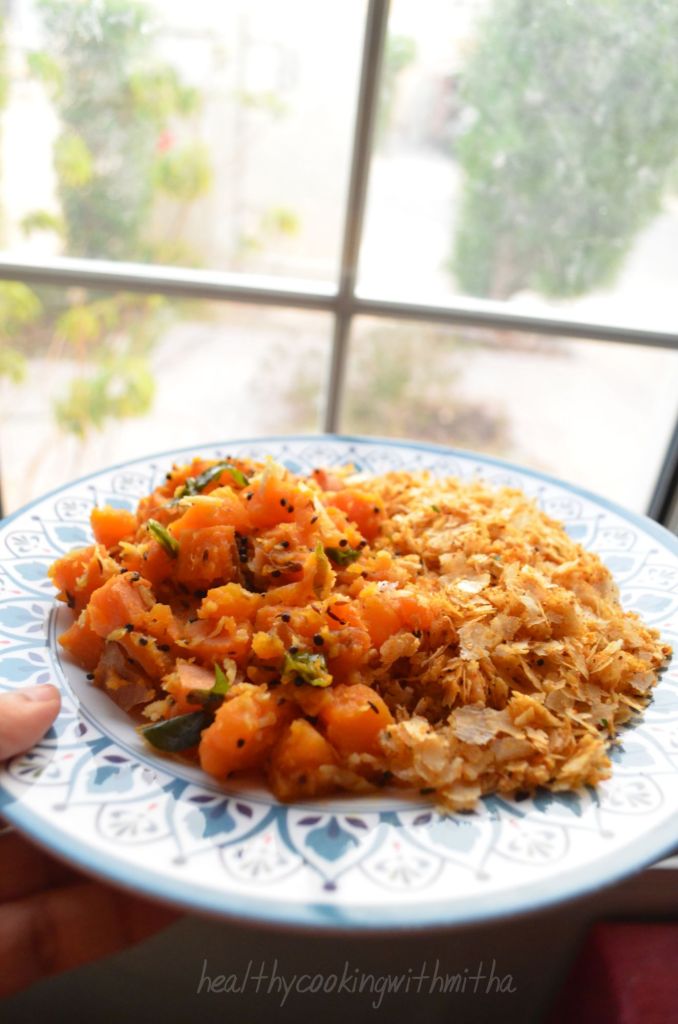
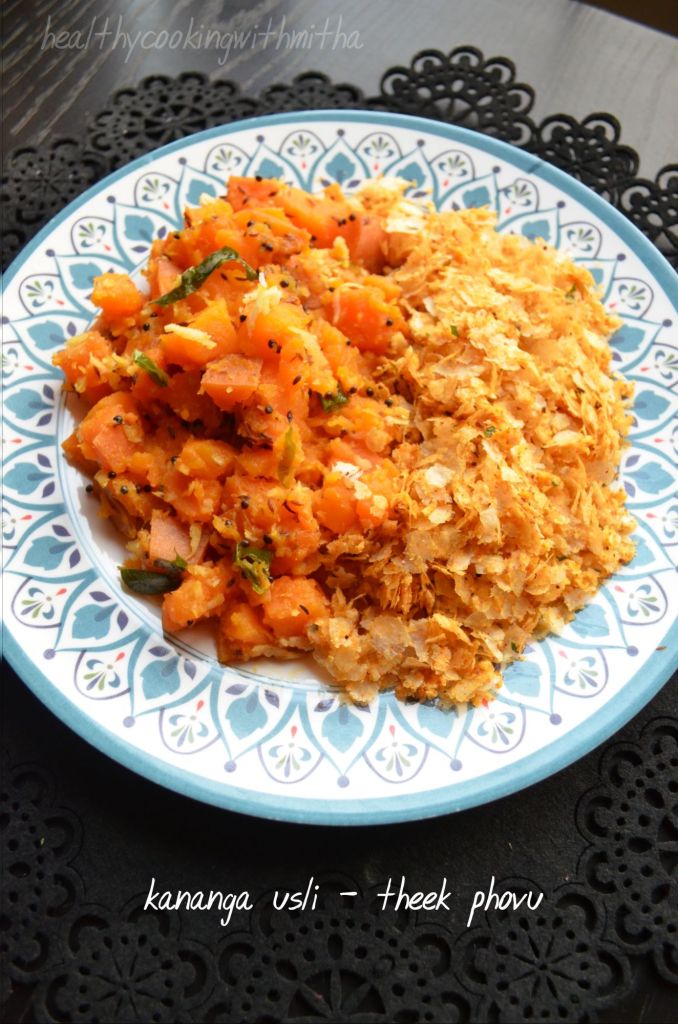
The weather here in Qatar is so good now that winters have started and the hungry me is even hungrier during evening time. 😍 Specially since I walk atleast for an hour, late in the evening, I make sure I have ample energy for that. 😄 And what’s more filling than our own age old combination of Kananga usli and theek phovu or sweet potato stir fry with spicy poha. ❤️
The mushy sweet potatoes with spicy and slightly crunchy poha makes for a heaven made pair making me go nostalgic, reminding me of my childhood when Amma and Anama used to make it for me. I was, am and forever will be a huge fan of our amchi food. ❤️
Nothing satisfies my tummy and soul more than Konkani delicacies. I have also realized that our food is so easy and quick to make along with being healthy and tasty too. ❤️
So here is me, sharing my favorite breakfast or snack dish. Hope you try and love it too. Happy and healthy cooking ❤️
RECIPE:
Ingredients:
For Sweet potato stir fry:
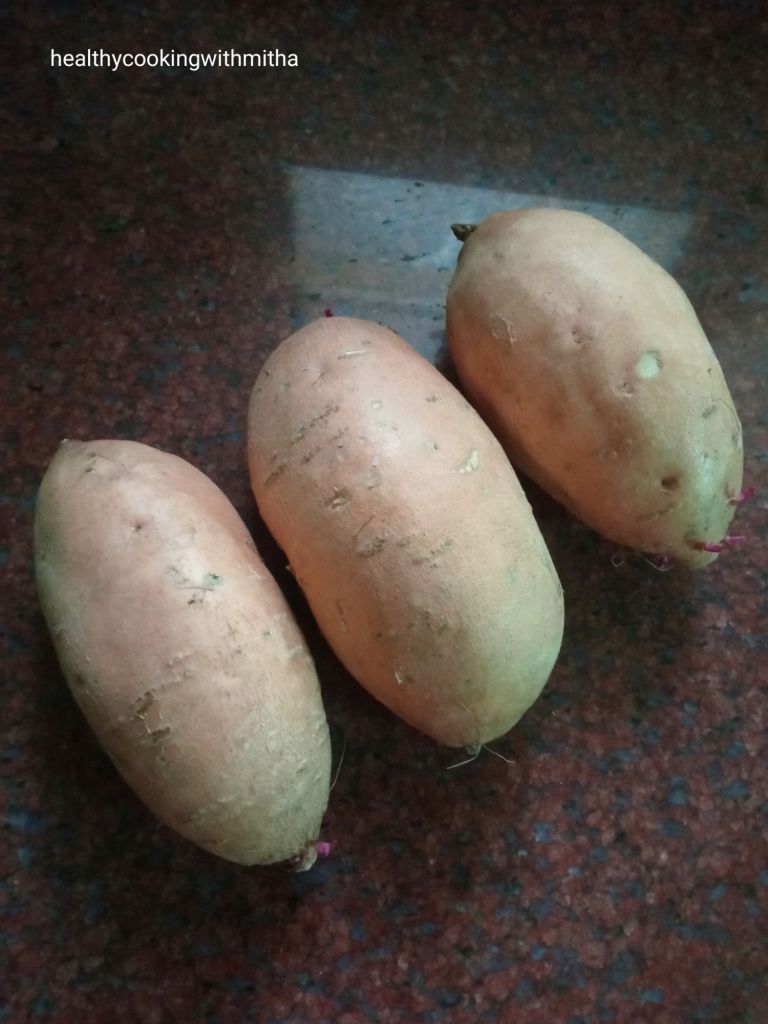
3 Medium sized Sweet potato
3 to 4 Green chillies
A sprig of curry leaves
2 tsp Mustard seeds
2 tsp Cumin seeds
Pinch of Hing or Asafoetida
1 Tbsp Jaggery powder
2 Tbsp Coconut oil
3 Tbsp freshly grated Coconut
Salt to taste
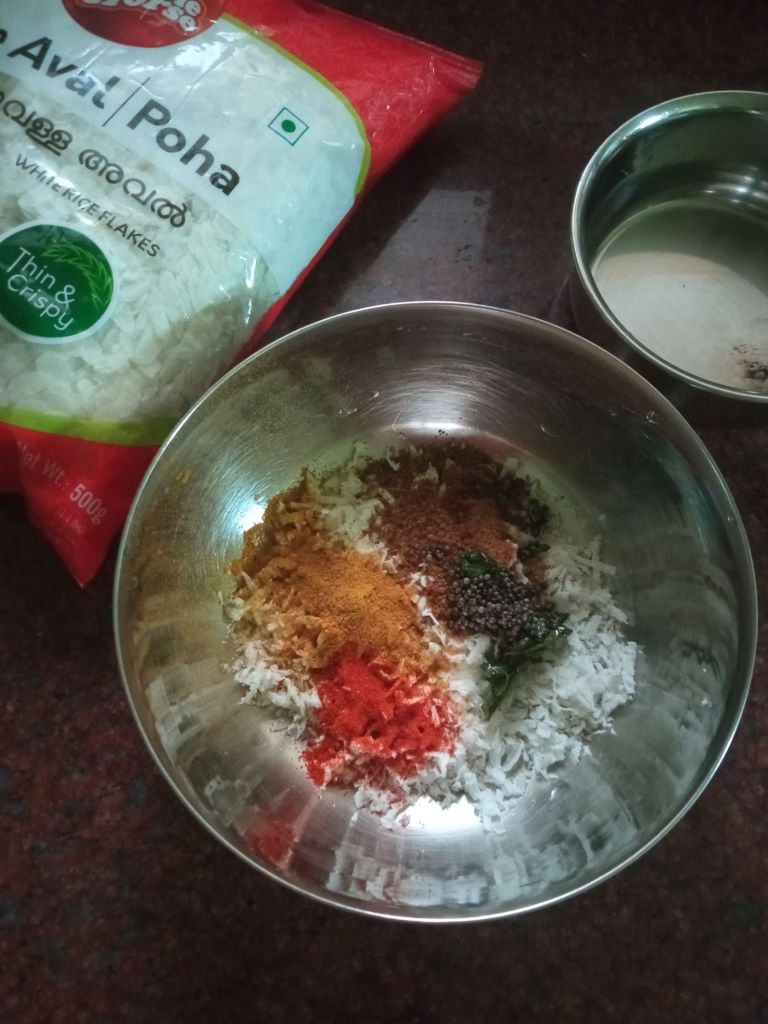
For theek phovu:
2 Cups Thin Poha/ Aval/ Flattened rice
1/2 Cup Freshly grated Coconut
2 tsp Coconut oil
1 tsp Mustard seeds
A sprig Curry leaves
2 tsp Sambar powder
1 tsp Red Chilli powder or to taste
1 tsp Jaggery powder
Salt to taste
Step by step recipe:
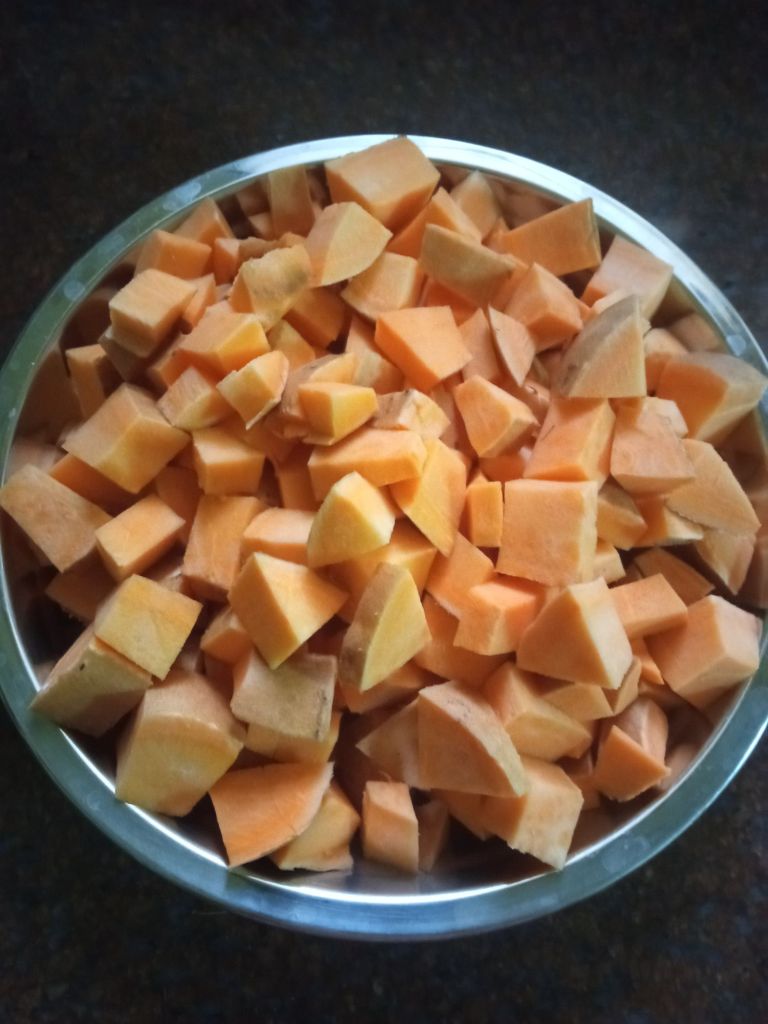
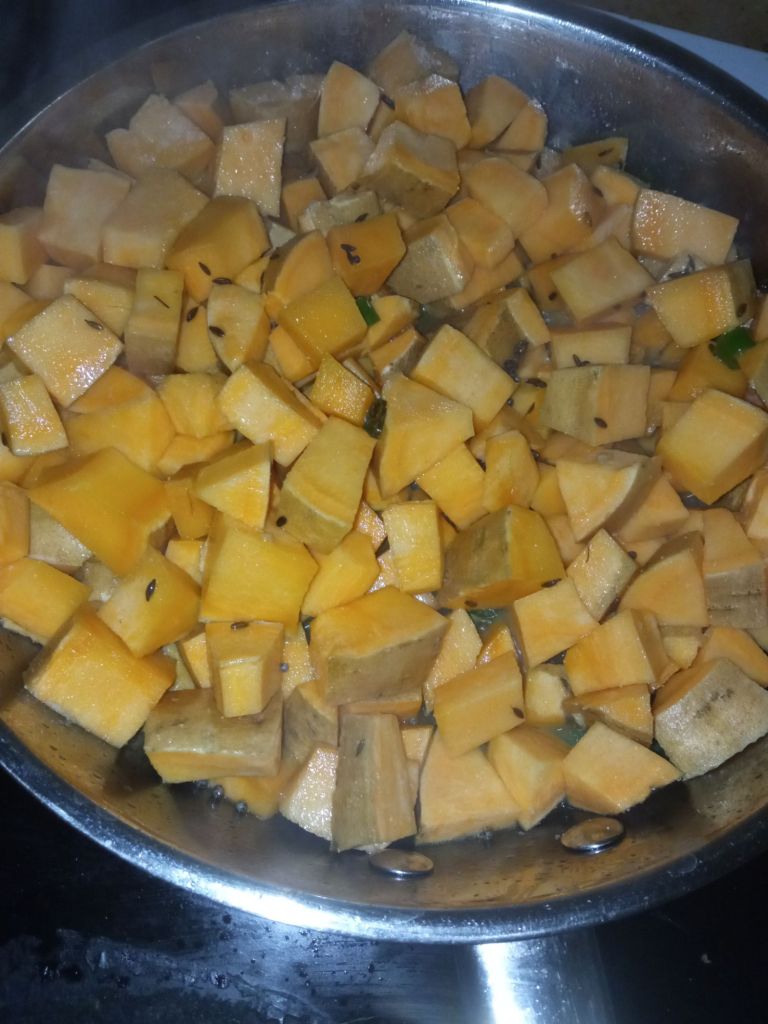
Take sweet potato as shown. Wash them well. Cut off the sides and cut into bite size pieces. I don’t peel it.
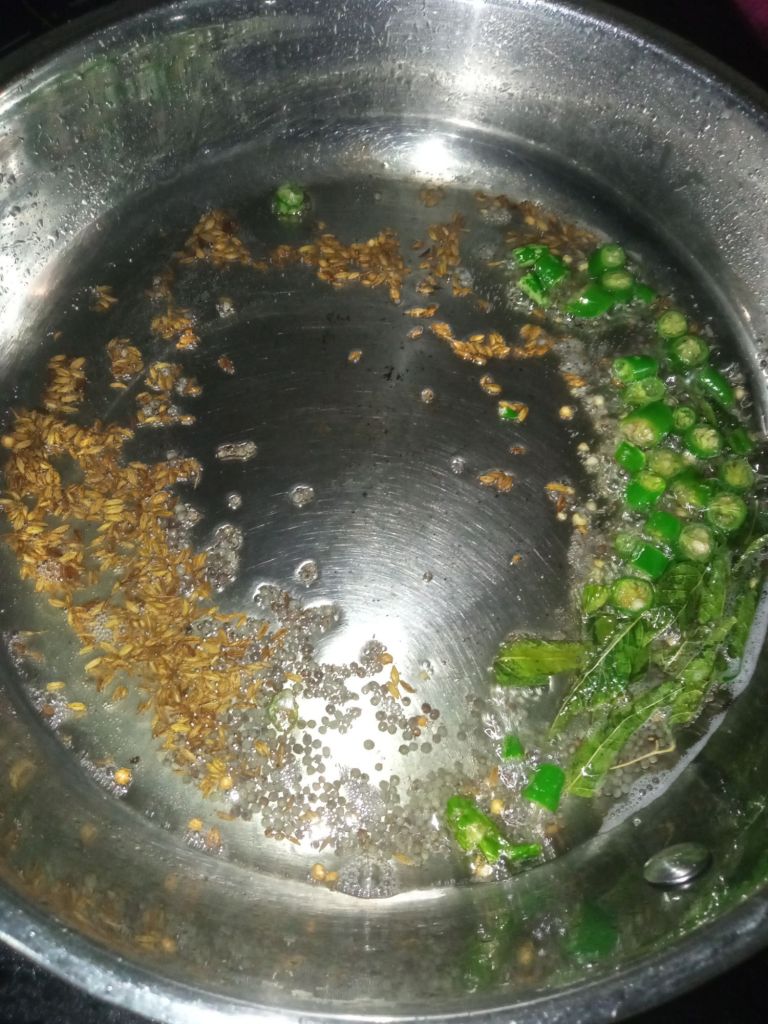
2. Now heat Coconut oil in a pan, add mustard seeds and cumin seeds. When mustard seeds splutter, add curry leaves and green chillies.
3. When green chillies start to change colour, add the chopped sweet potatoes. Mix well adding salt.
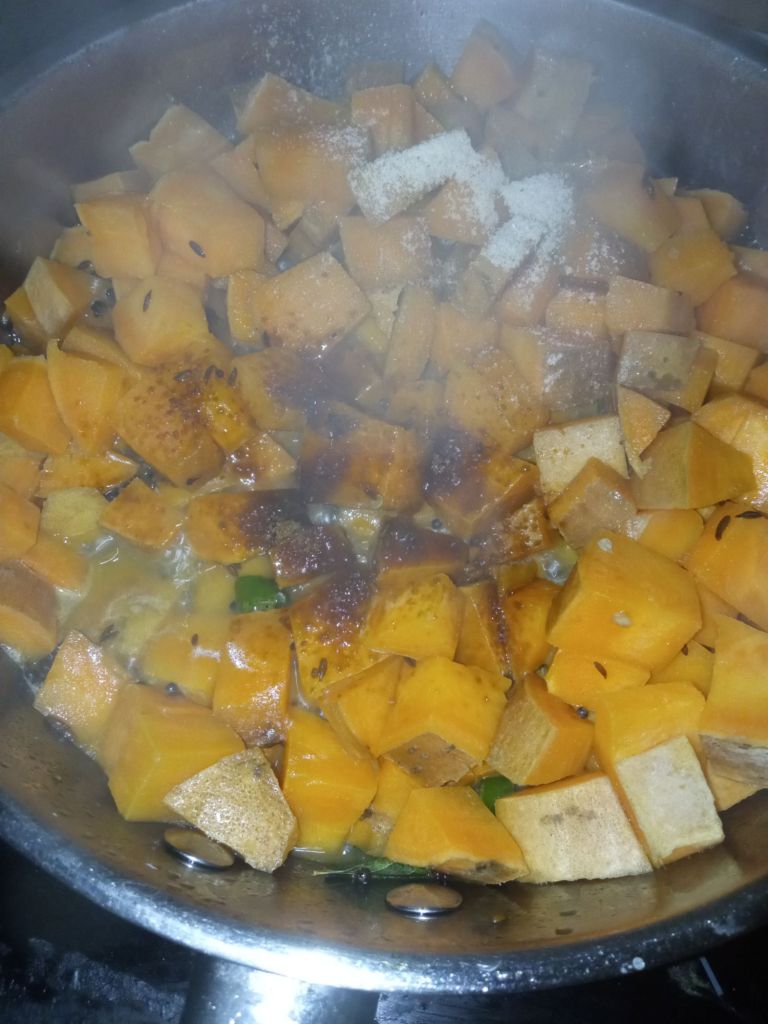
4. Add little water, cover and cook on medium flame till the sweet potatoes turn a little soft. Now add jaggery and hing powder.
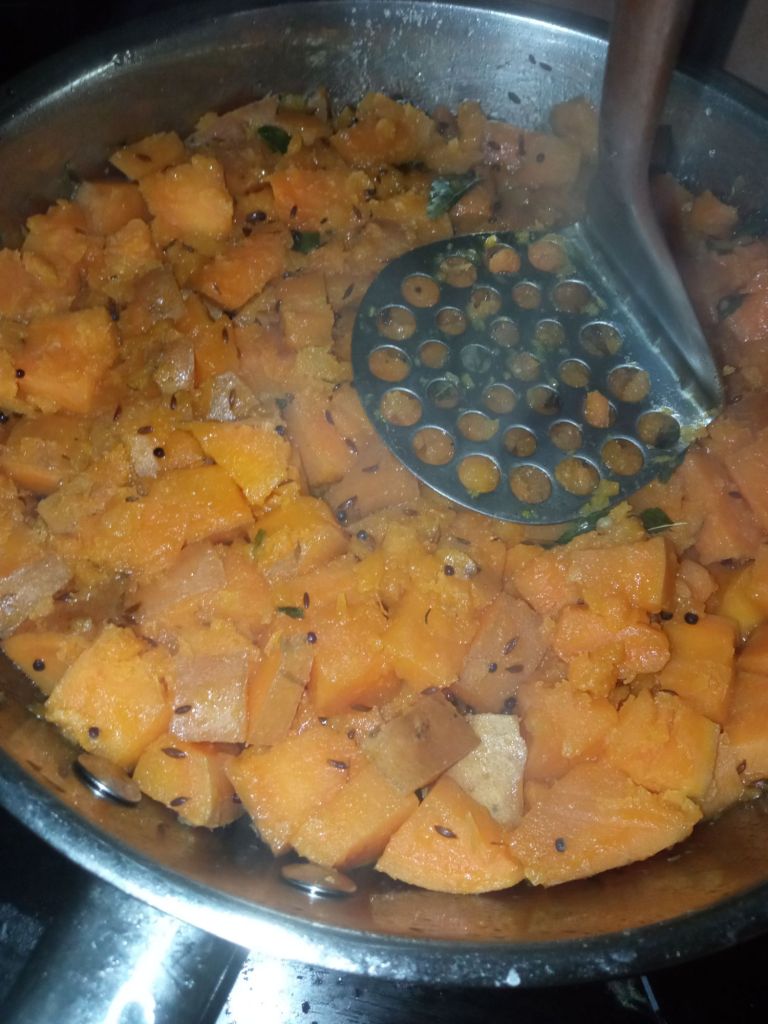
5. Mix again, cover and cook till the sweet potatoes turn soft. Mash using masher to make it into slightly mushy consistency. It’s optional but we love our usli that way.
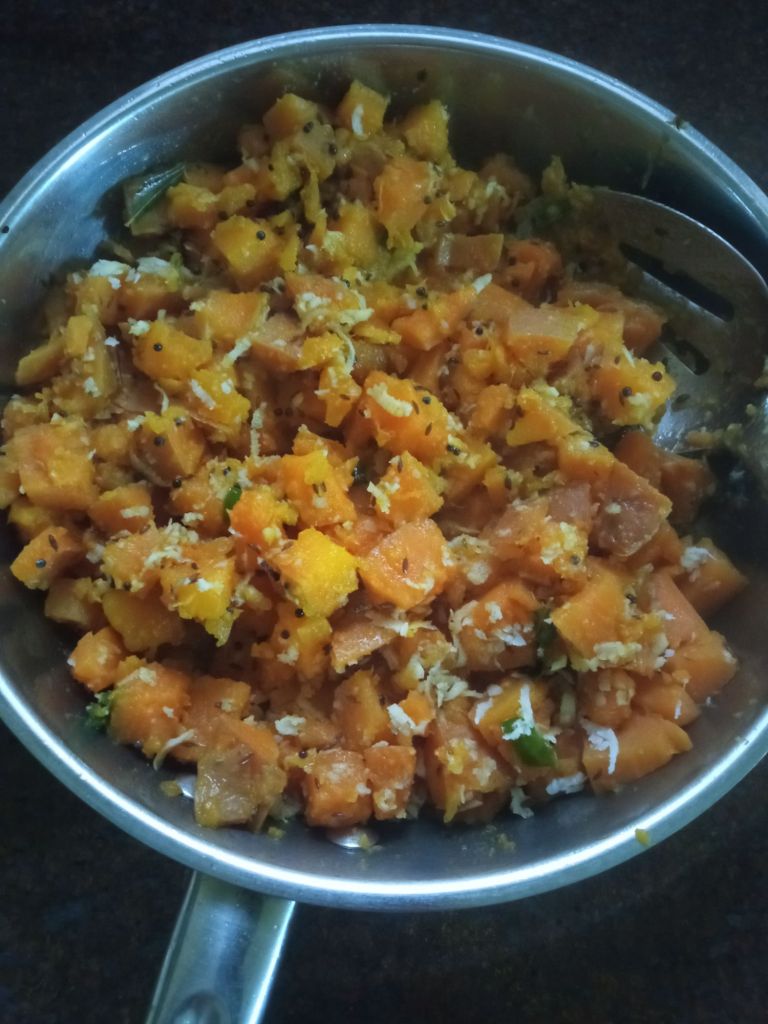
6. Remove from flame, garnish with fresly grated coconut and mix well.
Sweet potato stir fry or Kananga usli is done!
7. For the theek phovu or spicy poha, heat Coconut oil in a small pan and add mustard seeds and curry leaves. When the seeds splutter,remove from flame.
8. Now in a bowl, take freshly grated coconut, add the seasoning from step 7, sambar powder, red chilli powder, jaggery and salt.
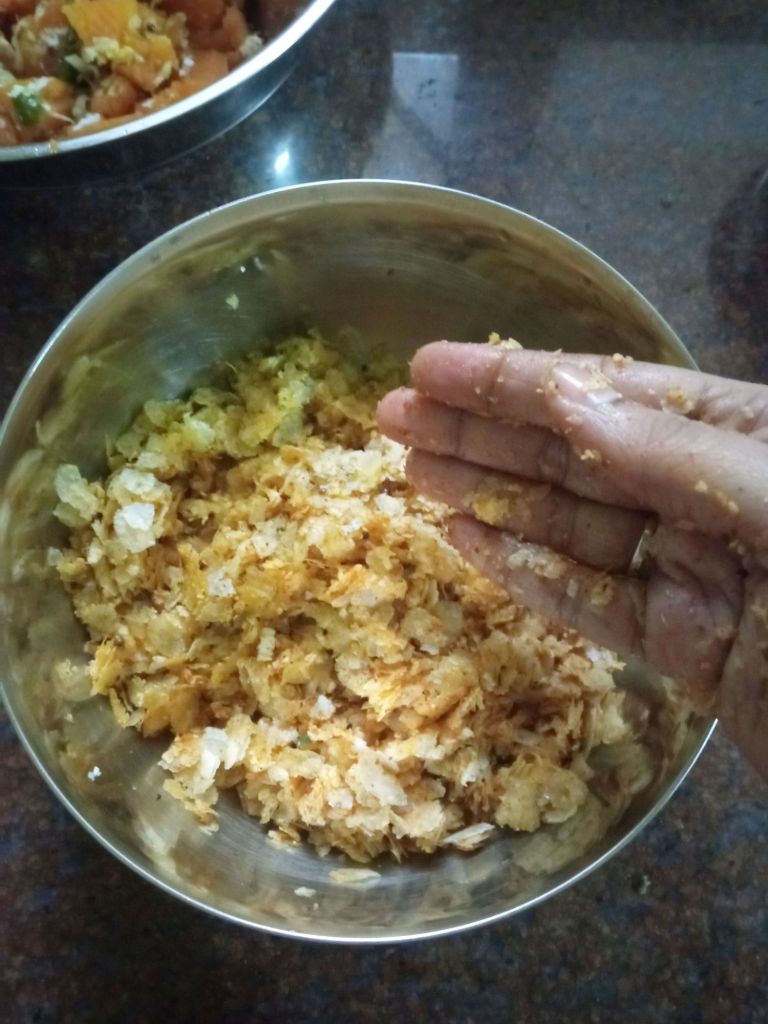
9. Now add the thin poha, one cup at a time and mix well crushing it lightly with hands.
10. Do a taste test to see if you need to add more red chilli powder, jaggery or salt.
Theek phovu is done too!
Click on the picture to save the recipe on Pinterest
Enjoy Kananga usli with theek phovu. This sweet spicy combination will win your heart for sure ❤️
Notes:
I live in Qatar and we get Egyptian sweet potatoes here. The size is medium. If using large ones, one large will suffice if making for two people.
I don’t peel the sweet potatoes as the peel is nutrient dense. Also, the peel is very thin here. So we don’t realize while eating.
You can replace sambar powder with Rasam powder too in theek phovu recipe.
Make sure to use only thin poha and not thick poha for this recipe.
Click on the picture to save the recipe on Pinterest
Breakfast is the most important meal in the day for me and I make sure it’s as healthy and filling as possible. Usually it’s any kind of dosa or idli but on days when the dosa batter is less, upma is my go to breakfast. Quick to make, quicker to finish, I love upma and often wonder why people make fun about it that it’s their least favorite breakfast. 🤔
Today morning, I felt peaceful as kids left for school after weekend 😀 and as I finished my morning walk, I thought of making this Barnyard millet upma. Since I was already feeling peacefully happy, I decided to utilize this moment to blog the recipe too. It has been long I am making this upma for breakfast and evening snack but never took pictures.
I have been substituting semolina or rava with millet for upma since sometime now as it’s more filling and healthy too. Also, I make pulav with millets too instead of rice for a change and love how delicious it comes out. Will share the recipe soon.
Hope you all try this simple yet tasty Barnyard millet upma. I am sure you will like it. Happy and healthy cooking ❤️
RECIPE:
Ingredients: { Serves 2 to 3 people }
1 Cup = 240 ml
{ Barnyard Millet is called Varai in Konkani, Kuthiraivali in Tamil, Sanwa in Hindi and Kavadupullu in Malayalam }
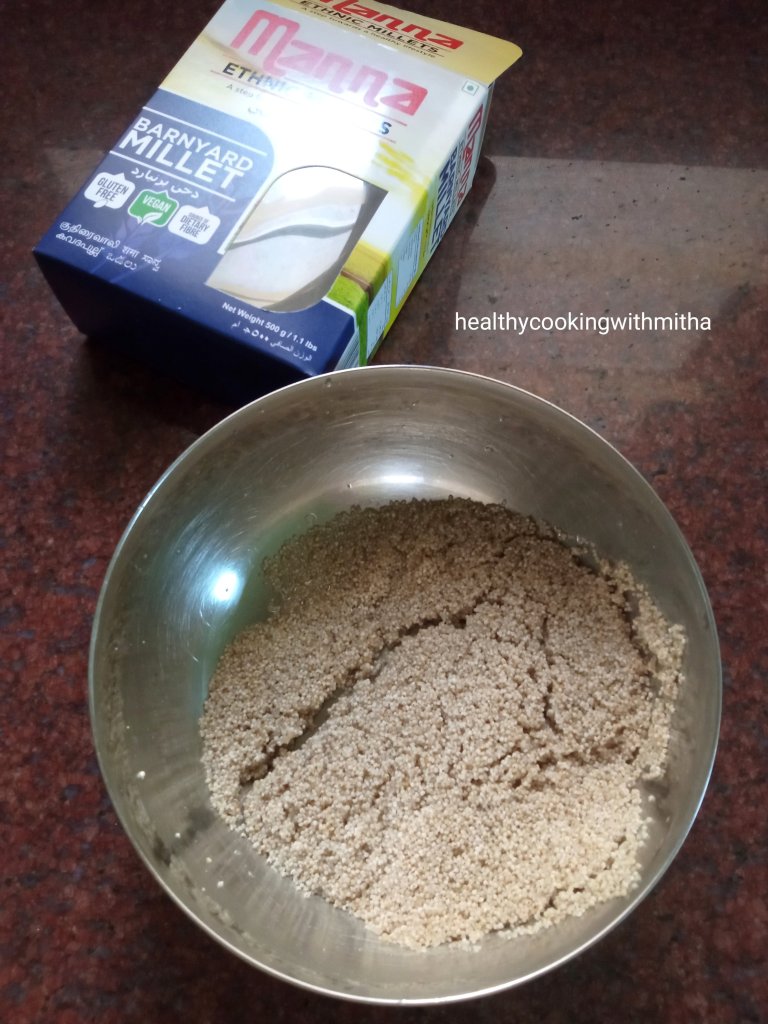
1 Cup Barnyard millet
3 Cups Water
For seasoning:
1 Tbsp Ghee
1 Tbsp Coconut Oil
2 tsp Mustard seeds
2 tsp Cumin seeds
A sprig of Curry leaves
3 Green chillies
6 to 8 Cashews
Salt to taste
Freshly grated Coconut for garnish
Step by step recipe:
1. Take 1 Cup of Barnyard millet in a bowl and wash it well. Remove water and keep aside. I use Manna brand of millet as it is readily available here in Qatar.
2. Now heat ghee and oil together in a pan. You can use only oil too but ghee adds a wonderful flavour to the upma. Add mustard seeds and cumin seeds. Once mustard starts spluttering, add curry leaves, green chillies and cashews. Fry till cashews turn light brown in colour.
3. Now add the washed millet and roast for few seconds. Now add salt and mix well.
4. Add hot water and mix together with the ladle.
5. Lower the flame to medium, cover and cook till the water gets absorbed completely by the millet and the mixture turns dry (takes about 10 mins) . Check if millet is cooked by mashing between fingers. Garnish with freshly grated Coconut. Serve hot.
Serve Barnyard millet Upma as it is or with peas curry like I have served and with chutney powder. Coconut chutney also goes well with this upma.
Click on the picture to save the recipe on Pinterest
Notes:
* I have used Manna brand of Barnyard millet as it is readily available here in Qatar in all major supermarkets. I get mine from Lulu or Grand mall.
* 1 Cup Barnyard millet needs atleast 3 Cups of water to cook. Keep hot water ready beforehand and add as soon as you roast the millet in the seasoning.
* Making upma with millet takes more time than regular upma with semolina or sooji as millet takes atleast 10 mins to cook but it is more filling and healthier.
* You can also add vegetables to make it vegetable upma.
Click on the picture to save the recipe on Pinterest
If there is one ingredient that is always available at my house, it’s Oats. My son loves Oats Vegetable Bhakri and my daughter loves Instant Oats Idli. Both these dishes can be quickly made within 30 mins and is a great help when kids demand for food ( When Ammaaa, hungryyy calls come unexpectedly 😁).
Similar is this Oats appo which I make regularly for my son when he comes back from school. Though I have shared all the recipes that I make with oats on my Oats recipes Collection page, this one recipe was long pending. So today when I made it, I thought of sharing it here too.
This is one delicious appo with bites of onion, capsicum, green chillies and carrot, crispy on the outside and soft inside. Do try it for breakfast or evening snack. If you don’t have appe pan, you can make small dosas with this batter too, like little bhakris. Comes out delicious as well. You will surely love it. Happy and healthy cooking ❤️
RECIPE:
Ingredients: { Makes around 21 small appos }
1 Cup = 240 ml
1 Cup Instant Oats ( I use saffola or quaker brand )
1 Tbsp Rice flour
1/2 Cup Curd or Yogurt
Approx 1/2 Cup Water
1/4 Cup finely chopped Onion
1/4 Cup finely chopped Capsicum
1/4 Cup finely grated Carrot
3 finely chopped Green chillies or to taste
2 Tbsp finely chopped Coriander leaves
1/4 tsp Turmeric powder
Salt to taste
Oil or Ghee to cook the appos
Step by step recipe:
1. Take instant oats, rice flour, turmeric powder and salt in a bowl. Add yogurt.
2. Add water, little by little to make a thick batter. For 1 Cup Oats, it takes 1/2 Cup Curd and 1/2 Cup Water for me. But will change according to the brand of oats and the consistency of Curd. Just make a thick batter and not thin one.
3. Now add finely chopped onion, capsicum, carrot, green chillies and coriander leaves.
4. Mix well. Batter is ready to make appos instantly.
5. Heat the appo pan or Paniyaram pan and when hot, reduce the flame to medium. Now add ghee or oil on the holes of the pan. Now add a spoonful of batter into each of the holes. Don’t overfill the holes.
6. Now cover and cook on medium to low flame till the surface cooks. Now add little ghee or oil and flip over the appos carefully. Cook again till the inside cooks well and underside turns crisp.
7. Remove and serve with a chutney of your choice.
Notes:
* I serve with Coconut chutney or Hing chutney. Here I have served with Hing chutney. Just grind together 1 Cup Coconut with 3 Red chillies, A pinch of Hing, 1 tsp Tamarind paste, salt and water to smooth paste.
Click on the picture to save the recipe on Pinterest
* Two important points with these appos are:
1. Don’t make a thin batter. It should be thick.
2. While making appos, make sure to add only less batter in each hole and cook on medium to low flame so that the appos cook till the inside. Also when you flip, tap slightly so that the under surface gets crisp.
* Use a skewer or the backside of a small spoon to check if the appos are done from inside. If it comes out wet, cook again on low flame. Once done, the skewer will come out dry.
* If you don’t have appe pan, you can make small dosas with this batter too, like little bhakris. Comes out delicious as well.
* As we are not adding any gluten in the form or Rava or semolina, nor are we adding baking soda, these appos won’t be extra big or fluffy but they are still soft inside and crispy outside. Tastes really delicious due to veggies inside it.
* I regularly make different kinds of dishes using Oats like Dosa, Idli, Bhakri, Paratha and Cake. You can check them in my Oats recipe compilation page.
Click on the image to save the recipe on Pinterest
Kids’ schools have started after Eid holidays and days have started flying again. Waking up early, preparing their snack boxes, sending them to school, morning walk, cleaning the house, relaxing till they come back and after that hearing about their day at school, teaching them, walking again in the evening while they play outside, finally preparing for their next day at school and putting them to sleep.
Days are super busy but I would not want it any other way. I have realized being busy is actually great than sitting idle and overthinking. So it’s a blessing in disguise for me. ❤️
In midst of this, is cooking which I love and which brings me happiness. I listen to bhajans and songs while cooking which makes it so peaceful. Music is truly therapeutic. ❤️
Apart from breakfast, lunch and dinner, there is one meal of the day which is most difficult for me – Snack time. Finding a quick, healthy and tasty snack which the kids also love is very hard. So when I tried this Ragi ada inspired by my Kochi memories of the regular ada and it came out so well that we all loved it, I knew I had to share it with all of you too. ❤️
I don’t know why some people think Ragi is bitter. Ragi is such a tasty millet and I use it regularly in my cooking. It is tasty and very healthy too. Have shared all the recipes that I make using Ragi in the notes section towards the end. Do try and I think if you follow the recipe well, adapt it in your cooking, in few days, you will love Ragi too, just like we do. ❤️
Happy and healthy cooking ❤️
RECIPE:
Ingredients: { to make about 5 adas }
1 Cup = 240 ml
Banana leaves to make the ada
To make outer covering:
1 Cup Ragi flour ( finger millet powder)
Salt to taste
Approx 1 Cup hot water
To make inner filling:
3/4 Cup Jaggery
3/4 Cup freshly grated Coconut
1/4 tsp Cardamom powder
Step by step recipe:
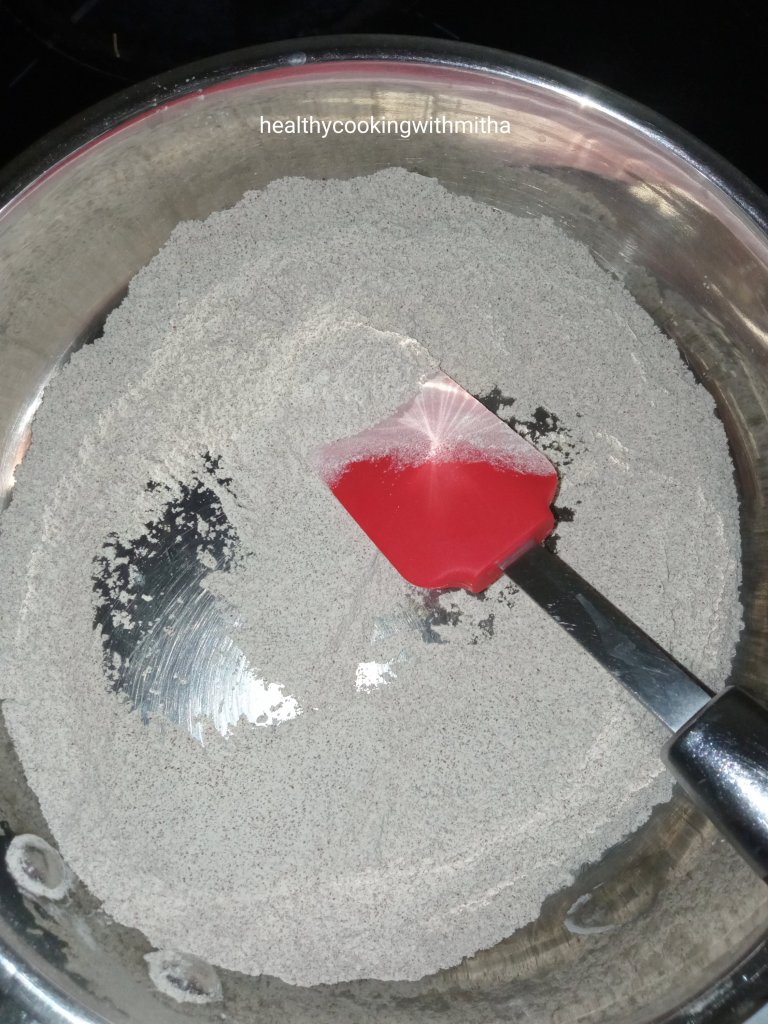
1. Dry roast Ragi flour ( do NOT add oil while roasting) on medium flame till you get an aroma of the flour and it changes colour to a darker tone.
Note: Even if you have roasted ragi flour with you, dry roast for few minutes as it enhances the flavour a lot.
2. Transfer it to a bowl. Add salt.
3. Now add hot water, little by little. Mix as you add water.
4. As you add hot water, little by little, after mixing, the dough will look like this. Do NOT add water after this.
5. Now the dough will be warm. Using hands, mix together to form a smooth and soft dough.
6. Now make the inner filling. Take coconut and jaggery in a pan. Heat it together on medium flame till the jaggery melts and coconut will stick to jaggery. Remove from flame. Add Cardamom powder. Mix well.
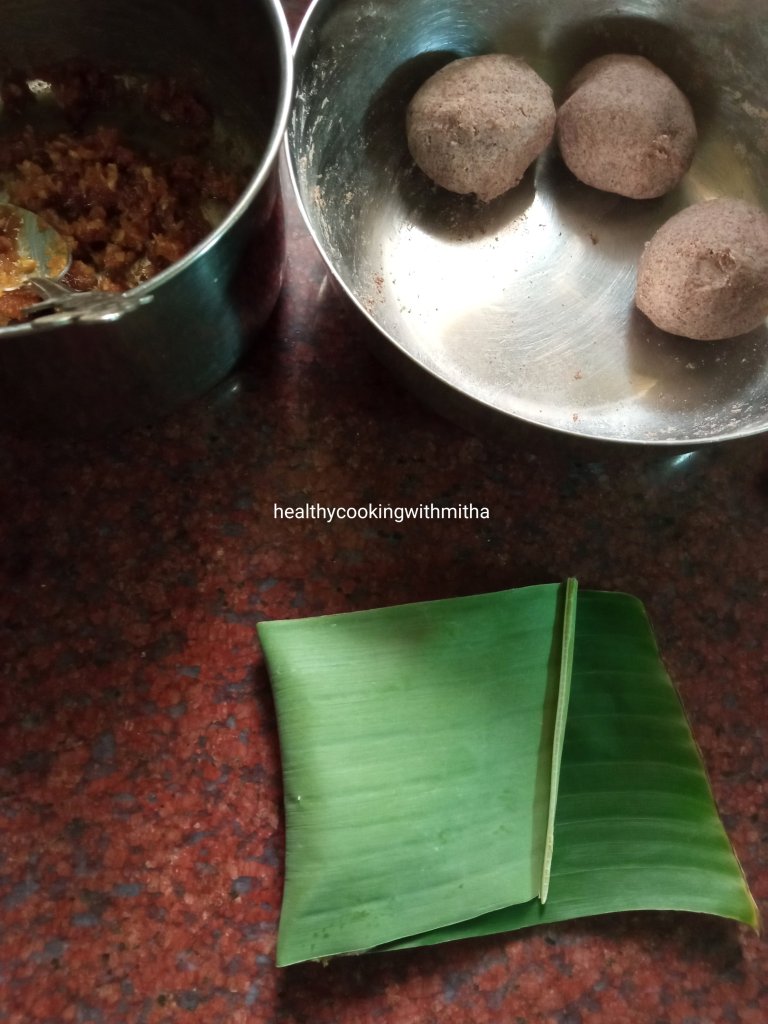
7. Now cut the banana leaf into rectangle pieces as shown. Clean it with water and wipe it dry.
Also divide the ragi dough into equal sized balls. If you have taken 1 Cup (240 ml) of Ragi flour, you will get 5 balls.
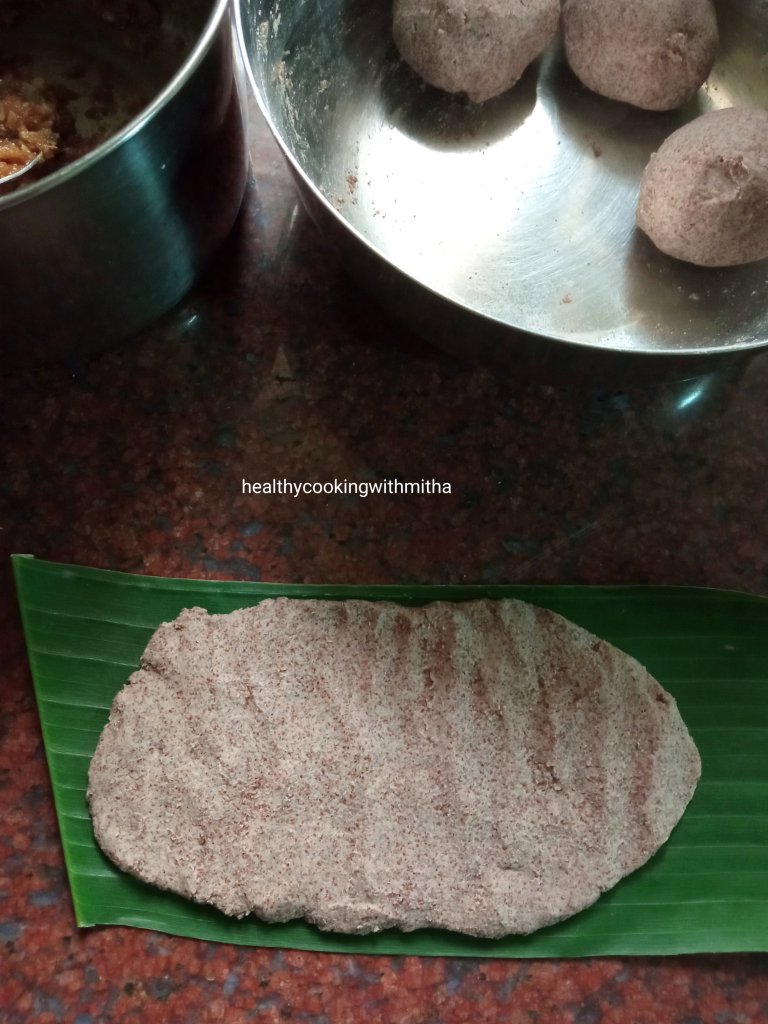
8. Take a ball of ragi dough and spread it using slightly wet fingers as thin as possible.
9. Take a spoonful of the filling and place it on one half side. Spread it on the half side using spoon as shown in the image below.
10. Fold the banana leaf while closing both the halves as shown.
11. Seal the edges of the dough using fingers so that the filling does not come out.
12. Repeat the same with the rest of the dough balls. Place it on a idli steamer.
13. Steam for 20 to 25 mins on high flame till the ada cooks thoroughly. Remove from flame. Allow it to cool for 5 mins.
14. Now peel off the banana leaf, discard it and enjoy the warm Ragi ela adas. 😍
Click on the image to save the recipe on Pinterest
Just look at the inside of the ada. Sweet, juicy and so delicious 😍
Click on the image to save the recipe on Pinterest
Notes:
* As you can see from the above picture, the ada is of the right thickness and also steamed fully. This is due to spreading the dough thin over the banana leaf and also steaming for atleast 20 mins.
* Even if you have roasted ragi flour with you, dry roast for few minutes to get perfect aromatic ragi adas.
* Do use only hot water while preparing the dough. It took me around 1 Cup hot water for 1 Cup Ragi flour. Add only 1/4 Cup at a time and mix well till you get the dough as in step number 4. Then mix using hands to form a smooth dough.
* Don’t add a lot of water while making dough. It will be difficult to spread if dough is too soft.
* For 1 Cup Ragi flour, 3/4 Cup coconut and 3/4 Cup jaggery made the right filling for me. If you add a lot of filling, it will be difficult to seal the edges. So add only a spoonful to cover half of the ada.
* I have not made this without banana leaves. So can’t say the alternative to it. Spreading the dough on the leaf is easy and the ada turns aromatic too. So try to get the leaves if you can.
* These adas are best eaten soon after they are steamed but tastes yummy even after few hours too. So you can carry it in tiffin box and during travel too.
* A similar recipe with coconut jaggery filling is this Kerala style Nendrapazham nirachathu or stuffed Nendran Bananas..
Click on the image to save the recipe on Pinterest
As a kid, whenever my Anama (grandmother) or Amma made idlis, I would ask them to keep some extra to make idli usli as breakfast for next day. The super soft hing flavoured idli usli with bites of green chillies in it was, is and will always be one among my most favorite breakfast. Childhood nostalgia. ❤️
Now in my kitchen, where I am the manager 😂😂, I purposely make a whole batch of idlis extra just to savour idli usli the next day. My family too likes it ( Thank God! 😁), so two days breakfast is set when I make idlis.
Even though I make it every couple of weeks, it never occured to me that I could share this easy recipe with all of you too. But yesterday when I was about to make it, the idlis in my steel case looked so beautiful that as I admired it, I thought why not share this recipe on the blog too. If it helps even one of you, I will be very happy. ❤️
So here’s me sharing this super easy, quick and very tasty recipe of Idli Usli, Konkani style. Hope you all try it and remember me while enjoying it. Happy and healthy cooking! ❤️
About 10 to 15 Leftover idlis (depends on how much you have)
1/4 tsp Hing/ Asafoetida
1 tsp Sugar
Salt to taste (be mindful as idlis already have salt)
For seasoning:
2 Tbsp Coconut oil
2 tsp Mustard seeds
2 tsp Cumin seeds/ Jeera
2 tsp Urad dal
A sprig of Curry leaves
3 to 4 Green chillies
Freshly grated Coconut for garnish
Step by step recipe:
1. Leftover idlis : I keep them in the refrigerator the previous night. Since they are cold and slightly hard, it’s easy to crumble them. You can also use idlis that are at room temperature. Fresh idlis need to be cooled completely before making usli.
2. Crumble them using hands as shown in the picture. Add salt ( be mindful as idlis already have salt) , sugar and hing.
3. Mix everything well and evenly with hands. Keep aside.
4. Heat coconut oil in a pan. Add mustard seeds. Allow it to splutter. Now add cumin seeds, urad dal, curry leaves and green chillies. Fry on medium flame till urad dal turns brown.
5. Now add the crumbled idlis and mix well on medium flame. Cover and keep for 5 mins.
6. Garnish with freshly grated coconut and serve hot. Done 🙂
Click on the image to save the recipe on Pinterest
Notes:
* If you don’t have leftover idlis, you can make the same recipe using Thick Poha. Only addition is peanuts in the seasoning which needs to be fried till crisp. Rest recipe is same. I make this regularly for a light and tasty evening snack. In Konkani it is called Phova Usli.
* I make regular idlis using this recipe of Mallige idlis. They come out super soft and very tasty.
* Since I love Idli Usli, I make an extra batch of Mallige idlis and refrigerate. Next day morning for breakfast, I make Idli usli.
* In this recipe, you can adjust the seasoning according to how many idlis you have leftover. I even make the usli when I have 6 to 8 idlis. It serves two people.
* Do remember to add less salt as idlis already have salt in them. Hing gives a wonderful aroma in the usli. So don’t skip it. Sugar gives a good balance in flavours too. Just a little is enough.
* You can also check these seasoned breakfast recipes that I make often:
Click on the picture to save the recipe on Pinterest
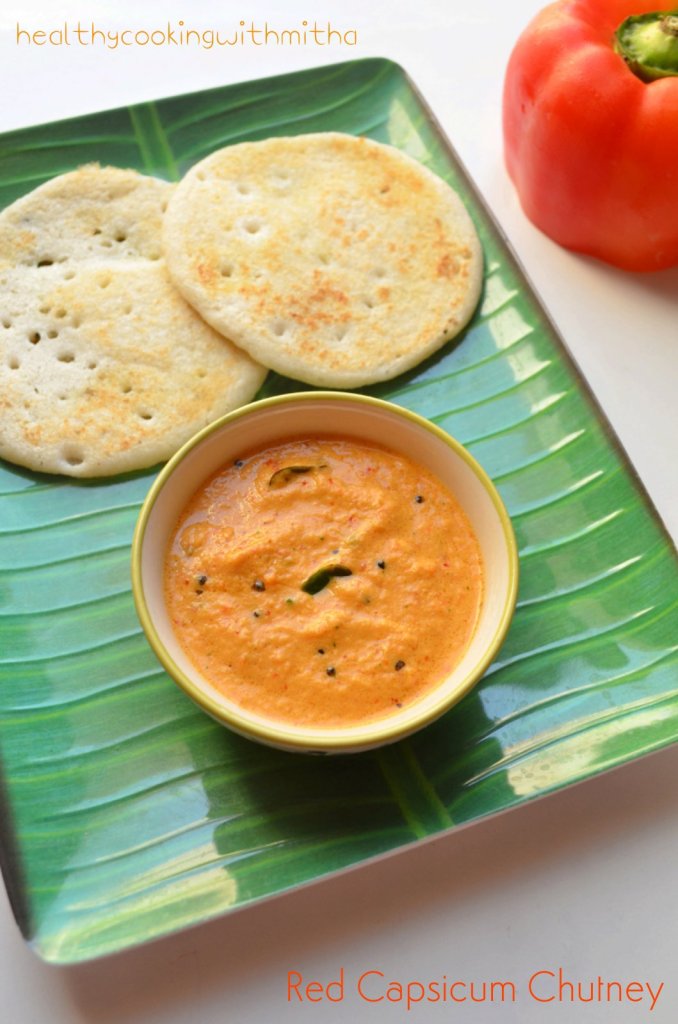
As many varieties of dosas and idlis that I make, I love to try different varieties of chutneys as well. Spicy chutneys are my favorite as they make such an amazing accompaniment to dosas. So when I tried this red capsicum chutney recently, it instantly became my favorite as it turned out spicy and delicious.
Even though red capsicums are sweet, the peanuts and red chillies give a wonderful flavour to this chutney which makes it a very tasty dip for dosas. A definite must try if you get your hands on red capsicums. ❤️
Apart from this chutney, I also make Tri colour Capsicum Salsa and fried rice with these capsicums but I must say, red capsicum chutney has won my heart with it’s flavours. Hope you all try and love it too. Happy and healthy cooking ❤️
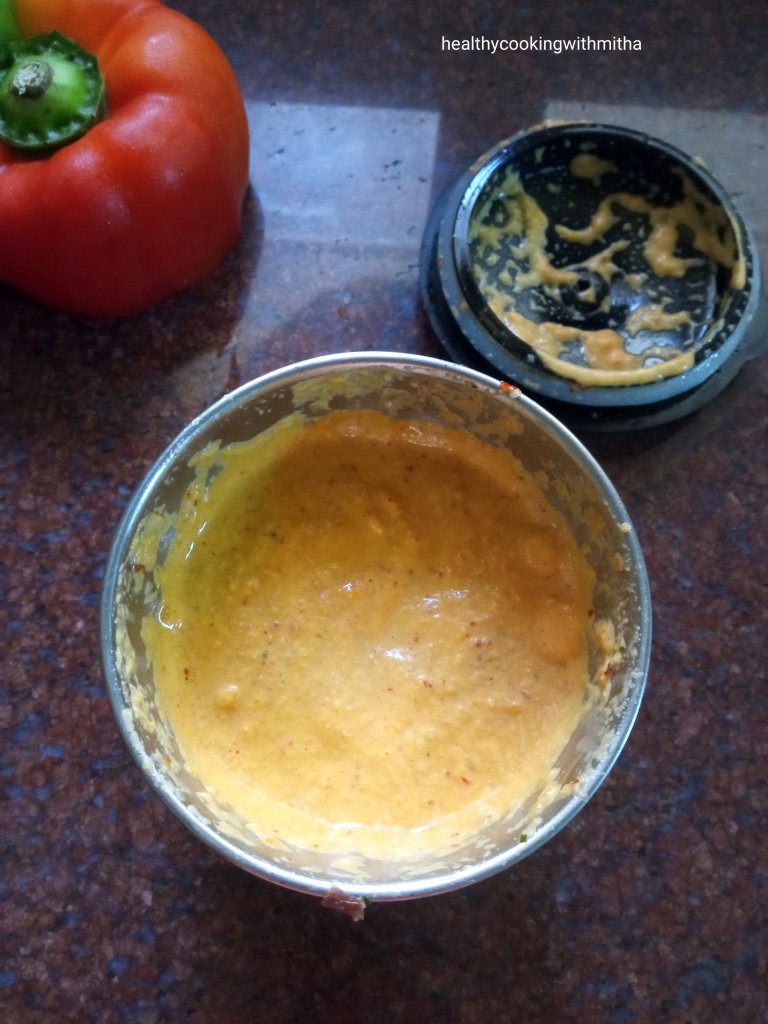
1. Heat 1 tsp oil in a small pan and fry peanuts in it on medium flame till the peanuts change colour and start to open slightly.
2. Remove it in the mixer jar and let it cool down.
3. In the same pan, heat 1 tsp oil and add roughly chopped onions, curry leaves, red chillies and roughly diced Red Capsicum. Fry well till onions turn translucent and capsicum turns soft.
4. Now transfer this to the mixer jar too and let it cool down.
5. Add salt and little water as needed to grind it to a smooth paste.
6. Now heat 1 tsp oil in the pan and add mustard seeds and curry leaves. Let mustard seeds splutter. Now remove from the flame and add the ground chutney to the pan. Mix well. Done 🙂
7. Serve with dosas or idlis. Tastes so yum ❤️
Click on the picture to save the recipe on Pinterest
Notes:
* I have served it with Methi dosa or the regular way I make my dosas. Makes for such a great combination.
* Don’t add more than two spoons of peanuts as otherwise the chutney will have a nutty flavour than that of red capsicum.
* This ratio of 1/2 capsicum, 2 spoon peanuts, 1 medium onion and 4 Red chillies works perfectly for me. If you prefer less spicy, add 3 red chillies and then you can adjust the spice using red chilli powder.
* This chutney is very unique in it’s taste due to the sweetness of the capsicum, spice from the chillies and the nuttiness from the peanuts. A must try if you love different flavours in chutneys.
* Since oil is used thrice while frying and seasoning, add very little each time so that the chutney does not turn oily. You can skip oil while frying if you prefer less oil.
* This chutney is based on my recipe of Peanut Onion Chutney which tastes amazing as well.
Click on the image to save the recipe on Pinterest
As I have already mentioned in my last post of Methi Theplas , during Winter in Qatar ie from October to March, most residents here grow many veggies and flowers in their garden. It’s a delight to see the greenery in front of all houses, specially where we live as it’s away from the main city.
Along with my husband who loves gardening, we are lucky to have neighbours who grow and share their produce with us too. One among the veggies that grows well here is white Radish. Look at these freshly plucked ones given to me by my neighbour who grew it with love. 💚
And as usual, whenever I get any veggie, I first see how it can be fed to my kids in a way that they like it. After my success with Methi Theplas and Bottlegourd Theplas, I decided to add these radishes as stuffing into parathas and imagine my happiness when it got gobbled away by both my little rabbits. 😍😍
So nowadays, whenever I get radish, I make these Mooli Parathas with it and as it tastes same like Paneer Parathas, kids never realize, it’s a vegetable that’s going inside them.
I had to share this with all of you and hence clicked photos when I made it recently. Hope you all try and like it. Happy and healthy cooking ❤️
RECIPE:
Ingredients: { Makes about 6 Parathas}
(1 Cup = 240 ml)
2 Cups Whole Wheat flour/ Atta
3 medium sized white Radishes (3/4 Cup gratings)
2 Tbsp finely chopped Coriander leaves
1/4 tsp Turmeric powder (haldi powder)
1/2 tsp Cumin powder (jeera powder)
1/2 tsp Garam Masala powder
1 tsp Red chilli powder
Salt to taste
Ghee to cook the parathas
Step by step recipe:
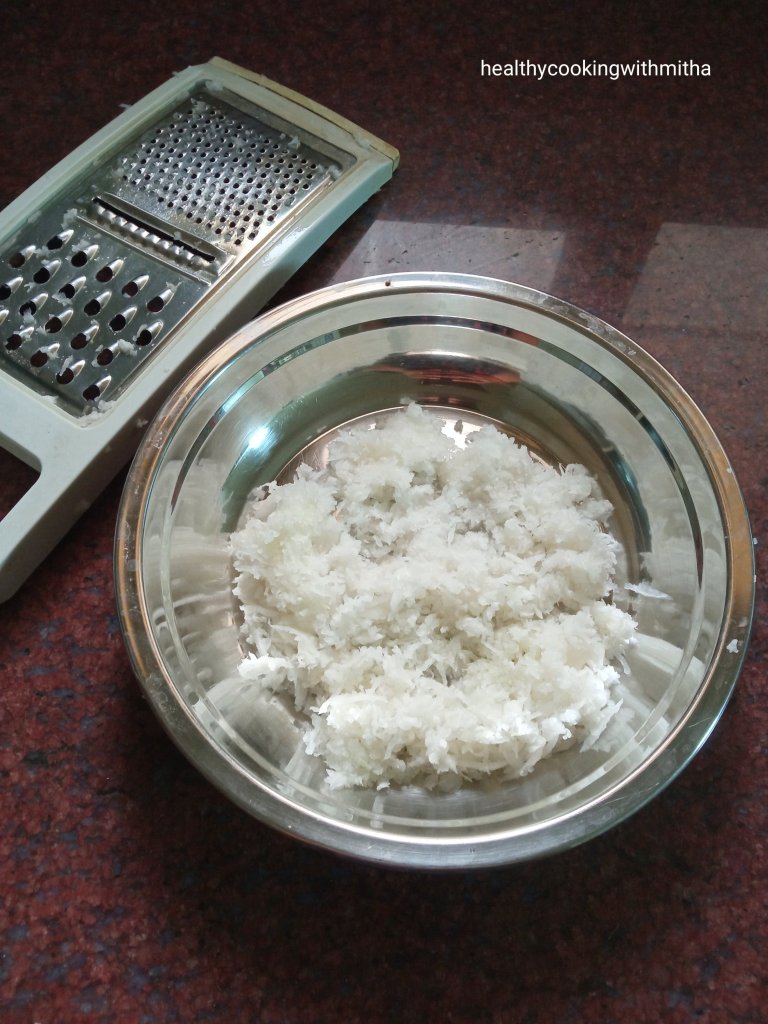
1. Peel the radishes and grate it finely as shown.
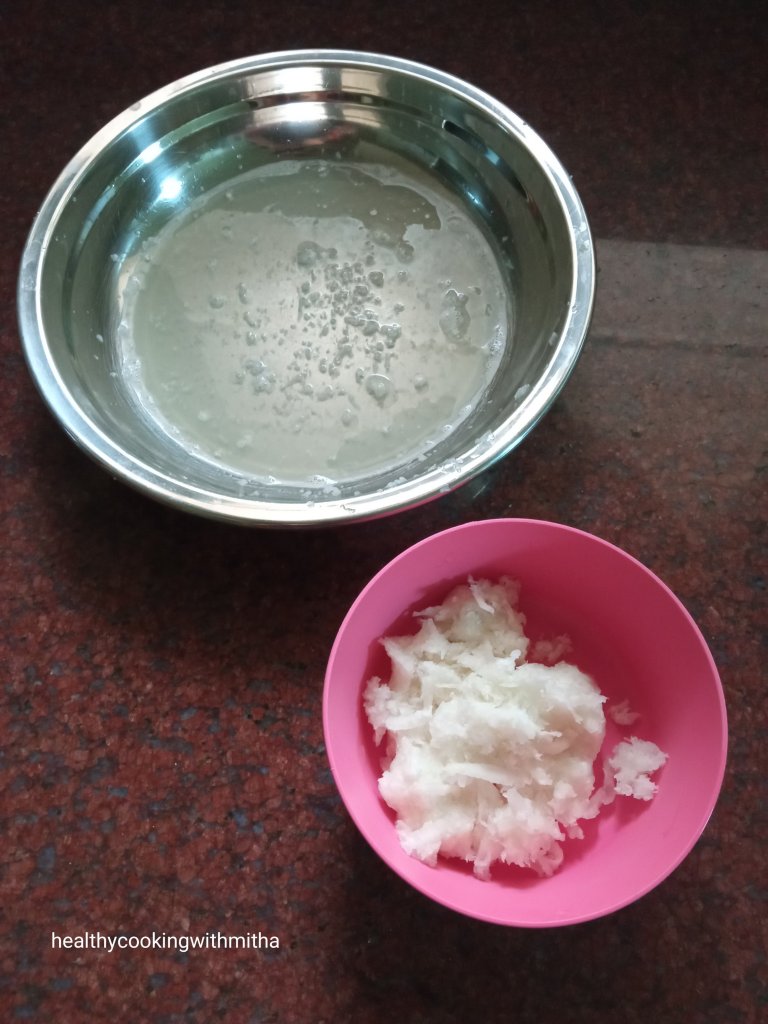
2. Add salt and keep it aside for about 10 mins. It will leave all the water content.
3. Now squeeze the radish gratings and add to another bowl. Don’t discard the water. We will knead dough in it.
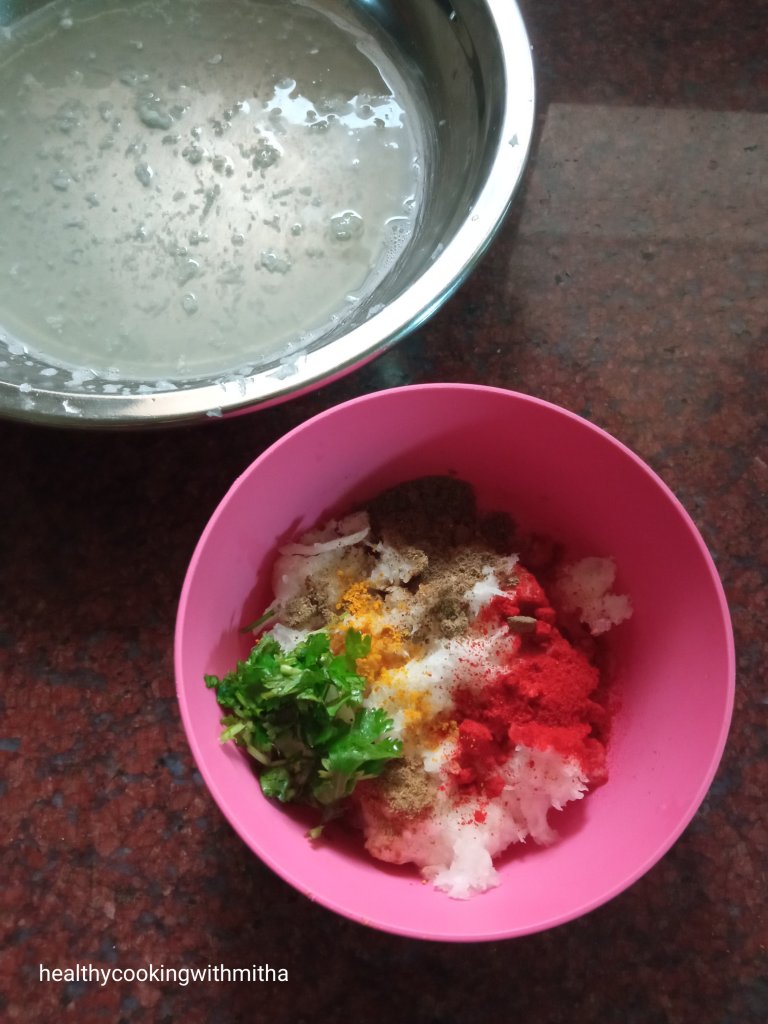
4. Now to the radish gratings, add coriander leaves, turmeric powder, jeera powder, Garam Masala powder, red chilli powder and salt. Mix well.
5. In the radish water, add wheat flour and knead a soft dough similar to chapati dough. Add extra water if needed to knead the dough. No need to add salt as we have already added to radish.
Now both the outer dough and inner filling is ready. Keep the Chapati dough for rest for about an hour before making parathas. Till then, it’s best to refrigerate the filling in case it leaves water.
6. To make Parathas, divide the chapati dough into equal, medium sized balls. Take one of the ball and dip it in dry wheat flour. Roll it into a small sized thick chapati and add a spoon of filling inside, in the center as shown.
7. Cover it by folding the edges and sealing it using the dough in the sides.
8. Dip again in dry wheat flour and roll as thin as possible, ensuring that you don’t give much pressure as the filling can come outside.
9. Now heat a pan/ tawa and place the paratha over it. Fry both sides using ghee till it browns and cooks well.
10. Serve with raita, chutney or pickle. Tastes so yum!
Notes:
* Remember to add salt and keep the radish gratings for atleast 10 mins so that all the water gets let out and you don’t get a soggy filling.
* Don’t discard the water and knead the wheat flour in it so as to not waste the nutrients in the radish water.
* While keep the dough to rest, refrigerate the filling so that it does not leave out water. In case, you feel the mixture is wet, you can add little crumbled paneer so that it absorbs the extra moisture from the filling.
* You can add the masalas which you like to the filling. I like which my family prefers. You can also add finely chopped green chillies to the filling.
* You can also check my other Paratha/ Thepla recipes:
Click on the image to save the recipe on Pinterest
As my son is sleeping after coming back tired from school, I have finally sat down to write this recipe of Methi Theplas which are his favorite 😍. He loves variety of dosas, bhakris, parathas and his recent love is this Methi Thepla. ❤️ It’s winter now in Qatar and we have fresh methi (fenugreek) leaves growing in our tiny kitchen garden, handled very lovingly by my husband. Here are the tiny yet pretty and very healthy leaves 😍
These leaves are plucked when my son demands for Theplas and love how homegrown leaves have an amazing flavour of it’s own. Farm to kitchen lifestyle is really the best way to enjoy and respect food. ❤️
Though I also make Alu methi and methi dal, these Theplas have become more regular as my kids love it. It’s also very easy to make and hardly takes 30 mins from start to finish.
They also stay well at room temperature for few hours and remain soft. So, in case there are leftovers, they still taste yum when enjoyed later.
Do try this delicious and healthy variation instead of rotis or parathas and you will definitely love it. Happy and healthy cooking ❤️
Ingredients: { Makes about 7 Theplas }
1 Cup = 240 ml
1 cup finely chopped Fenugreek leaves/ Methi leaves
2 Cups Wheat flour / Chakki ka Atta
2 tsp white Sesame seeds / Til
2 tsp Oil ( I use coconut oil)
1 tsp Red chilli powder
1 tsp Coriander powder
1/4 tsp Turmeric powder
A pinch of Hing/ Asafoetida
Salt to taste
Approx 1/2 cup water to make the dough
Oil or Ghee to cook the Theplas
Step by step recipe:
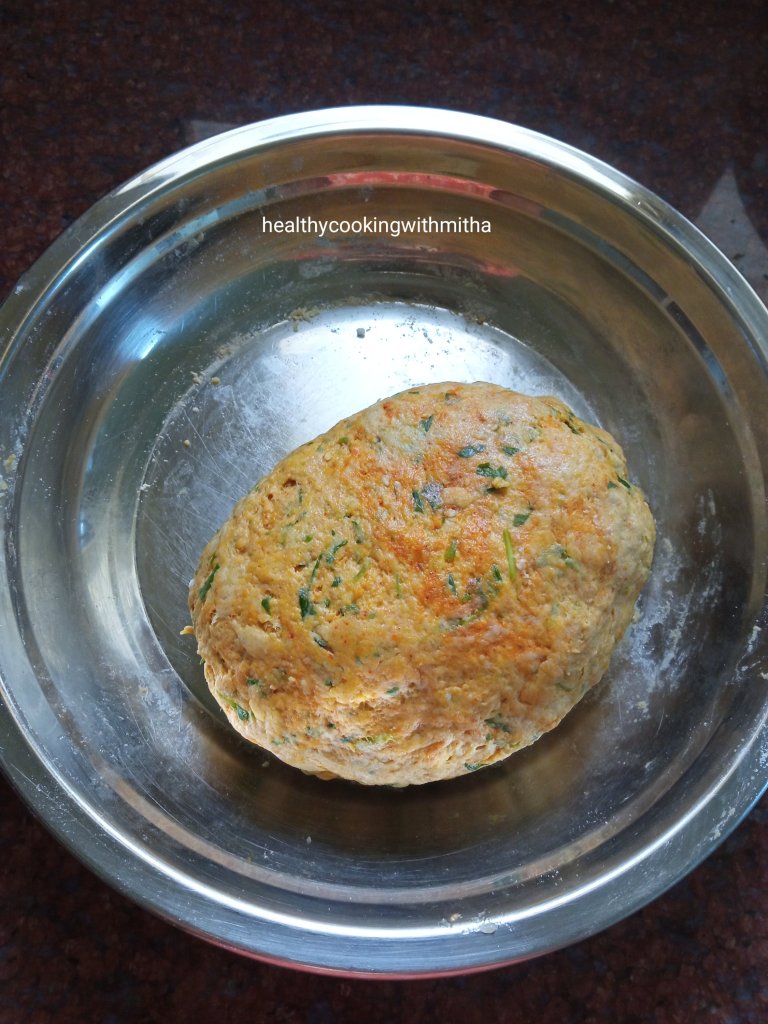
1. Take finely chopped methi leaves in a large mixing bowl (I chop the tender stems too along with the leaves. You can chop only the leaves if the stems are thick). Add sesame seeds, red chilli powder, coriander powder, turmeric powder, salt, oil, hing.
2. Now add wheat flour and mix everything well. Add water little by little and form a soft dough just like chapati dough.
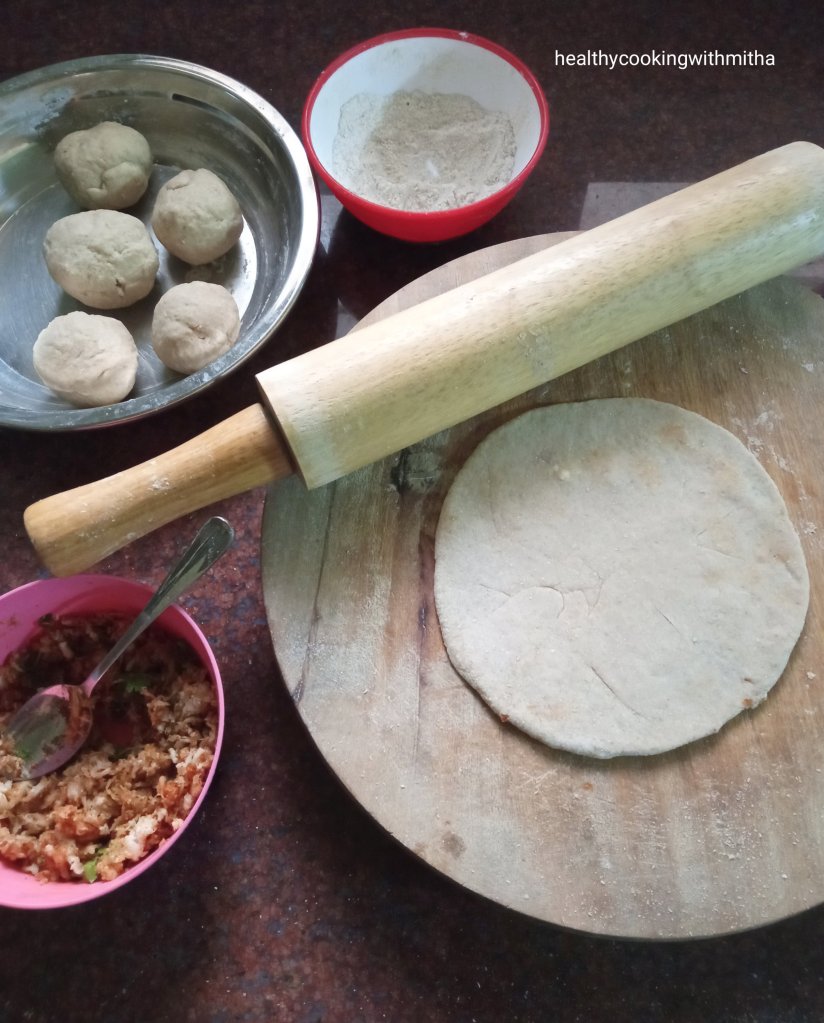
3. Now divide the dough into equal sized balls as shown.
4. Using dry wheat flour, dust each of the balls and roll just like chapatis.
5. Heat a pan and fry the Theplas, both sides while applying oil or Ghee. Cook till brown spots appear on either sides of the Thepla.
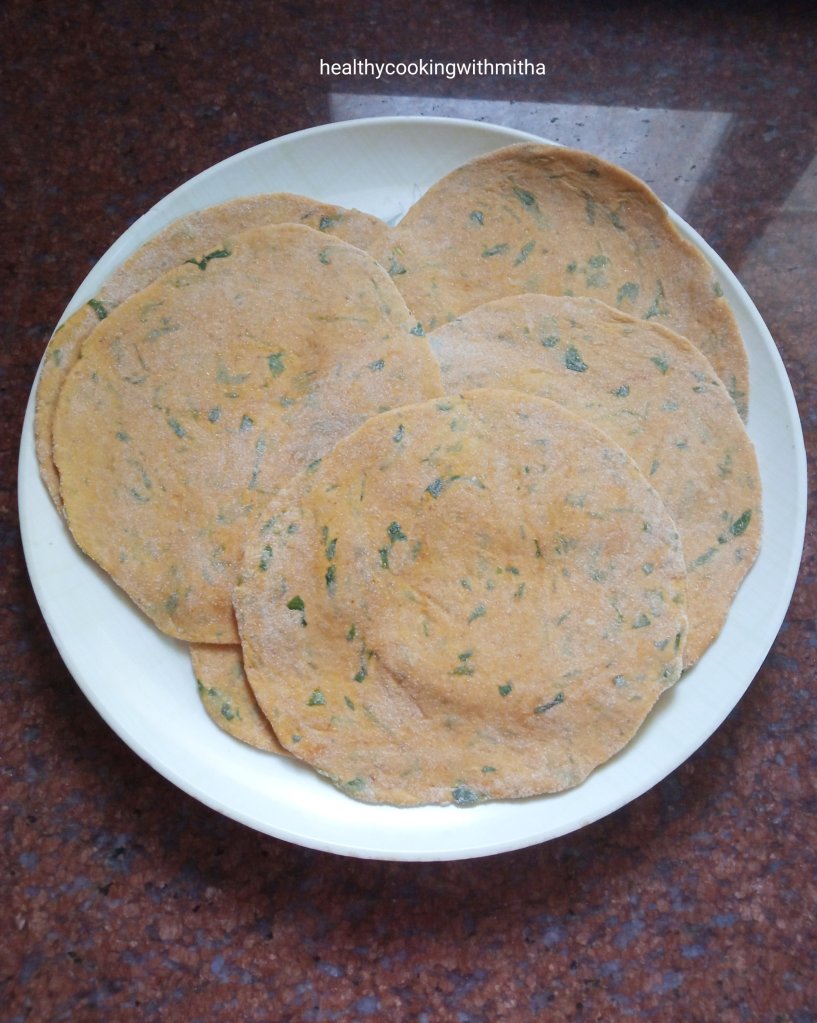
6. Enjoy hot Theplas with curd and pickle or even as it is. Tastes so yum ❤️
Click on the image to save the recipe on Pinterest
Notes:
* You can also enjoy them after a while as they remain soft for many hours. Hence they make an excellent lunch box option or to make and carry during traveling.
* Just pack them tightly in a steel box or a hot case.
* The ratio of 1 : 2 for methi leaves : wheat flour works well for me. If you change the ratio, it might be difficult to roll the Theplas.
* Remove thick stems from methi leaves before adding to Theplas. I add thin, tender stems finely chopped and you can never feel them in the mouth.
* Make sure to cook both sides of the Theplas well with oil or Ghee which makes the Theplas soft.
* I also make Theplas adding yogurt which is another method you can try. I make Bottlegourd or Dudhi/ Lauki Thepla that way. Here is the recipe : Bottlegourd Theplas
* For growing your own methi leaves, just sprout regular methi seeds and add them to soil. You can also grow in pots of you don’t have the space for direct soil. It takes about two weeks for methi leaves to grow completely once sowed in soil. I have shared the detailed blog on how to sprout methi seeds in this blog. You can check HERE.
Advertisements
Join me in my journey with a foodie husband and hungry kiddos while I make them eat healthy!