Tag Archives: Capsicum

Red Capsicum Peanut Chutney| Red bell pepper chutney

Click on the picture to save the recipe on Pinterest

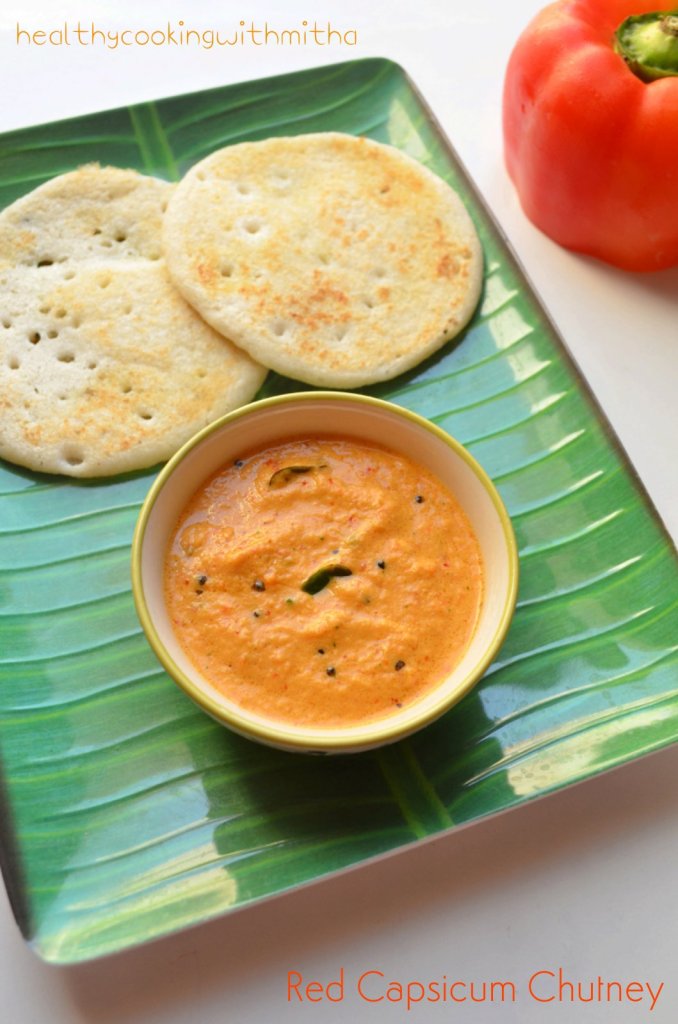
As many varieties of dosas and idlis that I make, I love to try different varieties of chutneys as well. Spicy chutneys are my favorite as they make such an amazing accompaniment to dosas. So when I tried this red capsicum chutney recently, it instantly became my favorite as it turned out spicy and delicious.

Even though red capsicums are sweet, the peanuts and red chillies give a wonderful flavour to this chutney which makes it a very tasty dip for dosas. A definite must try if you get your hands on red capsicums. ❤️

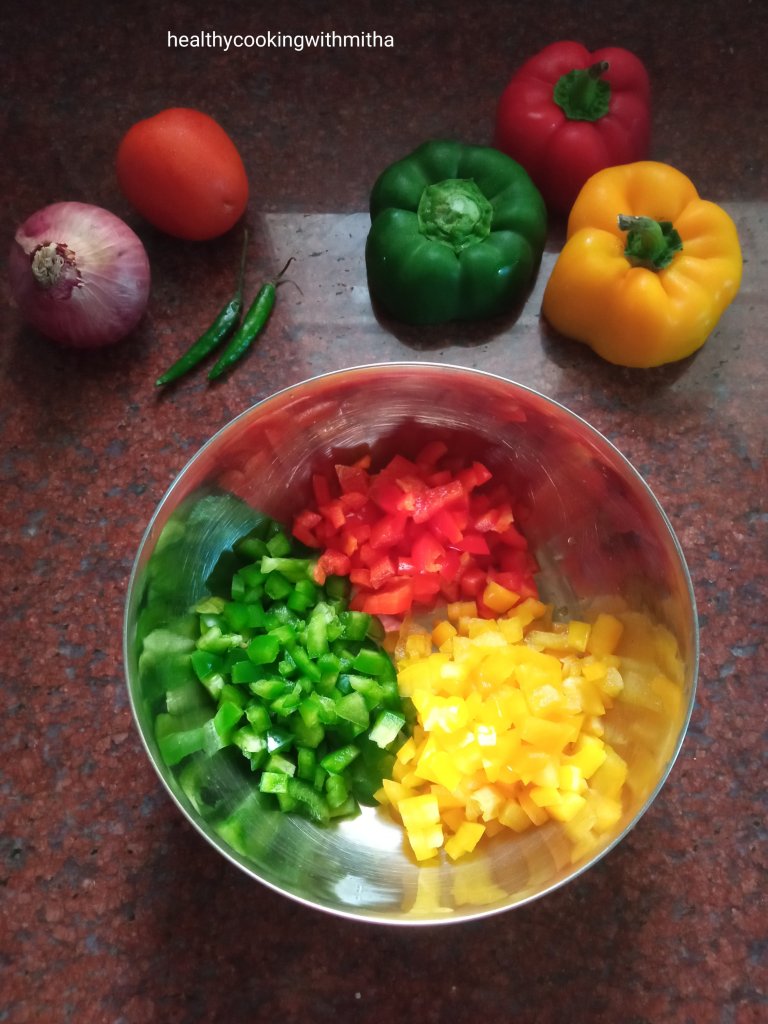
Apart from this chutney, I also make Tri colour Capsicum Salsa and fried rice with these capsicums but I must say, red capsicum chutney has won my heart with it’s flavours. Hope you all try and love it too. Happy and healthy cooking ❤️

RECIPE:

Ingredients: { Serves 2 to 3 people }

1/2 a large Red Capsicum

1 medium sized Onion

4 Red chillies (adjust to taste)

2 Tbsp Peanuts

1 tsp + 1 tsp + 1 tsp Coconut oil (for frying and seasoning)

2 tsp Mustard seeds

2 sprigs Curry leaves ( for frying and seasoning)

Salt to taste

Step by step recipe:

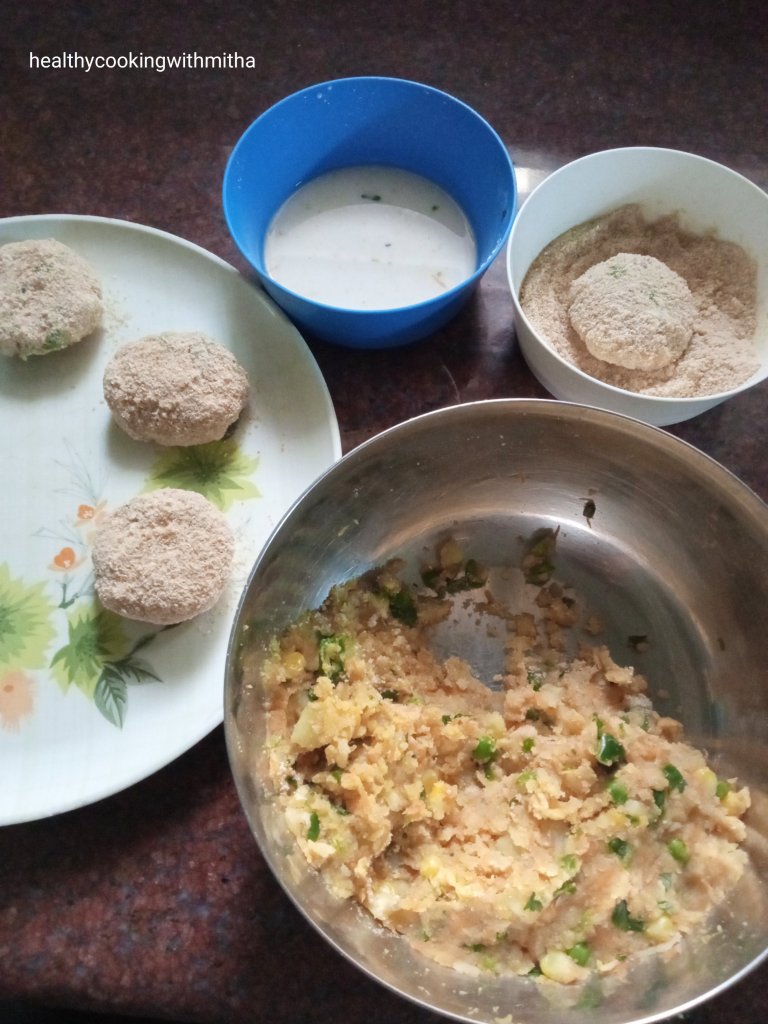
1. Heat 1 tsp oil in a small pan and fry peanuts in it on medium flame till the peanuts change colour and start to open slightly.

2. Remove it in the mixer jar and let it cool down.

3. In the same pan, heat 1 tsp oil and add roughly chopped onions, curry leaves, red chillies and roughly diced Red Capsicum. Fry well till onions turn translucent and capsicum turns soft.

4. Now transfer this to the mixer jar too and let it cool down.

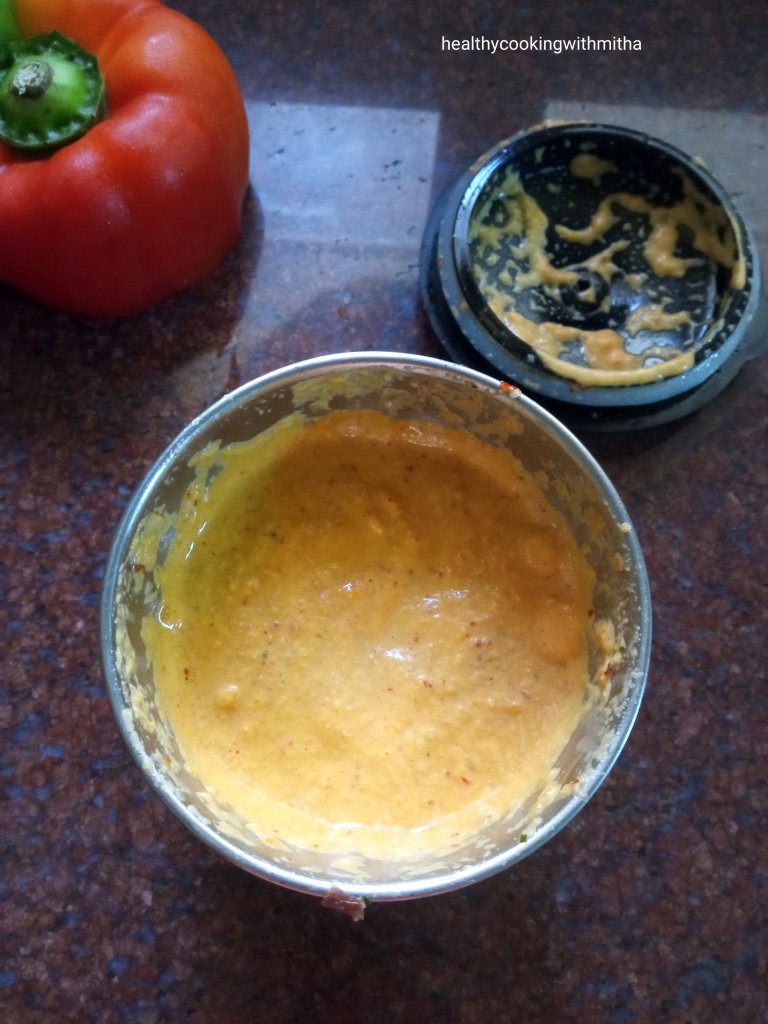
5. Add salt and little water as needed to grind it to a smooth paste.

6. Now heat 1 tsp oil in the pan and add mustard seeds and curry leaves. Let mustard seeds splutter. Now remove from the flame and add the ground chutney to the pan. Mix well. Done 🙂

7. Serve with dosas or idlis. Tastes so yum ❤️

Click on the picture to save the recipe on Pinterest

Notes:

* I have served it with Methi dosa or the regular way I make my dosas. Makes for such a great combination.

* Don’t add more than two spoons of peanuts as otherwise the chutney will have a nutty flavour than that of red capsicum.

* This ratio of 1/2 capsicum, 2 spoon peanuts, 1 medium onion and 4 Red chillies works perfectly for me. If you prefer less spicy, add 3 red chillies and then you can adjust the spice using red chilli powder.

* This chutney is very unique in it’s taste due to the sweetness of the capsicum, spice from the chillies and the nuttiness from the peanuts. A must try if you love different flavours in chutneys.

* Since oil is used thrice while frying and seasoning, add very little each time so that the chutney does not turn oily. You can skip oil while frying if you prefer less oil.

* This chutney is based on my recipe of Peanut Onion Chutney which tastes amazing as well.

* You can check my other chutney recipes too:

* Amma’s tomato chutney

* Coriander leaves chutney

* Sambarpalli leaves chutney version 1

* Sambarpalli leaves chutney version 2

* Hotel style Tomato Chutney

* Gooseberry or Amla Chutney

* Pudina lehsun Chutney

* Allam Pachadi or Ginger Chutney

* Walnut Chutney

* More than 30 Dosa recipes : Dosa Corner

* 21 Varieties of Idlis : Variety Idli Compilation

* “No rice” Dosa recipes Compilation

* If you have three coloured capsicums, you can try this: Tri colour Capsicum Salsa/ Salad

Advertisement

Tri colour Capsicum Salsa | Easy Capsicum salad/dip recipe

Click on the image to save the recipe on Pinterest

Tri colour Capsicums always attracted me when I went for grocery shopping but it used to be super expensive and I never felt like buying it. Recently Qatar has been growing a variety of veggies locally and hence we have been getting even expensive vegetables like Broccoli and coloured capsicums considerably cheaper. Also just see how fresh they are! 😍

So, whenever I get my hands on them, it’s either this salsa or fried rice. Both ways, it is consumed happily by my kids which is most important for me whenever I cook something. With salsa, I present it to them with nachos for evening snack and they munch it on happily. ❤️

Also, these capsicums are best when they are had raw with their flavours intact. Cooking them leads to make it soft and is not as fresh. So my preferable way to use these capsicums is by making this salsa which we have as an accompaniment with rice meals as well. Tastes so yum. ❤️

Hope you all try and love it too. Happy and healthy cooking ❤️

RECIPE:

Ingredients:

1/2 a medium sized Green Capsicum

1/2 a medium sized Yellow Capsicum

1/2 a medium sized Red Capsicum

1 medium sized Onion

1 medium sized Tomato

3 Green chillies

1/4 tsp Pepper powder

Salt to taste

Juice of 1 Indian lemon or half of large lemon

Finely chopped Coriander leaves, for garnish

Step by step recipe:

1. Finely chop the three capsicums and add to a mixing bowl.

2. Now add finely chopped Onion, tomatoes and green chillies to it.

3. Add finely chopped Coriander leaves, salt, pepper powder and lemon juice. Mix well. Taste and adjust the lemon juice and salt as needed.

4. Done! Enjoy as a salad or as a salsa with Nachos. ❤️

Click on the image to save the recipe on Pinterest

Notes:

* The above measurement serves 4. If you are making for more people, just use three whole capsicums and about two tomatoes and two onions.

* You can skip green chillies if making for small kids. I remove green chillies before giving to my kids.

* You can also add a dash of red chilli powder for more spice but we love this as it is.

* I also serve it as a side along with rice meals and the salad gives a nice, fresh crunch to the meal.

* The other salads that I make regularly:

Mixed Bean Salad

Carrot Kismuri

Moong dal Kosambari

Cabbage Kosambari

Mixed Vegetable Salad

Khamang Kakdi/ Cucumber salad

Barley Salad

Banana Stem Salad

Purple Cabbage Coleslaw

Capsicum Peanut Masala | Capsicum dry curry

Click on the image to save the recipe on Pinterest.

A new blog after a long break of many months. Kids had their summer vacation and towards the end of it, we went to India. Had a great month celebrating festivals with our families and the highlight being able to spend Janmashtami time at my native, Udupi. ❤️

If there is heaven on earth for me, it is Udupi. The feeling of living there, being able to see my dearest Krishna always is very precious. Hope my dream of settling down in Udupi fulfills in the coming years. ❤️🙏

I missed cooking at Udupi as we were either constantly travelling or were at our relatives’ houses. So coming back to my kitchen in Qatar, I have been cooking a lot to compensate it. 😁 This Capsicum Peanut Masala was a recent try inspired by something similar which I ate at a hotel during my vacation.

It comes out so delicious that a meal with rice, rasam and capsicum masala is all you need to get your soul satisfied. This is that kind of curry, simple, unique and very flavourful.

Hope you all try and love this curry too. Happy and healthy cooking! ❤️

RECIPE:

Ingredients:

1/4 Cup Peanuts

3 medium sized Green Capsicum, chopped into small pieces

1 small Onion

2 Tbsp Coconut Oil

2 tsp Mustard seeds

Few Curry leaves

3 Green chillies

1 tsp Tamarind paste

1/4 tsp Turmeric powder

2 tsp Red chilli powder or to taste

2 tsp Sambar powder ( I use Nirapara brand)

Freshly grated coconut for garnish

Salt to taste

Step by step recipe:

1. Dry roast peanuts in a pan till it starts changing colour and let’s out an aroma. Don’t let it turn black. Allow it to cool.

2. When it cools down, powder it coarsely in a mixer. Just pulse for few turns. Don’t blend it a lot as it will turn into paste. Keep it aside.

3. Now heat oil in the same pan, splutter mustard seeds. Add curry leaves and green chillies. Fry for few seconds.

4. Add finely chopped onions and fry till the onions turn translucent.

5. Now add chopped Capsicum and fry for few minutes.

6. Add salt, turmeric powder, red chilli powder, sambar powder and tamarind.

7. Mix well. Cover and cook till capsicum turns soft. Sprinkle little water if necessary. Now add the peanut powder.

8. Mix well. Cover and cook for about 5 mins. Add grated coconut on top. Done. 🙂

Serve with rice meals as a delicious accompaniment.

Notes:

* Be careful while roasting peanuts such that they don’t turn black. Roast on medium flame and immediately remove them as soon as they start changing colour.

* Also be careful while grinding the peanuts such that they should not turn into a paste. Coarse powder is enough.

* Onion can be skipped if you follow satvic diet.

* You can reduce chilli powder as we have already added green chillies, depending on your spice level.

* Sambar powder adds a wonderful flavour. So don’t skip it in this curry.

* This curry also tastes yummy with dosa.

Click on the image to save the recipe on Pinterest.

Healthy Coleslaw | Purple cabbage salad recipe

Click on the image to save the recipe on Pinterest

It’s been more than two months that I have blogged a new recipe (Too long a break, I know!😀). But sometimes you just want to get away from the same schedule of life and do something different. For me, in these two months, I enjoyed a lot with my kids. I made reels with them with funny Instagram filters (did not post them but made it just for fun.. their smiles on seeing them as Tigers and Donkeys were super cute 😍😍), played football with my son, did a lot of drawing and colouring with my daughter, danced like crazy everyday with both the kids and cooked whatever they wished for. ❤️

Since it was my daughter’s vacation, I made it my vacation as well 😅. Had a fun couple of months sleeping till late in the morning and watching my favorite songs on repeat. ❤️

So now that her classes have started with alternate weeks of online and physical classes, I said enough of my break and restarted blogging. What’s better to start than this salad which both my kids love a lot. ❤️

Purple cabbage has this unique flavour and crunch which tastes so good when made as a salad. Usually coleslaw recipes use Mayonnaise but I have substituted it with yogurt to make it vegetarian and of course healthy. Hope you all try and enjoy it. Happy and healthy cooking! ❤️

Special thanks to those who missed me and pinged me to ask why am I not blogging. It was so nice of you all and I appreciate it with all my heart. Loads of love. ❤️

RECIPE:

Ingredients:

1/2 Cup Purple cabbage, finely chopped

1/2 Cup regular cabbage, finely chopped

1/2 Cup Carrots, peeled and grated

1/2 Cup Capsicum, finely chopped

2 Tbsp thick yogurt (or hung curd)

1 tsp Vinegar (or lemon juice)

Pepper powder to taste

Salt to taste

Step by step recipe:

1. Take the finely chopped cabbages, Capsicum and grated carrots in a mixing bowl.

2. Now add thick yogurt, salt, pepper powder and vinegar. Mix well.

3. You are done. Serve immediately or chilled as it is or as an accompaniment with rice.

Click on the image to save the recipe on Pinterest

Notes:

* You can also add onions, lettuce or coloured capsicum if you want but I make this way.

* This salad is best consumed the same day when made as when kept in refrigerator and consumed next day makes it taste slightly bitter due to the purple cabbage.

* Make sure to use thick yogurt. If your yogurt or curd is thin, sieve it to remove water content and add to the salad.

* Pepper powder and vinegar are to taste. You can add as much or as less as you desire.

* This salad acts as an excellent sandwich filling. My kids love it a lot. ❤️ I add a little more yogurt to it, a little ketchup and fill in sandwiches.

* You can check : All my Salad recipes

Click on the image to save the recipe on Pinterest

Mixed Vegetable Salad | Simple salad recipe

This salad recipe is so simple that I thought twice before adding on the blog wondering if anyone would actually even look at this recipe. But then I thought, even if one person benefits by it, then the blog is worth it. So here is sharing the easiest salad recipe ever and definitely very healthy too since it has so many vegetables in it. ❤️

Click on the image to save the recipe on Pinterest

My kids are huge fan of this salad and this whole bowl that you can see above is finished mostly by them only. They enjoy it as it is and then add puffed rice or Bhel to it, calling it “Charmbure Upkari” or Bhel Puri in Konkani. Whatever they call it, I am very happy that all these vegetables go into their tummy without a fuss. ❤️

When I was a child, my grandmother used to make a simple salad with just tomatoes, onions, green chillies and coriander leaves. After a while of making it, it would leave water due to salt in it and I used to love to slurp that water. 😍 Now my son is the same. The water left by the salad is reserved only for him and he enjoys drinking it. Like mother, like son. ❤️❤️

Today, I also want to share a glimpse of my mother’s window which is her view of the outside world. Suffering from muscular dystrophy in her legs, she’s mostly sitting on her bed and this window is her best friend which offers her beautiful views of mother nature, the gleaming sky, different varieties of birds and butterflies, also of cows grazing. This picture was clicked by Amma today. Isn’t it beautiful! ❤️

Also, here is a picture of a pigeon, one among the many who come to visit Amma. How sweet is that! 😍

During my vacations, I used to lie on this bed, chatting with Amma while looking outside at nature, enjoying the beautiful scenery. Major missing since close to two years now. But really happy that Amma has this window as her friend, which makes her feel close to nature, even from within her room. That’s so blissful! ❤️

On this note, here’s sharing the recipe with all of you. Hope you all try it too. Happy and healthy cooking! ❤️

RECIPE:

Ingredients:

2 English Cucumbers (about 2 cups chopped Cucumbers)

1 medium sized Carrot (1 Cup grated Carrot)

1/2 Cup grated Cabbage

1/4 Cup finely chopped Capsicum

3 Lettuce leaves, chopped into small pieces

1 medium sized Onion

1 medium sized Tomato

3 Tbsp finely chopped Coriander leaves

2 Indian lemon or to taste

1/4 tsp Cumin powder

Salt to taste (I use rock salt/ kaala namak)

Step by step recipe:

1. Get all the veggies for the salad ready. I love to keep everything set at first so that I don’t forget any of the Vegetable and also love how colourful it looks. 😍

2. First chop the cucumbers into small pieces and add to a large mixing bowl. Then peel and grate carrots, finely chop cabbage, capsicum, onion and tomato. Make small pieces of lettuce and add to the bowl too.

3. Now add lemon juice along with salt, cumin powder and coriander leaves. Mix well and serve.

Click on the image to save the recipe on Pinterest

Notes:

* If using Indian cucumbers, it will need peeling and removing the core. Since I used English Cucumbers, I do not peel it.

* You can skip any Vegetable in this if you don’t have. I add as per what I have available.

* You can also add green chillies or pepper powder. I skip both as I make for my small kids.

* This salad acts a good base to make Mixed Vegetable sandwiches. Just take little of this salad and mix either hung Curd or cream cheese along with little tomato ketchup. Mix well and spread between bread slices. Toast on a pan and delicious sandwiches are ready.

* Also you can use this salad to make Mixed Vegetable Bhel Puri. Just take a little of this salad and mix in red chilli powder to taste along with little curd, puffed rice/ Bhel and Bhujiya/ Sev. Add Date Tamarind chutney too if you have.

* These are the other Salads that I make regularly:

# Carrot Kismuri

# Moong dal Kosambari

# Cabbage Kosambari

# Khamang Kakdi

# Mixed Bean Salad

Click on the image to save the recipe on Pinterest

Vegetable Paneer Chilly | Broccoli stir fry | Kid friendly recipes with Broccoli

Click on the image to save the recipe on Pinterest.

Broccoli is not something I grew up eating. In fact, don’t remember even seeing this vegetable till few years back (Talk about being desi 😅). In the winter months here in Qatar, which is between November and March, there opens a Mahaseel festival which sells varieties of flowers, indoor/outdoor plants and also fresh vegetables grown in different Qatari local farms. Inspite of the quality of the veggies being so good, the rate is surprisingly very cheap. I found this “pretty green vegetable similar to cauliflower” (exactly what was in my mind 😂) in the festival and could not resist buying it. That started my love for Broccoli and my kids too love it so much now. ❤️

The Mahaseel festival is a treat to the eyes for flower lovers and I want to share a picture which I clicked when we went there in December 2019. Look at the beauties. 😍😍

This reminds me of my favorite song from the movie Silsila, Ye kahaan aa gaye hum.. That song too has been shot in midst of floral heaven. Admire how beautifully it has been picturized and such an eternal love song too. ❤️❤️

For me, merely looking at greenery, lush trees, mountains, fields, flowers, birds chirping, cows grazing, waves of the river, streams of water in a waterfall, early morning dewdrops on leaves, the heavenly aroma of the freshly wet soil in the first rain and so many similar such experiences brings so much unexplainable joy. ❤️ I don’t know about you all, but being with nature makes me feel so alive and refreshes me a lot. If I could, I would love to live atop a mountain, far away from the city, embracing nature in it’s purest form (One among my dreams in life. ❤️)

Among these, there is also the wonderful feel of cooking with freshly plucked vegetables. 😍 Now, since a year, these locally grown vegetables like Broccoli and cucumber are available in our nearby supermarket. It’s a boon since we can’t travel all the way to the Mahaseel festival due to the Covid situation.

My kids love these two ways of Broccoli that I make and they eat it as it is even without rice. Sharing it so that you can try for your family too. Hope you all try and love it too. Happy and healthy cooking! ❤️

RECIPE:

Ingredients:

For Broccoli stir fry:

2 Cups Broccoli florets
1 tsp Oil
A pinch of Pepper powder
Salt to taste

For Vegetable Paneer Chilly:

1 Cup Broccoli florets

1 Cup diced Carrots

1 Cup Paneer cubes

1/2 a medium sized Capsicum, cubed

1 medium sized Onion, cubed

3 Garlic cloves, finely chopped

3 to 4 Green chillies

2 Tbsp Tomato ketchup

2 tsp Chilli sauce

1 tsp Soya sauce

Pepper powder to taste

Salt to taste

1 tsp Vinegar

Finely chopped coriander leaves

Step by step recipe:

1. For Broccoli stir fry, take bite size broccoli florets in a bowl and wash it well. Drain and keep it ready.

2. Heat oil in a pan and add the broccoli florets. Also add salt and pepper. Fry on high flame for few seconds. Cover and cook on medium flame till the florets turn soft. Sprinkle water only if needed. You are done!

3. For Vegetable Paneer Chilly, take Broccoli florets, diced Carrots and cubed capsicum in a bowl.

4. In a pan, heat oil and fry the green chillies and garlic first. Then add cubed onions and fry till it turns translucent.

5. Now add the veggies along with Paneer and fry for few seconds.

6. Add very little water and cook till the veggies turn soft but don’t overcook them. Now add ketchup, chilli sauce, soya sauce, salt and pepper. Mix well and cook for 5 mins.

7. Remove and add vinegar. Mix well adding coriander leaves.

Serve both the Broccoli stir fry and Vegetable Paneer Chilly with fried rice or any variety rice or meals.

Click on the image to save the recipe on Pinterest.

Notes:

* I usually make easy Schezwan fried rice with this. You can check the recipe here.

* Skip Paneer if you don’t like it. Makes regular vegetable chilly.

* You can make it as a gravy if you want. Just add more ketchup and water. For a thicker gravy, add corn flour mixed in water to the gravy. It will make it very thick. I love this dry version though.

* The broccoli stir fry makes for a great snack for kids. My kids dip it it ketchup and eat by themselves. Great finger food for toddlers as well.

Paneer Kathi Roll | Paneer Frankie | Paneer wrap

Click on the image to save the recipe on Pinterest.

If there is one event here in Qatar that I used to wait eagerly for (pre corona times), it is the Qatar International Food Festival or QIFF as it is called. My first visit to the QIFF was in 2016. It was held in one of my favorite parks here, the MIA park which is in a picturesque location. I love to sit there, just admiring the beauty and calmness of the gleaming blue waters 🌊. And enjoying food there made it extra special. That first experience of QIFF at MIA park was the best one till date. ❤️

Being vegetarians (who love Indian food ❤️) actually takes away the point of going to an “international” food festival (the irony 😁) but there were so many options from Indian restaurants that we got spoilt with choices. It was like finding all the famous Indian restaurants from Qatar in one place and you get to choose their best dishes from the menu. In short, Foodie heaven! 😍

After that, we made a point to go to the QIFF every year, for some variety chaats, north Indian platters, south Indian delicacies, sweets, ice creams and juices, hovering from stall to stall (basically rummaging into all the veg options 😂😂). I know it sounds like a lot of food but these food festivals make me go crazy and I forget all the healthy eating for a while (Sorry but not sorry, Mr Diet 😅😅).

The last food festival we visited was held in November 2019 which was a street food festival. The chef at the live counter of Desi Dhaba restaurant making hot Jalebis fried in ghee was the highlight of the event for the sweet lover in me. Look at how delicious the Jalebis were! 😍 My mouth waters as I think about it. 😋

Another unforgettable food memory with these food festivals is the Paneer Kathi Rolls from Zaffran cafe stalls. I never missed it and it is the most delicious kathi rolls I have ever eaten. ❤️

Click on the image to save the recipe on Pinterest.

So since due to Covid, it has been more than an year of no food festivals (😭), I decided to recreate those Paneer Kathi Rolls at home and how amazing did it come out. Never knew making them at home was so easy. My kiddos too loved it so much that they could not stop saying “mmmmm yummyyyyy 😍😍” (gone ditto after me 🤣🤣 exactly how I can’t stop saying it when I eat something yummy, not caring for anyone else in the world. 😂)

So I thought I must share this yumminess of a recipe with you all too. Makes a filling evening snack or even a meal in itself. Also a great way to finish your leftover rotis. Hope you all try and like it. Happy and healthy cooking! ❤️

RECIPE:

Ingredients: { Makes 5 to 6 Rolls }

For the Roti:

2 Cups wheat flour

Salt to taste

Water as needed

For the Paneer filling:

200 grams Paneer cubes

1 Tbsp thick Curd/ Yogurt

1 tsp Tomato ketchup

1/2 tsp Cumin powder

1/2 tsp Garam masala powder

1/4 tsp Turmeric powder

Salt to taste

For the Salad:

1 medium sized Onion, thinly sliced

1/4 a medium sized Capsicum, thinly sliced

Salt to taste

1/2 tsp Vinegar or Lemon juice

For Chutney:

Check the detailed recipe here

Ghee while making the rotis and pan frying paneer

Step by step recipe:

1. Take wheat flour and salt in a bowl. Add water and form a firm yet soft dough like that while making rotis. Keep aside.

2. Now take paneer cubes in a bowl. Add yogurt, ketchup, cumin powder, Garam masala powder, Turmeric powder and salt.

3. Mix well.

4. Now heat 2 tsp ghee in a frying pan and roast the paneer cubes on medium flame till the cubes get browned on all sides. Keep flipping as they turn brown each side.

5. Remove from the flame and keep aside. Also make the green chutney.

6. Take sliced onions and capsicums in a bowl. Add salt and vinegar. Mix well. Now the things ready for filling are ready.

7. Make roti like you make regularly. I make it almost like a square so that it’s easier to roll. Place in a plate. Spread with a spoon of the chutney. In the center, keep the paneer pieces are shown. Top with the salad.

8. Roll and serve!

Click on the image to save the recipe on Pinterest.

Notes:

* I make this roasted gram dal coriander leaves chutney for the roll. You can make regular Coriander leaves chutney for it too. Just remember to make the chutney thick and not liquidy as we have to spread it.

* You can add more veggies into the salad filling. I just keep it simple as I don’t want to overfill the rotis.

* Be careful to roast the marinated paneer on medium flame. Else due to Yogurt, it can turn black.

* You can also add red chilli powder to the marinate to make the paneer filling more spicy. I don’t add as I make for my kids too.

* These rolls are the best way to finish leftover rotis in a delicious and unique way. Also great for lunch box. Just make the chutney very thick if making for lunch box.

Click on the image to save the recipe on Pinterest.

Poha Vegetable cutlet | easy cutlet recipe

Click on the image to save the recipe on Pinterest

I have had a weakness for cutlets all my life. 😁 My mother who will be reading this would add, “Not only cutlets but all bakery foods, which is why I had decided to get you married off to a bakery owner. 😅😅”. That brings a wide grin on my face as I realize how true is that! I love bakery snacks a lot but still, cutlets definitely hold a special place in my heart (read : missing native : missing cutlets from Hotel Diana, Udupi). ❤️

Hotel Diana in Udupi is very famous for their cutlets and those must be the first ones I ever tasted too, as a child. I still remember the swirling walkway leading to the restaurant where we used to go, specially after picking Amma, whose office was next door. My order would be Puri bhaji and Cutlets (about 25 years later, my order in any south Indian restaurant is still the same, if they have both in the menu. #puribhajicutletfanforever 😂😂). The cutlets would be so crispy and dipping them with the green chutney- ketchup combo would be a bite into heaven for the little foodie Mitha. 😍

Click on the image to save the recipe on Pinterest

Amma saw that gleam in my eyes while enjoying the cutlets and after that, whenever she had any party in her office, be it in Udupi or Kochi, all cutlets would come packed safely for me, without her taking even a bite of it. That’s a mother’s love and I used to wonder how she could do it. But now, after being a mother myself, I really understand her. ❤️

My Annama (grandmother) used to make beetroot cutlets as evening snack and I used to sit like a cat next to fish, ardently waiting for the cutlets to come out of the frying pan. 😍 I still have the flavours of her cutlets in my taste buds. ❤️

But even though I am such a huge cutlet lover, it is honestly such a shame that I never attempted to make them at home. Always thought it was too much work. How amazed I was to find these poha cutlets on Instagram reels, made by so many food bloggers. It looked so easy and delicious that I had to try it out.

Truly, it comes out too delicious for words. A must try recipe for sure. By using poha, you can reduce potatoes in the cutlets and it becomes quite filling too. This cutlet is very soft and flavourful on the inside but crispy on the outside.

I am so happy that I have learnt to make a good cutlet. Will definitely be making often for sure. Hope you all try and love it. Happy and healthy cooking! ❤️

RECIPE:

Ingredients: { Makes 12 cutlets }

1 Cup thick Poha/ flattened rice/ Aval

1 Cup Mashed potatoes (2 medium sized potatoes)

1/4 Cup grated Carrot

3 Tbsp Green Peas

3 Tbsp Sweetcorn

2 Tbsp Capsicum, finely chopped

2 Tbsp Coriander leaves, finely chopped

1/4 tsp Turmeric or Haldi powder

1/2 tsp Cumin powder

1 tsp Red chilli powder

Salt to taste

While making cutlets:

2 Tbsp Corn flour

About 1/2 Cup Bread crumbs

Oil as required to shallow fry

Step by step recipe:

1. Get ready all the veggies required for the cutlet. Boil two potatoes, peel skin and mash it. Keep in a bowl. Steam peas and corn. Keep aside. Grate carrots, finely chop capsicum and coriander leaves.

2. Now wash the thick Poha well and soak in water for about 5 mins. Drain water completely and mash the poha with your hands.

3. Now add the mashed potatoes, steamed peas and corn, grated carrots, finely chopped capsicum and coriander leaves along with turmeric powder, red chilli powder, cumin powder and salt to it.

4. Mix well to form a even thick mixture.

5. Now make corn flour slurry by mixing 2 Tbsp corn flour with about 2 to 3 tbsp water. It’s should neither be very thick nor thin. Also keep bread crumbs in another bowl. Take a mixture in your palm and shape into cutlets as shown.

6. Dip in the corn flour slurry and roll in bread crumbs. Keep aside in a plate. Repeat the same with all cutlets.

7. Now heat little oil in a pan. Place each of the cutlets gently and fry on medium flame.

8. Flip to the opposite side and shallow fry till both sides turn golden brown in colour.

6. Serve hot with chutney and ketchup.

Click on the image to save the recipe on Pinterest

Notes:

* These cutlets taste heavenly with this Coriander leaves Chutney and tomato ketchup combination.

* I use thick Poha for this recipe. If using thin Poha, then no need to soak the poha, just washing and mashing will make it soft.

* 1 Cup mashed poha and 1 Cup mashed potatoes gives it the correct binding. If still you are unable to bind the cutlets due to the potatoes being moist, just add little bread crumbs to the mixture and you will be able to shape the cutlets well.

* Peas, corn and capsicum gives the cutlets a good bite and increases the health quotient too. But if you don’t have any one of these, you can skip.

* You can also add chopped green chillies to the mixture if desired.

* Bread crumbs in the coating makes the cutlets very crispy. So please do use it. I freeze my bread crumbs as it lasts well for many months that way.

* Shallow fry them on medium flame such that the cutlets get the beautiful golden brown colour.

Click on the image to save the recipe on Pinterest

Instant Oats Vegetable Bhakri | Quick Oats Uthappam

Click on the image to save the recipe on Pinterest

As my regular readers know already, my kids love dosas and our morning usually starts with any variety of dosa. I have already posted many of them on my Dosa corner page.

Even though I make sure that I always have dosa batter handy for their dosa love, there are some days when it gets over and I am left wondering what to do apart from the Instant Oats Poha dosa that I make always when I don’t have dosa batter.

That is when I started making these oats vegetable bhakris and it was loved a lot by both kids. It hardly takes 15 mins to get the batter ready and it is very tasty and filling. Also a healthy snack option for evenings.

Hope you all try and love it too. Happy and healthy cooking!

RECIPE:

Ingredients:

2 Cups Instant Oats (I use Quaker or Saffola instant Oats)

1 Cup wheat Semolina/ Rava/ Sooji

1/4 Cup Curd or Yogurt (optional)

3 Cups water or as required

1/2 Cup grated Carrots

1/4 Cup finely chopped Capsicum

1/4 Cup finely chopped Onion

2 to 3 Green chillies or to taste

2 Tbsp finely chopped Coriander leaves

Salt to taste

Oil or ghee to cook the uthappams

Step by step recipe:

1. Take 2 Cups oats, 1 Cup rava, 1/4 Cup curd and salt in a large mixing bowl.

2. Add 3 Cups water and mix well to remove any lumps.

3. Add grated carrots, finely chopped capsicum and onions, green chillies and coriander leaves.

4. Mix well.

5. Heat a dosa pan and add a ladle of the batter. Spread into a thick dosa as shown.

6. Cover and cook till the surface cooks well.

7. Now add oil or ghee. Flip and cook for few minutes.

8. Serve hot with butter and chutney.

Notes:

* You can skip onion if you want but it gives a wonderful bite and flavour to the bhakri. Don’t skip capsicum though. It’s a main ingredient.

* I sometimes don’t need chutney with it too. Just the bhakri with butter tastes so delicious.

* Don’t spread the bhakri too thick or else it won’t cook inside. Cook both sides very well on medium to high flame.

* I have used instant Oats as it is (without powdering or roasting). You can use rolled oats but it might need powdering.

* You can skip curd if you don’t have. I make without it too sometimes. Does not make much difference.

Do let me know if you have any doubts. Will be a pleasure to help. 🙂

Click on the image to save the recipe on Pinterest