Tag Archives: Lunchbox

Bottlegourd Thepla | Lauki/ Dudhi Thepla

Click on the image to save the recipe on Pinterest

The house is silent now, till afternoon, when my kids come back from school. I am utilizing this alone time to write this interesting, very healthy and super tasty Bottlegourd thepla recipe which I learned sometime back. Once the kids return from school, all they say is “Amma, Potta Bhook!” meaning “Mom, I am hungry!” in Konkani. 😁

So I have to keep something ready for them so that I can feed them as quick as I can. And it should be filling as well. Else in another 30 mins, it’s the same dialogue again. πŸ˜„ So, in my search for healthy snack recipes, I found this Bottlegourd Thepla which I tried one day for the hungry siblings. 😍😍

Both of them literally had a fight till the last bite while I had the last laugh as they did not realize they were eating bottlegourd too in it. 😁 Seriously speaking, you can never say it is made of bottlegourd. The taste of these soft theplas are heavenly to say the least. ❀️

So now, bottlegourd is bought weekly in our grocery shopping to specially make these theplas and I had to share the recipe with all of you too. ❀️

Bottlegourd ❀️

Do try them for a change from the regular food that we make and you are sure to be a fan of Bottlegourd theplas too. Happy and healthy cooking! ❀️

RECIPE:

Ingredients: { 1 Cup = 240 ml }

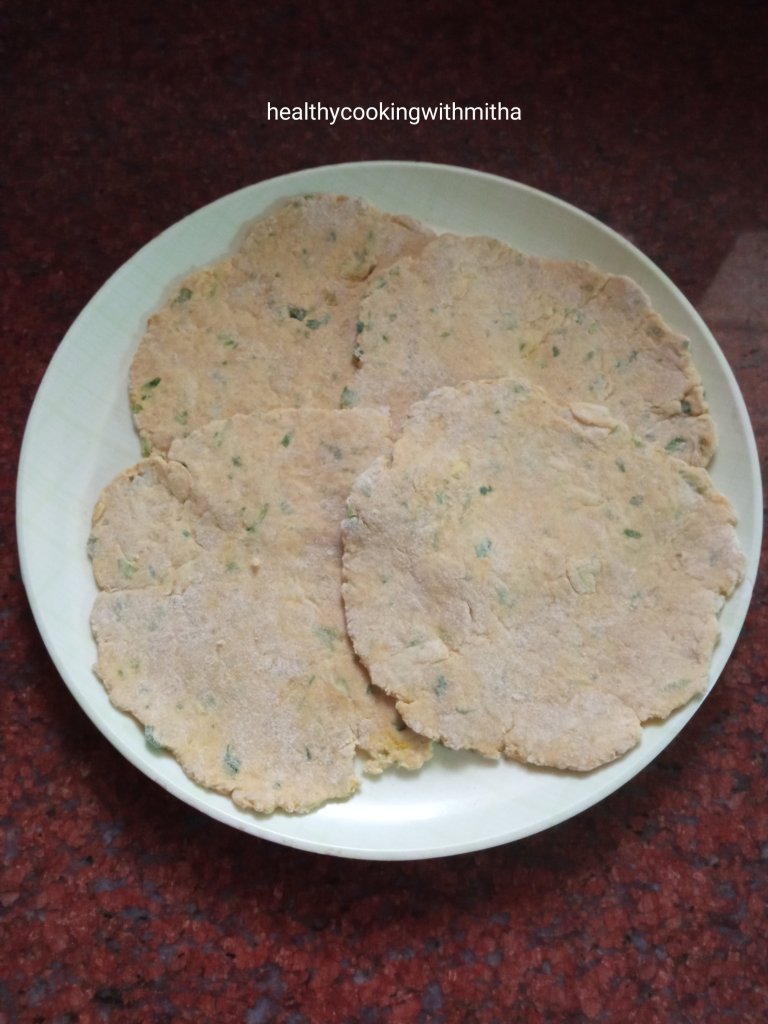
Makes about 4 Theplas

1 Cup Whole Wheat flour/ Atta

1/2 Cup peeled, cored and grated Bottlegourd/ Lauki / Dudhi / Sorekai / Chorakaa

1/2 inch Ginger piece, grated

3 Tbsp Coriander leaves, chopped

1/4 tsp Turmeric powder

1/2 tsp Red chilli powder

1 tsp Coriander powder

1 tsp Garam masala powder

Salt to taste

1 to 2 Tbsp Yogurt/ Curd or as needed

Dry wheat flour as needed while rolling

Oil or Ghee to cook the Theplas

Step by step recipe:

1. Peel, core and grate Bottlegourd. I took half of one medium sized Bottlegourd and got 1/2 Cup gratings.

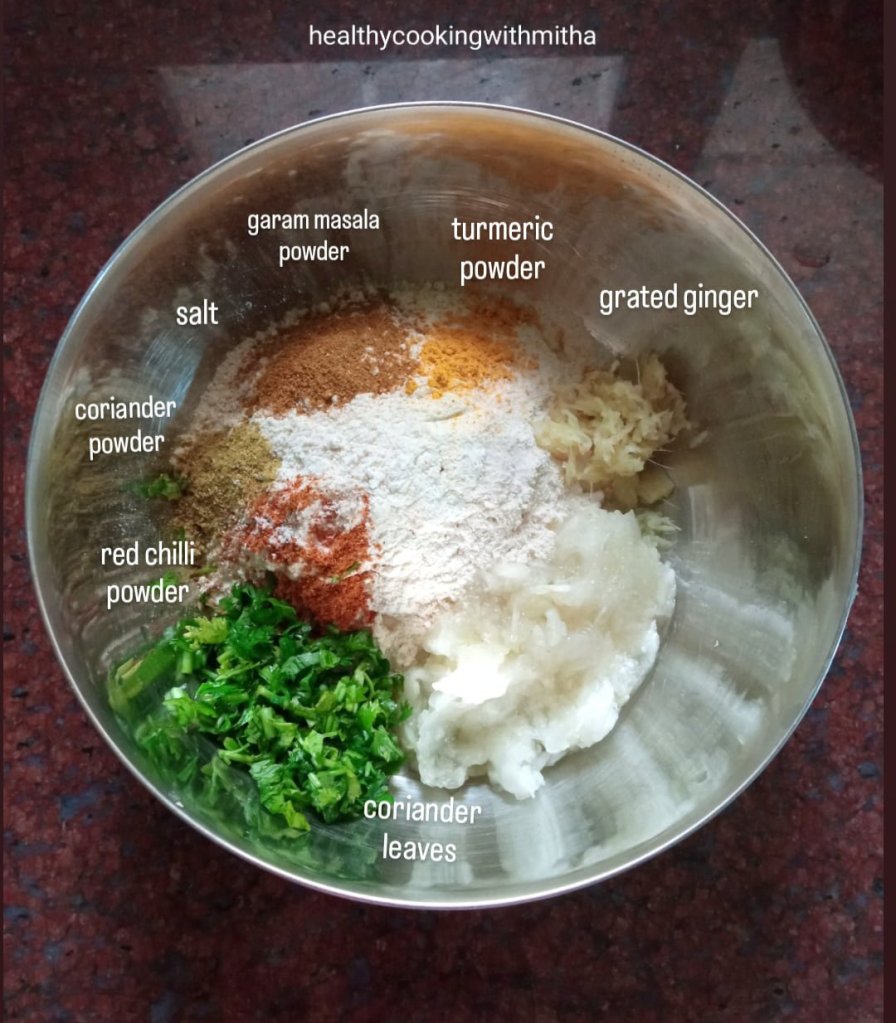
2. Add it to a mixing bowl. Add wheat flour. Then add grated ginger, chopped coriander leaves, turmeric powder, red chilli powder, Garam masala powder, coriander powder and salt.

3. Mix well using hands. Bottlegourd will release it’s water and the dough will be moist.

4. Now add 1 Tbsp Yogurt and mix well to form a dough.

Note: This step is very important as if you add more yogurt, the dough will be wet and you won’t be able to roll the theplas. Add only as much as to form a dough. In case by mistake you add more yogurt, just add more wheat flour to form a non sticky dough.

5. Coat the dough with few drops of any kind of oil so that the dough becomes non sticky.

6. Now divide into equal sized dough balls. Flatten and dip into dry wheat flour. Roll as thin as you can.

Note: The shape will not be perfect round due to grated bottlegourd in it but it’s fine. Just dip into as much dry wheat flour as needed and roll.

7. Now fry both sides on a hot tawa applying oil or Ghee on either sides, cooking the Thepla really well till it turns golden brown in colour.

8. Serve hot with mango or lemon pickle. ❀️

Notes:

* Hot theplas with pickle taste the best but you can also make ahead and keep as these last for two to three days. A perfect travel food made regularly by Gujaratis.

* Do a taste test by eating a small bite of the bottlegourd before grating to see if it’s bitter. I have never found a bitter one but I have heard some do taste bitter. So I always taste before grating.

* You can also add finely chopped green chillies to thepla dough but since I make for my kids, I add only little red chilli powder.

* Knead the dough only using the moisture from bottlegourd and yogurt. Don’t add water while kneading.

* The ratio of 1/2 Cup grated bottlegourd to 1 Cup wheat flour and 1 Tbsp Yogurt gives a very soft Thepla but is slightly tricky while rolling. If you are not good at rolling, you can increase the quantity of wheat flour to 1 1/2 Cups wheat flour. The texture will be similar to rotis though.

* While rolling, use ample amount of dry wheat flour which helps in rolling easily. If using less, the dough will stick to the rolling platform.

* I used ghee to fry the theplas. You can use oil too.

* A simple mango pickle tastes the best with this Thepla. You can also make coriander chutney or raita too.

* I regularly make this Bottlegourd Halwa which tastes really delicious. You can try it as well.

Click on the image to save the recipe on Pinterest
Advertisement

Paneer Kathi Roll | Paneer Frankie | Paneer wrap

Click on the image to save the recipe on Pinterest.

If there is one event here in Qatar that I used to wait eagerly for (pre corona times), it is the Qatar International Food Festival or QIFF as it is called. My first visit to the QIFF was in 2016. It was held in one of my favorite parks here, the MIA park which is in a picturesque location. I love to sit there, just admiring the beauty and calmness of the gleaming blue waters 🌊. And enjoying food there made it extra special. That first experience of QIFF at MIA park was the best one till date. ❀️

Being vegetarians (who love Indian food ❀️) actually takes away the point of going to an “international” food festival (the irony 😁) but there were so many options from Indian restaurants that we got spoilt with choices. It was like finding all the famous Indian restaurants from Qatar in one place and you get to choose their best dishes from the menu. In short, Foodie heaven! 😍

After that, we made a point to go to the QIFF every year, for some variety chaats, north Indian platters, south Indian delicacies, sweets, ice creams and juices, hovering from stall to stall (basically rummaging into all the veg options πŸ˜‚πŸ˜‚). I know it sounds like a lot of food but these food festivals make me go crazy and I forget all the healthy eating for a while (Sorry but not sorry, Mr Diet πŸ˜…πŸ˜…).

The last food festival we visited was held in November 2019 which was a street food festival. The chef at the live counter of Desi Dhaba restaurant making hot Jalebis fried in ghee was the highlight of the event for the sweet lover in me. Look at how delicious the Jalebis were! 😍 My mouth waters as I think about it. πŸ˜‹

Another unforgettable food memory with these food festivals is the Paneer Kathi Rolls from Zaffran cafe stalls. I never missed it and it is the most delicious kathi rolls I have ever eaten. ❀️

Click on the image to save the recipe on Pinterest.

So since due to Covid, it has been more than an year of no food festivals (😭), I decided to recreate those Paneer Kathi Rolls at home and how amazing did it come out. Never knew making them at home was so easy. My kiddos too loved it so much that they could not stop saying “mmmmm yummyyyyy 😍😍” (gone ditto after me 🀣🀣 exactly how I can’t stop saying it when I eat something yummy, not caring for anyone else in the world. πŸ˜‚)

So I thought I must share this yumminess of a recipe with you all too. Makes a filling evening snack or even a meal in itself. Also a great way to finish your leftover rotis. Hope you all try and like it. Happy and healthy cooking! ❀️

RECIPE:

Ingredients: { Makes 5 to 6 Rolls }

For the Roti:

2 Cups wheat flour

Salt to taste

Water as needed

For the Paneer filling:

200 grams Paneer cubes

1 Tbsp thick Curd/ Yogurt

1 tsp Tomato ketchup

1/2 tsp Cumin powder

1/2 tsp Garam masala powder

1/4 tsp Turmeric powder

Salt to taste

For the Salad:

1 medium sized Onion, thinly sliced

1/4 a medium sized Capsicum, thinly sliced

Salt to taste

1/2 tsp Vinegar or Lemon juice

For Chutney:

Check the detailed recipe here

Ghee while making the rotis and pan frying paneer

Step by step recipe:

1. Take wheat flour and salt in a bowl. Add water and form a firm yet soft dough like that while making rotis. Keep aside.

2. Now take paneer cubes in a bowl. Add yogurt, ketchup, cumin powder, Garam masala powder, Turmeric powder and salt.

3. Mix well.

4. Now heat 2 tsp ghee in a frying pan and roast the paneer cubes on medium flame till the cubes get browned on all sides. Keep flipping as they turn brown each side.

5. Remove from the flame and keep aside. Also make the green chutney.

6. Take sliced onions and capsicums in a bowl. Add salt and vinegar. Mix well. Now the things ready for filling are ready.

7. Make roti like you make regularly. I make it almost like a square so that it’s easier to roll. Place in a plate. Spread with a spoon of the chutney. In the center, keep the paneer pieces are shown. Top with the salad.

8. Roll and serve!

Click on the image to save the recipe on Pinterest.

Notes:

* I make this roasted gram dal coriander leaves chutney for the roll. You can make regular Coriander leaves chutney for it too. Just remember to make the chutney thick and not liquidy as we have to spread it.

* You can add more veggies into the salad filling. I just keep it simple as I don’t want to overfill the rotis.

* Be careful to roast the marinated paneer on medium flame. Else due to Yogurt, it can turn black.

* You can also add red chilli powder to the marinate to make the paneer filling more spicy. I don’t add as I make for my kids too.

* These rolls are the best way to finish leftover rotis in a delicious and unique way. Also great for lunch box. Just make the chutney very thick if making for lunch box.

Click on the image to save the recipe on Pinterest.