Category Archives: Curry house

Tendle Kajjubi Upkari | Ivy gourd – Cashewnut stir fry Konkani style

Click on the image to save the recipe on Pinterest

Having grown up now (though I would love to be a child 😍), I realize how much my food choice has changed over the years. From loving hotel food as a kid to now, loving all the dishes that were made at home by my Amma and Grandma, recreating them in my kitchen and remembering my childhood memories with the dishes, I have come a long way. ❤️

Even though I still like to enjoy restaurant dishes occasionally, my comfort will always be the simple dishes that I make daily. We have pej or matta rice gruel for dinner and any kind of stir fry or upkari (as we call in Konkani) is a must with it.

So whenever I get good ivy gourd, I make this tendle kajjubi upkari which is an alternative to the famous Konkani dish called Tendle Bibbe upkari which is made with Bibbo or Fresh Cashews. They are available during our new year festival or Ugadi and in every Konkani household, either Bibbe upkari or Tendle Bibbe upkari is made.

Since I live in Qatar and we don’t get fresh cashews here, I make this upkari with regular cashews and it tastes delicious too. I made it yesterday and decided to share this easy recipe with all of you too. I know Konkanis already know this easy recipe but I am sure it will be new to atleast some of my readers.

So here’s sharing the recipe. Hope you all try and love this yummy dish. Happy and healthy cooking! ❤️

RECIPE:

Ingredients:

1 1/2 Tbsp Coconut Oil

1 tsp Mustard seeds

A sprig of Curry leaves

3 Green chillies

About 20 Ivy Gourds/ Tindora/ Tendle (2 Cups sliced)

3/4 to 1 Cup Cashews (regular ones)

Salt to taste

2 Tbsp freshly grated Coconut for garnish

Step by step recipe:

1. Wash ivy gourds well, then chop off the ends and slice them as shown. You can slice one ivy gourd into 6 long pieces.

2. Heat oil in a pan, add mustard seeds, allow it to splutter. Now add curry leaves and green chillies. Fry for few seconds.

3. Now add the sliced ivy gourds and cashews together. Mix well.

4. Add little water ( about 1/4 cup) along with salt. Cover and cook on medium flame for about 10 mins. Check in between if the water has evaporated. Add little more if needed.

5. Once the ivy gourds change colour to light green and turns soft along with cashews turning soft too, the upkari is done. If water is remaining in the stir fry, just keep the flame on high and fry till the mixture turns dry. Now garnish with freshly grated Coconut. Done 🙂

6. Serve with rice meals or with congee (pej/rice gruel). Tastes so yum ❤️

Click on the image to save the recipe on Pinterest

Notes:

* The ratio of ivy gourd to cashew is upto you. We love cashew in this upkari. So I add 1 Cup for 2 Cups sliced ivy gourd. You can also add just a handful. Tastes good even then.

* Remember to cook both the ivy gourd and cashews till soft. Ivy gourd takes time to cook, so keep the flame on medium, add little by little water and cook till it changes to light green and soft.

* We Konkanis make this with Bibbo or fresh, tender Cashewnuts during our New year festival called Ugadi. But since I live in Qatar and am here during Ugadi, I make it with cashews.

* You can check all my Konkani recipes here:

All Konkani Recipes

Advertisement

Kerala style Vegetable stew | easy stew recipe

Click on the image to save the recipe on Pinterest

I love different varieties of mixed vegetable curries and Vegetable Kurma is one of my favorite. Apart from that, I also make Vegetable stew for a change as it’s very quick to make, tastes divine and so aromatic too.

Though it is usually eaten with Appam and Idiyappam, it is a great combination with chapatis and pulav too. Today I made it with dosas for breakfast and it was amazing as well. The soft dosas dipped in this stew was a tasty and healthy breakfast.

Hope you all try this delicious stew and enjoy it’s aroma in your kitchen too. Happy and healthy cooking! ❤️

(Sorry for short writeups nowadays. My kids hardly give me time to write blogs as they need me always. But I really wanted to share this recipe right away. So writing this quickly for all of you. 😍)

RECIPE:

Ingredients:

2 Tbsp Coconut oil

2 Cardamom pods

2 Cloves

1 inch Cinnamon stick

1 Bay leaf

1 inch Ginger, finely chopped

1 medium sized Onion, finely chopped

1 long Carrot, diced (about 1 Cup)

10 to 15 medium sized Beans, chopped

2 medium sized Potatoes, diced

1/4 tsp Pepper powder

2 Cups thin Coconut milk

A sprig of Curry leaves

1 Cup thick Coconut milk

Salt to taste

Step by step recipe:

1. Prepare the vegetables first by peeling and dicing carrots, chopping beans into 1 inch pieces (discard the ends), peel and dice potatoes. Keep aside. Also cut green chillies into long pieces and finely chop onions and ginger.

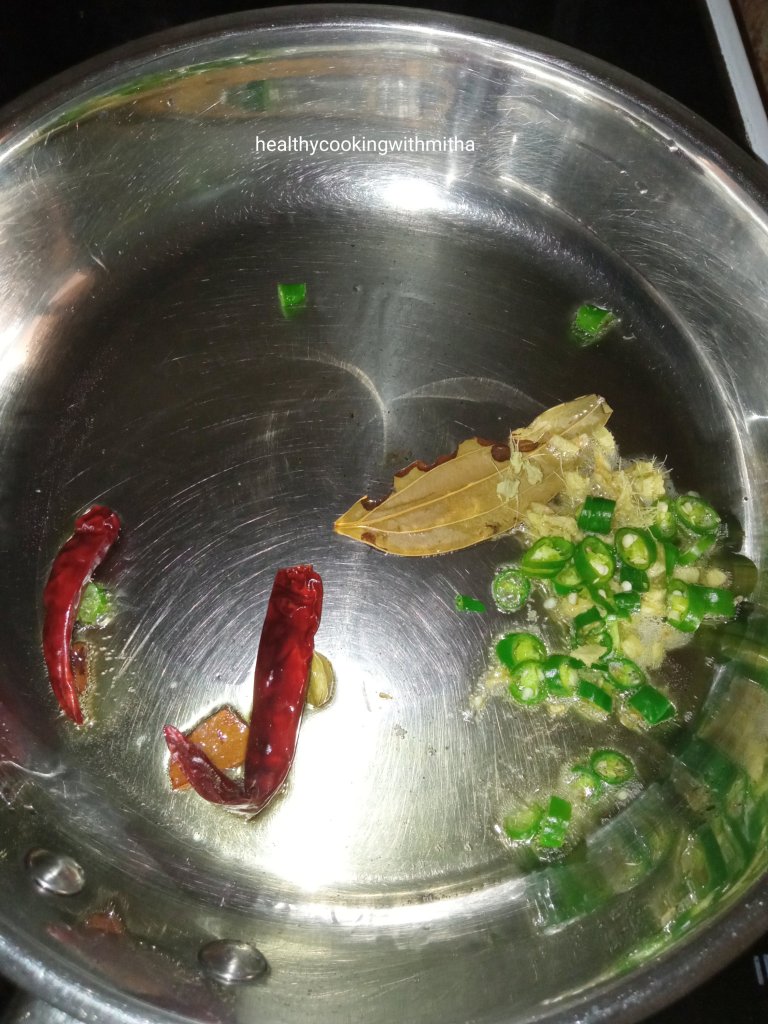
2. Heat oil in a pan. Add a bay leaf, cloves, cardamom and cinnamon. Also add ginger, green chillies and onions. Fry till onions turn translucent.

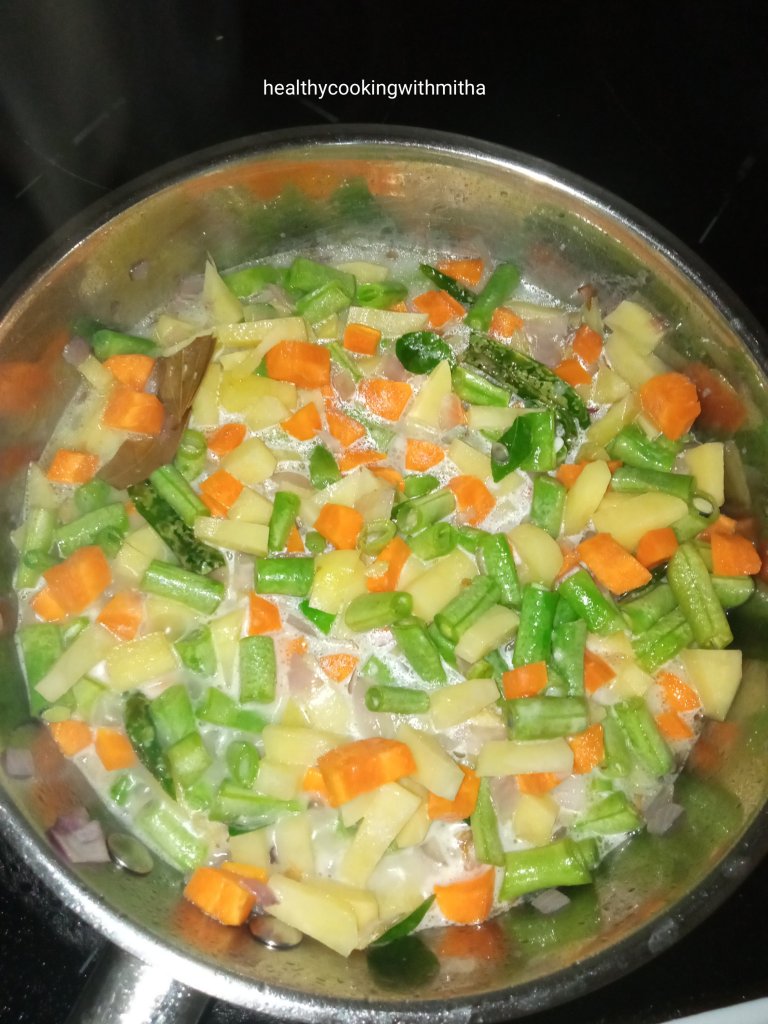
3. Now add the vegetables along with curry leaves and mix well. Add the thin Coconut milk (about 2 Cups). Also add salt and pepper powder. Cover and cook till the veggies turn soft.

4. Once vegetables turn soft (about 10 mins), add thick Coconut milk ( 1 Cup) and mix well.

5. Let it simmer on medium flame for about 10 mins till the gravy thickens. Now adjust water and salt. Done ❤️

6. Vegetable stew is served with Appam or Idiyappam. You can also serve it with rice or pulav, chapatis or dosas. It is so simple yet aromatic and delicious. ❤️

Click on the image to save the recipe on Pinterest

Notes:

* You can also add fresh/ frozen/ dried peas if you have.

* There are so many variations to stew as some add turmeric powder and even Garam Masala powder but this is a basic recipe close to the authentic Kerala style Vegetable stew. You can make variations as per your taste.

* Thick Coconut milk means when you grind fresh coconut with little water and sieve.

* Thin Coconut milk means when you grind the sieved coconut again with water and sieve again. That is the second coconut milk.

* What I do is, I use coconut milk powder diluted with water to get thin Coconut milk and use canned coconut milk for thick Coconut milk.

* You can use fresh, powder or canned coconut milk in this recipe as per what is easily available for you.

* Cooking the vegetables in thin Coconut milk is what gives the stew it’s flavour. So don’t skip it.

* After adding thick Coconut milk, don’t cook it on high flame for long. Just simmer it till it boils and remove from flame.

* You can also try this recipe of Restaurant style Vegetable Kurma.

Ghugni | Bengali Matar Ghugni | Peas curry/chaat

Click on the picture to save the recipe on Pinterest

Chaat of any kind has been my favorite since a child, may it be the eating waala spicy, tangy chaats or the talking waala chatting. 😂😂 In fact talking my heart out while eating chaats with my loved ones is my dream kind of outing. During my college days, me, my brother and parents used to go out to eat chaats on Saturday evenings. It used to be so much fun and I still cherish those memories. ❤️

Now, whenever we go out and there are chaats available, my first order would definitely be atleast one among the various chaats in their menu. 😍 Karnataka style Masala Puri is my favorite among all chaats followed by Dahi Puri.

Bengalis make a similar chaat like our masala puri with peas, which can be had as a curry too. I had shared it in my old blog and I am happy to share it here too. This Chaat is very flavorful and so easy to make that you will be tempted to try it as soon as possible.

Hope you all will try it for your next evening snack and enjoy it with your cup of tea or coffee. Enjoy cooking and eating with your loved ones. It is these moments that we remember all our life. Happy and healthy cooking ❤️

RECIPE:

Ingredients:

1 Cup dried Green peas/ white peas

1 Tbsp Oil

2 tsp Ghee

1 Bay leaf

2 Cloves

1 inch Cinnamon stick

1 Cardamom pod

2 Dried Red chillies

1 inch Ginger, grated

2 Green chillies, finely chopped

1 medium sized Onion, thinly sliced

1 medium sized Tomato, diced

1 medium sized Potato, peeled and diced

1/4 tsp Turmeric powder

1 tsp Cumin powder

2 tsp Coriander powder

2 tsp Red chilli powder or to taste

3 Tbsp finely chopped Coriander leaves

1 green chilli and few finely chopped onion pieces, for garnish

Salt to taste

Step by step recipe:

1. Wash well and soak the dried peas in enough water overnight or for atleast 8 hours.

2. Drain the water completely and wash again. Add the peas to a pressure cooker with fresh water to the level of about 2 cm above the peas level. Pressure cook till soft. Take care to not overcook it.

In my electric stove top, I keep on high flame for 10 mins and it gets very soft.

3. Now heat oil + ghee in a pan. Add bay leaf, cloves, cinnamon, cardamom, red chillies, ginger and green chillies. Let it cook for few seconds.

4. Now add sliced onion and fry till it turns translucent. Add potatoes and fry in the oil for few seconds.

5. Add tomatoes and mix well. Let it turn soft.

6. In a small bowl, add turmeric powder, cumin powder, coriander powder and red chilli powder. Add about 2 to 3 Tbsp water and make a smooth paste with it mixing well with a spoon.

7. Add this to the pan and mix well stirring continually for few minutes till the powders cook.

8. Add the cooked green peas along with salt. Also add water if needed to get the desired consistentency. I prefer it thick, so don’t add much water. Cover and cook for about 10 mins on medium flame till the gravy thickens.

9. Remove from flame. When serving, garnish with chopped onions, green chillies and coriander leaves.

Click on the picture to save the recipe on Pinterest

Notes:

* You can use dried Green or white peas to make Ghugni. Frozen or fresh ones will not give the same taste.

* Do soak the peas for atleast 8 hours so that it gets digested well by the body.

* Don’t overcook the peas that it gets mashed. We need it go be soft yet retain it’s structure.

* You can enjoy Ghugni as a Chaat or like a curry with rice or chapati.

* For Ghugni Chaat, you can make additions like tamarind chutney/ coriander leaves- mint chutney and sev or bhujiya as topping but I love it just as it is.

* The gravy can be thick or thin like how you prefer but Ghugni is usually had thick.

* With leftover Ghugni, I add paneer cubes to make it Matar Paneer. Tastes so yum too. 😍

My favorite Chaat recipes:

* Masala Puri Chaat

* Bhel Puri Chaat

* Sprouted Moong Chaat

* Paneer Pav Bhaji

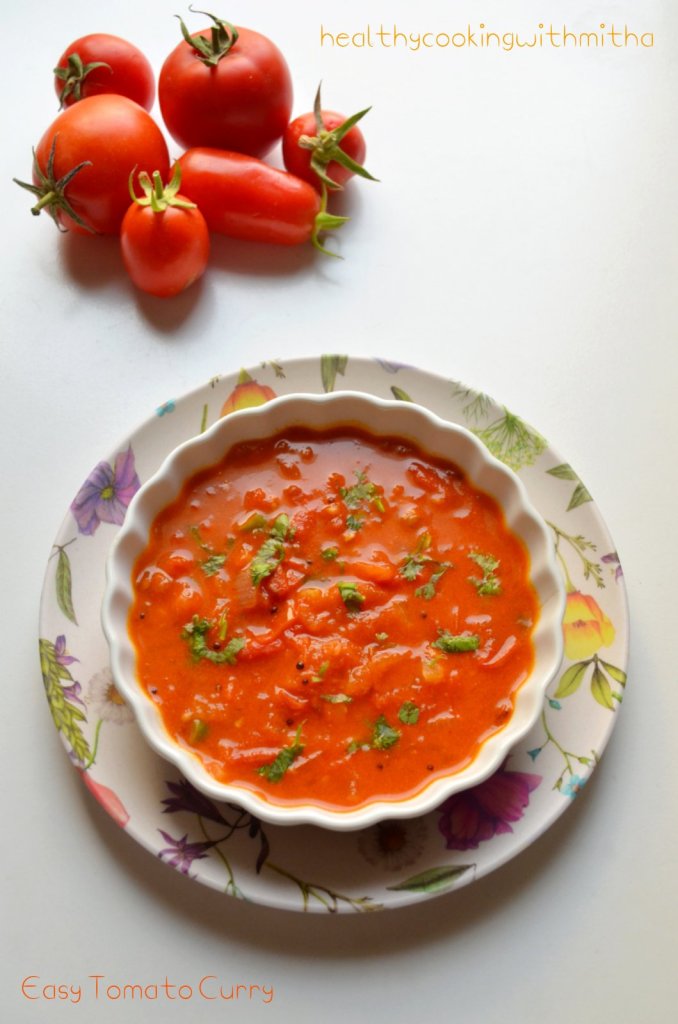
Easy Tomato Curry | To eat with dosa, chapati and rice

Click on the picture to save the recipe on Pinterest

After homegrown methi leaves, one produce that has been growing abundantly in our garden is the gorgeous red tomato 🍅. It’s also one of my favorite as I love the flavour it brings in my chutneys and curries.

During off season, I use it only in North Indian gravies but now that they are available in abundance, this tomato curry has been my first choice to make always. I made it as an accompaniment with dosas as a change for breakfast and we loved it so much that now I make it regularly to eat with chapatis and rice too.

The quantity of tomatoes that grows in our garden make me so happy and I want to share it with all of you too. Homegrown love 😍 Look at the variation in size and colours as some are yet to ripe. They stay well at room temperature and the green ones will soon turn red sitting with other ripe tomatoes. It’s a treat to see and use them daily. ❤️

Hope you all try and love this curry with tomatoes too when they are in season. It’s a very simple recipe but tastes really yummy specially with ripe tomatoes. Happy and healthy cooking ❤️

RECIPE:

Ingredients:

6 to 8 medium sized Tomatoes

2 medium sized Onions

1 inch Ginger piece

3 Green chillies

A sprig of Curry leaves

1 Tbsp Coconut oil

1 tsp Mustard seeds

1 tsp Cumin seeds

1/4 tsp Turmeric powder

1 tsp Coriander powder

2 tsp Red chilli powder or to taste

Salt to taste

1/2 Cup Coconut milk ( I mix 2 Tbsp Coconut milk powder with 1/2 cup water)

3 to 4 Tbsp finely chopped Coriander leaves

Step by step recipe:

1. Heat oil in a pan and add mustard seeds. When it splutters, add cumin seeds, curry leaves, finely chopped green chillies and ginger.

2. Now add finely chopped onions and fry till it turns translucent.

3. Now add deseeded and roughly chopped tomatoes. Add salt and mix well.

4. Allow tomatoes to cook well. It will leave water and the mixture will be watery. Now add turmeric powder, coriander powder and red chilli powder.

5. Mix well and allow the mixture to come to a boil. Now add coconut milk and mix well.

6. Cook till tomatoes blend well and the mixture thickens ie for about 5 mins. Check for salt and other spice powders. Adjust and then remove from flame. Garnish with coriander leaves.

Click on the image to save the recipe on Pinterest

Notes:

* This curry tastes really delicious as an accomplishment with dosas, chapatis, parathas and rice.

* I add 6 to 8 tomatoes as I have plenty of homegrown tomatoes. You can also use 3 to 4 as per what you have.

* For satwik version, skip onions and add hing instead in the seasoning.

* You can also add rasam powder for a unique flavour. I keep alternating between powders to give different taste each time.

* I also add a dash of pepper powder sometimes. Tastes yum too.

* I use instant coconut milk powder to make coconut milk. You can use fresh coconut milk or even skip it completely. But coconut milk gives a nice thick texture and flavour to this curry.

* For other tomato dishes:

Ammas Tomato Chutney

Hotel style Tomato Chutney

Eggless Tomato Omelette

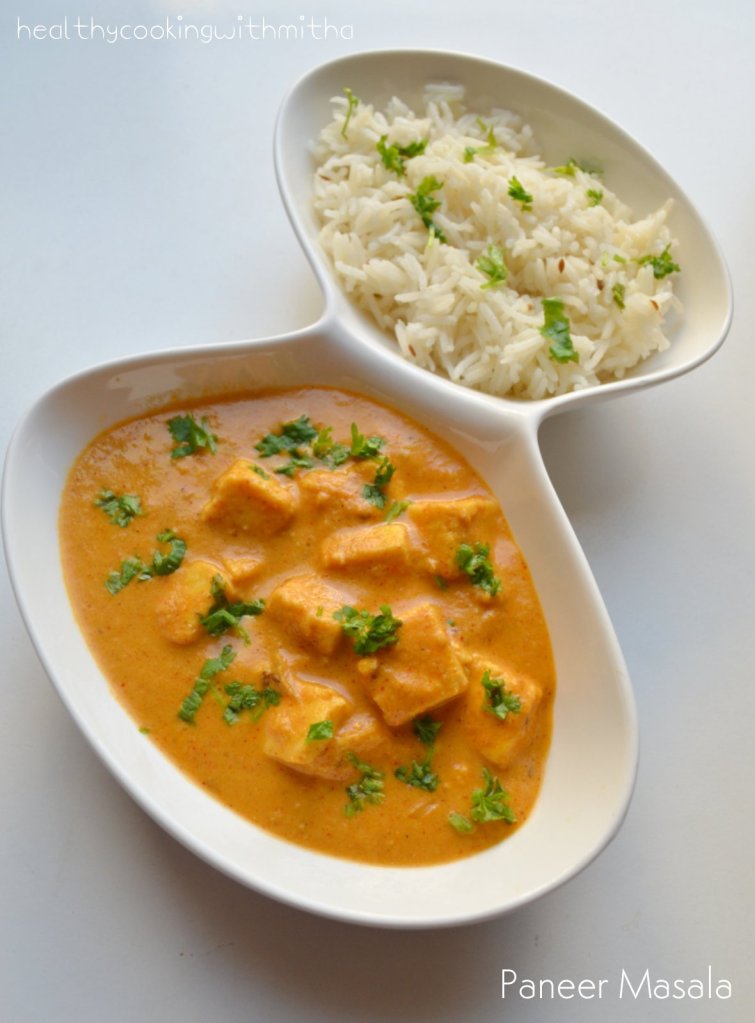
Easy Paneer Masala | Quick Paneer curry

Click on the image to save the recipe on Pinterest

Paneer is our most favorite and I regularly make different paneer curries and kathi roll with it. But the most commonly made is this super easy and very tasty Paneer Masala which I made one day when I had 15 mins to cook before we went out. This quick fix curry was loved so much by my family that now, I mostly make Paneer only this way.

This along with jeera rice or chapatis makes a delicious meal which tastes better than even restaurant ones. I love how homemade food has a comfort of it’s own which can never be found in outside foods, no matter from which fancy restaurant.

Hope you all try and like this simple yet delicious curry too. Happy and healthy cooking! ❤️

RECIPE:

Ingredients:

300 grams Paneer cubes

To fry and make paste:

2 ripe medium sized Tomatoes

1 medium sized Onion

1 inch Ginger piece

About 10 to 12 Cashews

4 Cloves

2 Cardamom pods

1 Tsp Ghee

Other ingredients:

1/4 Cup Curd/ Yogurt

1 Tbsp Ghee

1 tsp Cumin seeds

1 Bay leaf

1/4 tsp Turmeric powder

1/2 tsp Amchoor powder

2 tsp Coriander powder

2 tsp Red chilli powder

2 tsp Garam Masala powder

A pinch of Sugar

Salt to taste

Finely chopped Coriander leaves for garnish

Step by step recipe:

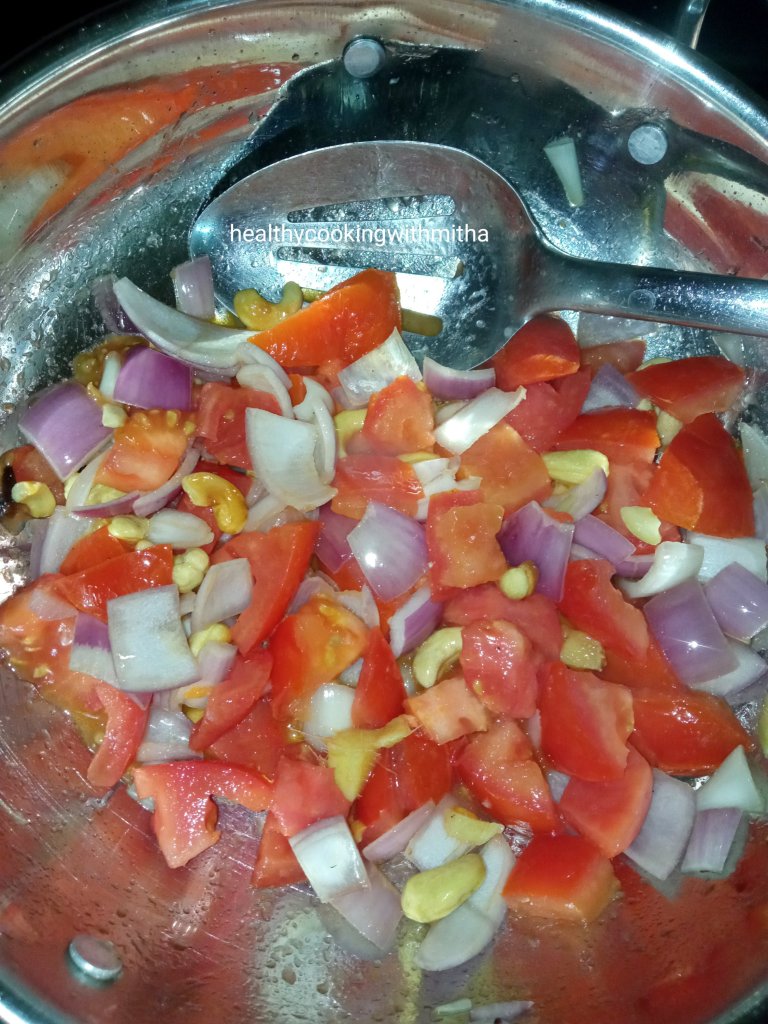
1. Heat 1 tsp Ghee in a pan. Add cloves and cardamom pods. Add Cashews and fry till brown. Now add roughly chopped ginger, onions and tomatoes.

2. Fry till the onions and tomatoes turn soft. Now allow it to cool.

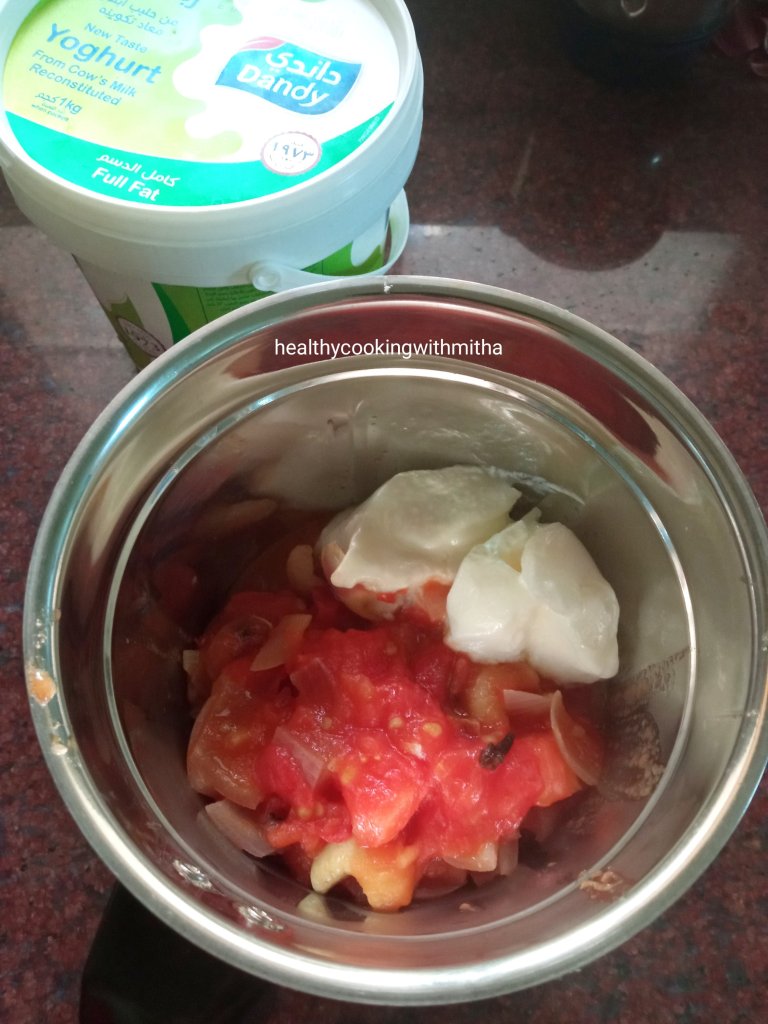
3. Now add this to a blender along with yogurt.

4. Blend to a smooth paste. Now heat Ghee in the same pan. Add cumin seeds and bay leaf. Fry till cumin seeds turn brown. Now add the ground paste.

5. Mix well for few minutes. Then add turmeric powder, Amchoor powder, coriander powder, red chilli powder, Garam masala powder, sugar and salt.

6. Mix well again continually for about 5 mins. Now add paneer cubes and cook on medium flame till paneer turns soft. Add water if needed to adjust consistency.

7. Remove from flame and garnish with finely chopped Coriander leaves.

Click on the image to save the recipe on Pinterest

Notes:

* I usually combine this with jeera rice or chapatis. For jeera rice, heat coconut oil and fry cumin seeds. Add rice, hot water and salt. Cook till rice turns soft. Garnish with coriander leaves.

* You can skip Amchoor powder if you don’t have. I add it since I have it. Yogurt and tomatoes are enough for the tangy flavour.

* A pinch of sugar enhances the overall flavour of the curry. So remember to add it.

* You can decrease the amount of cashews if you like a less thicker curry.

Other Paneer recipes that I make regularly:

Paneer Butter Masala | No Onion No Garlic

Dhaba Style Paneer

Restaurant style homemade Palak Paneer

Paneer Sukka

Vegetable Paneer Chilly

Paneer Hara Masala

Paneer Kathi roll

Capsicum Peanut Masala | Capsicum dry curry

Click on the image to save the recipe on Pinterest.

A new blog after a long break of many months. Kids had their summer vacation and towards the end of it, we went to India. Had a great month celebrating festivals with our families and the highlight being able to spend Janmashtami time at my native, Udupi. ❤️

If there is heaven on earth for me, it is Udupi. The feeling of living there, being able to see my dearest Krishna always is very precious. Hope my dream of settling down in Udupi fulfills in the coming years. ❤️🙏

I missed cooking at Udupi as we were either constantly travelling or were at our relatives’ houses. So coming back to my kitchen in Qatar, I have been cooking a lot to compensate it. 😁 This Capsicum Peanut Masala was a recent try inspired by something similar which I ate at a hotel during my vacation.

It comes out so delicious that a meal with rice, rasam and capsicum masala is all you need to get your soul satisfied. This is that kind of curry, simple, unique and very flavourful.

Hope you all try and love this curry too. Happy and healthy cooking! ❤️

RECIPE:

Ingredients:

1/4 Cup Peanuts

3 medium sized Green Capsicum, chopped into small pieces

1 small Onion

2 Tbsp Coconut Oil

2 tsp Mustard seeds

Few Curry leaves

3 Green chillies

1 tsp Tamarind paste

1/4 tsp Turmeric powder

2 tsp Red chilli powder or to taste

2 tsp Sambar powder ( I use Nirapara brand)

Freshly grated coconut for garnish

Salt to taste

Step by step recipe:

1. Dry roast peanuts in a pan till it starts changing colour and let’s out an aroma. Don’t let it turn black. Allow it to cool.

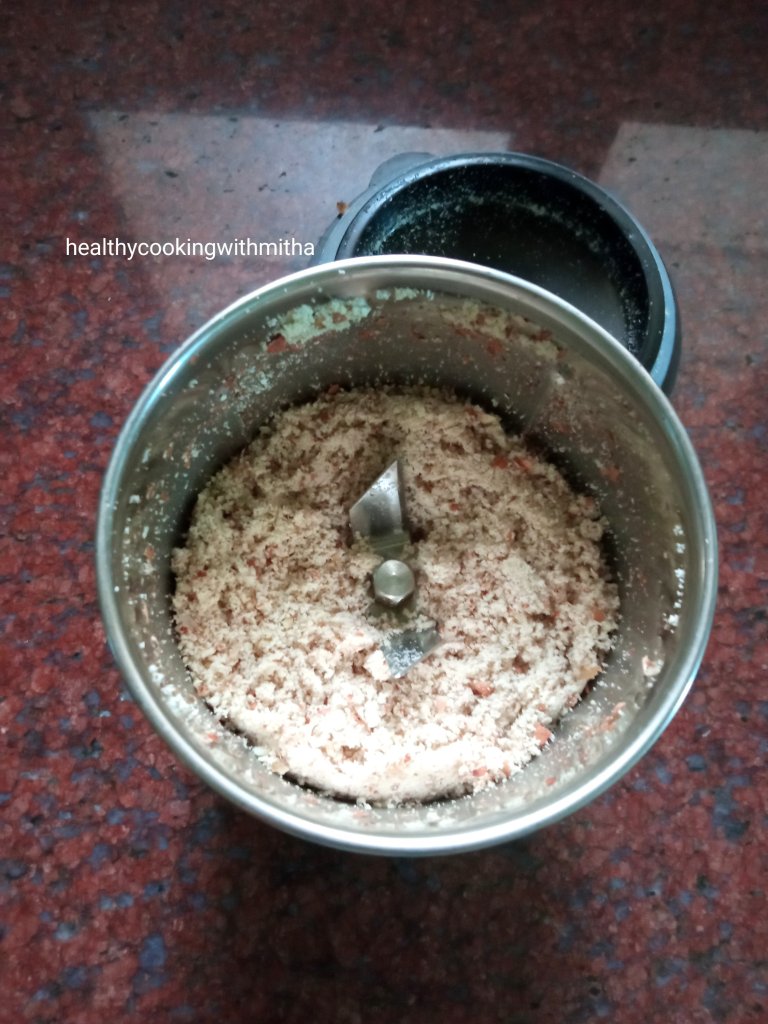
2. When it cools down, powder it coarsely in a mixer. Just pulse for few turns. Don’t blend it a lot as it will turn into paste. Keep it aside.

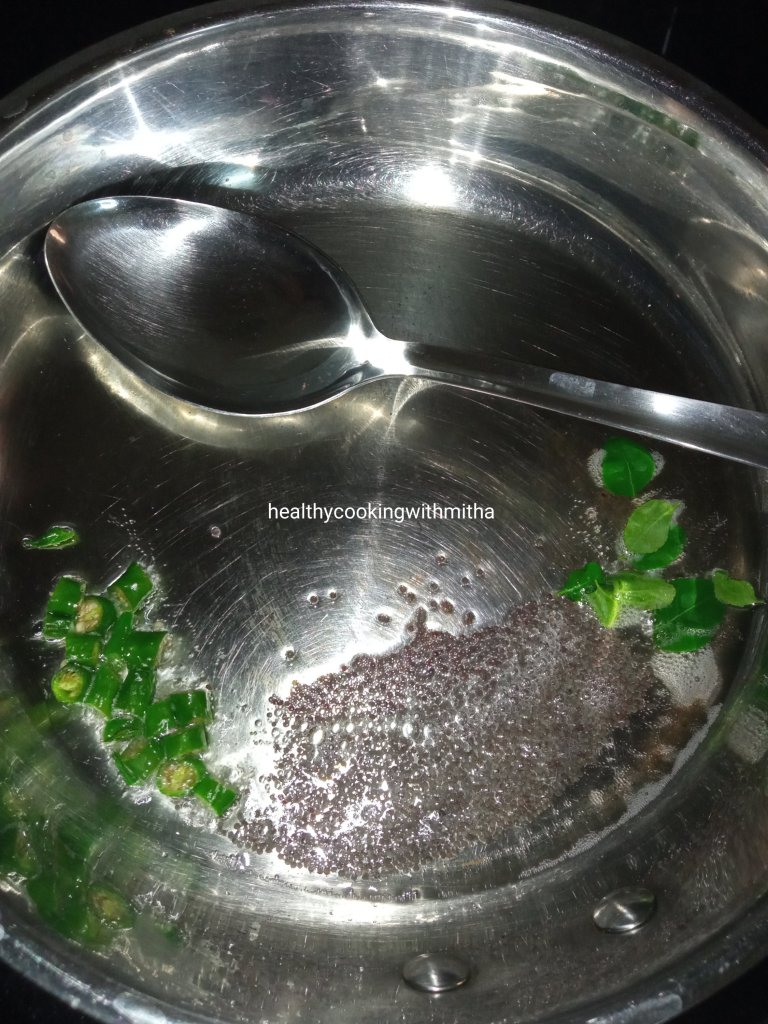
3. Now heat oil in the same pan, splutter mustard seeds. Add curry leaves and green chillies. Fry for few seconds.

4. Add finely chopped onions and fry till the onions turn translucent.

5. Now add chopped Capsicum and fry for few minutes.

6. Add salt, turmeric powder, red chilli powder, sambar powder and tamarind.

7. Mix well. Cover and cook till capsicum turns soft. Sprinkle little water if necessary. Now add the peanut powder.

8. Mix well. Cover and cook for about 5 mins. Add grated coconut on top. Done. 🙂

Serve with rice meals as a delicious accompaniment.

Notes:

* Be careful while roasting peanuts such that they don’t turn black. Roast on medium flame and immediately remove them as soon as they start changing colour.

* Also be careful while grinding the peanuts such that they should not turn into a paste. Coarse powder is enough.

* Onion can be skipped if you follow satvic diet.

* You can reduce chilli powder as we have already added green chillies, depending on your spice level.

* Sambar powder adds a wonderful flavour. So don’t skip it in this curry.

* This curry also tastes yummy with dosa.

Click on the image to save the recipe on Pinterest.

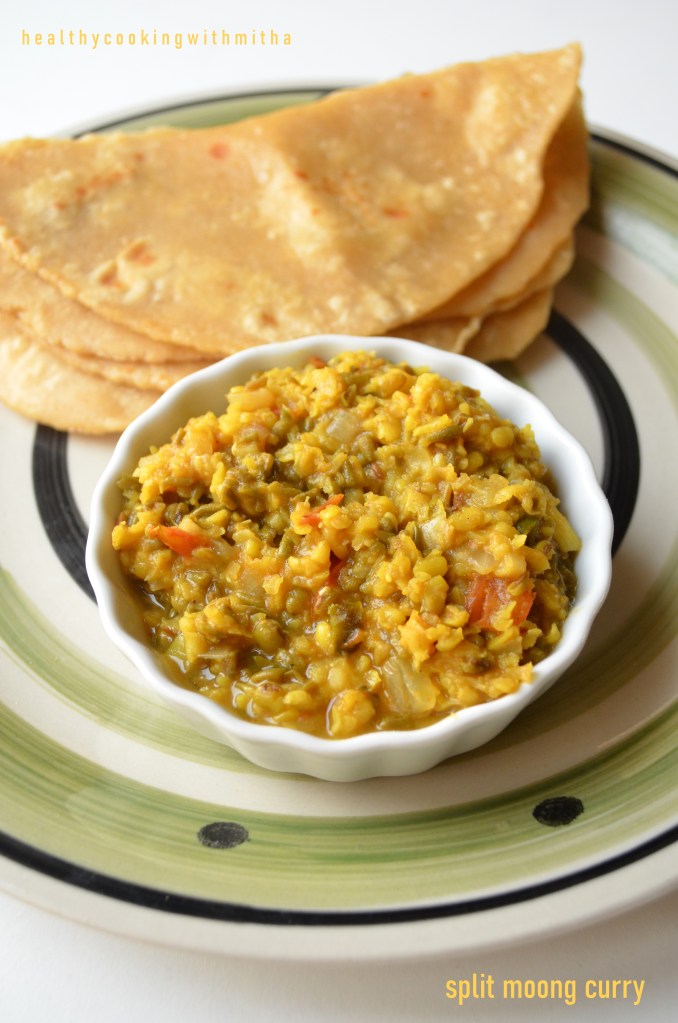
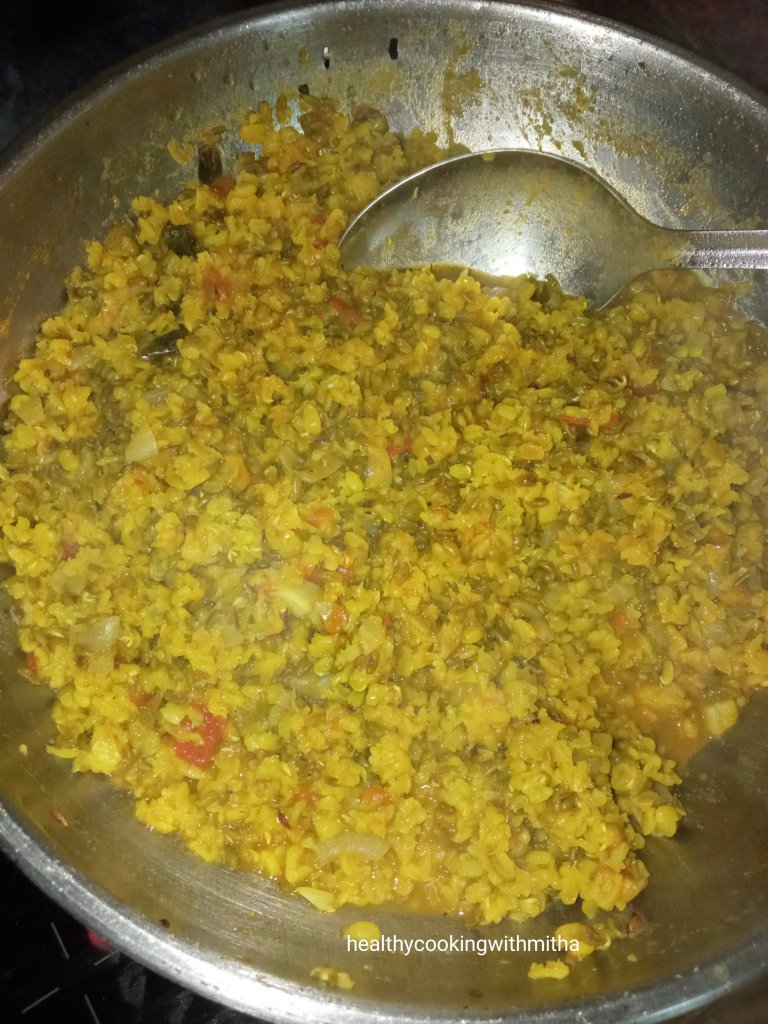
Split Moong curry | Easy side dish for chapatis

Click on the image to save the recipe on Pinterest.

Usually I decide the lunch menu the previous night itself. When I put my kids to sleep, before falling asleep myself, I quickly think of what vegetables are in the fridge, what pulses can I soak and what I could make such that it caters to the liking of all of them (Motherhood diaries and I am sure its a kahaani ghar ghar ki 😅).

But since few days, me and the kids have been doing a dancing session in the evening where we put on Bollywood songs, dance however we want to, without the care in the world. 😂 Even though I am a big zero at dancing 😁, my daughter teaches me few steps and I am learning atleast basic dancing from her. 😀 For me, it’s a form of workout and apart from my favorite walking, this dance session uplifts my mood so much. 😍

My favorite song to dance is “Tum hi ho bandhu” from cocktail movie in which this line is my favorite, “Jag mujhpe lagaye pabandi, main hoon hi nahi is duniya ki.” That’s what I have thought of myself too. Over the years, trying to fit everywhere, I now realize there’s nothing wrong in being different. We are all unique and that’s what makes us special. ❤️ Also, there is truly something magical when you dance for yourself with no one to see you (no adult, to be precise 😄), that I realize now, all thanks to my 6 year old daughter. ❤️

So after all that dancing, I fall asleep even before the kids now 😂 and that leaves me no time to think about the lunch menu. That’s when this instant split moong curry comes handy. When vegetables are less, when you feel like having whole moong curry but have forgotten to soak it or merely if you are in no mood to make something elaborate, this split moong curry becomes a best friend. 😍

The curry tastes really delicious with chapatis and rice equally, is very filling and healthy too. I make this regularly and is loved a lot by my family. Hope you all try and like it too. Happy and healthy cooking! ❤️

RECIPE:

Ingredients:

3/4 Cup split green moong dal (with skin)

1/4 Cup split yellow moong dal (skinned)

1 tsp Ghee + 1 tsp Oil

1 tsp Cumin seeds/ Jeera

3 to 4 Garlic cloves, finely chopped

1 inch Ginger, finely chopped

3 Green chillies, finely chopped

1 medium sized Onion, finely chopped

1 medium sized Tomato, finely chopped

1/4 tsp Turmeric powder

1/2 tsp Cumin powder

1 tsp Garam masala powder

1 tsp Red chilli powder

Salt to taste

1 tsp Lemon juice, for garnish

2 Tbsp Finely chopped Coriander leaves, for garnish

Step by step recipe:

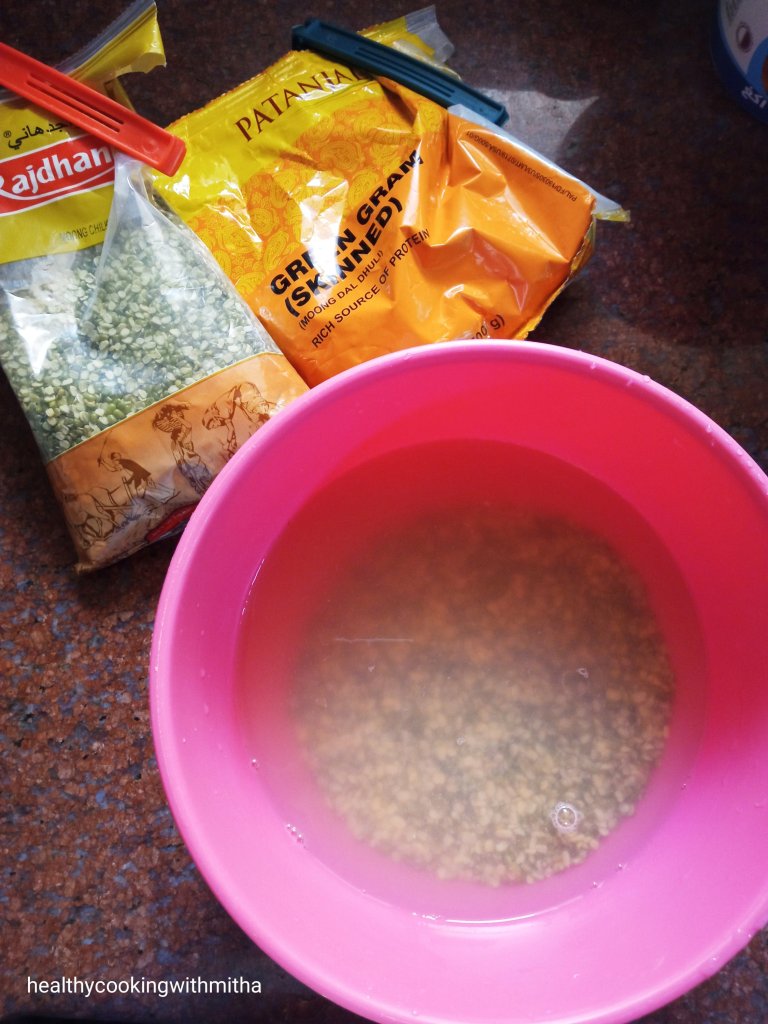
1. Take 3/4 Cup split green moong dal and 1/4 Cup split yellow Moong dal in a bowl. Wash twice and soak till use. (You can make the curry even without soaking but soaking atleast for 15 mins helps it to cook quickly.)

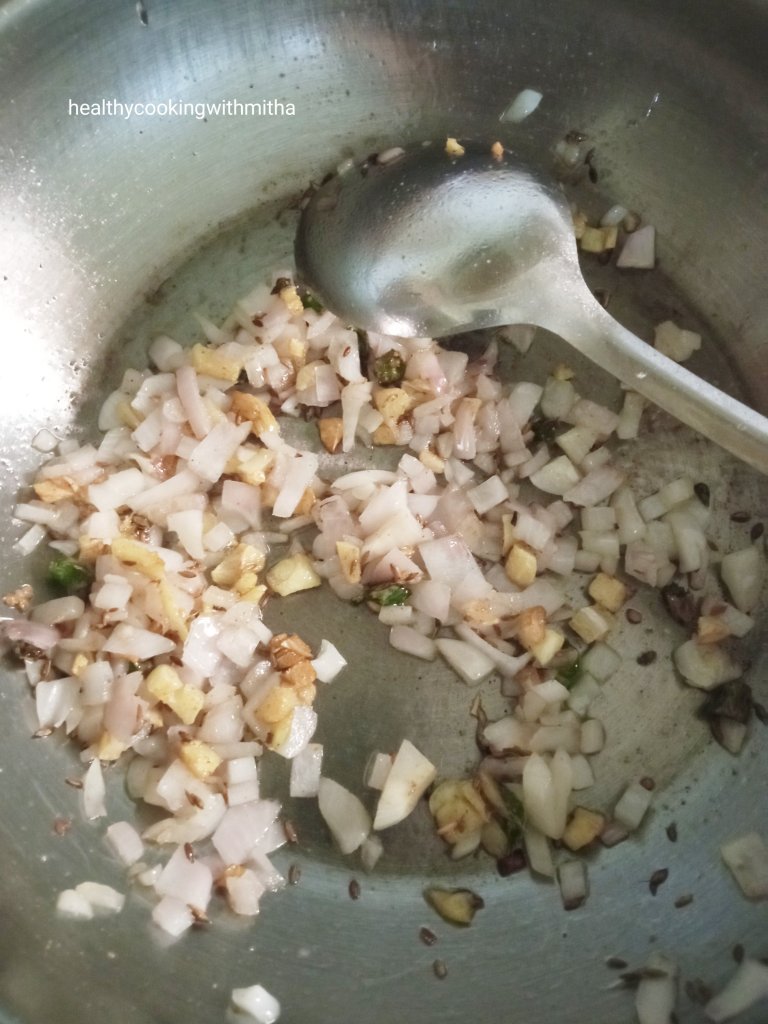
2. Take ghee + oil (or only oil) in a pan. Add cumin seeds and allow it to change colour. Add finely chopped garlic, ginger and green chillies. Fry till garlic turns brown in colour. Add onions and fry till onions turn translucent.

3. Now add tomatoes and fry till tomatoes turn mushy. Now add turmeric powder, cumin powder, Garam masala powder and red chilli powder.

4. Mix well frying for few seconds. Now drain water from the soaking dal and add to the pan.

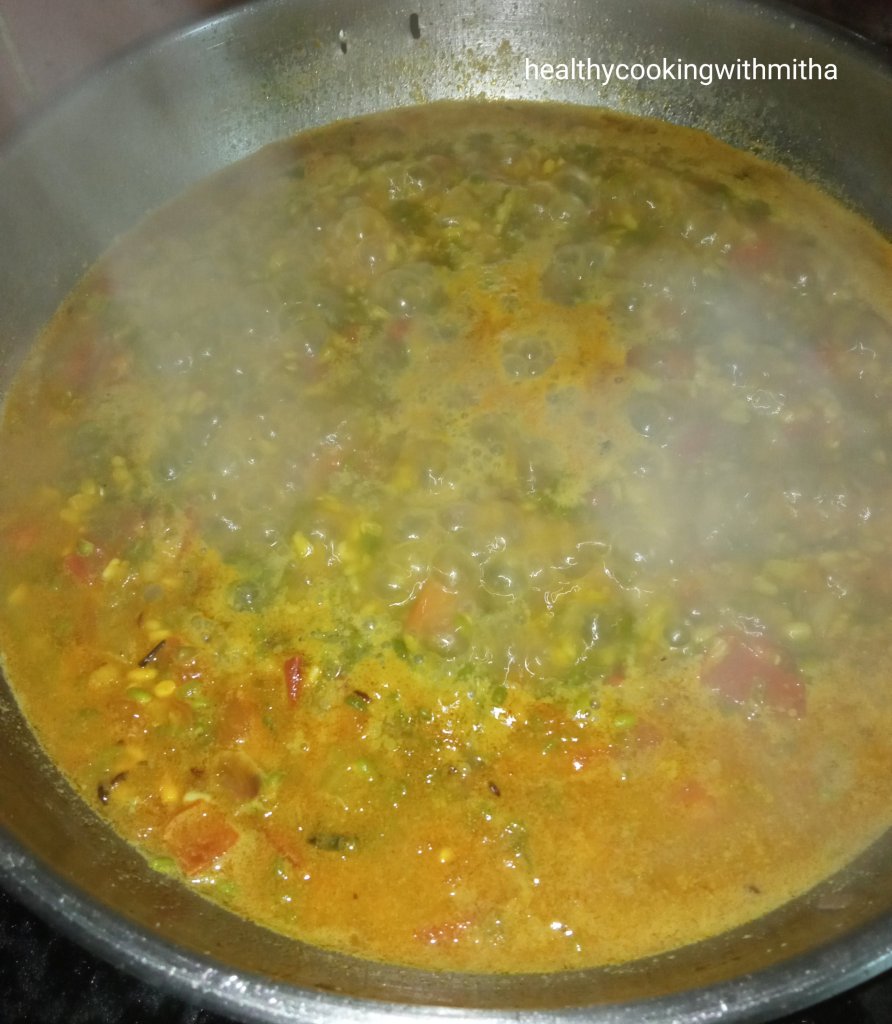
5. Add water and salt. Mix well. Bring to a boil.

6. Cover and cook till the moong turns soft and water gets absorbed completely.

7. Now drizzle lemon juice and garnish with coriander leaves. Mix well. Serve hot with chapatis or rice.

Click on the image to save the recipe on Pinterest.

Notes:

* You can make the same curry with overnight ( or atleast for 6 hours) soak whole green gram or even sprouted green gram. I make with split ones when I forget to soak, yet feel like eating this curry.

* Combining both split green moong dal and split yellow moong dal makes it tastier.

* Skip onion and garlic for a satwik version of the curry. I do so on fasting days and it still tastes delicious.

* You can cook till the moong dal turn mushy or till it’s just done. Also you can make the curry dry or keep a little liquid in the gravy. Depends on your taste.

* I usually make this curry with chapatis but it tastes delicious with rice meals too.

* You can also try this:

# Amma’s style moong curry.

# Sprouted Moong Methi sukhe

# Muga Dali Usli

Banana stem salad | Banana stem Kosambari | Banana stem Upkari | Gabbo recipes Konkani

Click on the image to save the recipe on Pinterest

There was a time when I used to make only one or two curries for our matta rice meals. Since I cook the matta rice very soft like a gruel, a side dish would be sufficient to enjoy a simple dinner. Don’t know when I started cooking more, maybe lockdown effect 😄 or to deviate my mind 😅 or listen to more music 😍, I now make atleast 3 to 4 varieties of curries daily. It makes me very happy to see the thali with different colours and nutrients too.❤️

My son is also a huge fan of his plate filled with curries and says, “Amma, Wow 😍” when I bring his meal to feed him. I am glad that this boy needs no extra efforts to make him eat veggies. He already loves vegetables (even traditional ones) so much that I am sure he was a farmer in his past life and a Konkani for sure. 😅

As for me, due to him, I too have learned to like these vegetables which I did not like as a kid (Amma, true na? 😂). So, as a mother, at 31 year old, I am learning healthy eating habits from my 2.5 year old son ( how cool is that 😄). But honestly, not only this, if I have learned to be happy at the simplest things, it is through my kids, if I have learned to enjoy life with whatever we have, it is through them. Even if I scold them, they still come back to me with the same amount of love and hug me saying, “Love you, Amma”. That forgiving, non judging, free thinking, trusting nature of kids and the innocence, which gets lost as we grow up, have to be learned from kids. Maybe that’s what is a part of the circle of life. ❤️

So, on this thoughtful note, sharing the recipes with Banana stem. Hope you all like it. Happy and healthy cooking!

RECIPE:

Ingredients:

Banana stem (inner pith)/ Gabbo as available {mine was 35 cm in length}

For Kosambari:

1/4 Cup Moong dal

1 Cup finely chopped Banana stem

3 Green chillies

2 Tbsp Coriander leaves

2 Tbsp grated Coconut

A pinch of Hing/ Asafoetida

1 tsp Oil, 1 tsp Mustard seeds, A sprig of Curry leaves – for seasoning

Lemon juice from 1 Indian lemon for garnish

Salt to taste

For Salad:

1 Cup finely chopped Banana stem

1 Cup Curd / Yogurt

2 Green chillies

Salt to taste

1 tsp Oil or ghee, 1 tsp Mustard seeds, 1/2 tsp Cumin seeds, A sprig of Curry leaves – for seasoning

Step by step recipe:

1. First wash well and soak the moong dal in enough water and keep aside till use. This is for the kosambari.

2. Next, wash the Banana pith well. I get the outer parts of the stem already removed. So I don’t have pictures of how to remove that. Please check YouTube videos on how to use banana stem if using for the first time. Cut into roundels while removing any fibres which may come out. Immediately put in a vessel filled with water as shown.

3. Now finely chop these roundels and add little to a bowl for the salad. Also add finely chopped green chillies.

4. Now add curd and salt. Mix well.

5. Season oil or ghee by spluttering mustard seeds and adding cumin seeds and curry leaves. Pour this seasoning over the salad. Mix well. Salad is ready.

6. For the Kosambari, now again finely chop the banana stem and add to the soaked, drained moong dal along with green chillies and coriander leaves.

7. Now add coconut along with the seasoning of mustard seeds and curry leaves in oil.

8. Add lemon juice and salt. Mix well. Kosambari is ready.

9. For the Gabbe Upkari, cut the rest of the Banana stem into long pieces. Heat about 2 tsp Oil in a pan. Add a pinch of Hing along with 3 to 4 broken red chillies and the chopped Banana stem pieces with salt and little water. Cover and cook till the stem pieces turn soft. Garnish with grated Coconut and mix well.

10. Serve the Banana stem salad, Banana stem Kosambari and Upkari with rice meals.

Notes:

* I also make a simple sambar along with these three dishes as it makes a great combination and a very wholesome meal.

* Remember to remove the outer parts of the Banana stem if you have the stem with outer parts intact. Check YouTube videos on how to use Banana stem. I get it with the innermost pith in my nearest supermarket.

* While chopping the pith, you will get some fibres come out. Discard it.

* Keep the chopped pieces in plain water or tumeric water till use, else the pieces turn black very quickly.

* Don’t worry about using banana stem without cooking it in salad and Kosambari. It can be had raw and tastes really good too. Just chop it very finely.

Click on the image to save the recipe on Pinterest.

Amma’s Carrot Upkari | with ground masala

Click on the image to save the recipe on Pinterest.

This recipe of carrot upkari is simple but the blog is very special as I am posting it on my Amma‘s birthday today. Since I am not with her, this post is my gift for her, my little way of showing my love to make her feel special (the least I can do ❤️). Hope you like it Amma. 😍

Amma and Aanu (my dad) got married in March 1989 and I was born in December the same year. So Amma always says that I am the greatest gift from God as I came into her life so quickly. As for me, her love made me so close and attached to her that even today, she’s the one I am closest to, in my life. ❤️

Amma was a working woman and I am amazed at how well she used to manage both work and home together. She used to cook very lovingly for me and my brother, which made the food taste so delicious that I still remember the flavours and aroma of her dishes (Maa ke haath ka jadoo ❤️).

These are some of my favorites from what she used to make and each of these dishes carry a special memory of Amma in it. ❤️

The moong curry with chapatis which I used to take in my college lunch box, a favorite among my friends too.. ❤️

The eggless Tomato omelette which Amma used to make with the most pieces of tomato in my omelette (out of extra love for me 😍).. ❤️

The panpolos with tomato chutney which Amma made during my pregnancy craving, not one or two but more than 15 at a time, while using her walker for support.. Can never forget that ever in my life.. ❤️

The piping hot, delicious Alu parathas and carrot pulao which were made during weekends by Amma after we were bored of regular meals.. Her love made it extra tasty for sure. ❤️

Same is with today’s recipe of Carrot Upkari.. Though it’s a very simple dish, Amma made it so well that I used to ask her to make it always.. ❤️

This is a collage of pictures of Amma with me in the first two photos and with my kids in the photos below it. The left side picture is of Amma with my daughter, when she had come here to Qatar and we had taken her to Villagio mall. I captured this moment between the loving grandmother in Amma and her first grandchild, to be treasured forever. ❤️ The right side picture is with my son, her second grandchild but not loved any less. This is when he had worn the Krishna costume on Janmashtami. Such a beautiful moment this was, my Shankar Krishna immersed in grandma love. ❤️

As loving a mother Amma is, she is equally my kids’ most loving grandmother too, their moga mamama, as they call her. 😍

I searched for many quotes to describe her, to make a card and found this one apt for her. ❤️

Her beautiful smile is always reassurance for me, that I have her with me, to share my feelings and thoughts, to listen to my woes, to feel happy for my happiness and to pray for me always. ❤️

Amma suffers from muscular dystrophy in her legs since many years and needs wheelchair for movement. But the way she lives her life, happily, filled with devotion to God, music, even doing many household chores while sitting on the wheelchair, without complaining, is commendable and very inspiring for me. Hats off to you, Amma. So proud of you! ❤️

A mother’s love is always exceptional and unconditional. I believe that we can’t be loved by anyone more than our mother can love us. Even if we are far from her, she only wants us to be happy and will always pray for us. Her love is not based on conditions that I should be with her, I should talk to her or even does not expect me to love her as much as she loves me. She just loves truly with all her heart, irrespective of any conditions. ❤️

On this note, here’s wishing you a very Happy Birthday, Amma. May you always be healthy and happy. Love you so much. ❤️❤️❤️❤️❤️❤️❤️❤️

For my readers, excuse me for such a long write-up. But I know you all will also agree that no matter how much we write for our mothers, it’s very less for their love. Anyhow, hope you all will try this recipe and remember my Amma when you do. Happy and healthy cooking! ❤️

RECIPE:

Ingredients:

3 Cups peeled and chopped Carrots

1 medium sized Onion

3 to 4 Red chillies (depends on the variety)

6 to 8 Curry leaves

Salt to taste

2 tsp Coconut oil

2 Tbsp grated Coconut for garnish

Step by step recipe:

1. Take chopped onion, red chillies and curry leaves in a mixer.

2. Now add little water and grind to a smooth paste.

3. Heat oil in a pan and add the ground paste. Fry for couple of minutes till the raw smell of onion goes away.

4. Now add chopped carrots and salt. Mix well. Add little water, cover and cook till the carrots turn soft.

5. The mixture turns dry on cooking as all the water is absorbed. Remove from flame. Garnish with grated Coconut. Serve with rice meals.

Click on the image to save the recipe on Pinterest.

Notes:

* The number of red chillies depends on the variety of chillies you have. Since carrots are sweet, the masala needs to be spicy to make the curry spicy too.

* Remember to fry the ground paste well in oil. Else there will a raw smell of onions in the curry.

* Curry leaves adds a wonderful aroma and flavour. So don’t skip it.

* Here are the other recipes by Amma which I have added on the blog:

# Amma’s Moong curry with freshly ground masala

# Amma’s Carrot Pulao

# Amma’s Tomato Chutney and Panpolos

# Amma’s Alu Paratha

# Amma’s Eggless Tomato Omelette

Vegetable Paneer Chilly | Broccoli stir fry | Kid friendly recipes with Broccoli

Click on the image to save the recipe on Pinterest.

Broccoli is not something I grew up eating. In fact, don’t remember even seeing this vegetable till few years back (Talk about being desi 😅). In the winter months here in Qatar, which is between November and March, there opens a Mahaseel festival which sells varieties of flowers, indoor/outdoor plants and also fresh vegetables grown in different Qatari local farms. Inspite of the quality of the veggies being so good, the rate is surprisingly very cheap. I found this “pretty green vegetable similar to cauliflower” (exactly what was in my mind 😂) in the festival and could not resist buying it. That started my love for Broccoli and my kids too love it so much now. ❤️

The Mahaseel festival is a treat to the eyes for flower lovers and I want to share a picture which I clicked when we went there in December 2019. Look at the beauties. 😍😍

This reminds me of my favorite song from the movie Silsila, Ye kahaan aa gaye hum.. That song too has been shot in midst of floral heaven. Admire how beautifully it has been picturized and such an eternal love song too. ❤️❤️

For me, merely looking at greenery, lush trees, mountains, fields, flowers, birds chirping, cows grazing, waves of the river, streams of water in a waterfall, early morning dewdrops on leaves, the heavenly aroma of the freshly wet soil in the first rain and so many similar such experiences brings so much unexplainable joy. ❤️ I don’t know about you all, but being with nature makes me feel so alive and refreshes me a lot. If I could, I would love to live atop a mountain, far away from the city, embracing nature in it’s purest form (One among my dreams in life. ❤️)

Among these, there is also the wonderful feel of cooking with freshly plucked vegetables. 😍 Now, since a year, these locally grown vegetables like Broccoli and cucumber are available in our nearby supermarket. It’s a boon since we can’t travel all the way to the Mahaseel festival due to the Covid situation.

My kids love these two ways of Broccoli that I make and they eat it as it is even without rice. Sharing it so that you can try for your family too. Hope you all try and love it too. Happy and healthy cooking! ❤️

RECIPE:

Ingredients:

For Broccoli stir fry:

2 Cups Broccoli florets
1 tsp Oil
A pinch of Pepper powder
Salt to taste

For Vegetable Paneer Chilly:

1 Cup Broccoli florets

1 Cup diced Carrots

1 Cup Paneer cubes

1/2 a medium sized Capsicum, cubed

1 medium sized Onion, cubed

3 Garlic cloves, finely chopped

3 to 4 Green chillies

2 Tbsp Tomato ketchup

2 tsp Chilli sauce

1 tsp Soya sauce

Pepper powder to taste

Salt to taste

1 tsp Vinegar

Finely chopped coriander leaves

Step by step recipe:

1. For Broccoli stir fry, take bite size broccoli florets in a bowl and wash it well. Drain and keep it ready.

2. Heat oil in a pan and add the broccoli florets. Also add salt and pepper. Fry on high flame for few seconds. Cover and cook on medium flame till the florets turn soft. Sprinkle water only if needed. You are done!

3. For Vegetable Paneer Chilly, take Broccoli florets, diced Carrots and cubed capsicum in a bowl.

4. In a pan, heat oil and fry the green chillies and garlic first. Then add cubed onions and fry till it turns translucent.

5. Now add the veggies along with Paneer and fry for few seconds.

6. Add very little water and cook till the veggies turn soft but don’t overcook them. Now add ketchup, chilli sauce, soya sauce, salt and pepper. Mix well and cook for 5 mins.

7. Remove and add vinegar. Mix well adding coriander leaves.

Serve both the Broccoli stir fry and Vegetable Paneer Chilly with fried rice or any variety rice or meals.

Click on the image to save the recipe on Pinterest.

Notes:

* I usually make easy Schezwan fried rice with this. You can check the recipe here.

* Skip Paneer if you don’t like it. Makes regular vegetable chilly.

* You can make it as a gravy if you want. Just add more ketchup and water. For a thicker gravy, add corn flour mixed in water to the gravy. It will make it very thick. I love this dry version though.

* The broccoli stir fry makes for a great snack for kids. My kids dip it it ketchup and eat by themselves. Great finger food for toddlers as well.