Click on the picture to save the recipe on Pinterest
Now that my kids have grown ( 9 and 6 years), their food taste is evolving and they no longer want the same food everyday. Though dosa and idli tops the list anytime, for evening snacks, they want something different and unique.
My brain after becoming a mommy runs overtime 😀 and I keep scanning the supermarket seeing what else I can buy to cook a dish which they like. So in that pursuit, I bought pasta shells few months back which they had never tasted before. Made white sauce pasta with wheat flour and they did not like it as much.
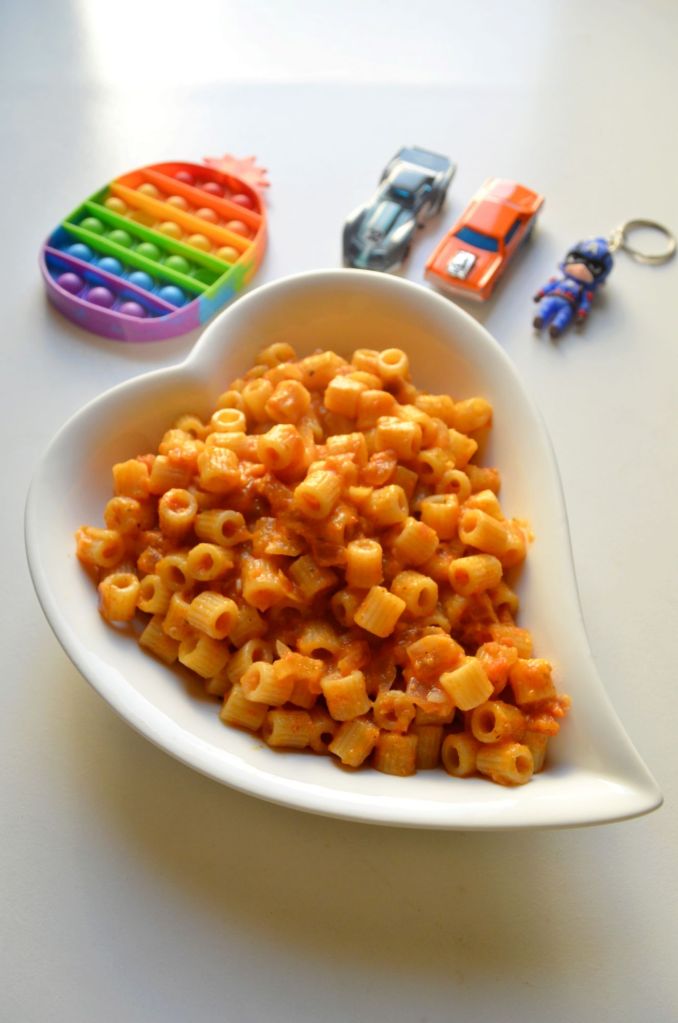
So next I tried this red sauce pasta with fingers crossed and to my happiness, they loved it so much that now, I get requests for it to be made regularly. My son specially has become a huge lover of this pasta. Though I have limited it to once in a week as I know if they eat more than that, they will get bored of it, I honestly feel happy when they enjoy eating what I make at home..
This pasta recipe is super easy yet tastes heavenly. I am not a pasta fan but I love this one. So you can definitely try for a change. Hope you all love it too. Happy and healthy cooking ❤️
RECIPE:
Ingredients: {Serves 2 to 3 people}
1 Cup = 240 ml
1 Cup Pasta shells of any shape you like
1 large Tomato
3 to 4 Garlic cloves
1 medium sized Onion
2 tsp Oil
2 tsp Butter
Red Chilli powder, to taste
1 tsp dried Oregano or mixed herb seasoning
1 Cheese slice or cheese cube
Salt to taste
Step by step recipe:
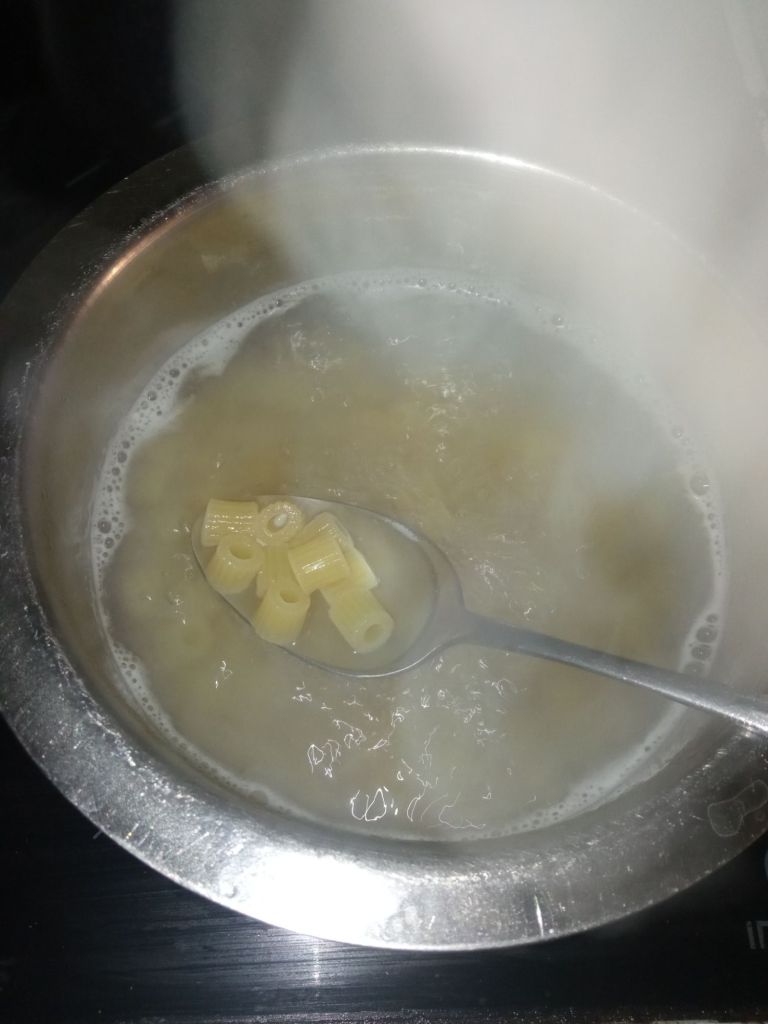
Boil water with little salt and once it comes to a rolling boil, add pasta shells. Cook till it turns soft yet not fully cooked.
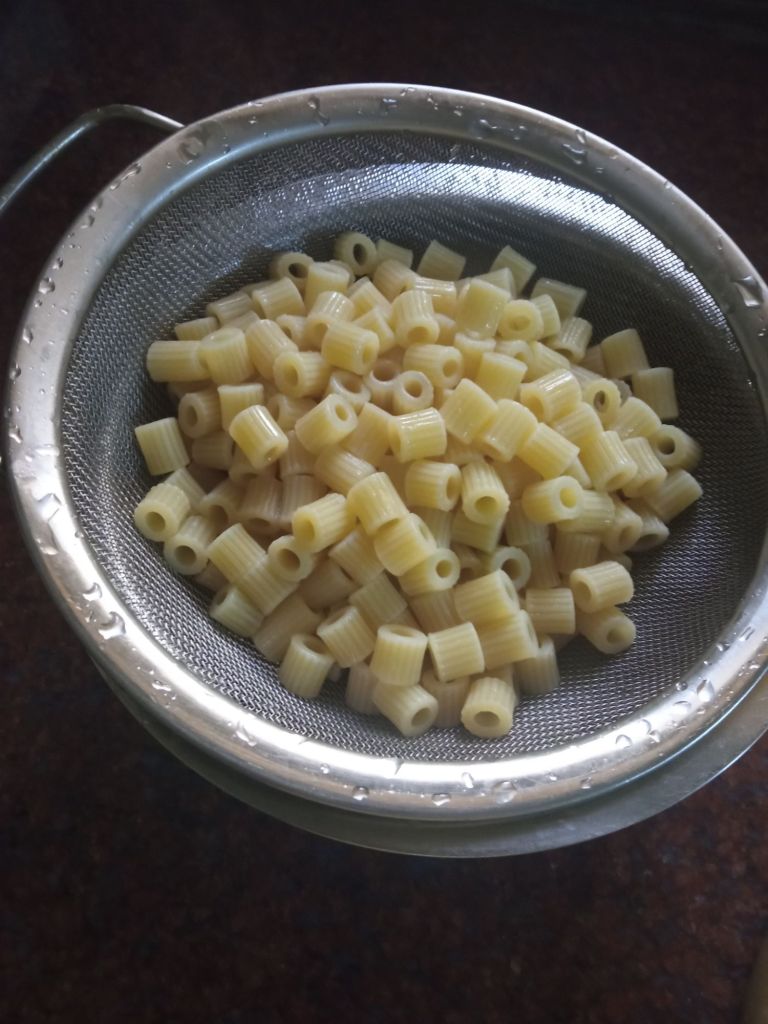
2. Now strain using a strainer and run tap water over it so that it stops the cooking process. Keep it aside.
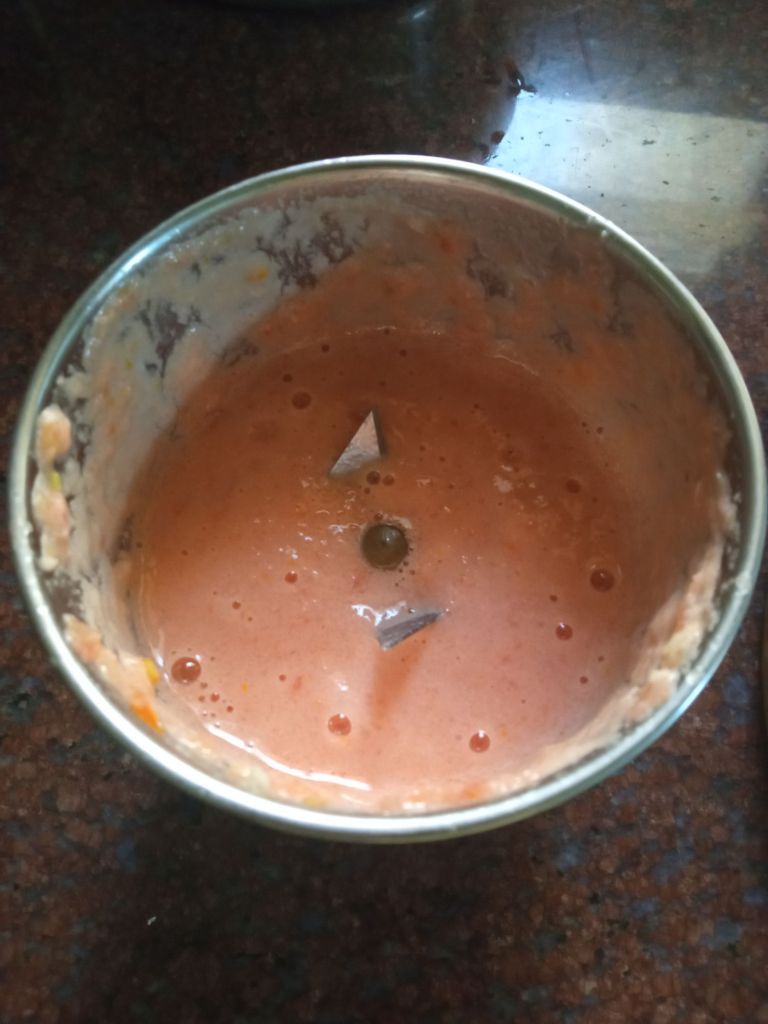
3. Add garlic and chopped tomato in a mixer and grind to a paste. Don’t add water while grinding.
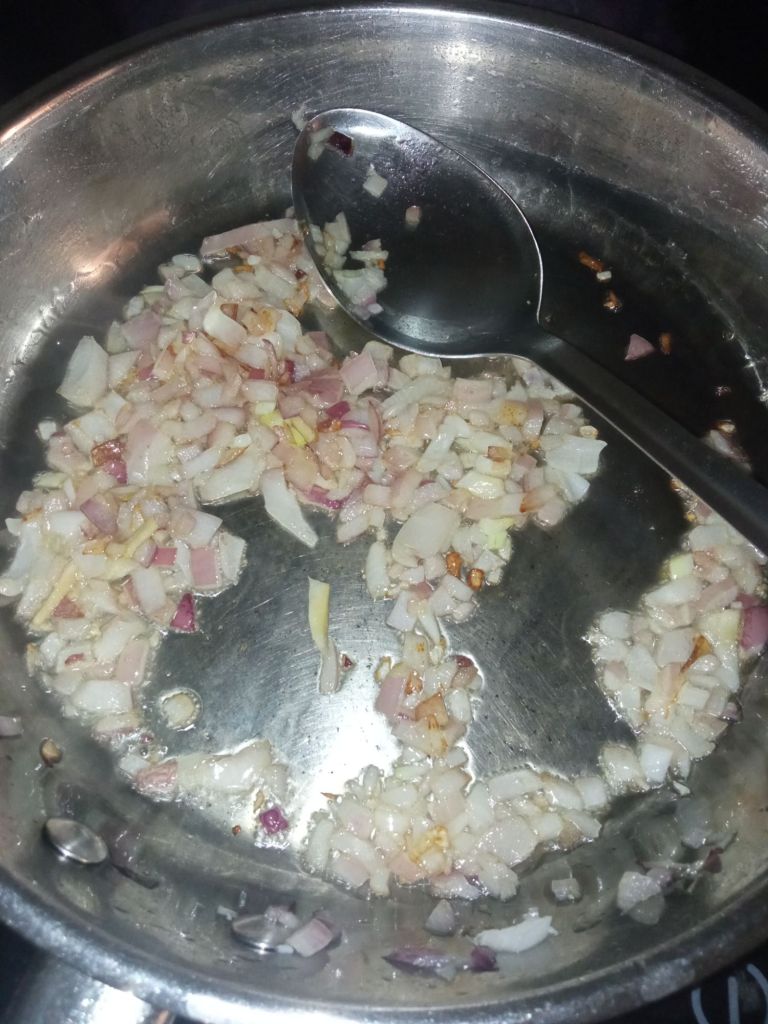
4. Now heat oil in a pan and add chopped onions. Fry till it turns translucent.
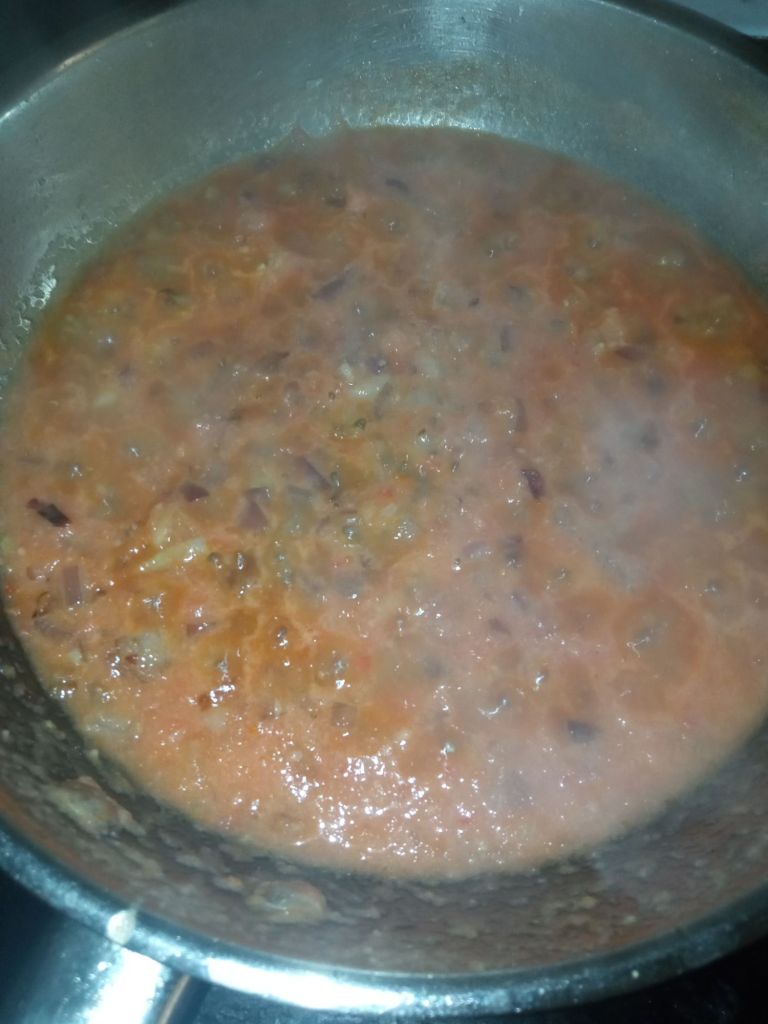
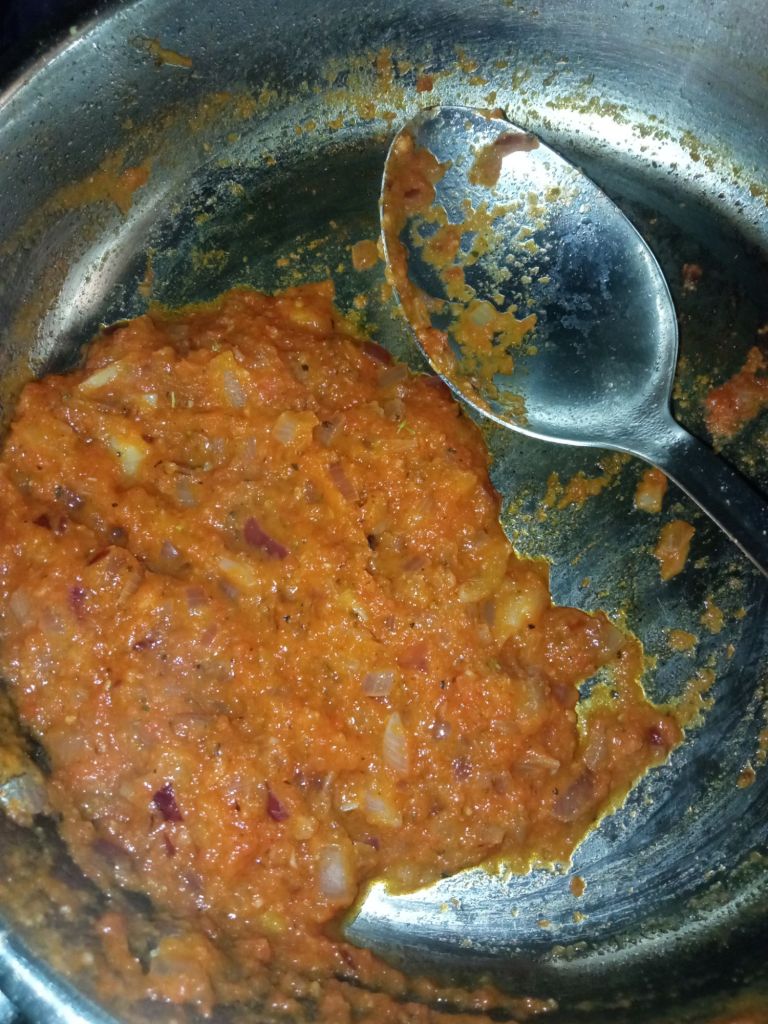
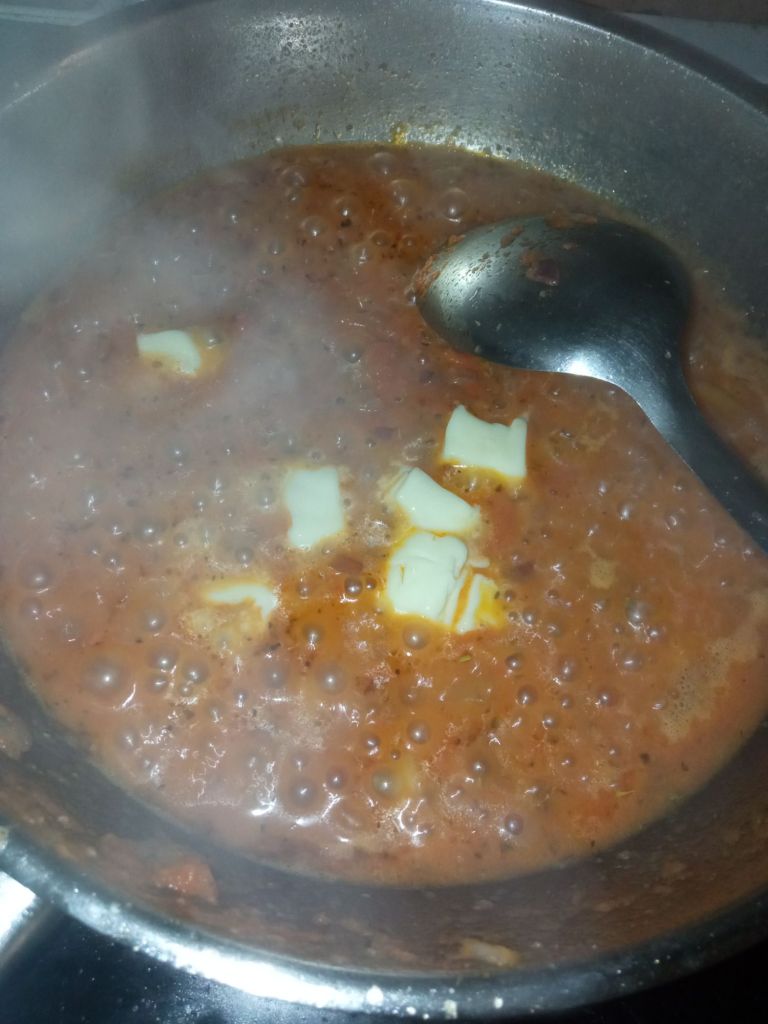
5. Add the tomato garlic paste along with red chilli powder and cook till the mixture leaves oil.
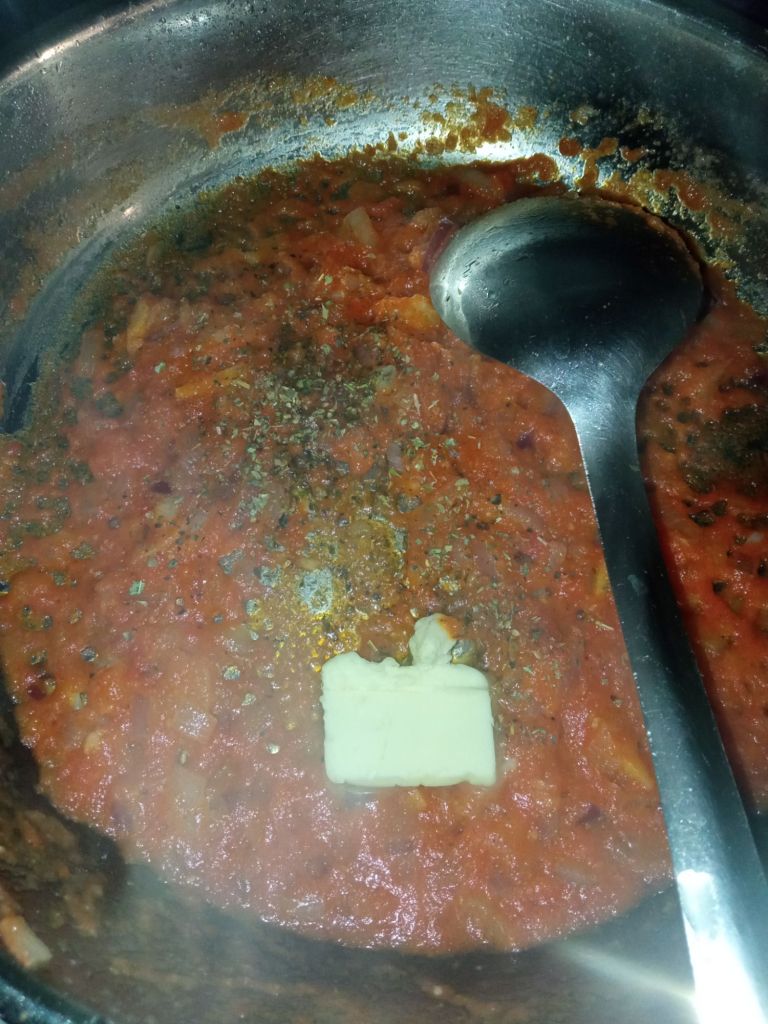
6. Now add butter, oregano and salt. Mix well.
7. Add cheese slice or cube and mix till the cheese melts. Adjust water consistency to make a thick sauce.
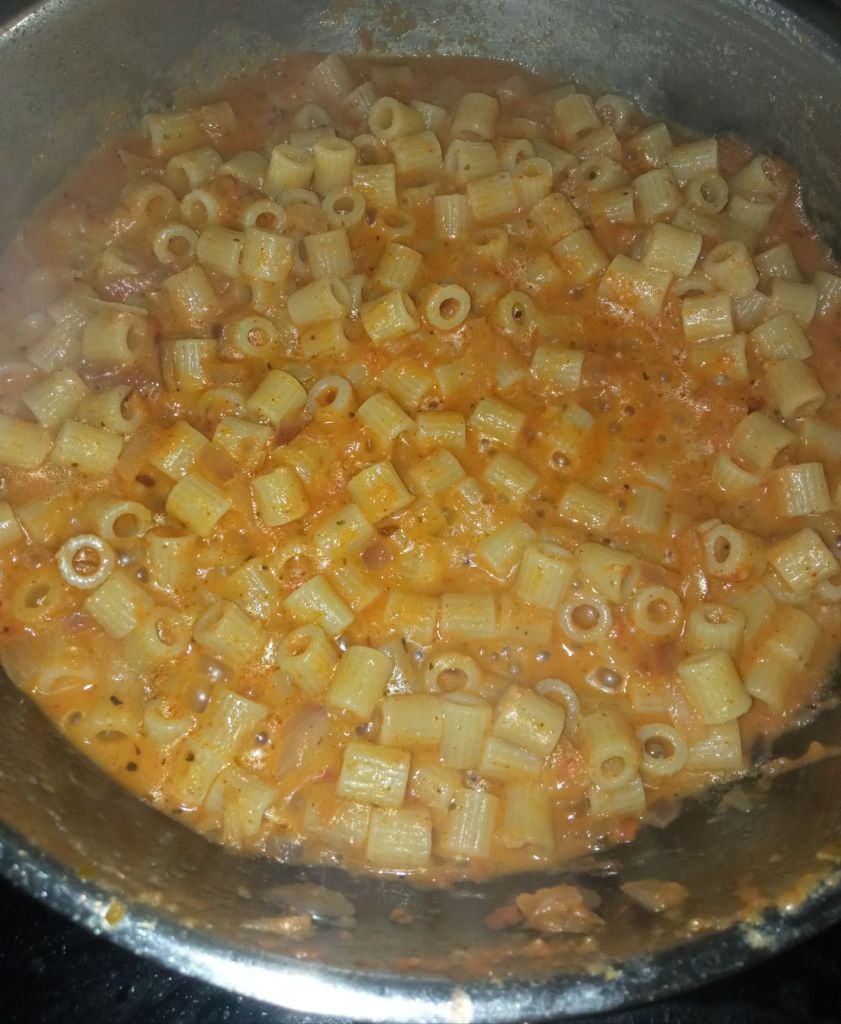
8. Add the cooked pasta and mix well, adjusting water consistency if necessary.
Red sauce pasta is ready! Serve hot and kids will love it..
Click on the picture to save the recipe on Pinterest
Notes:
I usually buy small sized pasta shells as it’s easy for the kids to eat. You can buy any pasta of your choice.
My kids love the red sauce pasta to be less liquidy. You can adjust the consistency as per your taste.
Red chilli powder, oregano and cheese can be adjusted to your taste too.
Click on the picture to save the recipe on Pinterest
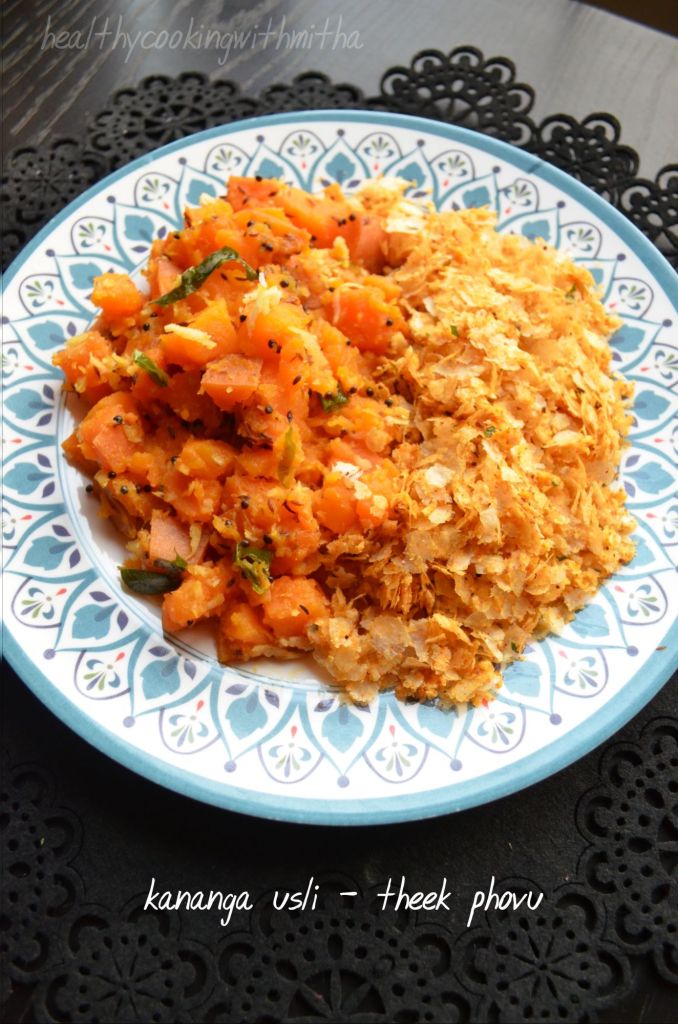
The weather here in Qatar is so good now that winters have started and the hungry me is even hungrier during evening time. 😍 Specially since I walk atleast for an hour, late in the evening, I make sure I have ample energy for that. 😄 And what’s more filling than our own age old combination of Kananga usli and theek phovu or sweet potato stir fry with spicy poha. ❤️
The mushy sweet potatoes with spicy and slightly crunchy poha makes for a heaven made pair making me go nostalgic, reminding me of my childhood when Amma and Anama used to make it for me. I was, am and forever will be a huge fan of our amchi food. ❤️
Nothing satisfies my tummy and soul more than Konkani delicacies. I have also realized that our food is so easy and quick to make along with being healthy and tasty too. ❤️
So here is me, sharing my favorite breakfast or snack dish. Hope you try and love it too. Happy and healthy cooking ❤️
RECIPE:
Ingredients:
For Sweet potato stir fry:
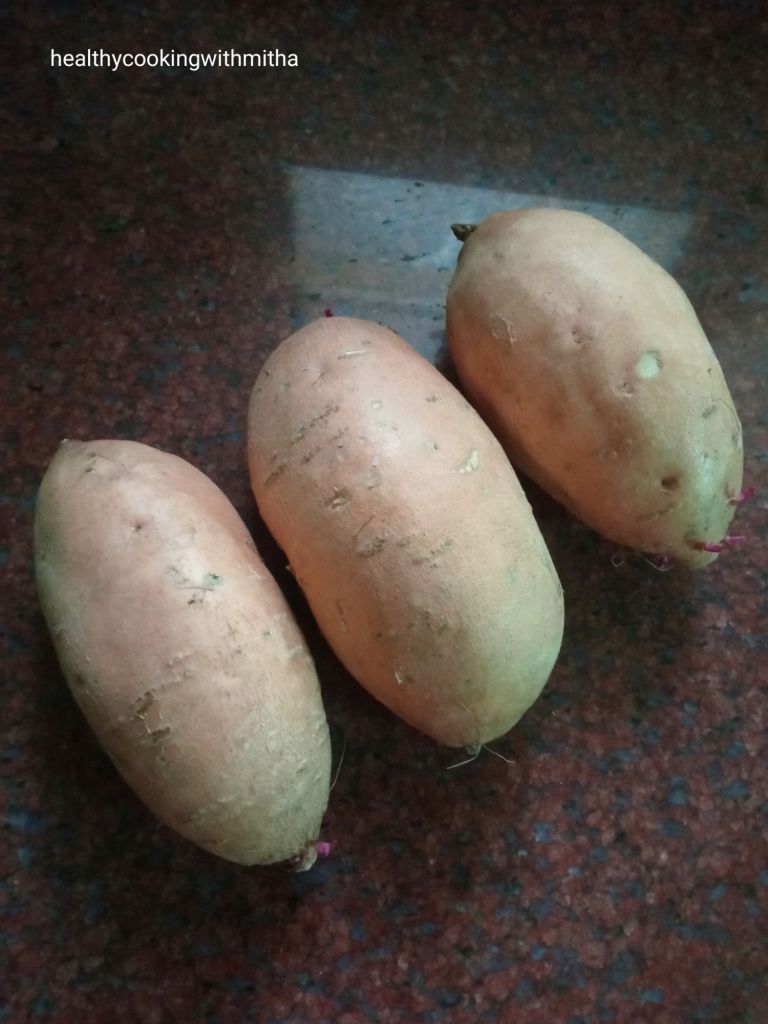
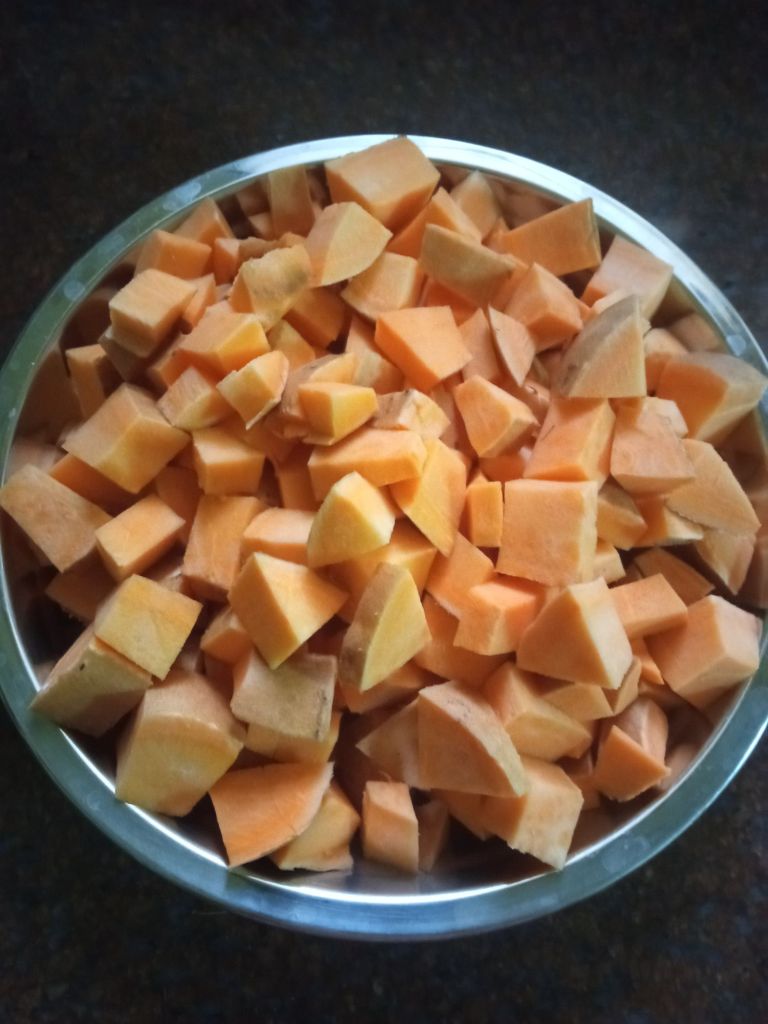
3 Medium sized Sweet potato
3 to 4 Green chillies
A sprig of curry leaves
2 tsp Mustard seeds
2 tsp Cumin seeds
Pinch of Hing or Asafoetida
1 Tbsp Jaggery powder
2 Tbsp Coconut oil
3 Tbsp freshly grated Coconut
Salt to taste
For theek phovu:
2 Cups Thin Poha/ Aval/ Flattened rice
1/2 Cup Freshly grated Coconut
2 tsp Coconut oil
1 tsp Mustard seeds
A sprig Curry leaves
2 tsp Sambar powder
1 tsp Red Chilli powder or to taste
1 tsp Jaggery powder
Salt to taste
Step by step recipe:
Take sweet potato as shown. Wash them well. Cut off the sides and cut into bite size pieces. I don’t peel it.
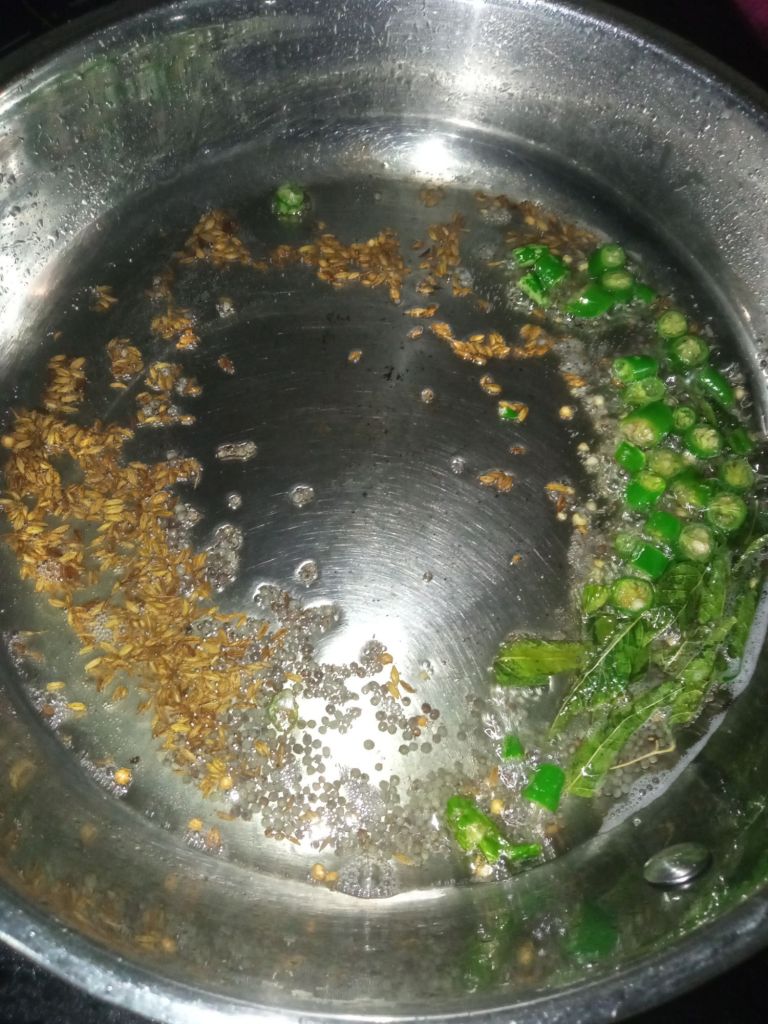
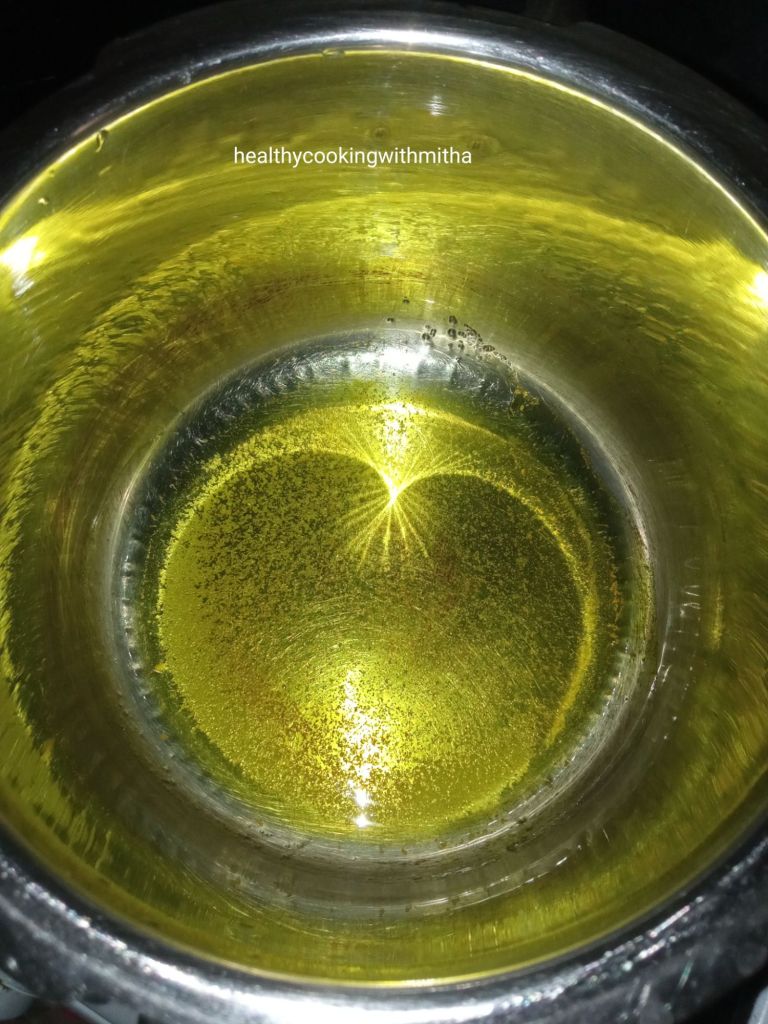
2. Now heat Coconut oil in a pan, add mustard seeds and cumin seeds. When mustard seeds splutter, add curry leaves and green chillies.
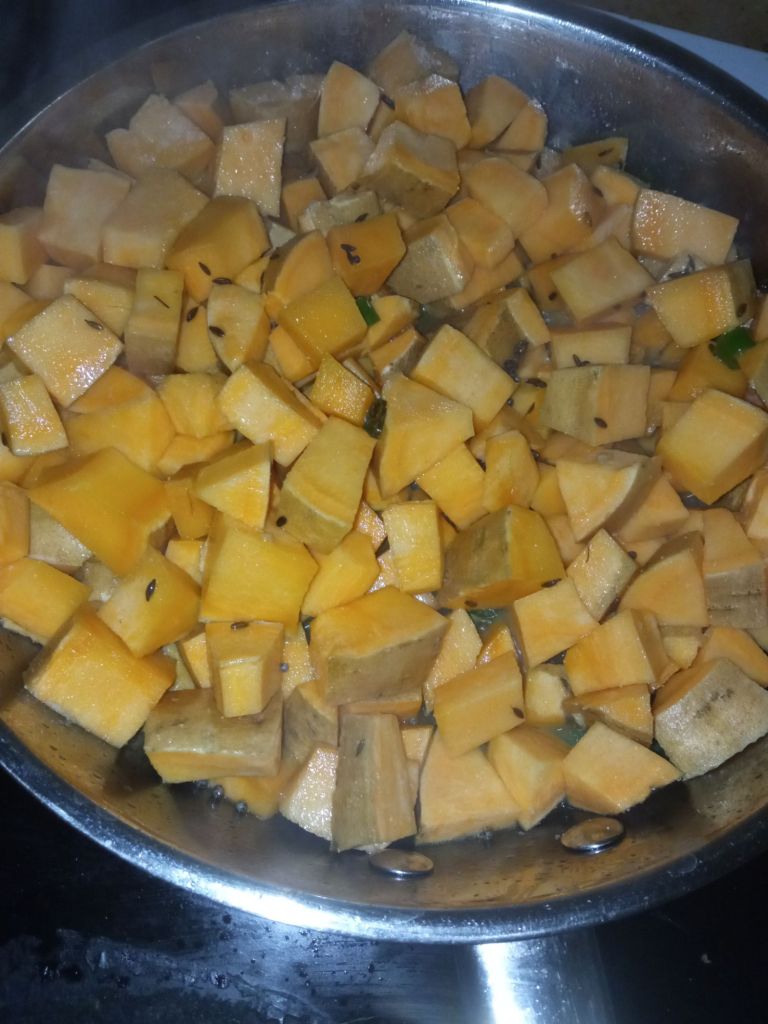
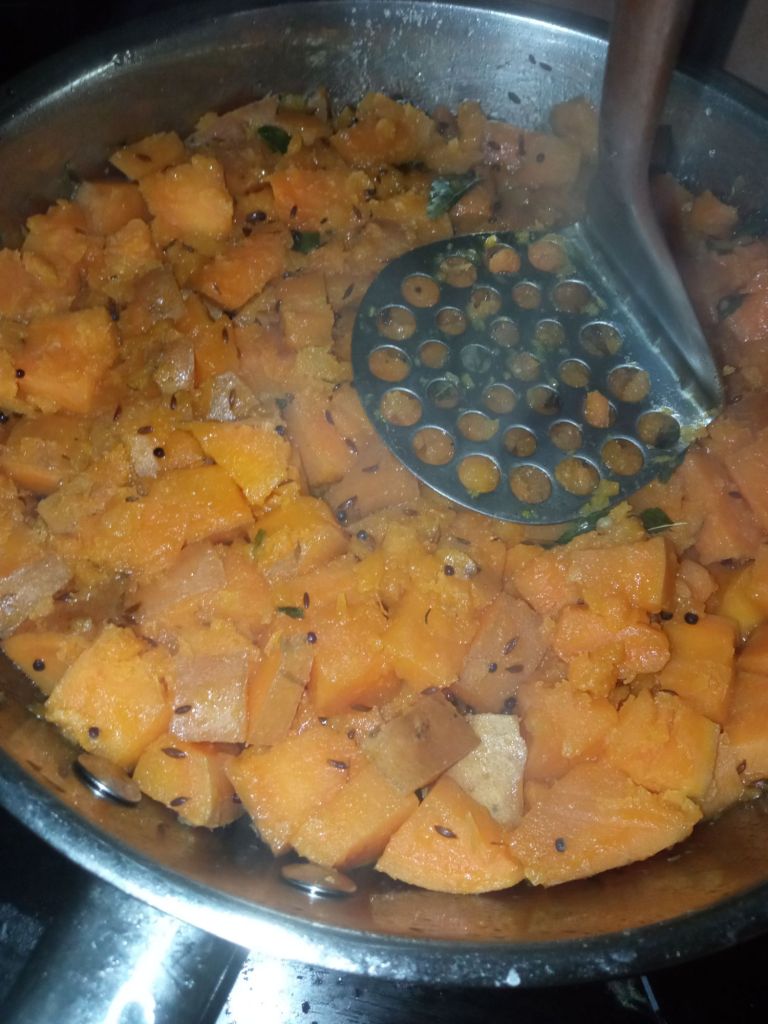
3. When green chillies start to change colour, add the chopped sweet potatoes. Mix well adding salt.
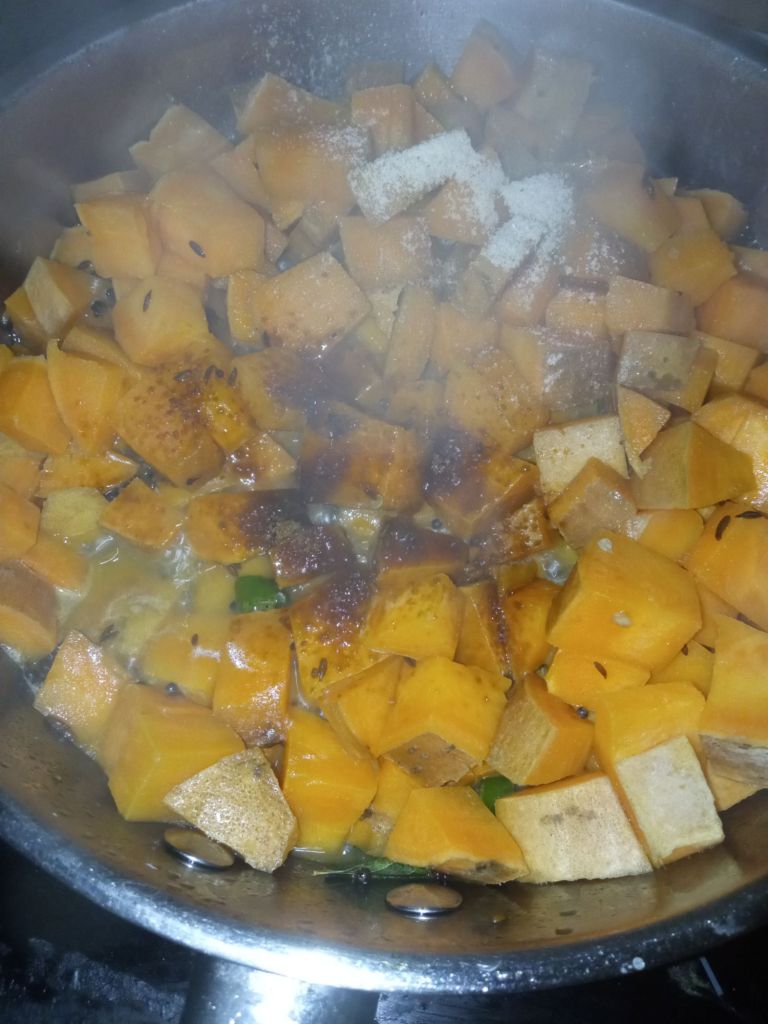
4. Add little water, cover and cook on medium flame till the sweet potatoes turn a little soft. Now add jaggery and hing powder.
5. Mix again, cover and cook till the sweet potatoes turn soft. Mash using masher to make it into slightly mushy consistency. It’s optional but we love our usli that way.
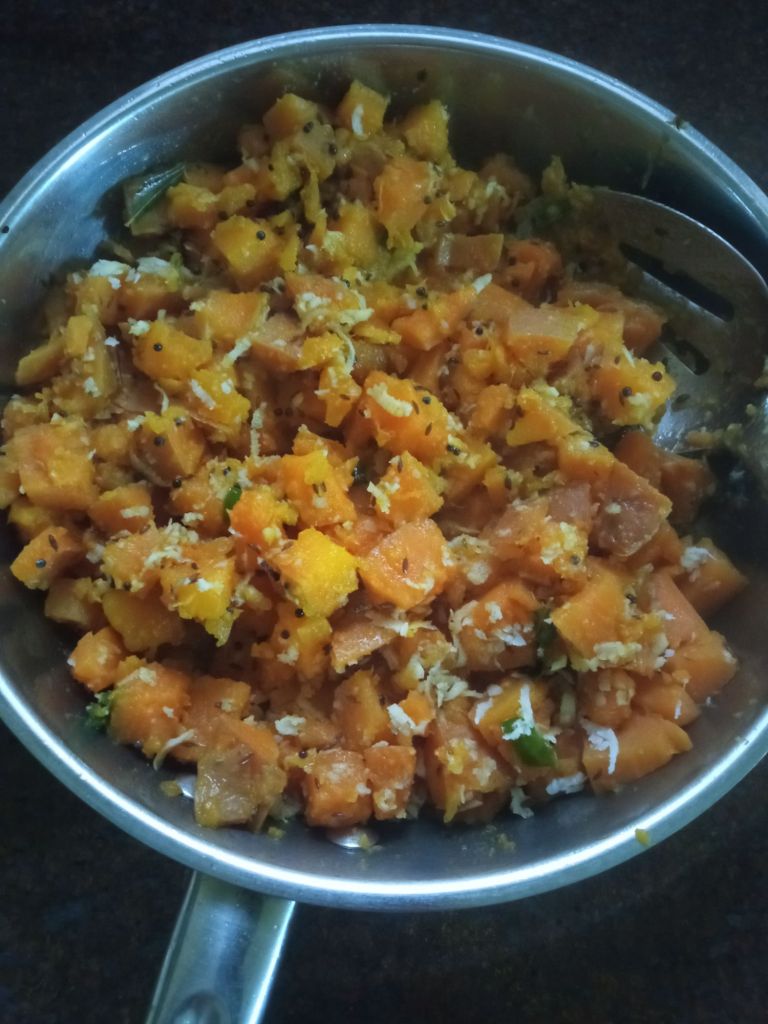
6. Remove from flame, garnish with fresly grated coconut and mix well.
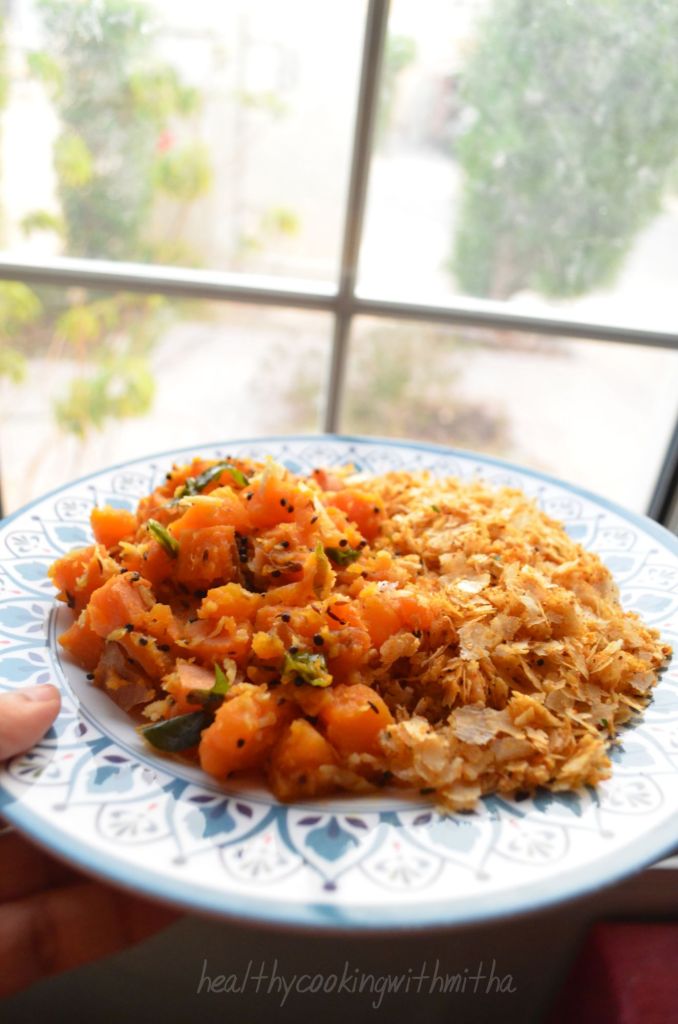
Sweet potato stir fry or Kananga usli is done!
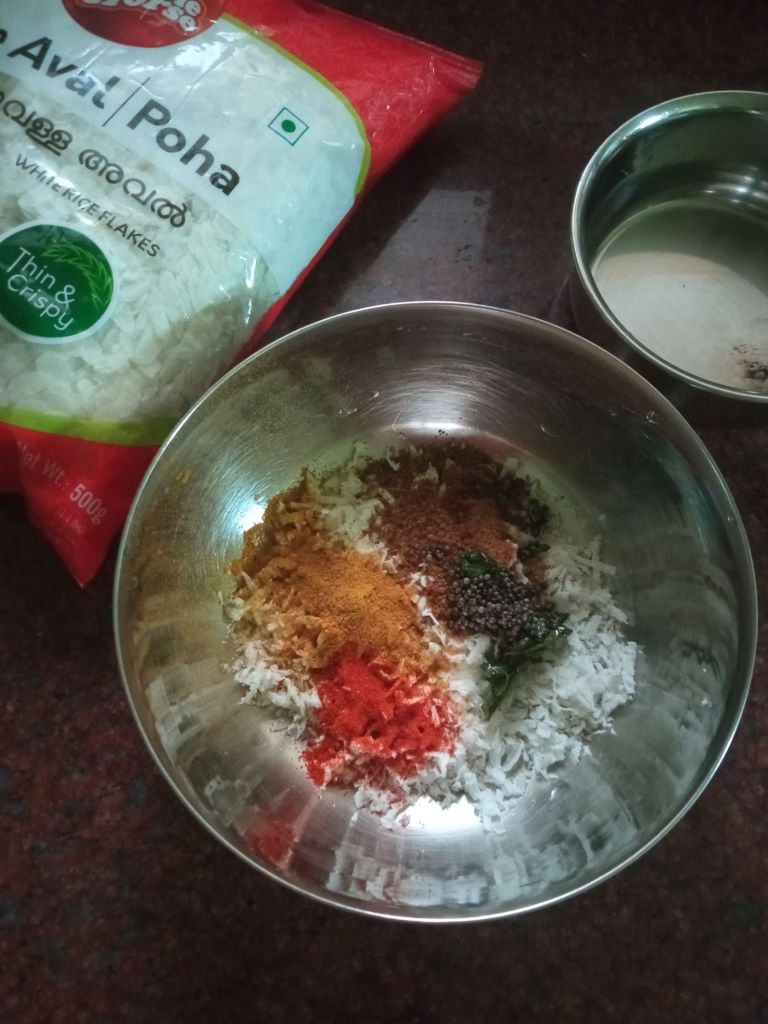
7. For the theek phovu or spicy poha, heat Coconut oil in a small pan and add mustard seeds and curry leaves. When the seeds splutter,remove from flame.
8. Now in a bowl, take freshly grated coconut, add the seasoning from step 7, sambar powder, red chilli powder, jaggery and salt.
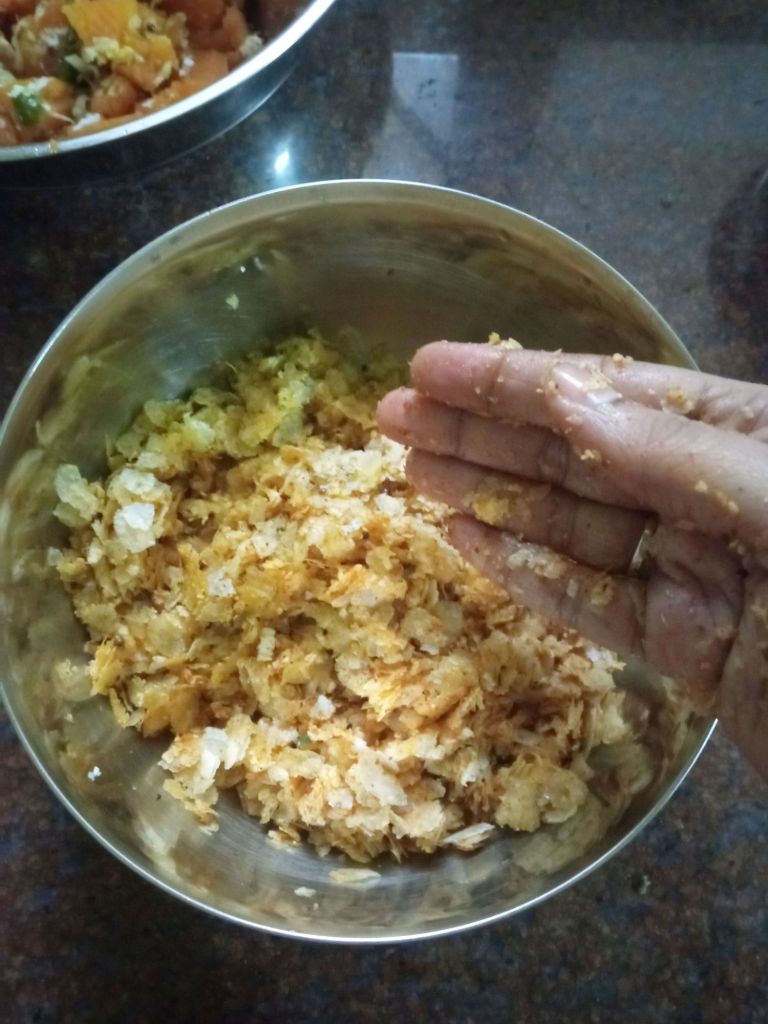
9. Now add the thin poha, one cup at a time and mix well crushing it lightly with hands.
10. Do a taste test to see if you need to add more red chilli powder, jaggery or salt.
Theek phovu is done too!
Click on the picture to save the recipe on Pinterest
Enjoy Kananga usli with theek phovu. This sweet spicy combination will win your heart for sure ❤️
Notes:
I live in Qatar and we get Egyptian sweet potatoes here. The size is medium. If using large ones, one large will suffice if making for two people.
I don’t peel the sweet potatoes as the peel is nutrient dense. Also, the peel is very thin here. So we don’t realize while eating.
You can replace sambar powder with Rasam powder too in theek phovu recipe.
Make sure to use only thin poha and not thick poha for this recipe.
Click on the picture to save the recipe on Pinterest
Kids have gone to school today after many days of holidays due to semester break and then due to government holidays here in Qatar. What better to send in their tiffin than this favorite of theirs, popcorn. 😍
Two kids and three boxes, you may wonder! The third big box is for my daughter’s classmates who absolutely love the popcorn I make. So whenever I make popcorn for tiffin box, I send an extra box for the kids at school. Ashritha says, her friends come and finish it off in a jiffy. 😍
Cooking for others is my passion and kids are my love, so when kids eat what I cook, it’s sheer joy for me, which words can’t explain. ❤️
Woke up early this morning to take pictures too to share with all of you. Hope it’s helpful for atleast some of you. Happy and healthy cooking ❤️
RECIPE:
Ingredients: { Makes 5 to 6 Cups of popcorn }
2 Tbsp Ghee or Oil
Pinch of Turmeric powder
Salt to taste
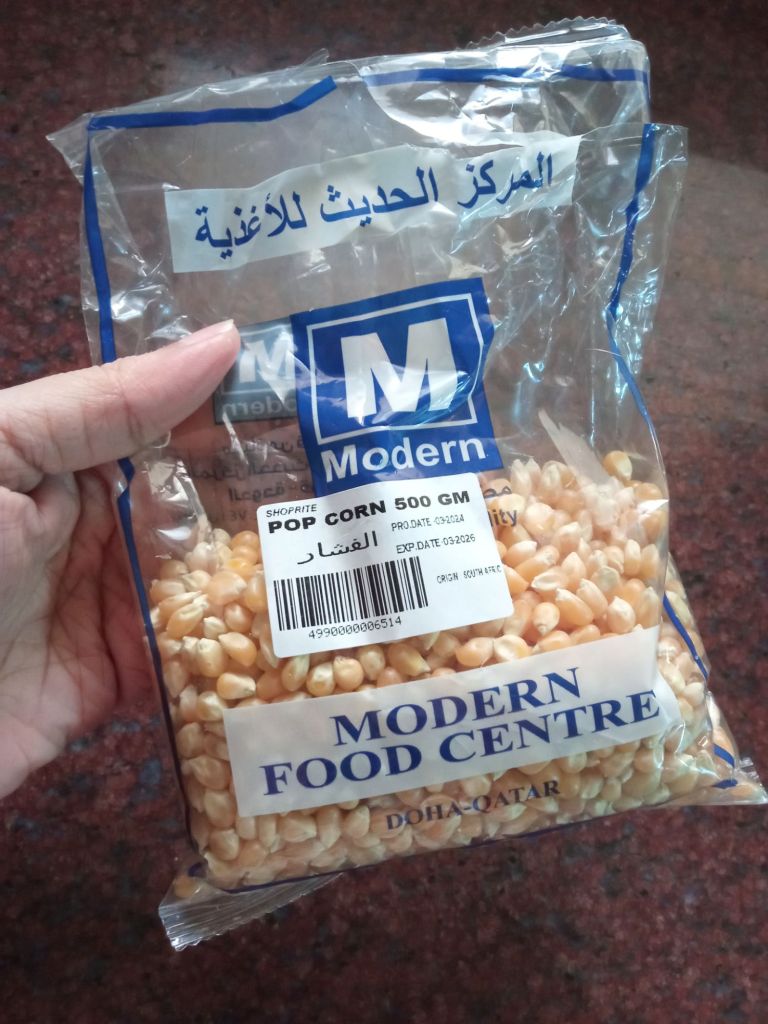
1/4 Cup Popcorn kernels
This is how we get it in Qatar
Step by step recipe:
Heat 2 Tbsp Ghee or Oil in a pressure cooker. You can also make in a thick bottomed pan. Add turmeric powder and salt.
2. Add the popcorn kernels and saute for few seconds.
3. Cover the pressure cooker lid without whistle, not tightly and leave just a little bit of space for steam to come out. Keep the flame on high.
4. Once popcorn starts popping, in a while, reduce the flame to medium or low and allow all the kernels to pop. You will know it’s done when you no longer can hear the popping sound. Now remove from flame.
5. Serve in bowls or add into tiffin boxes. Homemade popcorn is ready!
Click on the picture to save the recipe on Pinterest
Notes:
The last few kernels in the pressure cooker may be half popped or not popped properly. So make sure to check before giving to kids.
You can add either ghee or oil but I prefer ghee for my kids as they love the flavour.
1/4 cup of popcorn kernels gives about 6 cups of popcorn. So when making less quantity, make sure to add only couple of spoons of kernels.
If you want to add more flavoring like cheese powder, chat masala or red chilli powder, sprinkle on top after popcorn is done when it’s still warm. Mix well.
Click on the picture to save the recipe on Pinterest
My husband’s company bus takes us to three of the oldest (and everyone’s favorite) malls in Qatar every Friday, alternating between City center, Villagio and Lulu. Although we only go sometimes due to husband’s busy shift work, kids absolutely love going to Villagio and City center as they both have huge play places.
If you ask me, I love Villagio just to look around people enjoying the boat rides inside the mall, few others posing for pictures and kids running around happily looking at the boats. ❤️ Food and shopping options are better at City center mall but Villagio does have Asha’s restaurant by Asha Bhonsle ma’am for great Indian vegetarian food.
Recently when we went to Villagio, I had already made dinner at home. So we were looking for light snacks there. That’s when I saw this guacamole wrap at Tea Time while waiting in their long queue for Karak tea ( I love love Karak 😍).
After tasting the wrap, I felt I could make it even healthier at home with our regular chapati. Few attempts later, I can now say, the guacamole wrap that I make tastes really super delicious.
To my luck, both Kenyan and South African Avocados are getting very cheap here and so in our weekly grocery, Avocadoes are a regular now. Kids enjoy its milkshake and love the wrap as well. For me too, it’s a filling, healthy snack before I go for my evening walk.
So this is how I make the Guacamole wrap and hope you all loved reading my short story. 😍 Do try it too when you get Avocadoes. Happy and healthy cooking ❤️
RECIPE:
Ingredients: {Makes about 4 wraps}
For the Guacamole:
2 ripe, soft Avocadoes
Juice of half a large lemon or to taste
1 small sized Onion
1 small sized Tomato
2 to 3 Green chillies
2 Garlic, peeled and finely chopped
3 Tbsp finely chopped Coriander leaves
Salt to taste
For the Wrap:
One chapati/ roti for each wrap
Step by step recipe:
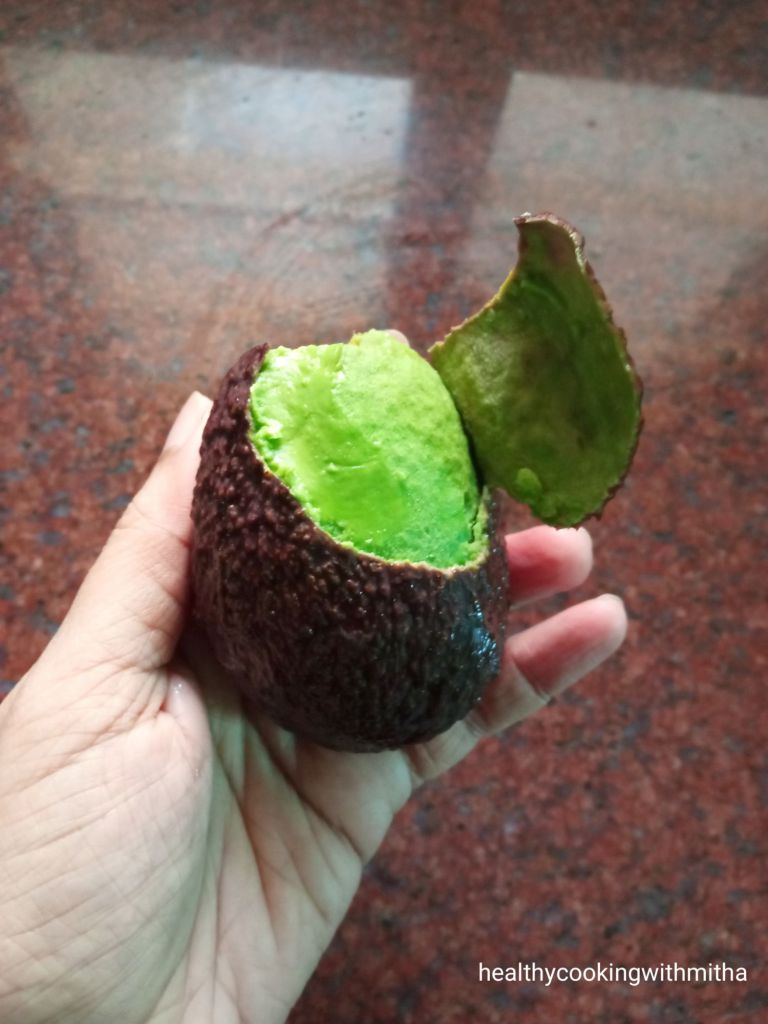
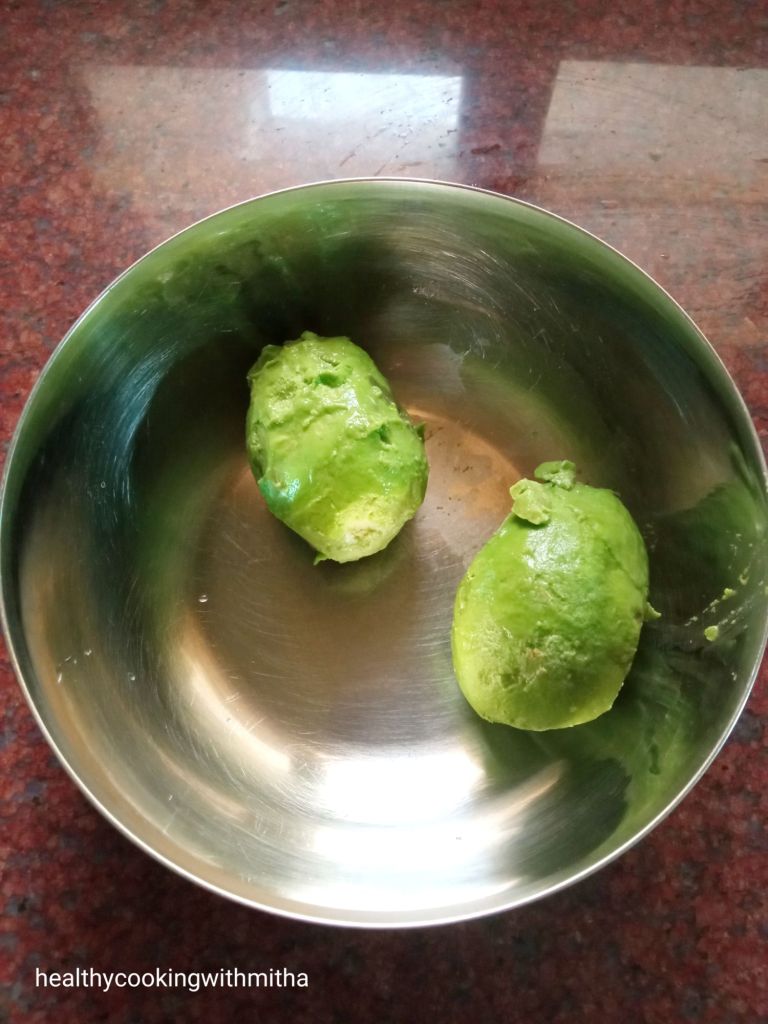
1. Chop the stem part of the Avocadoes. I used Kenyan Avocadoes which are dark brown or black in colour.
2. Now it’s easy to peel off the skin like this.
3. Add to a bowl.
4. Remove the seed (one each) and mash both the Avocadoes using a fork till they are smooth in texture.
5. Add lemon juice and salt. Mix well. At this point, add lemon juice little by little, while tasting. You can also add more later. It takes me half a large green lime for two avocadoes.
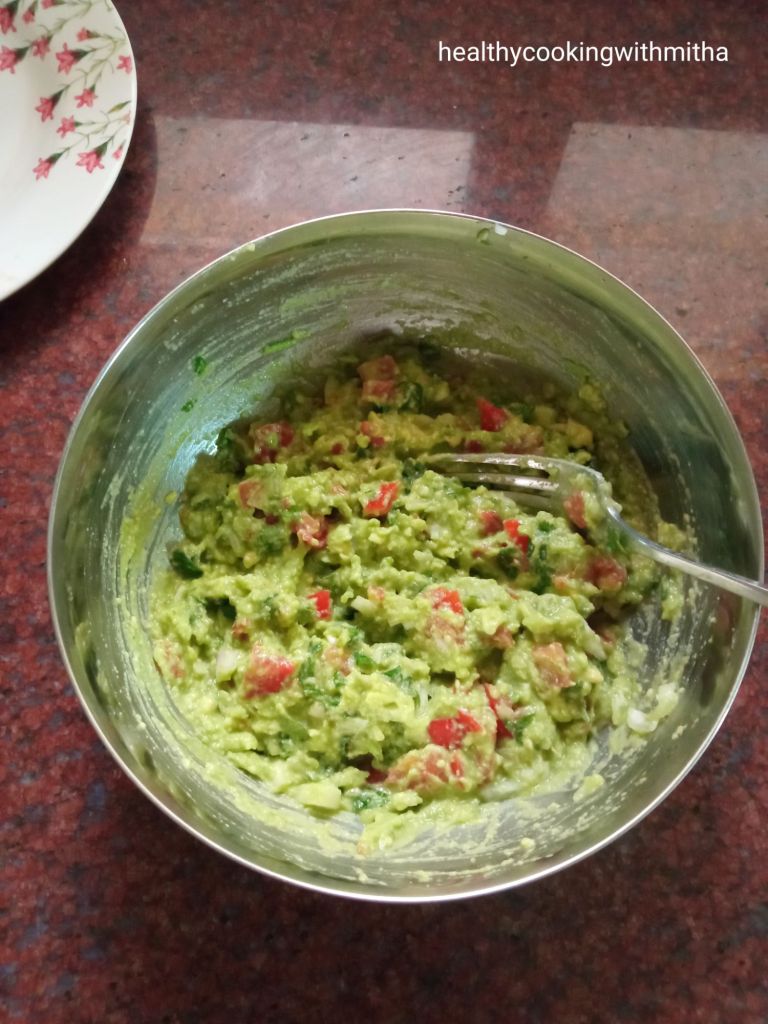
6. Now add all the other ingredients like onion, tomato, green chillies, garlic and coriander leaves.
7. Mix everything and do a taste test for salt and lime. Guacamole is done! You can use it as a dip or as a spread.
8. For wrap, take a regular chapati. I make it triangular in shape so that it’s easy to hold the guacamole inside. Spread the guacamole evenly over the chapati as shown.
9. Roll to make the wrap.
10. Done!
Click on the picture to save the recipe on Pinterest
Notes:
* In Guacamole, as per me, lemon juice and garlic are the most important ingredients. When I ate the wrap at Tea Time, Villagio, I felt the taste was slightly bland as the lemon juice was less for me and they had not added garlic. In my first attempt too, I skipped garlic and I felt it was not as flavourful.
* So I checked many authentic Guacamole recipes and found garlic in all of them. So I too added it and how wonderful does it taste with garlic and a little extra lemon juice. 😍 However if you are not a sour taste lover, you can add lemon to your taste.
* Green chillies can be added to your taste as well.
* Kenyan Avocadoes are so soft in texture and easy to peel as well as compared to Green Avocadoes. If using green ones, look for ripe ones and scoop the pulp using a spoon instead of peeling the skin like I showed above.
* For chapati, just knead whole wheat flour, salt and water to make a firm, soft dough. Keep it to rest for atleast 30 mins. Roll and make chapatis adding ghee while flipping in the pan.
Click on the image to save the recipe on Pinterest
Kids’ schools have started after Eid holidays and days have started flying again. Waking up early, preparing their snack boxes, sending them to school, morning walk, cleaning the house, relaxing till they come back and after that hearing about their day at school, teaching them, walking again in the evening while they play outside, finally preparing for their next day at school and putting them to sleep.
Days are super busy but I would not want it any other way. I have realized being busy is actually great than sitting idle and overthinking. So it’s a blessing in disguise for me. ❤️
In midst of this, is cooking which I love and which brings me happiness. I listen to bhajans and songs while cooking which makes it so peaceful. Music is truly therapeutic. ❤️
Apart from breakfast, lunch and dinner, there is one meal of the day which is most difficult for me – Snack time. Finding a quick, healthy and tasty snack which the kids also love is very hard. So when I tried this Ragi ada inspired by my Kochi memories of the regular ada and it came out so well that we all loved it, I knew I had to share it with all of you too. ❤️
I don’t know why some people think Ragi is bitter. Ragi is such a tasty millet and I use it regularly in my cooking. It is tasty and very healthy too. Have shared all the recipes that I make using Ragi in the notes section towards the end. Do try and I think if you follow the recipe well, adapt it in your cooking, in few days, you will love Ragi too, just like we do. ❤️
Happy and healthy cooking ❤️
RECIPE:
Ingredients: { to make about 5 adas }
1 Cup = 240 ml
Banana leaves to make the ada
To make outer covering:
1 Cup Ragi flour ( finger millet powder)
Salt to taste
Approx 1 Cup hot water
To make inner filling:
3/4 Cup Jaggery
3/4 Cup freshly grated Coconut
1/4 tsp Cardamom powder
Step by step recipe:
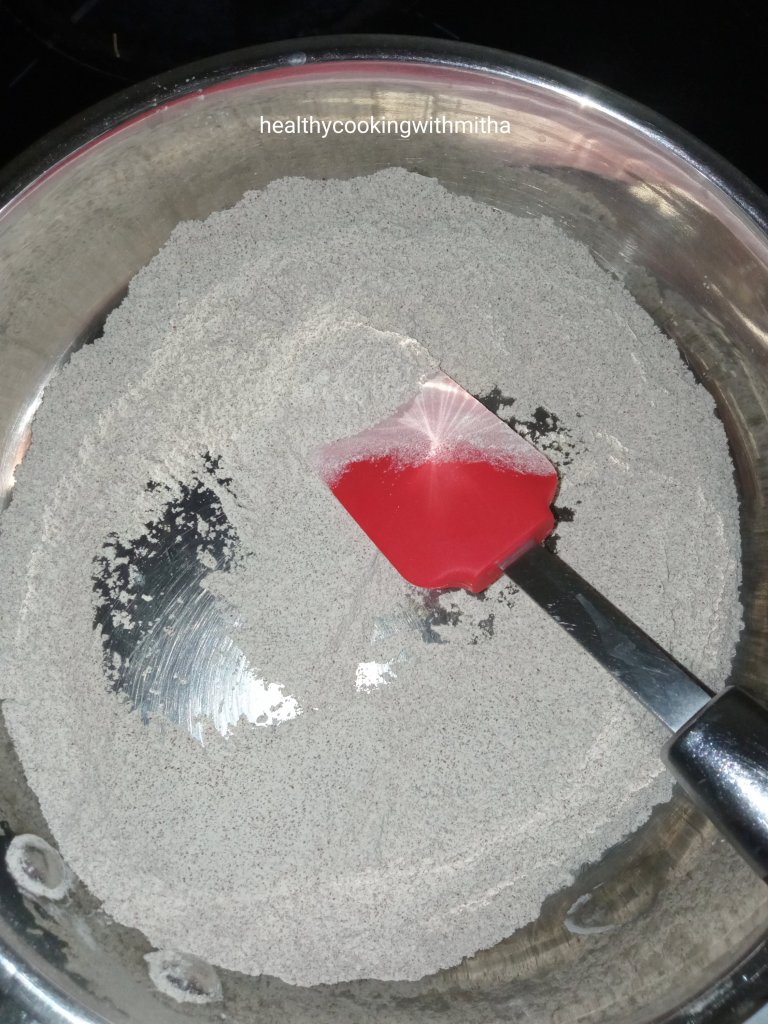
1. Dry roast Ragi flour ( do NOT add oil while roasting) on medium flame till you get an aroma of the flour and it changes colour to a darker tone.
Note: Even if you have roasted ragi flour with you, dry roast for few minutes as it enhances the flavour a lot.
2. Transfer it to a bowl. Add salt.
3. Now add hot water, little by little. Mix as you add water.
4. As you add hot water, little by little, after mixing, the dough will look like this. Do NOT add water after this.
5. Now the dough will be warm. Using hands, mix together to form a smooth and soft dough.
6. Now make the inner filling. Take coconut and jaggery in a pan. Heat it together on medium flame till the jaggery melts and coconut will stick to jaggery. Remove from flame. Add Cardamom powder. Mix well.
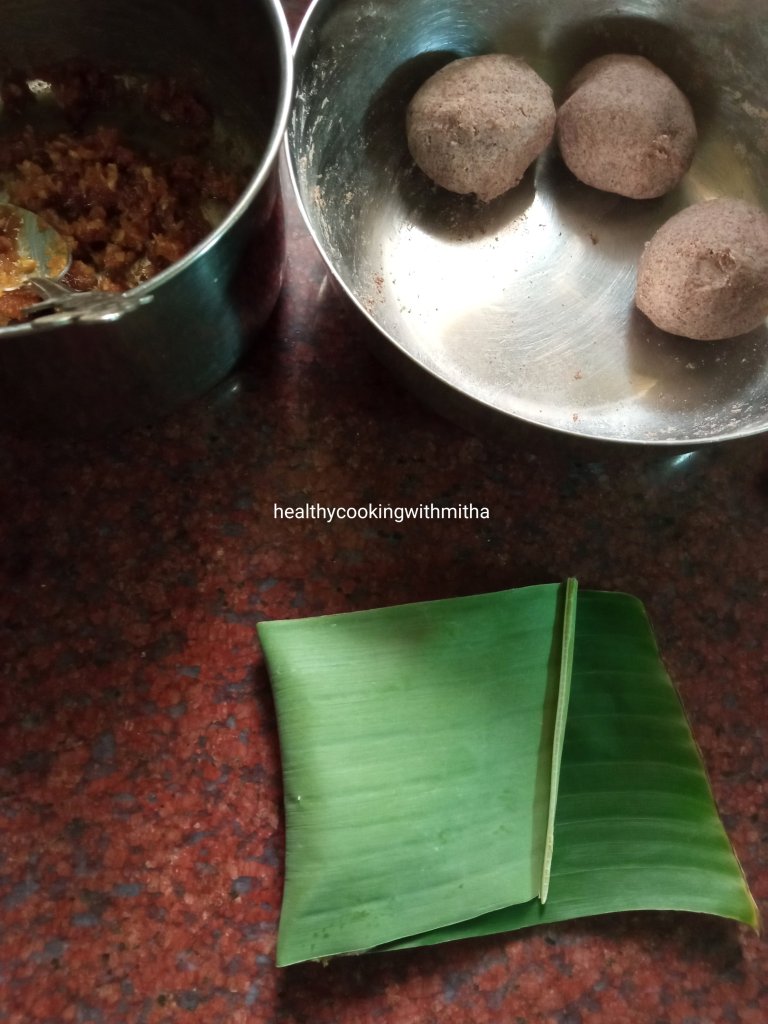
7. Now cut the banana leaf into rectangle pieces as shown. Clean it with water and wipe it dry.
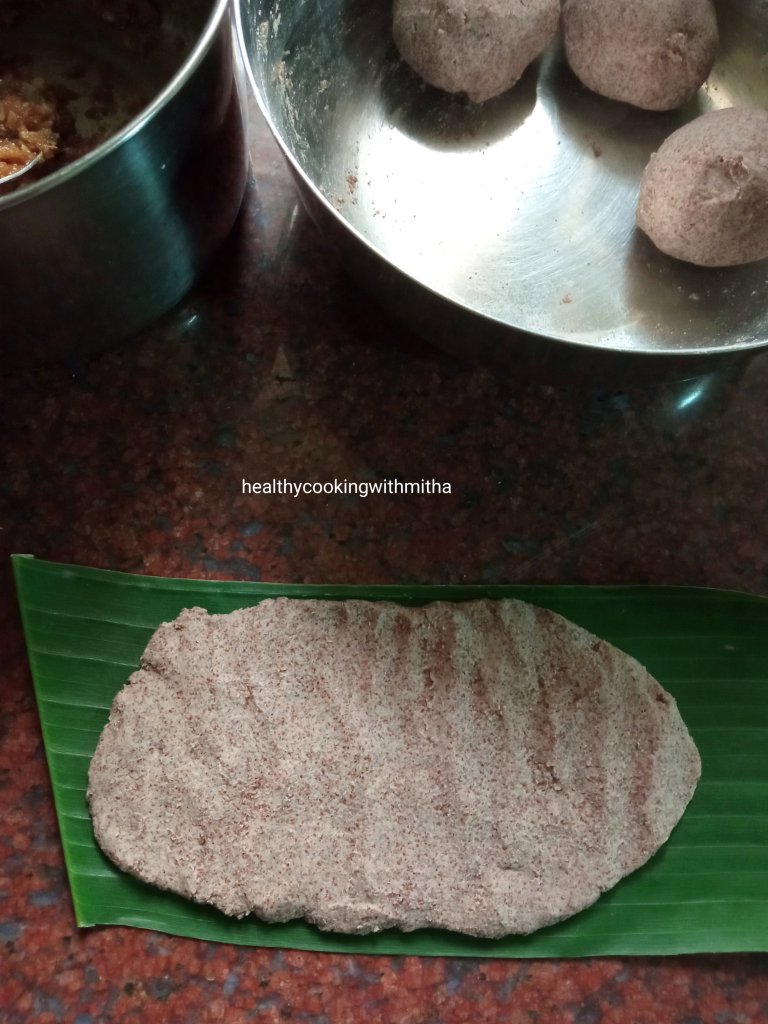
Also divide the ragi dough into equal sized balls. If you have taken 1 Cup (240 ml) of Ragi flour, you will get 5 balls.
8. Take a ball of ragi dough and spread it using slightly wet fingers as thin as possible.
9. Take a spoonful of the filling and place it on one half side. Spread it on the half side using spoon as shown in the image below.
10. Fold the banana leaf while closing both the halves as shown.
11. Seal the edges of the dough using fingers so that the filling does not come out.
12. Repeat the same with the rest of the dough balls. Place it on a idli steamer.
13. Steam for 20 to 25 mins on high flame till the ada cooks thoroughly. Remove from flame. Allow it to cool for 5 mins.
14. Now peel off the banana leaf, discard it and enjoy the warm Ragi ela adas. 😍
Click on the image to save the recipe on Pinterest
Just look at the inside of the ada. Sweet, juicy and so delicious 😍
Click on the image to save the recipe on Pinterest
Notes:
* As you can see from the above picture, the ada is of the right thickness and also steamed fully. This is due to spreading the dough thin over the banana leaf and also steaming for atleast 20 mins.
* Even if you have roasted ragi flour with you, dry roast for few minutes to get perfect aromatic ragi adas.
* Do use only hot water while preparing the dough. It took me around 1 Cup hot water for 1 Cup Ragi flour. Add only 1/4 Cup at a time and mix well till you get the dough as in step number 4. Then mix using hands to form a smooth dough.
* Don’t add a lot of water while making dough. It will be difficult to spread if dough is too soft.
* For 1 Cup Ragi flour, 3/4 Cup coconut and 3/4 Cup jaggery made the right filling for me. If you add a lot of filling, it will be difficult to seal the edges. So add only a spoonful to cover half of the ada.
* I have not made this without banana leaves. So can’t say the alternative to it. Spreading the dough on the leaf is easy and the ada turns aromatic too. So try to get the leaves if you can.
* These adas are best eaten soon after they are steamed but tastes yummy even after few hours too. So you can carry it in tiffin box and during travel too.
* A similar recipe with coconut jaggery filling is this Kerala style Nendrapazham nirachathu or stuffed Nendran Bananas..
Click on the image to save the recipe on Pinterest
As my son is sleeping after coming back tired from school, I have finally sat down to write this recipe of Methi Theplas which are his favorite 😍. He loves variety of dosas, bhakris, parathas and his recent love is this Methi Thepla. ❤️ It’s winter now in Qatar and we have fresh methi (fenugreek) leaves growing in our tiny kitchen garden, handled very lovingly by my husband. Here are the tiny yet pretty and very healthy leaves 😍
These leaves are plucked when my son demands for Theplas and love how homegrown leaves have an amazing flavour of it’s own. Farm to kitchen lifestyle is really the best way to enjoy and respect food. ❤️
Though I also make Alu methi and methi dal, these Theplas have become more regular as my kids love it. It’s also very easy to make and hardly takes 30 mins from start to finish.
They also stay well at room temperature for few hours and remain soft. So, in case there are leftovers, they still taste yum when enjoyed later.
Do try this delicious and healthy variation instead of rotis or parathas and you will definitely love it. Happy and healthy cooking ❤️
Ingredients: { Makes about 7 Theplas }
1 Cup = 240 ml
1 cup finely chopped Fenugreek leaves/ Methi leaves
2 Cups Wheat flour / Chakki ka Atta
2 tsp white Sesame seeds / Til
2 tsp Oil ( I use coconut oil)
1 tsp Red chilli powder
1 tsp Coriander powder
1/4 tsp Turmeric powder
A pinch of Hing/ Asafoetida
Salt to taste
Approx 1/2 cup water to make the dough
Oil or Ghee to cook the Theplas
Step by step recipe:
1. Take finely chopped methi leaves in a large mixing bowl (I chop the tender stems too along with the leaves. You can chop only the leaves if the stems are thick). Add sesame seeds, red chilli powder, coriander powder, turmeric powder, salt, oil, hing.
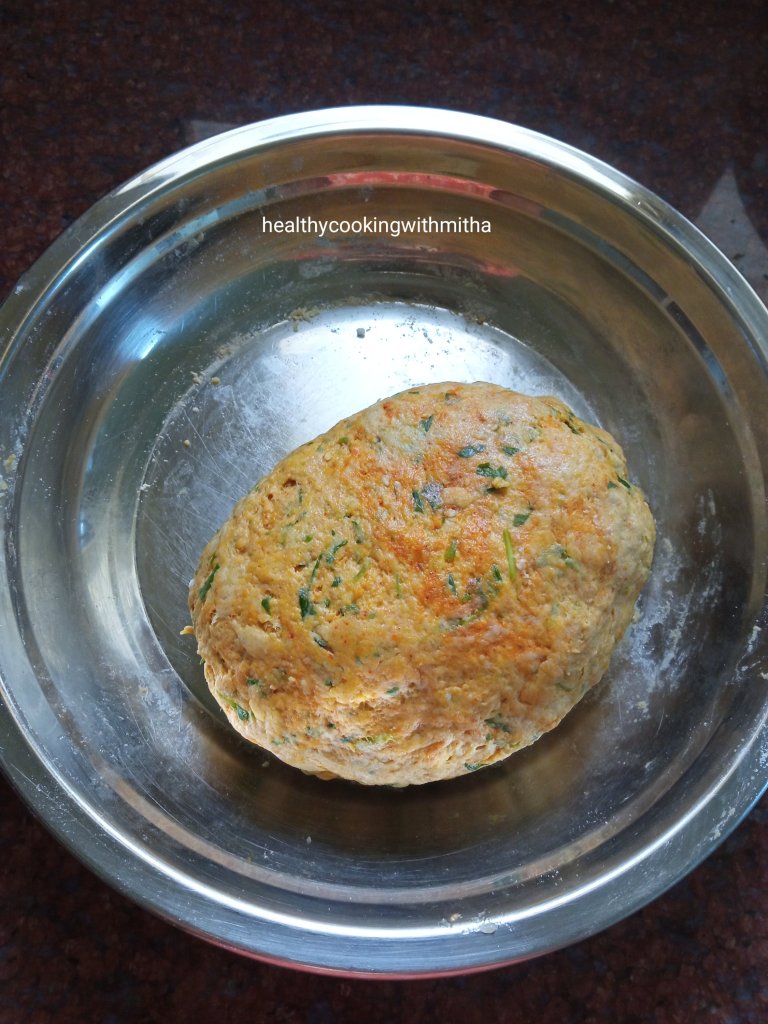
2. Now add wheat flour and mix everything well. Add water little by little and form a soft dough just like chapati dough.
3. Now divide the dough into equal sized balls as shown.
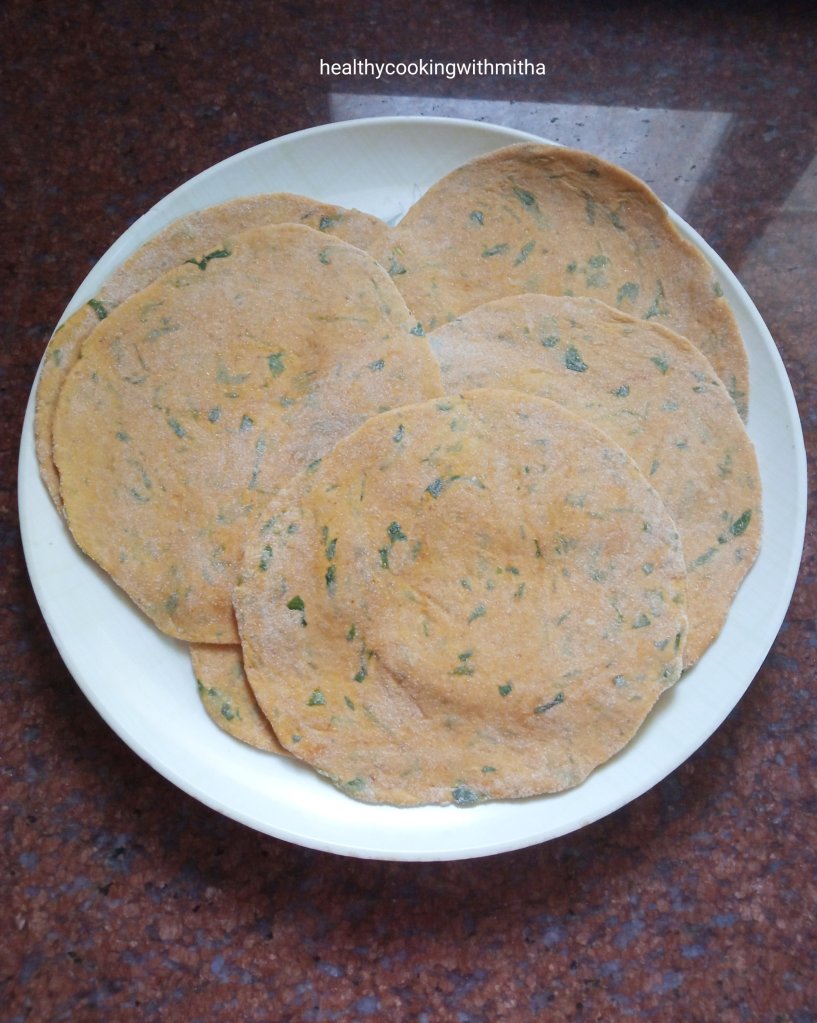
4. Using dry wheat flour, dust each of the balls and roll just like chapatis.
5. Heat a pan and fry the Theplas, both sides while applying oil or Ghee. Cook till brown spots appear on either sides of the Thepla.
6. Enjoy hot Theplas with curd and pickle or even as it is. Tastes so yum ❤️
Click on the image to save the recipe on Pinterest
Notes:
* You can also enjoy them after a while as they remain soft for many hours. Hence they make an excellent lunch box option or to make and carry during traveling.
* Just pack them tightly in a steel box or a hot case.
* The ratio of 1 : 2 for methi leaves : wheat flour works well for me. If you change the ratio, it might be difficult to roll the Theplas.
* Remove thick stems from methi leaves before adding to Theplas. I add thin, tender stems finely chopped and you can never feel them in the mouth.
* Make sure to cook both sides of the Theplas well with oil or Ghee which makes the Theplas soft.
* I also make Theplas adding yogurt which is another method you can try. I make Bottlegourd or Dudhi/ Lauki Thepla that way. Here is the recipe : Bottlegourd Theplas
* For growing your own methi leaves, just sprout regular methi seeds and add them to soil. You can also grow in pots of you don’t have the space for direct soil. It takes about two weeks for methi leaves to grow completely once sowed in soil. I have shared the detailed blog on how to sprout methi seeds in this blog. You can check HERE.
Click on the image to save the recipe on Pinterest
It has been so long that I have posted a cake recipe, in fact the last one was in February which was this delicious Chocolate Sponge cake. The cake is so amazing that I have been making it regularly, mostly as cupcakes for my kids. It is also a great snack box option for my daughter who’s school has started regularly now (after months of online classes, my butterfly is happy to be flying again 😄).
Apart from chocolate cake and other cakes, I have also learned to make this healthy Dry fruit Cake which she takes to school and my 3 year old son too enjoys it as his morning snack. In fact I made it again today on their request and decided to take step by step pictures to share the recipe with all of you too. 😍
My son could not wait for me to complete taking pictures and he came to take a slice. I captured the moment and it came out so cute. Those tiny hands. 😍
Click on the image to save the recipe on Pinterest
He gobbled up two slices of the cake and the rest of them are waiting for my daughter to come back from school. It’s her favorite and I am sure she will be very happy to see it. ❤️
Hope you all try and love this cake too. They are a great way to add the healthy dry fruits in the kids’ diet and since it has wheat flour and ghee along with the nuts, they are filling too. Specially great for the winters now. I have also been making these easy Sesame seeds Burfi and Dry fruits ladoo for them which you can try as well. Happy and healthy cooking! ❤️
RECIPE:
Makes a single loaf cake in a loaf pan of length 20 cm and width 7 cm
Ingredients:
Dry Ingredients: { 1 Cup = 240 ml }
1 Cup Whole wheat flour (Regular Chapati atta)
1 tsp Baking powder
1 tsp Baking soda
1/4 tsp Salt
Wet Ingredients:
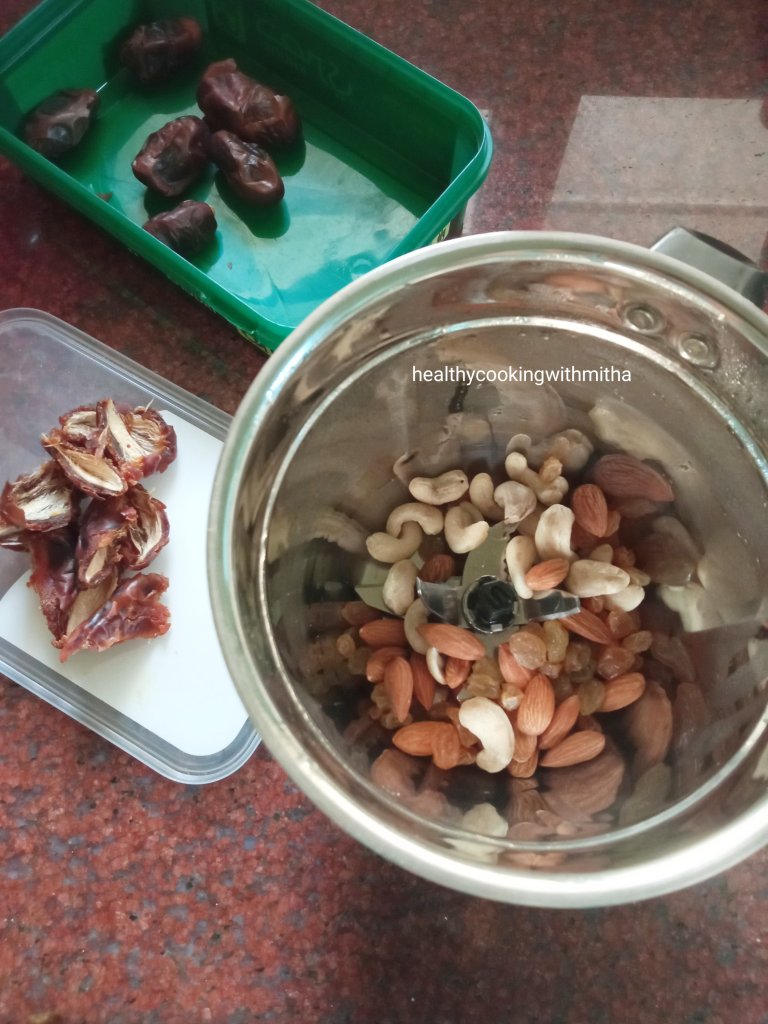
1 Cup Mixed nuts, raisins and dates (I take about 10 cashews, 10 Almonds, some raisins and 5 seedless dates which make a total of 1 Cup)
1 Cup Orange Juice (I use freshly squeezed)
1/4 Cup Jaggery powder
1/4 Cup Ghee
Step by step recipe:
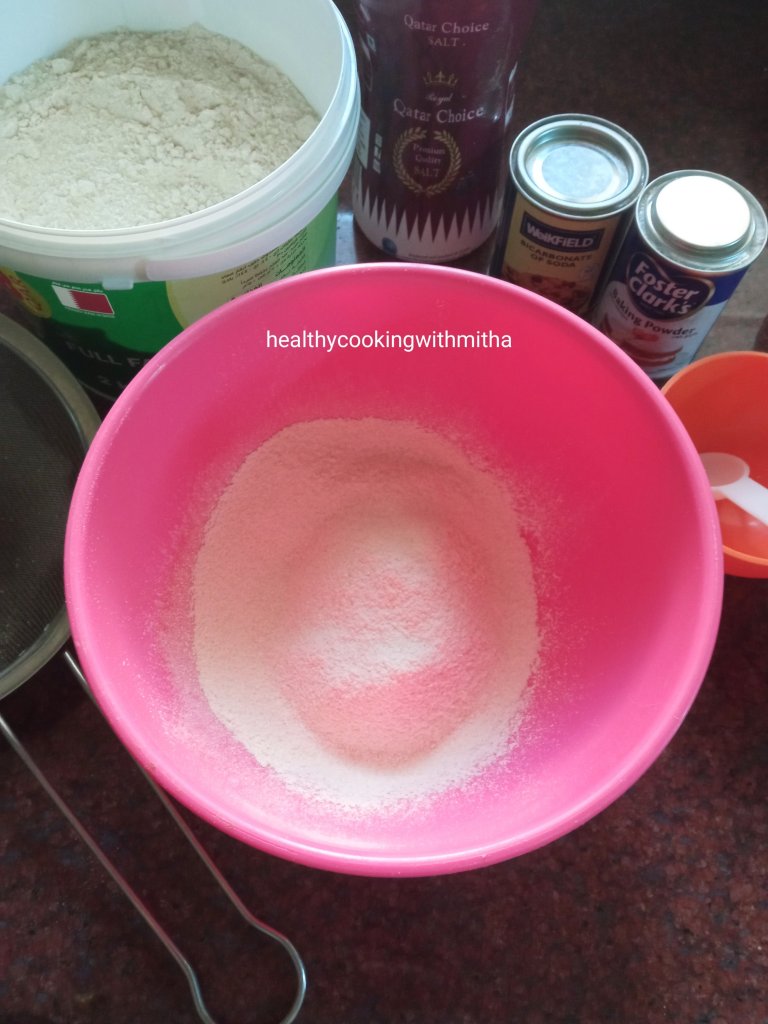
1. Sieve together 1 Cup wheat flour, 1 tsp baking powder, 1 tsp baking soda, 1/4 tsp salt into a mixing bowl.
2. Take mixed nuts and raisins in a mixer. Deseed dates and halve them (Fine chop them if they are not very soft. It helps when you pulse later in the mixer). Keep aside.
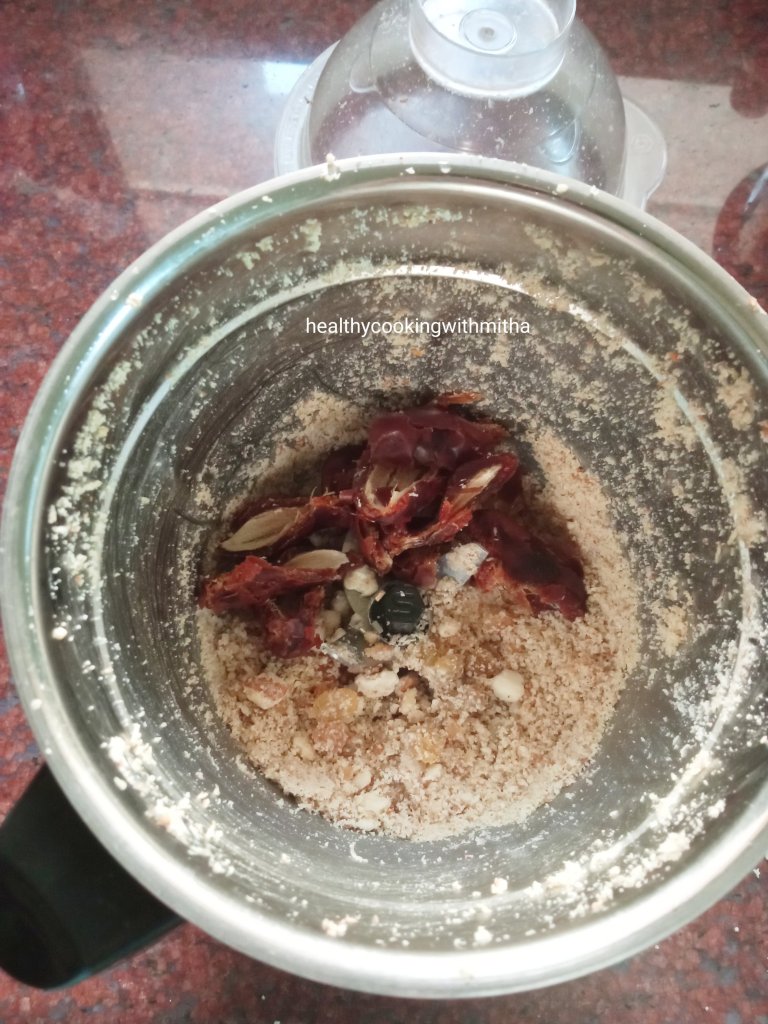
3. Coarsely powder the nuts and raisins together using Pulse mode of the mixer. Don’t grind at one go or you will get a paste. Just pulse few times till the nuts turn into coarse powder. Now add the deseeded dates to it.
4. Pulse again till the dates blend together and it forms a coarse mixture as shown. (Small pieces of dates left in the mixture is fine. Gives a great bite in the cake.) Note that this mixture is in powder form and not paste. Pulse the mixer few times to get this. Don’t grind all at once as the nuts leave oil and the mixture becomes a paste.
5. Now preheat the oven at 180 C for 10 mins.
6. Meanwhile take this dry fruit mixture in a mixing bowl, along with jaggery powder and ghee. Keep orange juice ready too.
7. Add orange juice and mix well. Remember to sieve the orange juice if using fresh ones so that it does not have the pulp.
8. Now add the dry ingredients to the wet Ingredients. Mix well using light hands till you don’t see any dry flour specks. Don’t overmix or you will get a dense cake. Just few mixes till you don’t see dry flour is enough.
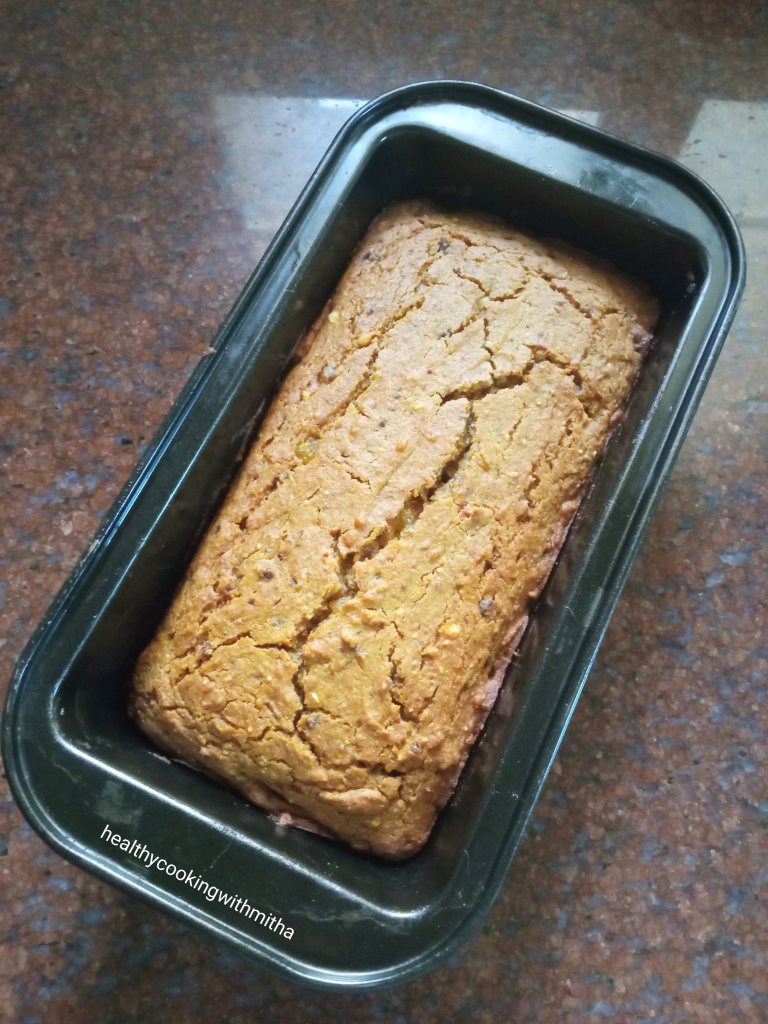
9. Add to a greased cake pan. I grease my pan with ghee. The size of my loaf pan is 20 cm length and 7 cm width. Using a spatula, flatten the surface.
10. Bake in a preheated oven at 180 C for 30 mins. Might take between 25 to 35 mins depending on your oven type. Keep an eye after 25 mins. Don’t keep opening the oven door before that. Using a skewer or toothpick, insert in the center of the cake. If it comes out clear or with dry crumbs, it is done. If it comes out wet, keep again for 5 mins and check again.
11. Allow it to cool for sometime. Once cooled, loosen the edges of the cake using a knife and invert onto a plate.
Click on the image to save the recipe on Pinterest
12. Slice and serve. Store in a moisture free container.
Notes:
* This cake lasts well at room temperature for a day. Mine gets over within that time but if yours lasts, you can refrigerate it. Microwave for few seconds before serving if needed.
* I always use Pillsbury wheat flour and it works well for all my bakes. Recently though I started baking with Lulu brand of wheat flour and they come out great as well. This particular bake was with Lulu wheat flour and I was happy to see the cake come out soft and tasty.
* I have used freshly squeezed and sieved orange juice for this cake. It enhances the flavour of the cake so much. You can use store bought ones too.
* Regarding the mixed nuts, raisins and dates, as I have mentioned above, I have used about 10 cashews, 10 Almonds, few raisins and 5 dates. This made 1 Cup. You can use other nuts too if you like but I prefer this combination. Don’t skip dates though as it adds to the sweetness of the cake.
* You can also finely chop all the nuts and dates but I prefer coarsely powdering it as my kids don’t like the bite of nuts in their cakes.
* I have used 1/4 Cup Jaggery powder. It makes the cake sweet like bakery ones. You can skip if you want to make it completely sugar free and also substitute with brown sugar if you want.
* I always use ghee or butter in my bakes as I make it mainly for my kids. So, not sure about the texture and flavour if oil is used instead.
* Don’t overmix the dry and wet Ingredients. Mix slowly with light hands till the mixture is free from dry flour specks.
* My cake gets done exactly at 30 mins. Since each oven type is different, please keep an eye on the cake after 35 mins. Mine is an OTG. In microwave convection oven, the time required to bake will be less. So keep an eye after 20 mins into the baking time.
* This cake is very soft and slightly moist due to the orange juice and dates. So be careful while slicing it and start slicing only after it cools completely. Else it can break apart as it’s very soft in texture.
* If you are new to baking, I have written an article combining all notes and pointers that I learnt in my decade long baking journey. You can check that if needed – Baking Basics for Beginners
I have tried to note down as much points as possible so that it’s easy for you all to follow but if you still have any doubts, either comment here or message me on my Facebook page Healthy cooking with mitha and I would be happy to help. Happy baking!
Click on the image to save the recipe on Pinterest
Click on the image to save the recipe on Pinterest
I know I have been taking long breaks from blogging and there are many reasons for it, some are personal, some are worth sharing with all of you. The main reason why I can’t blog like before is my son, who needs me all the time, to play with him, to hear his life issues as a 3 year old (😅) and sometimes to just hug him tight, sitting on our sofa, looking outside at the birds. ❤️
But all this will last only for 4 more months as we have got him admission for Kindergarten (KG 1/ LKG) which he will join in April. It’s a bitter sweet moment for me as both the kids will be at school while the home turns empty.. Though I know I will get all the time in the world for myself, I really don’t know what I will do with that time 😂. Will definitely miss the chatter and the fun mornings with my son. ❤️
It’s been many days my husband has been asking me to restart blogging ( he loves this blog much more than me 😅) and I wanted more time to get my mind reset on blogging. Today he said he will play with the momma’s boy and here I am writing this blog.
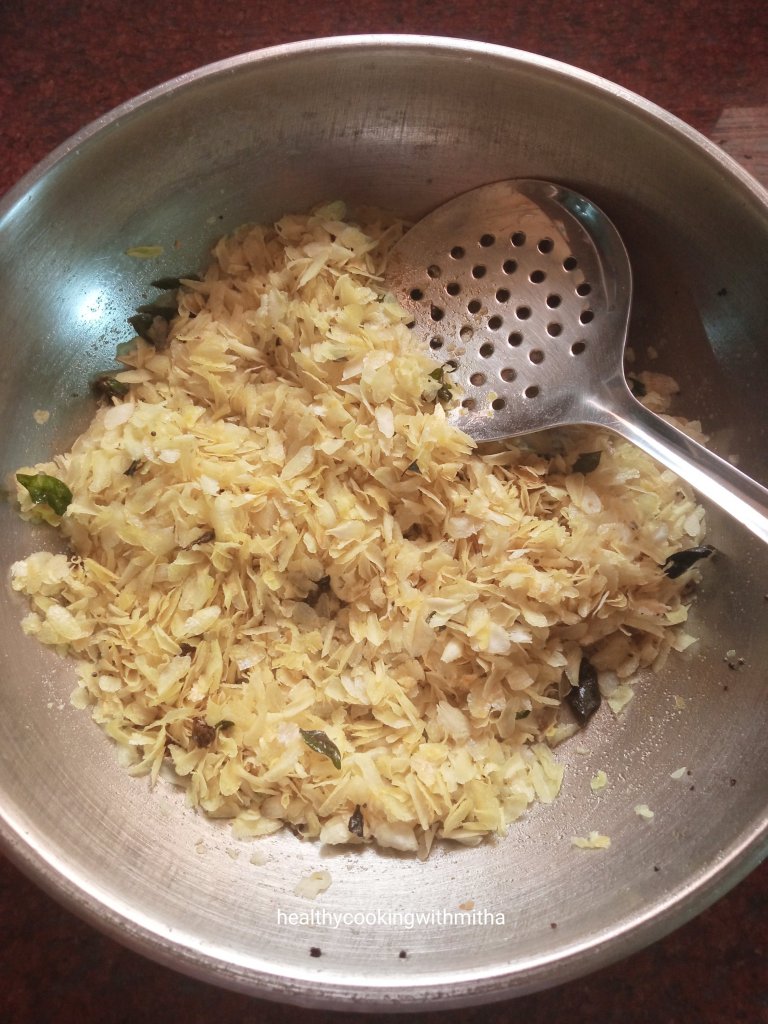
I learned to make this roasted Poha snack long back when Nandini Bhandarkar Akka posted it on our common food group. We all loved it and it has now become a regular at my place. I absolutely love how quickly it can be made, yet tastes really delicious with simple flavours.
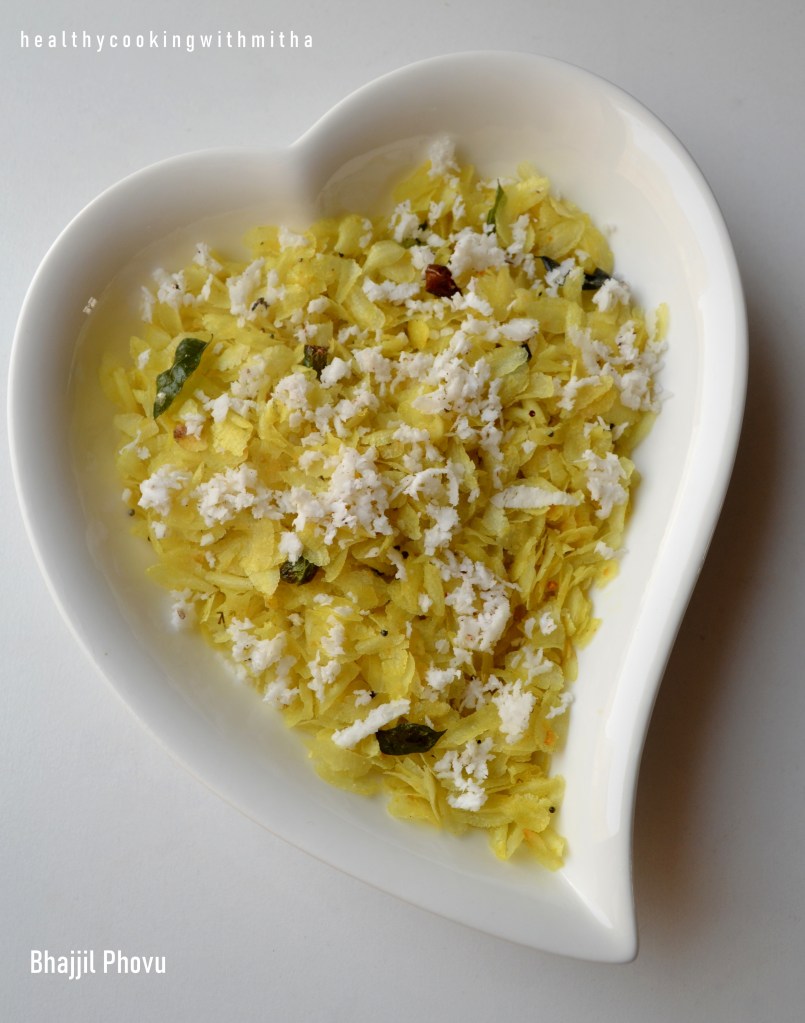
Hope you all try and love this Bhajjil Phovu. Happy and healthy cooking! ❤️
Thank you Nandini Bhandarkar Akka for your recipe. ❤️
1. Dry roast the thin variety of Poha in a pan (without oil) on medium flame till it turns crisp. Takes about 5 mins.
2. Now remove it in a mixing bowl. Keep aside.
3. Now heat coconut oil in the same pan. Splutter mustard seeds, add curry leaves, finely chopped green chillies, turmeric powder and fry for few seconds.
4. Add the roasted Poha to this seasoning along with salt and sugar. Mix well. Switch off the flame.
5. Remove in a bowl. Garnish with freshly grated coconut. Serve!
Click on the image to save the recipe on Pinterest
Notes:
* Bhajjil Phovu makes for an excellent evening snack as it is light on the tummy and can be easily made, yet really delicious.
* You can also roast peanuts in the seasoning.
* Please note that this snack is made using thin Poha and not thick Poha. Thick Poha needs soaking before consuming whereas thin Poha does not need it.
* If making for breakfast, you can combine it with Upma or Chane Usli too for a filling breakfast.
* Store this in a tight, moist free container and it lasts well for few days too. You can add freshly grated coconut just before serving.
* This Bhajjil Phovu tastes just like the Phova Chiwda that is made during festivals, the difference being this Phovu is a simpler and easier version of it.
Click on the image to save the recipe on Pinterest.
Broccoli is not something I grew up eating. In fact, don’t remember even seeing this vegetable till few years back (Talk about being desi 😅). In the winter months here in Qatar, which is between November and March, there opens a Mahaseel festival which sells varieties of flowers, indoor/outdoor plants and also fresh vegetables grown in different Qatari local farms. Inspite of the quality of the veggies being so good, the rate is surprisingly very cheap. I found this “pretty green vegetable similar to cauliflower” (exactly what was in my mind 😂) in the festival and could not resist buying it. That started my love for Broccoli and my kids too love it so much now. ❤️
The Mahaseel festival is a treat to the eyes for flower lovers and I want to share a picture which I clicked when we went there in December 2019. Look at the beauties. 😍😍
This reminds me of my favorite song from the movie Silsila, Ye kahaan aa gaye hum.. That song too has been shot in midst of floral heaven. Admire how beautifully it has been picturized and such an eternal love song too. ❤️❤️
For me, merely looking at greenery, lush trees, mountains, fields, flowers, birds chirping, cows grazing, waves of the river, streams of water in a waterfall, early morning dewdrops on leaves, the heavenly aroma of the freshly wet soil in the first rain and so many similar such experiences brings so much unexplainable joy. ❤️ I don’t know about you all, but being with nature makes me feel so alive and refreshes me a lot. If I could, I would love to live atop a mountain, far away from the city, embracing nature in it’s purest form (One among my dreams in life. ❤️)
Among these, there is also the wonderful feel of cooking with freshly plucked vegetables. 😍 Now, since a year, these locally grown vegetables like Broccoli and cucumber are available in our nearby supermarket. It’s a boon since we can’t travel all the way to the Mahaseel festival due to the Covid situation.
My kids love these two ways of Broccoli that I make and they eat it as it is even without rice. Sharing it so that you can try for your family too. Hope you all try and love it too. Happy and healthy cooking! ❤️
RECIPE:
Ingredients:
For Broccoli stir fry:
2 Cups Broccoli florets 1 tsp Oil A pinch of Pepper powder Salt to taste
For Vegetable Paneer Chilly:
1 Cup Broccoli florets
1 Cup diced Carrots
1 Cup Paneer cubes
1/2 a medium sized Capsicum, cubed
1 medium sized Onion, cubed
3 Garlic cloves, finely chopped
3 to 4 Green chillies
2 Tbsp Tomato ketchup
2 tsp Chilli sauce
1 tsp Soya sauce
Pepper powder to taste
Salt to taste
1 tsp Vinegar
Finely chopped coriander leaves
Step by step recipe:
1. For Broccoli stir fry, take bite size broccoli florets in a bowl and wash it well. Drain and keep it ready.
2. Heat oil in a pan and add the broccoli florets. Also add salt and pepper. Fry on high flame for few seconds. Cover and cook on medium flame till the florets turn soft. Sprinkle water only if needed. You are done!
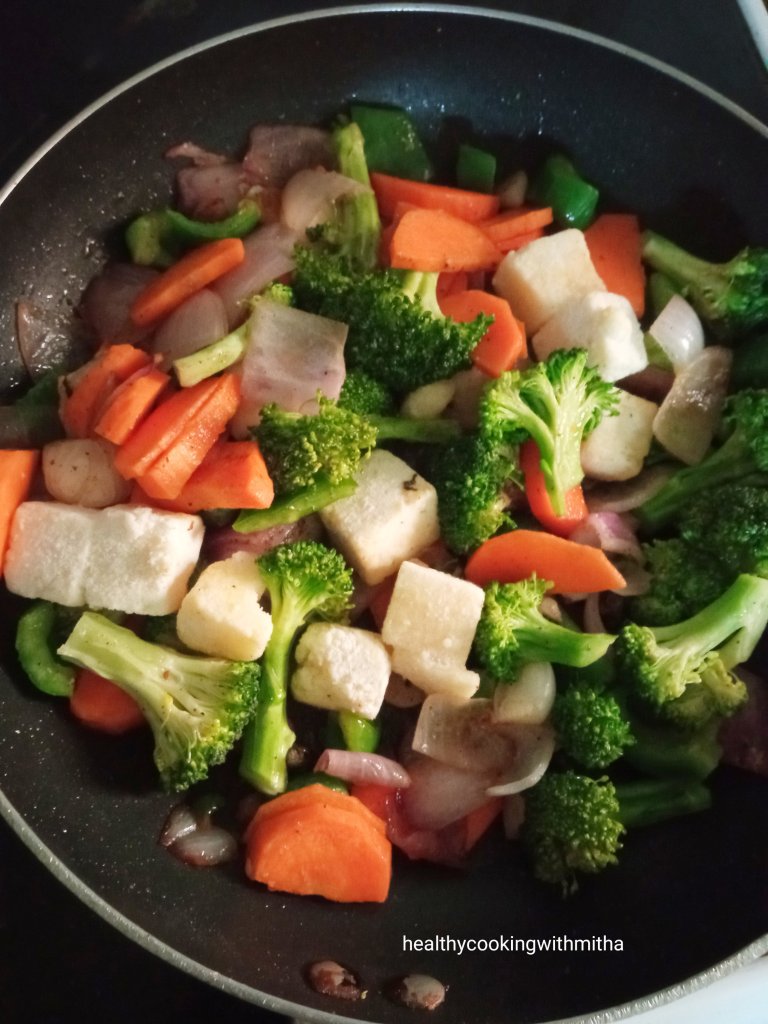
3. For Vegetable Paneer Chilly, take Broccoli florets, diced Carrots and cubed capsicum in a bowl.
4. In a pan, heat oil and fry the green chillies and garlic first. Then add cubed onions and fry till it turns translucent.
5. Now add the veggies along with Paneer and fry for few seconds.
6. Add very little water and cook till the veggies turn soft but don’t overcook them. Now add ketchup, chilli sauce, soya sauce, salt and pepper. Mix well and cook for 5 mins.
7. Remove and add vinegar. Mix well adding coriander leaves.
Serve both the Broccoli stir fry and Vegetable Paneer Chilly with fried rice or any variety rice or meals.
Click on the image to save the recipe on Pinterest.
Notes:
* I usually make easy Schezwan fried rice with this. You can check the recipe here.
* Skip Paneer if you don’t like it. Makes regular vegetable chilly.
* You can make it as a gravy if you want. Just add more ketchup and water. For a thicker gravy, add corn flour mixed in water to the gravy. It will make it very thick. I love this dry version though.
* The broccoli stir fry makes for a great snack for kids. My kids dip it it ketchup and eat by themselves. Great finger food for toddlers as well.
Click on the image to save the recipe on Pinterest.
If there is one event here in Qatar that I used to wait eagerly for (pre corona times), it is the Qatar International Food Festival or QIFF as it is called. My first visit to the QIFF was in 2016. It was held in one of my favorite parks here, the MIA park which is in a picturesque location. I love to sit there, just admiring the beauty and calmness of the gleaming blue waters 🌊. And enjoying food there made it extra special. That first experience of QIFF at MIA park was the best one till date. ❤️
Being vegetarians (who love Indian food ❤️) actually takes away the point of going to an “international” food festival (the irony 😁) but there were so many options from Indian restaurants that we got spoilt with choices. It was like finding all the famous Indian restaurants from Qatar in one place and you get to choose their best dishes from the menu. In short, Foodie heaven! 😍
After that, we made a point to go to the QIFF every year, for some variety chaats, north Indian platters, south Indian delicacies, sweets, ice creams and juices, hovering from stall to stall (basically rummaging into all theveg options 😂😂). I know it sounds like a lot of food but these food festivals make me go crazy and I forget all the healthy eating for a while (Sorry but not sorry, Mr Diet 😅😅).
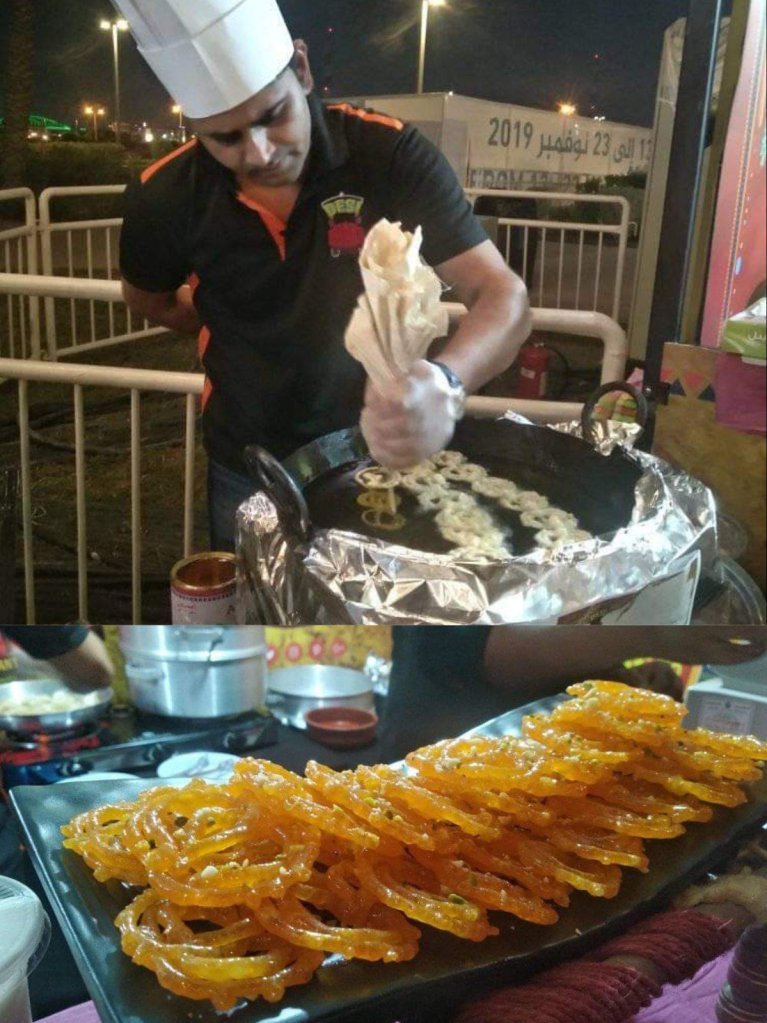
The last food festival we visited was held in November 2019 which was a street food festival. The chef at the live counter of Desi Dhaba restaurant making hot Jalebis fried in ghee was the highlight of the event for the sweet lover in me. Look at how delicious the Jalebis were! 😍 My mouth waters as I think about it. 😋
Another unforgettable food memory with these food festivals is the Paneer Kathi Rolls from Zaffran cafe stalls. I never missed it and it is the most delicious kathi rolls I have ever eaten. ❤️
Click on the image to save the recipe on Pinterest.
So since due to Covid, it has been more than an year of no food festivals (😭), I decided to recreate those Paneer Kathi Rolls at home and how amazing did it come out. Never knew making them at home was so easy. My kiddos too loved it so much that they could not stop saying “mmmmm yummyyyyy 😍😍” (gone ditto after me 🤣🤣 exactly how I can’t stop saying it when I eat something yummy, not caring for anyone else in the world. 😂)
So I thought I must share this yumminess of a recipe with you all too. Makes a filling evening snack or even a meal in itself. Also a great way to finish your leftover rotis. Hope you all try and like it. Happy and healthy cooking! ❤️
1. Take wheat flour and salt in a bowl. Add water and form a firm yet soft dough like that while making rotis. Keep aside.
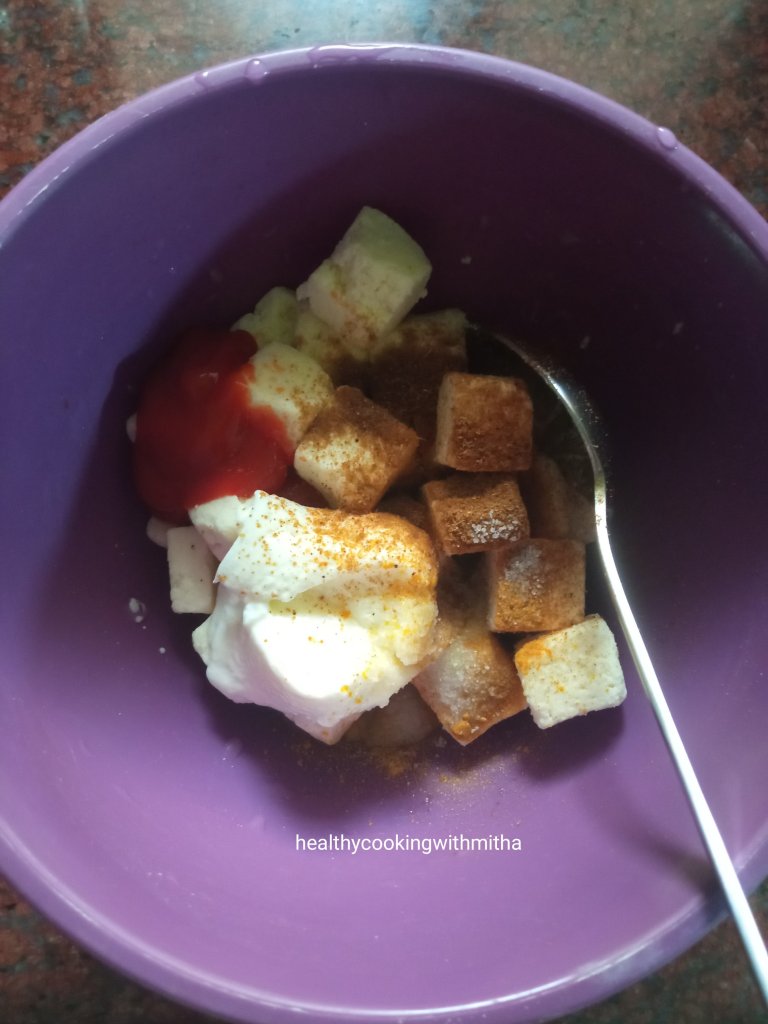
2. Now take paneer cubes in a bowl. Add yogurt, ketchup, cumin powder, Garam masala powder, Turmeric powder and salt.
3. Mix well.
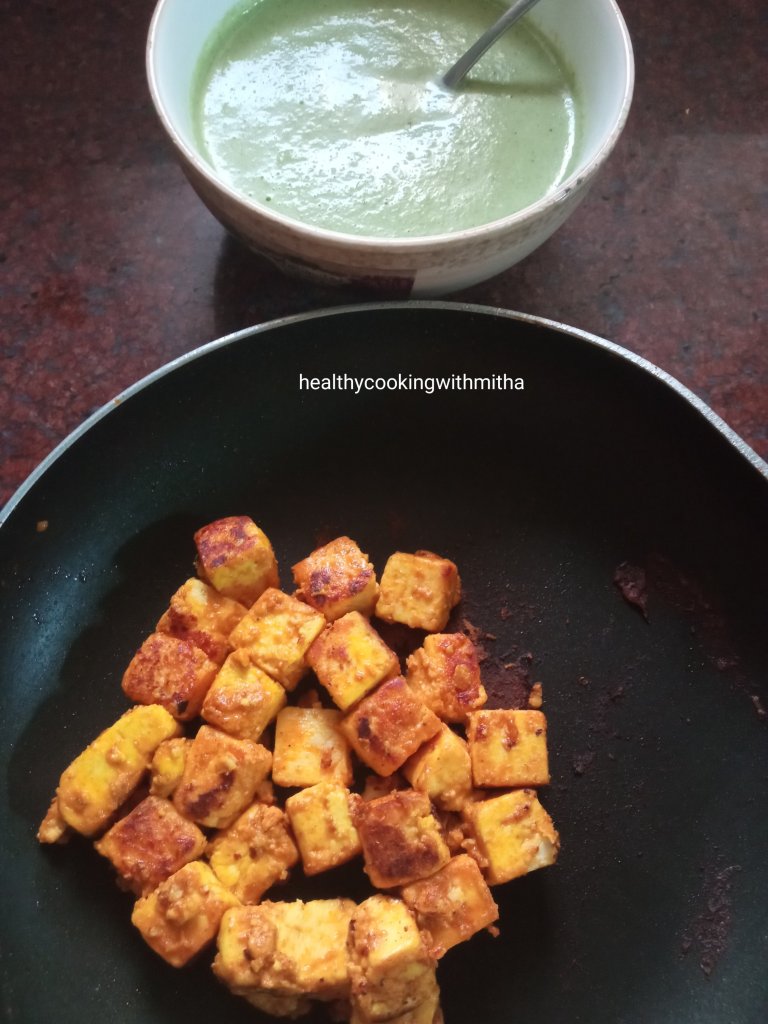
4. Now heat 2 tsp ghee in a frying pan and roast the paneer cubes on medium flame till the cubes get browned on all sides. Keep flipping as they turn brown each side.
5. Remove from the flame and keep aside. Also make the green chutney.
6. Take sliced onions and capsicums in a bowl. Add salt and vinegar. Mix well. Now the things ready for filling are ready.
7. Make roti like you make regularly. I make it almost like a square so that it’s easier to roll. Place in a plate. Spread with a spoon of the chutney. In the center, keep the paneer pieces are shown. Top with the salad.
8. Roll and serve!
Click on the image to save the recipe on Pinterest.
Notes:
* I make this roasted gram dal coriander leaves chutney for the roll. You can make regular Coriander leaves chutney for it too. Just remember to make the chutney thick and not liquidy as we have to spread it.
* You can add more veggies into the salad filling. I just keep it simple as I don’t want to overfill the rotis.
* Be careful to roast the marinated paneer on medium flame. Else due to Yogurt, it can turn black.
* You can also add red chilli powder to the marinate to make the paneer filling more spicy. I don’t add as I make for my kids too.
* These rolls are the best way to finish leftover rotis in a delicious and unique way. Also great for lunch box. Just make the chutney very thick if making for lunch box.
Click on the image to save the recipe on Pinterest.
Advertisements
Join me in my journey with a foodie husband and hungry kiddos while I make them eat healthy!