Tag Archives: Ragi

Ragi Ela Ada | Steamed Finger Millet snack | Vegan, Gluten free and Oil free

Click on the image to save the recipe on Pinterest

Kids’ schools have started after Eid holidays and days have started flying again. Waking up early, preparing their snack boxes, sending them to school, morning walk, cleaning the house, relaxing till they come back and after that hearing about their day at school, teaching them, walking again in the evening while they play outside, finally preparing for their next day at school and putting them to sleep.

Days are super busy but I would not want it any other way. I have realized being busy is actually great than sitting idle and overthinking. So it’s a blessing in disguise for me. ❤️

In midst of this, is cooking which I love and which brings me happiness. I listen to bhajans and songs while cooking which makes it so peaceful. Music is truly therapeutic. ❤️

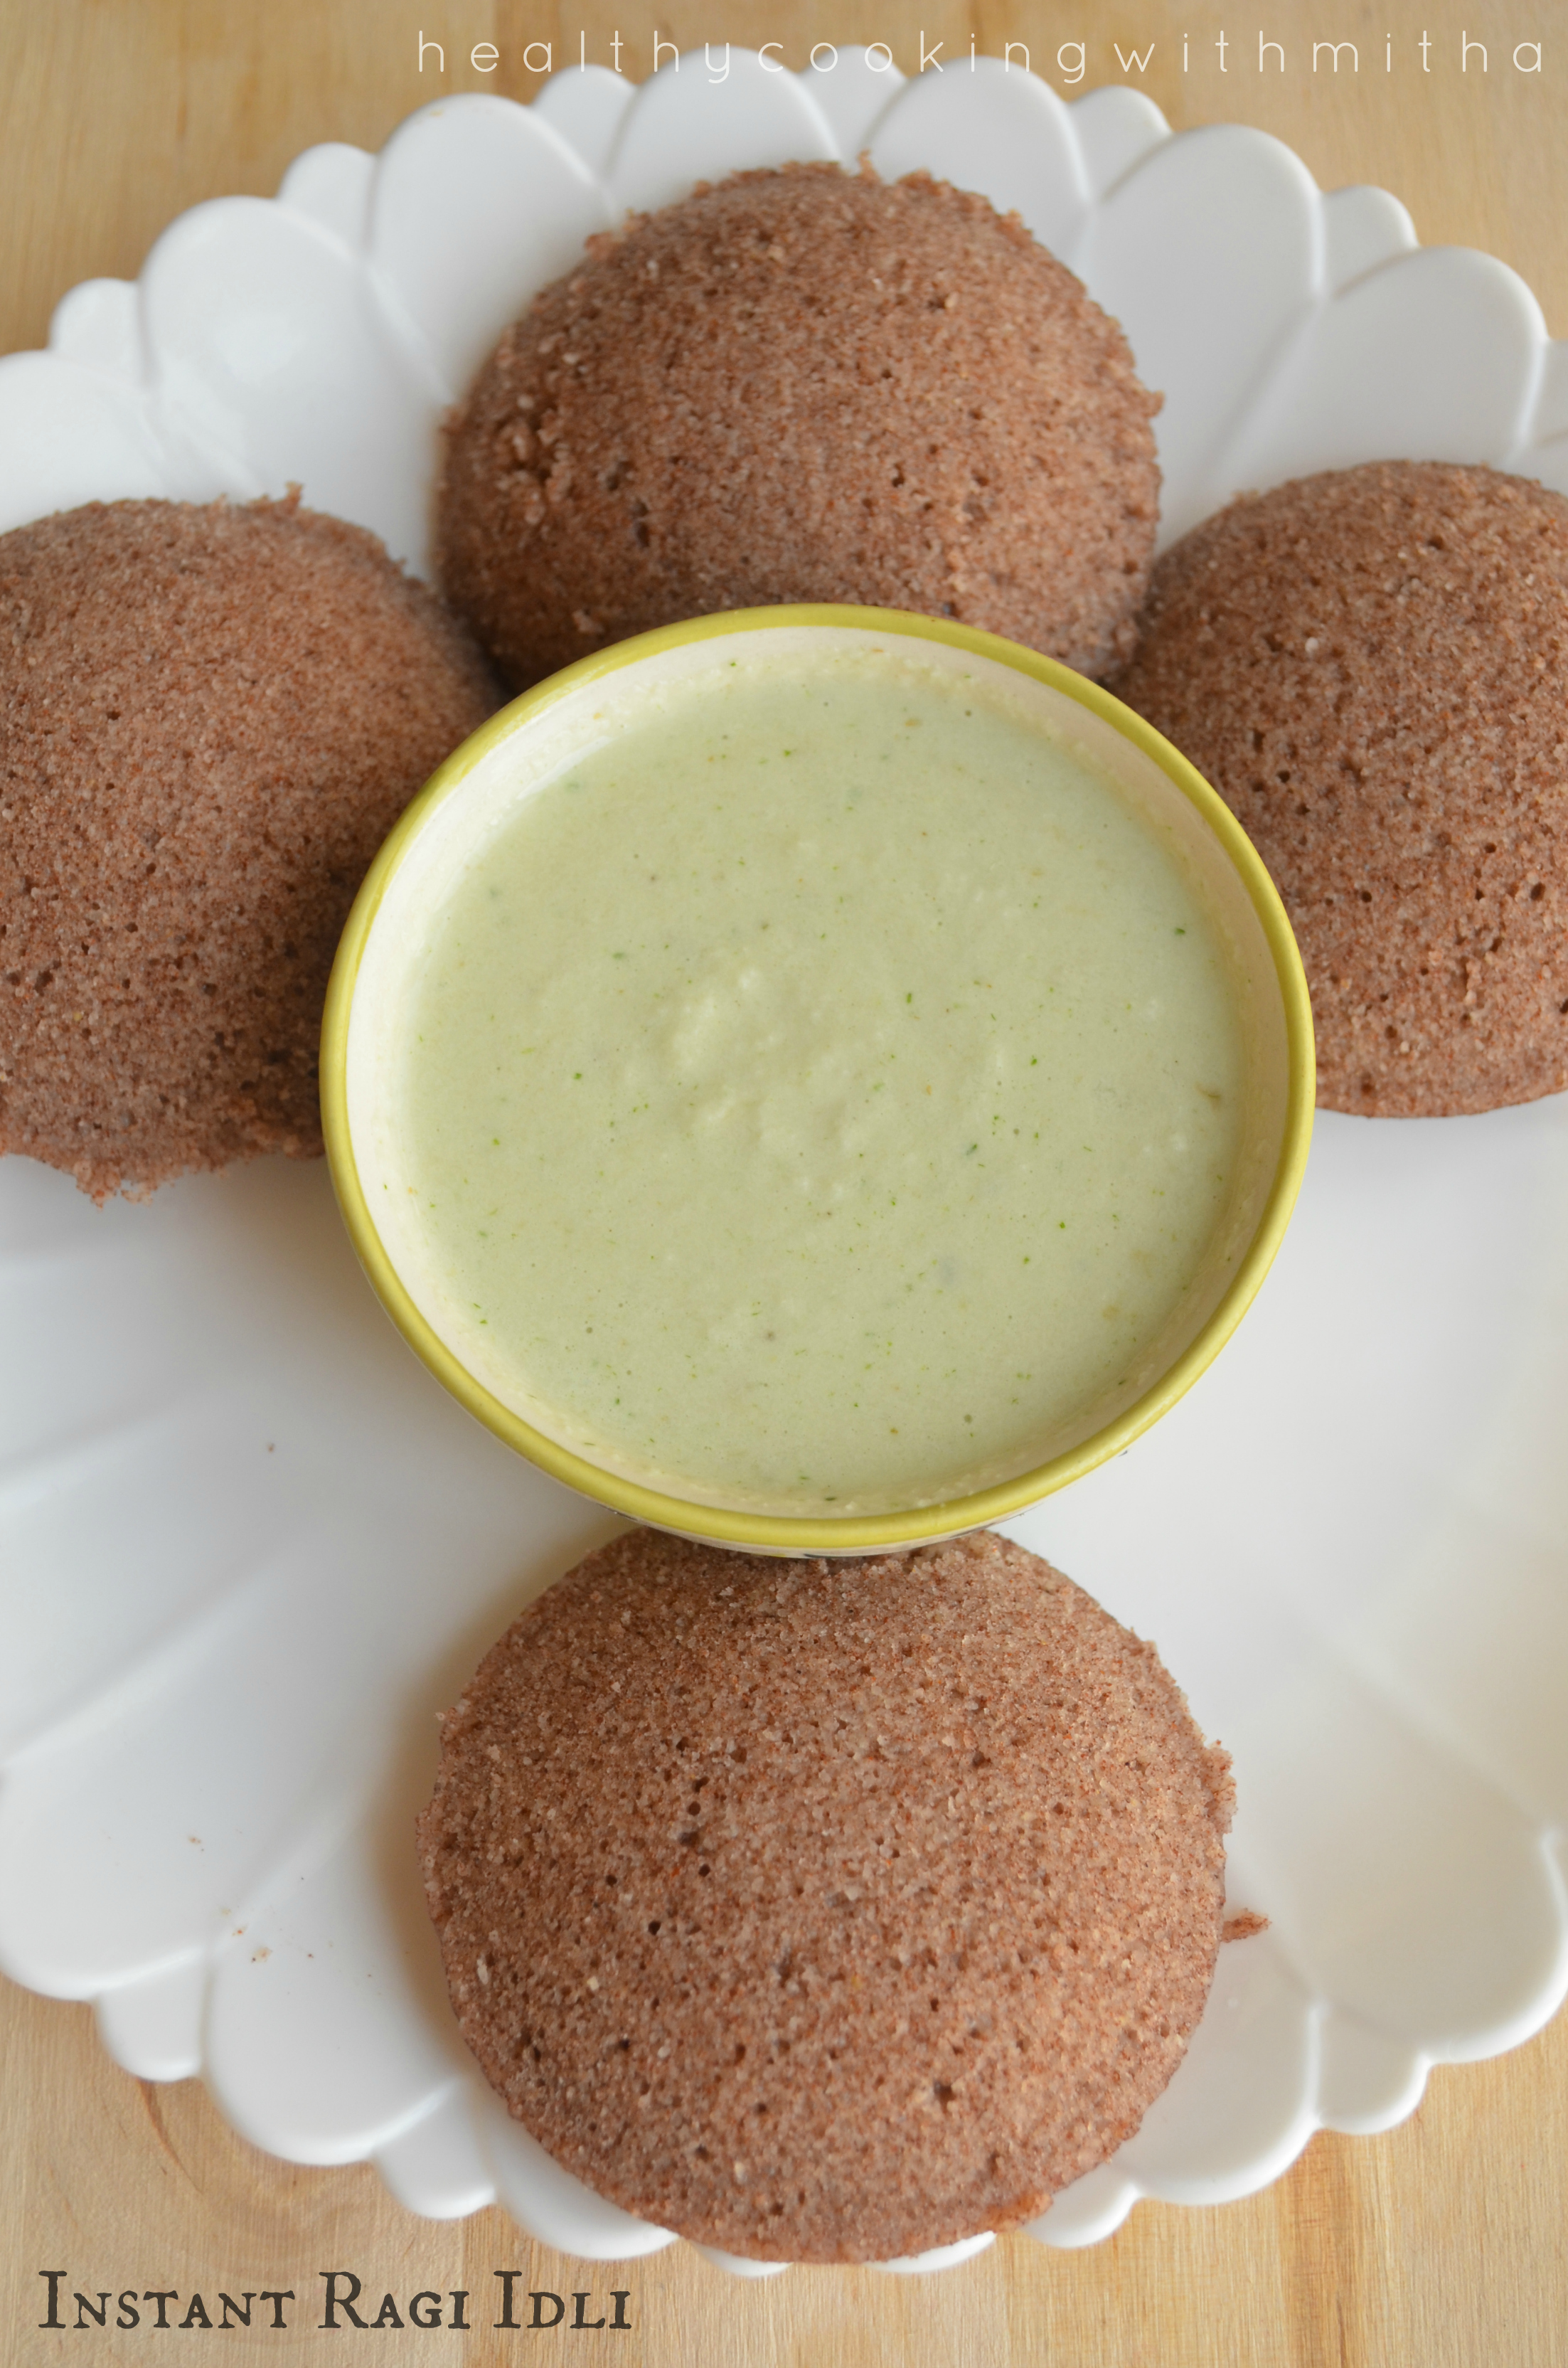
Apart from breakfast, lunch and dinner, there is one meal of the day which is most difficult for me – Snack time. Finding a quick, healthy and tasty snack which the kids also love is very hard. So when I tried this Ragi ada inspired by my Kochi memories of the regular ada and it came out so well that we all loved it, I knew I had to share it with all of you too. ❤️

I don’t know why some people think Ragi is bitter. Ragi is such a tasty millet and I use it regularly in my cooking. It is tasty and very healthy too. Have shared all the recipes that I make using Ragi in the notes section towards the end. Do try and I think if you follow the recipe well, adapt it in your cooking, in few days, you will love Ragi too, just like we do. ❤️

Happy and healthy cooking ❤️

RECIPE:

Ingredients: { to make about 5 adas }

1 Cup = 240 ml

Banana leaves to make the ada

To make outer covering:

1 Cup Ragi flour ( finger millet powder)

Salt to taste

Approx 1 Cup hot water

To make inner filling:

3/4 Cup Jaggery

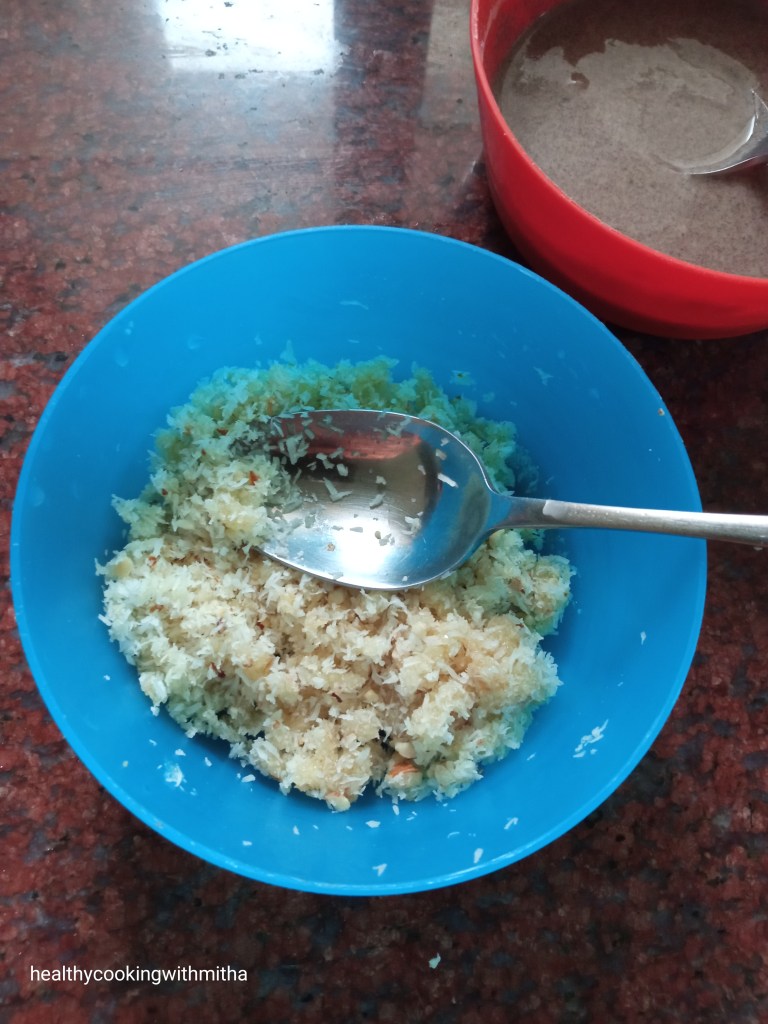
3/4 Cup freshly grated Coconut

1/4 tsp Cardamom powder

Step by step recipe:

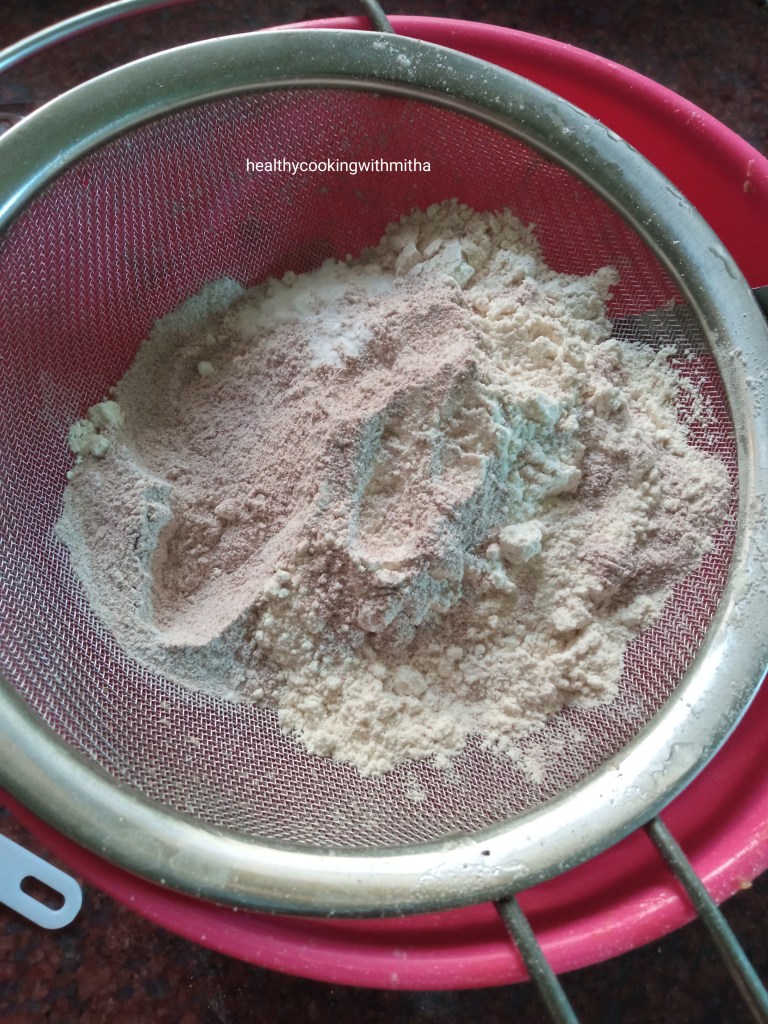
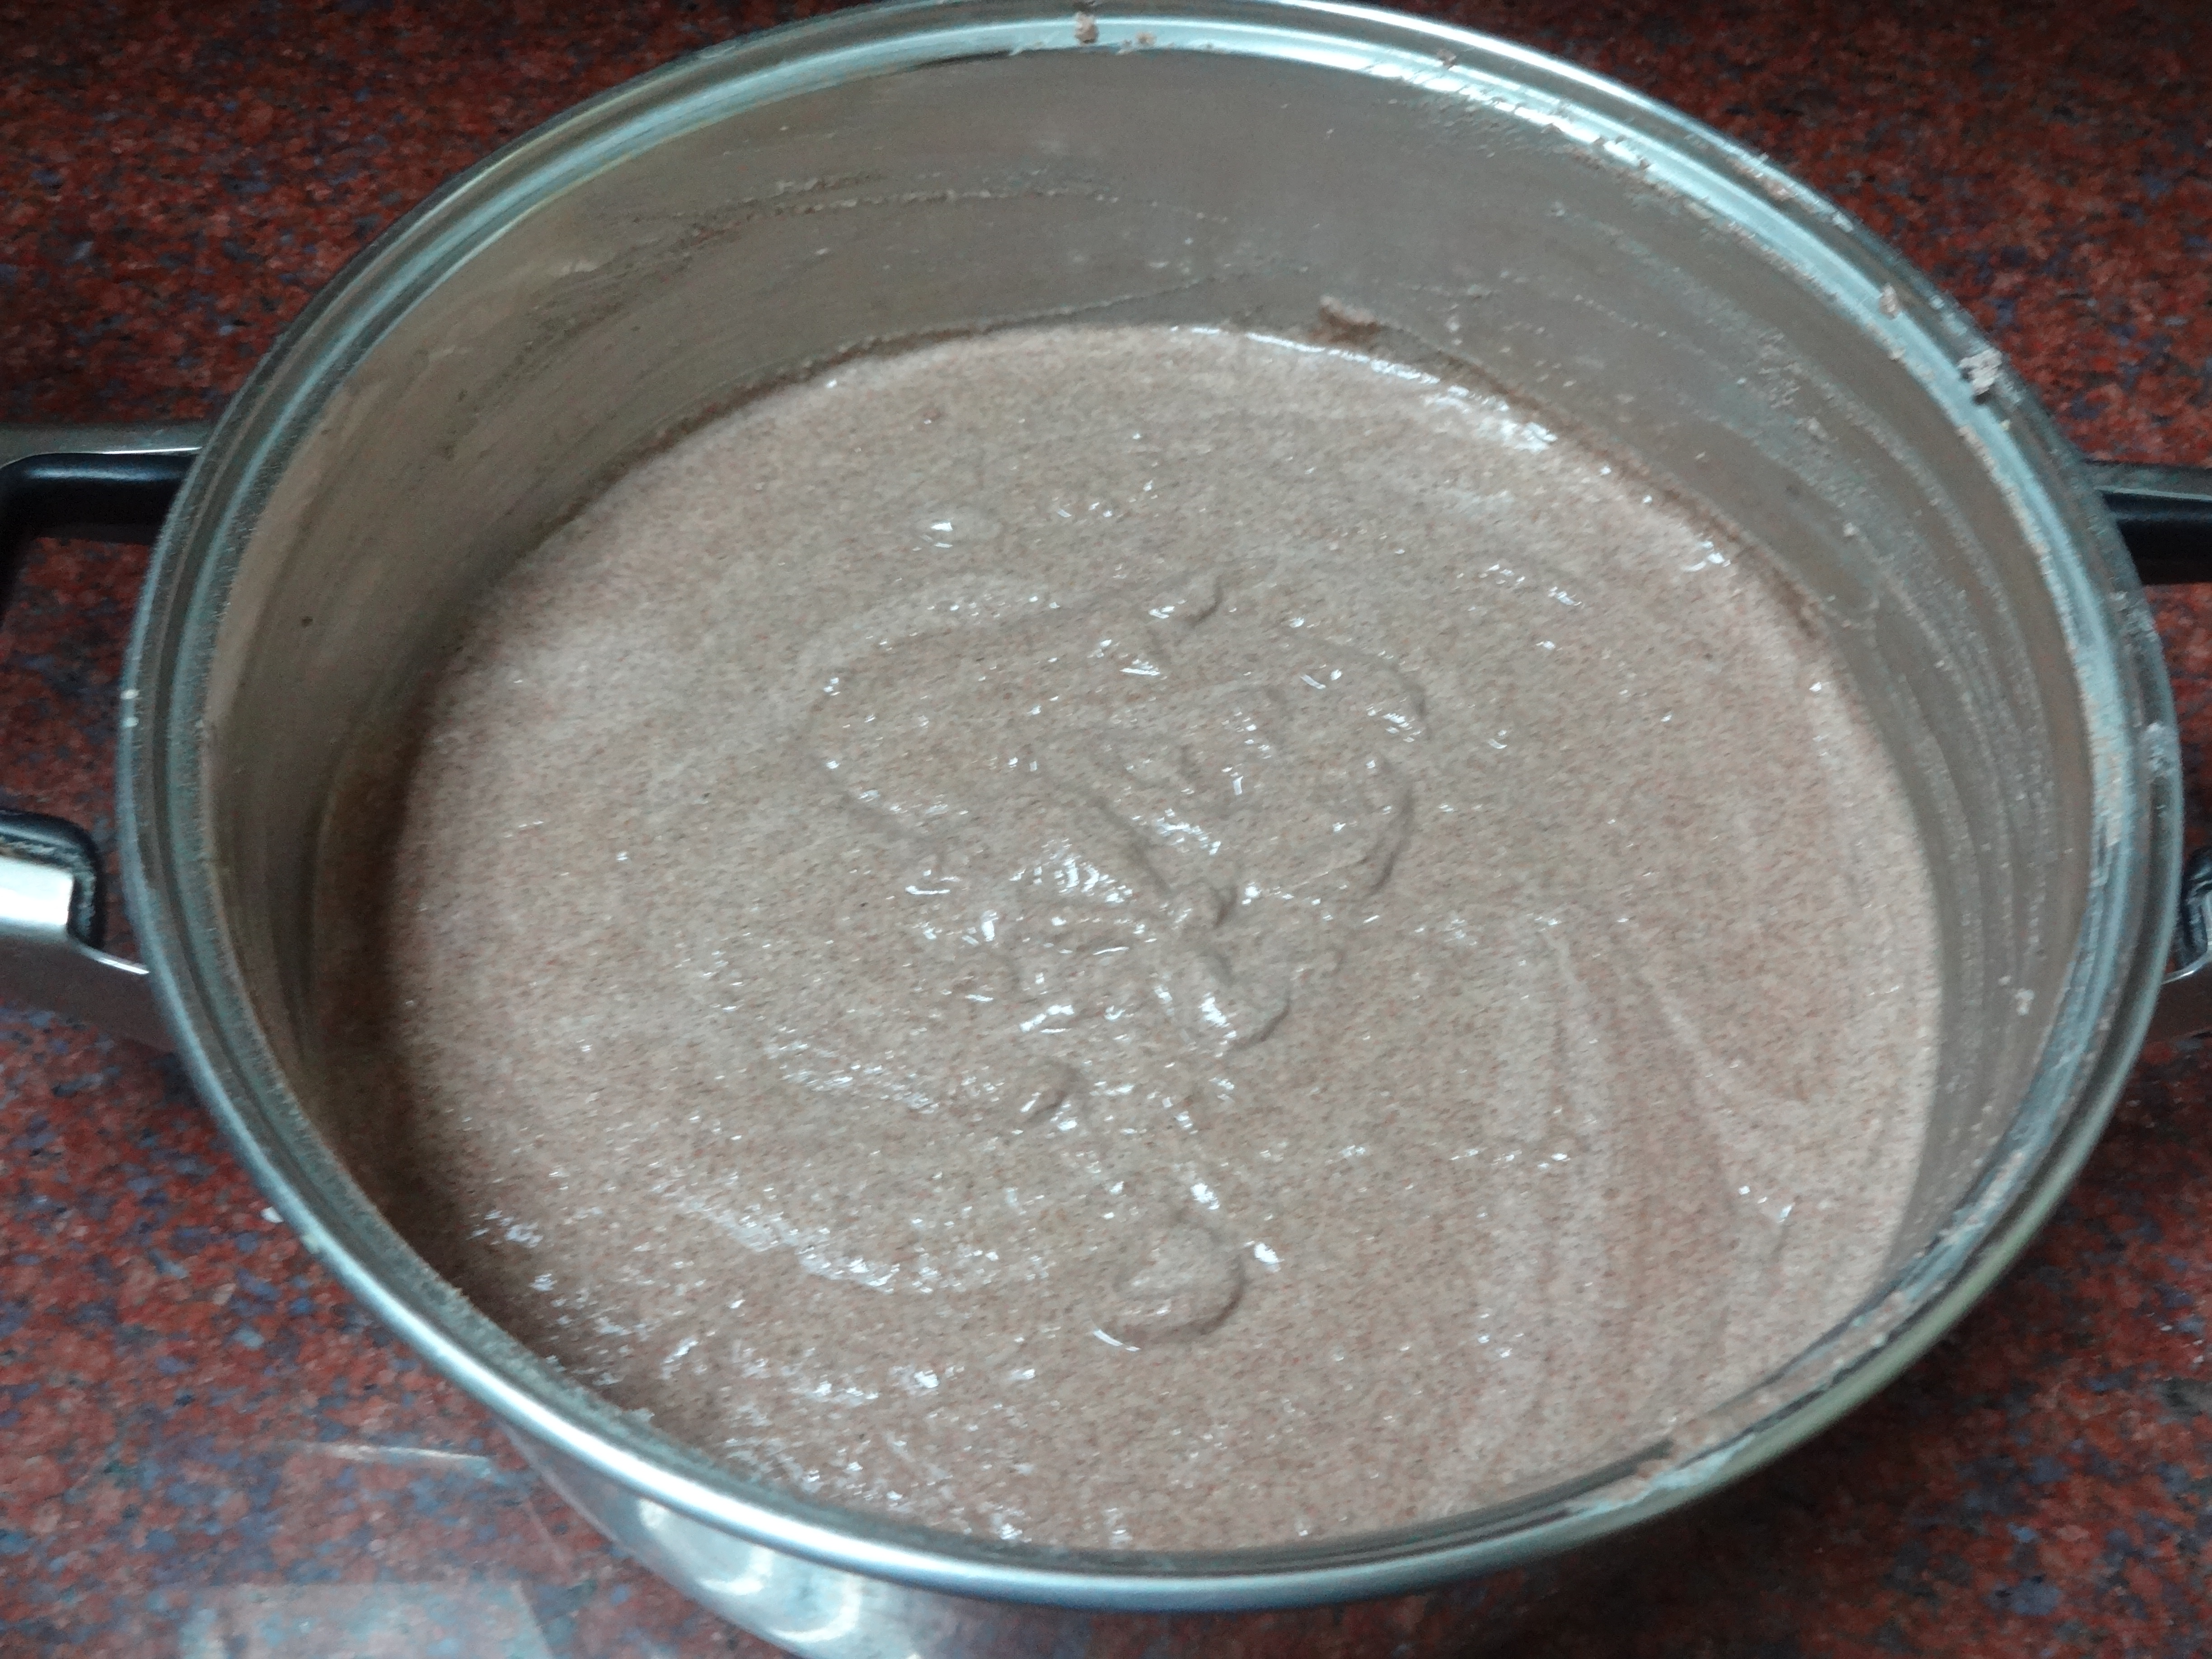
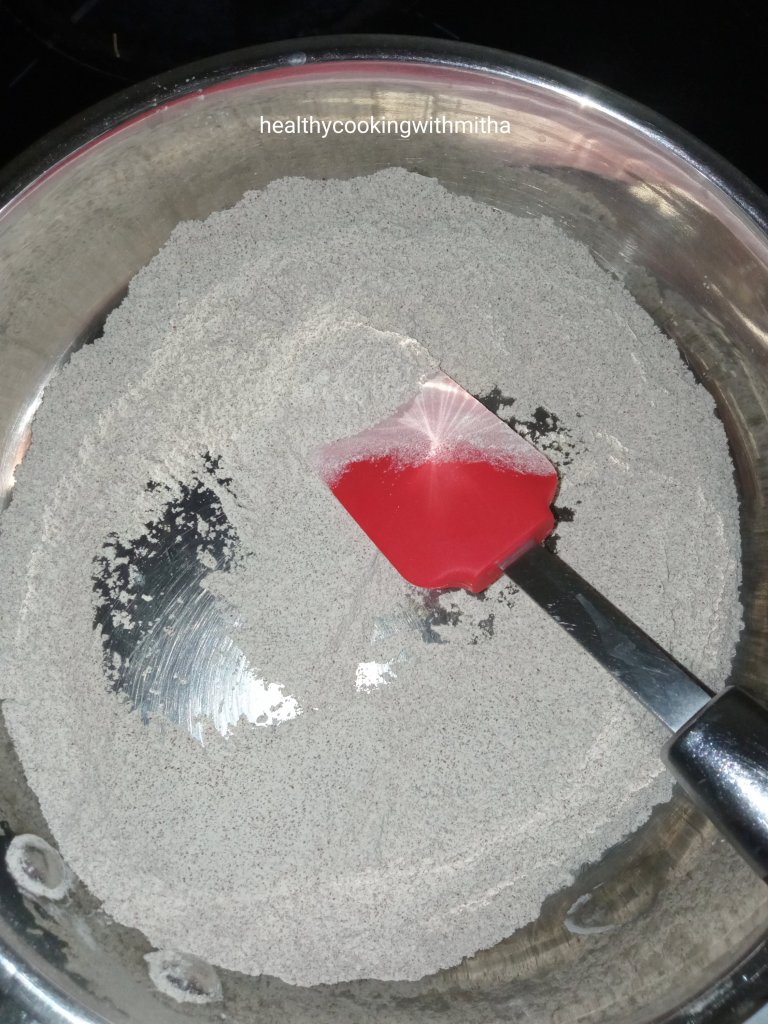
1. Dry roast Ragi flour ( do NOT add oil while roasting) on medium flame till you get an aroma of the flour and it changes colour to a darker tone.

Note: Even if you have roasted ragi flour with you, dry roast for few minutes as it enhances the flavour a lot.

2. Transfer it to a bowl. Add salt.

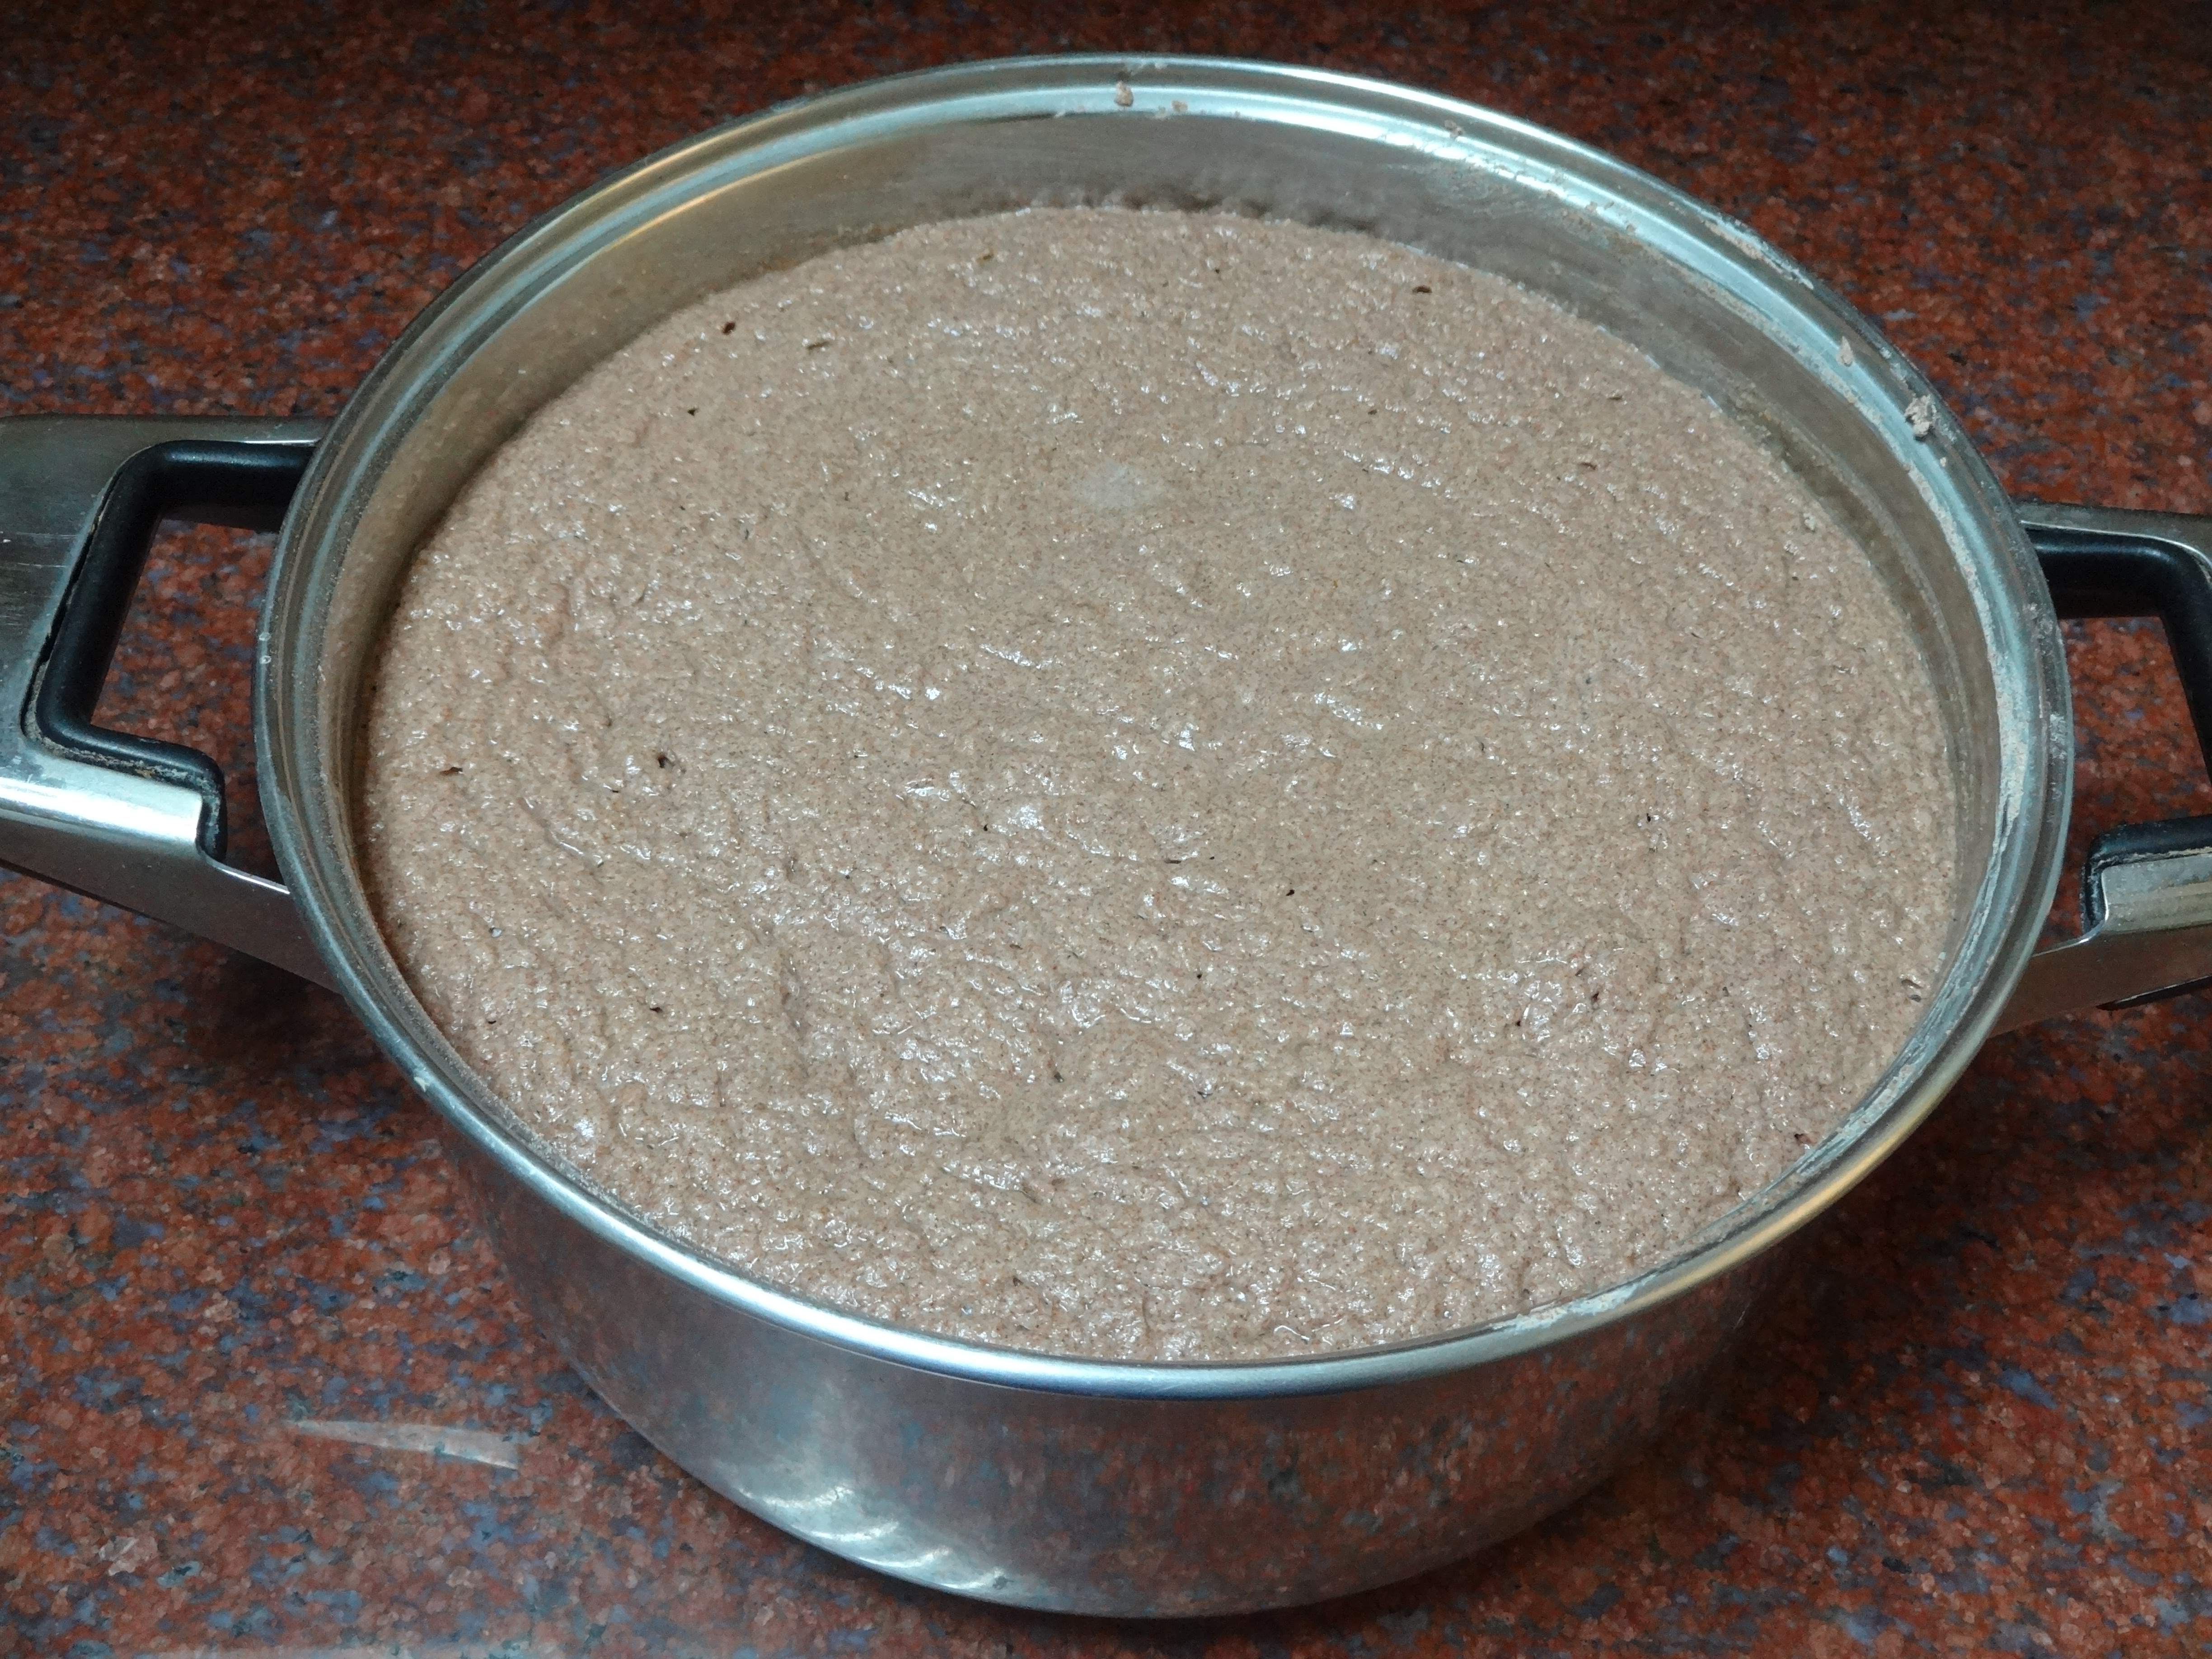
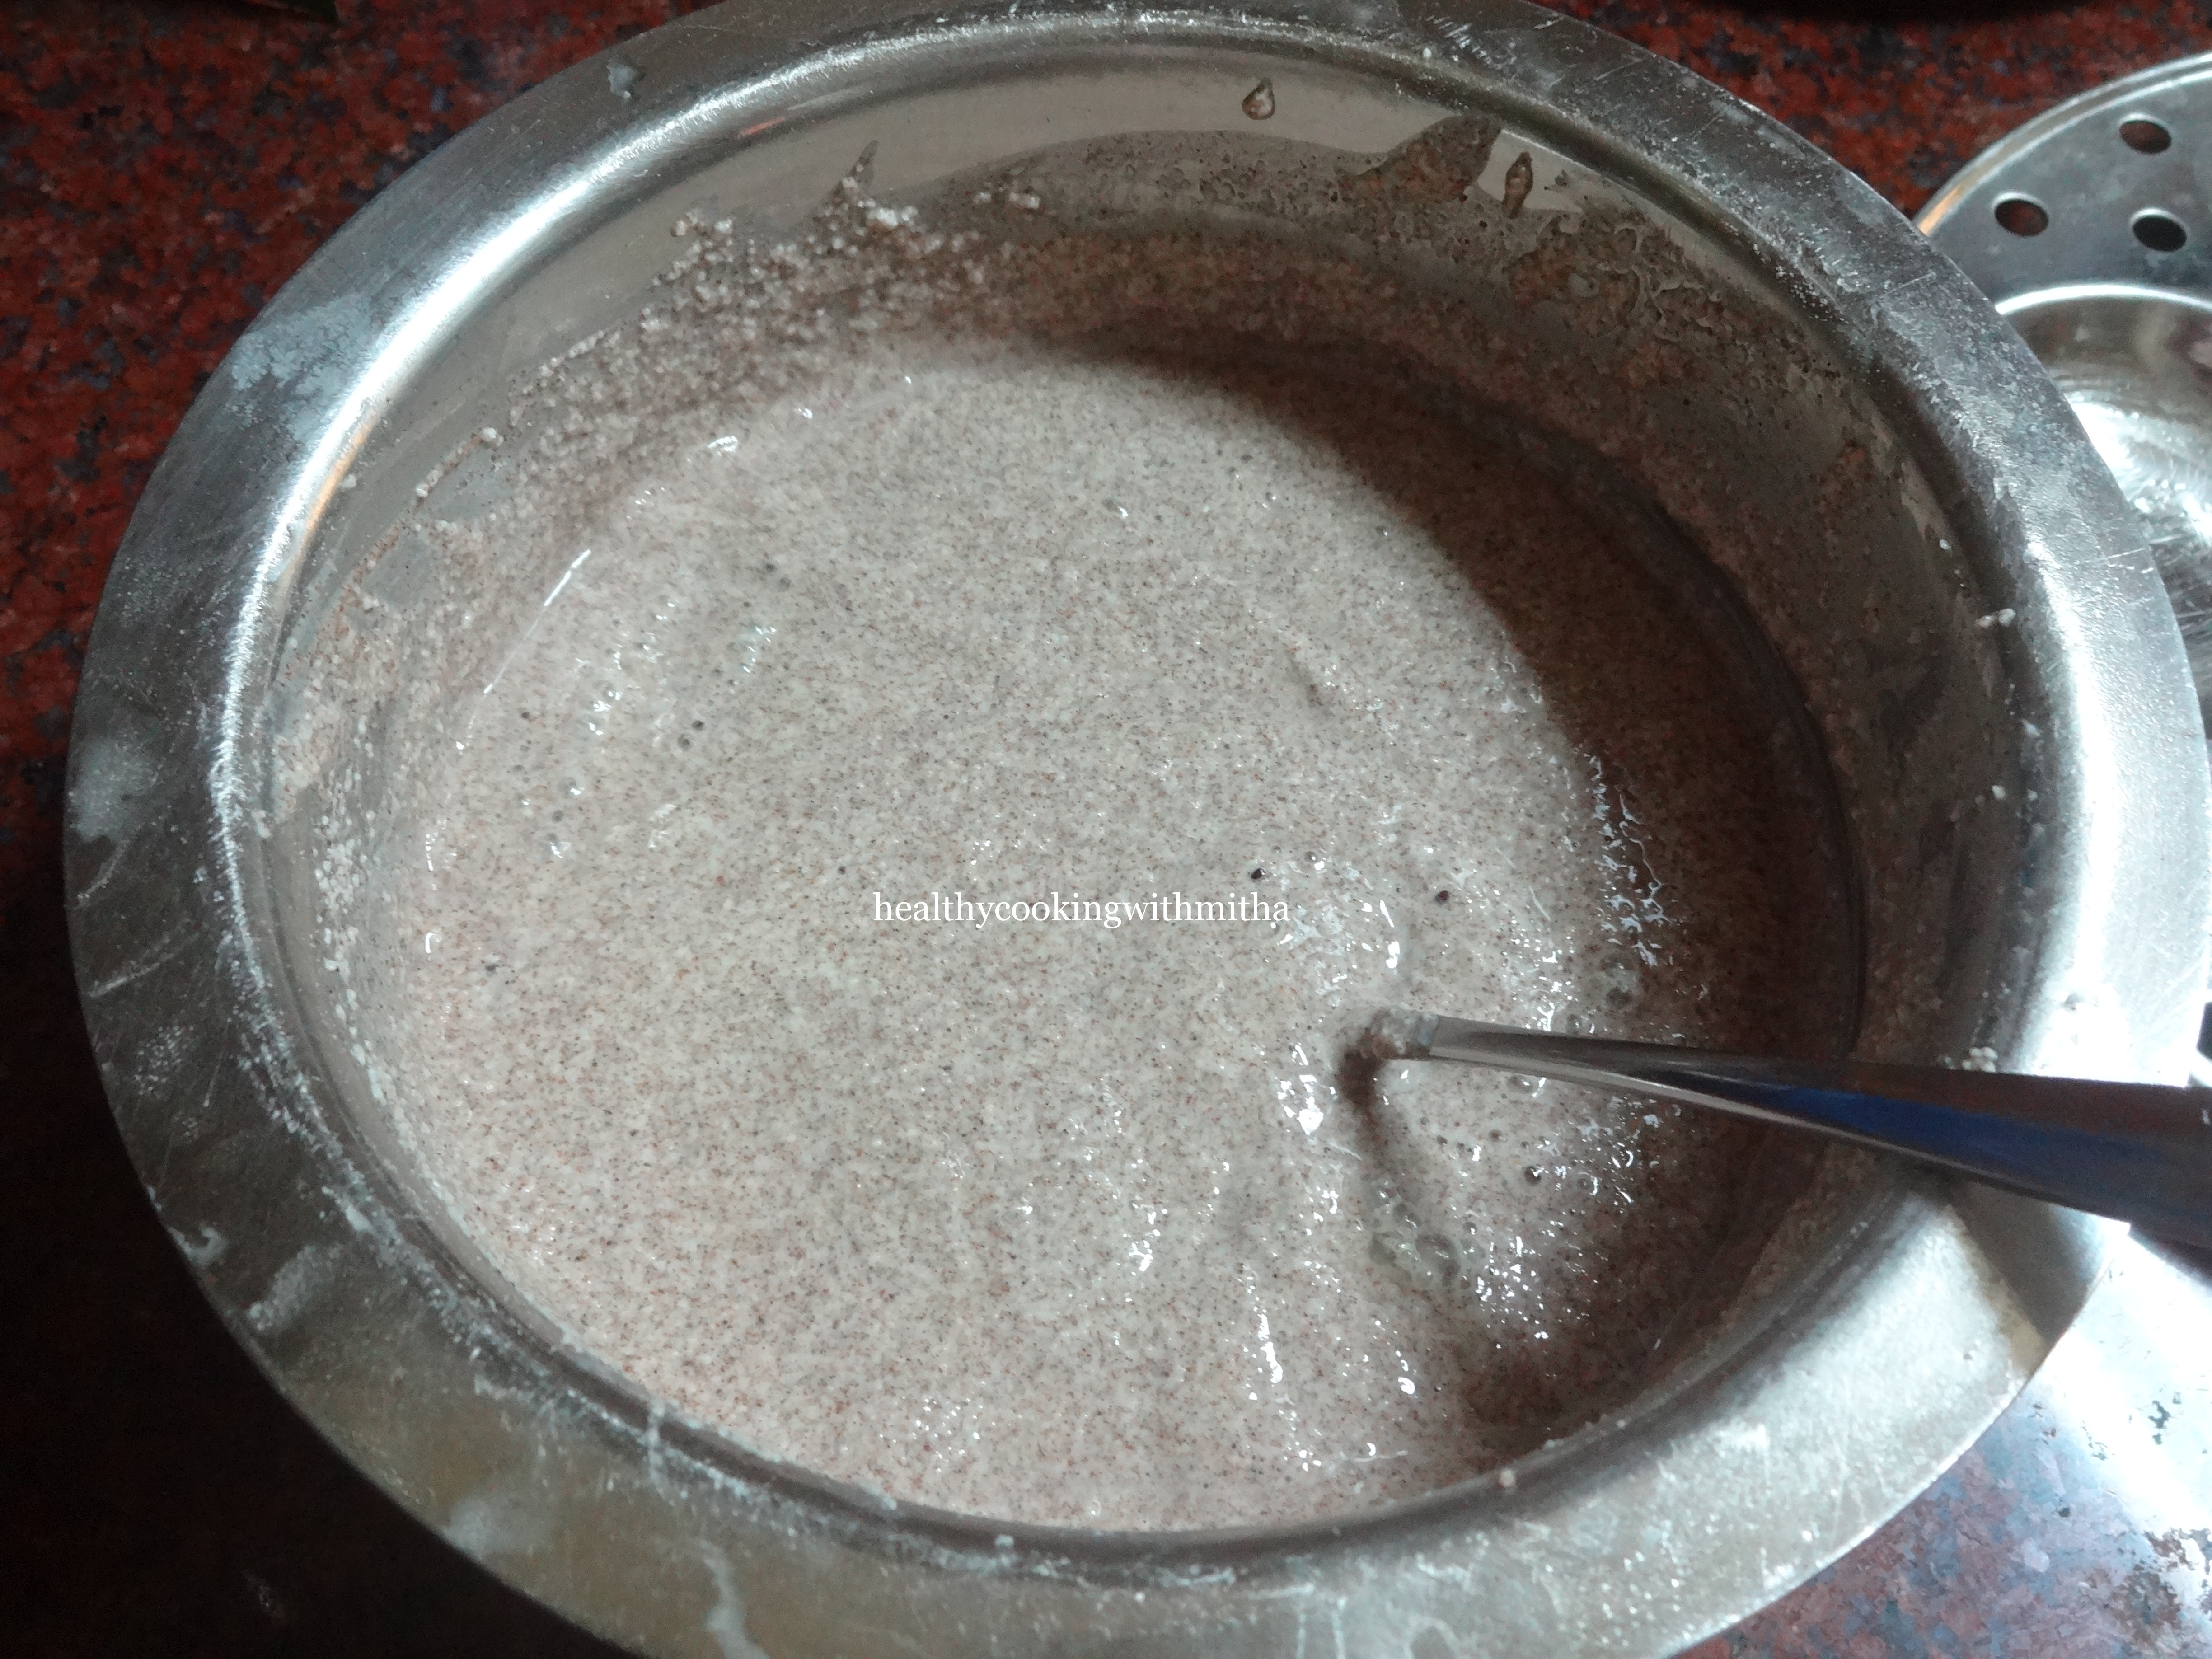
3. Now add hot water, little by little. Mix as you add water.

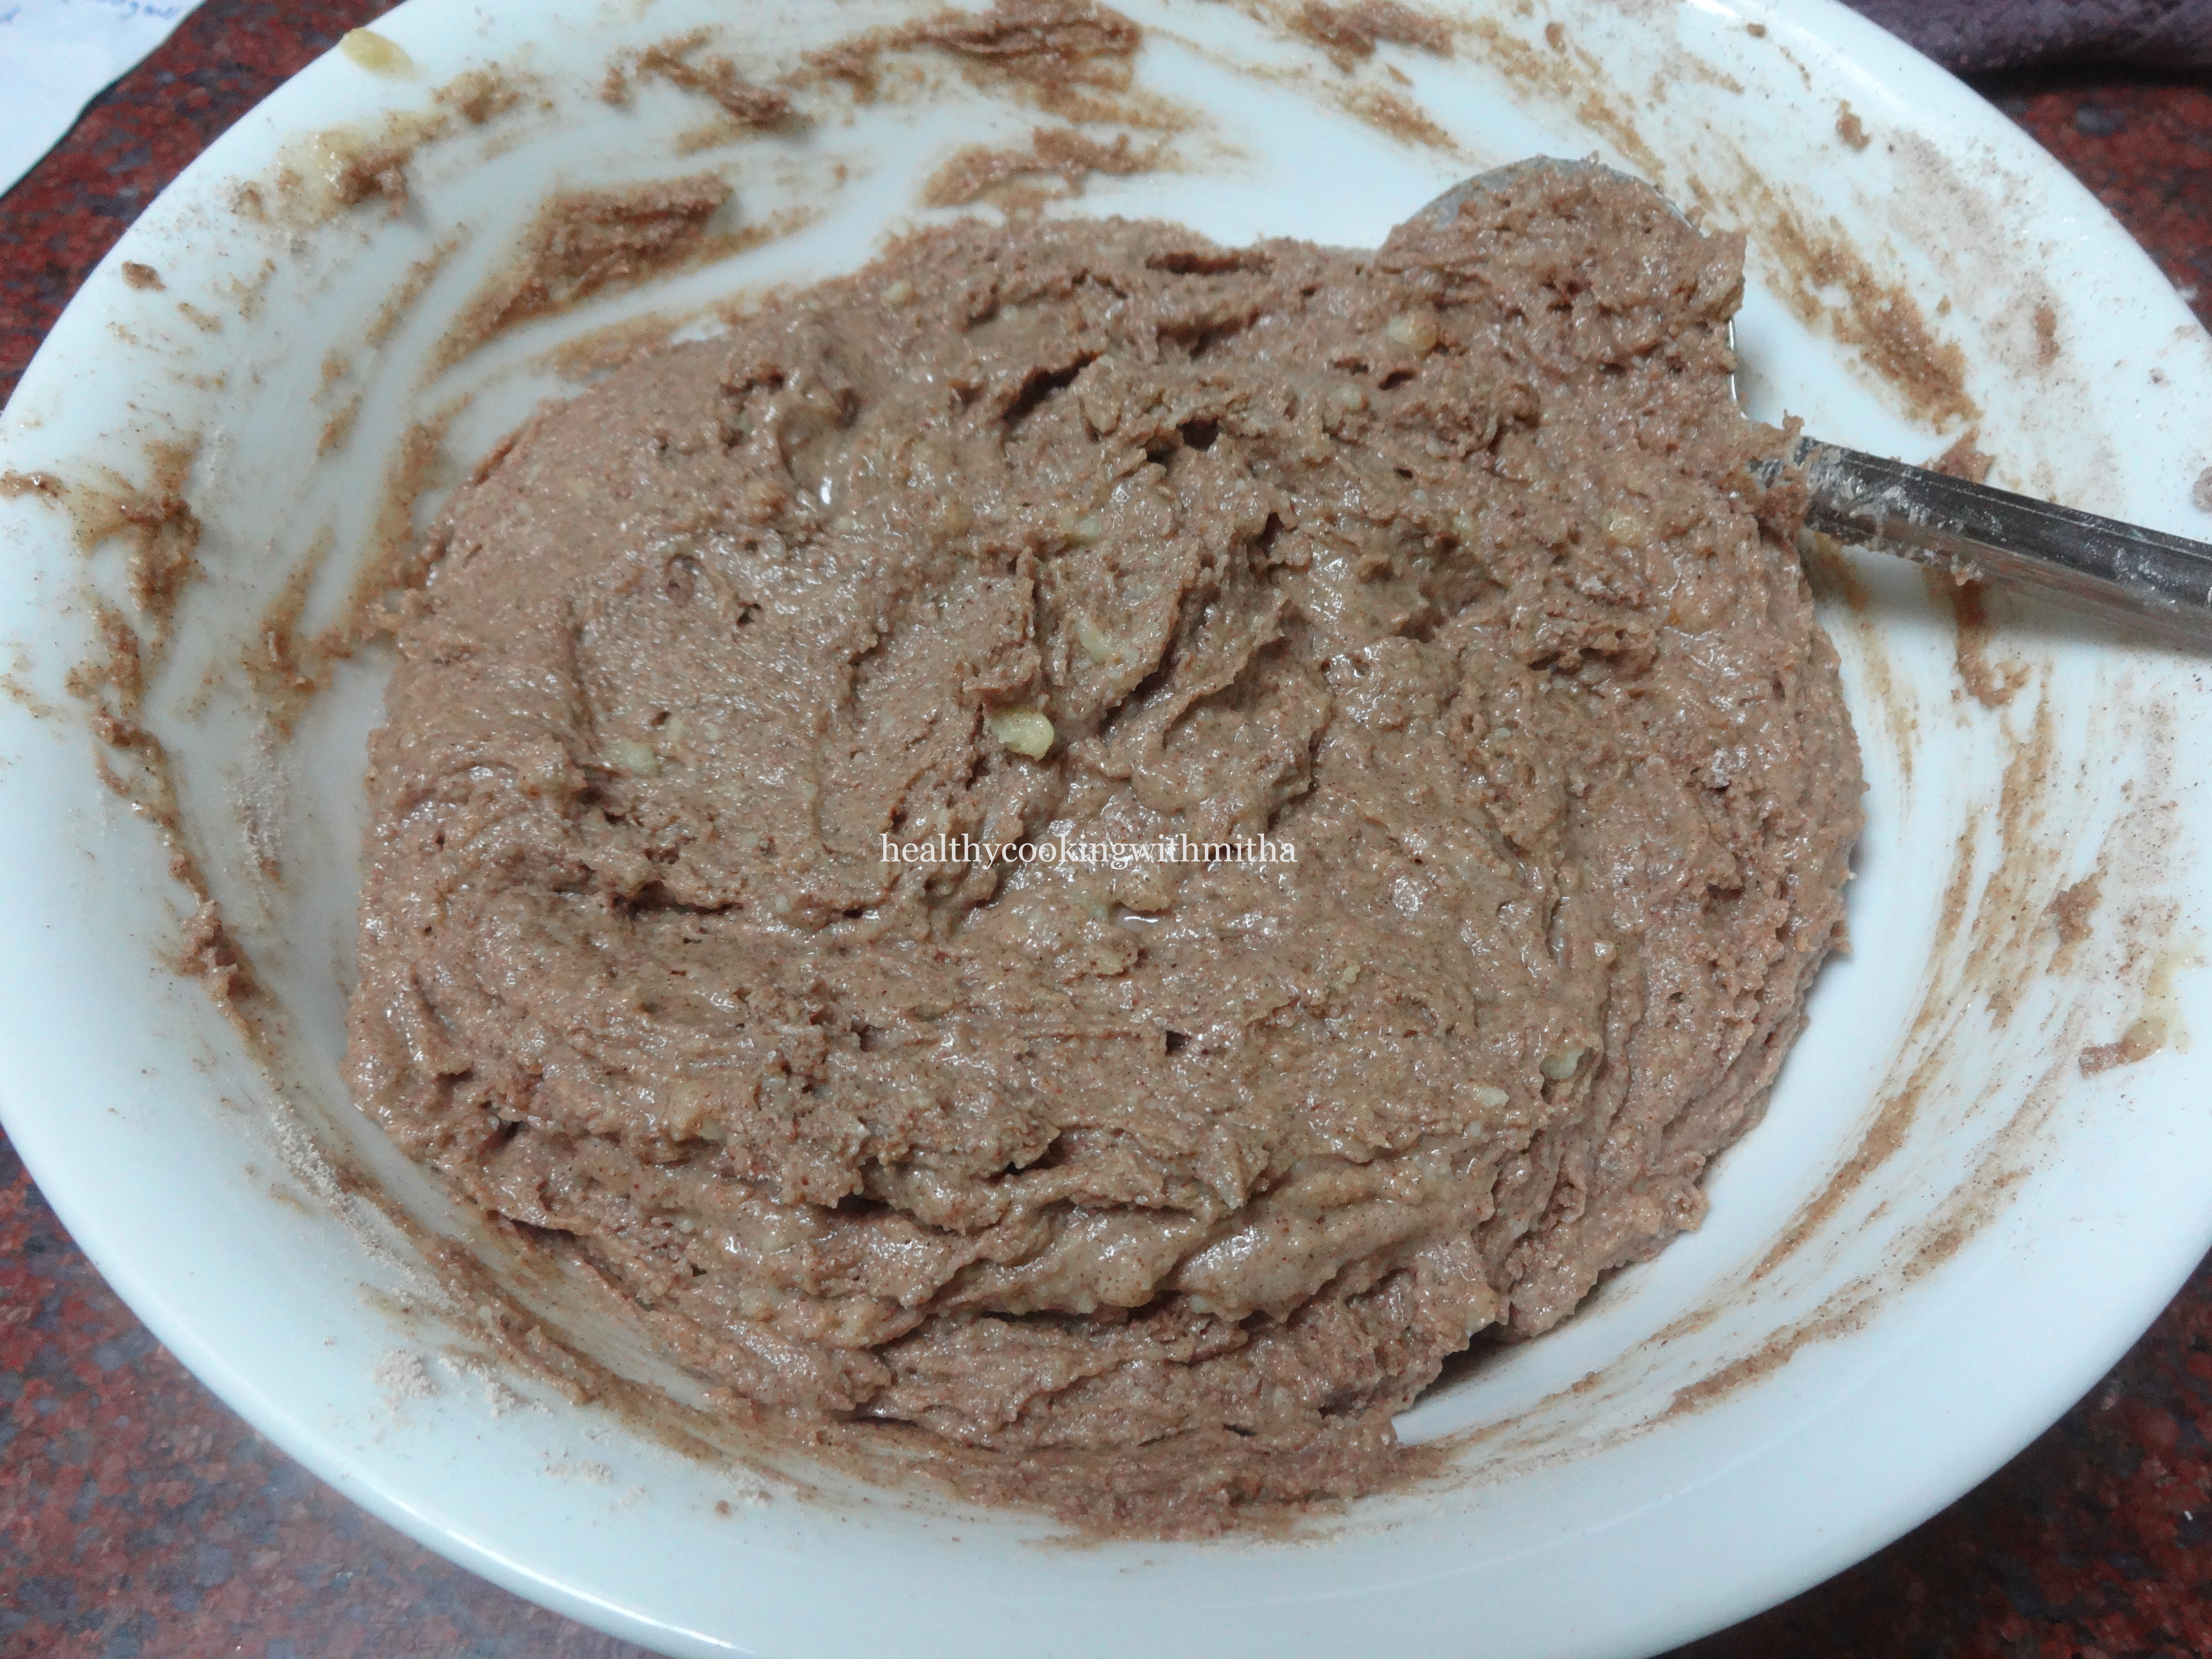
4. As you add hot water, little by little, after mixing, the dough will look like this. Do NOT add water after this.

5. Now the dough will be warm. Using hands, mix together to form a smooth and soft dough.

6. Now make the inner filling. Take coconut and jaggery in a pan. Heat it together on medium flame till the jaggery melts and coconut will stick to jaggery. Remove from flame. Add Cardamom powder. Mix well.

7. Now cut the banana leaf into rectangle pieces as shown. Clean it with water and wipe it dry.

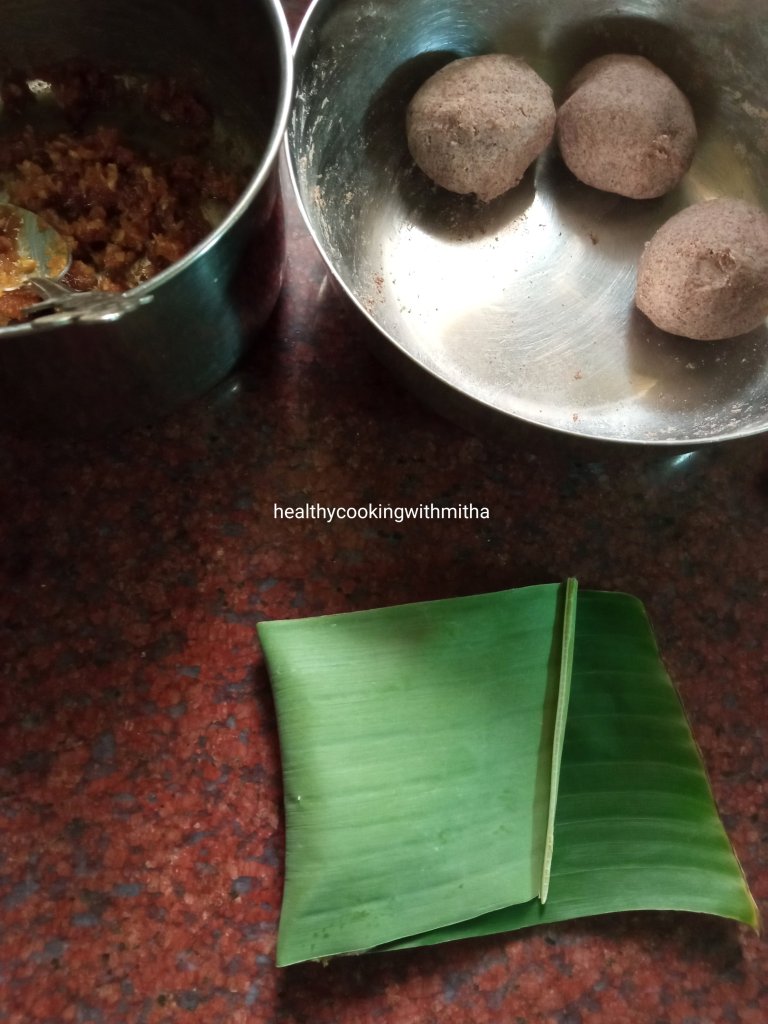
Also divide the ragi dough into equal sized balls. If you have taken 1 Cup (240 ml) of Ragi flour, you will get 5 balls.

8. Take a ball of ragi dough and spread it using slightly wet fingers as thin as possible.

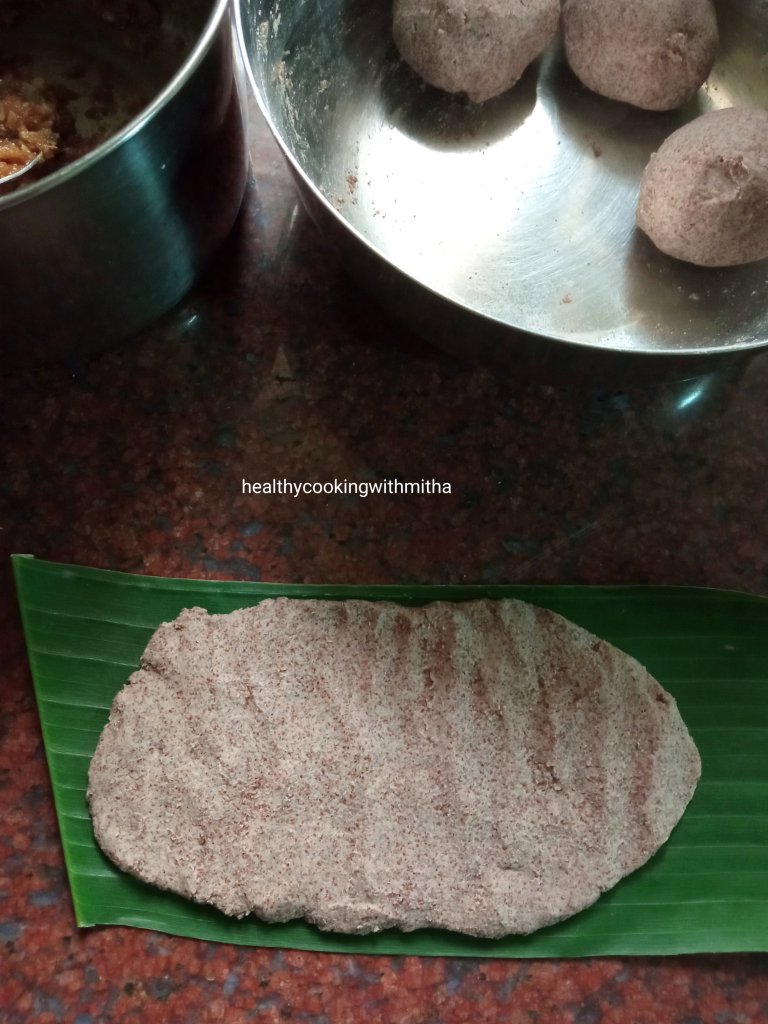
9. Take a spoonful of the filling and place it on one half side. Spread it on the half side using spoon as shown in the image below.

10. Fold the banana leaf while closing both the halves as shown.

11. Seal the edges of the dough using fingers so that the filling does not come out.

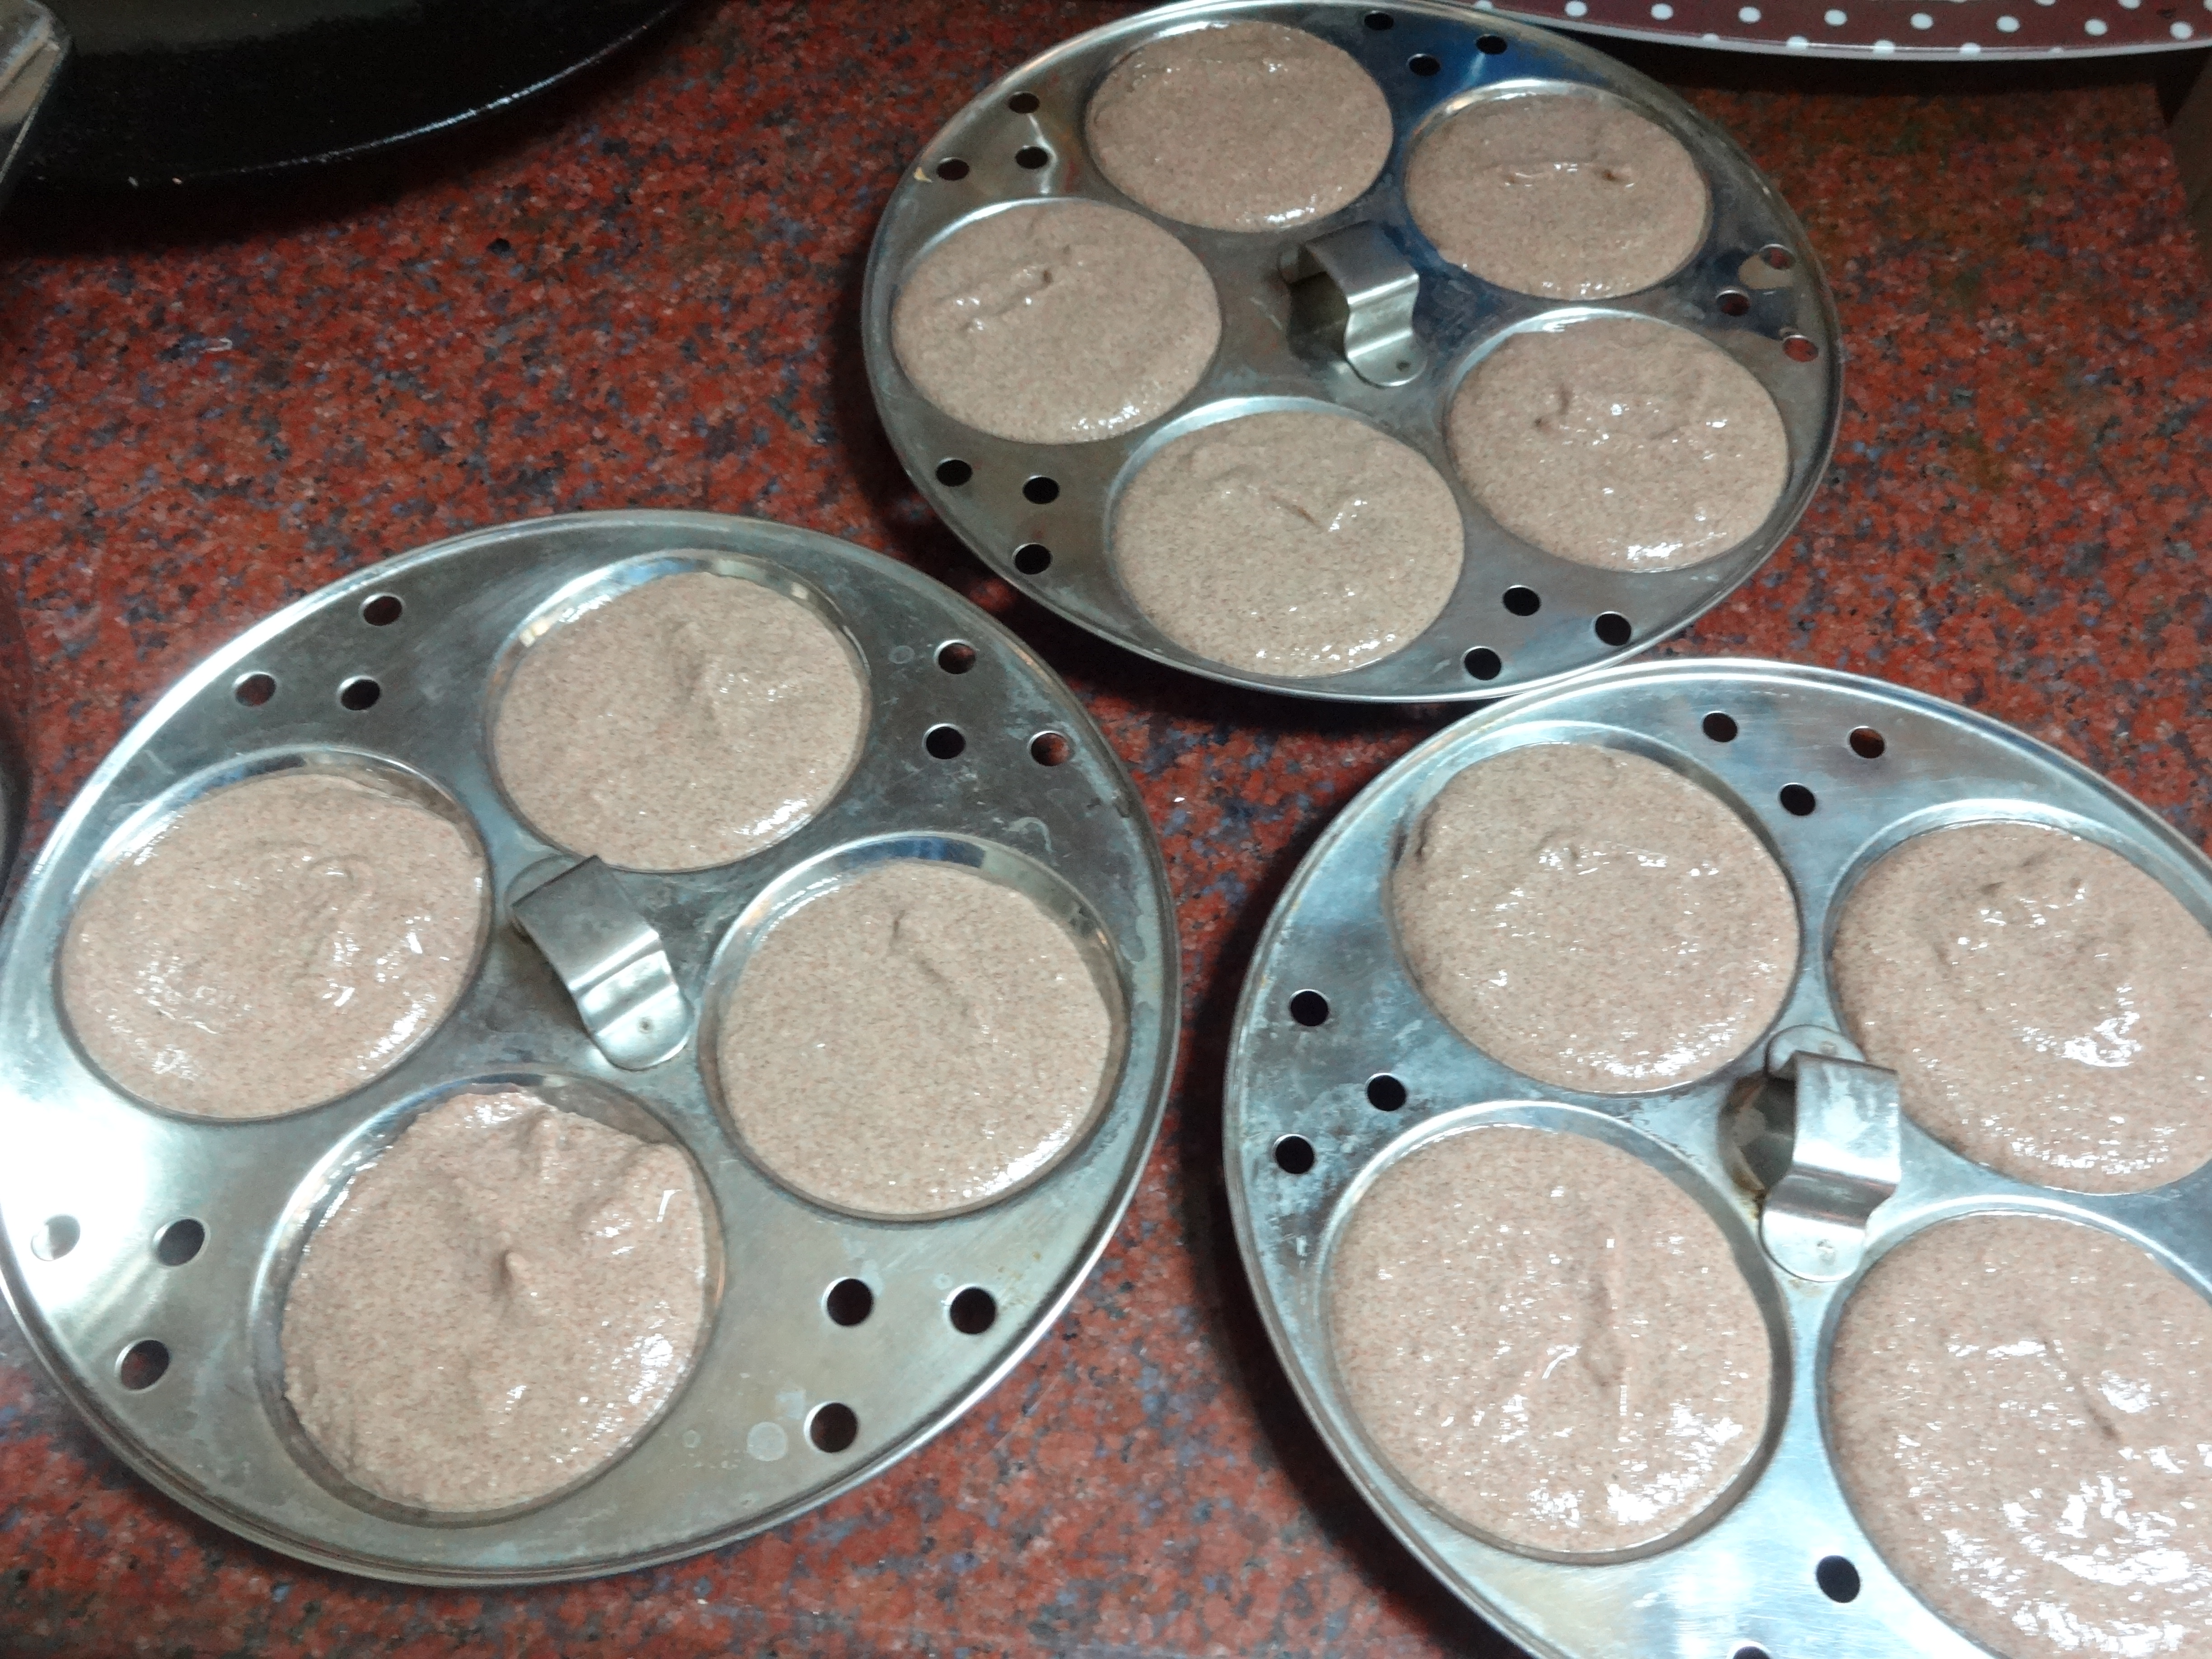
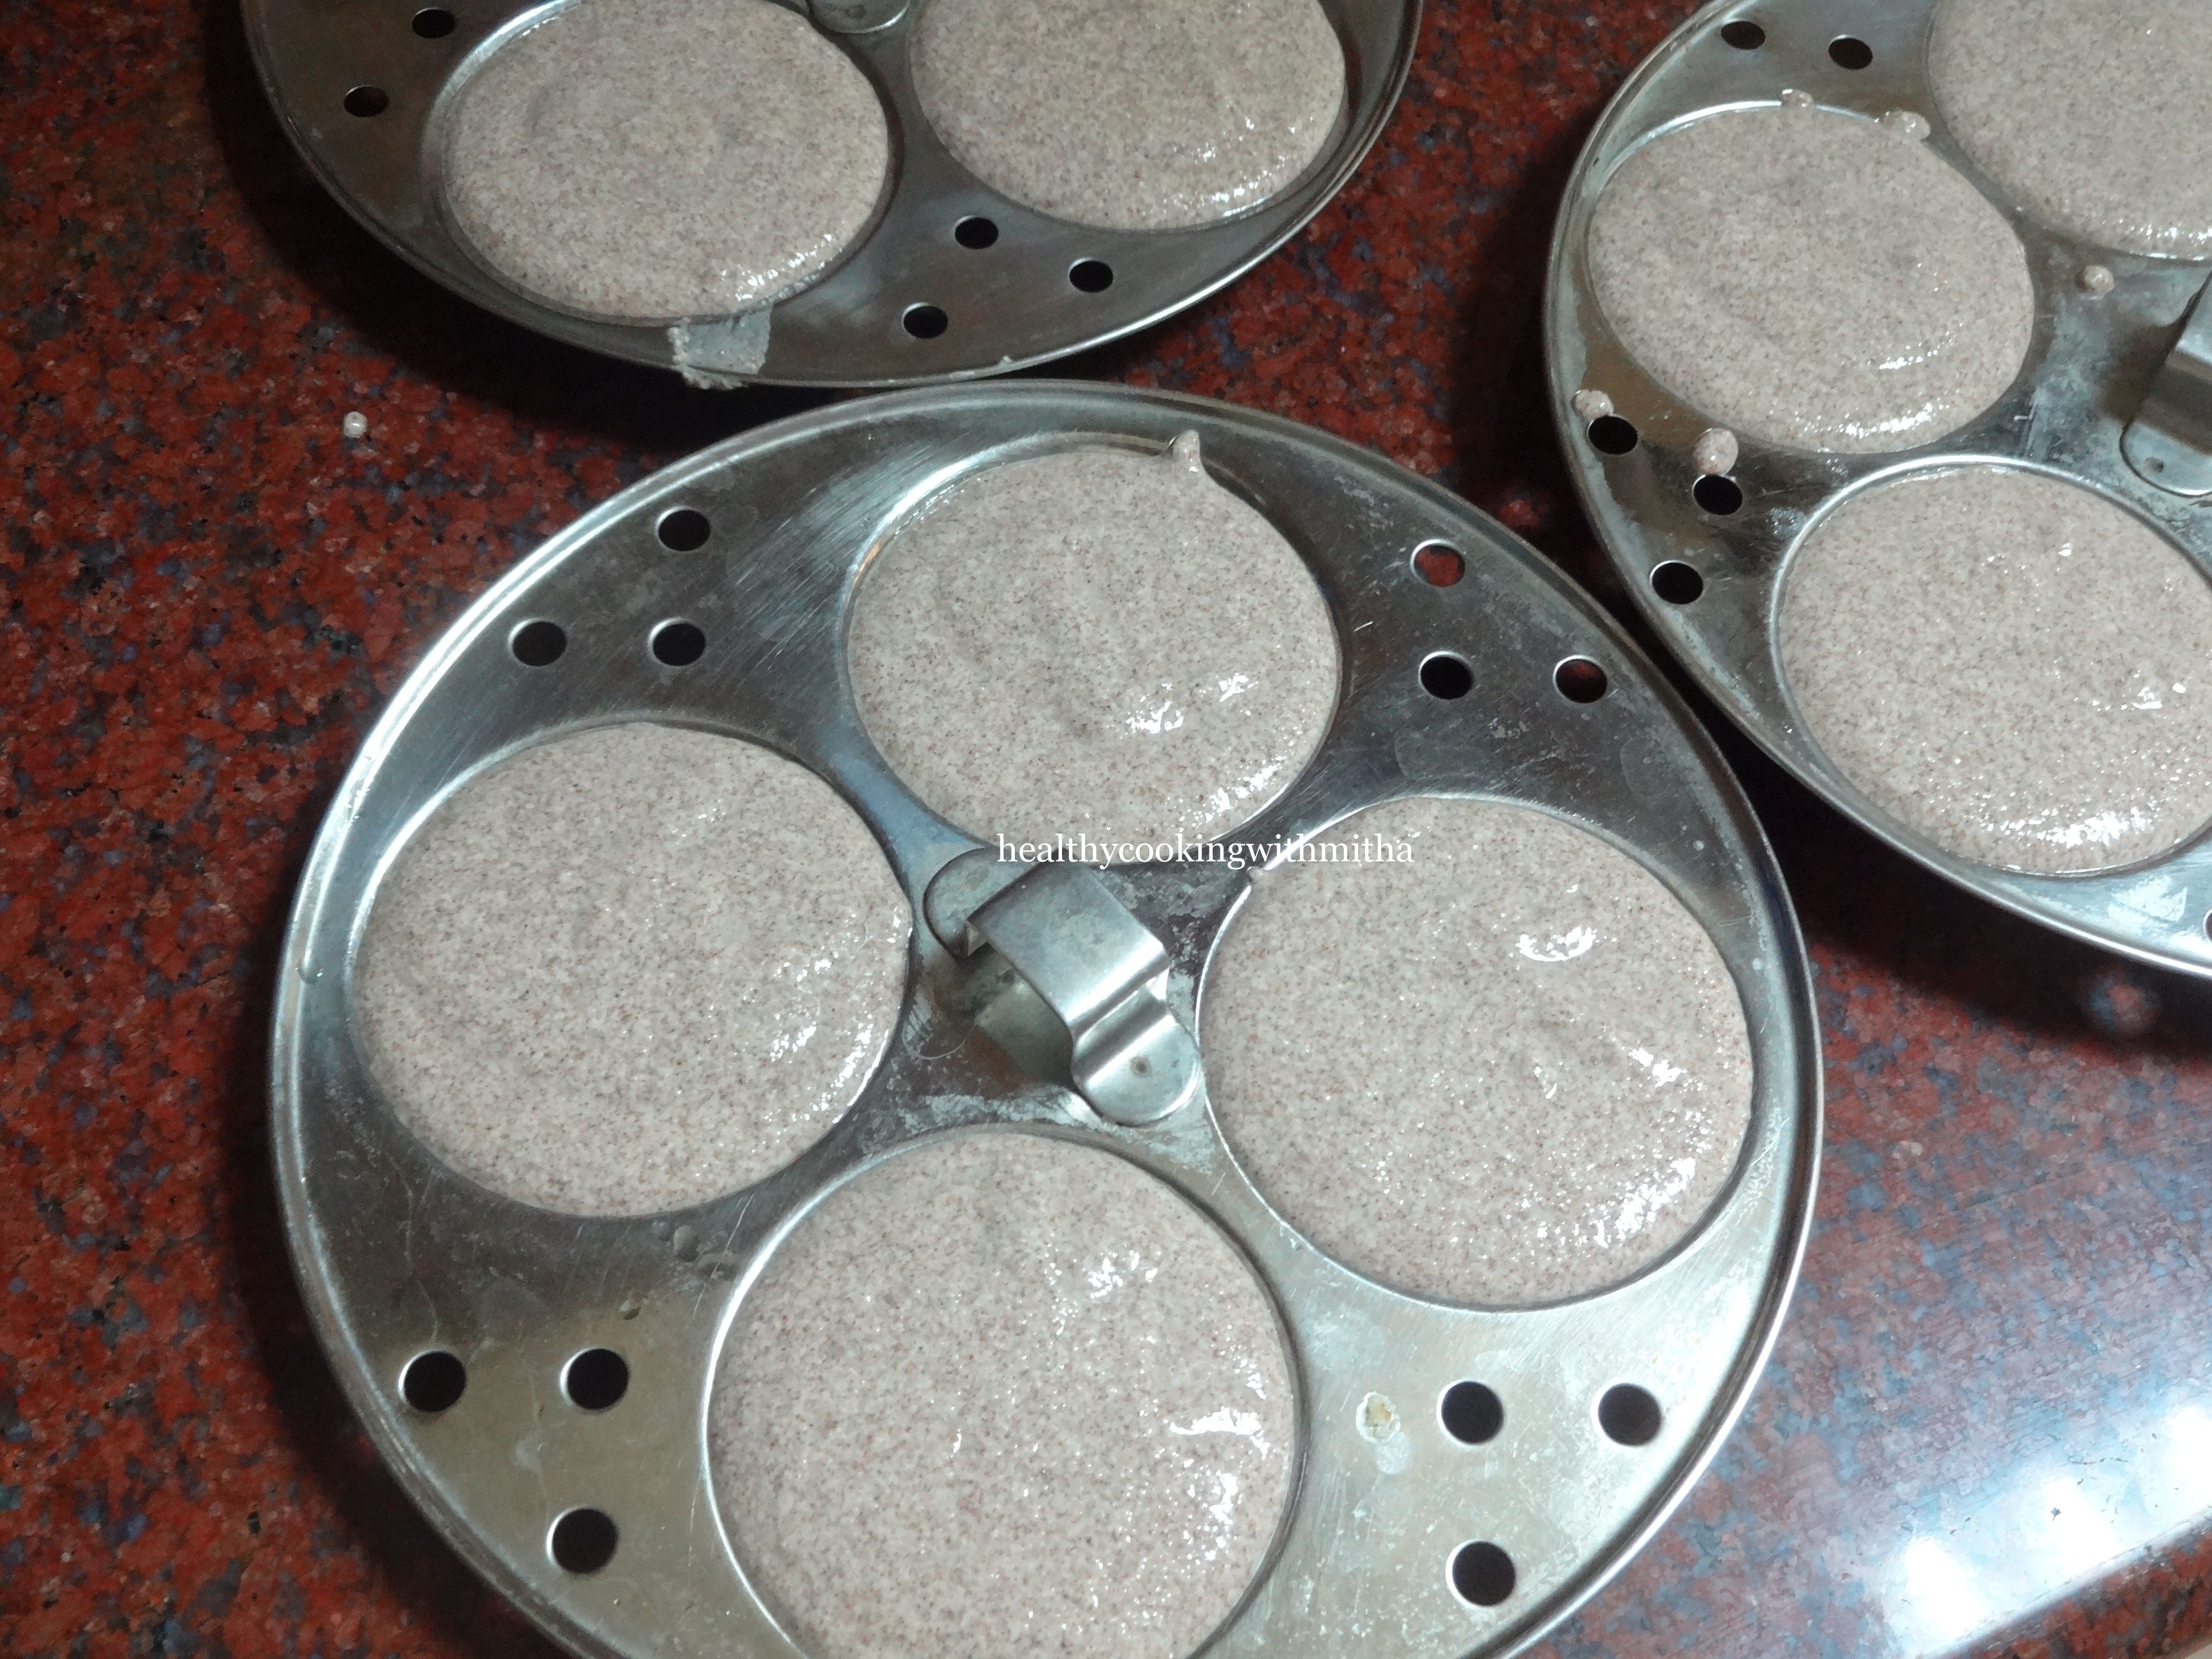
12. Repeat the same with the rest of the dough balls. Place it on a idli steamer.

13. Steam for 20 to 25 mins on high flame till the ada cooks thoroughly. Remove from flame. Allow it to cool for 5 mins.

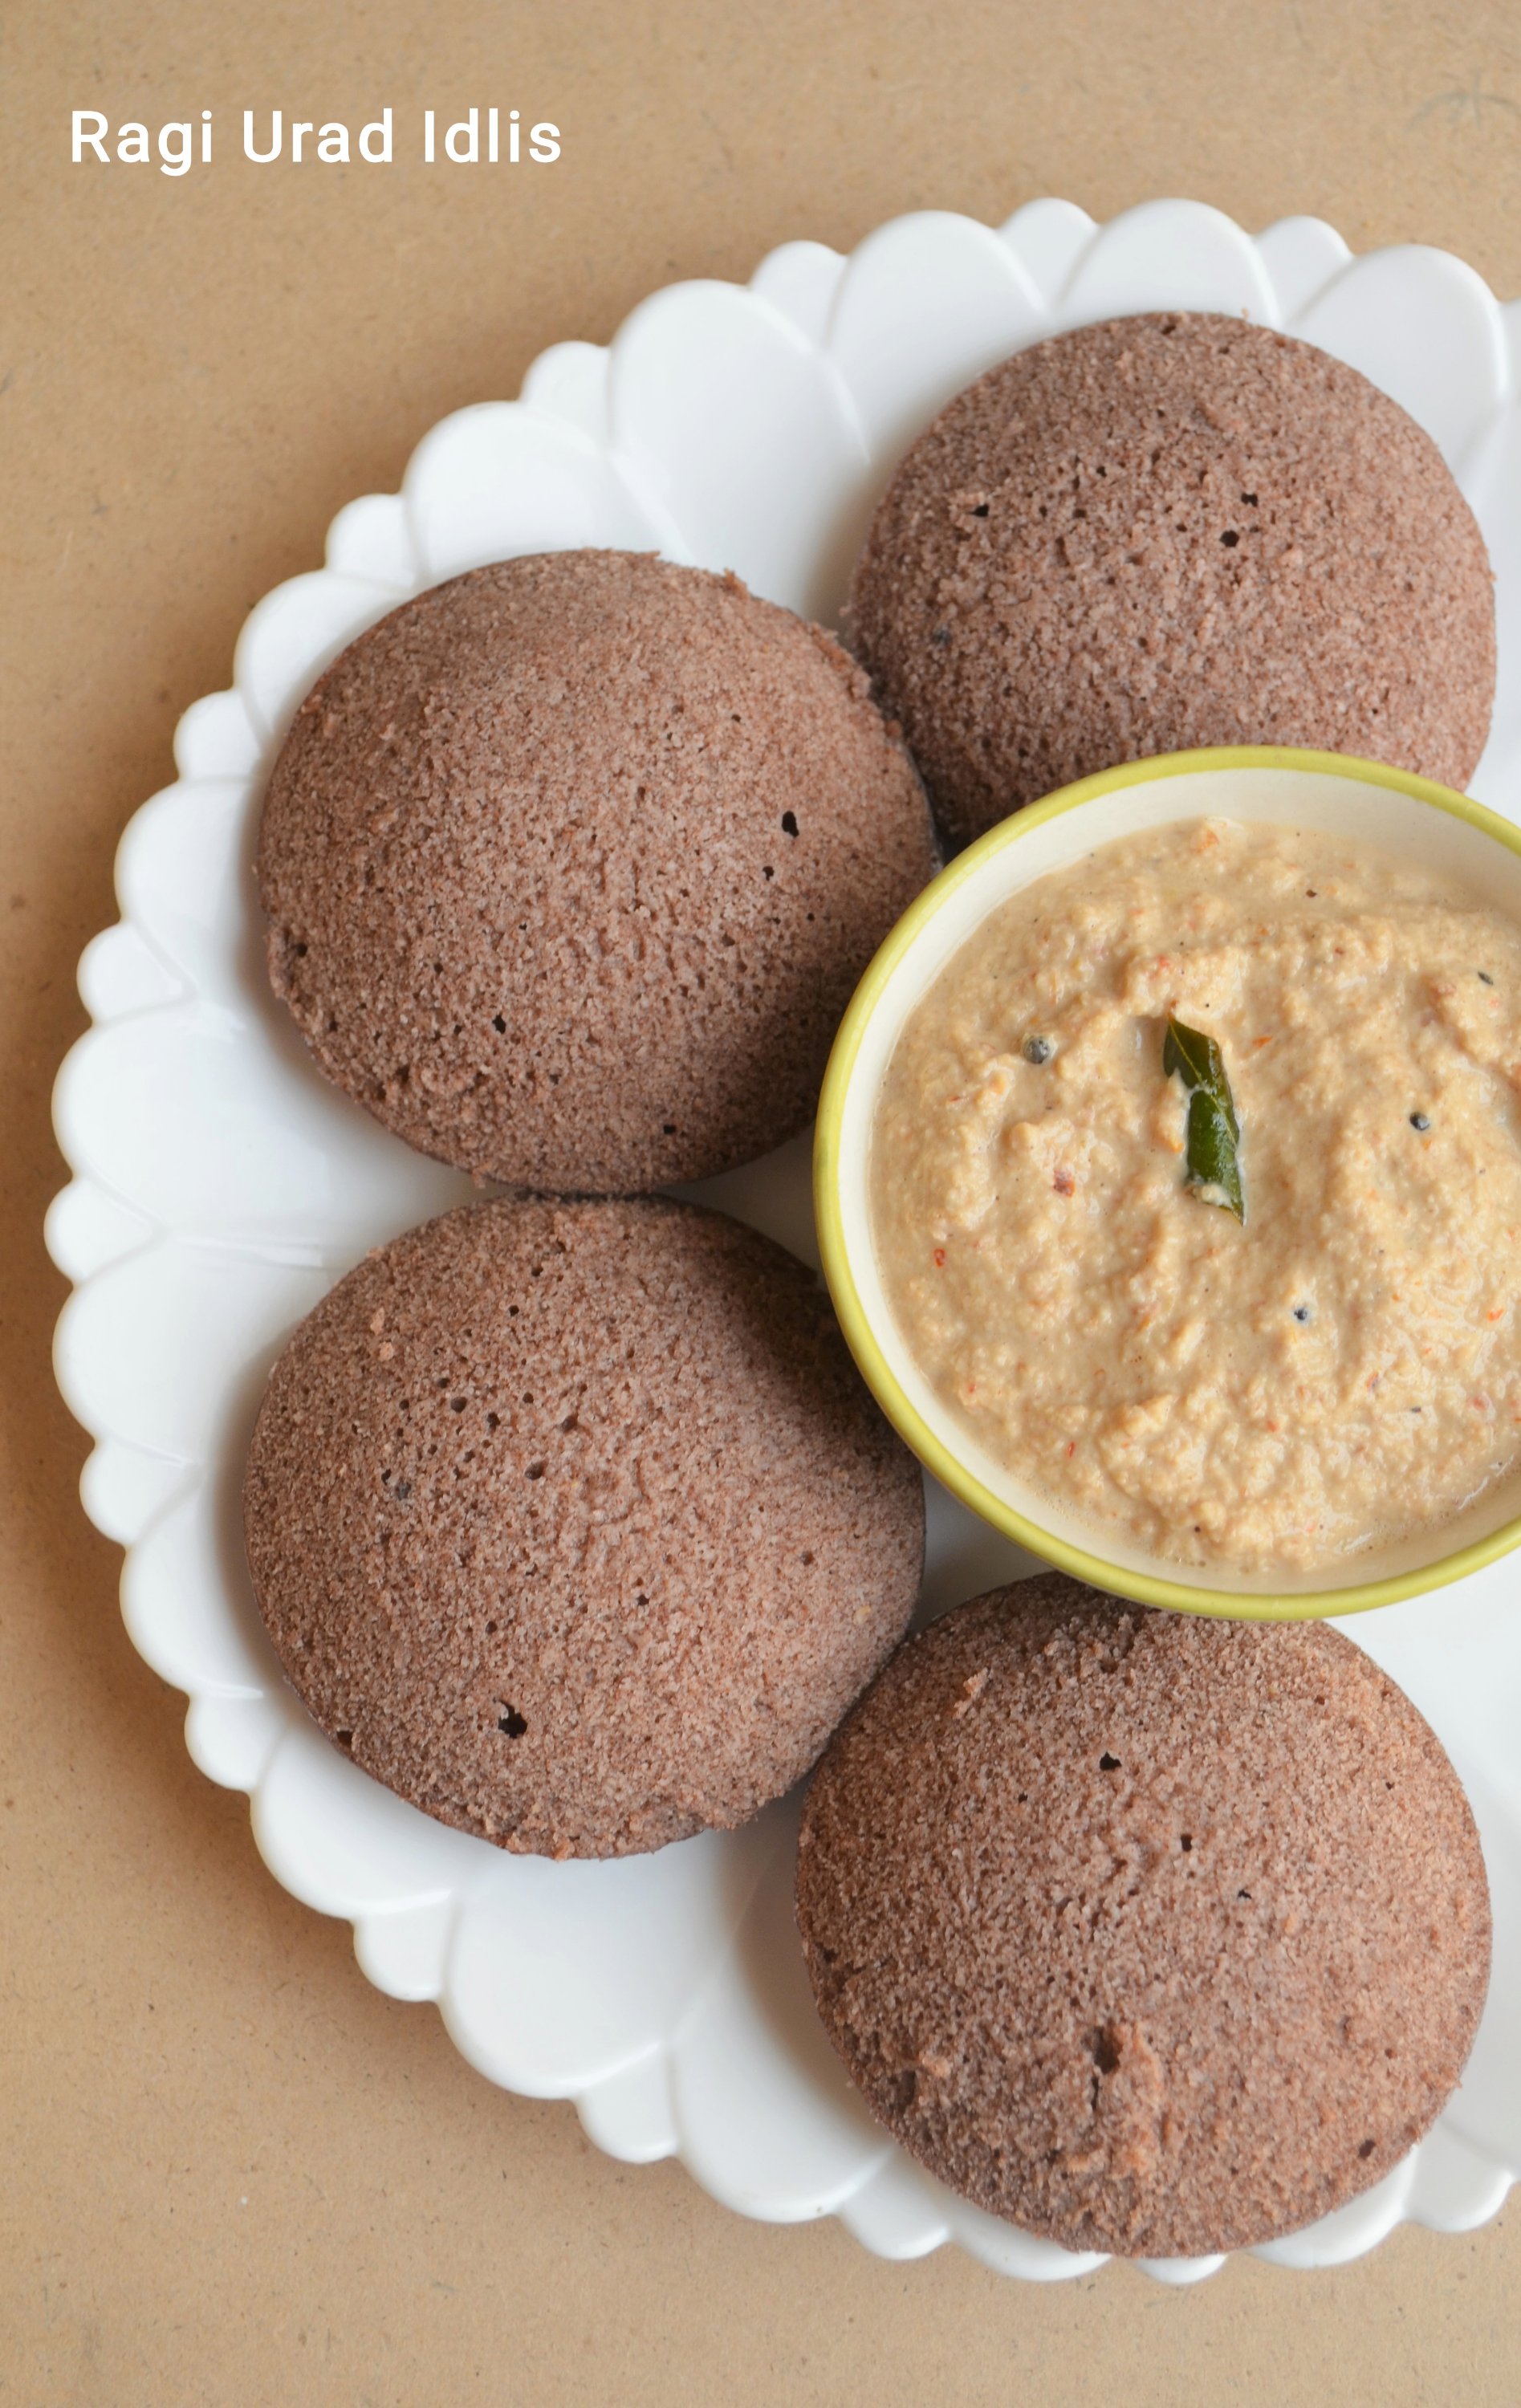
14. Now peel off the banana leaf, discard it and enjoy the warm Ragi ela adas. 😍

Click on the image to save the recipe on Pinterest

Just look at the inside of the ada. Sweet, juicy and so delicious 😍

Click on the image to save the recipe on Pinterest

Notes:

* As you can see from the above picture, the ada is of the right thickness and also steamed fully. This is due to spreading the dough thin over the banana leaf and also steaming for atleast 20 mins.

* Even if you have roasted ragi flour with you, dry roast for few minutes to get perfect aromatic ragi adas.

* Do use only hot water while preparing the dough. It took me around 1 Cup hot water for 1 Cup Ragi flour. Add only 1/4 Cup at a time and mix well till you get the dough as in step number 4. Then mix using hands to form a smooth dough.

* Don’t add a lot of water while making dough. It will be difficult to spread if dough is too soft.

* For 1 Cup Ragi flour, 3/4 Cup coconut and 3/4 Cup jaggery made the right filling for me. If you add a lot of filling, it will be difficult to seal the edges. So add only a spoonful to cover half of the ada.

* I have not made this without banana leaves. So can’t say the alternative to it. Spreading the dough on the leaf is easy and the ada turns aromatic too. So try to get the leaves if you can.

* These adas are best eaten soon after they are steamed but tastes yummy even after few hours too. So you can carry it in tiffin box and during travel too.

* A similar recipe with coconut jaggery filling is this Kerala style Nendrapazham nirachathu or stuffed Nendran Bananas..

Nendrapazham nirachathu

* I make many dishes using Ragi flour. You can check the recipes here:

Instant Ragi Rava dosa

Ragi Set Dosas

Instant Ragi Idlis

Ragi Urad Idlis

Ragi Malpuas/ Ragi Pancakes

Ragi Jaggery Ladoos

Ragi Butter cookies

Eggless Ragi Chocolate Cake

Advertisement

Instant Ragi Rava Dosa | Quick finger millet dosa

Click on the picture to save the recipe on Pinterest

Of all the millets, Ragi has been my favorite and I make so many dishes with it like dosas, idlis, ladoos, cookies and even a cake. But I had not tried a Rava dosa with it, partially because I am scared of such thin dosas which is tricky to get right.

But few months back, I had this sudden mood in the morning to try it for breakfast and imagine my happiness when it came out so perfectly. Hardly took me about 10 mins to make the batter and within 20 mins, our breakfast was ready. 😍

So now, whenever I have not soaked for regular dosas, ragi rava dosas are our breakfast. It has truly become a favorite ❤️ Not only is it filling but very tasty too specially due to the addition of onions, green chillies and coriander leaves in it.

Hope you all try and love it too. I have added all the tips and tricks to get it perfectly. If you still have doubts, you can comment below or message me on my Facebook or Instagram handle – ” Healthy cooking with Mitha ” and I will help. ❤️

Happy and healthy cooking ❤️

RECIPE:

Ingredients: { Makes about 10 dosas }

1 Cup = 240 ml

1 Cup Ragi powder / finger millet powder

1/2 Cup Rava/ Sooji

1/4 Cup Rice powder

2.5 to 3 Cups Water ( to make thin batter )

1 medium sized Onion

3 Green chillies

3 Tbsp Coriander leaves

1 tsp Jeera or Cumin seeds

Salt to taste

Ghee or oil to cook the dosa

Step by step recipe:

1. Take 1 Cup Ragi powder, 1/2 Cup Rava and 1/4 Cup Rice powder in a mixing bowl.

2. Now add salt and 2.5 cups water, mixing well with a whisk to form a lump free batter.

3. When the above batter is ready, start chopping onions, green chillies and coriander leaves. Thus the batter gets few minutes of rest too.

Now, add finely chopped onions, green chillies, coriander leaves and cumin seeds/ jeera to the batter. Mix well. Batter ready!

You can make dosas instantly with this batter. No need to ferment the batter.

4. Heat a flat dosa pan till it becomes really hot. Pour a ladle full of dosa batter over it such that it fills the pan.

Just as an example, I have taken two pictures to show how the batter should look in the pan for perfect Ragi Rava Dosa.

If batter is thick and needs more water : The dosa will be thick with less holes and will seem uncooked on the surface.

Not a perfect dosa.. needs more water in the batter.

If your dosa looks like the above one, add about 1/4 to 1/2 Cup water each time till the batter turns perfect.

Once the batter is of perfect consistency, the dosas will turn thin with full of holes like this.

Perfect!

5. Cover and cook on medium to high flame. Add ghee or oil on the sides of the dosa. After a while, the dosa will cook and the thin portions of the dosa will turn brown and crisp.

6. Remove it slowly using the spatula over the edges and then folding it. Repeat the same with the rest of the batter. Serve hot with a chutney of your choice.

Click on the picture to save the recipe on Pinterest

Notes:

* I usually serve this dosa with either Amma’s tomato chutney as I have served in the above picture or Hing chutney. Both taste amazing with these dosas.

* For Hing chutney, grind together 1 Cup of Coconut with 3 to 4 Red chillies, 1 tsp Tamarind, 1/4 tsp Hing, salt to taste and little water to a smooth paste. I don’t season it. You can season it with mustard seeds and curry leaves fried in coconut oil.

* Please take care of the ratio of Ragi powder to sooji to rice powder for perfect dosas.

* Also, the batter should not be thick and should be thin to get perfect dosas with holes in it. I have explained it with pictures above. You can read it.

* It took me close to 3 Cups of water to get the right texture of the dosas. It might take you few attempts to perfect these dosas.

* This dosa batter does not need fermentation. You can make dosas instantly.

* They come out well in non stick pans. If using cast iron pans, see that it’s seasoned well..else the dosa can stick to the pan.

* You can also add peppercorns and curry leaves to the batter.

* I refrigerate the batter if leftover and it does not change the texture of the dosas. Just adjust the water quantity in case the batter gets thicker on refrigeration.

* One more similar kind of thin dosa that I make is our own Konkani style Panpolos or Neeru dose. It is with rice and tastes so delicious.

* Other recipes with Ragi that I make always:

* Ragi Set dosas

* Ragi Urad idlis

* Instant Ragi Idlis

* Ragi butter cookies

* Ragi Chocolate Cake

* Ragi Malpuas

* Ragi Jaggery ladoos

* You can check all my ‘No rice dosa recipes’ including dosas with millets here –

No Rice dosa recipes Compilation

Ragi Set Dosas | “No rice” soft dosas

Click on the image to save the recipe on Pinterest

When I had posted the Ragi Urad idli recipe, I had got many queries about if it can be made as dosas too. Though I do make dosas with that batter, there is a way I make my Ragi dosas which come out as soft as restaurant style set dosas and I thought it was high time I share it too.

If not for my readers who continually keep asking me queries and request for recipes, I will not be inspired to post them. Most of my day passes in household chores while juggling between two kids, one seeking my attention to draw for her ( my daughter 😬) while the other clinging to me like fevicol ( my son 😄). The only thing that keeps my sanity are these daily shlokas, bhajans and songs which I have made as playlists on youtube and keep them in the background whole day. They give me strength in my motherhood battles and otherwise too. Music is really my life. ❤️

So here is the most requested dosa by my readers. They come out very soft and my kids are huge fans of it. My daughter used to call it chocolate dosa as a toddler and even now, in spite of knowing it’s ragi, still calls it the same. 😃 Ragi is a very healthy millet and this is one of the best ways to include it in your diet. Happy and healthy cooking!

Click on the image to save the recipe on Pinterest

RECIPE:

Ingredients: { Makes about 20 dosas }

3 Cups Ragi flour / Finger millet powder/ Nachni ka atta

1 Cup Urad dal (I use split ones)

1/2 Cup Poha/ flattened rice (thick or thin, white or brown)

Salt to taste

Ghee or oil to cook the dosa

Step by step recipe:

1. Wash well and soak Urad dal for about 4 hours. Drain water completely. Add about 1 Cup water and 1/2 Cup poha (washed) and grind to a smooth paste. Add to a large preferably steel vessel.

2. Now take ragi flour in another bowl. Add water, 1 cup at a time and whisk well to remove lumps. It takes me 3 Cups water to 3 Cups Ragi flour for it to come to a thick batter.

3. Add this to the Urad dal batter. Add salt and mix well using hands. Cover and keep at room temperature for fermentation for 8 to 12 hours. Might take longer during winters.

Love the fermented batter 😍

4. Heat a dosa pan and pour a ladle of the batter on the center of the pan. No need to spread this dosa. Cover and cook one side first adding ghee or oil.

Sorry for the dull picture. Kitchen lights 😬

5. Flip and cook the other side too. Remove and repeat the same with the rest of the batter too.

Notes:

* You can store the rest of the batter in the refrigerator and use it the next day. The texture of the dosas are soft even the next day.

* You can use thick or thin Poha, brown or white poha, does not make any difference. It gives it the softness in the dosas.

* If due to any reason you can’t eat poha, just skip it and add 1 tsp Methi instead along with Urad dal. Grind it to smooth paste. It will give soft dosas too.

* For making idlis, you can check this Ragi Urad Idli recipe. Comes out very well.

* I served these dosas with Hing Chutney. Just grind 1 Cup Coconut with a pinch of Hing powder, 4 long red chillies, 1 tsp Tamarind paste, salt and water to a smooth paste. You can season the chutney using mustard seeds and curry leaves if needed.

Other Ragi dishes that I make regularly:

Instant Ragi Rava dosa

Instant Ragi Idlis

Ragi Urad Idli

Ragi Ela Ada – Steamed Ragi sweet snack

Ragi Butter cookies

Eggless Ragi Chocolate Cake

Ragi Malpuas

Ragi Jaggery ladoos

Click on the image to save the recipe on Pinterest

Ragi Jaggery Ladoos | Easy to make healthy ladoos

Click on the image to save the recipe on Pinterest

I can’t believe till some time back, I thought making ladoos were the most difficult among sweets. Now, if you give me 15 mins, I can make ladoos for you. 😄 That’s the change which practice has brought in me. Now I can understand the real meaning of “Practice makes a man perfect”. Though not perfect by looks (I am reaching there 😬), these ladoos come out looking like ladoos 😂 and tastes so delicious that my kids love it a lot. So I thought it was worth sharing with all of you.

Hope you all try these healthy and delicious ladoos. Happy and healthy cooking! ❤️

RECIPE:

Ingredients: {Makes about 12 ladoos}

1 Cup Ragi or finger millet powder

3/4 Cup Jaggery powder

1/4 Cup + 2 Tbsp Ghee

2 Tbsp Raisins

Step by step recipe:

1. Heat 2 Tbsp Ghee in a pan and add 2 Tbsp Raisins. Fry till the raisins puff up. Remove to a bowl.

2. Now melt 1/4 Cup Ghee in the pan and add 1 Cup ragi flour. On medium flame, saute the flour in the ghee. Saute till the ghee and ragi flour combines well.

3. Now, keep sauteing on medium flame till the mixture comes together as shown below. It will take about 6 to 8 mins. The mixture turns aromatic and raw smell of the flour goes away.

4. Remove it in the bowl where we had put the raisins. Also add 3/4 Cup jaggery powder.


5. Mix well and allow it to cool slightly. When it still warm, bind to make ladoos. I am attaching some pictures that I took when making these ladoos. Hope it helps all of you.

Keep it in your palm and open close your fingers. Keep doing it till it forms round shape.

6. Repeat the same with the rest of the mixture. Enjoy the ladoos!

Notes:

* Store in a moisture free container at room temperature. Stays well for atleast 2 to 3 days. Mine gets finished off before that.

* Don’t reduce the amount of ghee or you won’t be able to bind the ladoos well.

* Add little ghee to the mixture and on your palms if you find it difficult to form ladoos.

* Do remember to saute the ragi flour well in the ghee so that there is no raw taste in the ladoos.

* You can add cardamom powder too if you like.

* Substitute ragi flour with wheat flour to make Churmundos or wheat flour ladoos. They come out delicious too.

* These ladoos are very soft when freshly made but turns hard as they cool down and tastes much better when kept for little while.

You can check all recipes with Ragi that I make regularly like Ragi idlis, Ragi dosas, Ragi cake, Ragi cookies, Ragi Malpua in this Ragi recipes collection.

Ragi Set Dosas

Instant Ragi Rava Dosas

Instant Ragi Idlis

Ragi Urad Idlis

Ragi Ela Ada

Ragi Butter cookies

Eggless Ragi Chocolate Cake

Ragi Malpua

All Millet Recipes

Click on the image to save the recipe on Pinterest

You can also check my 15 mins healthy sweets recipes collection.

Collection of “no rice” dosa recipes

Click on the image to Pin the post on Pinterest

My regular readers know how much my kids love dosas. So much that anyday you come to my home, you will find dosa batter ready, either fermenting or in the fridge (and if you don’t find it, don’t worry, I can magically make some instant dosas for you too 😍). It is also very handy for those sudden hunger demands by the kids, especially my son who feels very hungry after his evening nap and says, “Amma, bobbo jayi.” (I want dosa in baby Konkani 🤩)

We have a little game after he wakes up where he being held in my arms, shows me the way to the kitchen and points to what he wants to eat. I purposely do a little wiggly kind of walk (the never growing child in me 😅) to make him laugh and that brightens him up. Then it finally ends in him pointing to dosa batter bowl. So I always have any one variety of dosa batter ready for him (my little “bobbo” lover boy ❤️).

My readers also love the dosa recipes that I post and always request for more “no rice” dosa recipes. So I decided to finally compile all my dosas which don’t contain rice and I was surprised to find that I had so many of them. This is one compilation I enjoyed making as it was like playing treasure hunt with my blog. 😂 Hunting dosa recipes without rice which is indeed no less a treasure for my readers requesting for it (sorry for the poor joke 😬).

Anyhow, hope this is useful to all of you. Happy and healthy cooking! Enjoy dosa making! (That rhymed!) 😄

Instant “no rice” Dosas/ Bhakris:

1. Rava Bhakri/ Instant Semolina dosas: These are one of the oldest variety of Konkani breakfasts and my family favorite too. If I forget to soak for regular dosas, Rava Bhakri it is for breakfast the next day. Also makes for a quick snack option. Tastes oh so heavenly with butter. ❤️

Recipe here: Rava Bhakri/ Instant Semolina dosas

2. Instant Cucumber dosas: This is a variation to rava bhakri with the addition of grated cucumbers which makes it even aromatic and healthy along with being super delicious. When I have to finish off those leftover cucumbers, I make these dosas.

Recipe here: Instant Cucumber dosas

3. Eggless Tomato Omelette: Being from a vegetarian family, the only Omelette we knew as a kid was this eggless Tomato Omelette which Amma made with loads of love. She always made sure I got the omelette with the maximum number of tomato pieces in it. 😍

Recipe here: Eggless Tomato Omelette

4. Instant Oats Vegetable Bhakri: This is our favorite evening snack and is super filling too. Best way to get oats and veggies in our diet. Add loads of green chillies and coriander leaves. Tastes super yummy with butter and simple coconut chutney. ❤️

Recipe here: Instant Oats Vegetable Bhakri

5. Instant Oats Poha dosas: A soft yet delicious dosa which can be made instantly yet tastes like regular dosas. Awesome combination with sambar making it a complete meal in itself.

Recipe here: Instant Oats Poha dosas

6. Instant Jowar Vegetable Bhakri: These Bhakris contain a mix of radish, carrots, cucumbers along with Jowar flour but still comes out so tasty. A very healthy and filling evening snack that I make always. You can make them as thalipeet too.

Recipe here: Instant Jowar Vegetable Bhakri

Dosas which don’t need fermentation:

1. Moong sprouts and Oats dosas: My kids don’t eat sprouts as it is, so this is my way to include sprouts in their diet in their favorite way, the dosa way! 😄 The way our brain works overtime in motherhood. 😂😂 Turns out so delicious too! No fermentation required makes it very easy too.

Recipe here: Moong sprouts and Oats dosas

2. Masoor dal dosas: One of the most tried and loved recipe by my readers. Try masala dosa with this and it tastes amazing. ❤️

Recipe here: Masoor dal dosas

“No rice” Dosas with millet flours:

1. Ragi Set Dosas: A dosa that I make atleast weekly once to include the wonder millet, Ragi in our diet. Turns out so soft and delicious. My daughter calls it “chocolate” dosas since she was a baby and even now at almost 6 years. 😍

Recipe here: Ragi Set Dosas

2. Urad – Jowar flour dosas: I feel this is the best way to include Jowar flour in our diet. Yet another weekly once breakfast in my house as kids love it. Kids food preferences rule in my house. 😀

Recipe here: Urad – Jowar flour dosas

“No rice” dosas with Whole Millets

1. Bajra Moong dal dosa: This is the crispiest dosa that I have ever made and you can never say it does not have rice in it. Also combines the goodness of Bajra with moong dal.

Recipe here: Bajra Moong dal dosa

2. Little Millet dosa: A very healthy yet tasty dosa with Little millet. Great idea to include this variety of millet in your diet.

Recipe here: Little Millet dosa

Other “no rice” dosa recipes:

1. Oats mixed dal dosas: A dosa for which I have got many compliments from readers for making them so evenly and also for the gorgeous colour. One of my readers have even commented that it looks machine made and there’s magic in my hands that it has been crafted to perfection. 😀 So these dosas are indeed very special for me. ❤️

Recipe here: Oats mixed dal dosas

2. Broken wheat Mixed dal dosas: These are one of my recent additions on the blog but tried and loved by so many of my readers. They loved how healthy yet tasty it turns out without missing rice in the dosa at all.

Recipe: Broken wheat Mixed dal dosas

3. Urad whole moong dosas: These are my favorite because I can make both idlis and dosas with this batter. Also a great way to include whole moong in my kids’ diet as they don’t eat moong as it is.

Recipe here: Urad whole moong dosas

4. Urad wheat flour dosas: This was my last recipe that I posted on the blog. Learnt it from my friend Vinanti and have turned out to be my kids’ favorite. They eat more dosas (touchwood!) when I make them. I absolutely love the gorgeous colour that it turns out. ❤️

Recipe here: Urad wheat flour dosas

5. Barley Urad dosas: These dosas are so soft and delicious, you could never say it has the healthy Barley grain in it. One of the most regularly made dosas in my house lately.

Recipe here: Barley Urad dosas

You can check all my dosa recipes here: DOSA CORNER

You can check all my idli recipes here: IDLI STAND

I have made two other recipe collections. You can check them out.

Oats recipes Collection:

Healthy Cakes and Bakes:

Healthy sweets that can be made under 15 mins:

Ragi Malpua | Quick sweet idea | Healthy snack for kids

I have already shared a chocolate cake, cookies, idlis and a dosa with Ragi flour. You can check all the recipes here. This recipe of Ragi Malpua was my first post on my old blog and one of my first trials with Ragi flour back in 2013. Now when my kids love it, it makes me very happy (one of my successful experiments 😄).

These little rolls of yumminess comes handy during their “Amma, we are hungry. Give us something right now!” kind of hunger 😂. Yes, as a mother, we always have to be ready as such hunger pangs can strike anytime (proportional to their naughtiness 😬). I quickly make these Ragi malpuas and they enjoy it while playing. Seeing them eat happily is one of the best moments in the day for me. ❤️

I never realized how someone else’s happiness can be more important than mine before becoming a mother. But now, all I think is how to make them happy (even though I do scold them if they get extra naughty 😁) and all my wishes have got replaced by theirs too. My daughter asked me yesterday what wish do I have in life (she was talking about her wish to be a princess 😆😍). I said I no longer wish for anything as nothing is in our hands and all depends on God’s will, but I do wish and pray that all your wishes get fulfilled. She was so happy with that answer that she gave me a tight hug saying thank you. It made my day! 🥰

Both of them fill my heart with their talks, smiles, naughtiness and love. Can’t imagine my life without them. ❤️❤️

Here’s sharing their favorite snack, these Ragi malpuas. Hope you all try and love it too. Happy and healthy cooking! ❤️

RECIPE:

Ingredients: { Makes 3 Malpuas }

4 Tbsp Ragi / Finger millet flour

2 Tbsp Atta/ Wheat flour

1 Tbsp Jaggery

Salt to taste

5 Tbsp Milk

For the filling:

1/4 Cup Desiccated or Fresh Coconut

1 Tbsp Honey or as needed

1 Tbsp finely chopped Dry fruits ( I use a mix of cashews, almonds and pistachios)

1/4 tsp Cardamom powder

Ghee to cook the malpua

Honey and Pistachios for garnish

Step by step recipe:

1. Take ragi flour, wheat flour, jaggery and salt in a bowl.

2. Mix it once using a spoon. Now add milk, one spoon at a time and make a thick batter free from lumps. Keep it aside.

3. Now for the filling, take coconut in another bowl. Add honey, finely chopped dry fruits and cardamom powder. Mix well.

4. Now heat a dosa pan well. Then reduce flame to medium. Add about two spoons of the malpua batter in the center of the pan. Spread in round shape. Add ghee and cook till the surface cooks.

5. Flip and cook for a minute.

6. Remove into a plate and fill with the filling. Roll and serve. Drizzle with honey on top and garnish with chopped pistachios.

Notes:

* I have not skipped wheat flour in this recipe as it needs little wheat flour for that soft yet firm texture.

* You can increase the amount of honey on the filling or jaggery in the batter for more sweet malpuas. I prefer it in this quantity.

* Skip jaggery in the batter if you don’t have much sweet tooth.

* They are best enjoyed as soon as made. Keeping them for little while can make it dry.

* Don’t make the batter very thin. The batter is free flowing yet thick. It took me 5 Tbsp milk for 4 Tbsp Ragi flour and 2 Tbsp wheat flour to get the perfect consistency.

* This snack is really handy as it is healthy as well as tastes delicious. Hardly takes 10 mins to make too.

* You can check all my Ragi recipes here.

Ragi Butter Cookies | easy recipe using Jaggery

Click on the image to save the recipe on Pinterest

The above picture is of “melt in the mouth” Ragi Butter cookies before two storms struck in 😅. Will come to that later. Right now, I just want to thank my school friend Anvy Susan Thomas who is a great baker ( I am her huge fan! 😍) for this amazing recipe of hers. She has an instagram page homemadebyanvy where she makes us drool with her delicious bakes.

As all of you know, I love baking and I bake atleast one kind of goodies everyday for my family (my daily dose of happiness ❤️). One of my regular bakes are these Ragi Butter cookies which turns out so good that you will never realize you are enjoying a healthy version of cookies. The kids are HUGE fans of it and you can see what I meant by storm strucking in. Here is my 5 year old daughter slowly coming in the frame to grab one of these cookies (storm no 1 😂).

Click on the image to save the recipe on Pinterest

And when she gets her share, how could the little one be left far behind? Here is storm number 2, my two year old son grabbing the cookies. I loved their cute hands on the cookies that it became my favorite picture too. ❤️❤️

Click on the image to save the recipe on Pinterest

These cookies are very easy to bake and turn out too good to be true. You won’t feel like getting cookies from outside once you bake them, that’s for sure. I always believe that it’s best we bake and make everything possible at home since we don’t know what kind of ingredients have gone in store bought ones.

Hence sharing one of my most favorite cookies. I whole heartedly thank my friend Anvy @homemadebyanvy for this recipe. Hope you all try it out too. Happy and healthy baking! ❤️

RECIPE:

Ingredients: { 8 Cookies }

100 grams salted Butter (add a pinch of salt if using unsalted)

1/3 Cup powdered Jaggery

1/2 Cup Ragi flour or Finger millet powder

1/2 Cup Whole wheat flour or Atta

1/2 tsp Baking soda

Step by step recipe:

1. Soften butter by keeping it at room temperature for little time. (Do NOT melt it in microwave or so.) Just place it at room temperature till it turns soft. Now add jaggery and mix both together using a spatula till they combine.

2. Now sieve ragi flour, wheat flour and baking soda over it.

3. Using hands, mix everything well till it forms a dough like shown below. Refrigerate it for 15 to 20 mins.

4. Preheat the oven at 180 C (350 to 375 F) for 10 mins. Make small balls of this dough and flatten with your fingers (like making pedas). Make lines over it with knife as shown. Place over a greased (with butter or ghee) oven proof plate. Keep distance between them as they increase in width as they bake.

5. Bake in the center rack of your OTG or with both rods on if using a conventional mode oven at 180 C (350 – 375 F) for 10 to 12 mins. Mine gets done exactly at 12 mins. Each oven is different. So in some ovens it may take upto 20 mins for it to bake completely. The surface will be smooth to touch and will be dough free. Also will have a golden tinge on the edges.

6. Allow it to cool slightly and enjoy the cookies.

Notes:

* They are very soft when they are right out of the oven but harden as they cool down. So do not keep a lot of time in the oven thinking the cookies are not done yet. Once the surface is free from dough and they are smooth to touch, they are ready to be removed from the oven.

* I used salted Butter for this recipe. Add a pinch of salt to the mixture if using unsalted butter.

* Also, don’t melt the butter. Just soften it by keeping it at room temperature.

* Refrigerating the dough is very important. Please don’t skip it.

* Place the cookies at little distance before baking as they increase in width as you can see from the pictures.

* Do grease the oven proof plate well with ghee or butter so that it does not stick to the plate.

* Bake in the center rack of your OTG or with both rods on if using a conventional mode oven. It is very important for even baking of the cookies.

* Mine gets done exactly at 12 mins. Might vary depending upon your oven. But don’t open the oven door before 8 mins into the baking time or else it will leave to uneven baking.

* Store in an air tight container at room temperature. Mine has never lasted beyond a day as my family finishes it off before that. 😀

* You may also want to try this Ragi chocolate cake which is my kid’s favourite (and her friends love it as well 😅). One of the most tried recipe by my readers.

Click on the image to save the recipe on Pinterest

Ragi Urad Idli | No rice idli

Click on the image to save the recipe on Pinterest

I have already posted Instant Ragi idlis that I make always. Even though it comes out soft, it has Eno fruit salt as an ingredient and I like to use it as less as possible. So those Idlis are kept for days when I forget to soak for idlis and dosas but still need to make a healthy breakfast for the family.

Ragi Urad Idlis are the ones I make always and it turns out soft and fluffy naturally without the need of Eno or soda. In fact the batter ferments so well that I am always scared if it will overflow and take great care to keep it in a very wide bowl with a plate underneath.

My kids love these Idlis very much and call it “chocolate” Idlis. The day I make them, they ask for it and eat it the whole day. So I steam and keep the whole batch for their idli demands. It remains soft even after 12 hours of steaming them. Such is the magic of naturally fermented foods.

Sharing the recipe which I have been following for years. Hope you all try and love it too. Happy and healthy cooking!

RECIPE:

Ingredients: { Makes about 26 Idlis }

4 Cups Ragi flour/ finger millet flour/ nachni ka atta

1 Cup Urad dal

1/2 Cup thick or thin Poha/ flattened rice

1 tsp Methi / Fenugreek seeds

Salt to taste

Step by step recipe:

1. Wash well and soak urad dal with methi for 3 to 4 hours.

2. Drain the water and add the soaked urad dal and methi along with Poha and grind to a smooth batter. Pour into a large bowl.

3. Add Ragi flour and salt. Whisk well or mix with hands to remove lumps.

4. Keep this batter to ferment overnight or for atleast 8 hours.

Love how much this batter rises. More than thrice. So do keep it in a large bowl. Else batter might overflow outside the vessel.

5. Add in idli moulds. Steam for 20 mins or till done.

Notes:

* When you add the ragi flour, make sure to whisk really well and the batter consistency should be slightly thicker than dosa batter consistency. So don’t add much water.

* Please remember that this batter rises very well. Atleast thrice its size. So keep it to ferment in a large bowl. Also keep a plate underneath to catch any overflow just in case.

* These Idlis taste the best with Peanut Onion Chutney.

* Dishes with Ragi that I make always:

Instant Ragi Idlis

Instant Ragi Rava Dosa

Ragi Set Dosas

Ragi Jaggery ladoos

Ragi Ela Ada

Ragi Butter cookies

Eggless Ragi Chocolate Cake

Ragi Malpua

* All my idli varieties: Variety Idli Collection

Click on the image to save the recipe on Pinterest

Instant Ragi Idlis

I have already posted two varieties of instant Idlis, Instant Oats Idlis and Instant Rava idlis. This is the third variety, Instant Ragi Idlis. Since these Idlis use Eno fruit salt (which is equivalent to baking soda), I make any one of these variation only once a week as it is considered not as healthy compared to naturally fermented idlis.

My kids love these Ragi Idlis as I have called them chocolate Idlis since they were babies. Used to make their idli without Eno and still they loved it. So now whenever the idli steamer is up on the stove top, my daughter comes running to ask if it’s chocolate idli. 😁

So glad they both love Ragi. It is full of calcium and very good for bone health. Though not people’s favourite because of its colour and distinct flavour, we love this millet as we have been using it is our regular cooking since many years now. Ragi Chocolate cake is our favourite and also a hit among my readers. So many have tried and posted feedbacks that their kids too loved it.

Anyhow, hope you all love these Idlis too. Happy and healthy cooking!

RECIPE:

Ingredients: { Makes about 12 to 14 Idlis}

1 Cup = 240 ml

1 Cup Ragi flour/ Finger millet flour

1 Cup Semolina/ Rava/ Sooji

1 Cup Curd

Salt to taste

1 tsp Eno fruit salt

Step by step recipe:

1. Take Sooji, ragi flour, curd and salt in a bowl. Add water little by little to make a thick batter whisking constantly to avoid lumps.

2. Add eno fruit salt to the batter and mix once.

3. Steam for 20 mins or till done.

Poke a knife to see if it is done. If the knife comes out clear, the Idlis are done.

4. We love these Idlis with Tomato chutney but you can make any chutney of your choice.

In the picture is shown Sambarpalli or ajwain leaves chutney. The colour of the chutney is not bright green as I have added only couple of leaves.

Notes:

* These Idlis are made exactly like I make Instant Oats Idlis. I just substitute oats with ragi powder.

* Don’t make the idli batter very thick nor very thin. It should be thicker than regular dosa batter consistency. Else the Idlis won’t come out well.

* 1 tsp Eno fruit salt can be substituted with 1/2 tsp baking soda plus 1/2 tsp lemon juice.

Eggless Ragi Chocolate cake

Click on the image to save the recipe on Pinterest

Baking is therapy for me. I love how the ingredients mix in together to create something so delicious and the aroma which fills the house is magical. I have been baking different varieties of cakes now using wheat flour and jaggery. My daughter loves it more than the refined flour based cakes. There is a richness in wheat flour cakes which makes it more tastier and of course healthier.

Ragi Chocolate cake was an amazing find of a recipe as it uses another healthy ingredient but is quite hidden in the cake. You could never say it has ragi in it. Even when I made it the first time, my little girl had loved it so much.

Click on the image to save the recipe on Pinterest

The simple frosting of chocolate sauce takes this cake to another level. We are a huge fan of this cake and it’s my pleasure to share it with all of you. Happy and healthy cooking.

RECIPE:

Adapted from here.

Ingredients:

Dry Ingredients:

3/4 Cup Ragi flour/ finger millet powder/ Nachni atta

3/4 Cup Whole wheat flour/ Atta

2 Tbsps Cocoa powder

1 tsp Baking powder

1/2 tsp Baking soda

Wet Ingredients:

150 grams (2/3 Cup) Butter (salted or unsalted can be used)

80 ml (1/3 Cup) Yogurt/ thick curd/ Dahi

3/4 Cup Milk

1 Cup powdered Jaggery/ cane sugar

1 Tbsp Vanilla extract

For the frosting:

1 Cup Milk

1/4 Cup Sugar

2 Tbsp Cocoa powder

1 tsp Vanilla extract

Step by Step recipe:

1. Preheat the oven at 180 C for 15 mins. Keep the heating rack as the center one if using a conventional oven like me.

2. Keep the baking tin ready by lining with parchment paper or applying butter inside so that the cake does not stick to the pan.

3. Sift all the dry ingredients using a sieve to ensure all the powders are lump free and mix uniformly.

4. Melt butter by microwaving it for two to three mins on high. Allow it to cool down. Add in the milk, Yogurt (which has been whisked well), jaggery and vanilla. Mix well using a whisk.

5. Now add the dry ingredients into the wet ingredients and mix using a spatula such that everything is mixed uniformly and there are no specks of flour visible. Do NOT over mix the batter.

6. Pour the batter into the baking pan and spread uniformly.

7. Bake at 180 C for 30 to 35 mins. It took 35 mins for my cake to bake in my conventional oven. In microwave with conventional mode ovens, it gets done even quickly. So keep an eye after 25 mins into the baking time. Read NOTES.

8. Check with toothpick inserted in the center of the cake. Is comes out clear, then the cake is done. If comes out sticky or wet, it needs few more mins of baking. After done, allow it to cool for few minutes.

9. For frosting, combine together milk, cocoa powder, sugar and vanilla in a bowl. Whisk well first and then keep on flame.

10. On medium flame, keep whisking continually while allowing it to get thicker (usually takes about 5 mins). Once it gets thick, remove from flame and pour over the cake and spread evenly.

Check how thick it has got. Sticks well to the spoon.

11. Wait for a while for the frosting to set before you slice and serve. Refrigerate the cake after a day at room temperature.

Click on the image to save the recipe on Pinterest

Notes:

* Use a pinch of salt while sifting the dry ingredients if using unsalted butter. I used salted butter.

* This cake tastes heavenly with the frosting. So don’t skip it. But for those who prefer their cakes plain, without frosting tastes good too. And no, there is no ragi flavour at all as cocoa, vanilla and jaggery do an amazing job at masking the ragi flavour.

* While baking, always ensure your oven is preheated well (180 C for 10 to 15 mins is the norm).

* Don’t keep opening the oven door between bake times. Check only after 25 mins if the bake time says 30 mins of baking. Else opening the door too often leads to uneven baking.

* This cake tastes good even after getting refrigerated. The frosting sets well and enhances the flavor. Just microwave for a minute before serving. I have kept the cake a maximum of three days in the fridge before it got finished off by my family.

* I have used organic powdered jaggery. You could also use cane sugar. Both work well for this recipe.

If any doubts, do message me on my Facebook page Healthy cooking with mitha or on my Instagram handle and I would be happy to help. Happy cooking!