Tag Archives: South Indian

Barnyard millet Upma |Varai Upma | Easy breakfast with millets

Click on the picture to save the recipe on Pinterest

Breakfast is the most important meal in the day for me and I make sure it’s as healthy and filling as possible. Usually it’s any kind of dosa or idli but on days when the dosa batter is less, upma is my go to breakfast. Quick to make, quicker to finish, I love upma and often wonder why people make fun about it that it’s their least favorite breakfast. 🤔

Today morning, I felt peaceful as kids left for school after weekend 😀 and as I finished my morning walk, I thought of making this Barnyard millet upma. Since I was already feeling peacefully happy, I decided to utilize this moment to blog the recipe too. It has been long I am making this upma for breakfast and evening snack but never took pictures.

I have been substituting semolina or rava with millet for upma since sometime now as it’s more filling and healthy too. Also, I make pulav with millets too instead of rice for a change and love how delicious it comes out. Will share the recipe soon.

Hope you all try this simple yet tasty Barnyard millet upma. I am sure you will like it. Happy and healthy cooking ❤️

RECIPE:

Ingredients: { Serves 2 to 3 people }

1 Cup = 240 ml

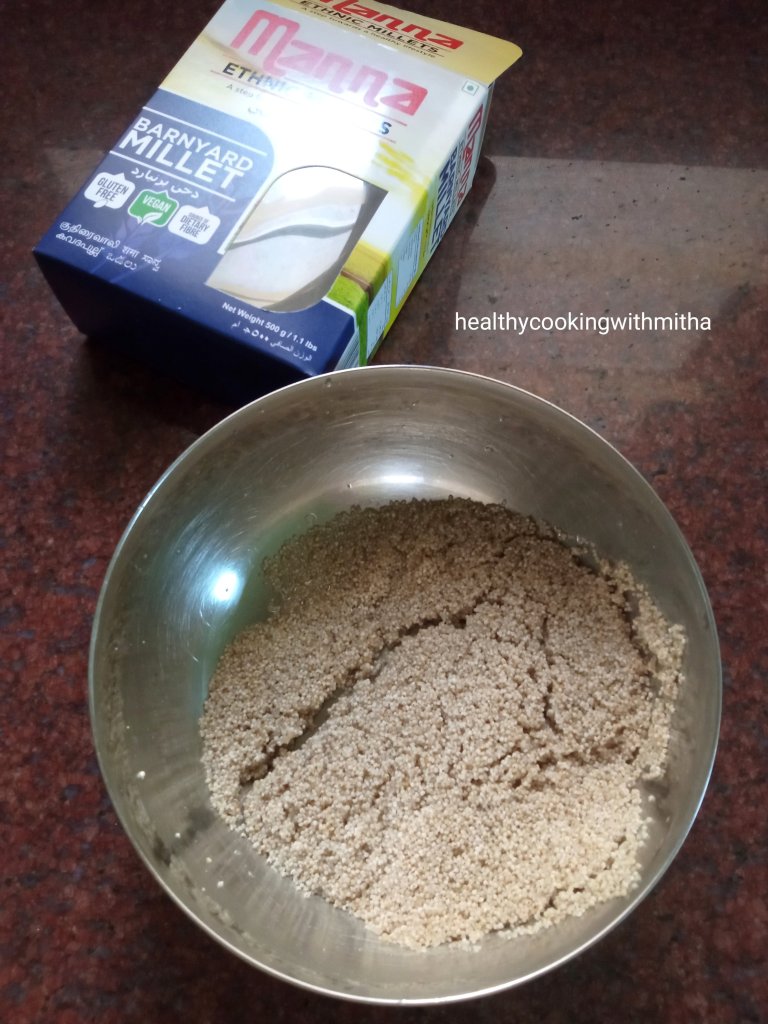
{ Barnyard Millet is called Varai in Konkani, Kuthiraivali in Tamil, Sanwa in Hindi and Kavadupullu in Malayalam }

1 Cup Barnyard millet

3 Cups Water

For seasoning:

1 Tbsp Ghee

1 Tbsp Coconut Oil

2 tsp Mustard seeds

2 tsp Cumin seeds

A sprig of Curry leaves

3 Green chillies

6 to 8 Cashews

Salt to taste

Freshly grated Coconut for garnish

Step by step recipe:

1. Take 1 Cup of Barnyard millet in a bowl and wash it well. Remove water and keep aside. I use Manna brand of millet as it is readily available here in Qatar.

2. Now heat ghee and oil together in a pan. You can use only oil too but ghee adds a wonderful flavour to the upma. Add mustard seeds and cumin seeds. Once mustard starts spluttering, add curry leaves, green chillies and cashews. Fry till cashews turn light brown in colour.

3. Now add the washed millet and roast for few seconds. Now add salt and mix well.

4. Add hot water and mix together with the ladle.

5. Lower the flame to medium, cover and cook till the water gets absorbed completely by the millet and the mixture turns dry (takes about 10 mins) . Check if millet is cooked by mashing between fingers. Garnish with freshly grated Coconut. Serve hot.

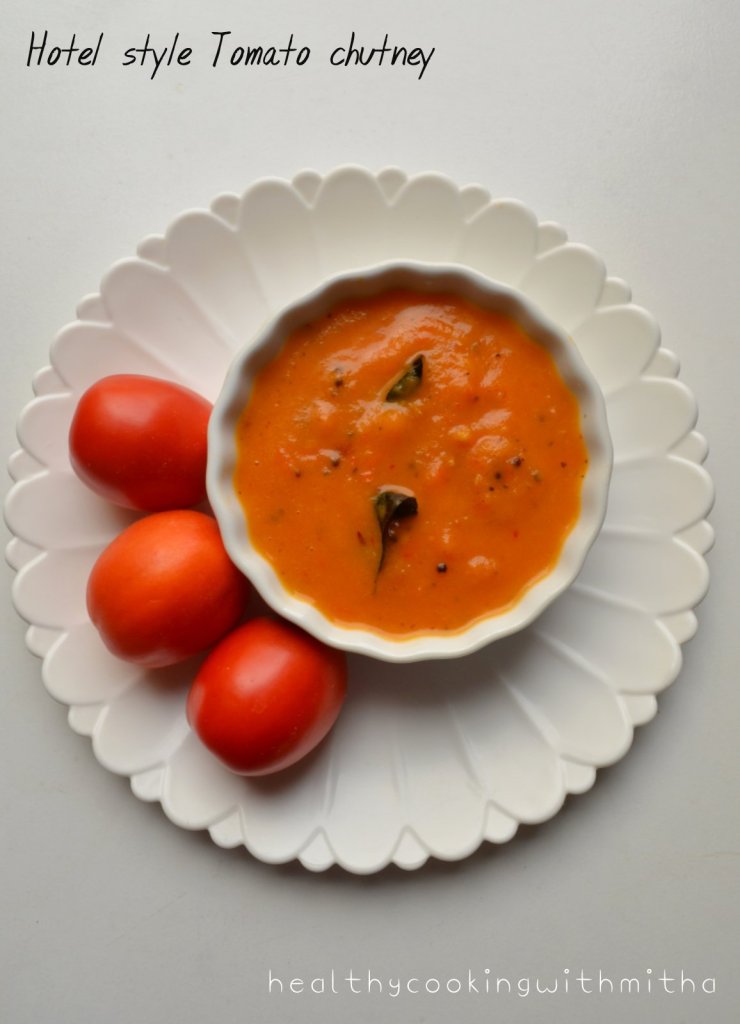
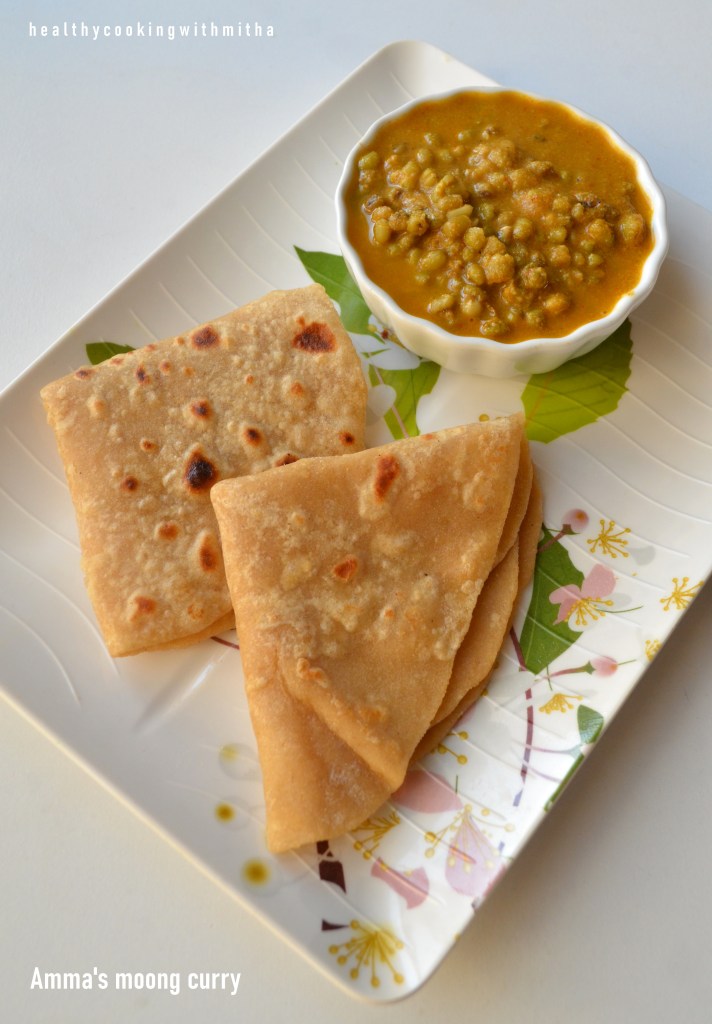
Serve Barnyard millet Upma as it is or with peas curry like I have served and with chutney powder. Coconut chutney also goes well with this upma.

Click on the picture to save the recipe on Pinterest

Notes:

* I have used Manna brand of Barnyard millet as it is readily available here in Qatar in all major supermarkets. I get mine from Lulu or Grand mall.

* 1 Cup Barnyard millet needs atleast 3 Cups of water to cook. Keep hot water ready beforehand and add as soon as you roast the millet in the seasoning.

* Making upma with millet takes more time than regular upma with semolina or sooji as millet takes atleast 10 mins to cook but it is more filling and healthier.

* You can also add vegetables to make it vegetable upma.

* I also make Barnyard millet idli and it tastes delicious.

* You can check all my Millet recipes here:

Millet recipes Collection

Kodo Millet Dosa | Soft and tasty Millet Dosa recipe

Click on the image to save the recipe on Pinterest

Dosa is our favorite breakfast and when we are spoilt for choices, how can one resist making it almost everyday. 😅 We Konkanis are famous for our unique yet delicious dosas and it makes me so happy to add yet another dosa, 34th variety on the blog. You can check all the recipes here – Dosa Corner.

I started making Millet dosas few years back and we loved the flavour very much. Combine it with your favorite chutney and you have a healthy, filling breakfast ready. ❤️

However, I have noted that Millet dosas are best had hot and can’t be packed in tiffin boxes as the texture changes. Also, it tastes the best when cooked in ghee instead of oil.

Kodo Millet is a lesser known millet variety but dosas made it with tastes really delicious, trust me on this. Once you start making it, you are sure to make it again and again..

Hope you all try and like it. Happy and healthy cooking ❤️

RECIPE: { Makes about 15 dosas }

Kodo millet is also known as Kodra (Hindi), Varagu (Tamil), Arikelu (Telugu), Harka (Kannada), Koovaragu (Malayalam)

Ingredients: { 1 Cup = 240 ml }

1/2 Cup Urad dal

2 Cups Kodo Millet

2 tsp Methi/ Fenugreek seeds

Salt to taste

Ghee to cook the dosa

Step by step recipe:

1. Wash well and soak Urad dal, Kodo millet and methi seeds in separate bowls in atleast double the water for 4 hours.

2. Now discard the soaked water from Urad dal and grind it with methi (along with soaked water) till it turns into a smooth batter adding water little by little as required. Pour into a large vessel. Add drained Kodo millet into the mixer.

3. Grind the millet with little water to a smooth paste. Pour into the same bowl. Add salt and mix well with hands.

4. Keep in a warm place for 8 to 10 hours for the batter to ferment.

5. Make dosas either thick or thin. My kids like it thick while we like it thin. For making it thick , just pour a ladle of dosa batter and don’t spread much. For making thin, spread the batter over the pan. Add ghee and cook till the surface cooks. Flip and cook for thick dosas.

6. Repeat the same with the rest of the batter. Serve with a chutney of your choice.

Click on the image to save the recipe on Pinterest

Notes:

* You can refrigerate the leftover batter to make dosas later.

* I used Kodo Millet from Manna brand.

* Don’t discard the soaked methi water while grinding the batter. It is important to get a soft porous texture of the dosas.

* These dosas are best cooked in ghee and eaten hot.

* We love the dosas when made thin but kids like it thick. So make and see how your family prefers it.

* I served it with Hing Chutney. Grind coconut with red chillies, hing, tamarind paste, salt and little water to a smooth paste.

* You can check all my Millet recipes here –

Millet Recipes Collection

* You can all my “No rice” Dosa recipes here –

No Rice Dosa recipes Compilation

* You can check all my dosa recipes here –

Dosa Corner

Capsicum Peanut Masala | Capsicum dry curry

Click on the image to save the recipe on Pinterest.

A new blog after a long break of many months. Kids had their summer vacation and towards the end of it, we went to India. Had a great month celebrating festivals with our families and the highlight being able to spend Janmashtami time at my native, Udupi. ❤️

If there is heaven on earth for me, it is Udupi. The feeling of living there, being able to see my dearest Krishna always is very precious. Hope my dream of settling down in Udupi fulfills in the coming years. ❤️🙏

I missed cooking at Udupi as we were either constantly travelling or were at our relatives’ houses. So coming back to my kitchen in Qatar, I have been cooking a lot to compensate it. 😁 This Capsicum Peanut Masala was a recent try inspired by something similar which I ate at a hotel during my vacation.

It comes out so delicious that a meal with rice, rasam and capsicum masala is all you need to get your soul satisfied. This is that kind of curry, simple, unique and very flavourful.

Hope you all try and love this curry too. Happy and healthy cooking! ❤️

RECIPE:

Ingredients:

1/4 Cup Peanuts

3 medium sized Green Capsicum, chopped into small pieces

1 small Onion

2 Tbsp Coconut Oil

2 tsp Mustard seeds

Few Curry leaves

3 Green chillies

1 tsp Tamarind paste

1/4 tsp Turmeric powder

2 tsp Red chilli powder or to taste

2 tsp Sambar powder ( I use Nirapara brand)

Freshly grated coconut for garnish

Salt to taste

Step by step recipe:

1. Dry roast peanuts in a pan till it starts changing colour and let’s out an aroma. Don’t let it turn black. Allow it to cool.

2. When it cools down, powder it coarsely in a mixer. Just pulse for few turns. Don’t blend it a lot as it will turn into paste. Keep it aside.

3. Now heat oil in the same pan, splutter mustard seeds. Add curry leaves and green chillies. Fry for few seconds.

4. Add finely chopped onions and fry till the onions turn translucent.

5. Now add chopped Capsicum and fry for few minutes.

6. Add salt, turmeric powder, red chilli powder, sambar powder and tamarind.

7. Mix well. Cover and cook till capsicum turns soft. Sprinkle little water if necessary. Now add the peanut powder.

8. Mix well. Cover and cook for about 5 mins. Add grated coconut on top. Done. 🙂

Serve with rice meals as a delicious accompaniment.

Notes:

* Be careful while roasting peanuts such that they don’t turn black. Roast on medium flame and immediately remove them as soon as they start changing colour.

* Also be careful while grinding the peanuts such that they should not turn into a paste. Coarse powder is enough.

* Onion can be skipped if you follow satvic diet.

* You can reduce chilli powder as we have already added green chillies, depending on your spice level.

* Sambar powder adds a wonderful flavour. So don’t skip it in this curry.

* This curry also tastes yummy with dosa.

Click on the image to save the recipe on Pinterest.

Hotel style Tomato Chutney

Click on the image to save the recipe on Pinterest

Both the kids just left for school and I take this (peaceful 😄) opportunity to write a recipe which I wanted to share since long time. In Qatar, during winters ie roughly from November to April, residents grow vegetables in their gardens. Main vegetable which almost everyone grows is Tomato. Even we have tomatoes in abundance every year which we enjoy till June due to it’s good shelf life.

Here are some of the beautiful tomatoes which grew in our’s and our neighbor’s garden who was kind enough to share with us. ❤️

And plenty of tomatoes means making my favorite, my Amma’s Tomato chutney. 😍 Apart from that, due to my daughter’s request, who wanted the hotel style Tomato Chutney which she enjoys at Aryaas restaurant here, I happened to try this recipe which came out exactly the same. Imagine my happiness!! ❤️

So after getting daughter approval as well, I knew this recipe deserved to be blogged and shared with all of you. Hope you all try and love this recipe too. Happy and healthy cooking! ❤️

RECIPE:

Ingredients:

About 4 to 6 medium sized Tomatoes (or as available, even 2 large tomatoes are fine)

2 medium sized Onions

1 inch Ginger piece

4 pods of Garlic

3 to 4 Red chillies

A sprig of Curry leaves

1/2 tsp Turmeric powder/ Haldi

1 Tbsp Coconut oil

Salt to taste

For seasoning:

2 tsp Coconut oil

1 tsp Mustard seeds

1 tsp Cumin seeds/ Jeera

A sprig of Curry leaves

A pinch of Asafoetida powder/ Hing

Step by step recipe:

1. Take all the ingredients for the chutney and keep ready. I have taken home grown tomatoes of different sizes depending on which of them were turning soft. Since I have a lot of tomatoes, I have taken plenty to make this chutney. You can use only two to three large ones depending on availability.

2. Heat oil in a pan, add curry leaves, chopped ginger, garlic and onions. Fry till onions turn translucent. Then add red chillies. Fry for few seconds.

3. Add roughly chopped tomatoes along with turmeric powder and salt. Cook till tomatoes turn soft. Don’t add water at all. Tomatoes will leave a lot of water as it cooks.

4. Once the tomatoes cook and turn soft, remove from the flame. Allow it to cool. Blend to a smooth paste.

5. Heat oil in the same pan, add mustard seeds and cumin seeds. When mustard seeds splutter, add curry leaves and hing.

6. Now add the blended paste along with little water if needed to bring it to desired consistency. Check for salt and also spice level, adding red chilli powder if needed.

7. Done! Serve with dosas, idlis and chapatis.

Click on the image to save the recipe on Pinterest

Notes:

* You can skip Onion and Garlic if you don’t consume or on Pooja days. The texture of tomatoes will still make a thick chutney.

* Ripe and bright red tomatoes will give a beautiful colour and flavour to the Chutney.

* Keeps well if refrigerated for couple of days. Mine usually gets over within that.

* I make a big batch specially during tomato season, hence you can see I have used plenty of them. You can use two to three tomatoes to make one batch of chutney.

* For variety of dosa recipes, you can check my Dosa Corner page.

* For Instant and Millet based dosas, you can check my No rice Dosa Compilation page.

* For all my Idli recipes, you can check my Variety Idli recipes Compilation page.

* For other chutney recipes, you can check Chutney recipes.

* I also make another variety of Tomato Chutney which in my Amma’s recipe and my favorite. You can check the recipe here – Amma’s Tomato Chutney.

Cabbage Kosambari | Easy Cabbage salad

Click on the image to save the recipe on Pinterest

As my kids are finally asleep, I can sit to write a new recipe now. A recipe I had been wanting to add to the blog since long but could not find time. With Eid holidays going on here, kids sleep till late in the morning and thus, my son skips his evening nap. Him skipping his nap = I don’t get time to sit for long in a place = I can’t blog. So night time is blog time as of now. 😄

Is night time also a time for deep thoughts for any of you? (or is it just me 😅) I find the silence of night so peaceful and comforting that I get time to talk to the divine, to understand myself, to over think (😄), to listen to my favorite music and to relax too. After all this, when I finally sleep, I dream a lot, also remembering my dreams completely when I wake up. I see myself going back to my school days, my college days, the tension of exams, the fun of enjoying with my friends, chatting with Amma along with seeing people close to my heart, in my favorite places like the mountains and beaches, every night in my dreams. ❤️ I feel very happy when I wake up that, so what if I can’t see them for real, atleast they visit me in my dreams. 😍 So, thank you my dream companions for coming in this crazy girl’s dream world. 😄❤️

So that was about night time which is my own “me” time. And what about my day time? Here is a glimpse into it:

My son making towers, cars, trucks, ships, tents, caves, houses, see saw, slides and what not with our sofa cushions. 😂😂 These cushions are his inhouse park and me being a child with them, don’t stop him too 😅 (I just see that he does not go overboard and is safe.) He has taught his elder sister as well and both of them enjoy making their own creations with these cushions. 😍

By the way, did any of you notice his dress? Yes, he loves wearing his Akka’s frock, specially this red one. Reminds me of how my brother used to love wearing my dresses too as a kid. Such wonderful memories. ❤️ His sister also adorns him with necklaces and accessories to doll him up. One of their favorite games. Look at him admiring his bangle. 😍

My daughter also loves to draw and colour, which can be clearly seen from the first picture above. Almost all of our walls are stuck with her paintings. She also likes to create various dress designs and here is one among them. I admire her for her creative ideas in art and craft, which I lack completely. 😂

So these two bundles of joy (sometimes also the reason for my 1 minute angers 😂😂) make my mornings worth waking up and are huge entertainment in my daytime. I don’t realize how my day passes with them. Also, I am so glad they have each other for company in these home bound times. ❤️❤️

Finally after my long chatter, here’s sharing the recipe of this simple yet very delicious Cabbage Kosambari which I learnt recently from my dear friend, Ambratha Shenoy. This is too tasty for words and definitely a must try recipe. Hope you all like it too. Happy and healthy cooking! ❤️

Thank you Ambratha for sharing this recipe! ❤️🙏

RECIPE:

Ingredients:

2 Cups grated Cabbage

1 medium Onion, finely chopped

3 Green chillies

1/4 Cup finely chopped Coriander leaves

3 Tbsp freshly grated Coconut

Juice from 1 Indian lemon or to taste

Salt to taste

Step by step recipe:

1. Take the grated Cabbage in a mixing bowl. { I grated the cabbage as much as possible and finely chopped the end pieces}

2. Now add finely chopped onion, green chillies, coriander leaves, coconut and salt.

3. Add lemon juice and mix well.

4. Mix well and serve as an accompaniment to meals.

Click on the image to save the recipe on Pinterest

Notes:

* Try to serve freshly made as much as possible as onions may start to leave water if kept for long as it has salt in it. Else you could salt just before serving.

* You could increase or decrease lemon juice and coconut as per your taste.

* Instead of grating cabbage, you could also very finely chop it. I combine both ways. Grate as much as I can and then finely chop the end pieces.

* Tastes very good as an accompaniment to rice meals.

* You could also try these three South Indian style salads that I make regularly:

1. Moong dal Kosambari with Cucumber and carrots

2. Carrot Kismuri

3. Khamang Kakdi

Ragi Set Dosas | “No rice” soft dosas

Click on the image to save the recipe on Pinterest

When I had posted the Ragi Urad idli recipe, I had got many queries about if it can be made as dosas too. Though I do make dosas with that batter, there is a way I make my Ragi dosas which come out as soft as restaurant style set dosas and I thought it was high time I share it too.

If not for my readers who continually keep asking me queries and request for recipes, I will not be inspired to post them. Most of my day passes in household chores while juggling between two kids, one seeking my attention to draw for her ( my daughter 😬) while the other clinging to me like fevicol ( my son 😄). The only thing that keeps my sanity are these daily shlokas, bhajans and songs which I have made as playlists on youtube and keep them in the background whole day. They give me strength in my motherhood battles and otherwise too. Music is really my life. ❤️

So here is the most requested dosa by my readers. They come out very soft and my kids are huge fans of it. My daughter used to call it chocolate dosa as a toddler and even now, in spite of knowing it’s ragi, still calls it the same. 😃 Ragi is a very healthy millet and this is one of the best ways to include it in your diet. Happy and healthy cooking!

Click on the image to save the recipe on Pinterest

RECIPE:

Ingredients: { Makes about 20 dosas }

3 Cups Ragi flour / Finger millet powder/ Nachni ka atta

1 Cup Urad dal (I use split ones)

1/2 Cup Poha/ flattened rice (thick or thin, white or brown)

Salt to taste

Ghee or oil to cook the dosa

Step by step recipe:

1. Wash well and soak Urad dal for about 4 hours. Drain water completely. Add about 1 Cup water and 1/2 Cup poha (washed) and grind to a smooth paste. Add to a large preferably steel vessel.

2. Now take ragi flour in another bowl. Add water, 1 cup at a time and whisk well to remove lumps. It takes me 3 Cups water to 3 Cups Ragi flour for it to come to a thick batter.

3. Add this to the Urad dal batter. Add salt and mix well using hands. Cover and keep at room temperature for fermentation for 8 to 12 hours. Might take longer during winters.

Love the fermented batter 😍

4. Heat a dosa pan and pour a ladle of the batter on the center of the pan. No need to spread this dosa. Cover and cook one side first adding ghee or oil.

Sorry for the dull picture. Kitchen lights 😬

5. Flip and cook the other side too. Remove and repeat the same with the rest of the batter too.

Notes:

* You can store the rest of the batter in the refrigerator and use it the next day. The texture of the dosas are soft even the next day.

* You can use thick or thin Poha, brown or white poha, does not make any difference. It gives it the softness in the dosas.

* If due to any reason you can’t eat poha, just skip it and add 1 tsp Methi instead along with Urad dal. Grind it to smooth paste. It will give soft dosas too.

* For making idlis, you can check this Ragi Urad Idli recipe. Comes out very well.

* I served these dosas with Hing Chutney. Just grind 1 Cup Coconut with a pinch of Hing powder, 4 long red chillies, 1 tsp Tamarind paste, salt and water to a smooth paste. You can season the chutney using mustard seeds and curry leaves if needed.

Other Ragi dishes that I make regularly:

Instant Ragi Rava dosa

Instant Ragi Idlis

Ragi Urad Idli

Ragi Ela Ada – Steamed Ragi sweet snack

Ragi Butter cookies

Eggless Ragi Chocolate Cake

Ragi Malpuas

Ragi Jaggery ladoos

Click on the image to save the recipe on Pinterest

Amma’s Moong curry (with freshly ground masala)

All of us have a special kind of liking towards our mother’s cooking and I am sure you all will agree that no matter which Masterchef cooks for us, our Amma’s food is the best. Why not, as she makes everything with a secret ingredient in it – Love. ❤️

My Amma too used to cook so well and the flavours of all her dishes are still in my taste buds. This moong curry was one among them and I used to take it with puris in my lunch box during my school/ college days. My friends used to love it too and I used to take extra boxes of it for them as well. The precious memory of those days is forever etched in my heart and I remember it each time I make this curry. ❤️

Now Amma can’t cook like before as she suffers from muscular dystrophy in her legs. Although she’s strong most of the days and remains happily engaged all day, there are times when she falls into self doubting sadness and I have to convince her my best that she is still very much loved and an important part of our lives. Right now, she’s going through a difficult phase and this post of mine is to cheer her up in my little way, by adding her recipe on my blog.

Amma, this is for you. ❤️ I am coming in few months to make this curry for you and you have to tell me if it tastes as good as yours or not. 😍 Loads of love to you Amma. 😘 Please be happy always as that is what makes me happy too. ❤️ Sharing some words for you which I found as best to describe our love for each other. Hope it cheers you up. 😍

Now to Amma’s recipe. Hope you all try her way of moong curry too. Tastes amazing with puris, chapatis or even with rice. Happy and healthy cooking!

RECIPE:

Ingredients:

1 Cup dried whole green gram/ whole moong

1 Tbsp Oil

2 tsp Red chilli powder or to taste

Salt to taste

For the ground paste:

1/4 Cup Coconut (freshly grated or desiccated)

6 to 8 sprigs of Coriander leaves

1/2 a large Tomato

1 small sized Onion

2 Cloves

1 Cardamom

1 small piece of star anise

1/2 tsp Cumin seeds or Jeera

1/4 tsp Turmeric powder

Step by step recipe:

1. Soak whole moong in atleast thrice the amount of water overnight or for 6 to 8 hours. When soaked, drain the water. Add fresh water enough to soak it in a pressure cooker and cook until soft. Takes 3 to 4 whistles on high in my electric stove top. Might vary depending on your cooking range.

2. Add ingredients to grind in a mixer.

3. Grind adding about 1/4 Cup water or as needed to a smooth paste. Now heat oil in a pan and add the paste. Also add red chilli powder and cook till the raw smell goes away. (About 5 mins and this paste splatters. So be careful and mix continually.)

4. Now add the cooked moong and salt. Bring it to boil and cook for 5 to 8 mins. Adjust consistency of the gravy.

5. Serve hot with Puris, Chapatis or rice meals.

Notes:

* The gravy thickens when kept at room temperature as moong absorbs a lot of water. So if serving later, add water that time to adjust gravy consistency.

* Star anise and coriander leaves make this masala very aromatic. So don’t skip it.

* The masala splatters while cooking. So be careful while sauteing.

* I also sprout moong and make this same curry.

* You can also check my mother’s other three recipes –

# Amma’s Carrot Pulao

# Amma’s Tomato Chutney

# Amma’s Alu Paratha

Radish Chutney

In my last post of Ragi Jaggery ladoos, I had mentioned about our relocating back to India but I had never expected my readers to comment and message me with their best wishes. It really made me so happy that people actually take time to read the full writeup and also write such heartfelt words for me. ❤️ I always consider my readers to be a part of my extended family and the love showered on me in the past couple of days proves that my readers feel the same, which means the world to me. Thank you dear readers. Love and blessings is what I need the most now. ❤️🙏

I had actually decided to stop blogging for a while as I am not in the right frame of mind to write. Most of the families we know will be separated, even us, as only me and kids will shift back as of now. But we knew this since a year, were mentally prepared for it and specially as I have a great support system in my parents, we are not much worried. But there are many families who don’t have that and hearing their situations make me feel very sad too. Praying that God blesses all of them and they can survive this change well. 🙏

Sorry that this is turning out to be such a emotional write-up which is why I did not want to blog but I guess you all will understand, like always. ❤️

Coming to this chutney, it is my way to sneak radish in my kids’ diet as they love dosas with chutneys. So making them eat vegetable in this form too. I learned this chutney long back from a cookbook but have changed it to suit our tastebuds. Comes out very tasty and you can never say it has radish in the chutney.

Hope you all try and love this chutney. Happy and healthy cooking! ❤️

RECIPE:

Ingredients:

1 Cup peeled and grated Radish

1/4 Cup Coconut

1 Tbsp Coconut Oil (+ 1 tsp)

4 Red chillies

1 tsp Urad dal

1 tsp Cumin seeds

1/4 tsp Hing or Asafoetida powder

Salt to taste

Step by step recipe:

1. Heat 1 Tbsp Oil in a pan. Add grated Radish and saute on medium flame till the raw smell of radish goes away and the radish turns dry. Takes about 5 mins. Now remove from flame and allow it to cool.

2. Now add the radish to a mixer along with coconut. In that pan, heat 1 tsp Oil and add Hing, 1 tsp Urad dal and 1 tsp Cumin seeds. Also add red chillies. Fry till Urad turns brown. Allow it to cool.

3. Now add the fried chilies, Urad dal, cumin seeds to the radish- coconut. Also add salt and about 1/4 Cup Water or as needed. Grind to a smooth paste. This is a thick chutney. Remove to a serving bowl.

Notes:

* Do fry the radish till the rawness goes away. Else the chutney will have the raw taste.

* This chutney is not seasoned with mustard seeds but you can season if needed.

* Can be had with rice meals or dosa/idli.

* Here is my Chutney/dips recipe collection that I make always.

Brinjal Rava fry on tawa and Upkari

Even though my kids eat almost everything that I cook ( touchwood!), my 5 year old daughter is slightly choosy when it comes to vegetables. So my mommy brains have to work overtime to make her eat some of the veggies. 😅

Brinjal is a vegetable she won’t eat if I make a regular curry with it (wish I could capture her face and show you all when she hears it’s brinjal curry for dinner 😂). I don’t blame her at all as I myself never used to eat any vegetable as a kid except for a few chosen ones like potato, elephant yam and beetroot. So I can totally understand her. 😃

But once I happened to make these rava fries for a change and she absolutely loved it. So now I make it regularly even as an evening snack. She loves munching on it and I am happy that a healthy vegetable is filling her with nutrition.

Hope you all will try this as well. Happy and healthy cooking! ❤️

RECIPE:

Ingredients:

3 small variety Brinjals or 1 large Purple Brinjal

1/4 tsp Turmeric powder

A pinch of Hing or Asafoetida

Salt to taste

1/4 Cup Rava or Semolina (or as needed)

1 tsp Red chilli powder

Step by step recipe:

1. Wash the brinjals well and chop off the stem. Slice brinjals thinly for the rava fry and finely chop for upkari. Add both into separate bowls of water.

2. Now drain water and add Turmeric powder, Hing and salt. Mix well.

3. In a plate, take rava and mix red chilli powder in it. Roll the brinjal slices one by one over the rava mix.

4. Heat tawa and place these onto the tawa. Drizzle coconut oil while cooking both sides on medium flame till it turns brown in colour and the brinjal turns soft.

5. Serve with rice meals.

Notes:

* For Brinjal Upkari, fry about 4 to 5 finely chopped Garlic pods in oil till it turns brown and add finely chopped brinjal to it. Add red chilli powder and salt. Cook till it turns soft. Don’t add water at all.

* For the rava fry, slice brinjals very thinly. It helps them cook easily and also turns crispy.

* You can make this with any variety of brinjals.

Peanut Ubbatti | whole wheat jaggery holige

Being homebound since many months now, I truly realize the value of our home town visits which were atleast twice a year. Along with that, I really miss the fun meeting my loved ones, the non stop chatter, going to temples, shopping with my cousin and also (importantly) indulging in sweets without a care in the world. 😅😍

I have been an ardent devotee of sweets since a child and my dad knowing that, spoils me to the core when I visit them. My favourite sweets are brought and stored before I come, all awaiting me to devour them 😬. One among them are Kayi holiges or coconut filled sweet Ubbattis which are a speciality of Udupi Shree Venkateshwara sweets near the famous and our dearest Shri Krishna’s temple.

So, when I miss those holiges, I make chapati dough, fill it with coconut and jaggery to make my own “jugad” kind of holiges 😀 which tastes yummy too. As I started making them, I realized I could make different varieties of it and these peanut Ubbattis came into being. It tasted so good that we make it regularly.

So glad to share this recipe. Hope you all try it for Diwali. It’s as easy as making parathas and hope my step by step recipe along with notes will help you all. Happy and healthy cooking.

Also, wishing my readers a very happy Diwali. May the festival of lights brighten your lives and fill it with happiness. ❤️

RECIPE:

Ingredients: { Makes 5 Ubbattis }

For the outer dough:

2 Cups Wheat flour/ Atta { I use Pillsbury brand }

About 3/4 Cup Water {to knead the dough}

1/4 tsp Turmeric powder or Haldi

Salt to taste

For the inner filling:

1 Cup Peanuts { skin removed }

1/2 Cup Jaggery

2 Tbsp Water

1/4 tsp Cardamom powder

To roll the Ubbatti: Dry wheat flour as needed

Ghee to cook the Ubbatti

Step by step recipe:

1. Add wheat flour, turmeric powder and salt in a bowl. Add water and knead to a soft dough. It took me about 3/4 Cup of water for 2 Cups of flour. Might vary as per your brand. The dough should be soft and smooth. Keep aside.

2. Now take the skinned peanuts in a mixer.

3. Powder it by pulsing it every two rounds. Don’t run the mixer continually as peanuts can leave oil. Just pulse for 4 to 5 times and it will turn into fine powder. If tiny bits of peanuts remain, it’s okay as it gives nice bite to the Ubbatti.

4. Now add jaggery along with water in a pan. Allow jaggery to melt and come to a boil. No need to make it into syrup.

5. Now add the peanut powder and mix once. Switch off the flame after mixing once or the mixture will harden.

6. Transfer it into a plate immediately. Allow it to cool slightly. Don’t cool it completely as it will turn hard. When it is warm, make small balls of it as shown. Also make balls of same size as filling from the wheat dough.

Note: It is important to make both inner and outer balls of equal size so that the Ubbatti turns perfect.

7. Now keep a chapati tawa to heat on the flame. Take a wheat ball and dip in dry wheat flour. Roll to a small Puri (small circle as shown). Keep the inner ball of filling inside.

8. Now take the sides of the wheat dough and cover it over the filling sealing it completely.

9. Roll it using little dry wheat flour to as thin and evenly as possible.

10. Place this over the heated tawa and cook till bubbles appear over the surface. Add ghee over it.

11. Flip and cook for about half a minute adding ghee over that side too.

12. Remove and repeat the same with the rest of the dough.

Notes:

* The water quantity while making the wheat dough can vary with your brand. Just make into a soft and smooth dough. Keep for rest for about 30 mins if you have time. Else it’s fine.

* We get readymade skinned peanuts here and I use that. If you have regular ones, you might need to roast it on low flame, cool it and remove the skin.

* While powdering the peanuts, be careful to not grind continually as it may leave oil. Just pulse and powder it. Even if little bits of peanuts remain, it’s fine. Adds a good crunch to the Ubbattis.

* Don’t make jaggery syrup. Just melt it and bring to a boil.

* Switch off the flame immediately after adding and mixing the peanuts. Else it may turn hard. Also, don’t keep the mixture to cool for long. Make balls when the mixture is still warm.

* Make both the inner and outer dough balls of equal size. Else the Ubbattis may not taste as good or might become like parathas. Making both balls of equal size ensures the outer layer is thin and we get good flavour of the filling.

* As these Ubbattis are kept at room temperature, they turn crisp on the outside but soft on the inside. That’s exactly how we love it. If you love soft Ubbattis, consume them immediately after making it.

* Since it is easy to make, I make it fresh each time. The measurements I have mentioned above yields 5 Ubbattis which are sufficient for us to last a day.

* Also, with the above measurements, I get two balls of wheat dough leftover ie it makes 7 wheat balls. I make chapati with it.