Tag Archives: Tomato

Guacamole Wrap | Avocado dip/ spread

Click on the picture to save the recipe on Pinterest

My husband’s company bus takes us to three of the oldest (and everyone’s favorite) malls in Qatar every Friday, alternating between City center, Villagio and Lulu. Although we only go sometimes due to husband’s busy shift work, kids absolutely love going to Villagio and City center as they both have huge play places.

If you ask me, I love Villagio just to look around people enjoying the boat rides inside the mall, few others posing for pictures and kids running around happily looking at the boats. ❤️ Food and shopping options are better at City center mall but Villagio does have Asha’s restaurant by Asha Bhonsle ma’am for great Indian vegetarian food.

Recently when we went to Villagio, I had already made dinner at home. So we were looking for light snacks there. That’s when I saw this guacamole wrap at Tea Time while waiting in their long queue for Karak tea ( I love love Karak 😍).

After tasting the wrap, I felt I could make it even healthier at home with our regular chapati. Few attempts later, I can now say, the guacamole wrap that I make tastes really super delicious.

To my luck, both Kenyan and South African Avocados are getting very cheap here and so in our weekly grocery, Avocadoes are a regular now. Kids enjoy its milkshake and love the wrap as well. For me too, it’s a filling, healthy snack before I go for my evening walk.

So this is how I make the Guacamole wrap and hope you all loved reading my short story. 😍 Do try it too when you get Avocadoes. Happy and healthy cooking ❤️

RECIPE:

Ingredients: {Makes about 4 wraps}

For the Guacamole:

2 ripe, soft Avocadoes

Juice of half a large lemon or to taste

1 small sized Onion

1 small sized Tomato

2 to 3 Green chillies

2 Garlic, peeled and finely chopped

3 Tbsp finely chopped Coriander leaves

Salt to taste

For the Wrap:

One chapati/ roti for each wrap

Step by step recipe:

1. Chop the stem part of the Avocadoes. I used Kenyan Avocadoes which are dark brown or black in colour.

2. Now it’s easy to peel off the skin like this.
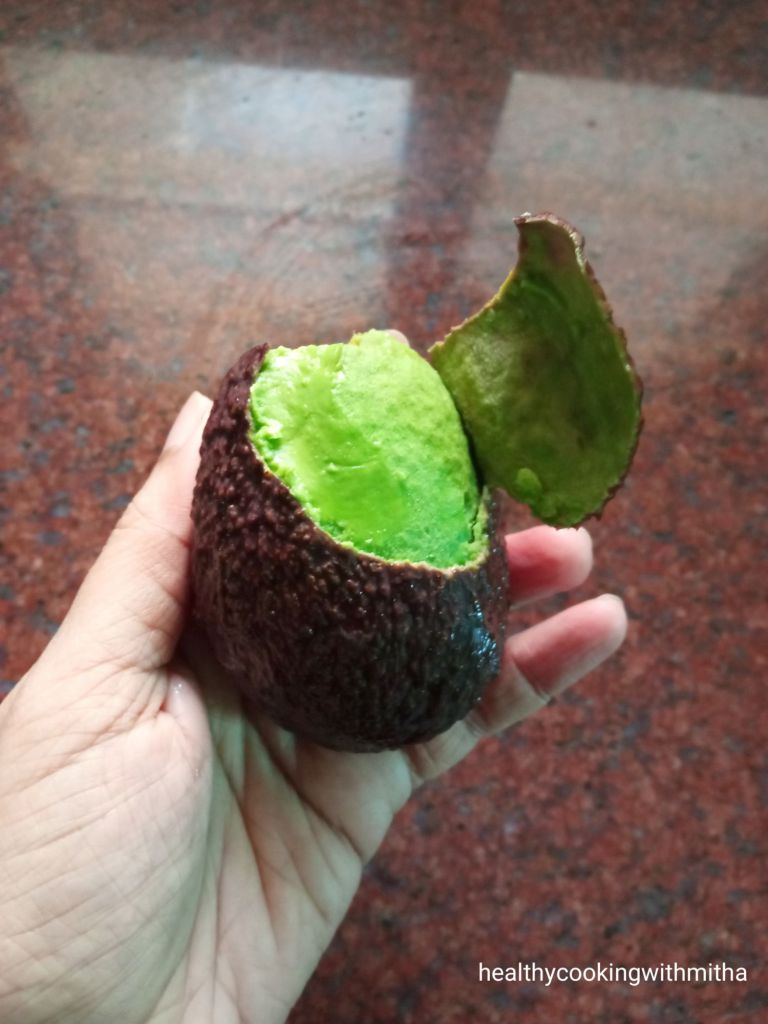
3. Add to a bowl.
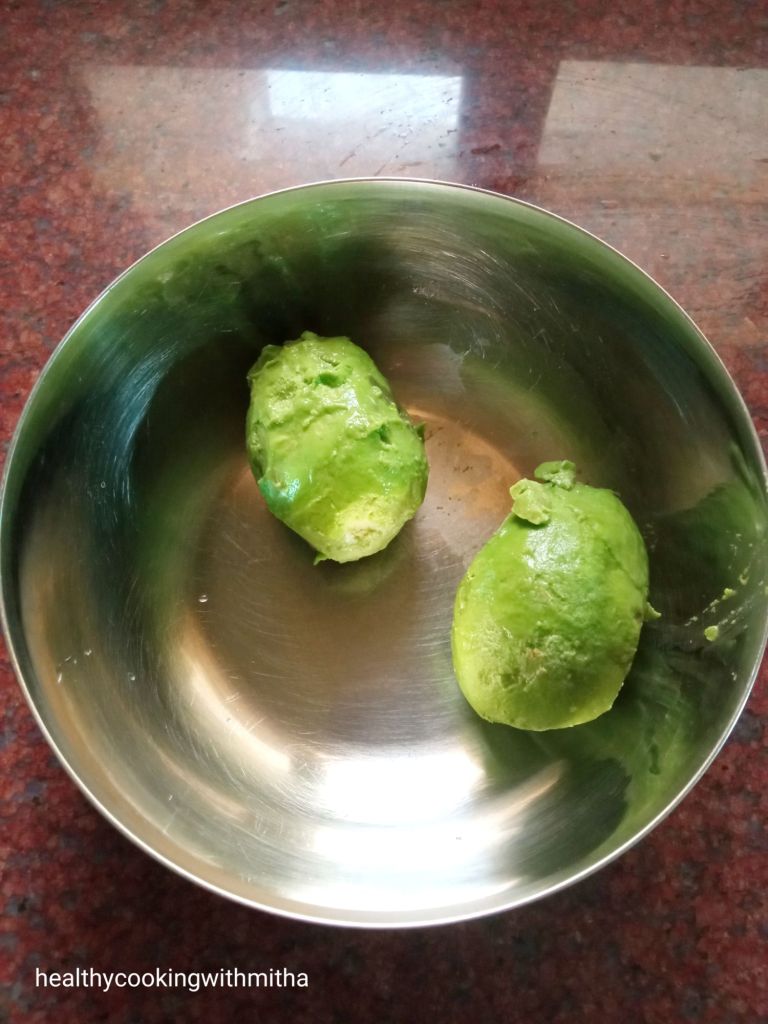
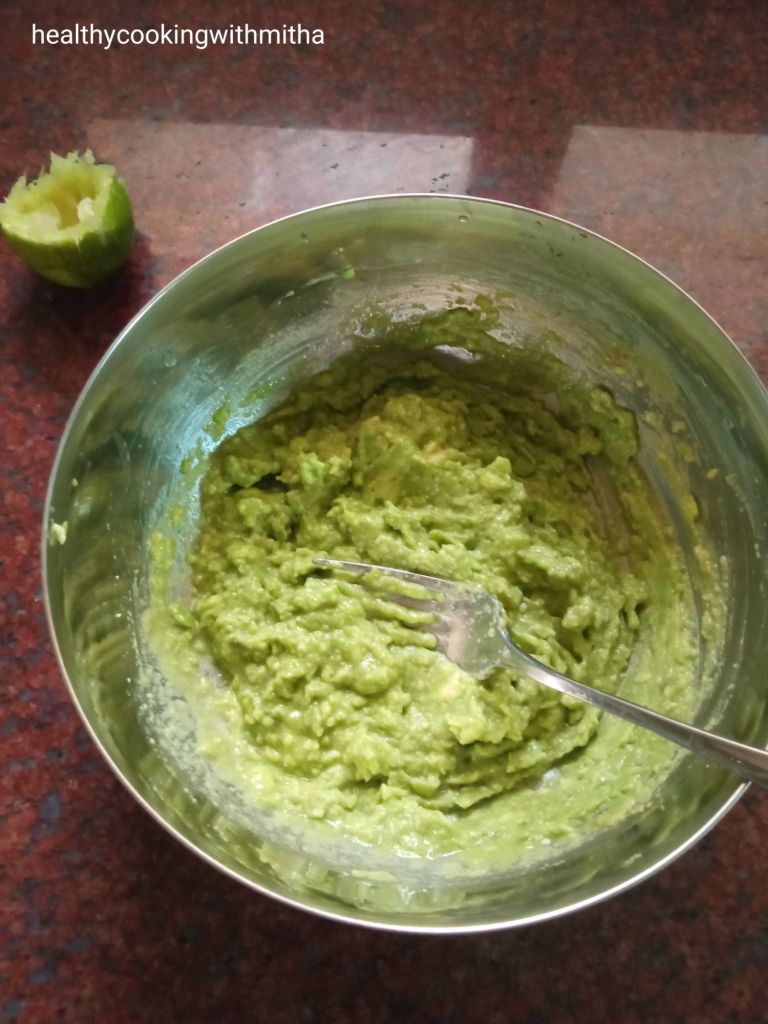
4. Remove the seed (one each) and mash both the Avocadoes using a fork till they are smooth in texture.

5. Add lemon juice and salt. Mix well. At this point, add lemon juice little by little, while tasting. You can also add more later. It takes me half a large green lime for two avocadoes.
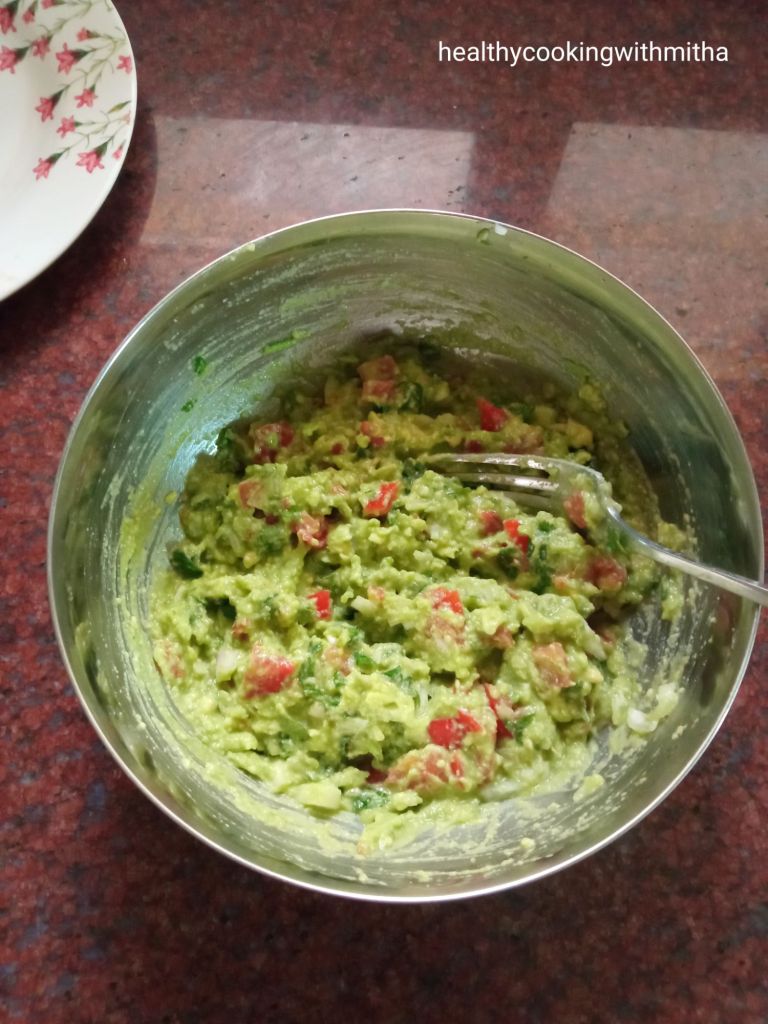
6. Now add all the other ingredients like onion, tomato, green chillies, garlic and coriander leaves.

7. Mix everything and do a taste test for salt and lime. Guacamole is done! You can use it as a dip or as a spread.
8. For wrap, take a regular chapati. I make it triangular in shape so that it’s easy to hold the guacamole inside. Spread the guacamole evenly over the chapati as shown.

9. Roll to make the wrap.

10. Done!

Click on the picture to save the recipe on Pinterest

Notes:

* In Guacamole, as per me, lemon juice and garlic are the most important ingredients. When I ate the wrap at Tea Time, Villagio, I felt the taste was slightly bland as the lemon juice was less for me and they had not added garlic. In my first attempt too, I skipped garlic and I felt it was not as flavourful.

* So I checked many authentic Guacamole recipes and found garlic in all of them. So I too added it and how wonderful does it taste with garlic and a little extra lemon juice. 😍 However if you are not a sour taste lover, you can add lemon to your taste.

* Green chillies can be added to your taste as well.

* Kenyan Avocadoes are so soft in texture and easy to peel as well as compared to Green Avocadoes. If using green ones, look for ripe ones and scoop the pulp using a spoon instead of peeling the skin like I showed above.

* For chapati, just knead whole wheat flour, salt and water to make a firm, soft dough. Keep it to rest for atleast 30 mins. Roll and make chapatis adding ghee while flipping in the pan.

* You can also try:

Paneer Tikka Wrap

Click on the picture to save the recipe on Pinterest

Easy Tomato Curry | To eat with dosa, chapati and rice

Click on the picture to save the recipe on Pinterest

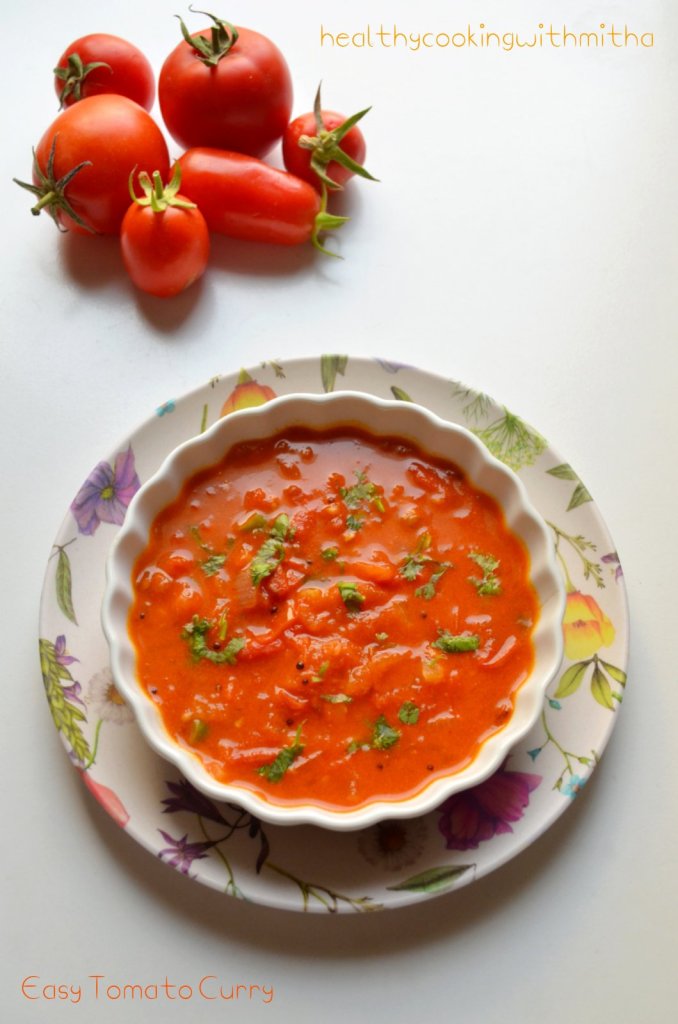
After homegrown methi leaves, one produce that has been growing abundantly in our garden is the gorgeous red tomato 🍅. It’s also one of my favorite as I love the flavour it brings in my chutneys and curries.

During off season, I use it only in North Indian gravies but now that they are available in abundance, this tomato curry has been my first choice to make always. I made it as an accompaniment with dosas as a change for breakfast and we loved it so much that now I make it regularly to eat with chapatis and rice too.

The quantity of tomatoes that grows in our garden make me so happy and I want to share it with all of you too. Homegrown love 😍 Look at the variation in size and colours as some are yet to ripe. They stay well at room temperature and the green ones will soon turn red sitting with other ripe tomatoes. It’s a treat to see and use them daily. ❤️

Hope you all try and love this curry with tomatoes too when they are in season. It’s a very simple recipe but tastes really yummy specially with ripe tomatoes. Happy and healthy cooking ❤️

RECIPE:

Ingredients:

6 to 8 medium sized Tomatoes

2 medium sized Onions

1 inch Ginger piece

3 Green chillies

A sprig of Curry leaves

1 Tbsp Coconut oil

1 tsp Mustard seeds

1 tsp Cumin seeds

1/4 tsp Turmeric powder

1 tsp Coriander powder

2 tsp Red chilli powder or to taste

Salt to taste

1/2 Cup Coconut milk ( I mix 2 Tbsp Coconut milk powder with 1/2 cup water)

3 to 4 Tbsp finely chopped Coriander leaves

Step by step recipe:

1. Heat oil in a pan and add mustard seeds. When it splutters, add cumin seeds, curry leaves, finely chopped green chillies and ginger.

2. Now add finely chopped onions and fry till it turns translucent.

3. Now add deseeded and roughly chopped tomatoes. Add salt and mix well.

4. Allow tomatoes to cook well. It will leave water and the mixture will be watery. Now add turmeric powder, coriander powder and red chilli powder.

5. Mix well and allow the mixture to come to a boil. Now add coconut milk and mix well.

6. Cook till tomatoes blend well and the mixture thickens ie for about 5 mins. Check for salt and other spice powders. Adjust and then remove from flame. Garnish with coriander leaves.

Click on the image to save the recipe on Pinterest

Notes:

* This curry tastes really delicious as an accomplishment with dosas, chapatis, parathas and rice.

* I add 6 to 8 tomatoes as I have plenty of homegrown tomatoes. You can also use 3 to 4 as per what you have.

* For satwik version, skip onions and add hing instead in the seasoning.

* You can also add rasam powder for a unique flavour. I keep alternating between powders to give different taste each time.

* I also add a dash of pepper powder sometimes. Tastes yum too.

* I use instant coconut milk powder to make coconut milk. You can use fresh coconut milk or even skip it completely. But coconut milk gives a nice thick texture and flavour to this curry.

* For other tomato dishes:

Ammas Tomato Chutney

Hotel style Tomato Chutney

Eggless Tomato Omelette

Tri colour Capsicum Salsa | Easy Capsicum salad/dip recipe

Click on the image to save the recipe on Pinterest

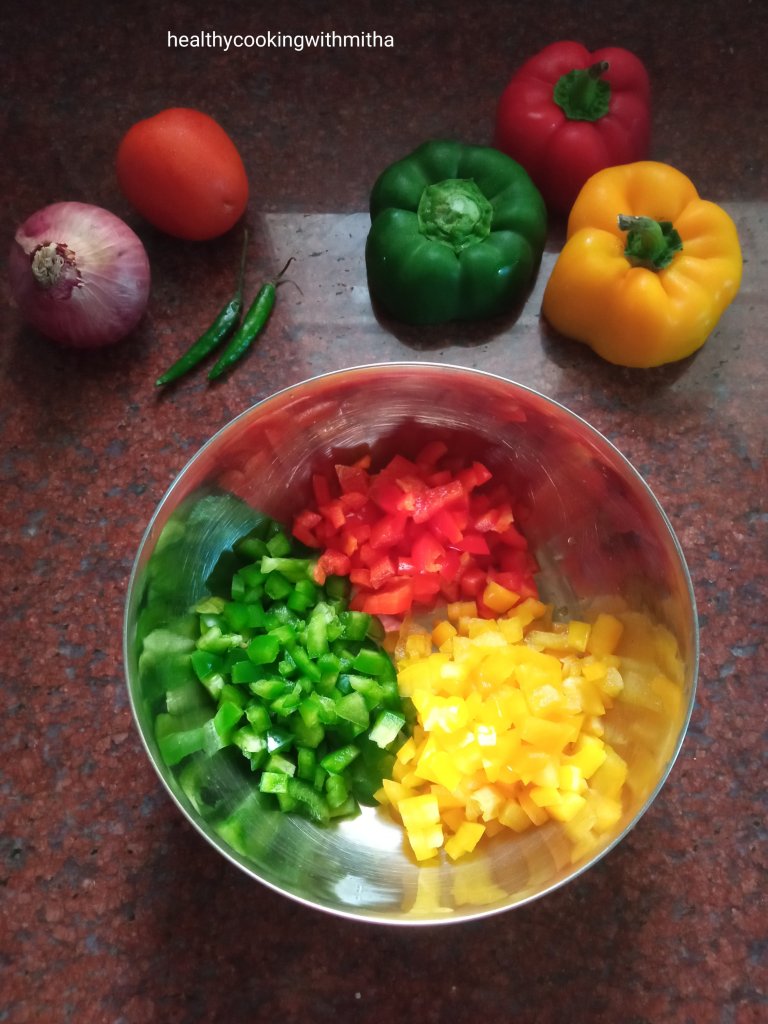
Tri colour Capsicums always attracted me when I went for grocery shopping but it used to be super expensive and I never felt like buying it. Recently Qatar has been growing a variety of veggies locally and hence we have been getting even expensive vegetables like Broccoli and coloured capsicums considerably cheaper. Also just see how fresh they are! 😍

So, whenever I get my hands on them, it’s either this salsa or fried rice. Both ways, it is consumed happily by my kids which is most important for me whenever I cook something. With salsa, I present it to them with nachos for evening snack and they munch it on happily. ❤️

Also, these capsicums are best when they are had raw with their flavours intact. Cooking them leads to make it soft and is not as fresh. So my preferable way to use these capsicums is by making this salsa which we have as an accompaniment with rice meals as well. Tastes so yum. ❤️

Hope you all try and love it too. Happy and healthy cooking ❤️

RECIPE:

Ingredients:

1/2 a medium sized Green Capsicum

1/2 a medium sized Yellow Capsicum

1/2 a medium sized Red Capsicum

1 medium sized Onion

1 medium sized Tomato

3 Green chillies

1/4 tsp Pepper powder

Salt to taste

Juice of 1 Indian lemon or half of large lemon

Finely chopped Coriander leaves, for garnish

Step by step recipe:

1. Finely chop the three capsicums and add to a mixing bowl.

2. Now add finely chopped Onion, tomatoes and green chillies to it.

3. Add finely chopped Coriander leaves, salt, pepper powder and lemon juice. Mix well. Taste and adjust the lemon juice and salt as needed.

4. Done! Enjoy as a salad or as a salsa with Nachos. ❤️

Click on the image to save the recipe on Pinterest

Notes:

* The above measurement serves 4. If you are making for more people, just use three whole capsicums and about two tomatoes and two onions.

* You can skip green chillies if making for small kids. I remove green chillies before giving to my kids.

* You can also add a dash of red chilli powder for more spice but we love this as it is.

* I also serve it as a side along with rice meals and the salad gives a nice, fresh crunch to the meal.

* The other salads that I make regularly:
Mixed Bean Salad

Carrot Kismuri

Moong dal Kosambari

Cabbage Kosambari

Mixed Vegetable Salad

Khamang Kakdi/ Cucumber salad

Barley Salad

Banana Stem Salad

Purple Cabbage Coleslaw

Easy Paneer Masala | Quick Paneer curry

Click on the image to save the recipe on Pinterest

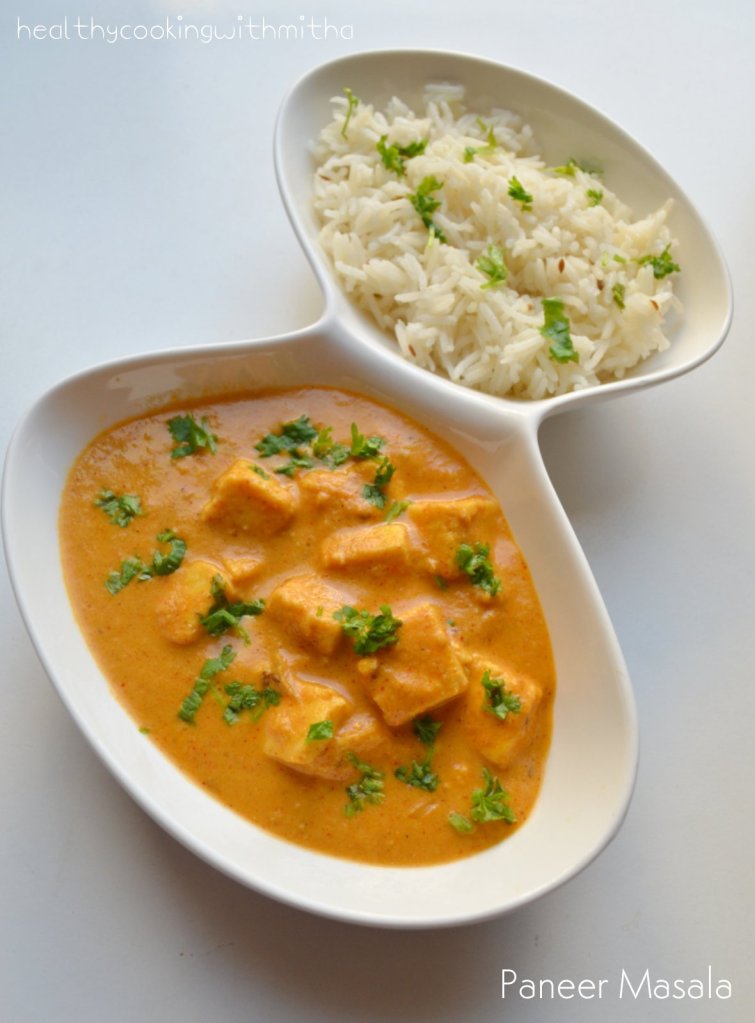
Paneer is our most favorite and I regularly make different paneer curries and kathi roll with it. But the most commonly made is this super easy and very tasty Paneer Masala which I made one day when I had 15 mins to cook before we went out. This quick fix curry was loved so much by my family that now, I mostly make Paneer only this way.

This along with jeera rice or chapatis makes a delicious meal which tastes better than even restaurant ones. I love how homemade food has a comfort of it’s own which can never be found in outside foods, no matter from which fancy restaurant.

Hope you all try and like this simple yet delicious curry too. Happy and healthy cooking! ❤️

RECIPE:

Ingredients:

300 grams Paneer cubes

To fry and make paste:

2 ripe medium sized Tomatoes

1 medium sized Onion

1 inch Ginger piece

About 10 to 12 Cashews

4 Cloves

2 Cardamom pods

1 Tsp Ghee

Other ingredients:

1/4 Cup Curd/ Yogurt

1 Tbsp Ghee

1 tsp Cumin seeds

1 Bay leaf

1/4 tsp Turmeric powder

1/2 tsp Amchoor powder

2 tsp Coriander powder

2 tsp Red chilli powder

2 tsp Garam Masala powder

A pinch of Sugar

Salt to taste

Finely chopped Coriander leaves for garnish

Step by step recipe:

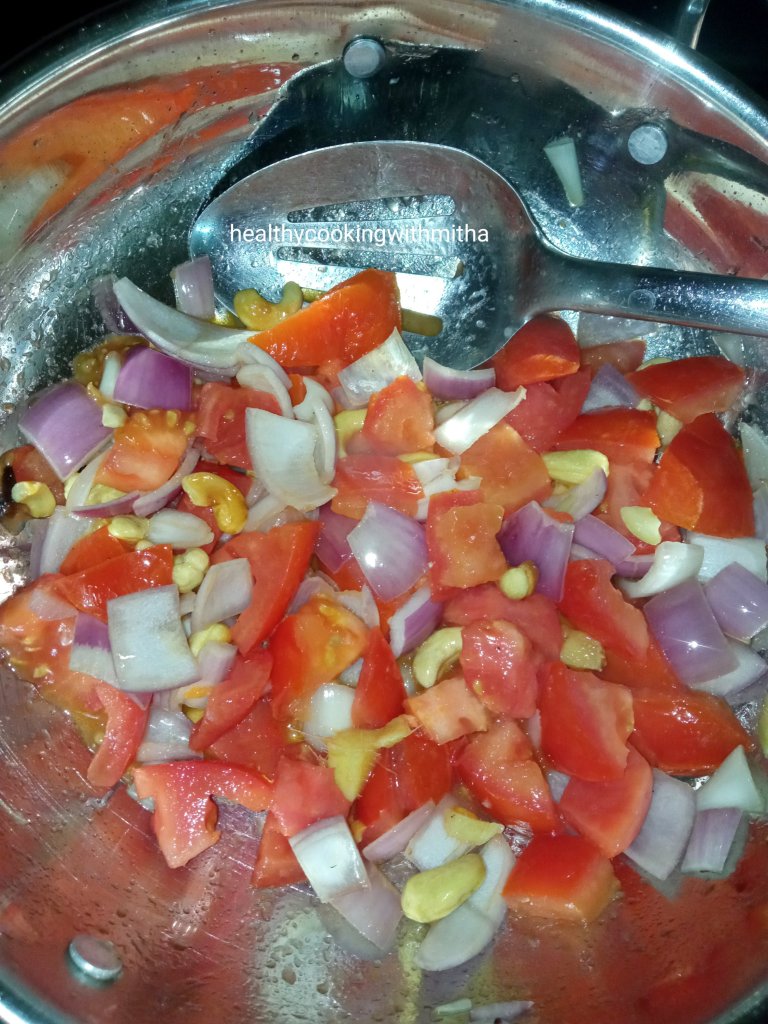
1. Heat 1 tsp Ghee in a pan. Add cloves and cardamom pods. Add Cashews and fry till brown. Now add roughly chopped ginger, onions and tomatoes.

2. Fry till the onions and tomatoes turn soft. Now allow it to cool.

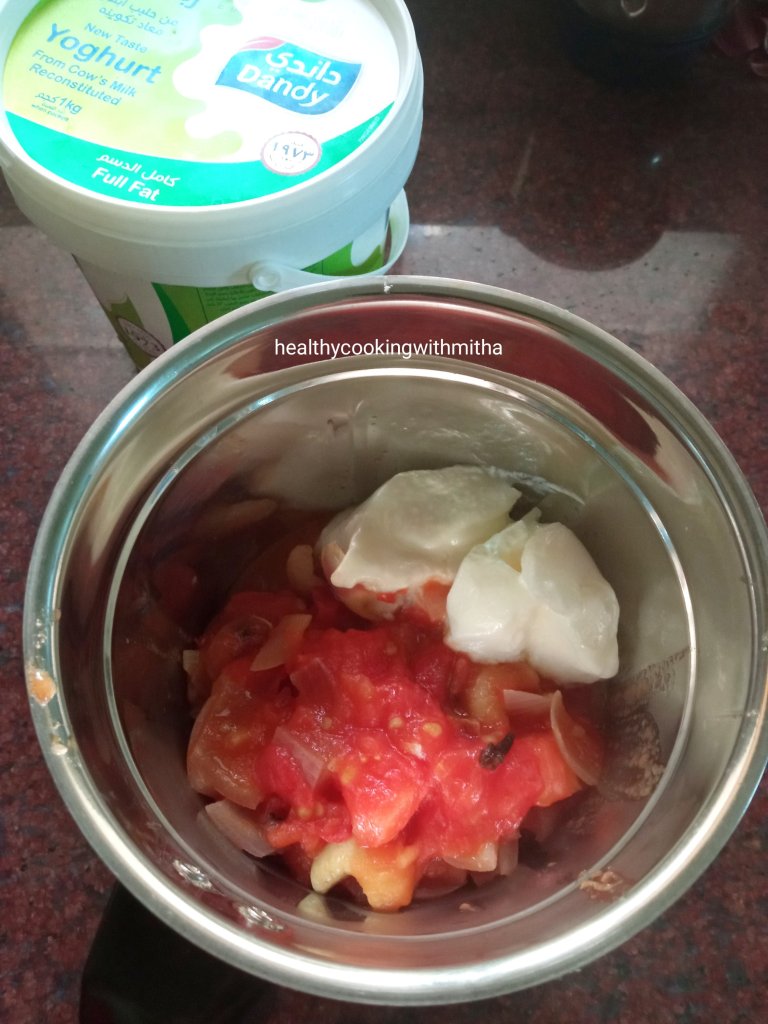
3. Now add this to a blender along with yogurt.

4. Blend to a smooth paste. Now heat Ghee in the same pan. Add cumin seeds and bay leaf. Fry till cumin seeds turn brown. Now add the ground paste.

5. Mix well for few minutes. Then add turmeric powder, Amchoor powder, coriander powder, red chilli powder, Garam masala powder, sugar and salt.

6. Mix well again continually for about 5 mins. Now add paneer cubes and cook on medium flame till paneer turns soft. Add water if needed to adjust consistency.

7. Remove from flame and garnish with finely chopped Coriander leaves.

Click on the image to save the recipe on Pinterest

Notes:

* I usually combine this with jeera rice or chapatis. For jeera rice, heat coconut oil and fry cumin seeds. Add rice, hot water and salt. Cook till rice turns soft. Garnish with coriander leaves.

* You can skip Amchoor powder if you don’t have. I add it since I have it. Yogurt and tomatoes are enough for the tangy flavour.

* A pinch of sugar enhances the overall flavour of the curry. So remember to add it.

* You can decrease the amount of cashews if you like a less thicker curry.

Other Paneer recipes that I make regularly:

Paneer Butter Masala | No Onion No Garlic

Dhaba Style Paneer

Restaurant style homemade Palak Paneer

Paneer Sukka

Vegetable Paneer Chilly

Paneer Hara Masala

Paneer Kathi roll

Soya Chunks Pulao | Easy Pulao recipe

Click on the image to save the recipe on Pinterest

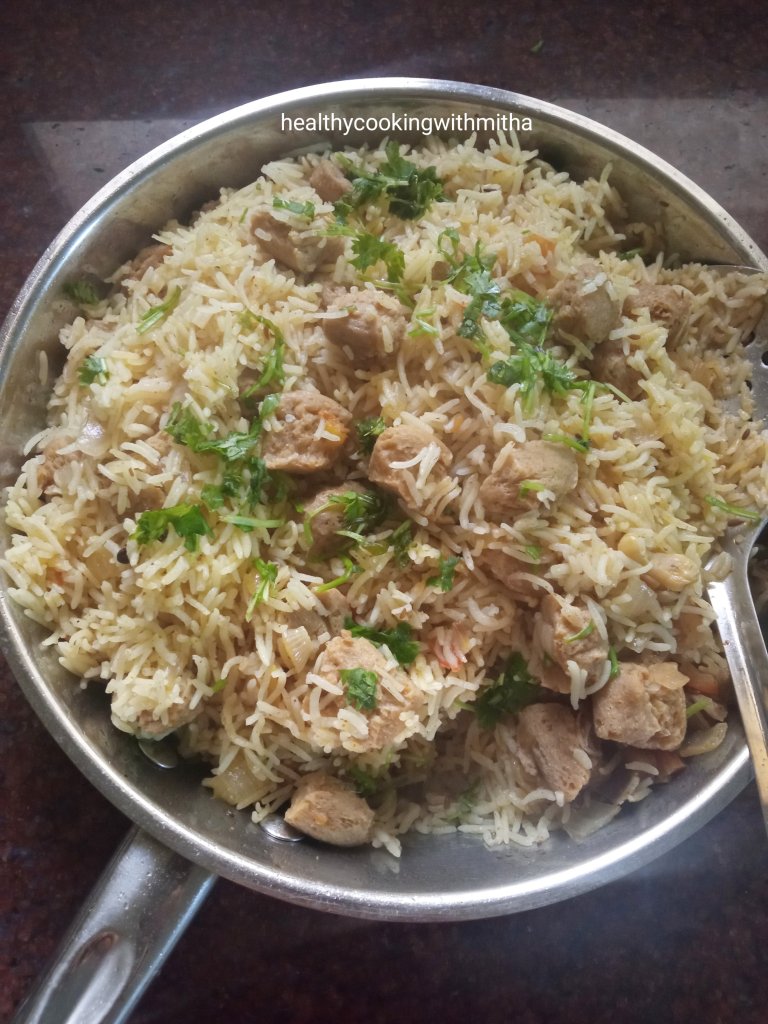
Qatar is hosting FIFA football tournament which starts in couple of days and will last a month. So the kids are having vacation till New year and both of them are so happy to get this break (from waking early and homeworks 😄). So to celebrate this holiday time, I wanted to make something special for my daughter who loves it when I cook her favorites, so made this Soya Chunks Pulao for lunch today to surprise her. ❤️

This Pulao is her all time favorite and she always enjoys extra helpings of it when I make it. I learnt this recipe from my husband’s aunt during my newly married days and this is a regular at my place since then, specially on husband’s lunch box days. With raita and a pickle on side, this is a healthy, delicious meal. ❤️

Also, before I forget, it’s a one pot, easy to make Pulao too with very simple ingredients. It’s simplicity is what makes it truly yummy. I have tried many soya chunks rice recipes but this is what we love the most. ❤️

Hope you all try and love it too. Happy and healthy cooking! ❤️

RECIPE:

Ingredients:

1 Cup = 240 ml

1.5 Cups Basmati rice

1 Cup Soya Chunks

1 medium sized Onion

1 medium sized Tomato

6 to 8 Cashews

2 tsp Cumin seeds/ Jeera

4 Cloves

2 pods of Cardamom

1 Bay leaf

1/2 tsp Turmeric powder

1 tsp Red chilli powder or to taste

2 tsp Garam masala powder

2 Tbsp Ghee

Salt to taste

4 Tbsp chopped Coriander leaves

Step by step recipe:

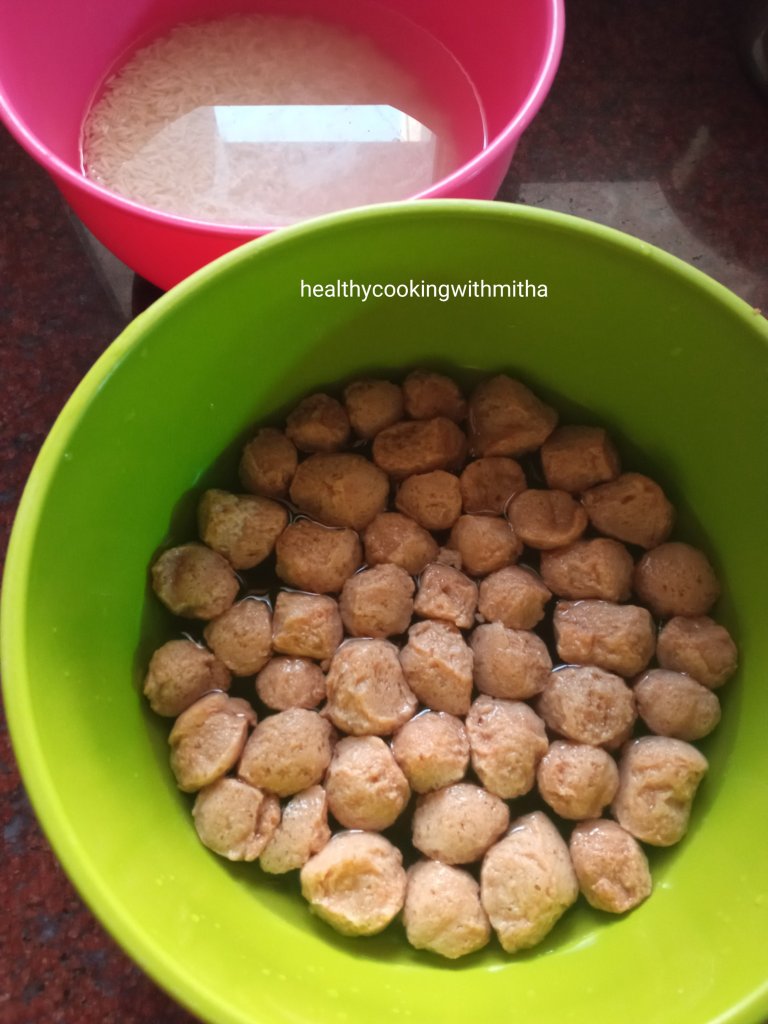
1. Soak Soya Chunks and rice separately in double the amount of water for about 20 mins. Soya Chunks will swell in size and become soft. Keep it aside.

2. Heat ghee in a pan, add cumin seeds, cloves, cardamom powder, bay leaf, cashews, onions and tomatoes in the same order. Fry till cashews turn slightly golden, onions and tomatoes cook well.

3. Now add tumeric powder, red chilli powder and garam masala powder. Fry for few seconds.

4. Squeeze the soya chunks out from the soaking water and add along with rice and salt to the pan. Also add about 2 Cups of water. Mix well.

5. Now cover and cook on medium flame till the rice cooks well, turning soft yet the grains remain separate. You might need little more water depending on the quality of rice and the cooking range you use. Once cooked well, remove from flame and add chopped coriander leaves.

6. Mix well. Serve with raita and pickle.

Click on the image to save the recipe on Pinterest

Notes:

* I use the ratio of 1 Cup Soya Chunks to 1.5 Cups rice which turns out perfectly for me.

* Do remember to soak both the soya chunks and rice separately for atleast 15 mins so that the soya chunks turn soft.

* You can add chopped ginger, garlic and green chillies too in the pulav but I skip since my daughter does not like it.

* For Garam Masala, I alternate between different masalas from Catch brand which I love very much. Currently I am using Catch Chana Masala which has a delicious flavour.

* To make Raita, just finely chop onion, tomato, cucumbers, coriander leaves. Add curd/ yogurt, rock salt, amchur powder, jeera powder, little water and mix well.

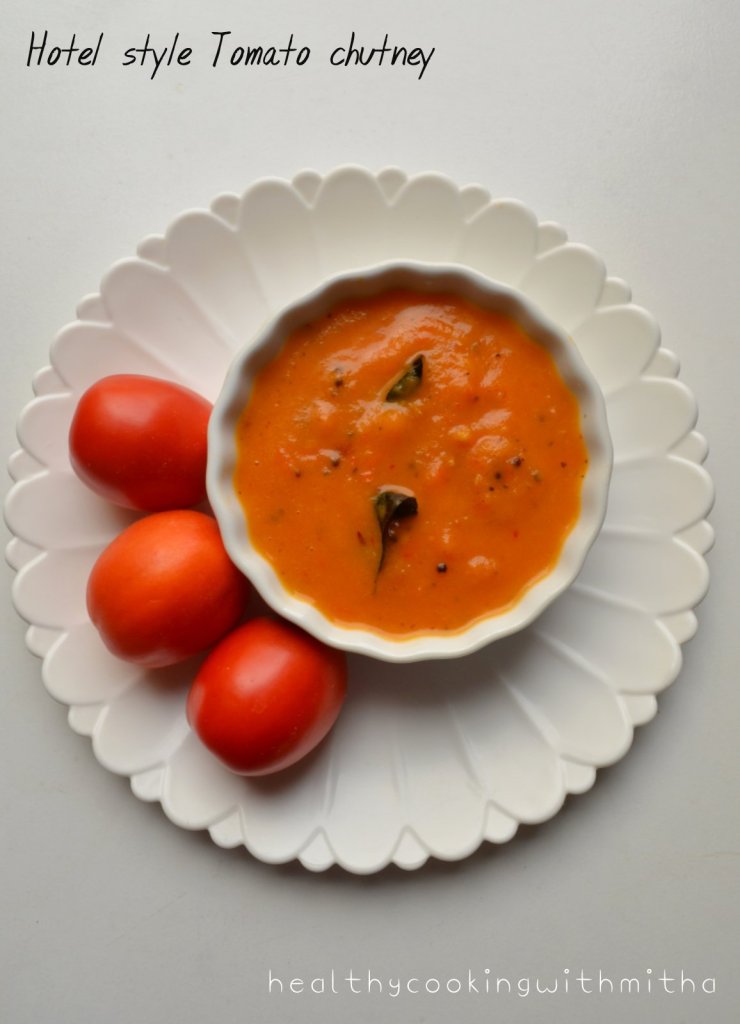
Hotel style Tomato Chutney

Click on the image to save the recipe on Pinterest

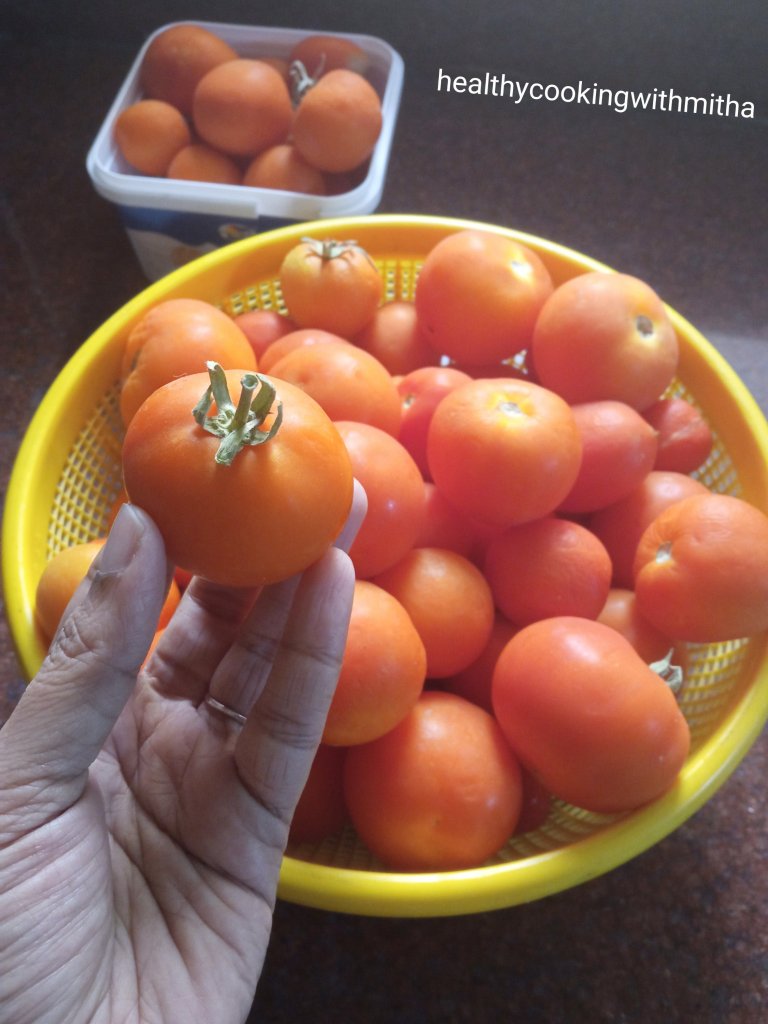
Both the kids just left for school and I take this (peaceful 😄) opportunity to write a recipe which I wanted to share since long time. In Qatar, during winters ie roughly from November to April, residents grow vegetables in their gardens. Main vegetable which almost everyone grows is Tomato. Even we have tomatoes in abundance every year which we enjoy till June due to it’s good shelf life.

Here are some of the beautiful tomatoes which grew in our’s and our neighbor’s garden who was kind enough to share with us. ❤️

And plenty of tomatoes means making my favorite, my Amma’s Tomato chutney. 😍 Apart from that, due to my daughter’s request, who wanted the hotel style Tomato Chutney which she enjoys at Aryaas restaurant here, I happened to try this recipe which came out exactly the same. Imagine my happiness!! ❤️

So after getting daughter approval as well, I knew this recipe deserved to be blogged and shared with all of you. Hope you all try and love this recipe too. Happy and healthy cooking! ❤️

RECIPE:

Ingredients:

About 4 to 6 medium sized Tomatoes (or as available, even 2 large tomatoes are fine)

2 medium sized Onions

1 inch Ginger piece

4 pods of Garlic

3 to 4 Red chillies

A sprig of Curry leaves

1/2 tsp Turmeric powder/ Haldi

1 Tbsp Coconut oil

Salt to taste

For seasoning:

2 tsp Coconut oil

1 tsp Mustard seeds

1 tsp Cumin seeds/ Jeera

A sprig of Curry leaves

A pinch of Asafoetida powder/ Hing

Step by step recipe:

1. Take all the ingredients for the chutney and keep ready. I have taken home grown tomatoes of different sizes depending on which of them were turning soft. Since I have a lot of tomatoes, I have taken plenty to make this chutney. You can use only two to three large ones depending on availability.

2. Heat oil in a pan, add curry leaves, chopped ginger, garlic and onions. Fry till onions turn translucent. Then add red chillies. Fry for few seconds.

3. Add roughly chopped tomatoes along with turmeric powder and salt. Cook till tomatoes turn soft. Don’t add water at all. Tomatoes will leave a lot of water as it cooks.

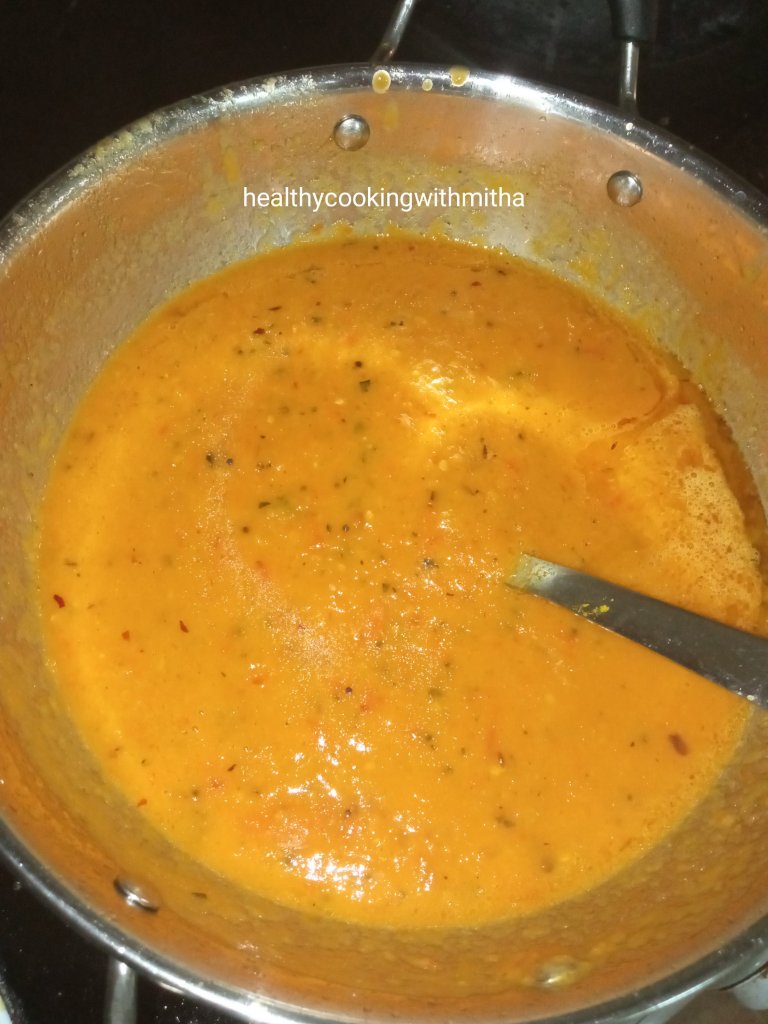
4. Once the tomatoes cook and turn soft, remove from the flame. Allow it to cool. Blend to a smooth paste.

5. Heat oil in the same pan, add mustard seeds and cumin seeds. When mustard seeds splutter, add curry leaves and hing.

6. Now add the blended paste along with little water if needed to bring it to desired consistency. Check for salt and also spice level, adding red chilli powder if needed.

7. Done! Serve with dosas, idlis and chapatis.

Click on the image to save the recipe on Pinterest

Notes:

* You can skip Onion and Garlic if you don’t consume or on Pooja days. The texture of tomatoes will still make a thick chutney.

* Ripe and bright red tomatoes will give a beautiful colour and flavour to the Chutney.

* Keeps well if refrigerated for couple of days. Mine usually gets over within that.

* I make a big batch specially during tomato season, hence you can see I have used plenty of them. You can use two to three tomatoes to make one batch of chutney.

* For variety of dosa recipes, you can check my Dosa Corner page.

* For Instant and Millet based dosas, you can check my No rice Dosa Compilation page.

* For all my Idli recipes, you can check my Variety Idli recipes Compilation page.

* For other chutney recipes, you can check Chutney recipes.

* I also make another variety of Tomato Chutney which in my Amma’s recipe and my favorite. You can check the recipe here – Amma’s Tomato Chutney.

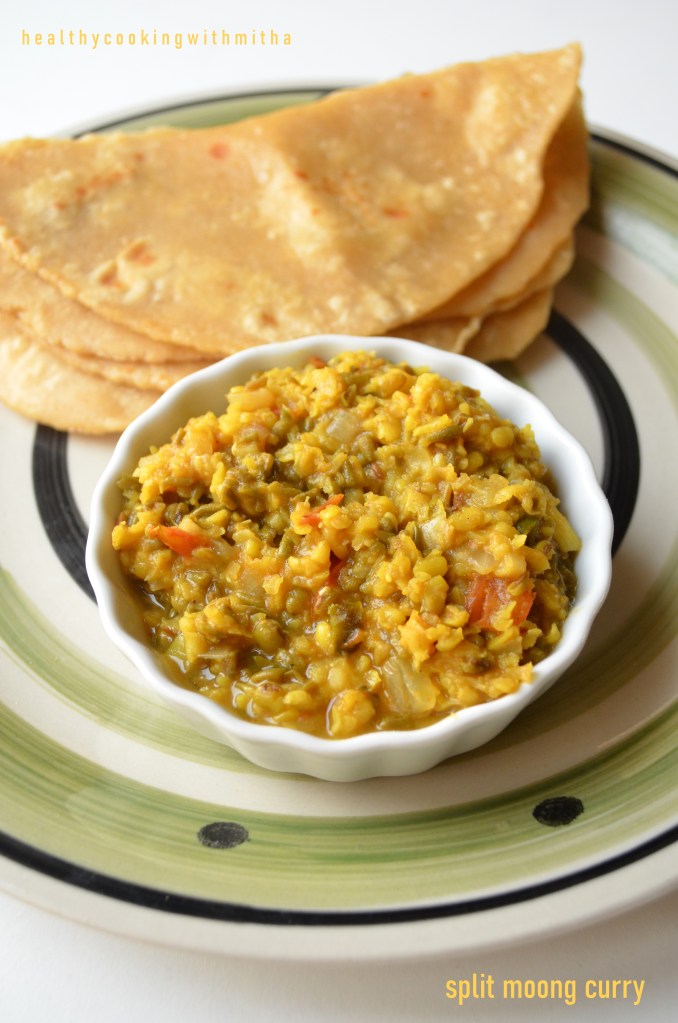
Split Moong curry | Easy side dish for chapatis

Click on the image to save the recipe on Pinterest.

Usually I decide the lunch menu the previous night itself. When I put my kids to sleep, before falling asleep myself, I quickly think of what vegetables are in the fridge, what pulses can I soak and what I could make such that it caters to the liking of all of them (Motherhood diaries and I am sure its a kahaani ghar ghar ki 😅).

But since few days, me and the kids have been doing a dancing session in the evening where we put on Bollywood songs, dance however we want to, without the care in the world. 😂 Even though I am a big zero at dancing 😁, my daughter teaches me few steps and I am learning atleast basic dancing from her. 😀 For me, it’s a form of workout and apart from my favorite walking, this dance session uplifts my mood so much. 😍

My favorite song to dance is “Tum hi ho bandhu” from cocktail movie in which this line is my favorite, “Jag mujhpe lagaye pabandi, main hoon hi nahi is duniya ki.” That’s what I have thought of myself too. Over the years, trying to fit everywhere, I now realize there’s nothing wrong in being different. We are all unique and that’s what makes us special. ❤️ Also, there is truly something magical when you dance for yourself with no one to see you (no adult, to be precise 😄), that I realize now, all thanks to my 6 year old daughter. ❤️

So after all that dancing, I fall asleep even before the kids now 😂 and that leaves me no time to think about the lunch menu. That’s when this instant split moong curry comes handy. When vegetables are less, when you feel like having whole moong curry but have forgotten to soak it or merely if you are in no mood to make something elaborate, this split moong curry becomes a best friend. 😍

The curry tastes really delicious with chapatis and rice equally, is very filling and healthy too. I make this regularly and is loved a lot by my family. Hope you all try and like it too. Happy and healthy cooking! ❤️

RECIPE:

Ingredients:

3/4 Cup split green moong dal (with skin)

1/4 Cup split yellow moong dal (skinned)

1 tsp Ghee + 1 tsp Oil

1 tsp Cumin seeds/ Jeera

3 to 4 Garlic cloves, finely chopped

1 inch Ginger, finely chopped

3 Green chillies, finely chopped

1 medium sized Onion, finely chopped

1 medium sized Tomato, finely chopped

1/4 tsp Turmeric powder

1/2 tsp Cumin powder

1 tsp Garam masala powder

1 tsp Red chilli powder

Salt to taste

1 tsp Lemon juice, for garnish

2 Tbsp Finely chopped Coriander leaves, for garnish

Step by step recipe:

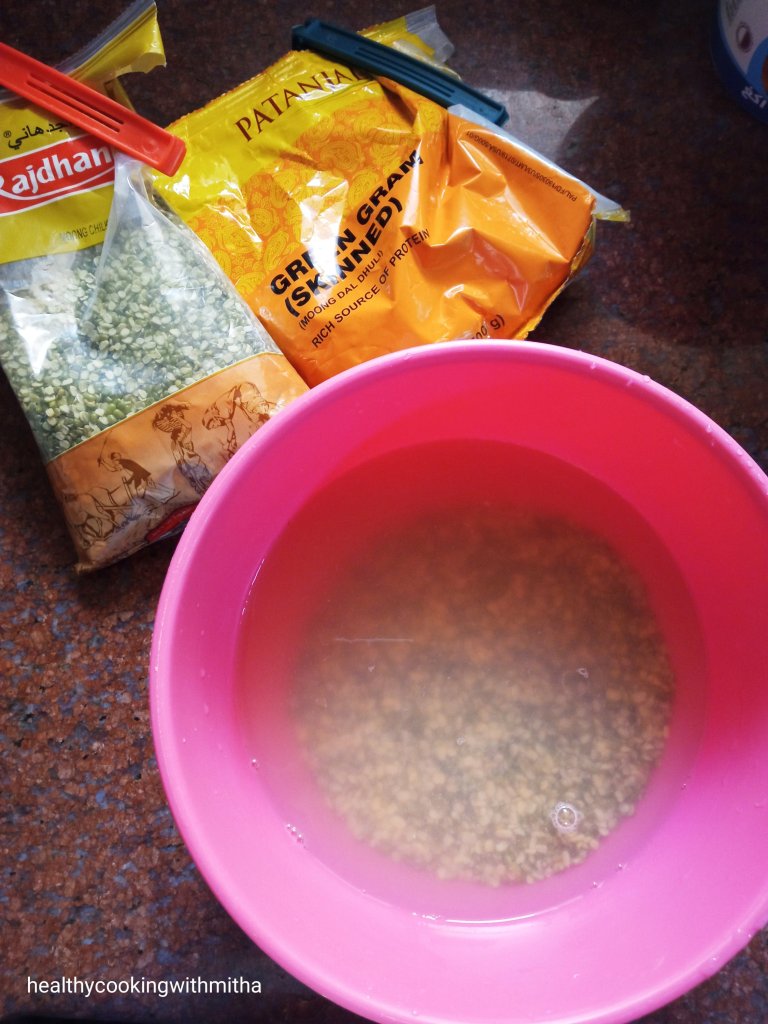
1. Take 3/4 Cup split green moong dal and 1/4 Cup split yellow Moong dal in a bowl. Wash twice and soak till use. (You can make the curry even without soaking but soaking atleast for 15 mins helps it to cook quickly.)

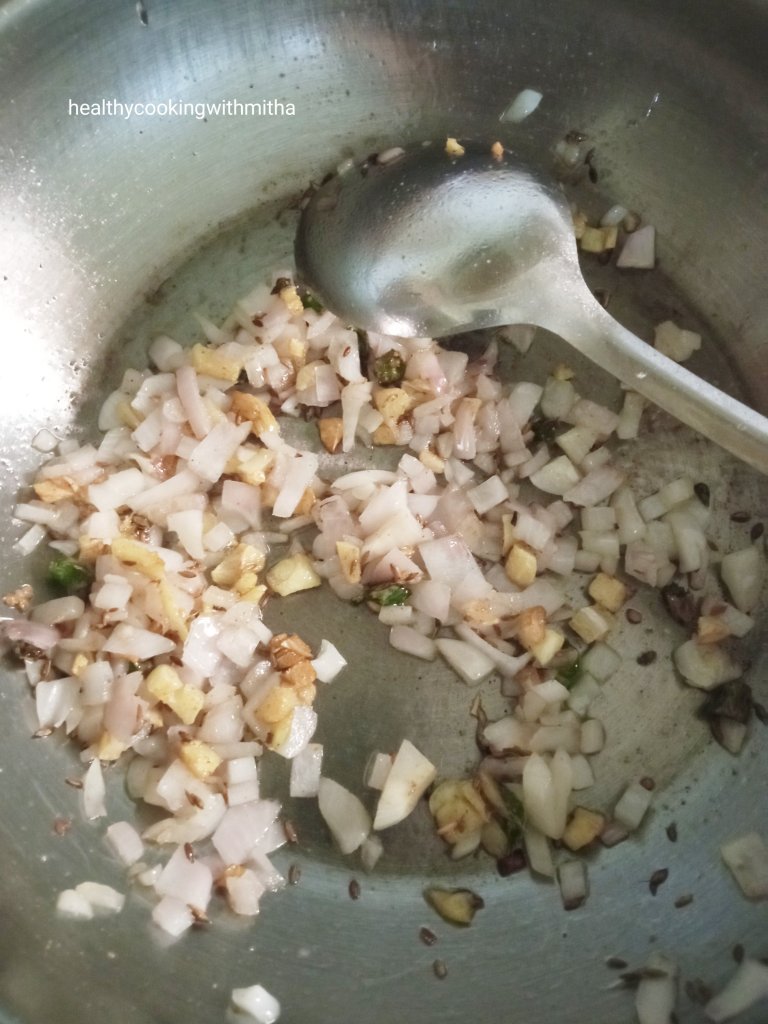
2. Take ghee + oil (or only oil) in a pan. Add cumin seeds and allow it to change colour. Add finely chopped garlic, ginger and green chillies. Fry till garlic turns brown in colour. Add onions and fry till onions turn translucent.

3. Now add tomatoes and fry till tomatoes turn mushy. Now add turmeric powder, cumin powder, Garam masala powder and red chilli powder.

4. Mix well frying for few seconds. Now drain water from the soaking dal and add to the pan.

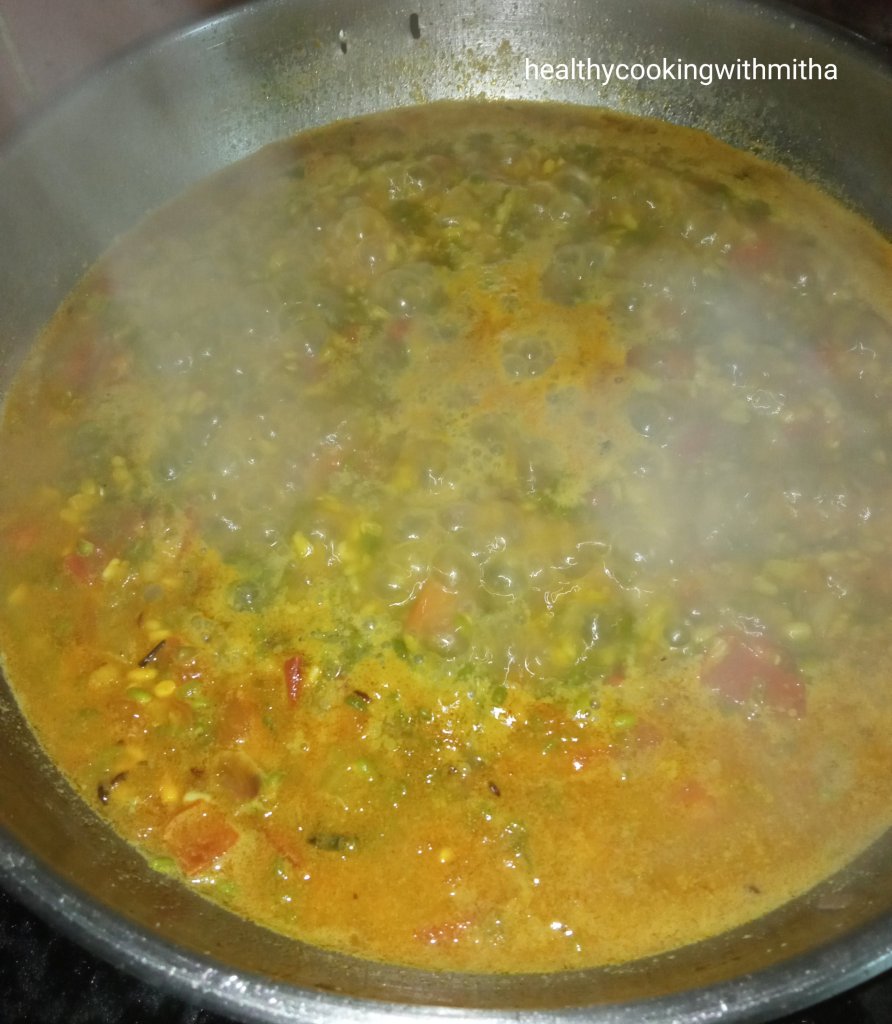
5. Add water and salt. Mix well. Bring to a boil.

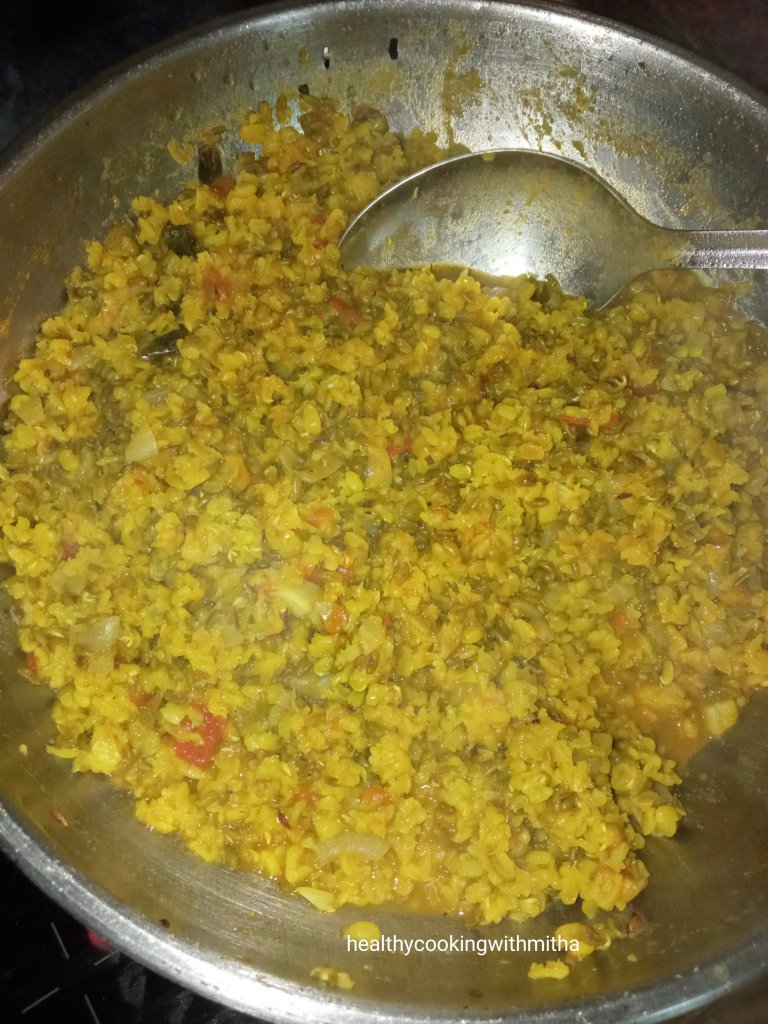
6. Cover and cook till the moong turns soft and water gets absorbed completely.

7. Now drizzle lemon juice and garnish with coriander leaves. Mix well. Serve hot with chapatis or rice.

Click on the image to save the recipe on Pinterest.

Notes:

* You can make the same curry with overnight ( or atleast for 6 hours) soak whole green gram or even sprouted green gram. I make with split ones when I forget to soak, yet feel like eating this curry.

* Combining both split green moong dal and split yellow moong dal makes it tastier.

* Skip onion and garlic for a satwik version of the curry. I do so on fasting days and it still tastes delicious.

* You can cook till the moong dal turn mushy or till it’s just done. Also you can make the curry dry or keep a little liquid in the gravy. Depends on your taste.

* I usually make this curry with chapatis but it tastes delicious with rice meals too.

* You can also try this:

# Amma’s style moong curry.

# Sprouted Moong Methi sukhe

# Muga Dali Usli

Mixed Vegetable Salad | Simple salad recipe

This salad recipe is so simple that I thought twice before adding on the blog wondering if anyone would actually even look at this recipe. But then I thought, even if one person benefits by it, then the blog is worth it. So here is sharing the easiest salad recipe ever and definitely very healthy too since it has so many vegetables in it. ❤️

Click on the image to save the recipe on Pinterest

My kids are huge fan of this salad and this whole bowl that you can see above is finished mostly by them only. They enjoy it as it is and then add puffed rice or Bhel to it, calling it “Charmbure Upkari” or Bhel Puri in Konkani. Whatever they call it, I am very happy that all these vegetables go into their tummy without a fuss. ❤️

When I was a child, my grandmother used to make a simple salad with just tomatoes, onions, green chillies and coriander leaves. After a while of making it, it would leave water due to salt in it and I used to love to slurp that water. 😍 Now my son is the same. The water left by the salad is reserved only for him and he enjoys drinking it. Like mother, like son. ❤️❤️

Today, I also want to share a glimpse of my mother’s window which is her view of the outside world. Suffering from muscular dystrophy in her legs, she’s mostly sitting on her bed and this window is her best friend which offers her beautiful views of mother nature, the gleaming sky, different varieties of birds and butterflies, also of cows grazing. This picture was clicked by Amma today. Isn’t it beautiful! ❤️

Also, here is a picture of a pigeon, one among the many who come to visit Amma. How sweet is that! 😍

During my vacations, I used to lie on this bed, chatting with Amma while looking outside at nature, enjoying the beautiful scenery. Major missing since close to two years now. But really happy that Amma has this window as her friend, which makes her feel close to nature, even from within her room. That’s so blissful! ❤️

On this note, here’s sharing the recipe with all of you. Hope you all try it too. Happy and healthy cooking! ❤️

RECIPE:

Ingredients:

2 English Cucumbers (about 2 cups chopped Cucumbers)

1 medium sized Carrot (1 Cup grated Carrot)

1/2 Cup grated Cabbage

1/4 Cup finely chopped Capsicum

3 Lettuce leaves, chopped into small pieces

1 medium sized Onion

1 medium sized Tomato

3 Tbsp finely chopped Coriander leaves

2 Indian lemon or to taste

1/4 tsp Cumin powder

Salt to taste (I use rock salt/ kaala namak)

Step by step recipe:

1. Get all the veggies for the salad ready. I love to keep everything set at first so that I don’t forget any of the Vegetable and also love how colourful it looks. 😍

2. First chop the cucumbers into small pieces and add to a large mixing bowl. Then peel and grate carrots, finely chop cabbage, capsicum, onion and tomato. Make small pieces of lettuce and add to the bowl too.

3. Now add lemon juice along with salt, cumin powder and coriander leaves. Mix well and serve.

Click on the image to save the recipe on Pinterest

Notes:

* If using Indian cucumbers, it will need peeling and removing the core. Since I used English Cucumbers, I do not peel it.

* You can skip any Vegetable in this if you don’t have. I add as per what I have available.

* You can also add green chillies or pepper powder. I skip both as I make for my small kids.

* This salad acts a good base to make Mixed Vegetable sandwiches. Just take little of this salad and mix either hung Curd or cream cheese along with little tomato ketchup. Mix well and spread between bread slices. Toast on a pan and delicious sandwiches are ready.

* Also you can use this salad to make Mixed Vegetable Bhel Puri. Just take a little of this salad and mix in red chilli powder to taste along with little curd, puffed rice/ Bhel and Bhujiya/ Sev. Add Date Tamarind chutney too if you have.

* These are the other Salads that I make regularly:

# Carrot Kismuri

# Moong dal Kosambari

# Cabbage Kosambari

# Khamang Kakdi

# Mixed Bean Salad

Click on the image to save the recipe on Pinterest

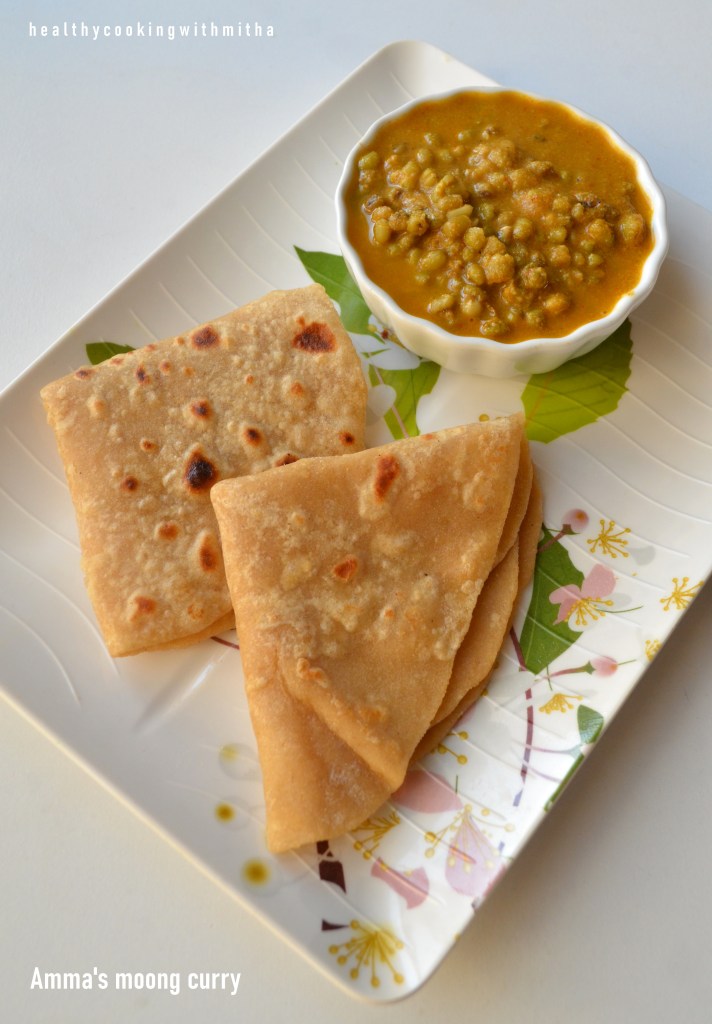
Amma’s Moong curry (with freshly ground masala)

All of us have a special kind of liking towards our mother’s cooking and I am sure you all will agree that no matter which Masterchef cooks for us, our Amma’s food is the best. Why not, as she makes everything with a secret ingredient in it – Love. ❤️

My Amma too used to cook so well and the flavours of all her dishes are still in my taste buds. This moong curry was one among them and I used to take it with puris in my lunch box during my school/ college days. My friends used to love it too and I used to take extra boxes of it for them as well. The precious memory of those days is forever etched in my heart and I remember it each time I make this curry. ❤️

Now Amma can’t cook like before as she suffers from muscular dystrophy in her legs. Although she’s strong most of the days and remains happily engaged all day, there are times when she falls into self doubting sadness and I have to convince her my best that she is still very much loved and an important part of our lives. Right now, she’s going through a difficult phase and this post of mine is to cheer her up in my little way, by adding her recipe on my blog.

Amma, this is for you. ❤️ I am coming in few months to make this curry for you and you have to tell me if it tastes as good as yours or not. 😍 Loads of love to you Amma. 😘 Please be happy always as that is what makes me happy too. ❤️ Sharing some words for you which I found as best to describe our love for each other. Hope it cheers you up. 😍

Now to Amma’s recipe. Hope you all try her way of moong curry too. Tastes amazing with puris, chapatis or even with rice. Happy and healthy cooking!

RECIPE:

Ingredients:

1 Cup dried whole green gram/ whole moong

1 Tbsp Oil

2 tsp Red chilli powder or to taste

Salt to taste

For the ground paste:

1/4 Cup Coconut (freshly grated or desiccated)

6 to 8 sprigs of Coriander leaves

1/2 a large Tomato

1 small sized Onion

2 Cloves

1 Cardamom

1 small piece of star anise

1/2 tsp Cumin seeds or Jeera

1/4 tsp Turmeric powder

Step by step recipe:

1. Soak whole moong in atleast thrice the amount of water overnight or for 6 to 8 hours. When soaked, drain the water. Add fresh water enough to soak it in a pressure cooker and cook until soft. Takes 3 to 4 whistles on high in my electric stove top. Might vary depending on your cooking range.

2. Add ingredients to grind in a mixer.

3. Grind adding about 1/4 Cup water or as needed to a smooth paste. Now heat oil in a pan and add the paste. Also add red chilli powder and cook till the raw smell goes away. (About 5 mins and this paste splatters. So be careful and mix continually.)

4. Now add the cooked moong and salt. Bring it to boil and cook for 5 to 8 mins. Adjust consistency of the gravy.

5. Serve hot with Puris, Chapatis or rice meals.

Notes:

* The gravy thickens when kept at room temperature as moong absorbs a lot of water. So if serving later, add water that time to adjust gravy consistency.

* Star anise and coriander leaves make this masala very aromatic. So don’t skip it.

* The masala splatters while cooking. So be careful while sauteing.

* I also sprout moong and make this same curry.

* You can also check my mother’s other three recipes –

# Amma’s Carrot Pulao

# Amma’s Tomato Chutney

# Amma’s Alu Paratha

Paneer Butter Masala | No Onion No Garlic easy recipe | Ready within 20 mins

Ideally I should be sleeping now as my kids have finally slept after chattering and more chattering (just like me 😁) but I decided to finish writing this (blog baby calls ❤️). Had planned to give it a break, actually fully from social media as I am someone who needs quiet time to focus inwards (the other side of me 😄) but that went for a toss as I got many beautiful feedbacks from my near and dear ones. So I had to post it and hence was active on my Facebook page (perfect example of how life never goes as per my plans 😬).

But I did listen to a lot of songs on repeat from Sanam and Maadhyam bands (my latest favourites ❤️❤️). The meaningful lyrics, combined with the singers’ soulful voices soothes me so much that I wonder what my life would have been without music. It’s as important as air and water for me (I know I am going overboard but that’s the truth 😁). Don’t know if anyone can understand this but once you fall in love with music, you just fall crazily and there’s no going back. 🎶❤️

That’s why I guess it’s called “falling” in love.. We slowly fall, without our control and by the time we know it, we have already fallen quite deeply into it.. ❤️ (sometimes there’s no way out and you don’t want to come out either 😍) – proof of my craziness 😅

Now coming back to today’s post before I lose my focus in my chatter (night time gives me ample time to think and write 😄), this combination is what I regularly make especially on days when we are fasting and don’t consume onion/garlic. The paneer butter masala comes out so delicious that you can never say it is a Satvik one. I make it only this way now and it can really beat restaurant ones anyday for sure (not exaggerating. Try it to know the magic 😍)

Hope you all try this and love it. Happy and healthy cooking! ❤️

RECIPE:

Ingredients:

200 grams Paneer cubes

1 Tbsp Butter or Ghee

1 Bay leaf

1/4 tsp Turmeric powder

1/2 tsp Coriander powder

1/2 tsp Cumin powder

1 tsp Red chilli powder or to taste

1 tsp Shahi Paneer Masala (I use catch brand) *substitute with any Garam masala powder of your choice

Salt to taste

2 Tbsp Milk

3 Tbsp Coriander leaves to garnish, finely chopped

To grind to paste:

2 to 3 medium sized Ripe Tomatoes

1 inch Ginger piece

2 Cloves

1 Cardamom

Step by step recipe:

1. Grind tomatoes, ginger, cloves and cardamom with about 1/4 Cup water to a smooth paste. Heat butter in a pan and add bay leaf along with the ground paste.

2. Allow it to cook, sauteing in between till the mixture turns thick (takes about 10 mins) and leaves the sides of the pan. Now add all the masala powders and salt.

3. Mix well. Now add milk and bring to a boil. Also add paneer cubes and cook for about 5 mins till paneer turns soft.

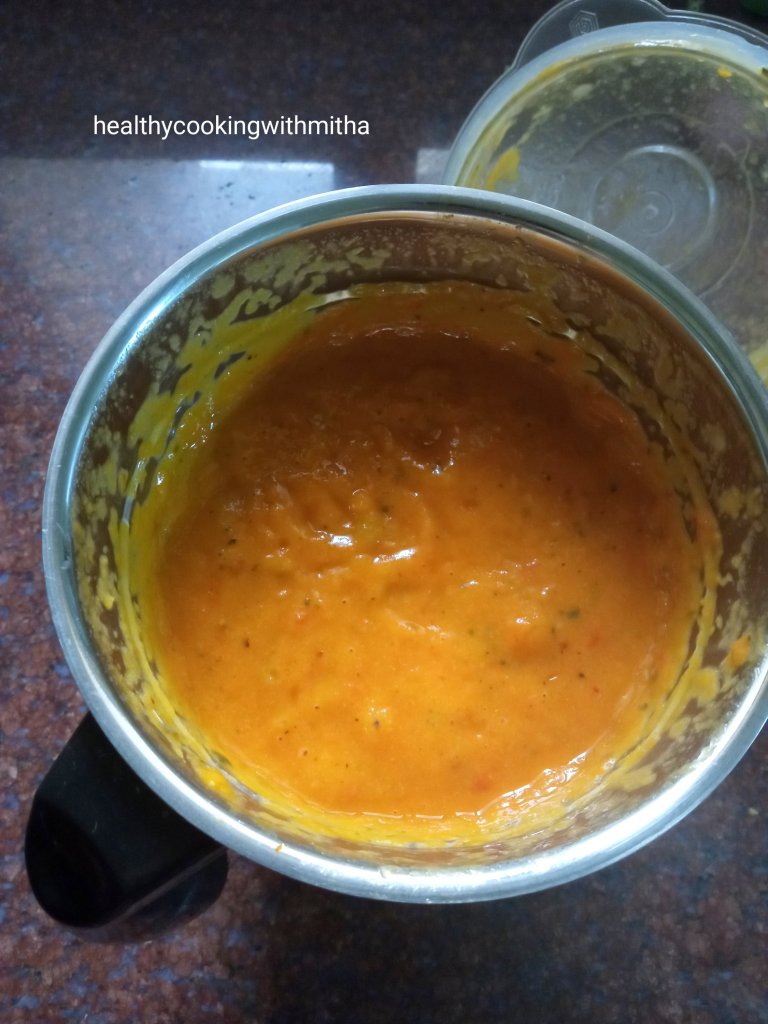
The colour looks orangy due to my kitchen lights and my mobile camera clarity. It comes out as shown in the main picture which was captured in daylight.

4. Remove from flame and garnish with coriander leaves. Mix well. Serve with rotis, rice or pulav.

Notes:

* I serve this with Peas Pulav. For peas pulav, heat 1 Tbsp ghee in a pan. Add bay leaf. Add washed and drained 1 Cup Rice along with about 1/2 Cup frozen peas and salt. Add water and cook till the rice turns soft yet firm. Amount of water depends on the variety of your rice. Garnish with coriander leaves.

* Please use ripe and bright red tomatoes for best results as it really makes a difference in the flavour. You can increase the number of tomatoes to 3 if you want to make more of the gravy.

* Cooking the ground paste very well till the rawness completely goes away is the most important step in this recipe.

* You can also add 1 Tbsp Tomato ketchup to the curry along with the masala powders if you are not particular about “no onion no garlic”. I add when we are not fasting and it adds a wonderful flavour to the curry. ( Some brands of ketchup contains garlic paste.)

* I use Catch Shahi Paneer Masala to make this curry as the flavours are great and it does not contain garlic or onion powders. You can use any powder of your choice though.

* Milk can be substituted with cream for a richer version but add cream after cooking paneer and don’t cook much after adding it.