Tag Archives: Instant

Dudde Upkari | Konkani style Pumpkin stir fry

Click on the picture to save the recipe on Pinterest

I have been sharing many Konkani recipes on the blog which have been loved by all of you. So nowadays when I cook something from our amchi cuisine which is loved a lot by us, I immediately take pictures to share on the blog, even if it’s a very simple dish like this Pumpkin upkari.

Mostly all our upkaris or stir fries are very simple with mustard seeds, curry leaves, green chillies or red chillies in seasoning with hing or garlic or onion seasoning. This particular stir fry is my most favorite with jaggery added that enhances the taste a lot. The simplicity is what makes it extra special and I can eat it as it is, even without rice. 😍

We are getting locally grown pumpkin in Qatar and it’s flavour and texture is amazing. Very quick to cook and super tasty. So I have been making this upkari almost every week. Also it’s one of the healthiest vegetable too. Hope you all try and love this delicious upkari. Happy and healthy cooking ❤️

RECIPE:

Ingredients: 1 Cup = 240 ml

1 medium sized Pumpkin ( about 4 cups chopped)

3 Green chillies

1 to 2 Tbsp Jaggery or to taste

For seasoning:

2 Tbsp Coconut Oil

1 tsp Mustard seeds

A sprig of Curry leaves

A pinch of Hing/ Asafoetida

Salt to taste

Freshly grated Coconut for garnish

Step by step recipe:

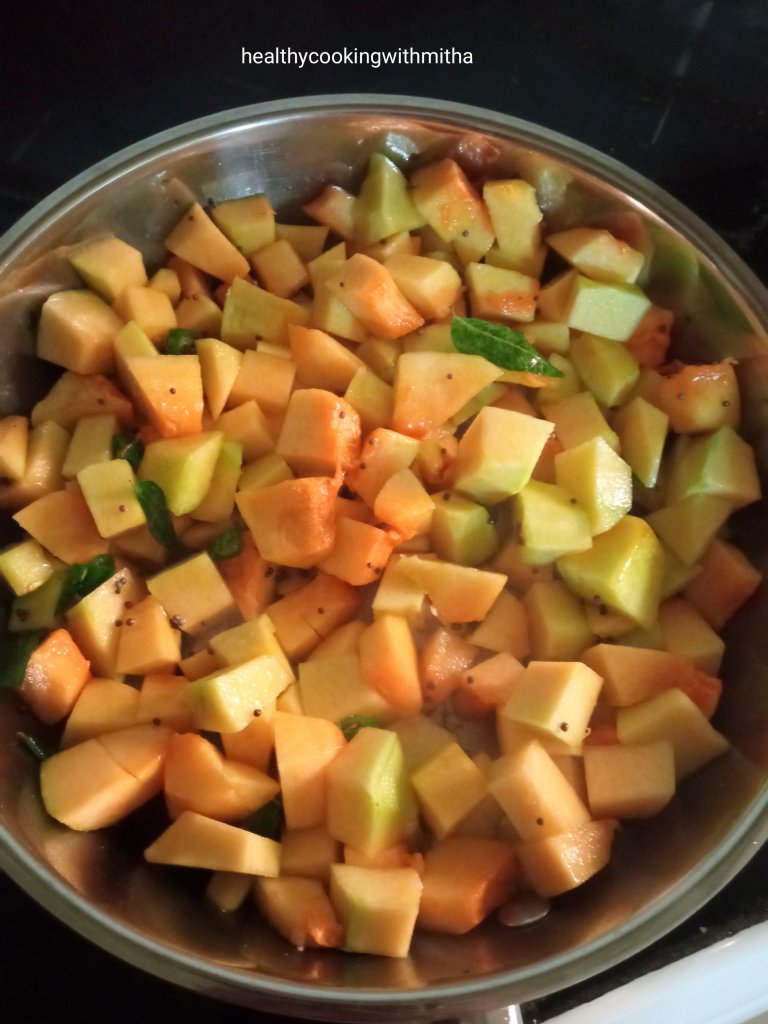
1. Wash well, remove the core, peel the skin of the pumpkin. Chop into bite sized cubes as shown in the picture.

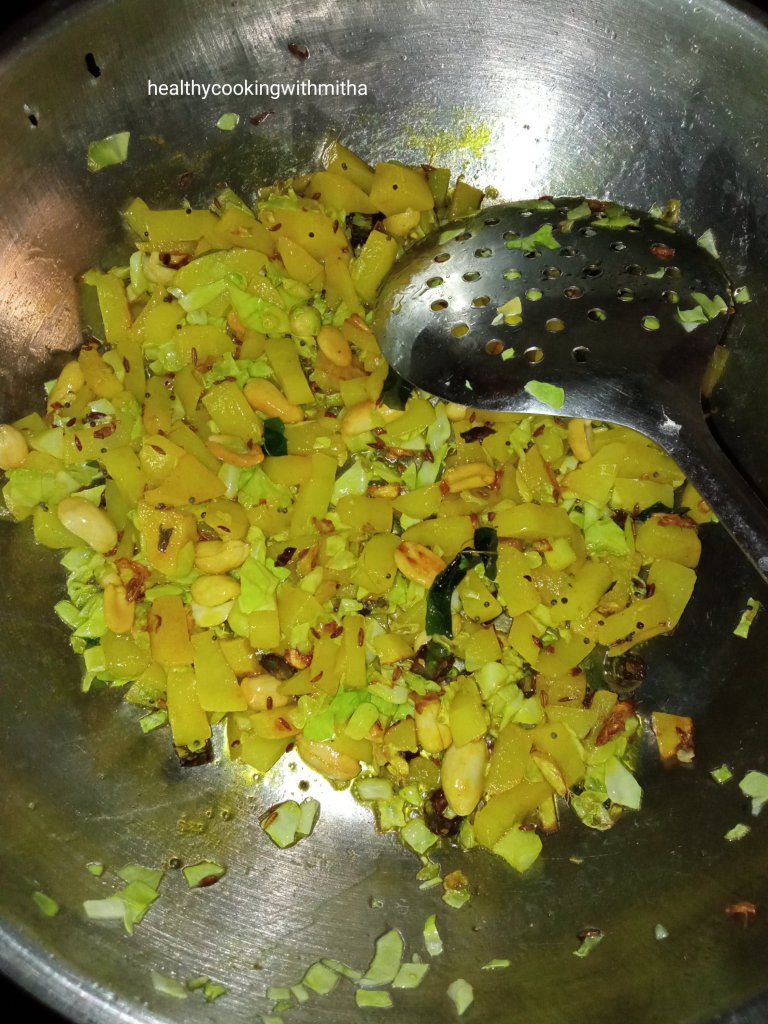
2. Heat oil in a pan, add mustard seeds, hing, curry leaves and green chillies. Let mustard seeds splutter.

3. Now add the chopped pumpkin pieces along with salt. Mix well.

Cover and cook on medium flame. Don’t add much water while cooking as pumpkin releases its own water as it cooks. If needed, that is if you feel it’s sticking in the bottom of the pan, add just a spoonful of water.

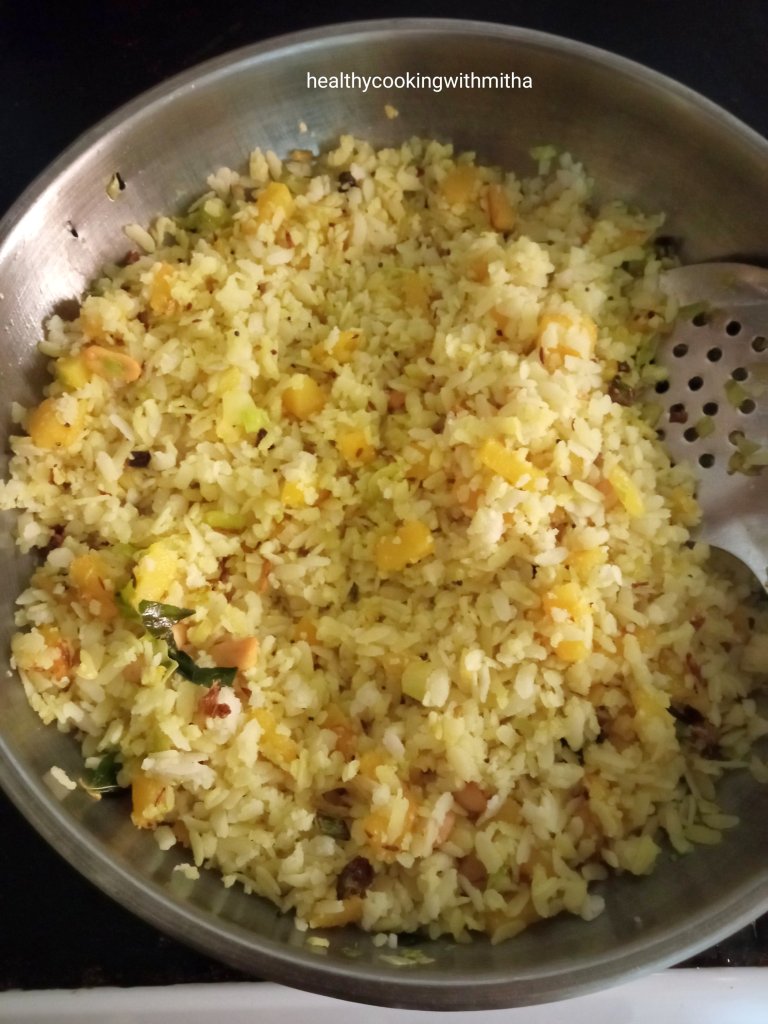
4. Pumpkin cooks very quickly and within 5 mins, you will see that it has turned soft. Now add jaggery.

5. Mix well. Cover and cook on low flame for 5 more mins or till the pumpkin pieces turn very soft. Now garnish with freshly grated coconut. Check for salt/ jaggery. Done. 🙂

6. Enjoy dudde upkari with pej (matta rice gruel) and Kosambari or with rice and rasam.

Click on the picture to save the recipe on Pinterest

Notes:

* You can use any variety of Pumpkin for this upkari. I use the local one available in Qatar.

* Some people don’t peel the pumpkin but I love it when peeled.

* Hing and jaggery are very important to give flavour to the upkari. So please don’t forget it. You can add jaggery, less or more, as per your taste.

* Don’t add much water while cooking this upkari as pumpkin releases its own water. Just add a spoon in the beginning if you feel pumpkin is sticking to the pan. Once you cook it covered on medium flame, it will start turning soft and release water.

* More recipes with Pumpkin:

Instant Pumpkin Idlis (Dudde kadamb)

Orange flavoured Pumpkin soup (Narangi Shorba)

* You can check all my Konkani recipes here:

Konkani recipes collection

Instant Jowar flour Dosa | Easy Sorghum millet dosa

Click on the picture to save the recipe on Pinterest

I have been going completely crazy this cricket season rekindling all my childhood memories of watching the world cup with my parents and brother. My kids are wondering what happened to Amma 😄 when I shout “India, India” while cheering for our team. 😍 Right now when Virat Kohli finally made his 49th ODI century which I was eagerly waiting for, that too on his birthday today, I wanted to write it in my blog to share my happiness here.

Amongst all this, I don’t feel like cooking at all and am glued to the TV, not wanting to miss any 4 or 6 when our team bats and not wanting to miss any wickets by our amazing bowlers. 😍 But since I am still a mother 😄, I have to cook and that’s when this instant dosa comes handy. I have been making Instant Jowar dosa since few months now and my kids love it.

It becomes a quick snack when they come back from school. Also a very filling breakfast, easy to make and healthy too. Hope you all try and love it too. Do let me know if any doubts and it will be a pleasure to help. Happy and healthy cooking ❤️

RECIPE:

1 Cup = 240 ml

Ingredients: { Makes about 10 to 12 dosas }

2 Cups Jowar flour/ Sorghum millet flour

Salt to taste

About 3 to 3 1/4 cups water

1 medium sized Onion

3 Green chillies

1/4 Cup finely chopped Coriander leaves

For seasoning:

1 Tbsp Ghee or Oil

1 tsp Mustard seeds

1 tsp Cumin seeds/ Jeera

1 tsp whole Peppercorns

Few curry leaves

Step by step recipe:

1. Take 2 Cups Jowar flour in a vessel and add 3 Cups water. Mix using a whisk to remove lumps and make a smooth batter. Add salt and mix well. (Adding one cup of water at a time helps in less lumps in the batter)

Batter consistency is thinner than regular dosa batter

2. Now add finely chopped onion, Coriander leaves and green chillies into the batter.

Also prepare seasoning in a small pan by heating ghee, splutter mustard seeds, add cumin seeds, pepper and curry leaves. Fry for few seconds. Remove from flame.

3. Mix the seasoning into the batter. Batter is ready to make dosas instantly.

4. Heat a good quality non stick pan or a well seasoned cast iron pan. It’s important for the dosas to come out easily as it’s thin dosas. Add about two ladles of the batter into the pan, making sure the flame is high. Start adding the batter in the edges of the pan and then add in the middle.

This is the first dosa from the batter. It looked a little thick. So I added 1/4 Cup water more to the batter.
Now the dosas are perfect 😍

5. Allow it to cook on high flame till the surface cooks completely and edges turn crisp. If needed, you can turn the flame to medium if the dosas turn black underneath. Add ghee or oil on the edges of the dosa. Now fold and remove from flame.

6. Dosa is ready to enjoy with a chutney of your choice. Repeat the same with the rest of the batter.

Click on the picture to save the recipe on Pinterest

Notes:

* I have never refrigerated this batter. So don’t know how it will be if refrigerated. Since it’s easy to make, I make fresh batter each time and use it up the same day. You can keep the batter at room temperature for few hours though. It won’t spoil. I sometimes make the batter in the morning and use it as evening snack.

* For me, 2 Cups Jowar flour and 3 1/4 Cups water yields perfect batter. Depending on your flour brand , it might vary a little for you.

* I keep a little batter separate without green chillies for the kids.

* A good quality non stick pan or well seasoned cast iron pan is necessary for the dosas to come out perfectly.

* If the dosas come out thick and you prefer it that way, you can still make it but cook it both sides. For thin dosas, only one side cooking with suffice.

* Other dishes that I make with Jowar flour regularly:

Jowar dosa with Urad dal

Jowar Idli

Jowar Vegetable Bhakri

* You can also try all my “no rice” dosas which includes instant varieties of dosas and also millet based ones.

“No rice” Dosas Compilation

Idli Usli | Idli Upma | Seasoned leftover idlis

Click on the image to save the recipe on Pinterest

As a kid, whenever my Anama (grandmother) or Amma made idlis, I would ask them to keep some extra to make idli usli as breakfast for next day. The super soft hing flavoured idli usli with bites of green chillies in it was, is and will always be one among my most favorite breakfast. Childhood nostalgia. ❤️

Now in my kitchen, where I am the manager 😂😂, I purposely make a whole batch of idlis extra just to savour idli usli the next day. My family too likes it ( Thank God! 😁), so two days breakfast is set when I make idlis.

Even though I make it every couple of weeks, it never occured to me that I could share this easy recipe with all of you too. But yesterday when I was about to make it, the idlis in my steel case looked so beautiful that as I admired it, I thought why not share this recipe on the blog too. If it helps even one of you, I will be very happy. ❤️

So here’s me sharing this super easy, quick and very tasty recipe of Idli Usli, Konkani style. Hope you all try it and remember me while enjoying it. Happy and healthy cooking! ❤️

RECIPE:

The Idlis used here are : Mallige idlis

Ingredients:

About 10 to 15 Leftover idlis (depends on how much you have)

1/4 tsp Hing/ Asafoetida

1 tsp Sugar

Salt to taste (be mindful as idlis already have salt)

For seasoning:

2 Tbsp Coconut oil

2 tsp Mustard seeds

2 tsp Cumin seeds/ Jeera

2 tsp Urad dal

A sprig of Curry leaves

3 to 4 Green chillies

Freshly grated Coconut for garnish

Step by step recipe:

1. Leftover idlis : I keep them in the refrigerator the previous night. Since they are cold and slightly hard, it’s easy to crumble them. You can also use idlis that are at room temperature. Fresh idlis need to be cooled completely before making usli.

2. Crumble them using hands as shown in the picture. Add salt ( be mindful as idlis already have salt) , sugar and hing.

3. Mix everything well and evenly with hands. Keep aside. 

4. Heat coconut oil in a pan. Add mustard seeds. Allow it to splutter. Now add cumin seeds, urad dal, curry leaves and green chillies. Fry on medium flame till urad dal turns brown.

5. Now add the crumbled idlis and mix well on medium flame. Cover and keep for 5 mins.

6. Garnish with freshly grated coconut and serve hot. Done 🙂

Click on the image to save the recipe on Pinterest

Notes:

* If you don’t have leftover idlis, you can make the same recipe using Thick Poha. Only addition is peanuts in the seasoning which needs to be fried till crisp. Rest recipe is same. I make this regularly for a light and tasty evening snack. In Konkani it is called Phova Usli.

* I make regular idlis using this recipe of Mallige idlis. They come out super soft and very tasty.

* Since I love Idli Usli, I make an extra batch of Mallige idlis and refrigerate. Next day morning for breakfast, I make Idli usli.

* In this recipe, you can adjust the seasoning according to how many idlis you have leftover. I even make the usli when I have 6 to 8 idlis. It serves two people.

* Do remember to add less salt as idlis already have salt in them. Hing gives a wonderful aroma in the usli. So don’t skip it. Sugar gives a good balance in flavours too. Just a little is enough.

* You can also check these seasoned breakfast recipes that I make often:

Chow Chow Bath (Upma and Sheera)

Batat Phovu

Muga Dali usli

Chane Usli – Godu Phovu

Kobi Pohe

Bhajjil Phovu

Undi – Piyava Gojju

* You can also check different varieties of Idlis in my Variety Idlis collection.

Instant Ragi Rava Dosa | Quick finger millet dosa

Click on the picture to save the recipe on Pinterest

Of all the millets, Ragi has been my favorite and I make so many dishes with it like dosas, idlis, ladoos, cookies and even a cake. But I had not tried a Rava dosa with it, partially because I am scared of such thin dosas which is tricky to get right.

But few months back, I had this sudden mood in the morning to try it for breakfast and imagine my happiness when it came out so perfectly. Hardly took me about 10 mins to make the batter and within 20 mins, our breakfast was ready. 😍

So now, whenever I have not soaked for regular dosas, ragi rava dosas are our breakfast. It has truly become a favorite ❤️ Not only is it filling but very tasty too specially due to the addition of onions, green chillies and coriander leaves in it.

Hope you all try and love it too. I have added all the tips and tricks to get it perfectly. If you still have doubts, you can comment below or message me on my Facebook or Instagram handle – ” Healthy cooking with Mitha ” and I will help. ❤️

Happy and healthy cooking ❤️

RECIPE:

Ingredients: { Makes about 10 dosas }

1 Cup = 240 ml

1 Cup Ragi powder / finger millet powder

1/2 Cup Rava/ Sooji

1/4 Cup Rice powder

2.5 to 3 Cups Water ( to make thin batter )

1 medium sized Onion

3 Green chillies

3 Tbsp Coriander leaves

1 tsp Jeera or Cumin seeds

Salt to taste

Ghee or oil to cook the dosa

Step by step recipe:

1. Take 1 Cup Ragi powder, 1/2 Cup Rava and 1/4 Cup Rice powder in a mixing bowl.

2. Now add salt and 2.5 cups water, mixing well with a whisk to form a lump free batter.

3. When the above batter is ready, start chopping onions, green chillies and coriander leaves. Thus the batter gets few minutes of rest too.

Now, add finely chopped onions, green chillies, coriander leaves and cumin seeds/ jeera to the batter. Mix well. Batter ready!

You can make dosas instantly with this batter. No need to ferment the batter.

4. Heat a flat dosa pan till it becomes really hot. Pour a ladle full of dosa batter over it such that it fills the pan.

Just as an example, I have taken two pictures to show how the batter should look in the pan for perfect Ragi Rava Dosa.

If batter is thick and needs more water : The dosa will be thick with less holes and will seem uncooked on the surface.

Not a perfect dosa.. needs more water in the batter.

If your dosa looks like the above one, add about 1/4 to 1/2 Cup water each time till the batter turns perfect.

Once the batter is of perfect consistency, the dosas will turn thin with full of holes like this.

Perfect!

5. Cover and cook on medium to high flame. Add ghee or oil on the sides of the dosa. After a while, the dosa will cook and the thin portions of the dosa will turn brown and crisp.

6. Remove it slowly using the spatula over the edges and then folding it. Repeat the same with the rest of the batter. Serve hot with a chutney of your choice.

Click on the picture to save the recipe on Pinterest

Notes:

* I usually serve this dosa with either Amma’s tomato chutney as I have served in the above picture or Hing chutney. Both taste amazing with these dosas.

* For Hing chutney, grind together 1 Cup of Coconut with 3 to 4 Red chillies, 1 tsp Tamarind, 1/4 tsp Hing, salt to taste and little water to a smooth paste. I don’t season it. You can season it with mustard seeds and curry leaves fried in coconut oil.

* Please take care of the ratio of Ragi powder to sooji to rice powder for perfect dosas.

* Also, the batter should not be thick and should be thin to get perfect dosas with holes in it. I have explained it with pictures above. You can read it.

* It took me close to 3 Cups of water to get the right texture of the dosas. It might take you few attempts to perfect these dosas.

* This dosa batter does not need fermentation. You can make dosas instantly.

* They come out well in non stick pans. If using cast iron pans, see that it’s seasoned well..else the dosa can stick to the pan.

* You can also add peppercorns and curry leaves to the batter.

* I refrigerate the batter if leftover and it does not change the texture of the dosas. Just adjust the water quantity in case the batter gets thicker on refrigeration.

* One more similar kind of thin dosa that I make is our own Konkani style Panpolos or Neeru dose. It is with rice and tastes so delicious.

* Other recipes with Ragi that I make always:

* Ragi Set dosas

* Ragi Urad idlis

* Instant Ragi Idlis

* Ragi butter cookies

* Ragi Chocolate Cake

* Ragi Malpuas

* Ragi Jaggery ladoos

* You can check all my ‘No rice dosa recipes’ including dosas with millets here –

No Rice dosa recipes Compilation

Tri colour Capsicum Salsa | Easy Capsicum salad/dip recipe

Click on the image to save the recipe on Pinterest

Tri colour Capsicums always attracted me when I went for grocery shopping but it used to be super expensive and I never felt like buying it. Recently Qatar has been growing a variety of veggies locally and hence we have been getting even expensive vegetables like Broccoli and coloured capsicums considerably cheaper. Also just see how fresh they are! 😍

So, whenever I get my hands on them, it’s either this salsa or fried rice. Both ways, it is consumed happily by my kids which is most important for me whenever I cook something. With salsa, I present it to them with nachos for evening snack and they munch it on happily. ❤️

Also, these capsicums are best when they are had raw with their flavours intact. Cooking them leads to make it soft and is not as fresh. So my preferable way to use these capsicums is by making this salsa which we have as an accompaniment with rice meals as well. Tastes so yum. ❤️

Hope you all try and love it too. Happy and healthy cooking ❤️

RECIPE:

Ingredients:

1/2 a medium sized Green Capsicum

1/2 a medium sized Yellow Capsicum

1/2 a medium sized Red Capsicum

1 medium sized Onion

1 medium sized Tomato

3 Green chillies

1/4 tsp Pepper powder

Salt to taste

Juice of 1 Indian lemon or half of large lemon

Finely chopped Coriander leaves, for garnish

Step by step recipe:

1. Finely chop the three capsicums and add to a mixing bowl.

2. Now add finely chopped Onion, tomatoes and green chillies to it.

3. Add finely chopped Coriander leaves, salt, pepper powder and lemon juice. Mix well. Taste and adjust the lemon juice and salt as needed.

4. Done! Enjoy as a salad or as a salsa with Nachos. ❤️

Click on the image to save the recipe on Pinterest

Notes:

* The above measurement serves 4. If you are making for more people, just use three whole capsicums and about two tomatoes and two onions.

* You can skip green chillies if making for small kids. I remove green chillies before giving to my kids.

* You can also add a dash of red chilli powder for more spice but we love this as it is.

* I also serve it as a side along with rice meals and the salad gives a nice, fresh crunch to the meal.

* The other salads that I make regularly:

Mixed Bean Salad

Carrot Kismuri

Moong dal Kosambari

Cabbage Kosambari

Mixed Vegetable Salad

Khamang Kakdi/ Cucumber salad

Barley Salad

Banana Stem Salad

Purple Cabbage Coleslaw

Methi Thepla | Easy, soft, flavourful theplas with fenugreek leaves

Click on the image to save the recipe on Pinterest

As my son is sleeping after coming back tired from school, I have finally sat down to write this recipe of Methi Theplas which are his favorite 😍. He loves variety of dosas, bhakris, parathas and his recent love is this Methi Thepla. ❤️ It’s winter now in Qatar and we have fresh methi (fenugreek) leaves growing in our tiny kitchen garden, handled very lovingly by my husband. Here are the tiny yet pretty and very healthy leaves 😍

These leaves are plucked when my son demands for Theplas and love how homegrown leaves have an amazing flavour of it’s own. Farm to kitchen lifestyle is really the best way to enjoy and respect food. ❤️

Though I also make Alu methi and methi dal, these Theplas have become more regular as my kids love it. It’s also very easy to make and hardly takes 30 mins from start to finish.

They also stay well at room temperature for few hours and remain soft. So, in case there are leftovers, they still taste yum when enjoyed later.

Do try this delicious and healthy variation instead of rotis or parathas and you will definitely love it. Happy and healthy cooking ❤️

Ingredients: { Makes about 7 Theplas }

1 Cup = 240 ml

1 cup finely chopped Fenugreek leaves/ Methi leaves

2 Cups Wheat flour / Chakki ka Atta

2 tsp white Sesame seeds / Til

2 tsp Oil ( I use coconut oil)

1 tsp Red chilli powder

1 tsp Coriander powder

1/4 tsp Turmeric powder

A pinch of Hing/ Asafoetida

Salt to taste

Approx 1/2 cup water to make the dough

Oil or Ghee to cook the Theplas

Step by step recipe:

1. Take finely chopped methi leaves in a large mixing bowl (I chop the tender stems too along with the leaves. You can chop only the leaves if the stems are thick). Add sesame seeds, red chilli powder, coriander powder, turmeric powder, salt, oil, hing.

2. Now add wheat flour and mix everything well. Add water little by little and form a soft dough just like chapati dough.

3. Now divide the dough into equal sized balls as shown.

4. Using dry wheat flour, dust each of the balls and roll just like chapatis.

5. Heat a pan and fry the Theplas, both sides while applying oil or Ghee. Cook till brown spots appear on either sides of the Thepla.

6. Enjoy hot Theplas with curd and pickle or even as it is. Tastes so yum ❤️

Click on the image to save the recipe on Pinterest

Notes:

* You can also enjoy them after a while as they remain soft for many hours. Hence they make an excellent lunch box option or to make and carry during traveling.

* Just pack them tightly in a steel box or a hot case.

* The ratio of 1 : 2 for methi leaves : wheat flour works well for me. If you change the ratio, it might be difficult to roll the Theplas.

* Remove thick stems from methi leaves before adding to Theplas. I add thin, tender stems finely chopped and you can never feel them in the mouth.

* Make sure to cook both sides of the Theplas well with oil or Ghee which makes the Theplas soft.

* I also make Theplas adding yogurt which is another method you can try. I make Bottlegourd or Dudhi/ Lauki Thepla that way. Here is the recipe : Bottlegourd Theplas

* For growing your own methi leaves, just sprout regular methi seeds and add them to soil. You can also grow in pots of you don’t have the space for direct soil. It takes about two weeks for methi leaves to grow completely once sowed in soil. I have shared the detailed blog on how to sprout methi seeds in this blog. You can check HERE.

Batat Phovu| Kanda Batata Poha | Easy Breakfast recipe with rice flakes

Click on the image to save the recipe on Pinterest

Whenever I ask my husband what breakfast he would like to eat when there is no dosa or idli batter, he immediately says “Batat Phovu”. 😄 And to imagine that he used to simply dislike potatoes when we got married. I used to beg him to please get us some potatoes as it used to be my favorite vegetable. Yes, “used to be” 😂 Now I have joined him in not liking potatoes so much but he is slowly liking them in some dishes and one of them is this Batat Phovu. 😍

In fact, it is he who suggested me that I should definitely share this recipe on the blog while I was sceptical as this is quite a well known recipe. “Everyone makes this and everyone knows the recipe..”, I told him. “But don’t think anyone can make it as perfectly as yours!”, was his reply instantly. (This man really loves what I cook 😂😂)

So I decided to share the recipe on the blog. Because if it helps even one, I will consider my efforts worthwhile. Though I am not a perfect cook in any way, some dishes I cook comes out really tasty and Batat Phovu is one among them.

Here’s sharing the simple recipe for those who don’t know yet. Hope it’s helpful for you. Happy and healthy cooking! ❤️

RECIPE:

Ingredients: {Serves 2 to 3 people}

1 Cup = 240 ml

2 Cups Thick Poha / Rice flakes / Beaten rice

2 Tbsp Coconut Oil

1 tsp Ghee

1 tsp Mustard seeds

1 tsp Cumin seeds

2 Tbsp Peanuts

Few Curry leaves

3 Green chillies

1 medium sized Onion

2 medium sized Potatoes

1/4 tsp Turmeric powder

A pinch of Asafoetida/ Hing

2 tsp Sugar

Salt to taste

2 Tbsp Coriander leaves, for garnish

2 Tbsp freshly grated Coconut, for garnish

Juice of 1/2 an Indian lemon

Step by step recipe:

1. Heat oil + ghee in a pan. Add mustard seeds and cumin seeds. Allow mustard seeds to splutter. Now add peanuts, curry leaves and finely chopped green chillies. Fry for few seconds till peanuts get roasted.

2. Now add finely chopped Onion and fry till onions turn translucent.

3. Add peeled and finely chopped Potatoes and turmeric powder. Mix well and fry the potatoes for a minute. Now add few spoons of water. Cover and cook till the potatoes turn soft. Will take about 5 mins.

4. Meanwhile take Thick Poha in a bowl. Note to take thick variety of Poha and not the thin variety of Poha.

5. Now wash it well once or twice to remove impurities from it. Drain water completely after washing. Poha turns soft now. Add salt, sugar and hing powder. Mix well.

6. Once potatoes turn soft, add poha to it and mix well continually till the mixture combines. Cover and keep for 5 mins on very low flame.

7. Now remove from flame and garnish with finely chopped coriander leaves and grated coconut. Drizzle lemon juice on top. Mix well. Serve hot. Done! ❤️

Click on the image to save the recipe on Pinterest

Notes:

* We like the Poha soft and moist. So I wash really well and also cook after adding to the pan. If you don’t like it soft, you can wash only once and just mix in the pan and remove from flame without covering it.

* Batat Phovu is best had hot when freshly made. If kept for long, it tends to get dry. In case you have to make ahead, just sprinkle few drops of water while reheating before serving. That makes it moist again.

* You can skip potatoes if you don’t like and make simple Kanda Poha with only onions.

* Some people also add carrots, capsicum and peas to this making it Vegetable Poha which is even healthier but my family loves Batat Phovu the authentic way only. Just shared as I thought it’s a great idea.

* I add oil + ghee to enhance the flavour of the Batat Phovu. You can add only oil if you like.

* Thick Poha is used to make Batat Phovu and not Thin Poha. Thin Poha is used in dishes like Godu Phovu (sweetened rice flakes) and Bhajjil Phovu (roasted rice flakes).

* I mix salt, sugar and hing in the washed Poha instead of adding in the pan as I have seen it results in even mixing and tastes really good.

* The thick Poha I use does not need soaking at all and turns soft when I wash it twice. If your Poha is very hard, you will need to soak for few minutes to make it soft before use.

* You can also try my other Poha recipes:

Kobi Pohe (Satwik version of Pohe with Cabbage)

Poha Vegetable Cutlet

Instant Poha Idlis

Instant Oats Poha Dosa

Other Breakfast Ideas

Easy Paneer Masala | Quick Paneer curry

Click on the image to save the recipe on Pinterest

Paneer is our most favorite and I regularly make different paneer curries and kathi roll with it. But the most commonly made is this super easy and very tasty Paneer Masala which I made one day when I had 15 mins to cook before we went out. This quick fix curry was loved so much by my family that now, I mostly make Paneer only this way.

This along with jeera rice or chapatis makes a delicious meal which tastes better than even restaurant ones. I love how homemade food has a comfort of it’s own which can never be found in outside foods, no matter from which fancy restaurant.

Hope you all try and like this simple yet delicious curry too. Happy and healthy cooking! ❤️

RECIPE:

Ingredients:

300 grams Paneer cubes

To fry and make paste:

2 ripe medium sized Tomatoes

1 medium sized Onion

1 inch Ginger piece

About 10 to 12 Cashews

4 Cloves

2 Cardamom pods

1 Tsp Ghee

Other ingredients:

1/4 Cup Curd/ Yogurt

1 Tbsp Ghee

1 tsp Cumin seeds

1 Bay leaf

1/4 tsp Turmeric powder

1/2 tsp Amchoor powder

2 tsp Coriander powder

2 tsp Red chilli powder

2 tsp Garam Masala powder

A pinch of Sugar

Salt to taste

Finely chopped Coriander leaves for garnish

Step by step recipe:

1. Heat 1 tsp Ghee in a pan. Add cloves and cardamom pods. Add Cashews and fry till brown. Now add roughly chopped ginger, onions and tomatoes.

2. Fry till the onions and tomatoes turn soft. Now allow it to cool.

3. Now add this to a blender along with yogurt.

4. Blend to a smooth paste. Now heat Ghee in the same pan. Add cumin seeds and bay leaf. Fry till cumin seeds turn brown. Now add the ground paste.

5. Mix well for few minutes. Then add turmeric powder, Amchoor powder, coriander powder, red chilli powder, Garam masala powder, sugar and salt.

6. Mix well again continually for about 5 mins. Now add paneer cubes and cook on medium flame till paneer turns soft. Add water if needed to adjust consistency.

7. Remove from flame and garnish with finely chopped Coriander leaves.

Click on the image to save the recipe on Pinterest

Notes:

* I usually combine this with jeera rice or chapatis. For jeera rice, heat coconut oil and fry cumin seeds. Add rice, hot water and salt. Cook till rice turns soft. Garnish with coriander leaves.

* You can skip Amchoor powder if you don’t have. I add it since I have it. Yogurt and tomatoes are enough for the tangy flavour.

* A pinch of sugar enhances the overall flavour of the curry. So remember to add it.

* You can decrease the amount of cashews if you like a less thicker curry.

Other Paneer recipes that I make regularly:

Paneer Butter Masala | No Onion No Garlic

Dhaba Style Paneer

Restaurant style homemade Palak Paneer

Paneer Sukka

Vegetable Paneer Chilly

Paneer Hara Masala

Paneer Kathi roll

Kobi Pohe | No onion No Garlic Satwik version of Poha with Cabbage | Breakfast recipe

Click on the image to save the recipe on Pinterest

I know if you have come here to read the recipe, you must be wondering as to what kind of Pohe this is. The name itself is so unique that I too was amazed as I read it few months back. My friend on Facebook, Aparna Kamat had posted this recipe and as part of a theme, I had tried it. Even though I was hesitant as to how it must taste with cabbage (also called Kobi in Goan side), I was surprised that it tasted so delicious and I never missed onions in my Pohe.

Thus Kobi Pohe found it’s place in my kitchen and I started making this whenever I had fresh Cabbage or when I felt like making Pohe on Pooja days and I needed to skip onions in my dish. Cabbage substitutes onion really well and you can never tell the difference. Aparna says this Pohe is made in our temples in Goa and I must say, what a great idea!

Though our breakfast is mainly Dosa and Idli varieties, some days the dosa batter is not sufficient for everyone and that’s when I make seasoned dishes like this Kobi Pohe for breakfast and relish it.

Hope you all try and love it too. Happy and healthy cooking! ❤️

Thank you so much Aparna for your wonderful recipe. It’s a keeper for sure. ❤️

RECIPE:

Ingredients:

3 Cups Thick Poha/ Flattened rice/ Beaten rice

1 Cup Finely chopped/ Shredded Cabbage

2 medium sized Potatoes

3 to 4 Green chillies

1 inch Ginger piece, finely chopped

For seasoning:

1 to 2 Tbsp Coconut Oil

1 tsp Mustard seeds

1 tsp Cumin seeds

2 Tbsp Peanuts

A sprig of Curry leaves

1/2 tsp Turmeric powder

Salt to taste

1 Tbsp Lemon juice, for garnish

1/4 Cup finely chopped Coriander leaves, for garnish

2 Tbsp freshly grated coconut

Step by step recipe:

1. Keep finely chopped Cabbage, peeled and chopped potatoes, finely chopped ginger, green chillies and curry leaves ready.

2. Take the thick Poha in a large bowl and wash it well removing impurities if any. Drain and keep aside.

Note: Be careful while washing Poha as some Poha requires only be sprinkled with water and it turns soft. My variety of thick Poha needs to be washed well and drained completely to get the desired texture.

3. I add salt to this softened Poha. Mix well and keep. This ensures that salt gets mixed evenly in the poha.

4. Now heat oil in a large pan. Add mustard seeds and cumin seeds. When mustard seeds splutter, add curry leaves, ginger, green chillies and peanuts. Roast till peanuts turn slightly brown in colour.

5. Now add potatoes, cabbage and turmeric powder. Keep frying for couple of minutes. Now cover and keep on medium flame. Cook till potatoes turn soft.

Note: Only if needed, you can sprinkle little water for potatoes to cook. I don’t add water at all.

6. Now add the softened Poha and mix well. Cover and keep for 2 mins on low flame.

7. Remove from flame. Drizzle lemon juice and garnish with finely chopped Coriander leaves and freshly grated coconut. Done! Enjoy Kobi Pohe with a hot cup of tea. ❤️

Click on the image to save the recipe on Pinterest

Notes:

* For a regular version of Poha which is called Kanda Poha in Maharashtra and we Konkanis call Batat Phovu, substitute Cabbage with finely chopped Onions. Rest procedure is the same.

* You can use white or brown Poha but make sure it is Thick Poha and not Thin Poha.

* If you are unsure of whether your family will like this or not, just use 1/2 Cup Cabbage first. Trust me, you just can’t say the difference between this and Kanda Poha. Just be sure to finely chop the Cabbage such that it mixes well with other ingredients.

* I also like to drizzle a spoon of ghee at the end as garnish while making any kind of Poha. It not only ensures that the poha is not dry but gives a wonderful flavour to the poha too. It is completely optional but just sharing the way I do.

* All Breakfast Recipes: Breakfast Recipes Collection

* All recipes with Poha: Poha recipes Collection

* All recipes with Cabbage : Cabbage Recipes

* My favorite recipe with Cabbage : Cabbage Kosambari

* My favorite recipe with Poha : Instant Poha Idli

Hotel style Tomato Chutney

Click on the image to save the recipe on Pinterest

Both the kids just left for school and I take this (peaceful 😄) opportunity to write a recipe which I wanted to share since long time. In Qatar, during winters ie roughly from November to April, residents grow vegetables in their gardens. Main vegetable which almost everyone grows is Tomato. Even we have tomatoes in abundance every year which we enjoy till June due to it’s good shelf life.

Here are some of the beautiful tomatoes which grew in our’s and our neighbor’s garden who was kind enough to share with us. ❤️

And plenty of tomatoes means making my favorite, my Amma’s Tomato chutney. 😍 Apart from that, due to my daughter’s request, who wanted the hotel style Tomato Chutney which she enjoys at Aryaas restaurant here, I happened to try this recipe which came out exactly the same. Imagine my happiness!! ❤️

So after getting daughter approval as well, I knew this recipe deserved to be blogged and shared with all of you. Hope you all try and love this recipe too. Happy and healthy cooking! ❤️

RECIPE:

Ingredients:

About 4 to 6 medium sized Tomatoes (or as available, even 2 large tomatoes are fine)

2 medium sized Onions

1 inch Ginger piece

4 pods of Garlic

3 to 4 Red chillies

A sprig of Curry leaves

1/2 tsp Turmeric powder/ Haldi

1 Tbsp Coconut oil

Salt to taste

For seasoning:

2 tsp Coconut oil

1 tsp Mustard seeds

1 tsp Cumin seeds/ Jeera

A sprig of Curry leaves

A pinch of Asafoetida powder/ Hing

Step by step recipe:

1. Take all the ingredients for the chutney and keep ready. I have taken home grown tomatoes of different sizes depending on which of them were turning soft. Since I have a lot of tomatoes, I have taken plenty to make this chutney. You can use only two to three large ones depending on availability.

2. Heat oil in a pan, add curry leaves, chopped ginger, garlic and onions. Fry till onions turn translucent. Then add red chillies. Fry for few seconds.

3. Add roughly chopped tomatoes along with turmeric powder and salt. Cook till tomatoes turn soft. Don’t add water at all. Tomatoes will leave a lot of water as it cooks.

4. Once the tomatoes cook and turn soft, remove from the flame. Allow it to cool. Blend to a smooth paste.

5. Heat oil in the same pan, add mustard seeds and cumin seeds. When mustard seeds splutter, add curry leaves and hing.

6. Now add the blended paste along with little water if needed to bring it to desired consistency. Check for salt and also spice level, adding red chilli powder if needed.

7. Done! Serve with dosas, idlis and chapatis.

Click on the image to save the recipe on Pinterest

Notes:

* You can skip Onion and Garlic if you don’t consume or on Pooja days. The texture of tomatoes will still make a thick chutney.

* Ripe and bright red tomatoes will give a beautiful colour and flavour to the Chutney.

* Keeps well if refrigerated for couple of days. Mine usually gets over within that.

* I make a big batch specially during tomato season, hence you can see I have used plenty of them. You can use two to three tomatoes to make one batch of chutney.

* For variety of dosa recipes, you can check my Dosa Corner page.

* For Instant and Millet based dosas, you can check my No rice Dosa Compilation page.

* For all my Idli recipes, you can check my Variety Idli recipes Compilation page.

* For other chutney recipes, you can check Chutney recipes.

* I also make another variety of Tomato Chutney which in my Amma’s recipe and my favorite. You can check the recipe here – Amma’s Tomato Chutney.