A blog after a long break and it’s not as easy as it seems. My son is sitting next to me chattering as he is eating this “chuda” (as we call it in konkani) and he’s asking me to write that it’s so yummy 😍😂 He calls me the best chef in the world. It was actually best “cooker” (which used to remind me of Prestige cookers 😅) till few months back but then he learnt the word chef at school. So nowadays cooker has become chef 😄
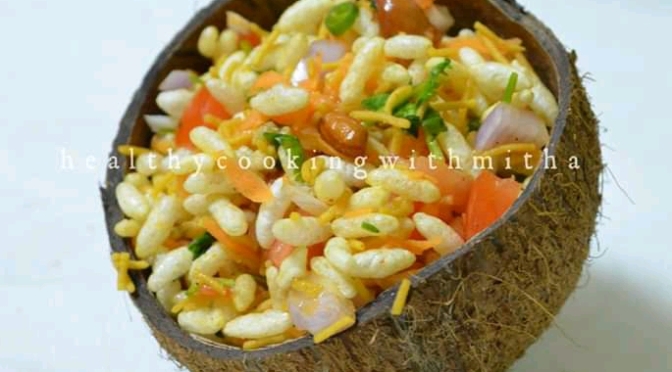
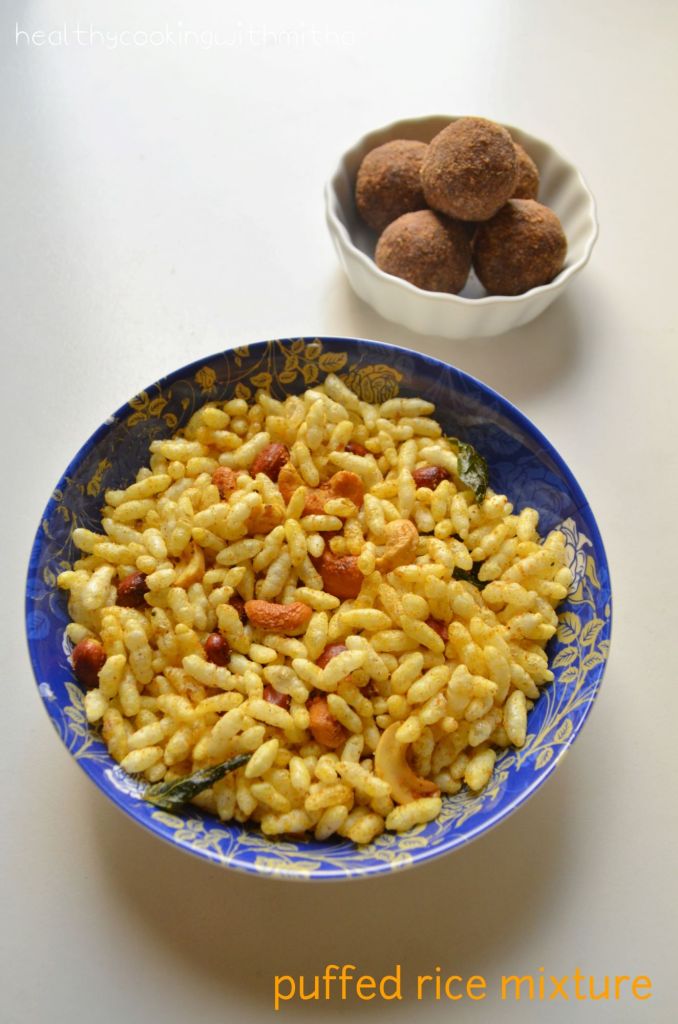
Today is Vijayadashami and Dussehra, so I had made ragi ladoos to celebrate the festival. My kids love it a lot and I make it regularly for them. Along with that, I planned to make this puffed rice mixture for their evening snack and also for their snack box at school tomorrow. It’s so easy and hardly takes few minutes to make. I too love it a lot.
So decided to share the recipe with all of you on this festive occasion. Hope I can share more such healthy recipes for you all. Wishing you a very happy Vijayadashami and Dussehra. Happy and healthy cooking!
RECIPE:
Ingredients: 1 Cup = 240 ml
2 Tbsp Coconut Oil
1/4 Cup Peanuts
1/4 Cup Cashews
1 tsp Mustard seeds
1 tsp Cumin seeds
A sprig of curry leaves
Pinch of Hing/ Asafoetida
1/4 tsp Turmeric powder
1 tsp Rasam powder (or Red Chilli powder)
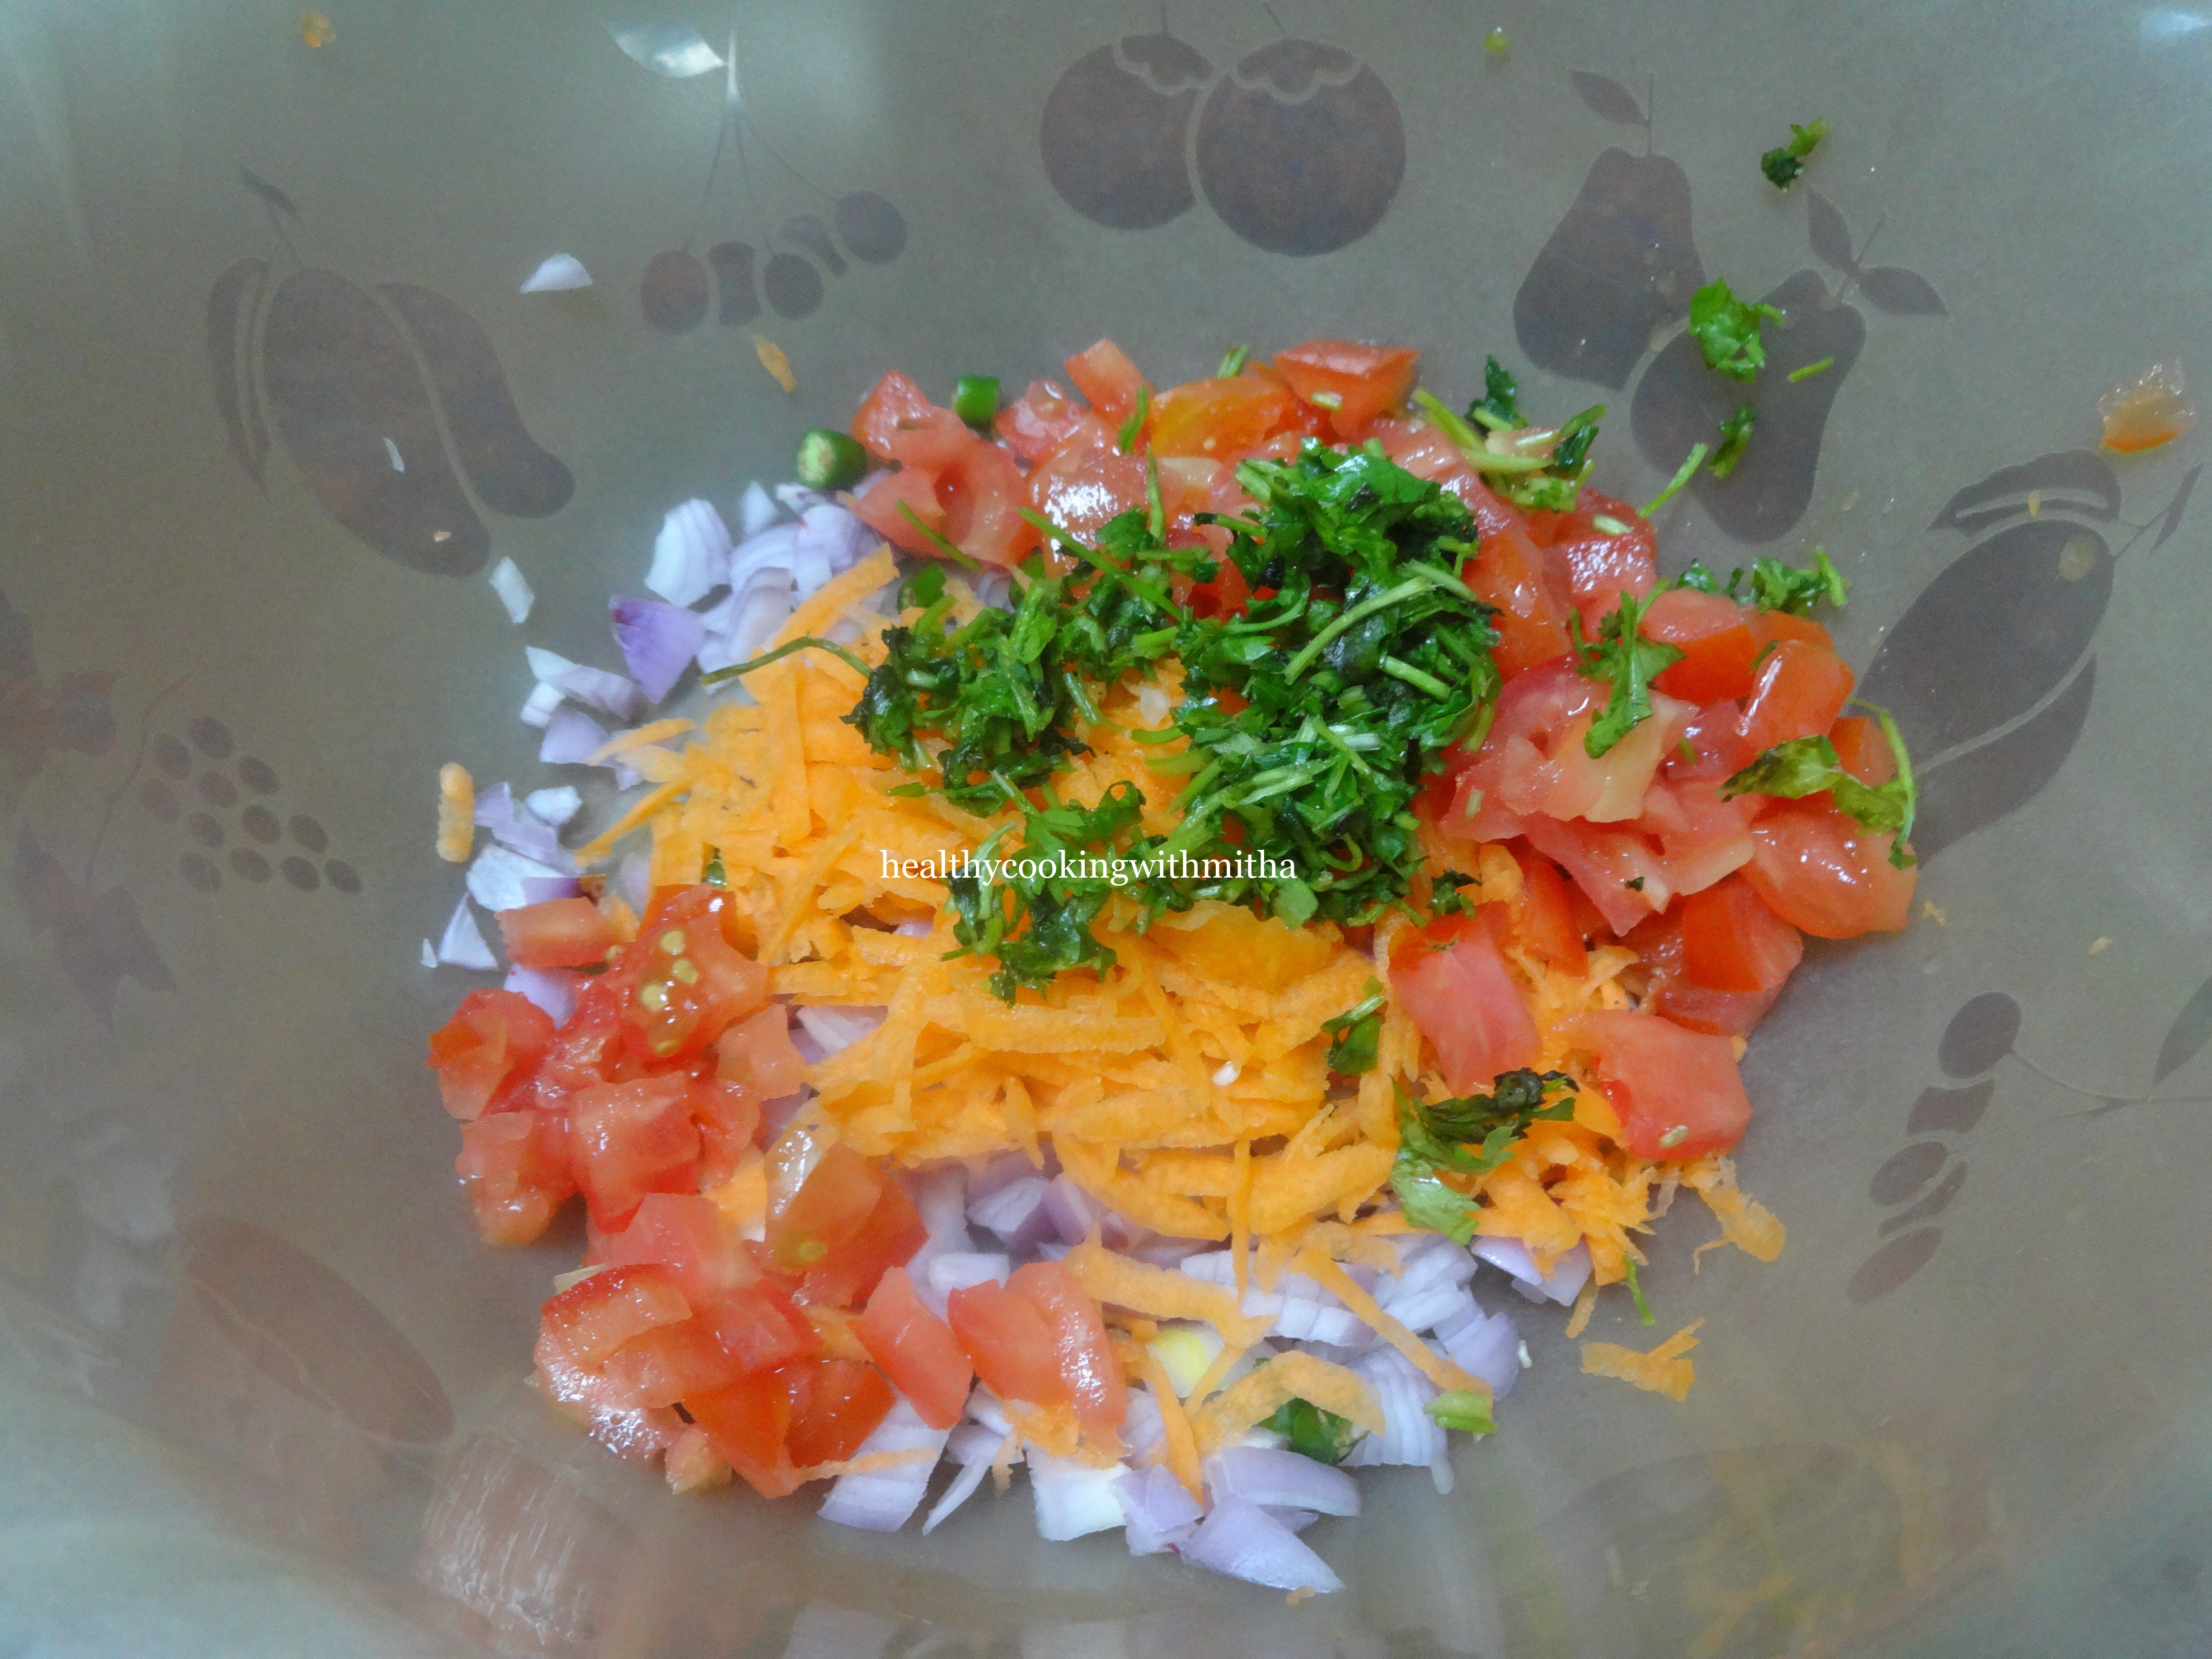
4 Cups Puffed Rice / Charmburo / Murmuro
1 Tbsp Jaggery powder
Salt to taste
Step by step recipe:
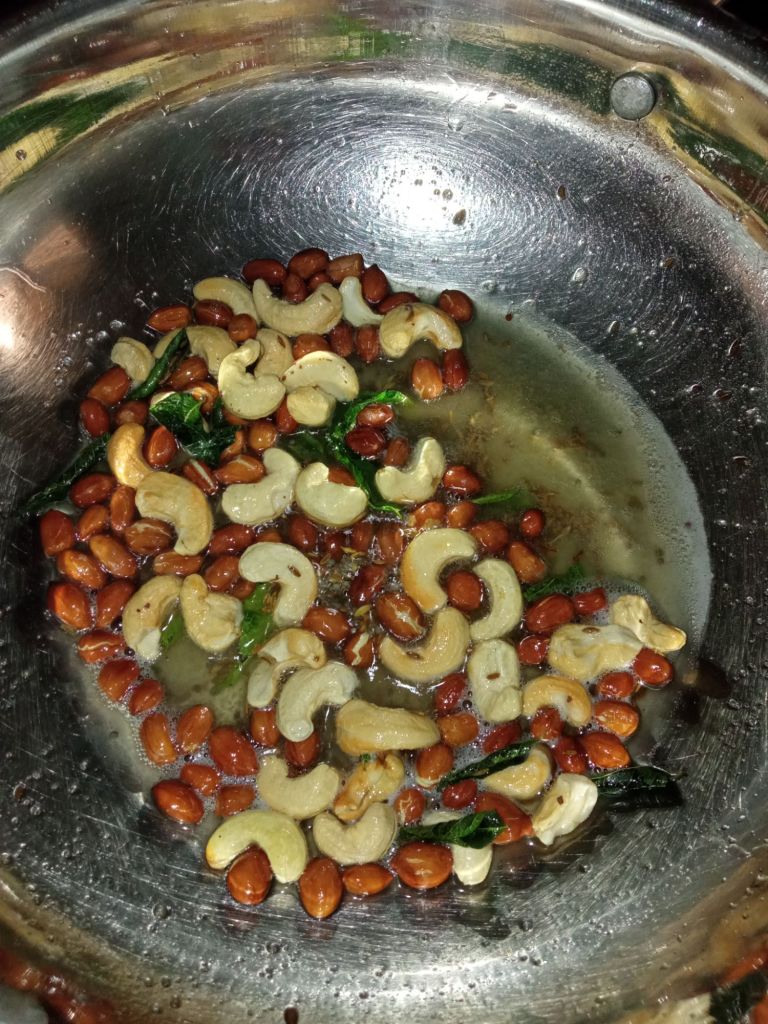
- Heat Coconut oil in a pan and add peanuts. Fry till peanuts gets roasted and slightly brown. Now add cashews and fry till they turn light brown. Keep the flame on medium.

2. Add mustard seeds, cumin seeds, curry leaves and hing. Allow mustard seeds to splutter and curry leaves to turn crisp.
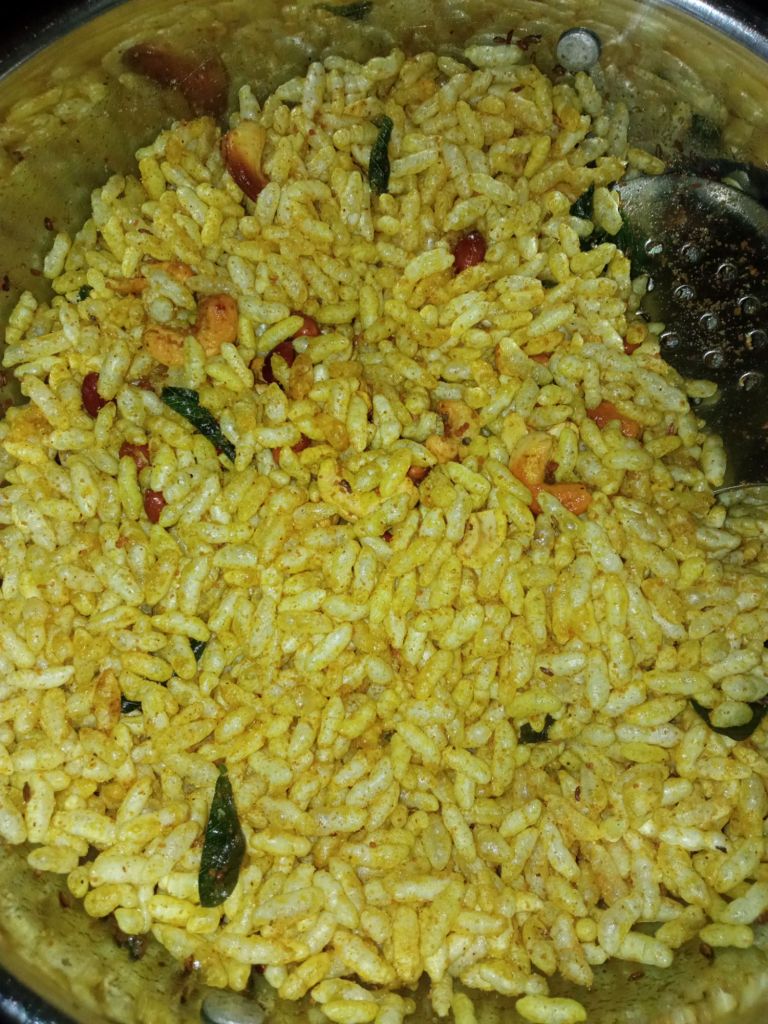
3. Add turmeric powder and Rasam powder. Fry for few seconds.

4. Now add puffed rice, one cup at a time and keep frying continually to medium to low flame for two minutes. When the masala has coated all the puffed rice kernels well, add jaggery powder and salt. Mix well. Done.
Serve warm puffed rice mixture as an evening snack or for kids’ snack box. Stays well in a moisture free air tight container for even till a week.
Notes:
- Instead of coconut oil, you can use the oil you regularly use in your kitchen.
- If making for first time and want to make less quantity, just use 1 Tbsp Oil, few peanuts and cashews along with 2 Cups of puffed rice.
- For less spicy mixture, use rasam powder and for spicy mixture, use red chilli powder.
- Store in an airtight container and use a moisture free spoon every time you remove it. It will last even till a week. My kids finish it even before that.
- For Ragi Jaggery Ladoos, you can see the recipe here:
- Ragi Jaggery Ladoos