It’s been exactly one year we are in India now, Udupi to be precise and I can’t explain the peace that I feel here. Life is simple in its simplest form and that’s how I like it to be. Parents and relatives are close by, temple functions keep coming up, neighbours are loving and kind, Udupi delicacies are so delicious, nature is its purest form around me, kids are enjoying a new kind of fun life.. in short, this one year has been a blessing, by Krishna’s grace.. ❤️🙏
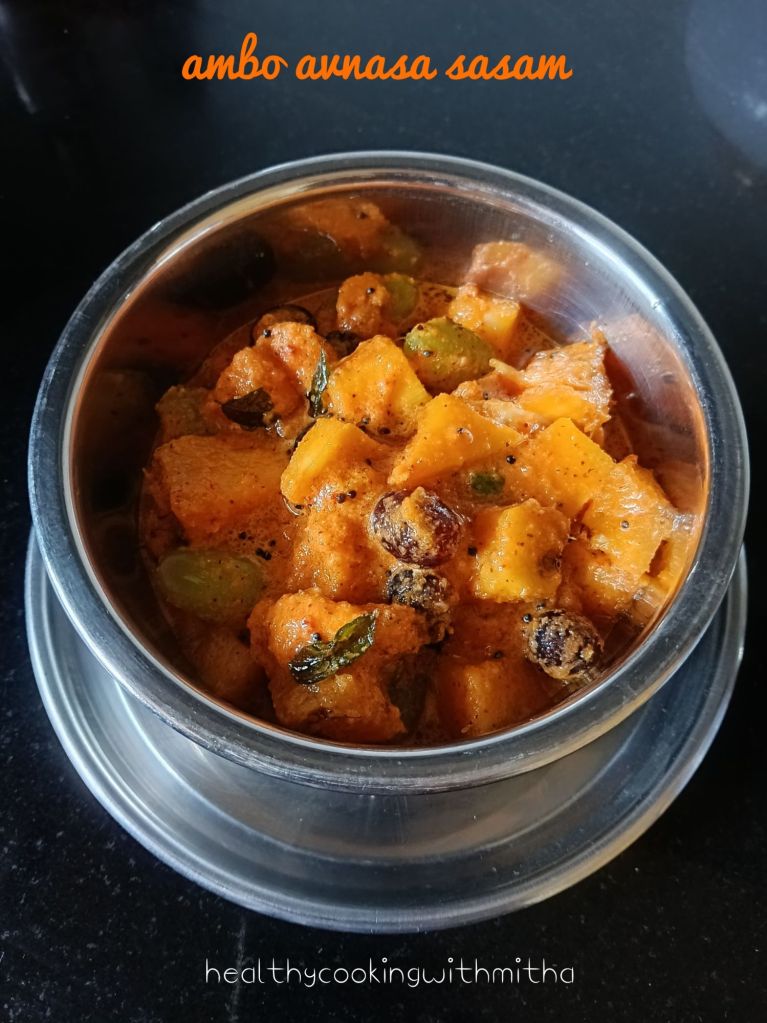
I have also been trying many Konkani dishes now as I get all kinds of ingredients easily here. One among them is this Ambo Avnasa Sasam which is famous among us Amchis specially during Mango season. Also the fresh and super sweet pineapples that we get here makes it extra special, taking it a level higher.
If you are a lover of sweet and spicy together, this dish is for you. It’s addictive and once you start eating it, the flavours will blow your mind away. It’s also a dish served at our functions regularly during Mango season.
Hope you all try and love it. Hope to post many more recipes soon. Happy and healthy cooking ❤️
RECIPE:
Ingredients: { Serves two people }
1 Large ripe Mango ( approx 1 Cup pieces )
1/4 of a large Pineapple ( approx 1 1/2 Cup pieces )
About 10 to 12 Green Grapes
About 10 to 12 Black Grapes
2 Green chillies
Salt to taste
2 Tbsp Jaggery or to taste
For the masala :
1 Cup freshly grated Coconut
2 roasted Red chillies
1 tsp mustard seeds ( raw, unroasted )
For the seasoning :
1 Tbsp Coconut oil
1 tsp mustard seeds
A sprig of curry leaves
Step by step recipe:
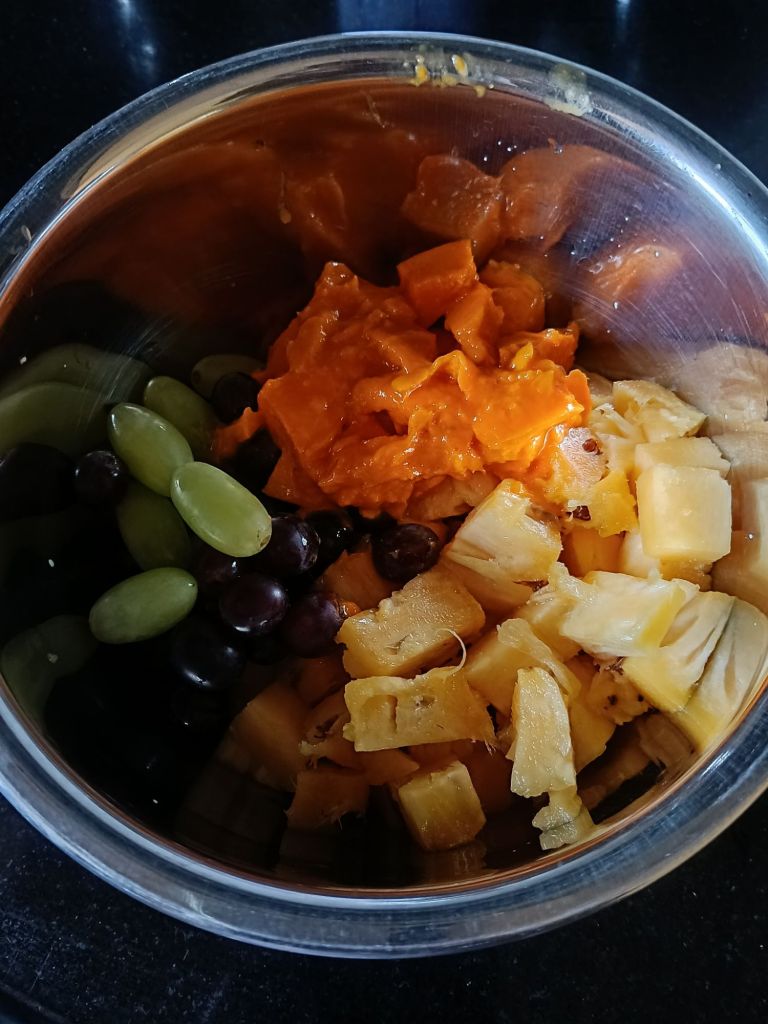
Peel and chop Mangoes and pineapple to bite sized pieces. Wash grapes well. Add to a mixing bowl.
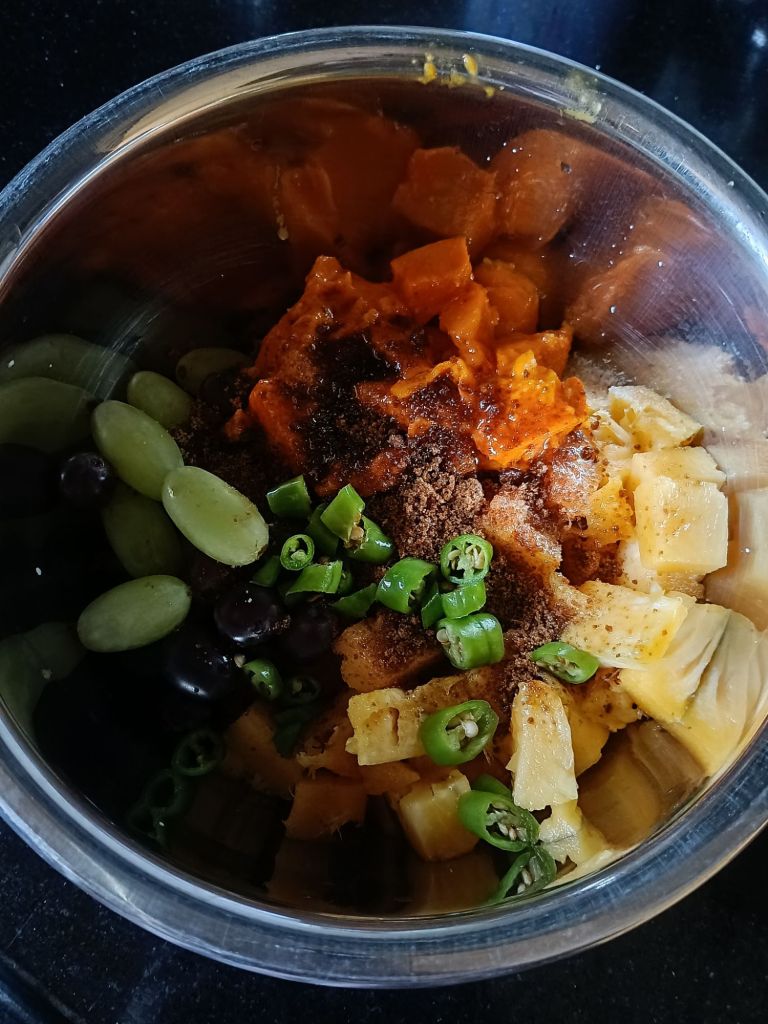
2. Now add salt, jaggery and finely chopped green chillies.
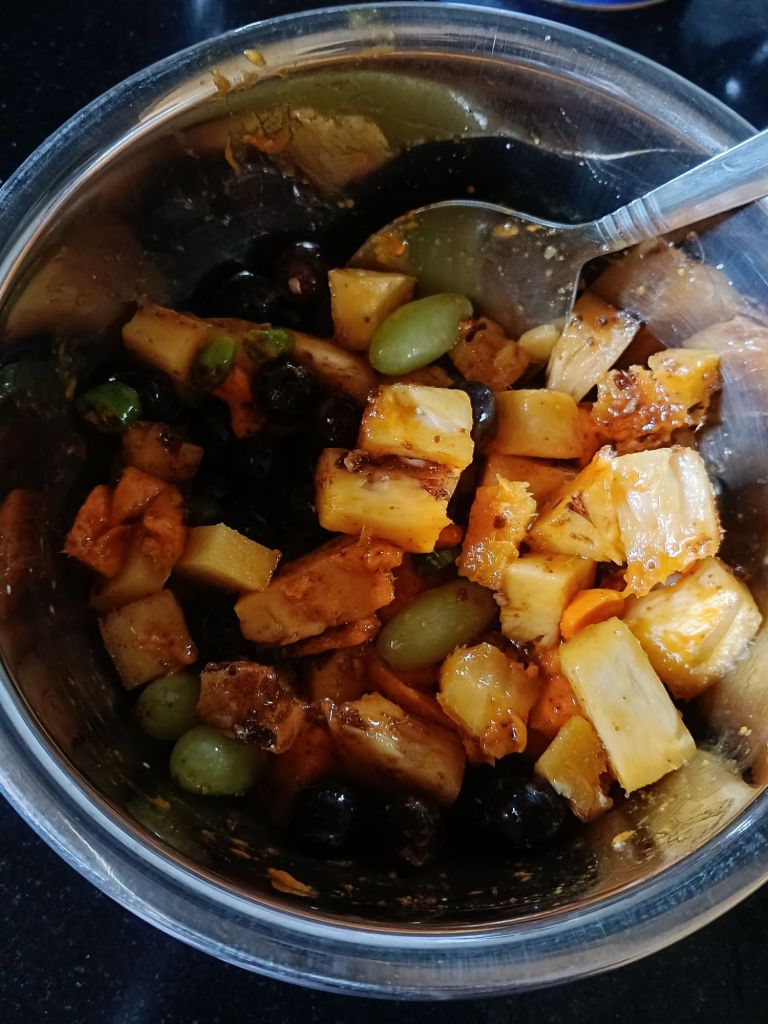
3. Mix well. Keep it aside for about 10 mins.
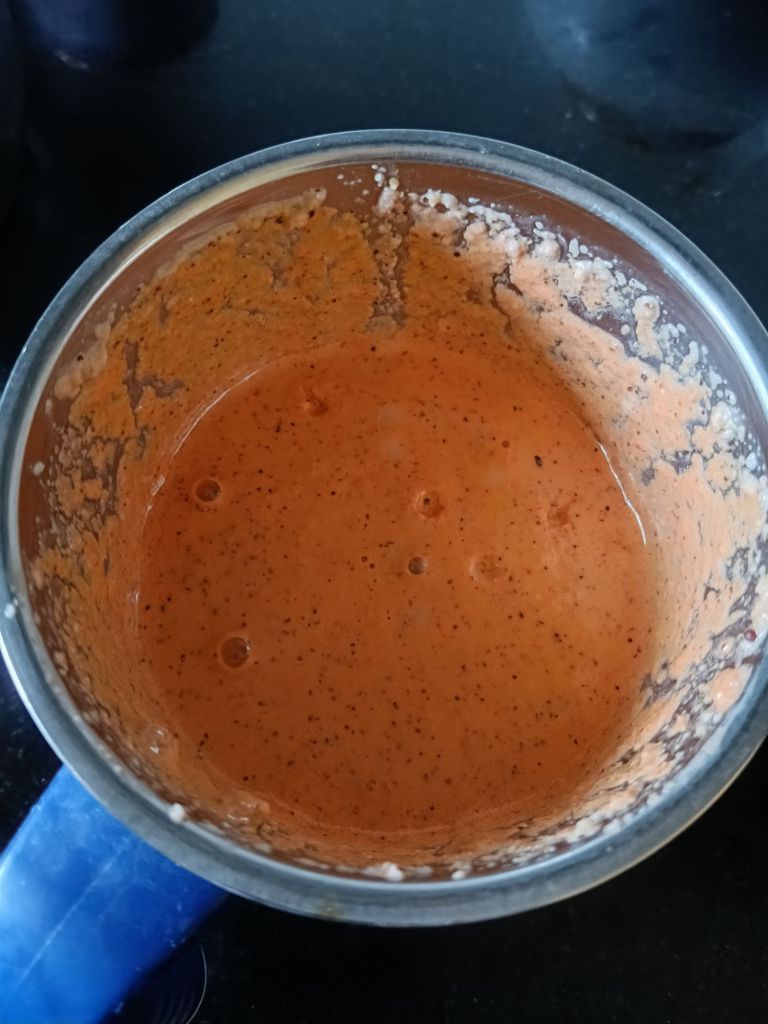
4. Now grind freshly grated coconut, red chillies and mustard seeds to smooth paste in a mixer.
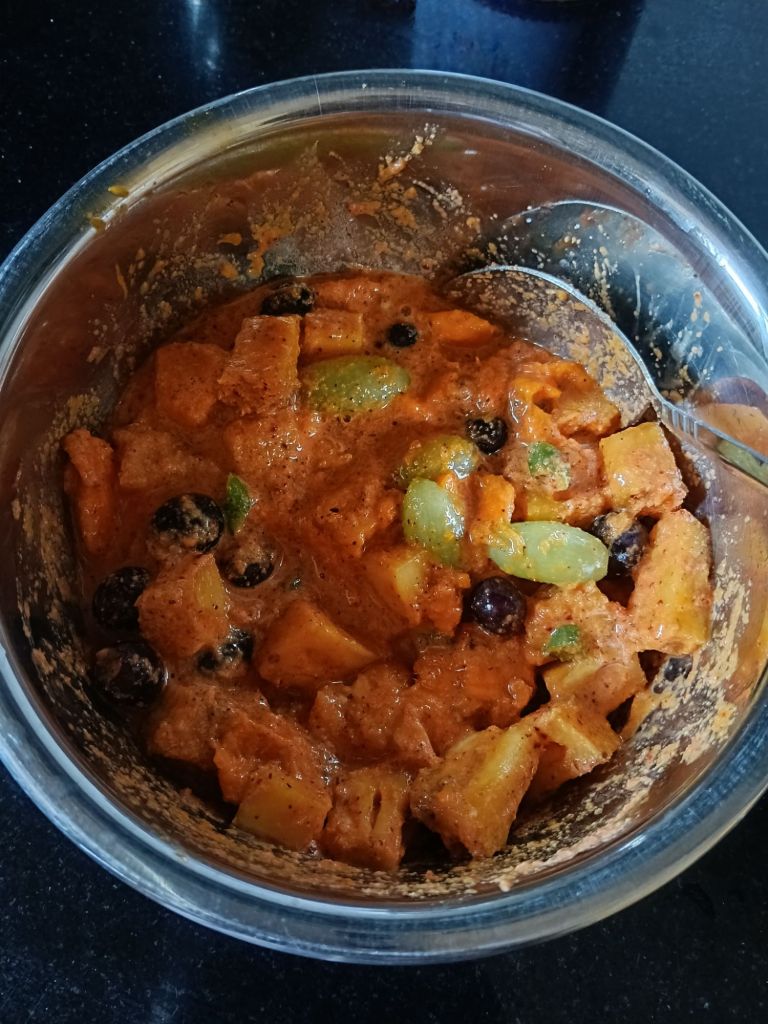
5. Now add this paste to the fruits. Mix well.
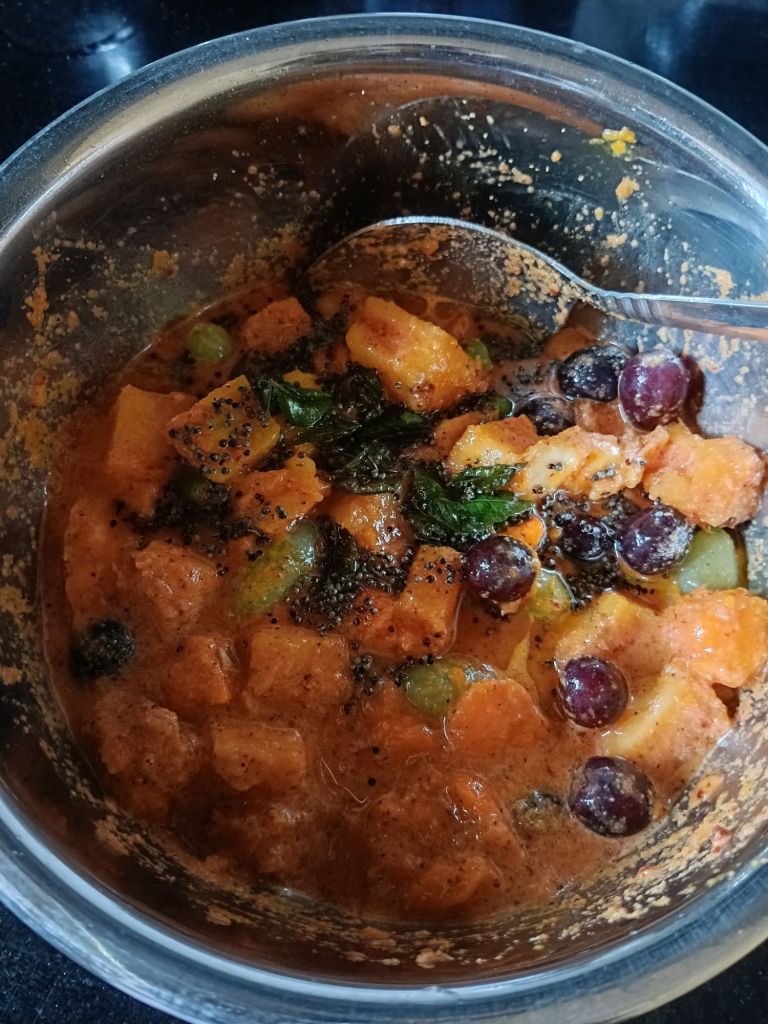
6. Heat coconut oil in a pan and add mustard seeds. When it splutters, add curry leaves. Roast for few seconds and then pour this seasoning over the fruit mix.
7. Mix well. Done 🙂 Enjoy it as a side dish with rice meals or as it is, like me 😍
Notes:
You can add any one variety of grapes of both are not available.
The ratio of fruits is upto to your taste.
If making for small kids, you can skip green chillies and adjust red chillies.
The dish leaves water once made. So don’t add extra water in the beginning or the dish will be very watery when serving.
Refrigerate the leftover as it can spoil if kept at room temperature for long since we have not cooked it and it has coconut too.
Click on the image to save the recipe on Pinterest
Don’t the ladoos look pretty? I loved how this picture came out. 😍 Even though I have been making these ladoos since some time now, the cashew bits idea came while presenting them for the blog and they looked so cute that I felt so happy. ❤️
I have a Microwave Mango Coconut ladoos recipe on the blog which many of my readers have tried but the recipe is with condensed milk which they wanted to avoid and I got requests for alternatives. So, I started experimenting and substituted condensed milk with cashew paste. And it worked very well. 😍
The ladoos come out very soft yet melt in the mouth delicious. I still remember the first time that I made it, I shared it with my neighbor Trinita and she showered me with so many wonderful words saying it tasted really delicious. Happiness is sharing, everything tastes much more yummier once you have shared it with your loved ones! ❤️
Wish I could share with all of you too 😍
Similar is with my daughter. She can’t colour alone and needs me (only me, mind you! Mr daddy is invisible to her 😅😁) to colour along with her. I guess sharing the colouring page and pencils make it much more pleasurable an activity. So, we both colour together listening to our favorite songs. Her current favorite is “Mere Sohneya” from Kabir Singh movie. Listening with her, I too love the song now (super cute music and lyrics ❤️) which is coming very close to “Tujhe kitna chahne lage” which has been my most favorite from the movie. How kids change our song choices too! 😍
On the note, sharing this sweet recipe made from my favorite Mango. Hope you all try and love it. Happy and healthy cooking! ❤️
RECIPE:
Ingredients: { About 15 small ladoos }
2 Cups Freshly grated/ Desiccated Coconut
1 Cup thick Mango Pulp (fresh/canned)
1/2 Cup Cashews
1/4 Cup Milk
1/4 Cup Jaggery powder
1 Tbsp Ghee
1/4 tsp Cardamom powder
Step by step recipe:
1. Grind 1/2 Cup Cashews with 1/4 Cup Milk to a smooth paste.
2. In a pan, add 2 Cups desiccated Coconut, 1 Cup Mango pulp, 1/4 Cup Jaggery powder along with cashew paste.
3. Now mix everything well into an even mixture.
4. Keep this pan on medium flame and cook till moisture evaporates and the mixture turns dry. Takes about 10 mins depending on the moisture content of the mango pulp. Now add ghee.
5. Remove from pan and allow to cool. Add cardamom powder and mix well.
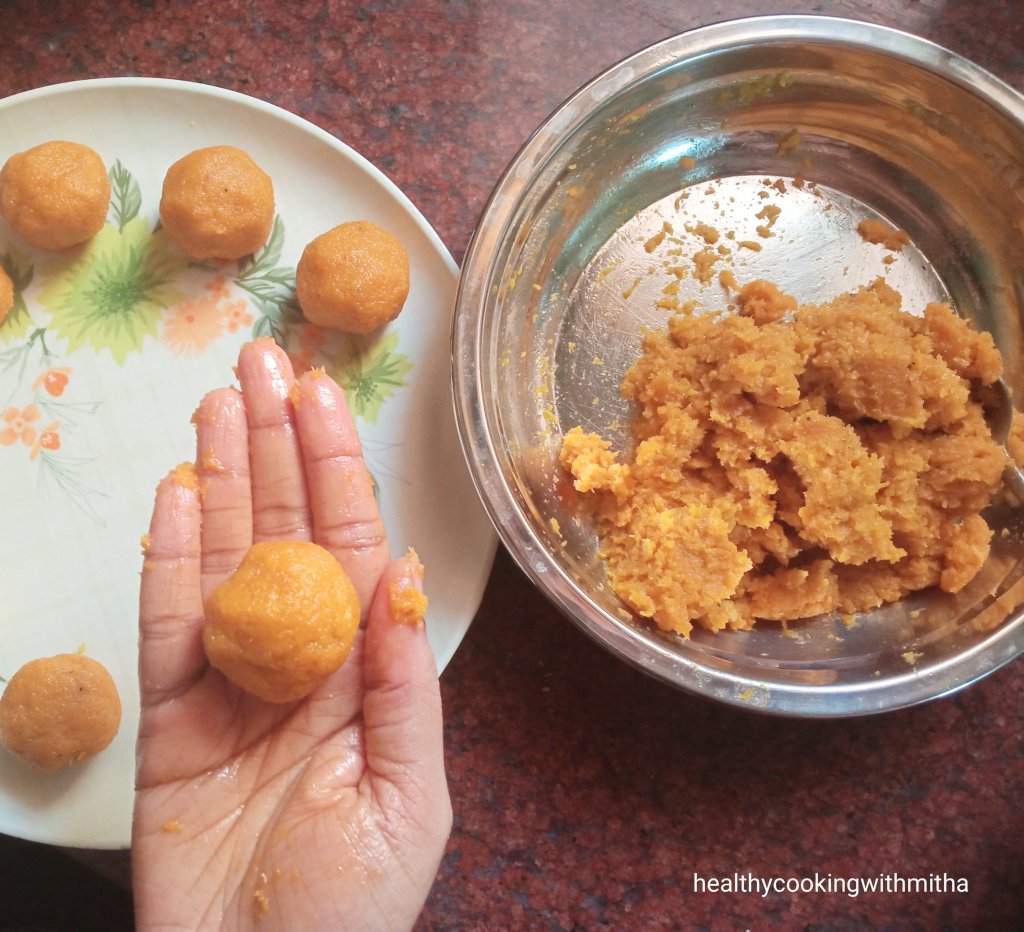
6. When it cools, using your palms form ladoos. It will be very soft and you can make ladoos easily. If the mixture sticks to the palm, apply ghee on your palms while making ladoos.
7. Repeat the same with the rest of the ladoos. Garnish with bits of cashews for it to look pretty. 😍
Click on the image to save the recipe on Pinterest
Notes:
* If using freshly grated Coconut, dry roast in a pan first to remove the moisture and then mix in mango pulp, jaggery and cashew paste like in step 2. Do not brown the coconut though. Just light toasting will do.
* You can use both fresh or store bought mango pulp during off season. If using fresh pulp, do not grind using water. Just slice mangoes and grind the mixer without water for a thick pulp.
* During off season, I use Mother’s recipe brand of Alphonso mango pulp. It works really well for this recipe.
* You can skip jaggeryif the mangoes are very sweet. You can taste the mixture slightly and then add jaggery only if needed.
* You can use grated Jaggery in place of jaggery powder as anyhow it will melt when we cook it.
* For a Vegan version, you can skip milk and grind cashews with equal amount of water. Also you can skip ghee and use any neutral flavoured oil while greasing your palms while forming ladoos.
* Cook the mixture really well such that the moisture evaporates. Else it will be difficult to form ladoos is the mixture is sticky. But don’t cook a lot that mangoes lose flavour. It took me about 10 mins on medium flame in my cooktop.
* These ladoos are not like regular ladoos and very soft but tastes delicious.
* If you have difficulty forming ladoos even after applying ghee on your palms, then refrigerate the mixture for an hour or so. You can form ladoos easily after that.
* After a day, refrigerate the ladoos in a moisture free container.
Click on the image to save the recipe on Pinterest
This picture of Amrakhand or Mango Shrikhand is making me drool now and I am so sad that it’s already finished off. 😅 Had made it as it is my brother’s birthday today and I wanted to post a sweet recipe on the blog dedicated to him. As my regular readers know, Mango is my most favorite fruit among all and making mango sweets are my favorite pastime during mango season. 😍
This dessert hardly takes any effort (just mixer jar washing 😂) but looks so beautiful (all credits to my fav Mango ❤️) and tastes so delicious that whenever I make it, the kids can’t get enough of it. They call it mango ice cream. 😍
Just received a picture of my brother cutting his birthday cake. He turned 25 years today and this picture amazed me as to how much he has grown from a little baby on my lap to a handsome man. ❤️
He works for IBM, Bangalore but is at home due to the work from home situation now. Grateful to God for that as I am relieved that my parents have company and also he’s much safer in Udupi. This picture also shows my home, Amma’s dream flat amidst nature near Shri Krishna temple, Udupi and makes me miss all of them so much. ❤️
Also sharing a collage of pictures of my journey with my brother from when he was a baby, born 6.5 years after me, to our childhood memories to growing up together. ❤️
Here’s wishing you a very happy birthday dear Madan. Loads of love and blessings on this special day as you turn 25. Dedicating this sweet to you. ❤️ The big heart is me, being your Akka and the small heart is you, my little brother.😍😍
Click on the image to save the recipe on Pinterest
On this note, sharing the recipe with all of you. Hope you all will try this sweet recipe and I am sure you will love it. Happy and healthy cooking! ❤️
RECIPE:
Ingredients: { Makes about 3 Cups }
2 Cups Curd / Yogurt
1 Cup thick Mango pulp
1/4 Cup Jaggery (about 3 to 4 spoons)
1/4 tsp Cardamom powder
Saffron strands and mango pieces to garnish (optional)
Step by step recipe:
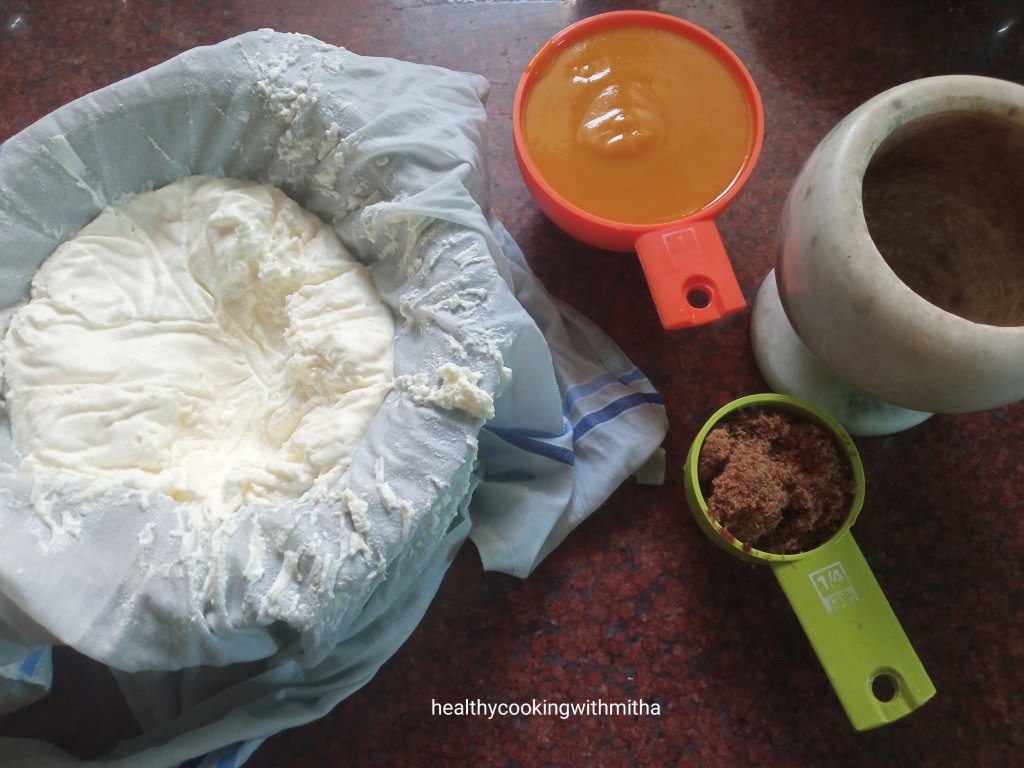
1. Make Hung Curd from the regular curd. It is very easy to make and I have shared all the step by step pictures in this Jaggery Shrikhand post. You can check that.
2. Once hung curd is ready, keep all the other ingredients ready too. In this picture you can see, freshly made hung curd, mango pulp, jaggery powder and cardamom powder.
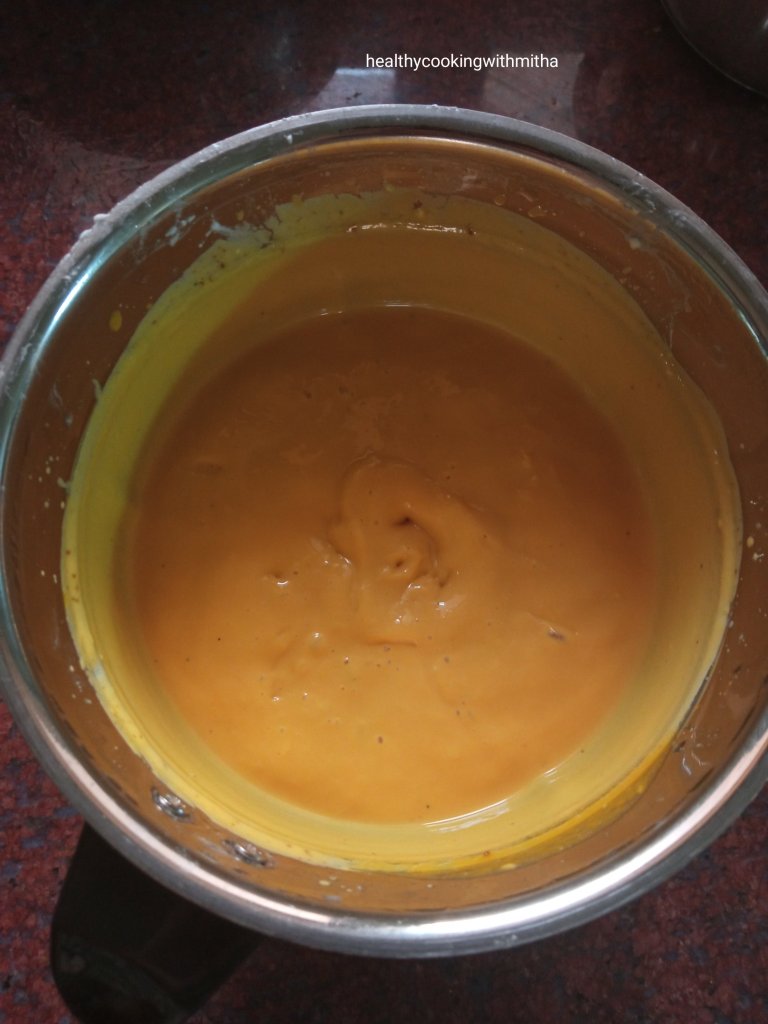
3. Now add all these ingredients in the mixer jar and blend till the mixture turns smooth and creamy.
4. You are done. Now pour into bowls, garnish with saffron and mango pieces. Serve chilled.
Click on the image to save the recipe on Pinterest
Notes:
* This sweet tastes best with Alphonso mango pulp due to the natural sweetness of the mango.
* You can use fresh or canned mango pulp. When making the mango pulp at home, just blend the mangoes to a thick pulp without adding water. Else the Amrakhand turns watery.
* You can skip jaggery too if the mangoes are very sweet.
* The thicker the yogurt, the quicker you will get hung curd. I hung the curd in a bowl only for two hours and it came out to be a thick hung curd. That’s because the curd or yogurt that we get here is very thick.
* For making hung curd using regular curd, check my Jaggery Shrikhand post.
* You can also add dry fruits to it. I skipped as my kids like it only with mango pieces.
* I have added a lot of mango sweet recipes on the blog. You can check them here – Mango Recipes.
It’s Christmas time and the official “bake at home” time too 😄. I have been seeing so many wonderful bakes on various Facebook food groups that I am part of and it is really amazing that now, everyone bakes so many varieties at home itself. So I thought I too should compile my healthy cakes and cookies in one page for those who want to bake guilt free goodies even for Xmas (if you are like me 😀).
For me, Christmas brings back two memories of my childhood. One is my dad bringing me Plum cake from our nearby bakery and I used to wait so eagerly for it. The aroma and flavour of the cake is still in my taste buds that it brings so much nostalgia. 😍
Second memory is singing Christmas carol at school (yes, I used to sing too 😅). We all used to wear white top and black skirt, practice so much for weeks and finally when standing on the stage singing the choir together with friends, it felt so good. ❤️ Though I don’t have a picture of the carol singing, here is a picture of the dress, which was my favourite as a 12 year old. This is from Amma’s album which is a treasure trove of old memories (love looking at them remembering old times 😍).
A part of the album page for the memory of old style albums. Nothing can replace the pleasure of looking through those albums. ❤️
Though after school, I never sang on stage, I still sing bhajans and songs for my kids when putting them to sleep and record them to send Amma who loves to listen to them. 😍 The best part is I still remember the lyrics and tune of the Christmas carols, much to the amazement of my daughter (she loves Christmas 🎄). So we have been singing carols together, making cards for her friends while baking some goodies to enjoy this season.
Hope you all try some of them too. Happy and healthy Baking! Merry Christmas to all of you in advance! ❤️
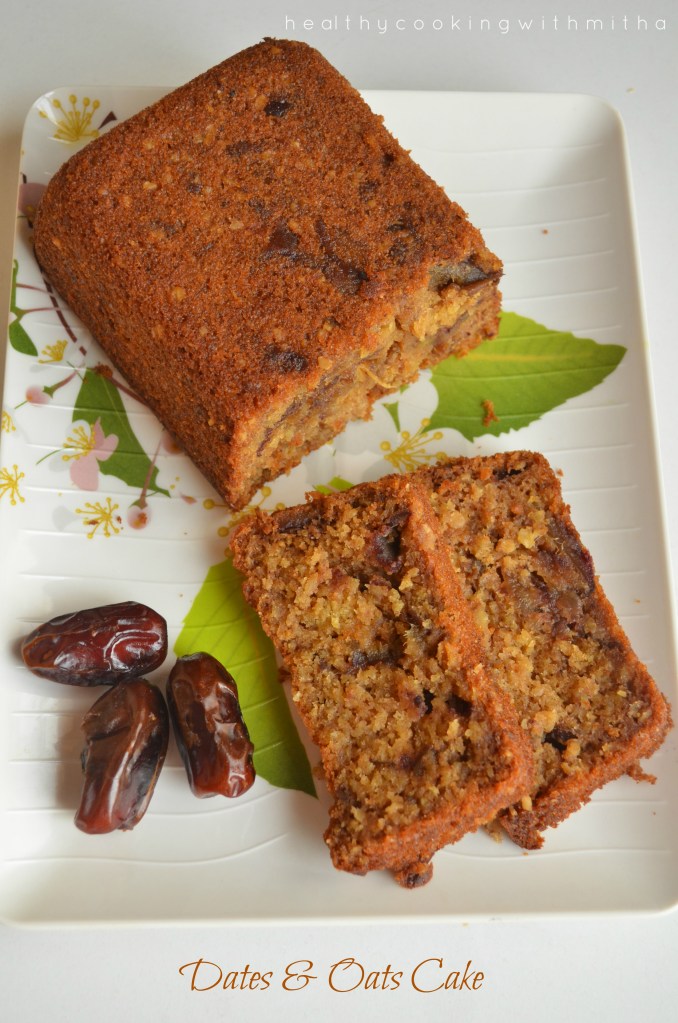
3. Dates and Oats Cake – My idea to sneak some oats in the cake as well. Because you can never say it has oats in it. Another of my readers’ favorite cakes. Tried and loved by so many.
5. Dates and Carrot Cake – Sugar free cake – My personal favorite as it is free from sugar or even jaggery can be skipped. Beautifully combines the natural sweetness of dates and carrots. Another of my recipe tried a lot by my readers.
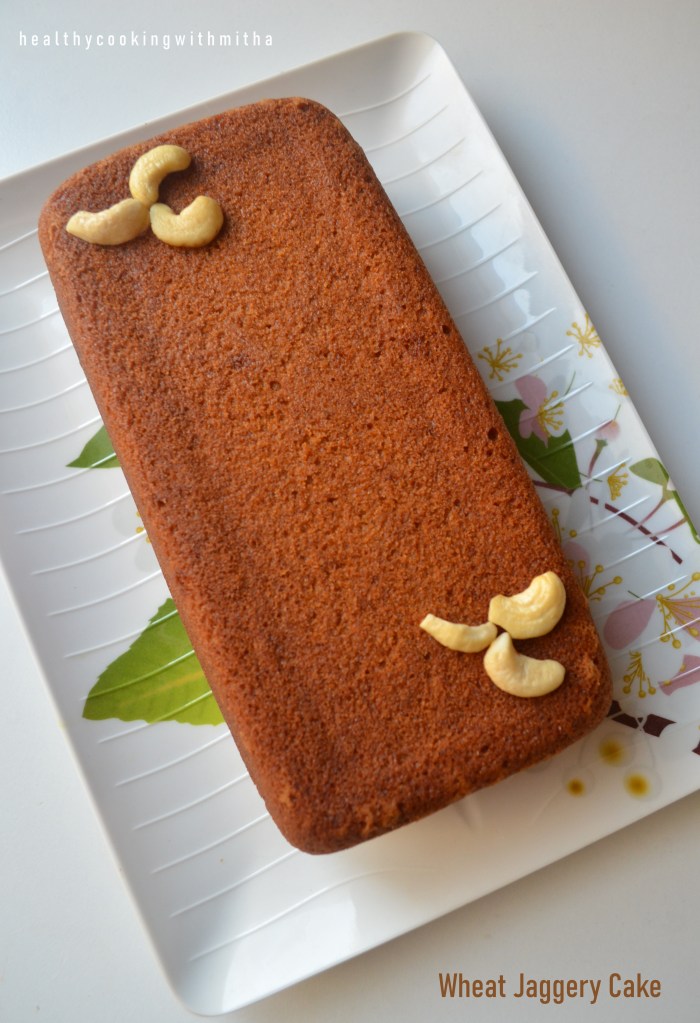
8. Wheat Jaggery Cake – Basic cake to which you can add dried fruits to make a dry fruit cake. Also can make cupcakes with this. Have been making this cake for years now for my kids.
9. Wheat Chocolate Sponge Cake – You can never say it is made with wheat flour and jaggery. Comes out super soft and delicious. I make cupcakes with this batter regularly for my kids as they love it. ❤️
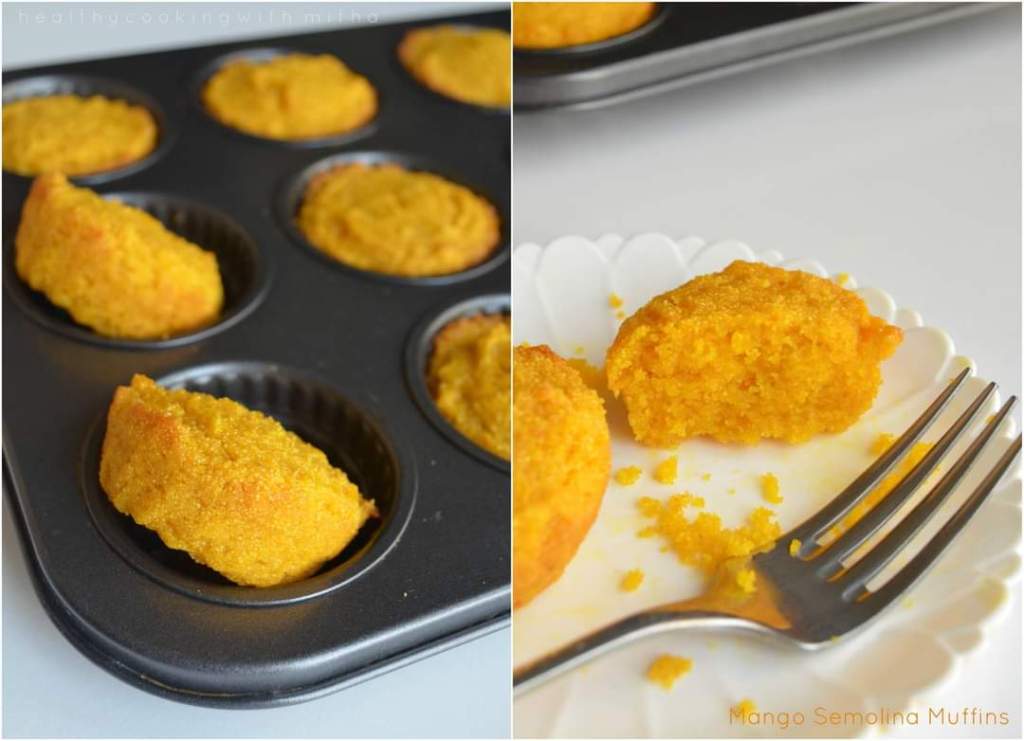
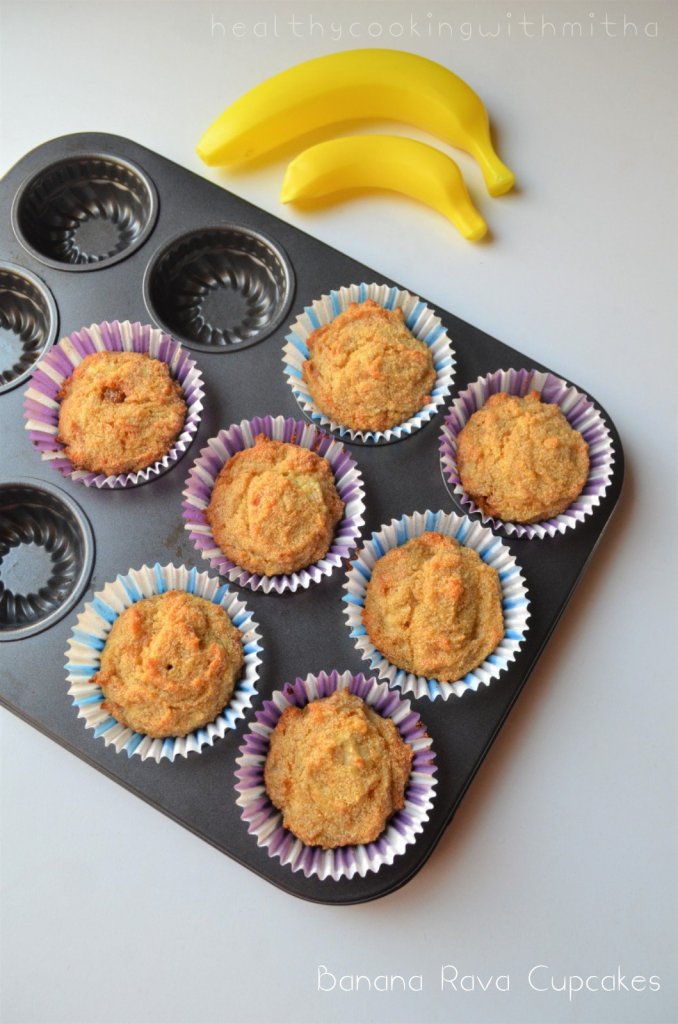
10. Eggless Banana Rava Cupcakes – This is my go to recipe when I have over ripe bananas. Super easy to make, one bowl recipe which tastes heavenly due to the combination of Rava, banana, Jaggery, ghee and cardamom powder.
11. Eggless Dry Fruit Cake – A great way to add dry fruits in your kids snack. With the addition of orange juice, this cake tastes absolutely delicious. A regularly made cake at my place.
12. Eggless Wheat Banana Cupcakes: I make these cupcakes for my kids’ evening snack during vacations and also for their tiffin box to school. A great way to finish up those over ripe bananas too. Comes out soft and delicious.
Jowar Chocolate Sponge Cake – Gluten free and eggless, this cake baked with Jowar flour is a perfect example of being healthy as well as tasty. Comes out very soft and spongy too..
This is another easy, healthy sweet recipes collection that I made last time. You can find the recipes here. They are sweets that can be made under 15 mins.
Click on the image to save the recipe on Pinterest
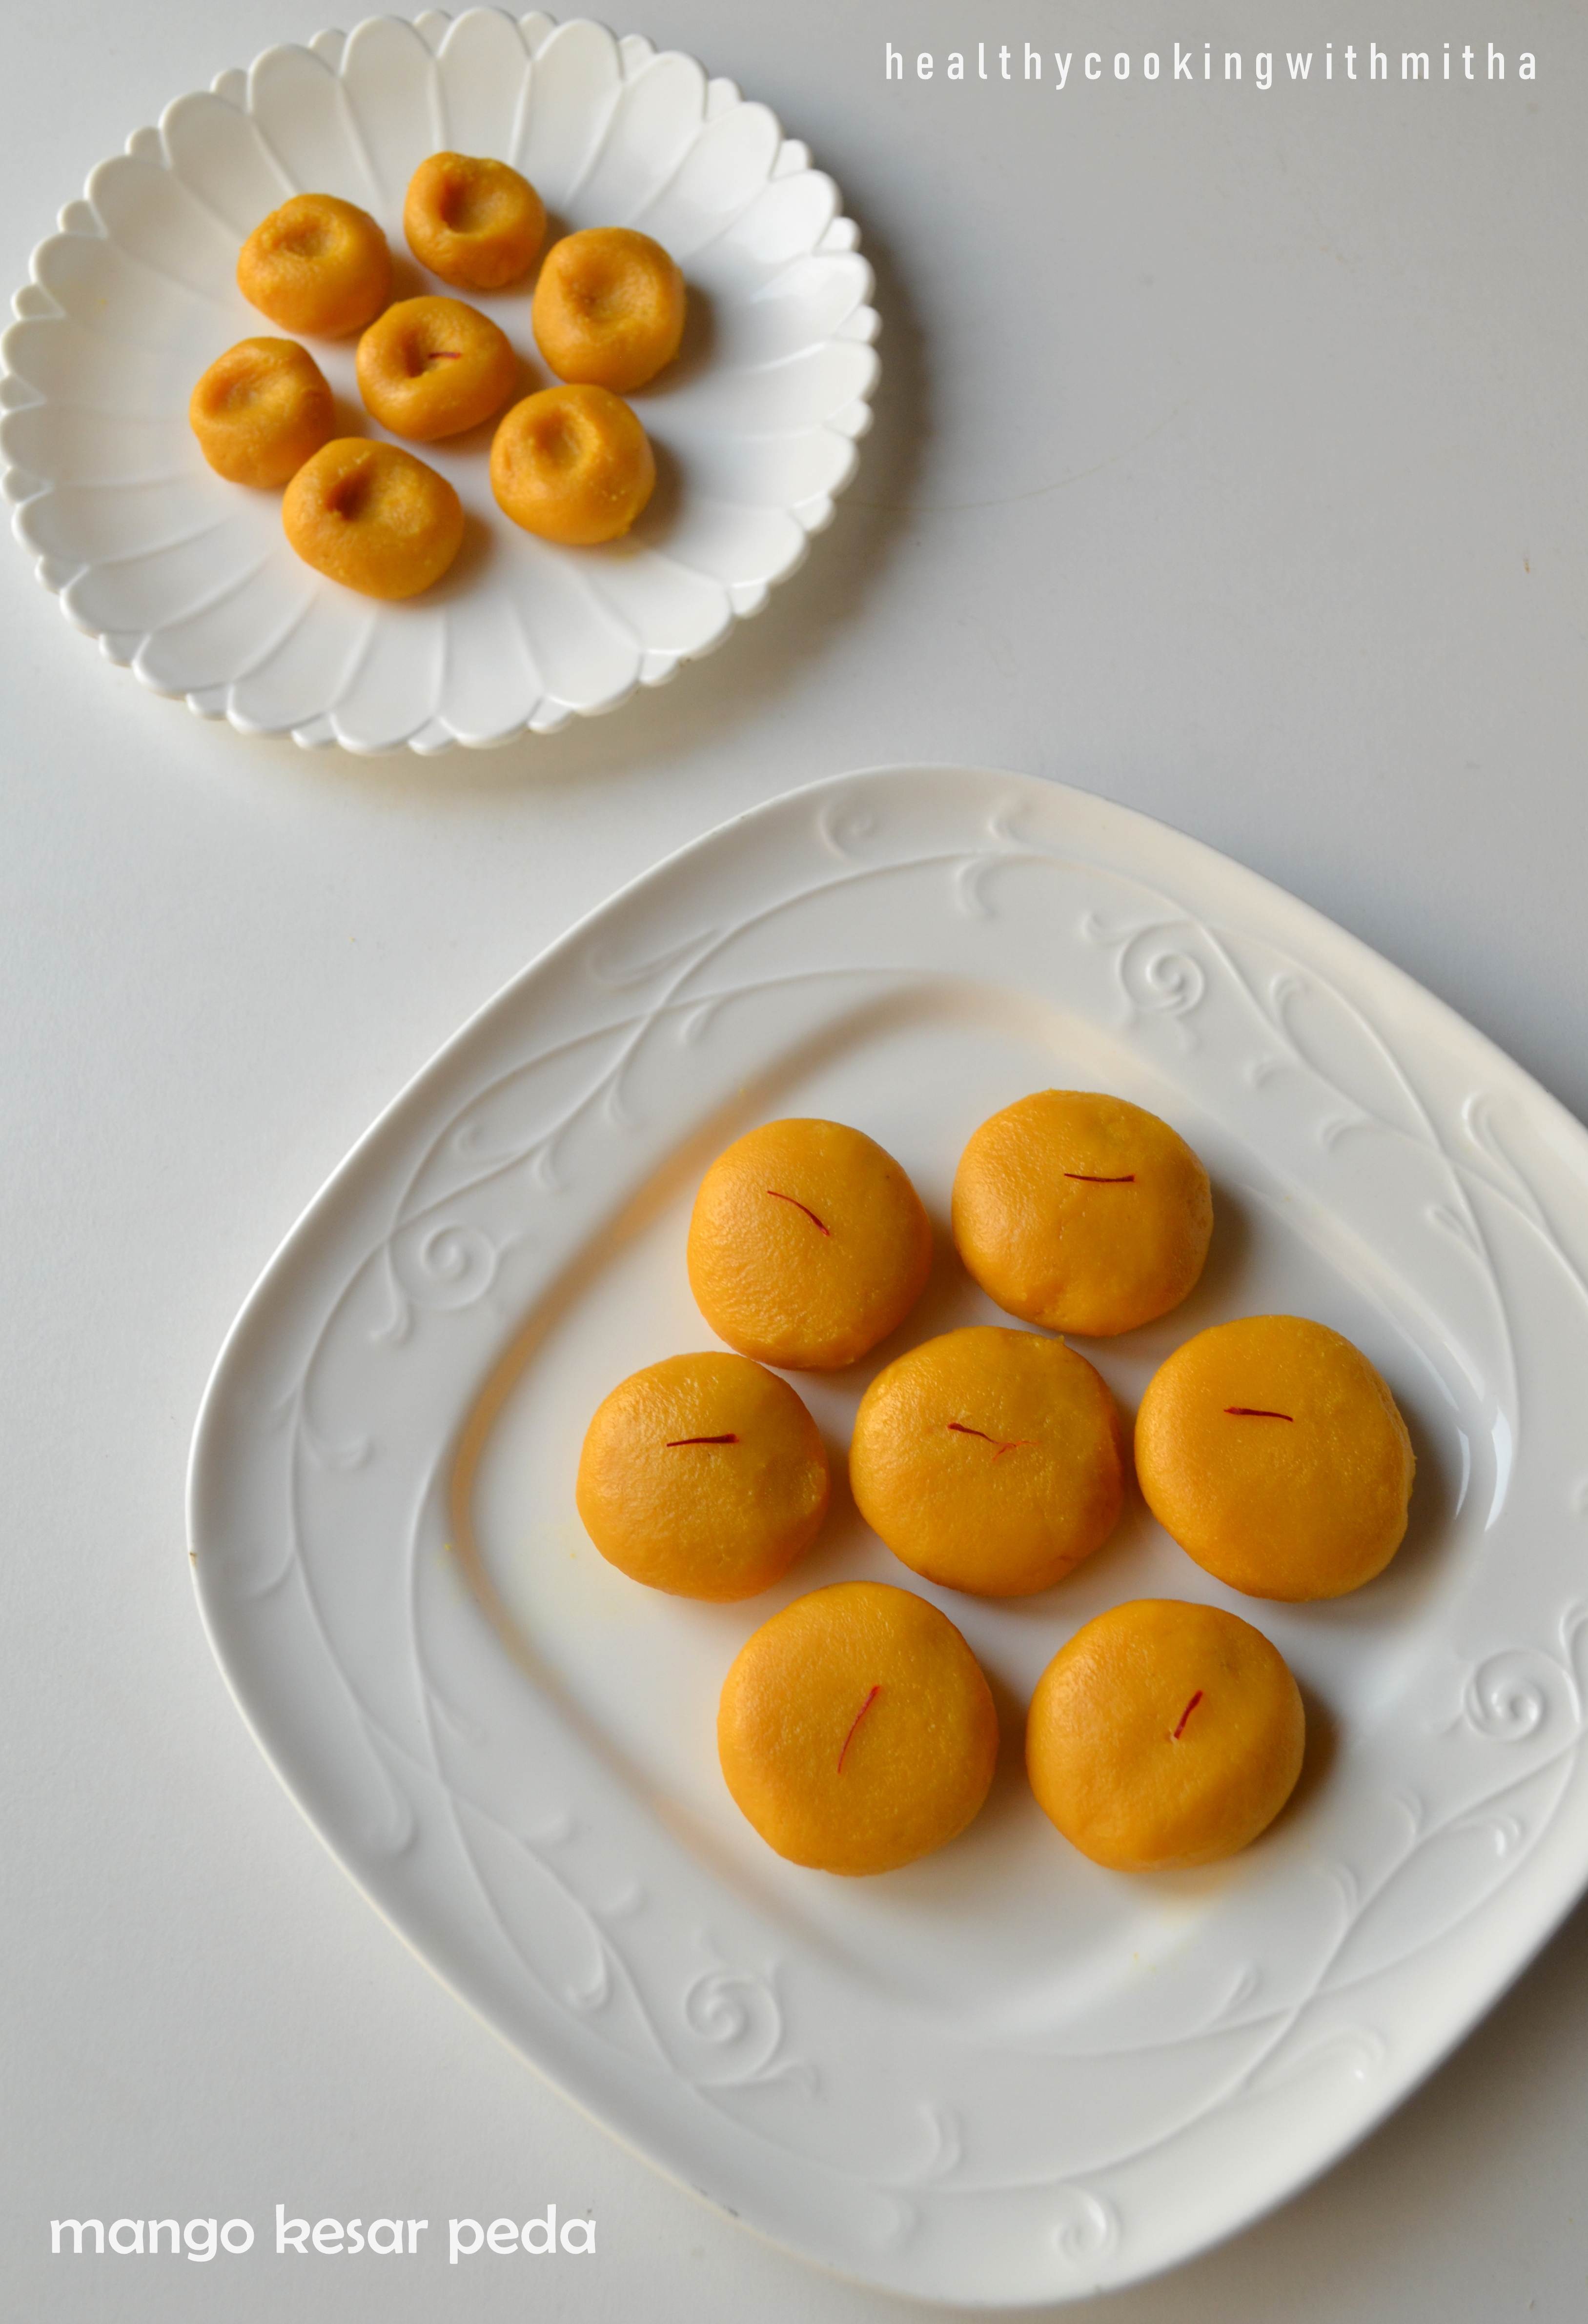
As our most prominent festival Navaratri is approaching, I decided to share some sweet recipes which I make regularly during festive occasions. One among them is this Mango Kesar peda which is our favourite (especially mine as I love mangoes and sweets. So this is a heaven made match for me ❤️❤️)
Navaratri during childhood meant pooja days in Kerala as books were kept in front of Goddess Saraswati for blessings and we would take it on the 10th day ie on Vijaya Dashami day. {I would actually be more happier that pooja days meant no school and no studies too. 😀😀}
After marriage, in my husband’s home, they follow satvik meals all through the 9 days of Navaratri and don’t eat onion or garlic. On Vijaya Dashami day, there is a family get together and we enjoy a “navve javan” or new meal meaning we are celebrating a new beginning. We prepare huge number of dishes and eat them together while chattering our hearts off. {Yes, they all are as talkative as me and I am their leader “Ammi” as they call me! 😀}
We usually take vacations to India during this time to be with the family during “navve javan”. This will be the first year we will be missing it due to Covid situation.
Anyhow, I hope to celebrate the Navaratri days and Vijaya Dashami by making sweets, enjoying simple satvik meals and most importantly remembering Goddess Durga in all her forms. Essentially, celebrate to remember that good always triumphs. So, never let your goodness diminish even in difficult times and keep praying.
So here is the recipe for the peda. Hope you all try and love it too. Happy cooking! Shubh Navaratri and Vijaya Dashami to all of you! 🙏
RECIPE:
Ingredients:{Makes about 12 pedas}
1 1/2 Cups Milk Powder ( full fat milk powder)
1 Cup thick Mango Pulp (fresh or canned)* I use Mother’s recipe brandof Alphonso mango pulp
2 Tbsp Jaggery powder ( can skip if using sweetened mango pulp)
1 Tbsp Ghee
1/4 tsp Cardamom powder (optional)
Saffron strands to garnish on top of the peda
{ I have doubled the measurements in the below pictures and hence the quantity seems so much. It yielded me 24 pedas.}
Step by step recipe:
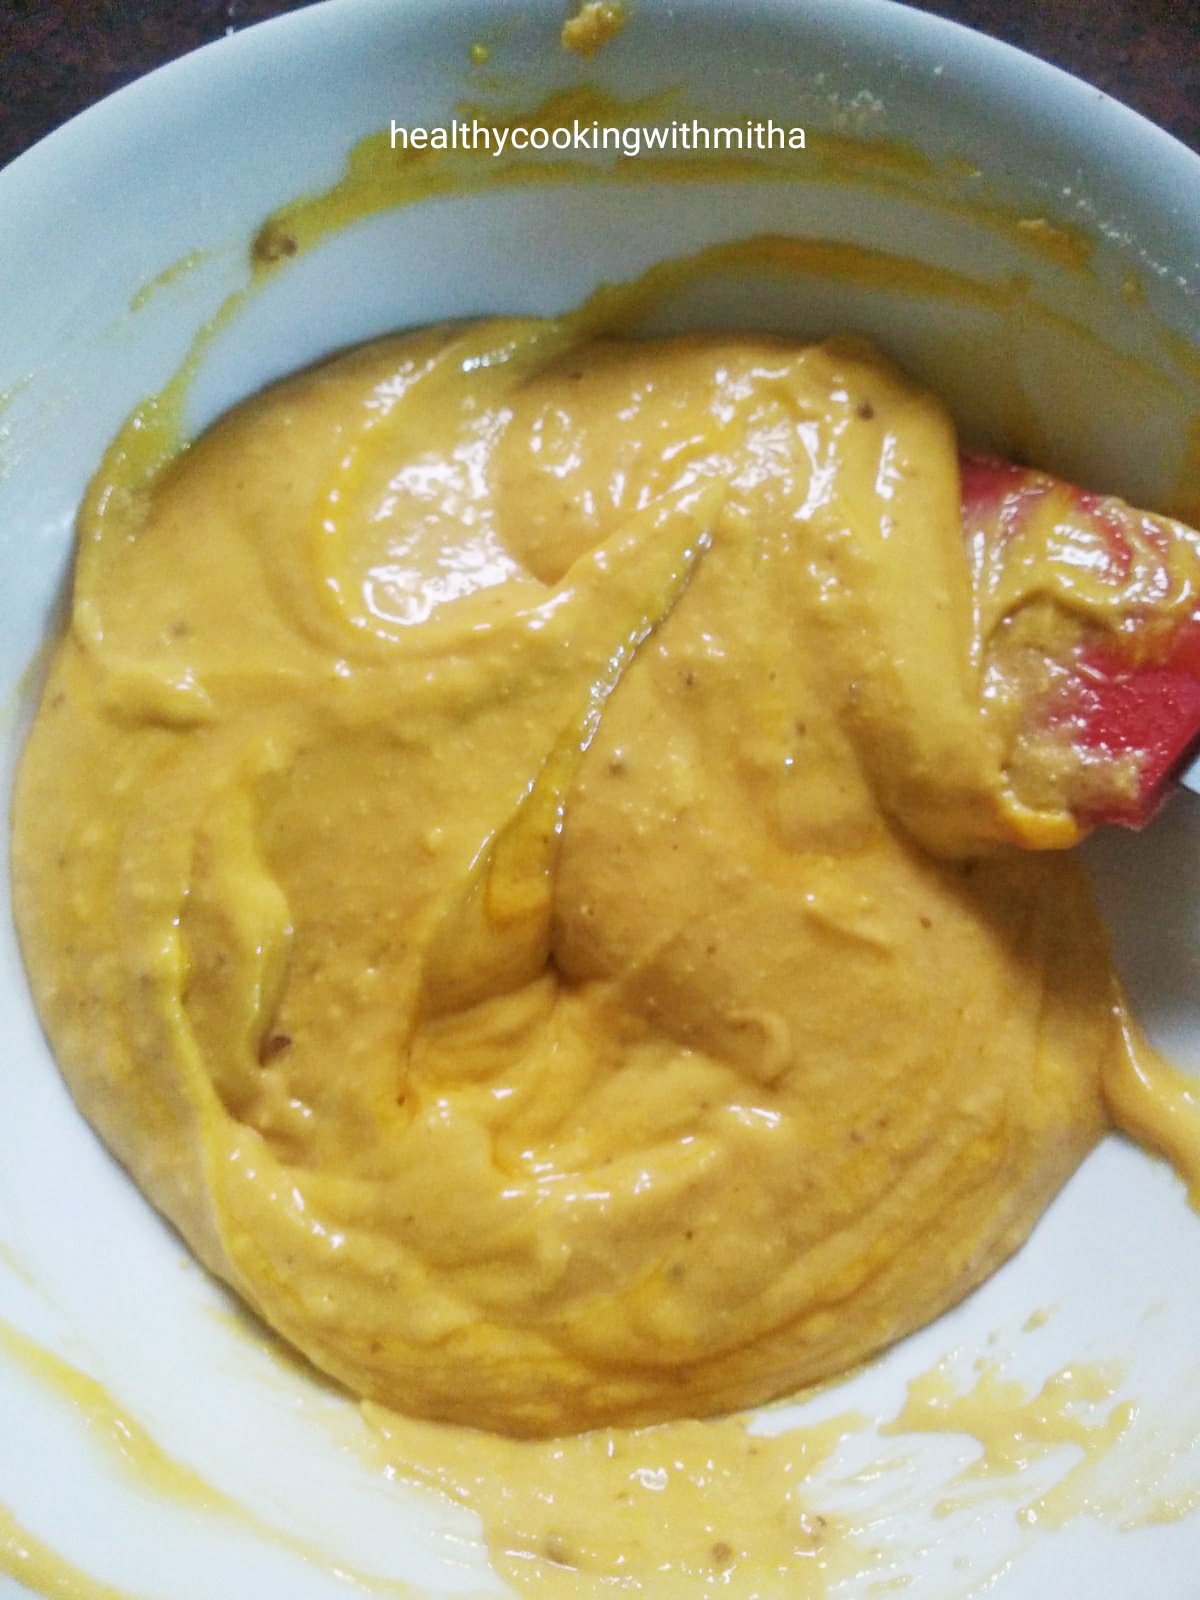
1. Take milk powder, mango pulp and jaggery powder in a bowl.
2. Mix well using a spatula so that the mixture is free from lumps.
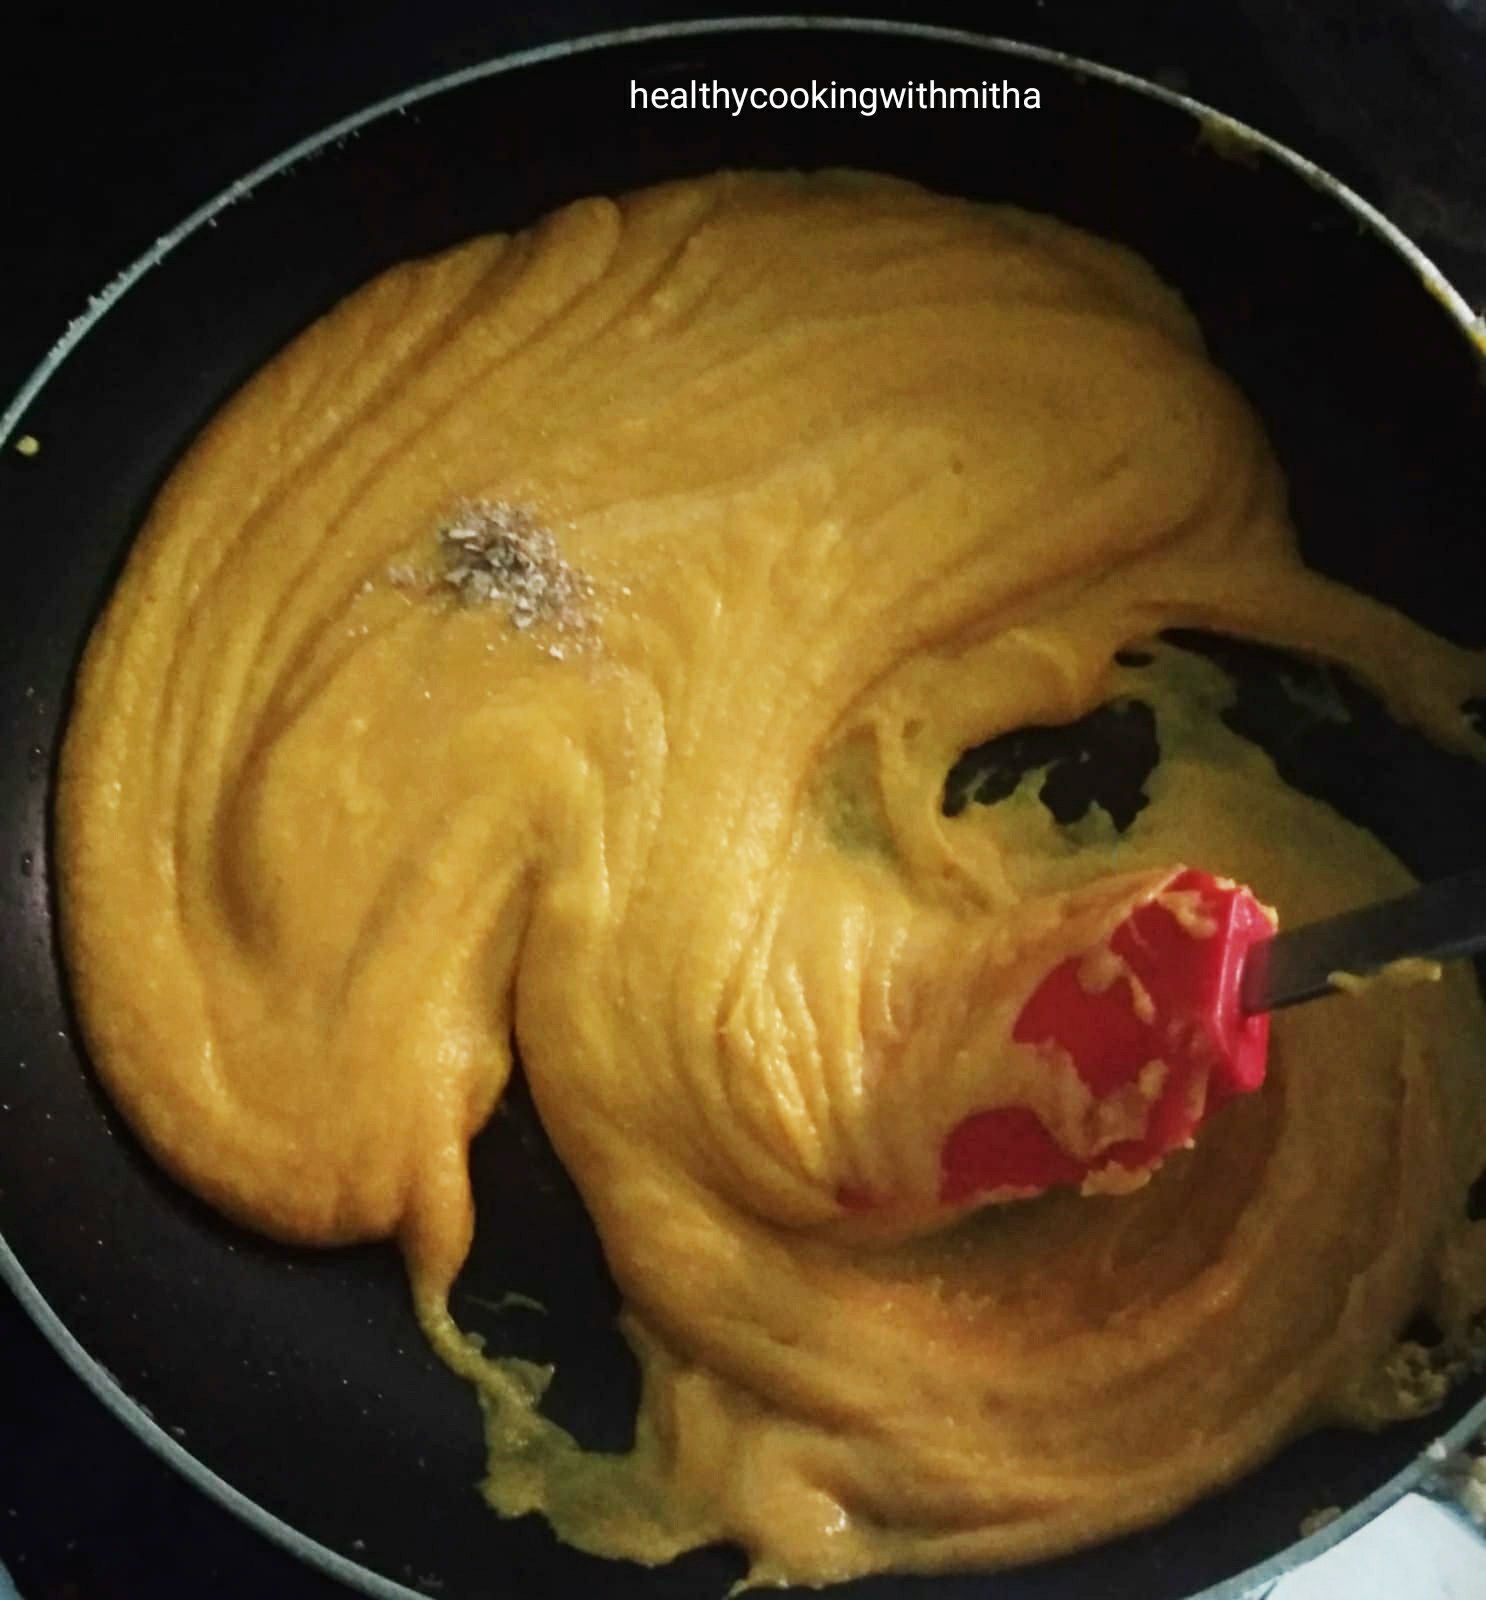
3. Heat ghee in a non stick pan and add this mixture. Keep the flame on medium.
4. Keep stirring on medium flame till the mixture starts to thicken and leaves the sides of the pan. Add cardamom powder and mix well. Takes about 8 to 10 mins.
5. Remove from the flame and allow it to cool completely. Take a small ball of the mixture and press between your palms to bring to the shape of the peda. If you find it difficult to shape them, grease your palms with ghee and they will come out well.
6. Repeat the same with the rest of the mixture. I also made some small pedas for my kids as it looks cute to them. Garnish with saffron strands.
Click on the image to save the recipe on Pinterest
Notes:
* This ratio of ingredients lead to very soft pedas. If you like slightly harder pedas, then reduce mango pulp to 3/4 Cup instead of 1 Cup.
* I used regular milk powder available at grocery stores. I live in Qatar and the brands available here are local to this region. You can use Nestle milk powder or any full fat milk powder.
* The mixture will be very soft when hot. It will turn hard as it cools down.For quicker hardening of the mixture, you can refrigerate the mixture for some time and then form pedas. The pedas will harden as they are kept in room temperature.
* I refrigerate them in an airtight container so that they last well. They last well till 4 days if handled well. Mine got finished off by then.
* I have used both sweetened mango pulp and unsweetened ones to make this. Sweetened mango pulp does not need the addition of jaggery while unsweetened ones requires the little amount of jaggery powder.
* Be careful to stir the mixture on medium flame as high flame can burn the mixture.
* You can also add saffron strands into the mixture but I prefer to garnish as they look pretty.
Update: I am getting many messages about what other option is available for those who don’t have mango pulp. If mango pulp is not available, there is another peda which I make with milk powder and condensed milk. For 1 tin condensed milk ie 397 grams, mix 1 and 1/2 Cups milk powder. Heat ghee and add Kesar. Pour this mixture and cook till it leaves the sides of the pan. Then make pedas. Though it’s not as healthy, tastes very delicious. I have made this peda many times and it comes out perfect each time.
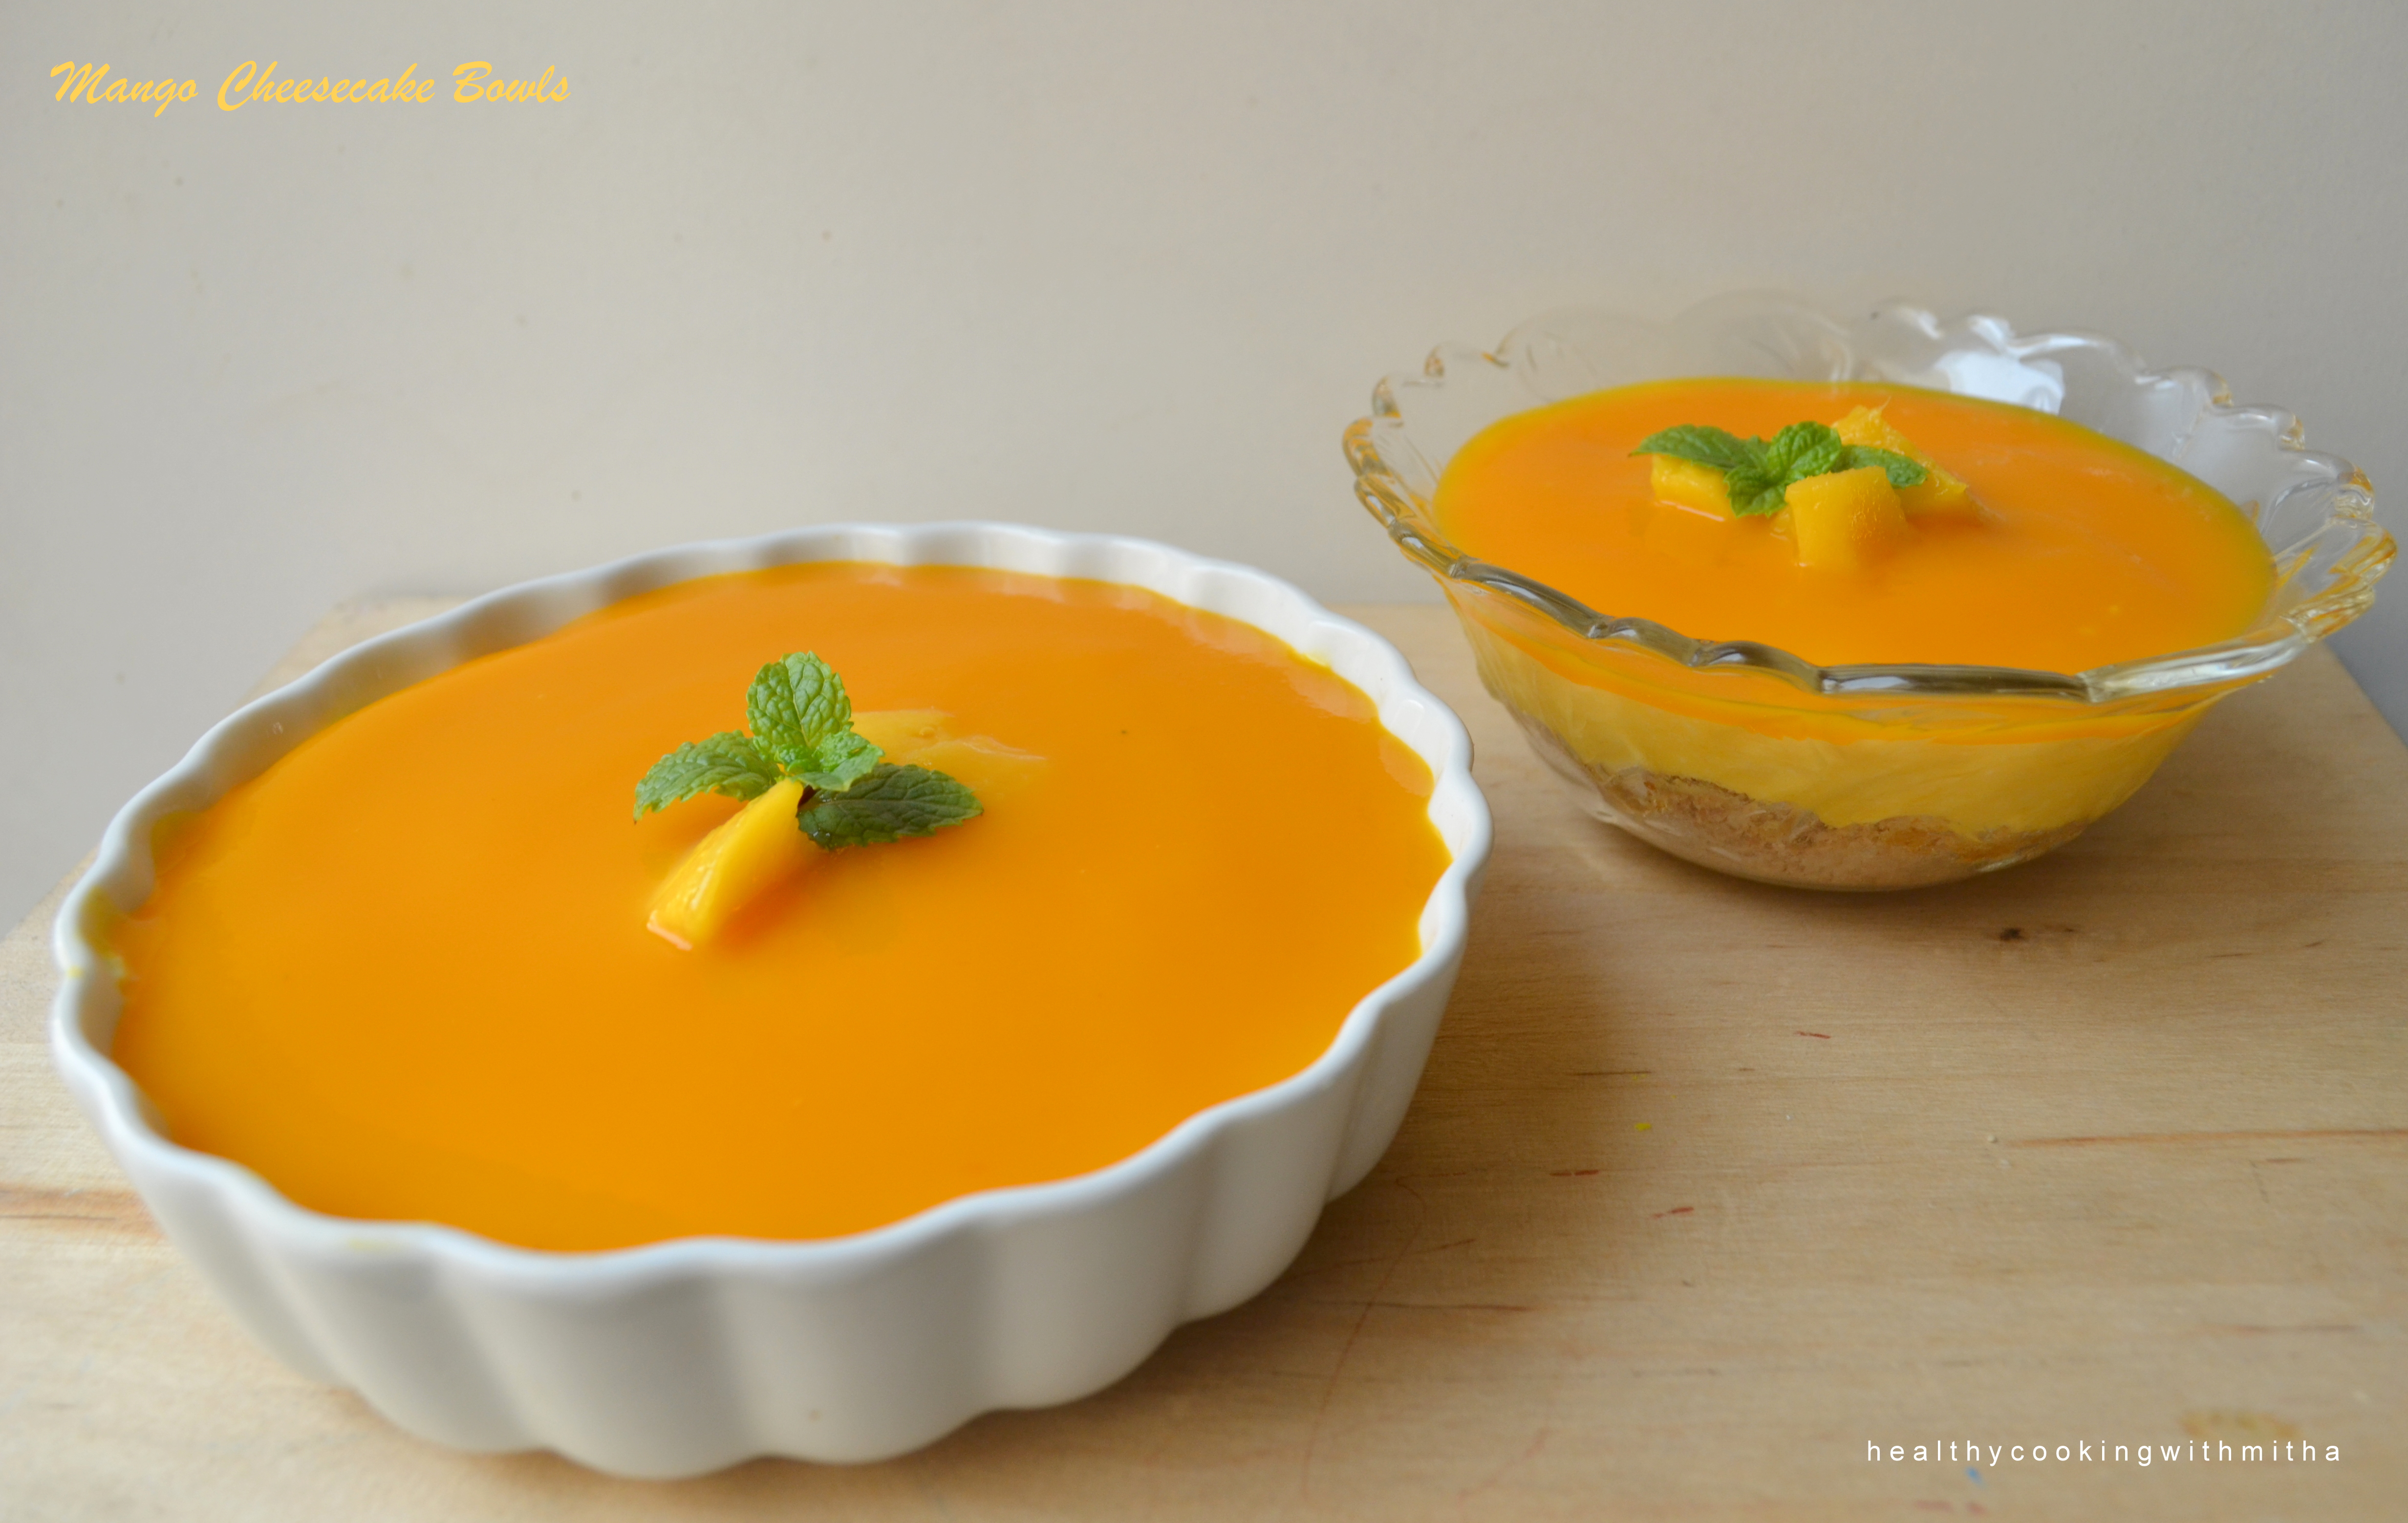
Here is the easiest cheesecake ever and definitely the tastiest too since it has mango in it. How can anything with mango not taste delicious?
Btw did you notice those hands holding the cheesecake? It is my husband’s and it is his photography too. I am very bad at pictures such as this and he helps me by clicking such unique captures.
I make Chocolate cheesecake well and he wanted me to make a mango version of it to see how it will come out. Even though I was hesitant as I was unsure whether it will set or not but it set so beautifully and tasted so yummy that we had a great time enjoying it for our weekend dessert (though we could not move out of our couch after that 😂).
But I guess some days are meant to be like that. To enjoy such sinful desserts just for a wonderful change from being health conscious always. Hope you all try and love it too. Happy cooking!
RECIPE:
Ingredients:
For the biscuit base:
100 grams Digestive biscuits (I used 8 McVities biscuits)
2 Tbsp Butter
For the cheesecake layer:
225 grams Cream cheese (can be substituted with hung curd)*check notes
1 tin sweetened condensed milk (397 grams)
1/3 Cup Lemon juice
2/3 Cup Mango pulp (fresh or canned)
For the mango topping:
About 1/2 Cup Mango pulp, fresh mango pieces and mint leaves
Step by step recipe:
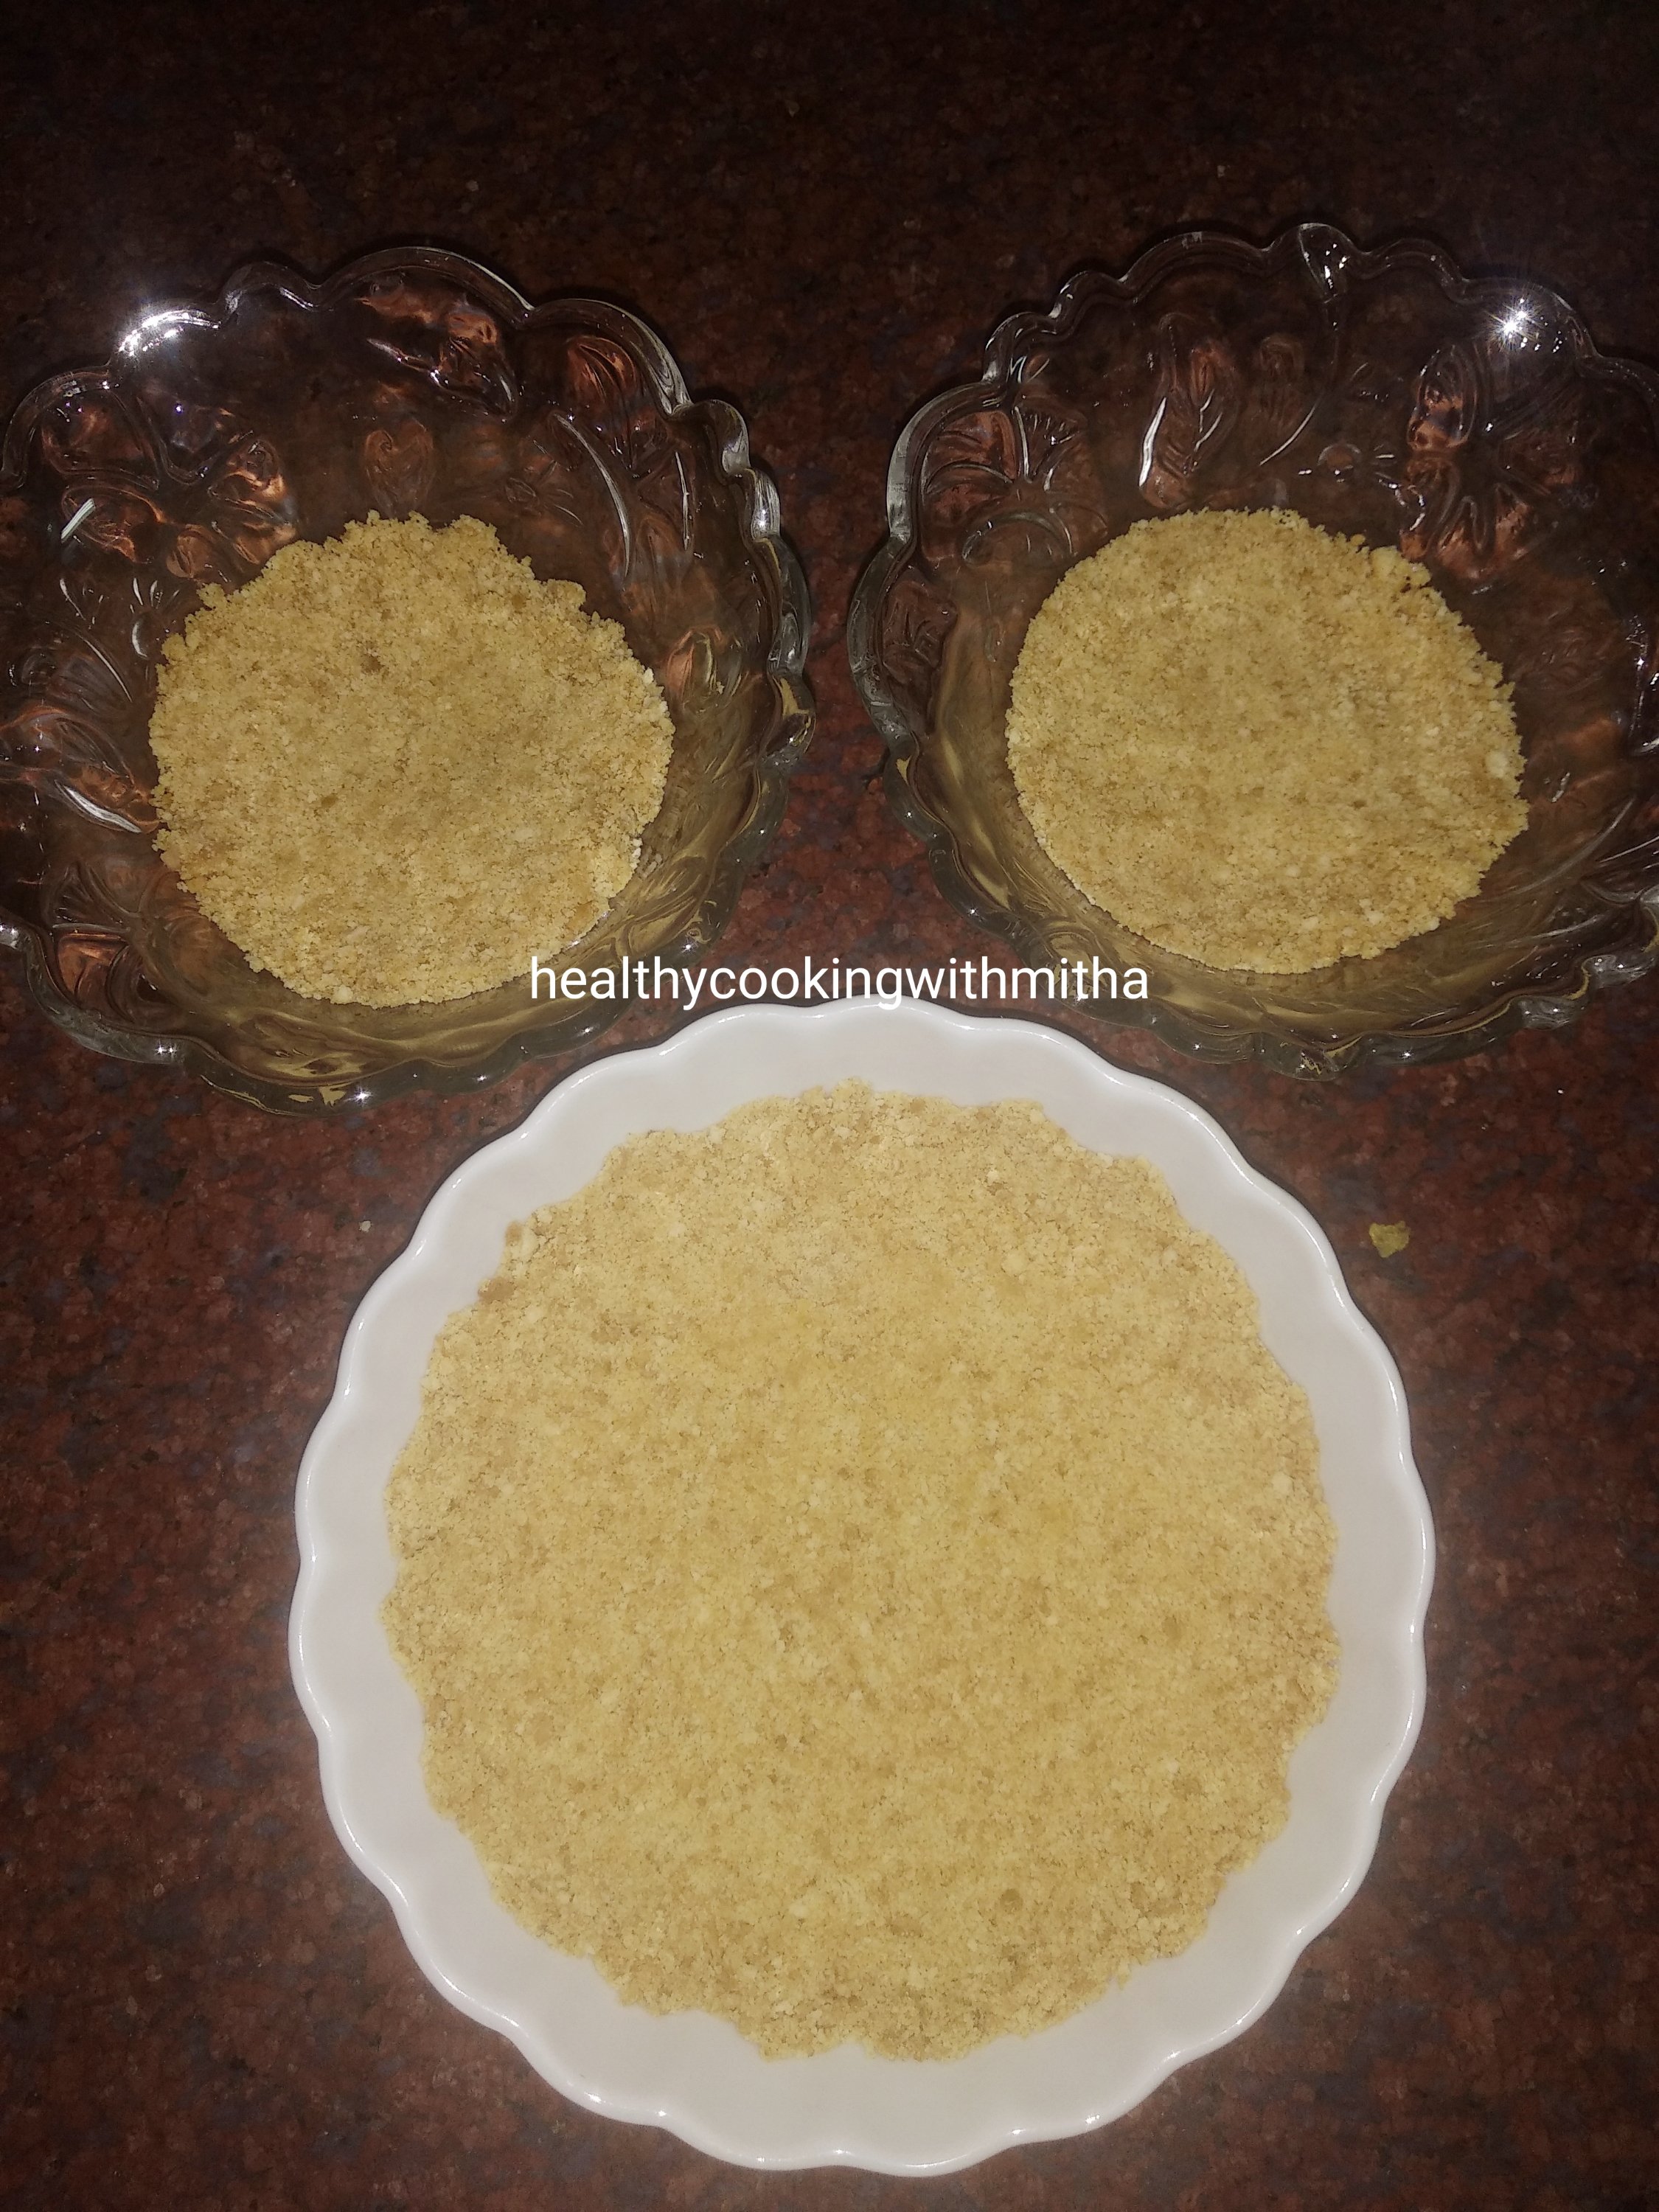
1. Powder the biscuits to a fine powder using a mixer or just add to a ziplock pouch and use a rolling pin to powder the biscuits. (My 5 year old daughter did this for me 😉)
2. Melt butter in a bowl and add this biscuit powder to it. Mix well.
3. Put it in bowls to set as shown. Just a thin layer will do. Keep for refrigeration for 10 to 15 mins.
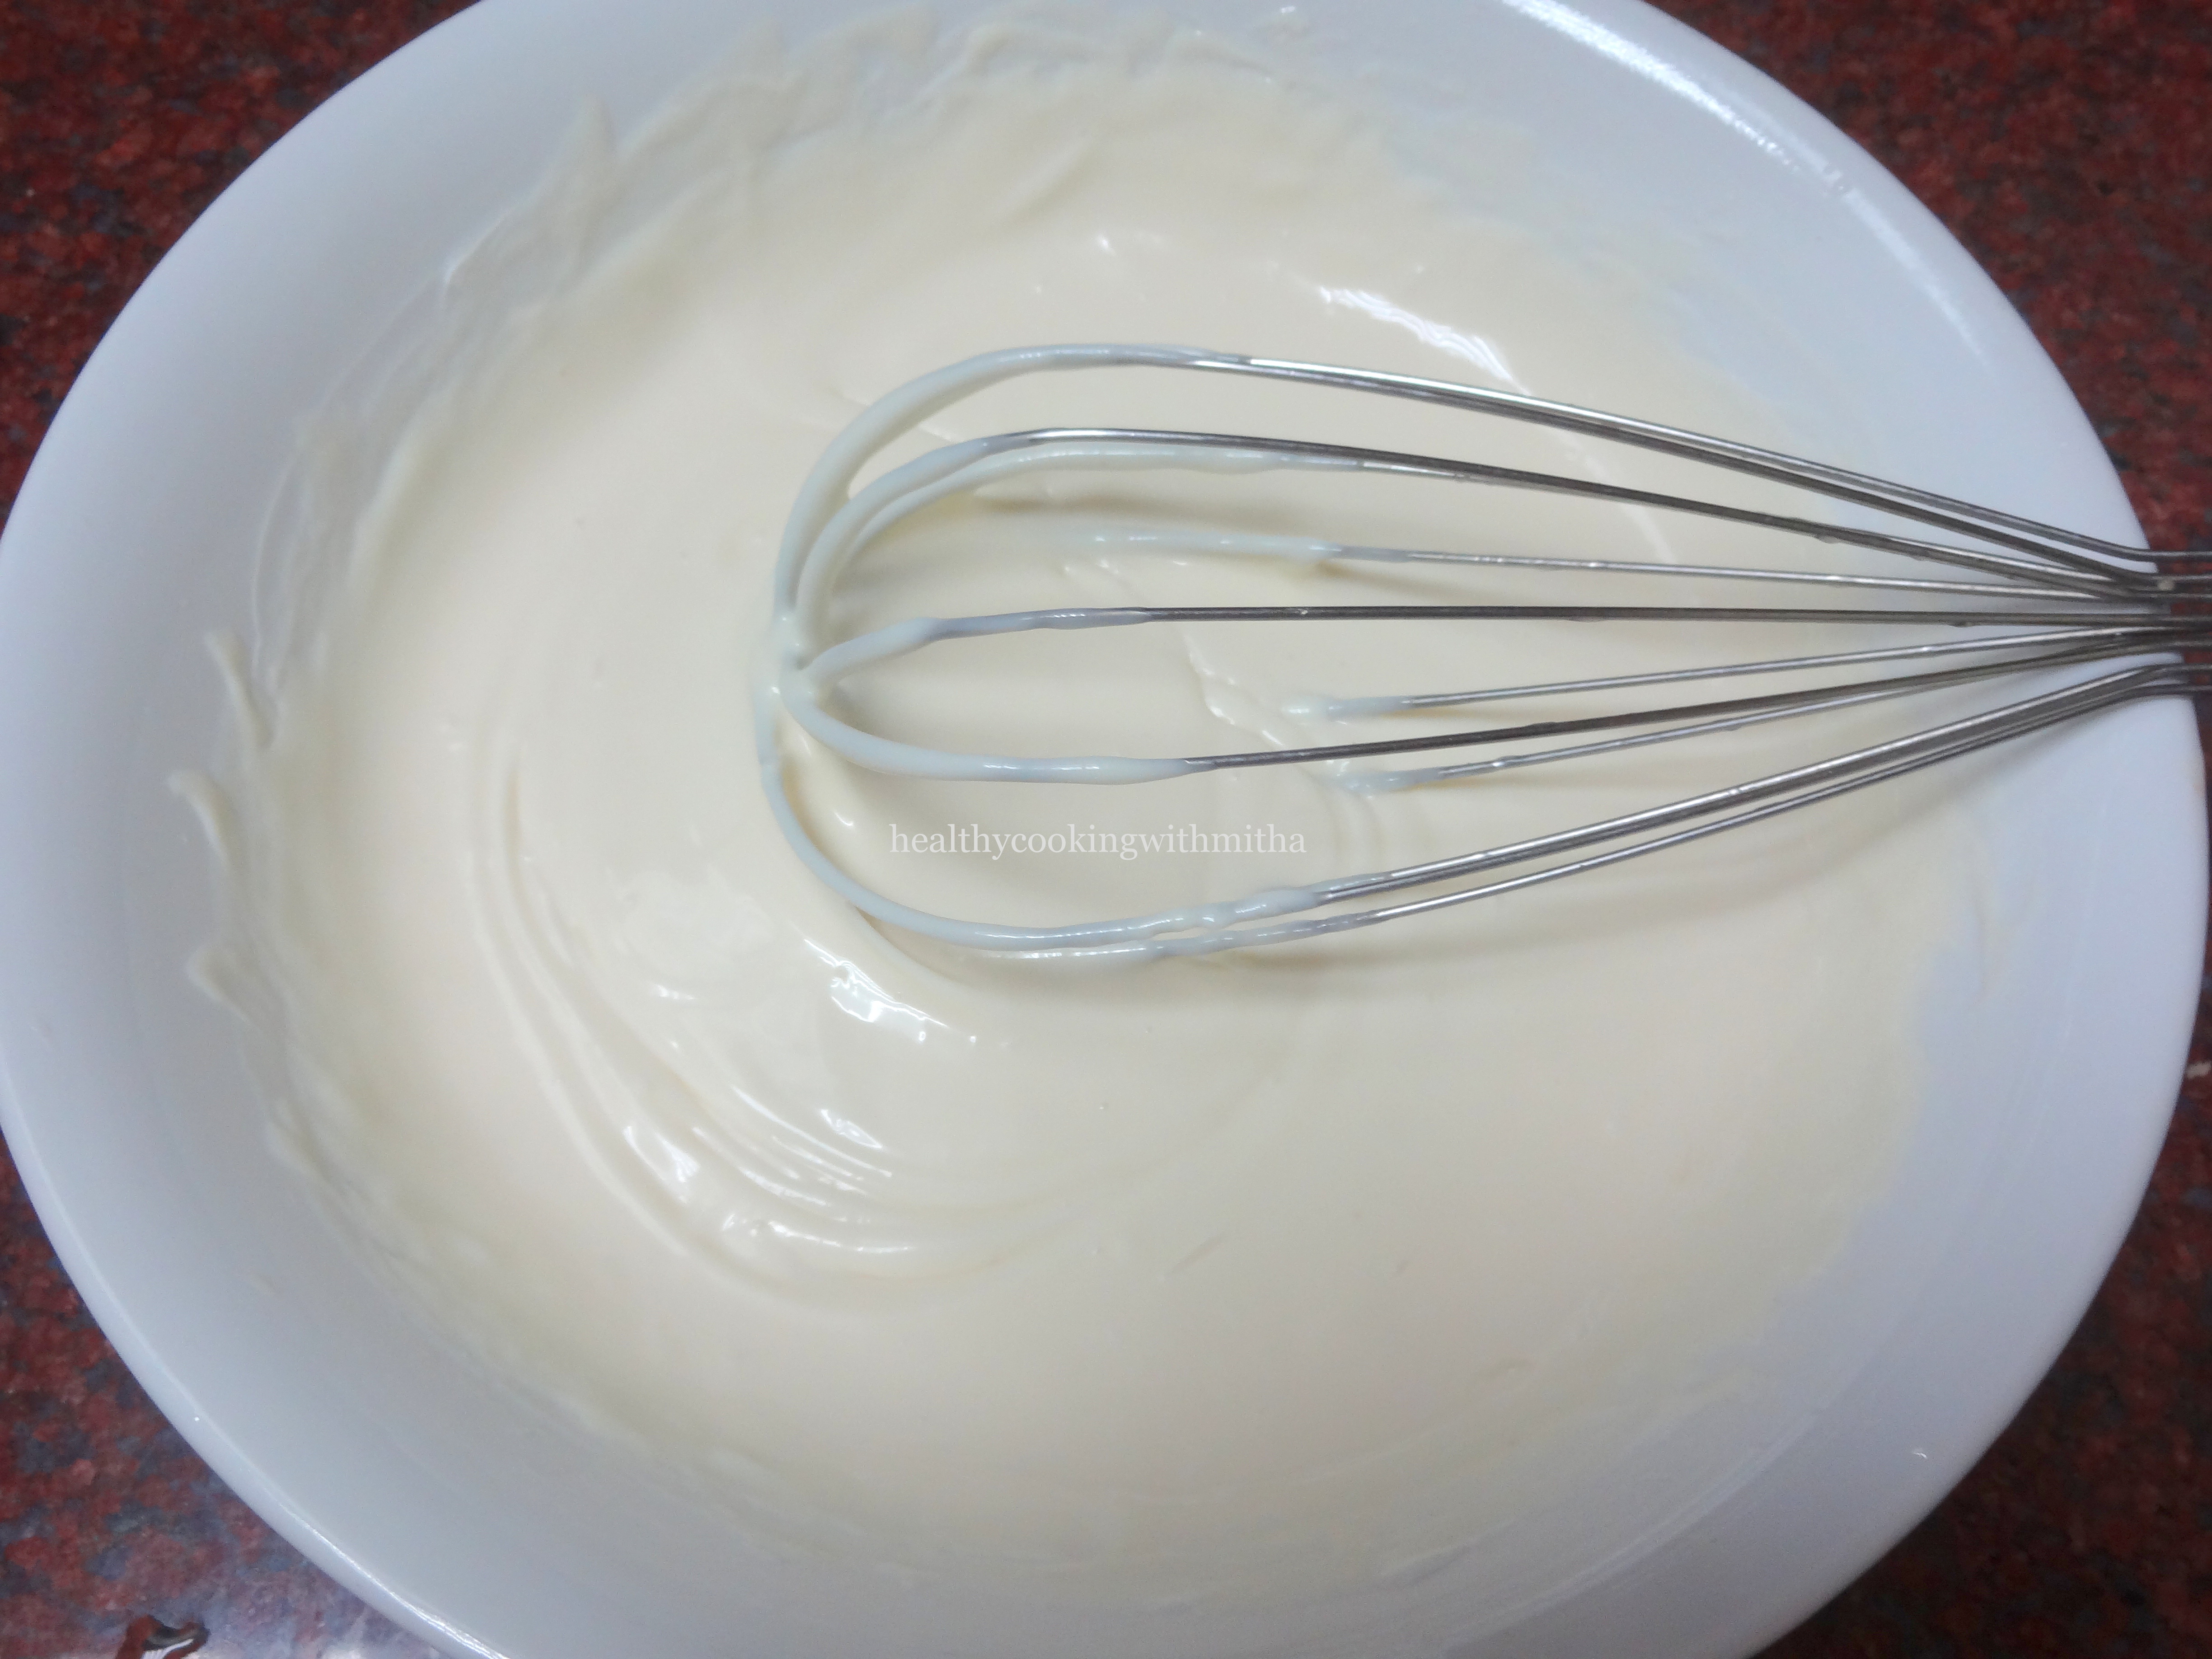
4. Meanwhile let us get the cheesecake layer ready. Whisk cream cheese till creamy just to remove lumps. No need to whisk a lot.
Note: You can also use hung curd instead of cream cheese. Whisk till smooth.
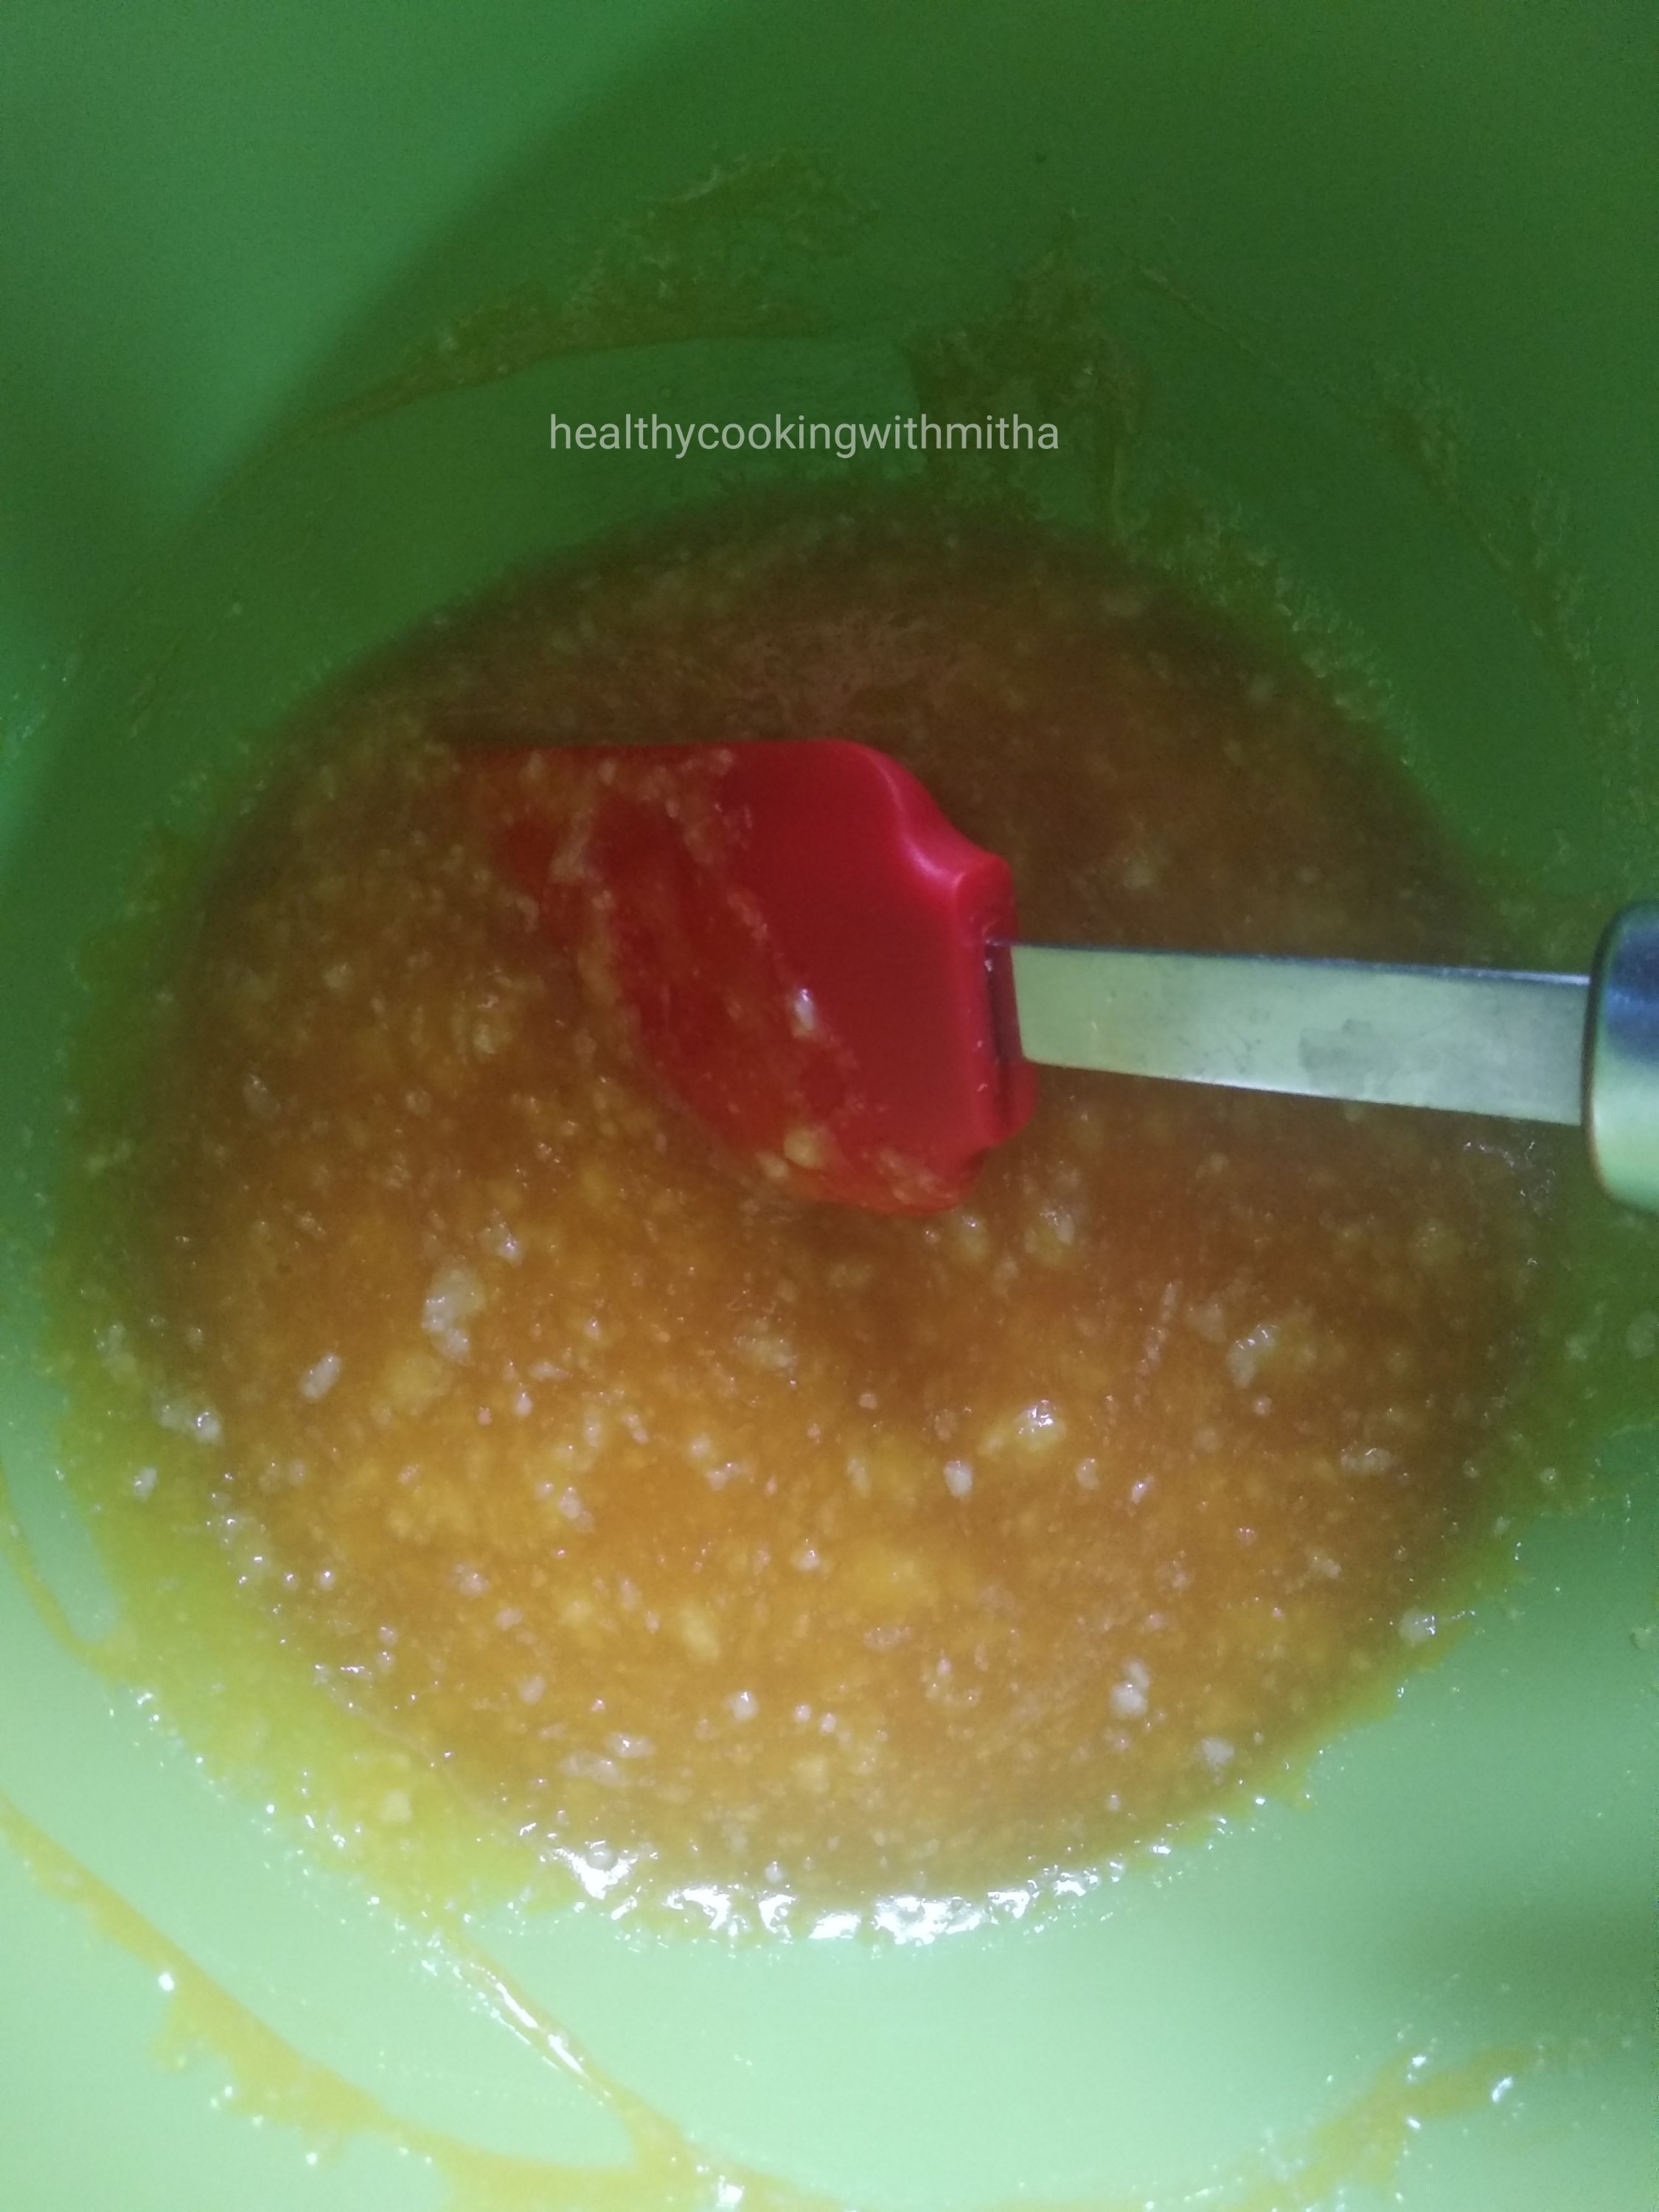
6. Now add mango pulp. Whisk again just to mix well.
7. Now remove the set biscuit mixture from the fridge. Add a layer of this cheesecake mixture evenly. Level using spatula.
8. Refrigerate for atleast 12 hours or overnight. (*Check notes) I usually set for one day or about 20 hours. See how well it sets then.
9. Now layer with mango pulp and serve chilled.
Notes:
* If you have time, refrigerate after adding the last mango pulp layer too. Else it’s okay as the last layer does not set anyhow.
* You can skip the last mango layer too if you don’t like cheesecakes very sweet.
* I usually make this a day ahead and refrigerate for 24 hours so that the cheesecake layer sets well. Then add mango pulp and refrigerate for another hour before serving.
* Lemon juice is an important ingredient for the cheesecake to set. So please don’t skip it.
* The benefit of serving in individual bowls is that you can save yourself the hassle of cutting into slices and enjoy your own cheesecake portion from a bowl.
* If you want to make a large cheesecake, double the measurements that I mentioned above, set it in a cheesecake pan and refrigerate for atleast 24 hours for the cheesecake to set. Remember that the mango pulp layer does not set. It’s just for flavour.
* My readers have successfully replaced cream cheese with hungcurd in the Chocolate cheesecake recipe. So it definitely works if cream cheese is not available and you are setting in individual bowls or glasses.
* For making hung curd, just keep a clean handkerchief or muslin cloth over a large sieve and add curd over it. Tie the cloth tightly and remove excess water. Now keep a heavy weight over it and keep it to rest in the fridge overnight till the curd becomes thick and all water drips in the bowl beneath it. The water can be used in gravies or chapati dough and hung curd can be used to make this cheesecake.
* I have used Mother’s recipe sweetened mango pulp. You can use fresh mango pulp too. Just make sure you blend well and the strands of mango are not in the pulp.
I have tried to note down as much points as possible so that it’s easy for you all to follow but if you still have any doubts, either comment here or message me on my Facebook page Healthy cooking with mitha or on my Instagram handle and I would be happy to help.
I really wish I could share this cake with all of you. It tastes so delicious and it is so soft that it literally melts in the mouth. A cake that made me so happy that I am glad I tried it.
After Mango Rava Cupcakes, my husband was behind me to try mango cake with wheat flour. So we tried couple of recipes but it did not work and I did not like the texture even though we enjoyed it. Then few days back, when I had taken a short break from social media (being the moody girl that I am 😄), he asked me to try this mango cake again.
Though I did not want to, I reluctantly agreed just for my kids who love cakes. And how glad I am that I baked such a beautiful and mouth watering cake. The kids kept asking for more and I was one happy mom. Sometimes I wonder what my life would have been without them. Even though their naughtiness keeps me on my toes the whole day, it also keeps me engaged which is very important too during these home bound times.
Hope you all try this mango cake. You can use both fresh mango pulp if available or canned like I used. Happy baking!
RECIPE:
Ingredients: ( 1 Cup = 240 ml)
Dry Ingredients:
1.5 Cups Wheat flour/ Atta (I use Pillsbury atta)
1 tsp Baking powder
1/2 tsp Baking soda
A pinch of salt
Wet ingredients:
1 Cup Mango pulp (fresh or canned){Iusually use Mother’s recipe Alphonso mango pulp.}
1/2 Cup Sugar
1/2 Cup Ghee
1 tsp Vanilla essence
Step by step recipe:
1. Preheat the oven at 180 C for 10 minutes in the centre rack if using an OTG.
2. Sift the dry ingredients together using a sieve into a bowl so that the ingredients are well mixed. Keep aside.
2. Now in another large bowl, add mango pulp, ghee, sugar and vanilla essence.
3. Mix well using a spatula.
4. Now add the dry ingredients mix to the wet ingredients mix and just combine using the spatula. Do NOT overmix. Just mix till you don’t see any flour specks.
5. Now grease the baking pan well with ghee and pour this mixture into the pan. Level it using the spatula.
6. Now bake at 180 C for 30 mins or till done in the center rack if using an OTG.
Note: Don’t forget to preheat the oven at 180 C for 10 mins which was the first step.
7. Allow it cool. Invert, slice and serve.
Notes:
* Insert a toothpick or knife in the center to check if the cake is done. If it comes out clear, it’s done. Else bake for 5 mins more or till done.
* If the top has already browned but inside is not done yet, cover with a aluminium foil and bake for the last 5 mins so that the top does not turn hard.
* I have used both fresh and canned Alphonso mango pulp depending on the availability and both work well for this recipe.
* You can replace sugar with cane sugar or fine jaggery powder. I also use it when I have and you won’t know the difference.
* This cake is very moist and soft due to ghee and mango pulp. So you don’t need any frosting or syrup for this cake.
* The proportions for sugar is such that it comes out very sweet. If you are not a sweet loving person, reduce the sugar. We love it this sweet though.
* Lasts well at room temperature for a day. After that if leftover, refrigerate in an airtight container and microwave when serving.
I am not very good at making sweets but there are few easy recipes that can be tried successfully by amateurs like me and it will definitely come out well. One is the Coconut burfis that I already posted and the second is these Mango Coconut burfis.
My kids love coconut based sweets. So I always make these instead of buying them from outside. I love the colour mango brings in this sweet.
You can make on stove top instead of microwave. Hope you all like it too. Happy cooking!
RECIPE:
Ingredients: { Makes about 20 ladoos}
2.5 Cups Desiccated coconut
1 Cup Sweetened condensed milk (about 300 grams)
1/4 Cup Mango pulp ( fresh/ tinned)
1 tbsp Ghee
1/2 tsp Cardamom powder
Step by step recipe:
1. Take all the ingredients in a microwave safe bowl.
2. Mix well using a spatula so that it turns into a even mixture.
3. Microwave on HIGH (max power) for 6 to 8 mins (check at every 2 min intervals) till the mixture cooks and resembles the below mixture. It will come together and not sticky.
Check if you can make small balls which are smooth and non sticky. If you can, the mixture is perfect. Else cook for couple of mins more.
4. Allow it to cool slightly and then make ladoos.
Notes:
* Store in an airtight container. Lasts well at room temperature for a day. Then refrigerate as it might spoil during summers.
* As every microwave is different, check at every two mins so that the mixture does not burn.
* You can also do it in a pan on stove top instead of microwave. That is how I make Coconut Burfis.
* I always make these ladoos as they are very easy. Here is a picture of the ladoos when I made them sometime back. The colour of the ladoos depend on the colour of the mangoes.
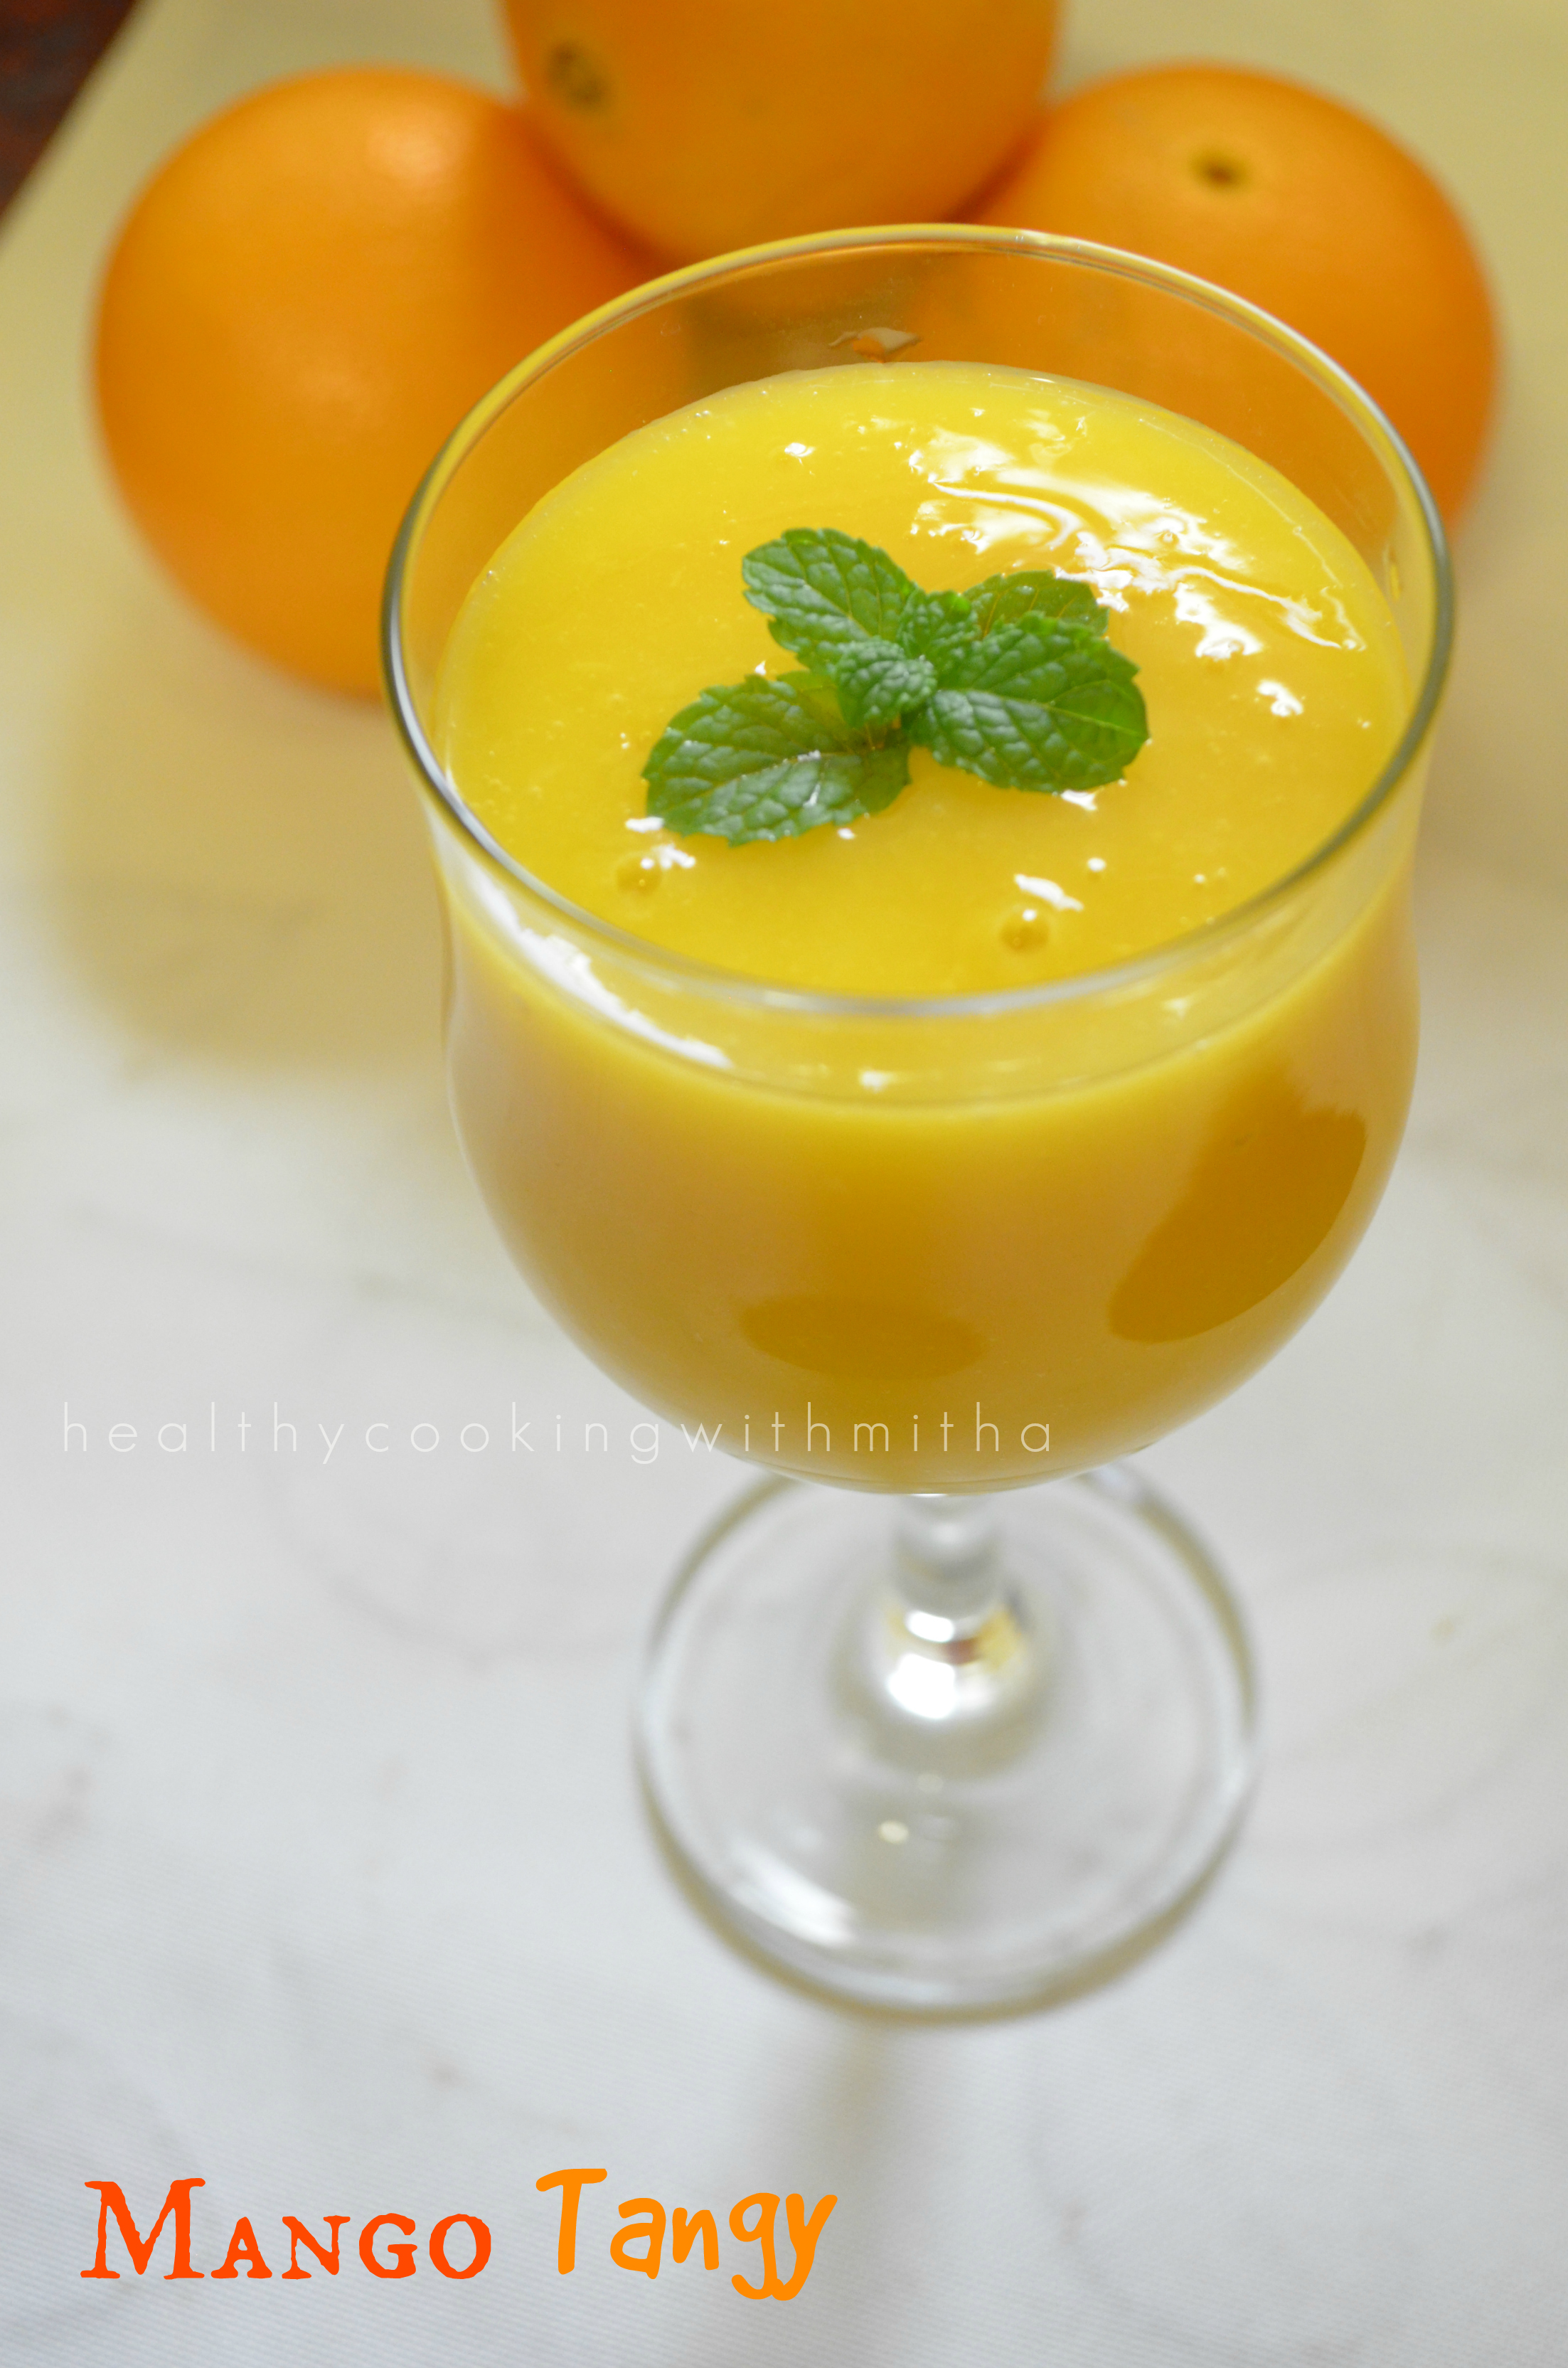
We don’t buy carbonated drinks since many years now. During summer months, we prefer our age old drink Paanak or Jaggery Lemonade and other fruit juices. My husband loves mix matching fruits while making juices and I love his combinations.
This juice and the name too is my husband’s idea. Instead of making mango milkshake always, he suggested I add orange juice to mangoes. I was like what are you thinking?? He then compelled me to try it once and hence Mango Tangy was invented.
The citrusy flavour of oranges takes the sweetness of mangoes to another level altogether. I love how this juice needs no refined sugar at all.
Hope you all love it too. Happy and healthy cooking!
RECIPE:
Ingredients:
1 Cup Mango pieces
1/2 Cup freshly squeezed Orange juice
Step by step recipe:
1. Take Mango pieces in a jar or blender.
2. Add orange juice in the jar or blender.
3. Blend till smooth without adding water. I used my hand blender. You can use the regular mixer or juicer.
4. Chill and drink or drink as it is. We enjoy it freshly blended.
Notes:
* The ratio of mango to orange is as per taste. I usually do it 1 : 0.5 cups of mango : orange. It tastes delicious with the tangy flavours of Orange enhancing the sweetness of mango.
* This recipe is specially useful when the mango is not as sweet as you would like it and the easiest way to use it up would be to make this juice.
* I don’t add water at all while making this juice. Orange juice thins it down very well.
* I don’t add sugar too. Since the orange juice enhances the sweetness of mango, the juice is sweet enough for us.
Click on the image to save the recipe on Pinterest
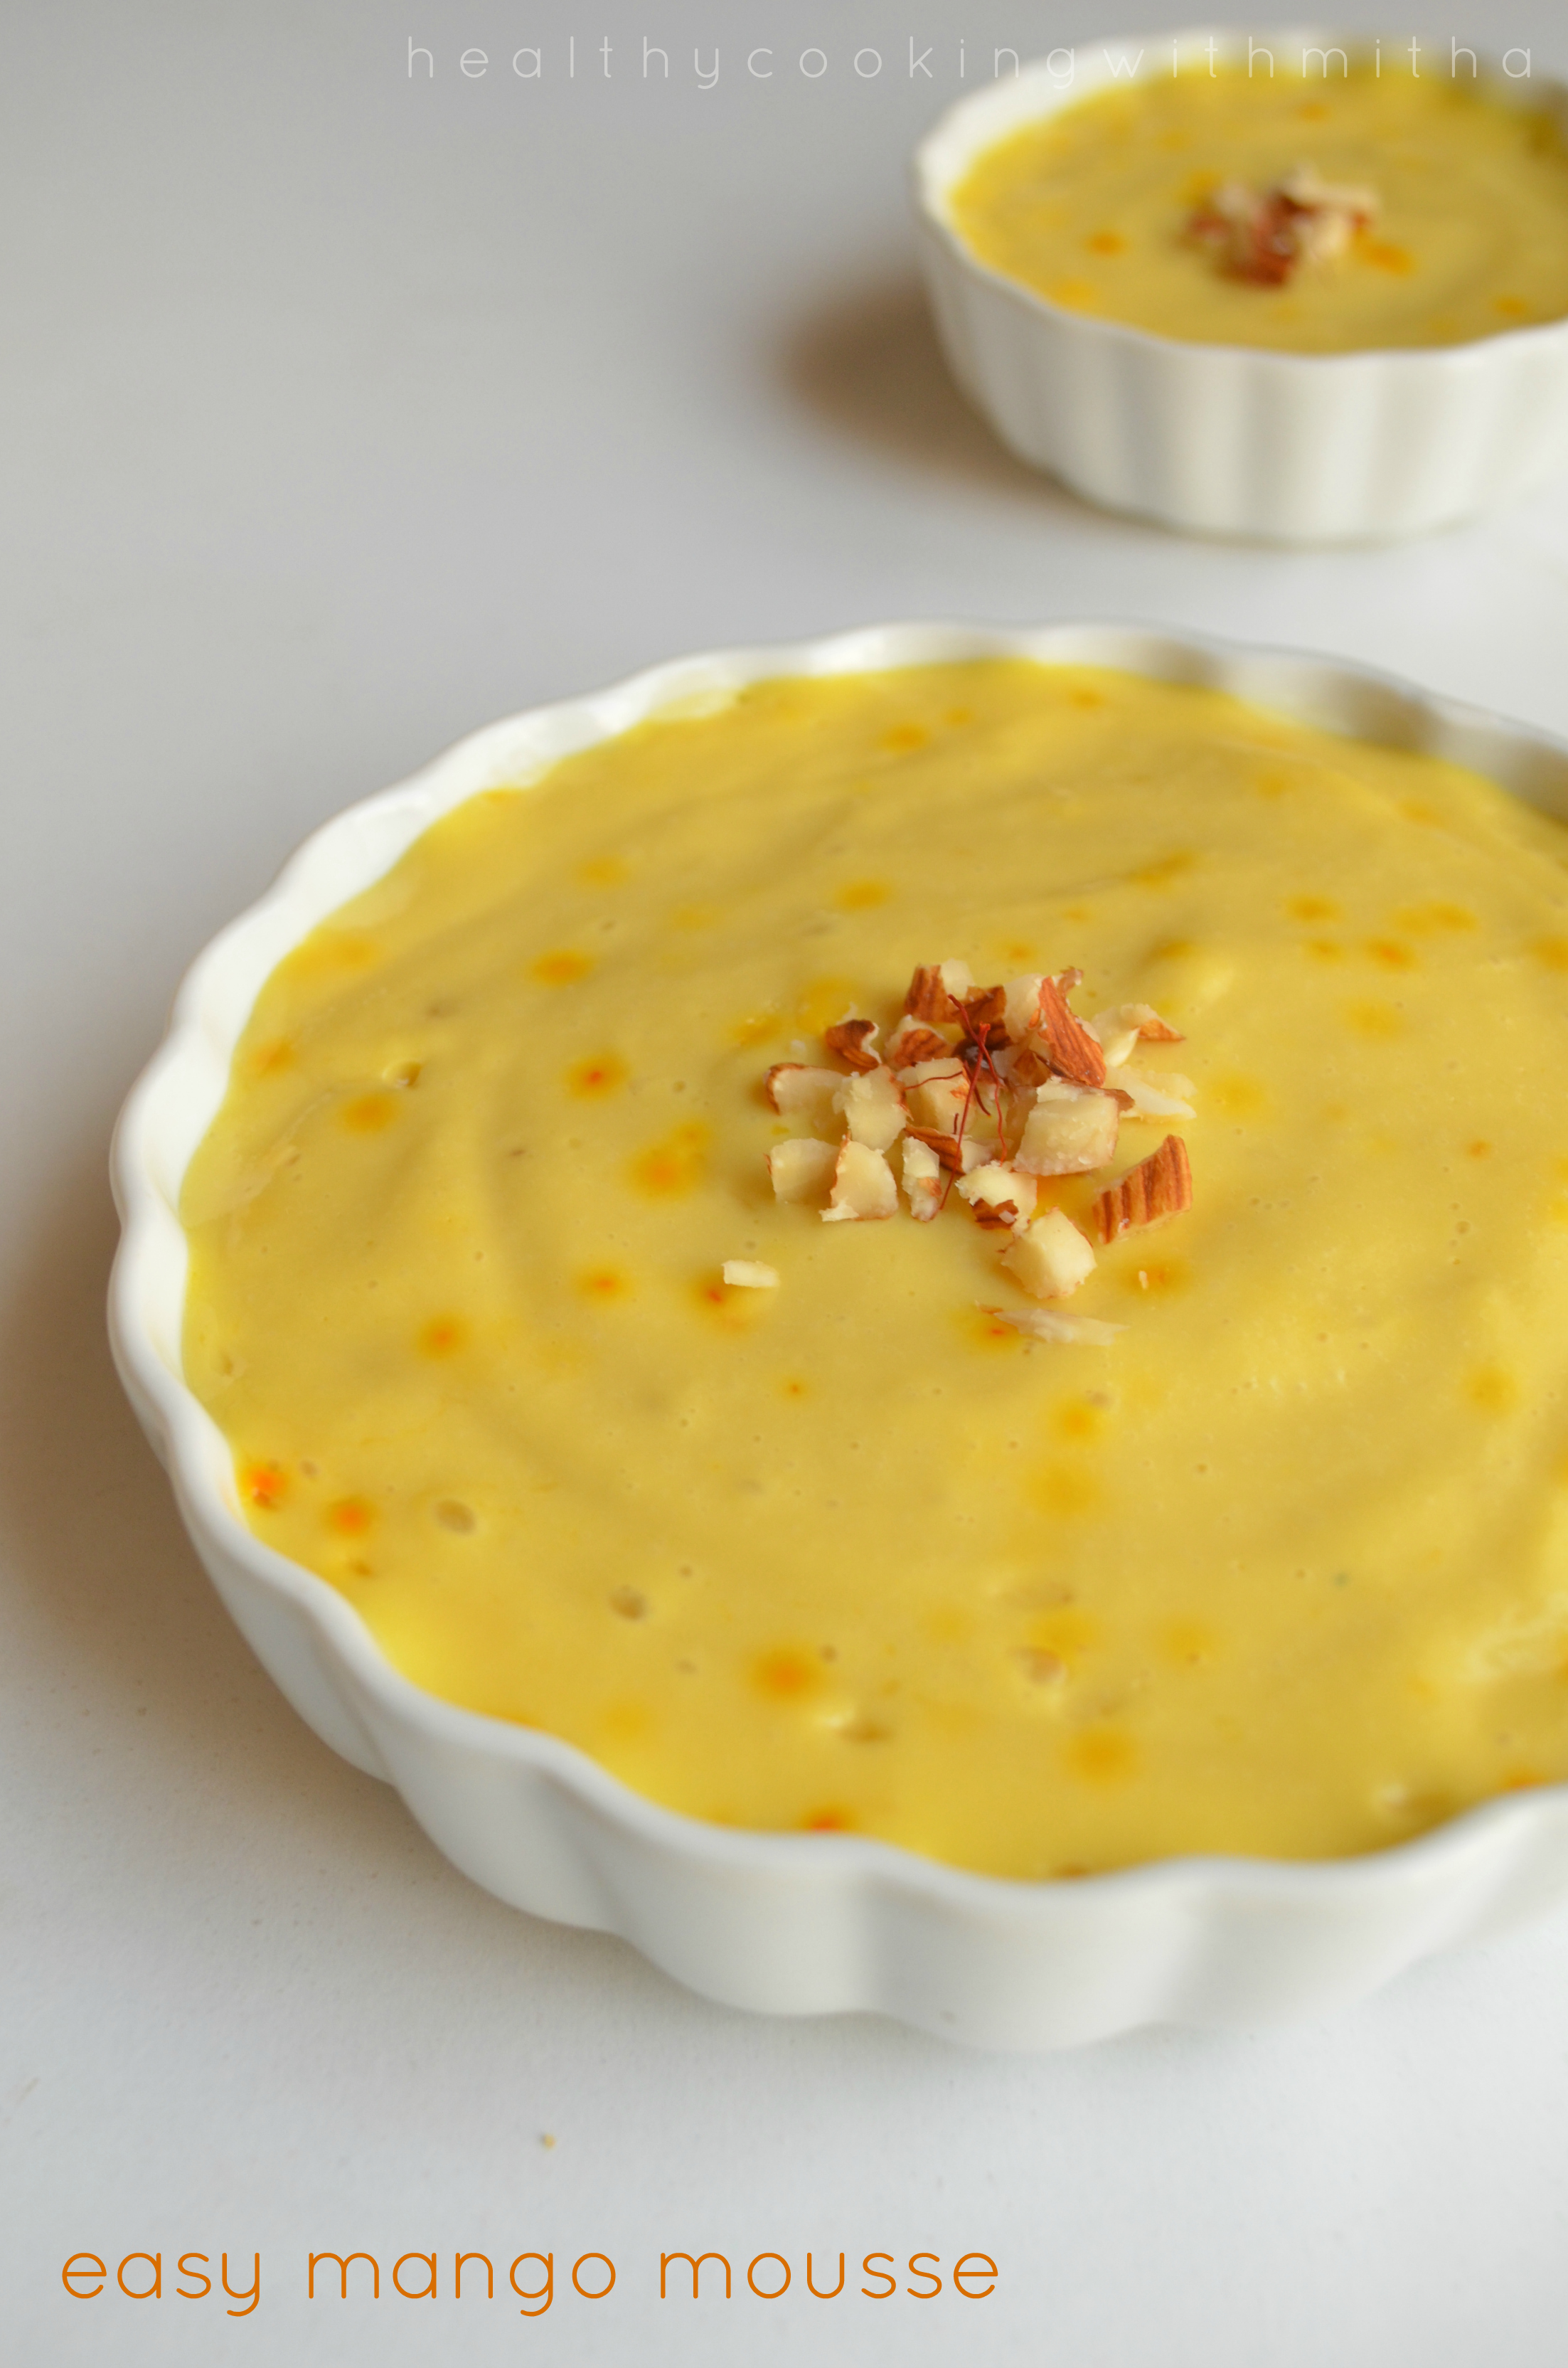
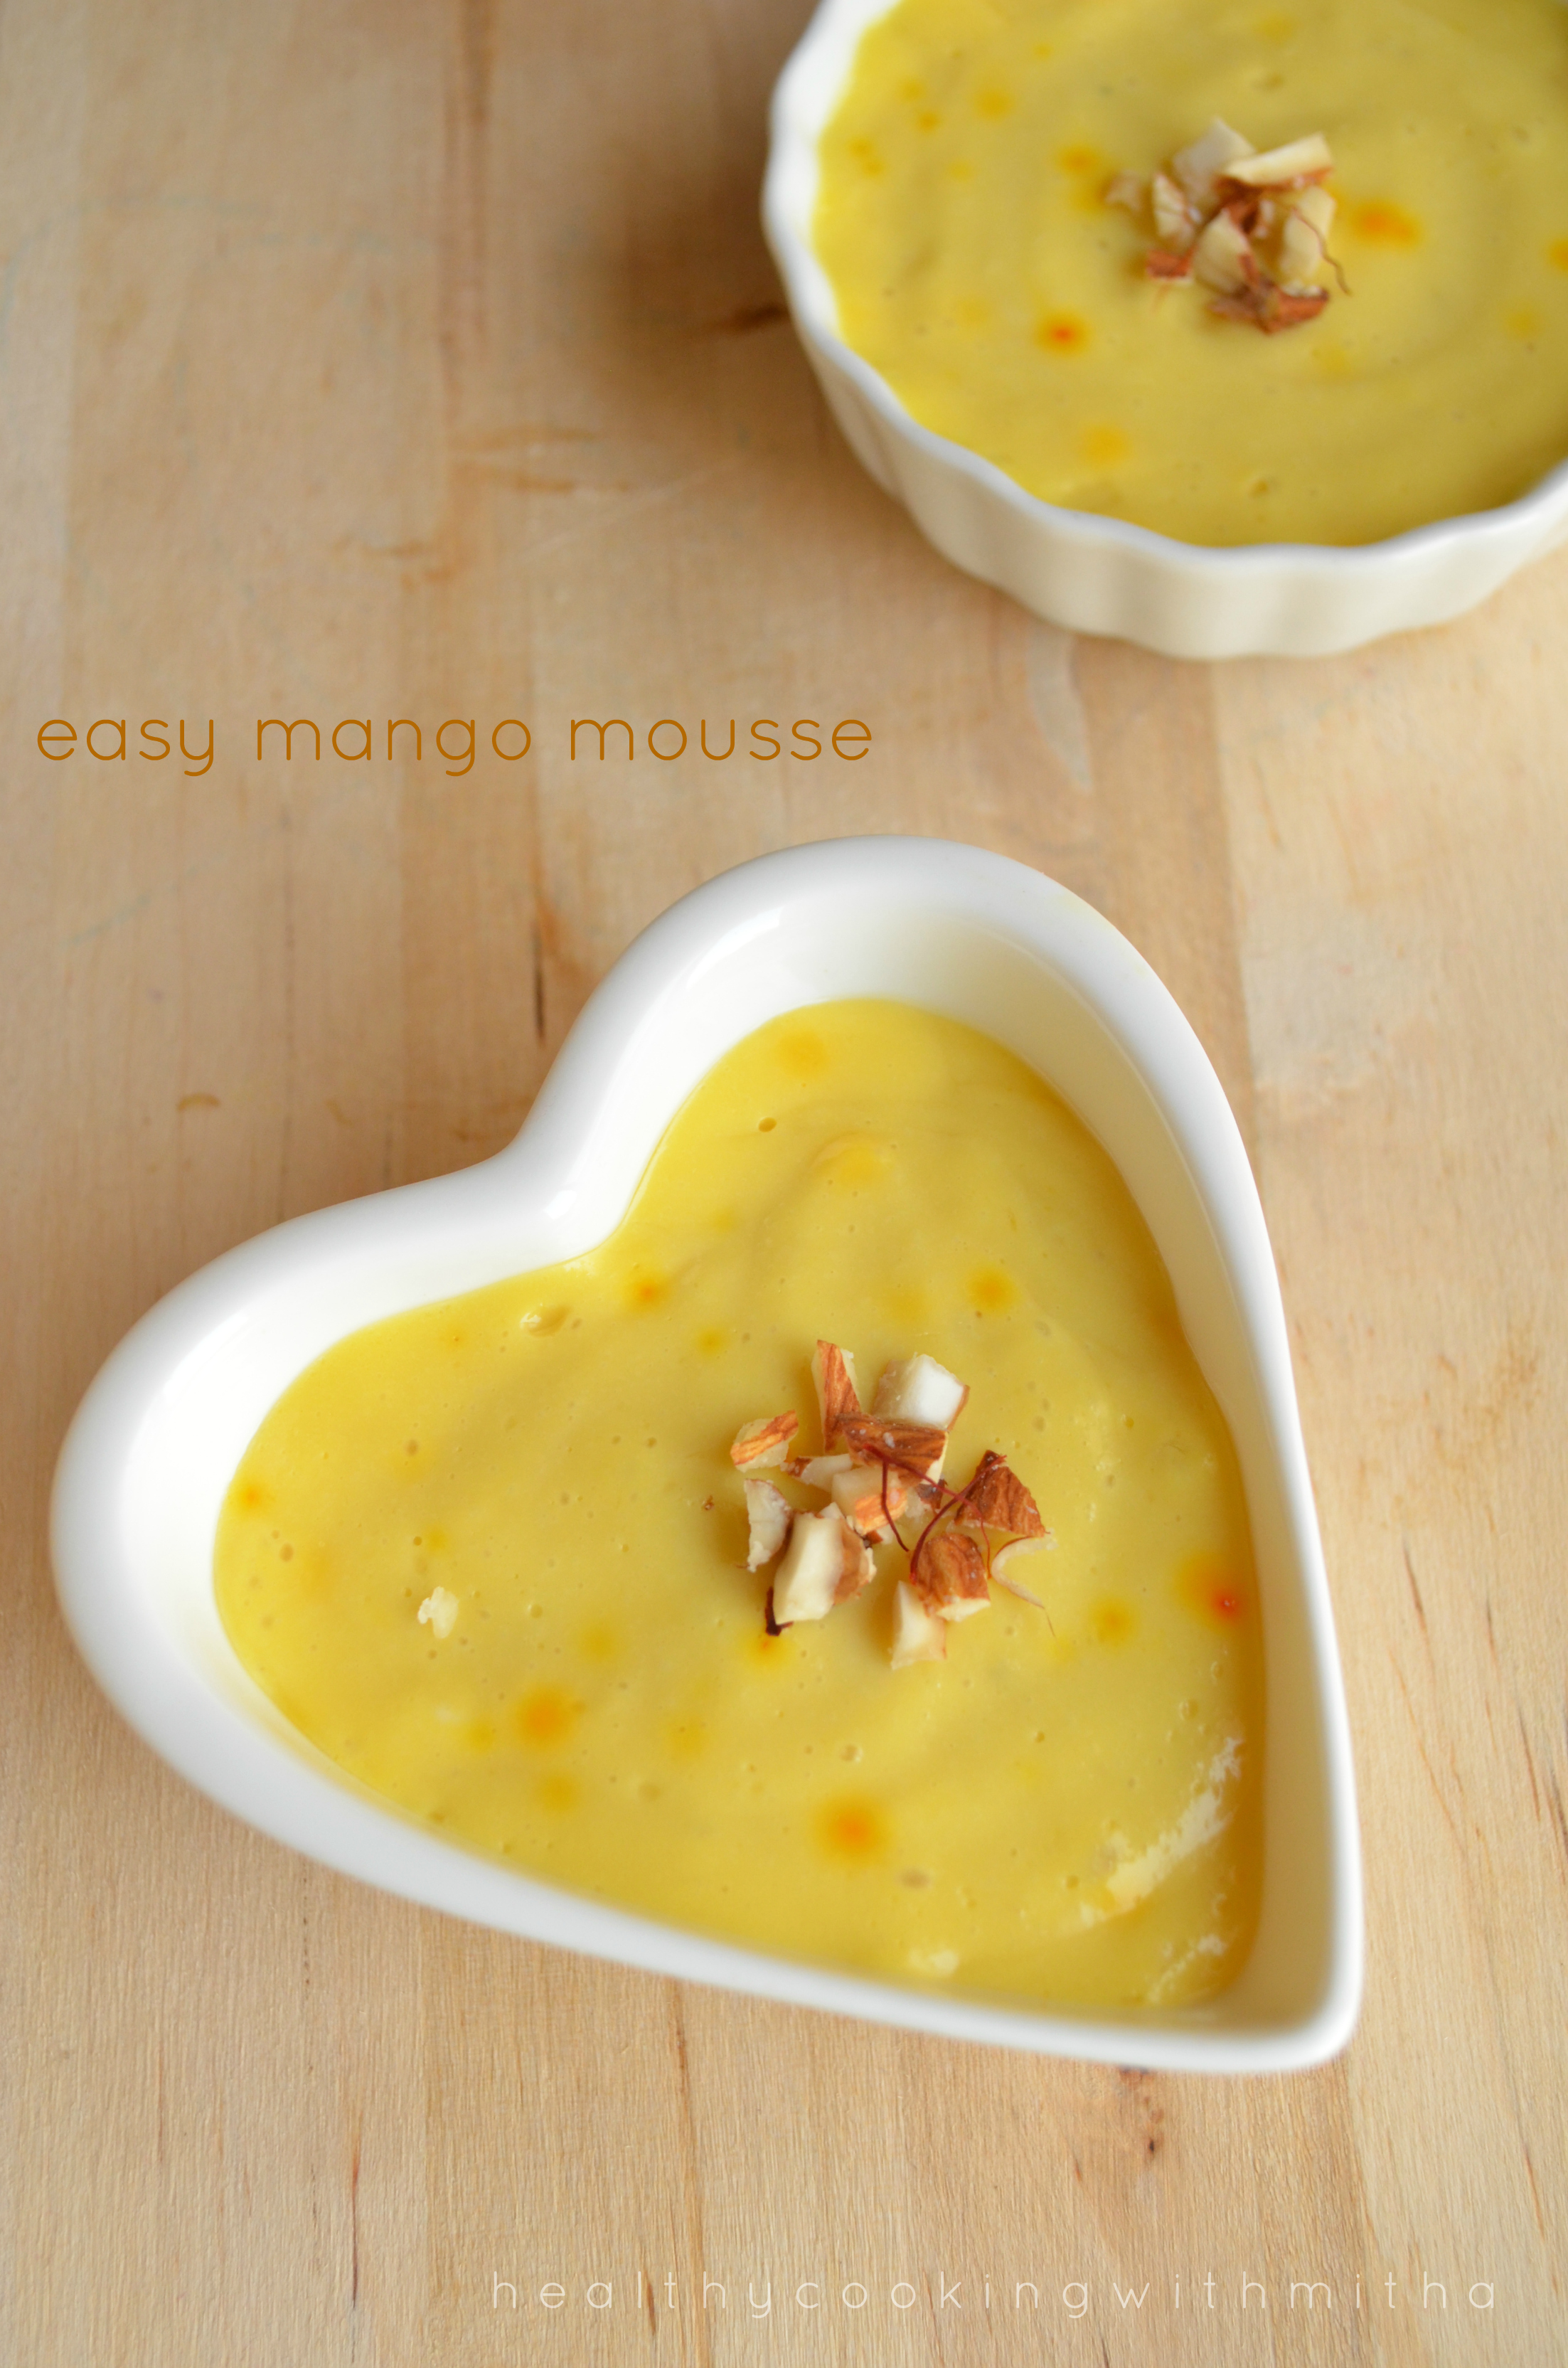
After easy Mango cupcakes, here is another easy mango mousse. I have made it for many parties and everyone have loved it a lot. The easiest dessert ever. Since this is mango season, I thought of sharing this as well. I have adapted this recipe from here.
My kids call it mango ice cream and love it very much.
Click on the image to save the recipe on Pinterest
RECIPE:
Ingredients: {serves 4}
1.25 Cups Mango pulp (fresh or canned)
1 Cup Yogurt/ thick curd
1/2 a tin sweetened condensed milk (around 200 grams)
Saffron strands/ Cardamom powder for flavour (optional)
Step by step recipe:
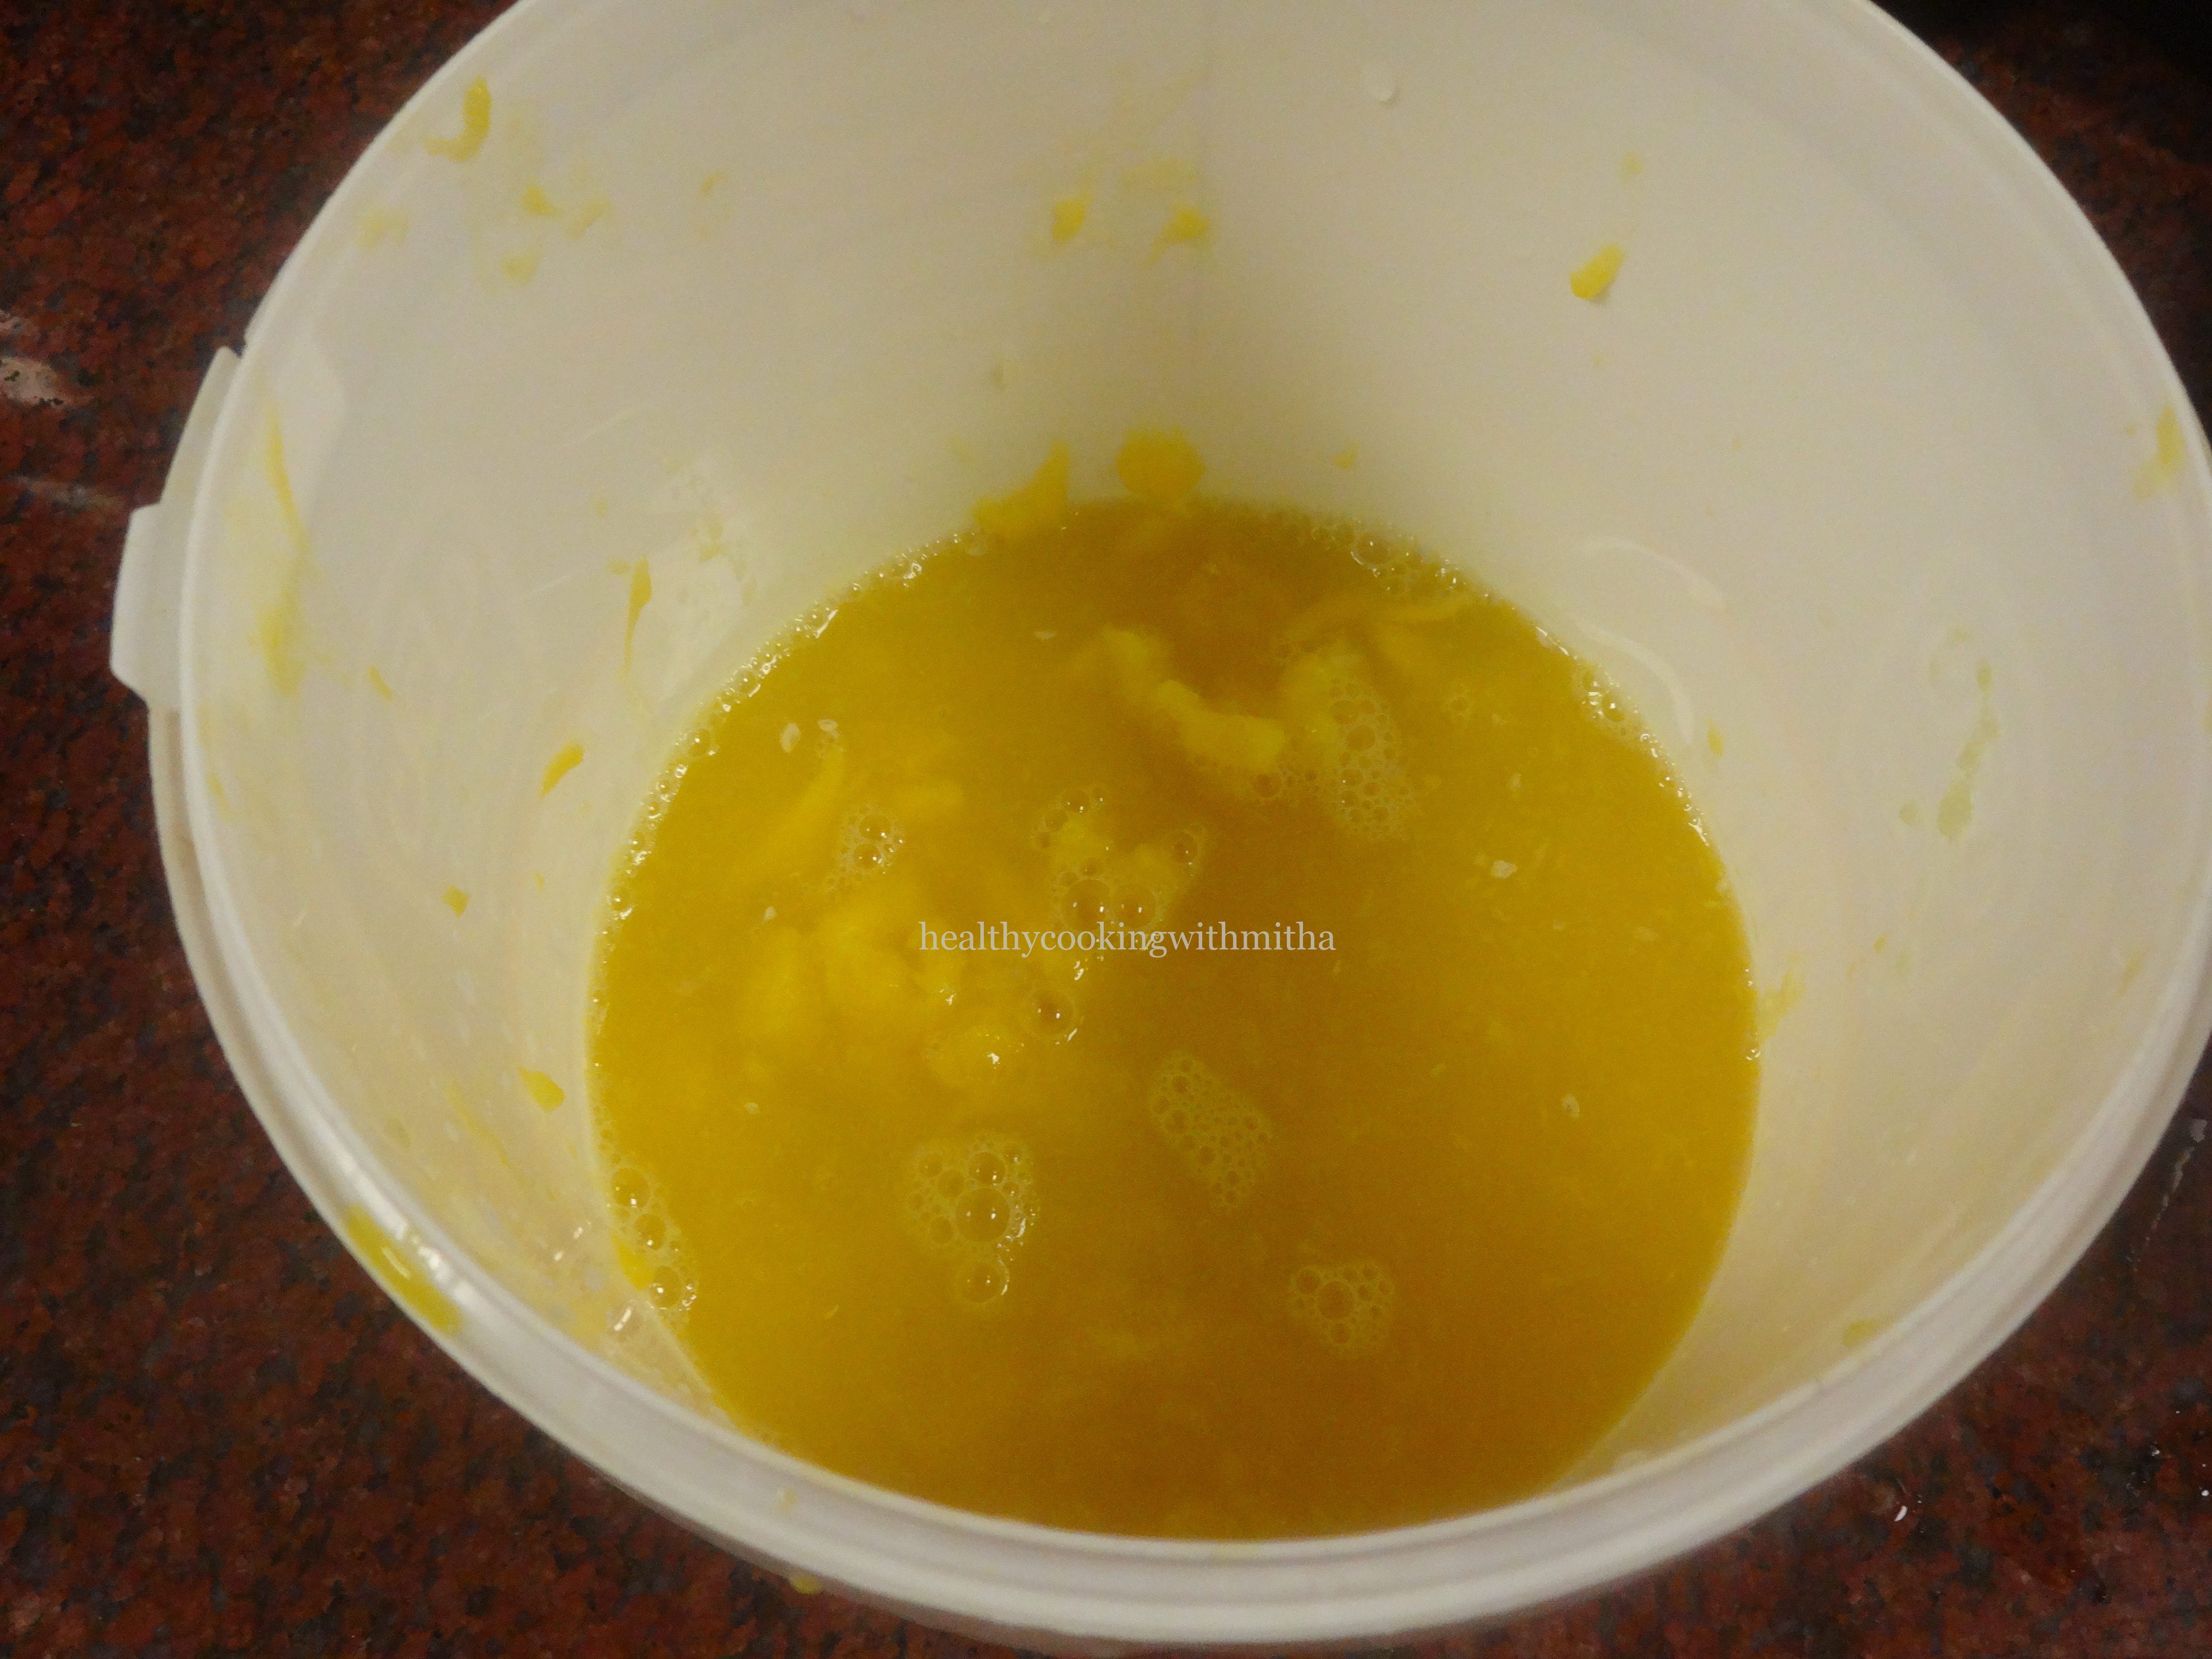
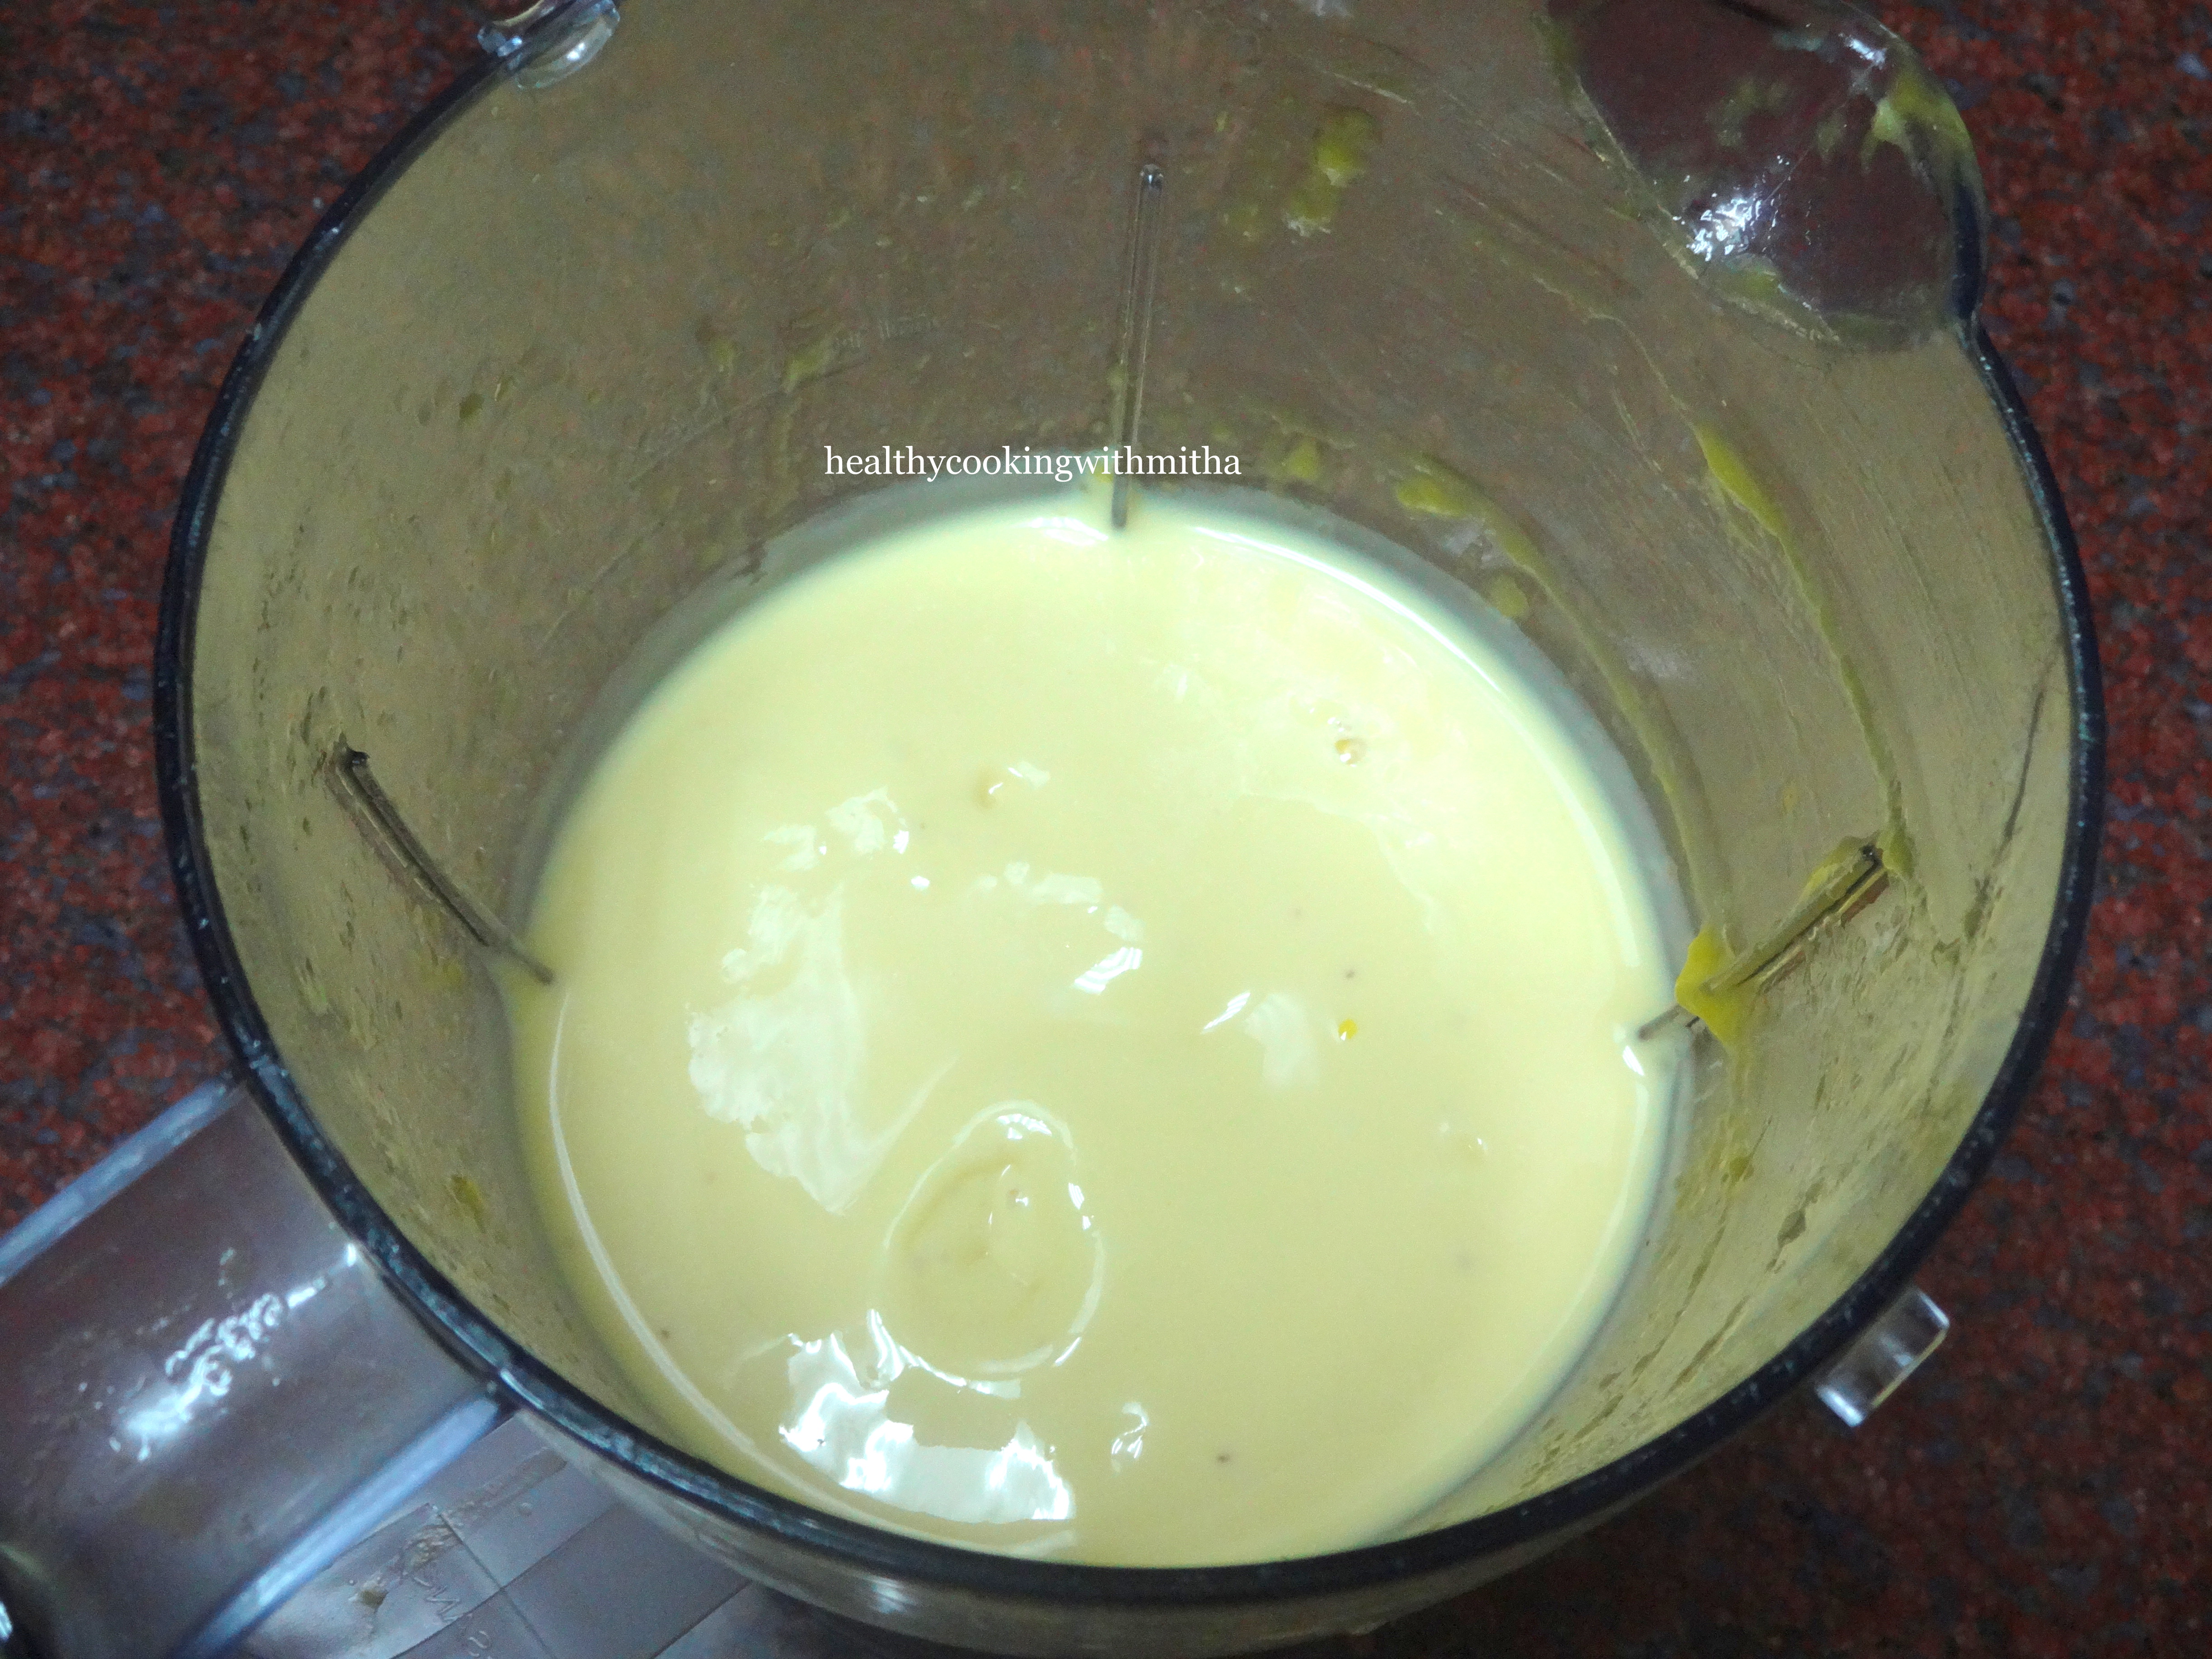
1. Add mango pulp in a blender jar.
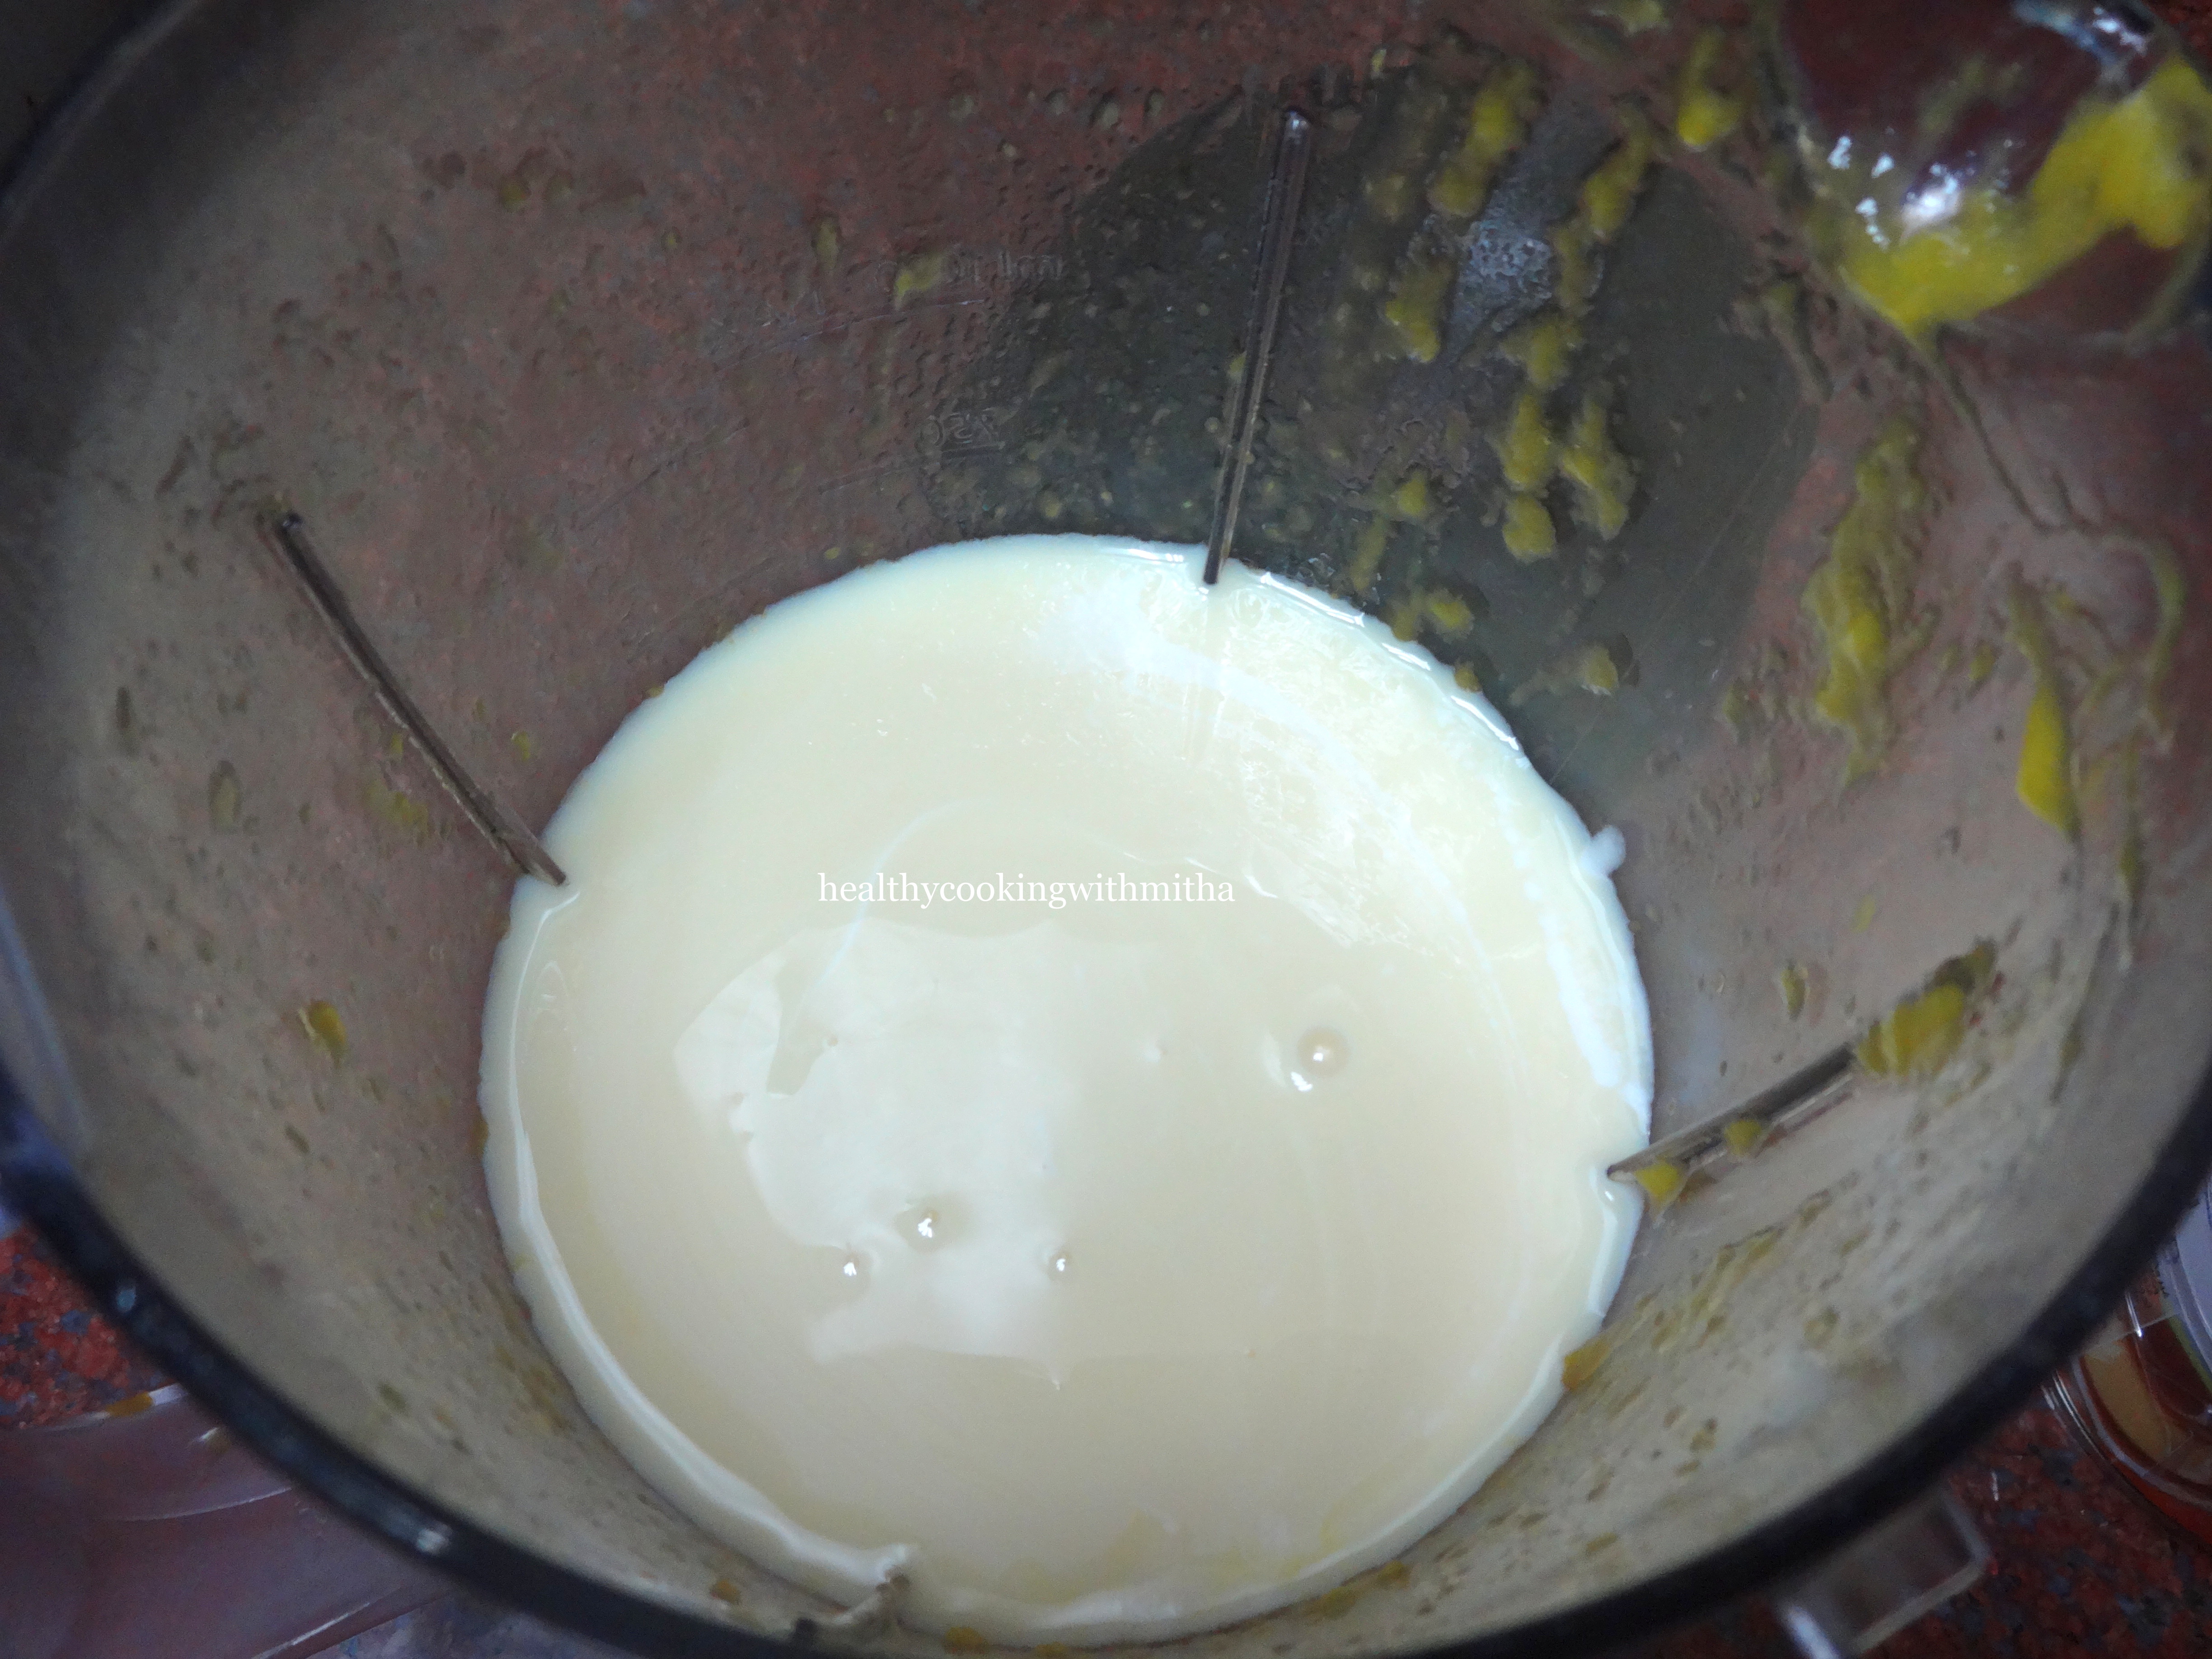
2. Add Yogurt and sweetened condensed milk.
3. Add in saffron strands.
4. Blend for a minute until everything is combined well.
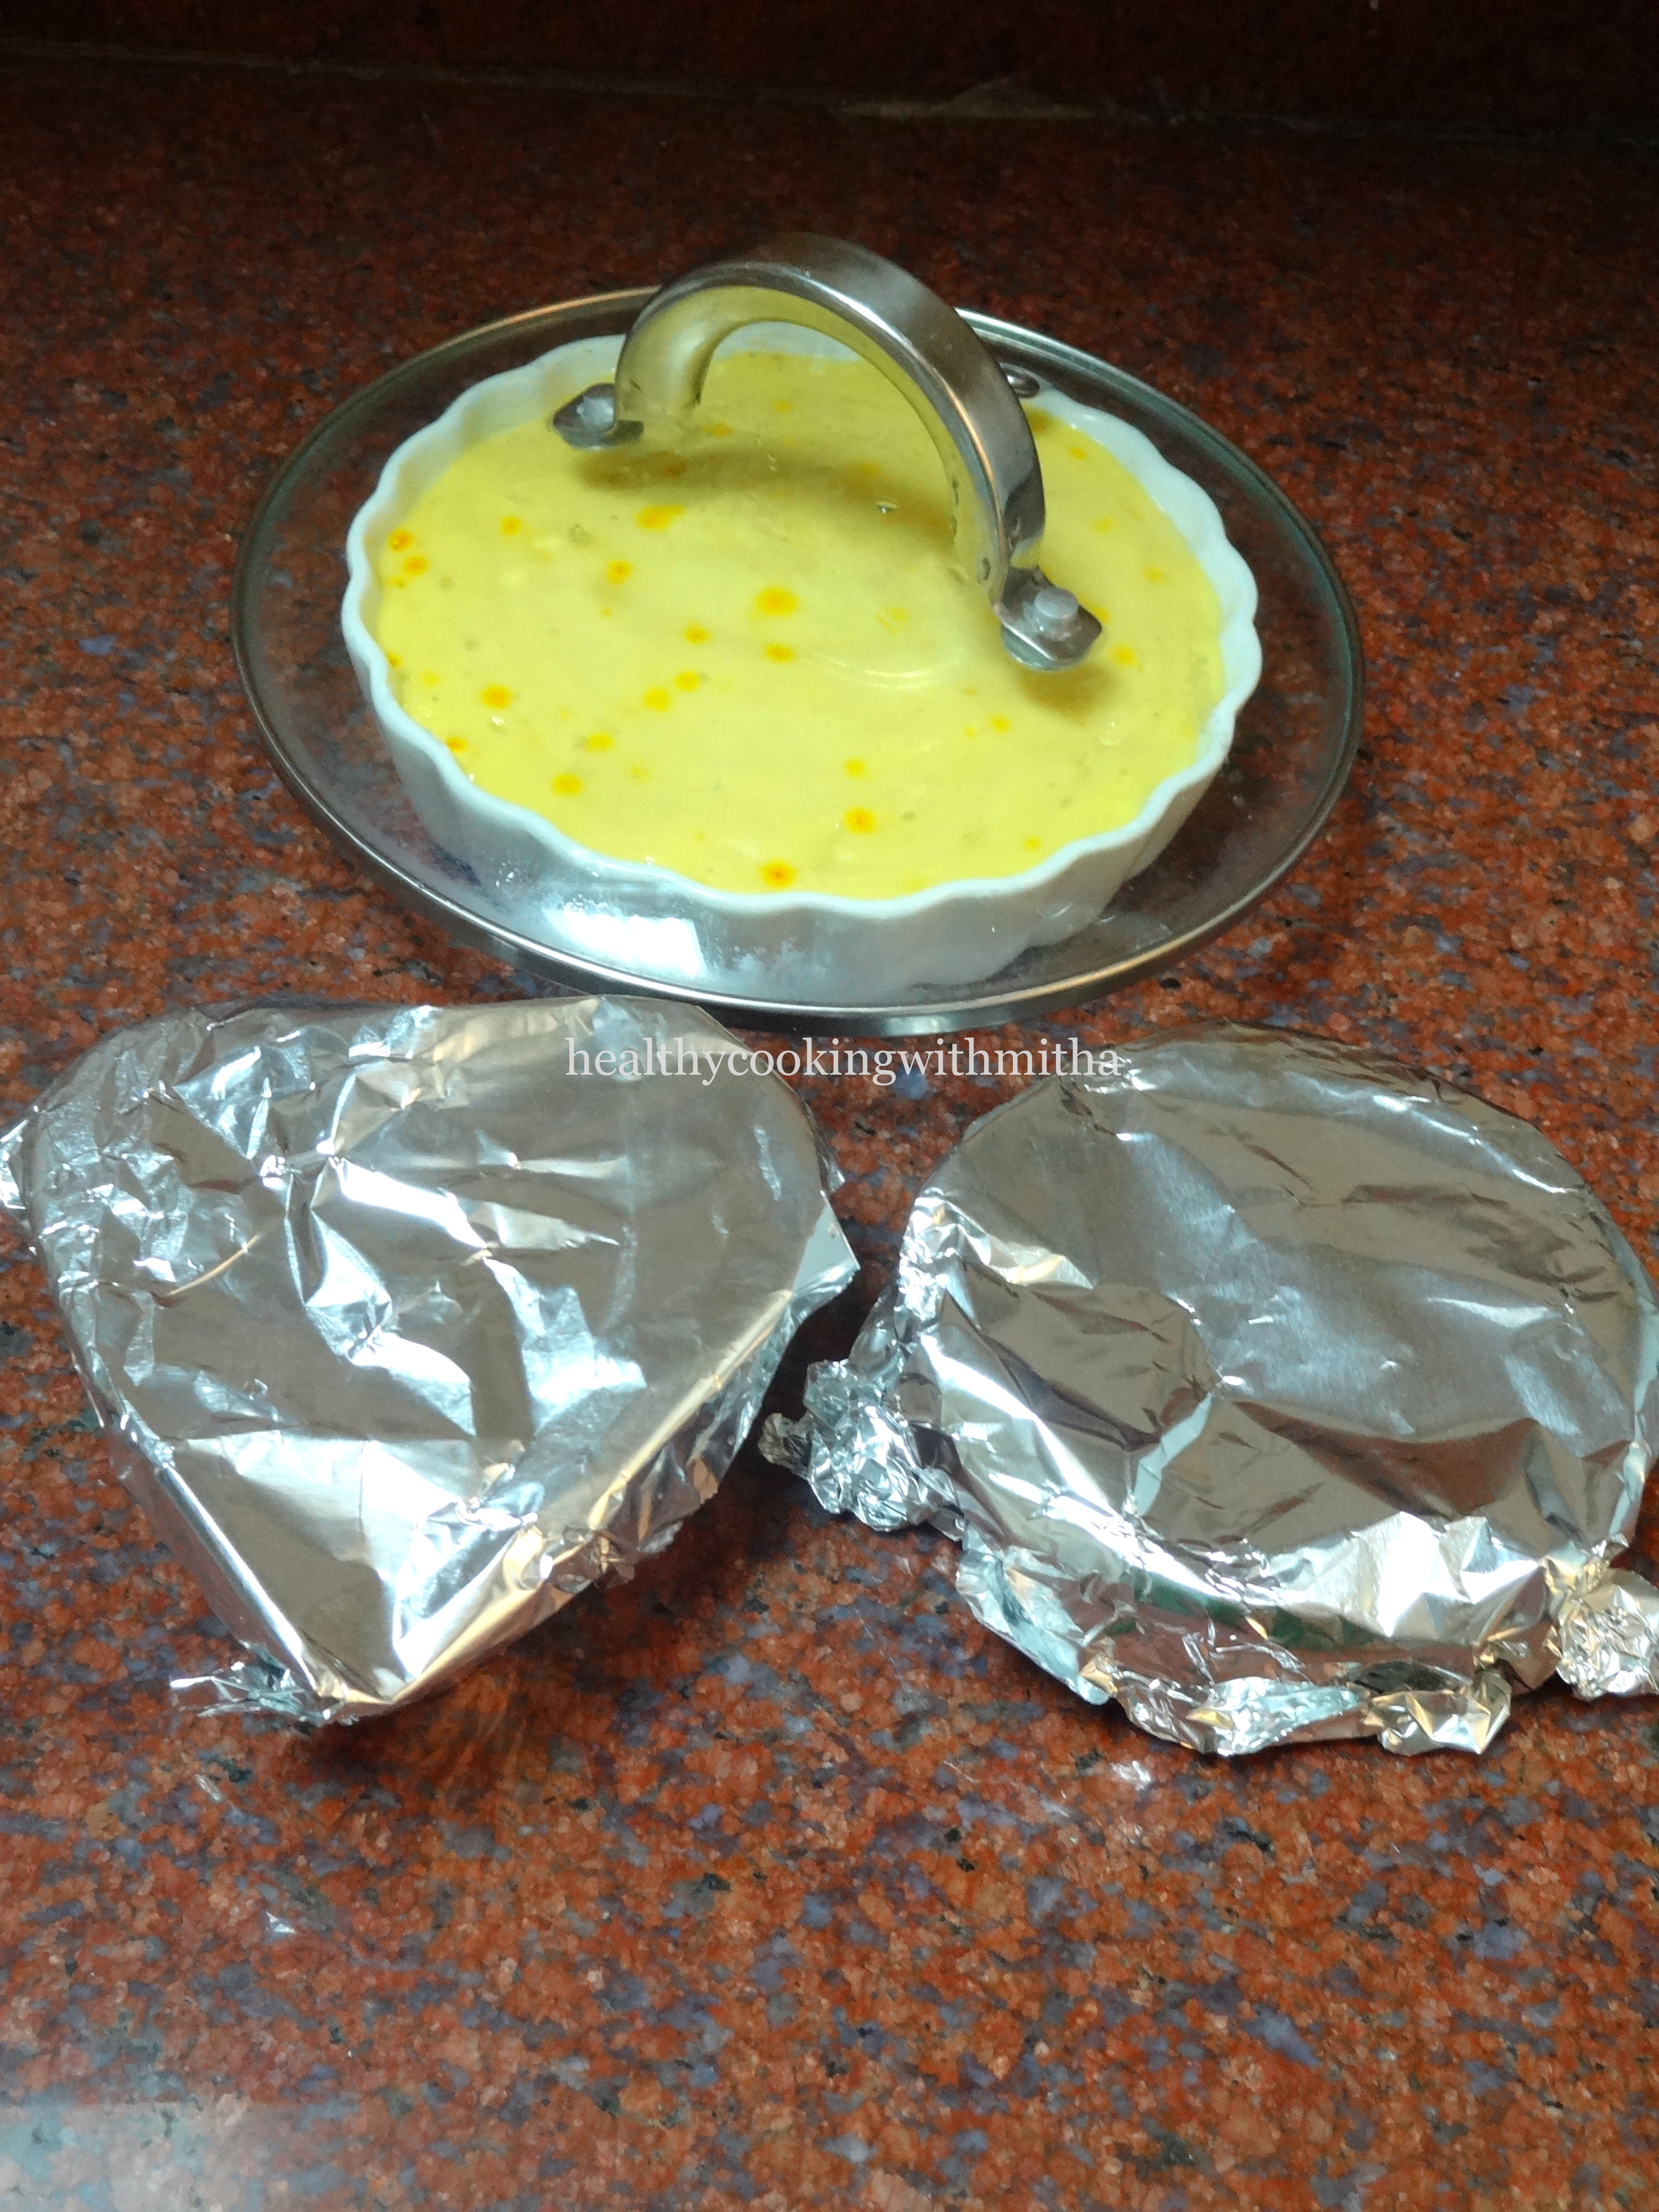
5. Pour into individual OVEN PROOF molds.
Please keep it to set in small bowls. These bowls are very small and largest one is only about the size of my palm.
6. Preheat the oven at 180 C for 10 mins. Then SWITCH IT OFF. We need only the warmth of the oven. No need to bake the mousse. So don’t forget to switch off the oven after preheating it.
7. Place the mousse inside the oven covered overnight or for 8 hours.
Cover with a foil when you keep. I have not shown in this picture. Please note that the oven is OFF before placing the bowls. OFF all night.
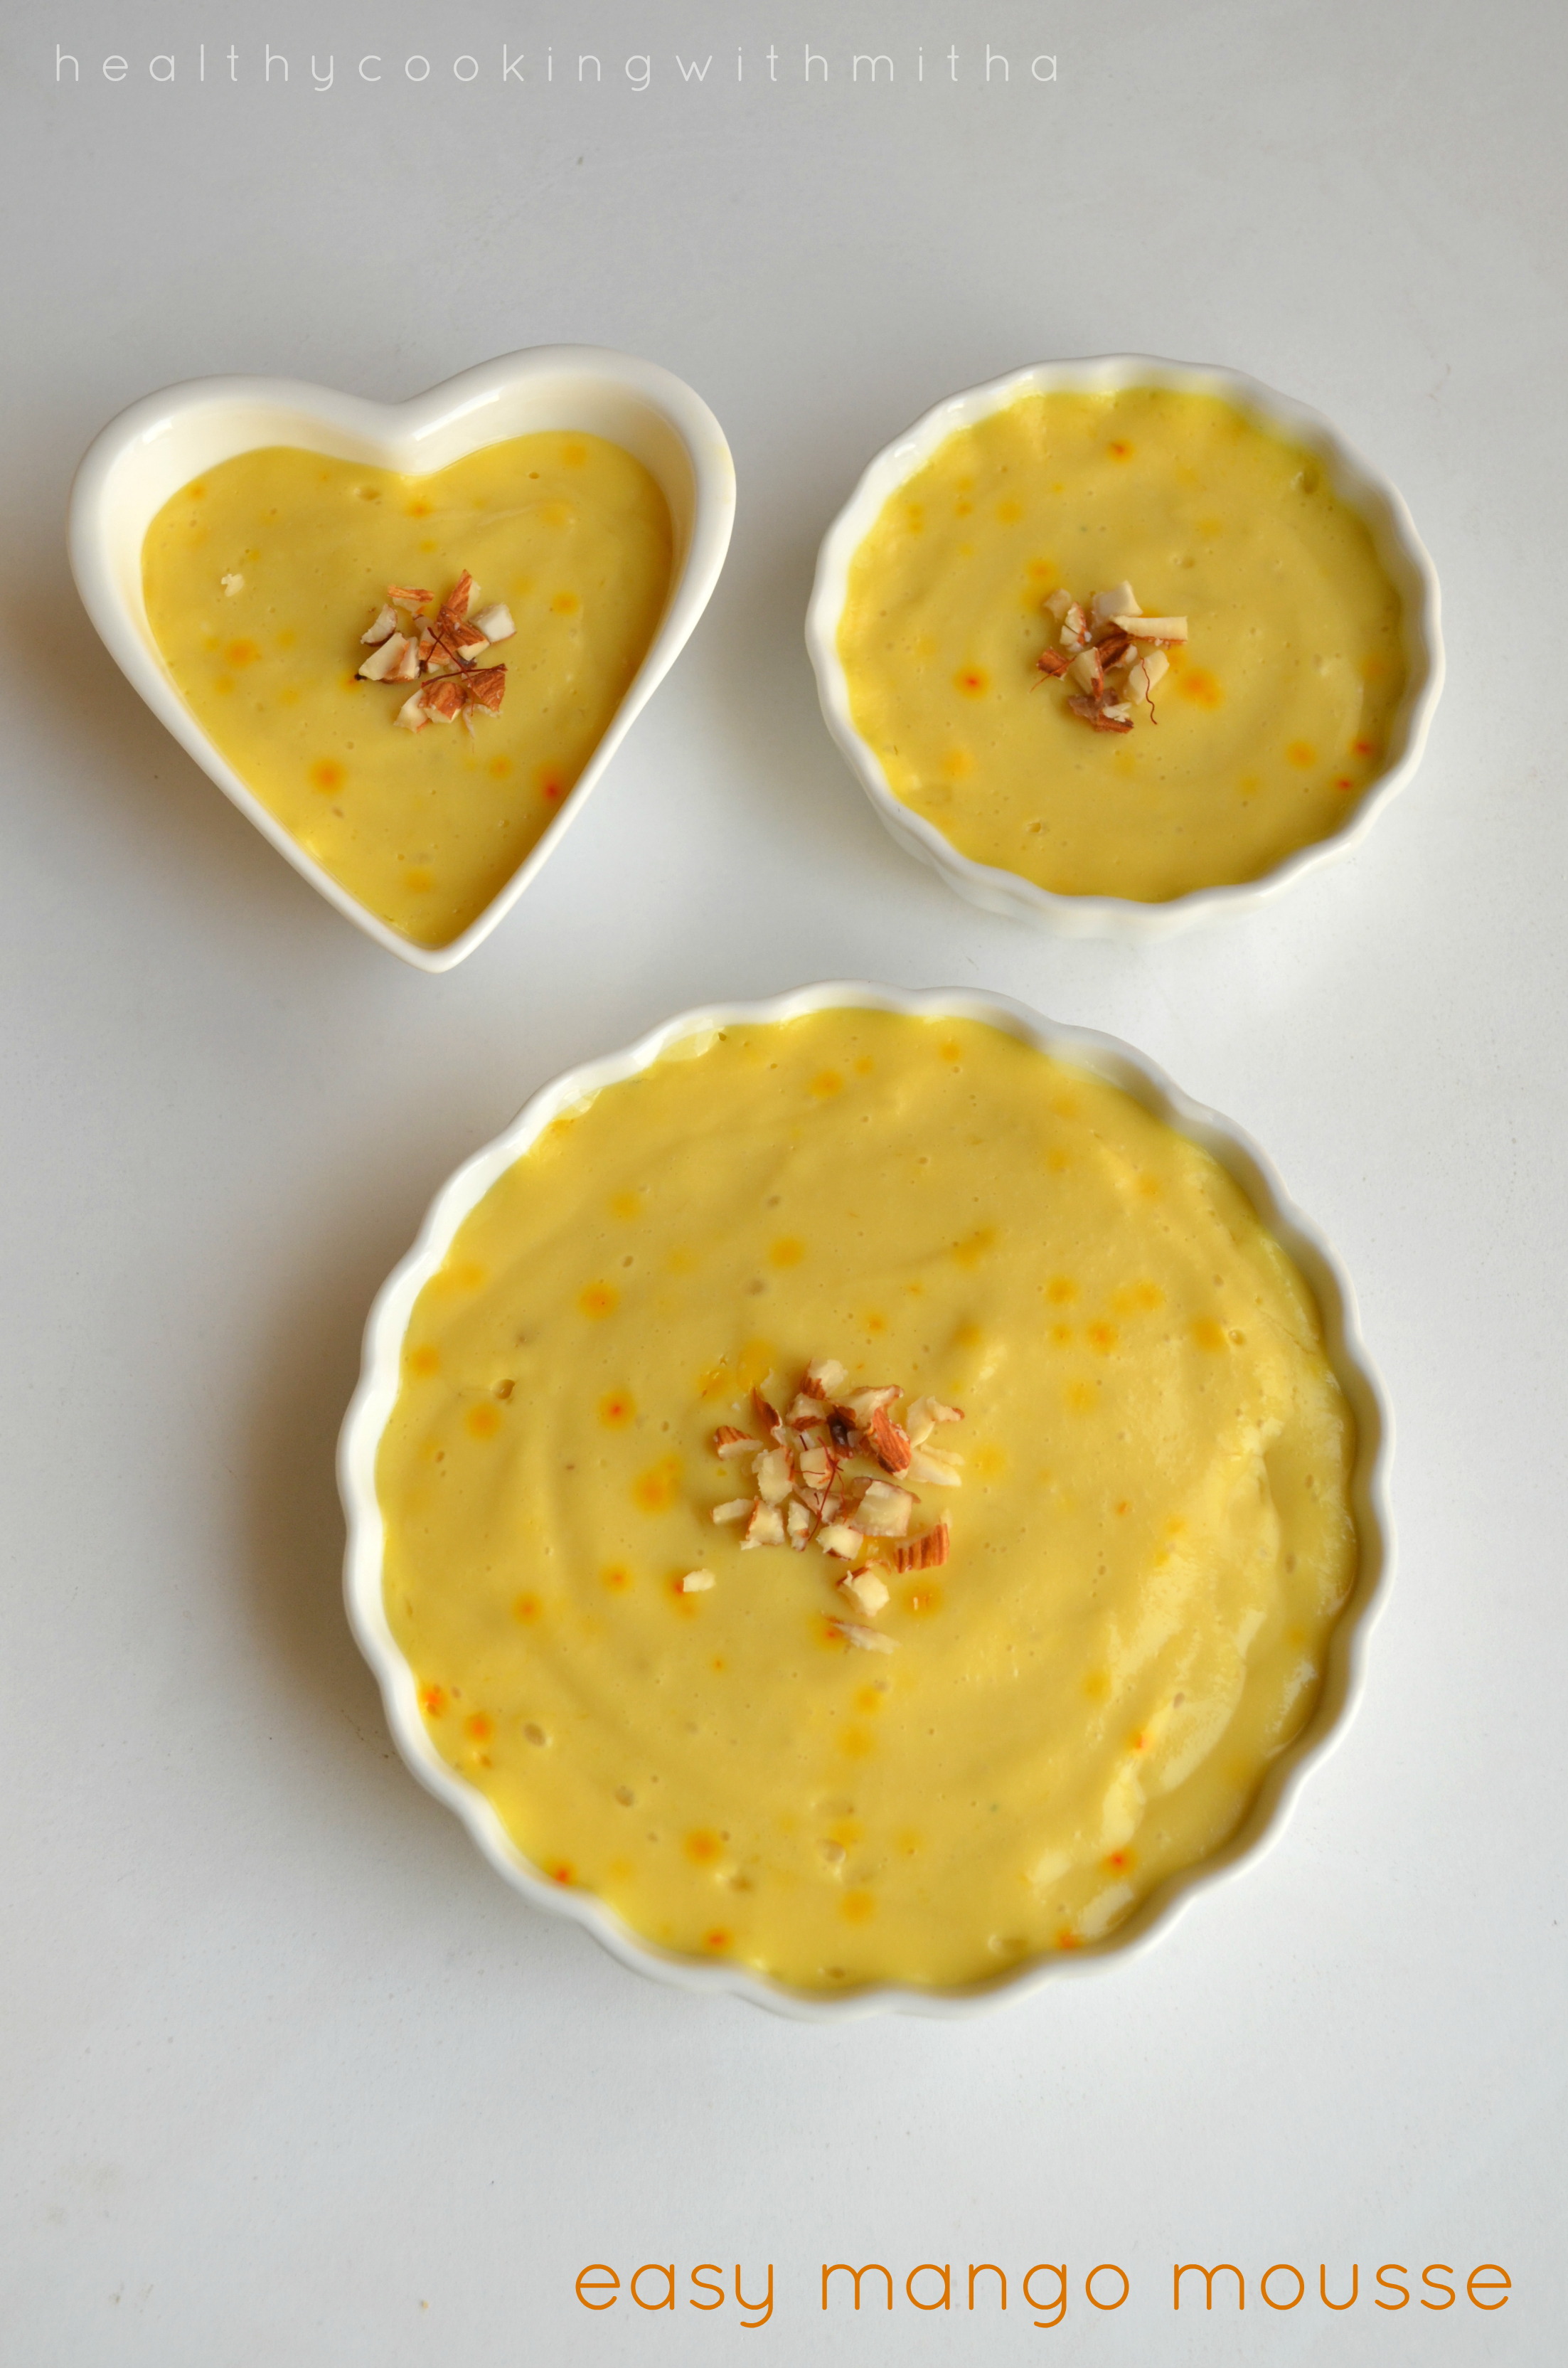
8. After keeping overnight, see how well it sets.
Perfect mousse
9. Now keep it in the fridge for couple of hours for it to cool.
Enjoy chilled mousse topped with little chopped dry fruits if needed!
Click on the image to save the recipe on Pinterest
Notes:
* If you don’t have oven, just keep them covered in the warmest place of your house and it will set overnight. Just that it may not turn set completely but still turns delicious.
* Make sure the mango pulp is thick and not watery. Alphonso mangoes or its canned pulp gives best taste to this mousse.
* The curd/ yogurt should be thick and not watery to be used in this recipe. If it is watery, sieve and use.
* Do NOT add water at all while blending.
* Both fresh mangoes or canned mango pulp can be used in this recipe.
* Do NOT bake this in the oven. Preheat the oven and SWITCH IT OFF. Then place it inside. Make sure the dishes are oven proof. Else may break in the heat.
* You can easily double or triple the measurements for making in bulk.
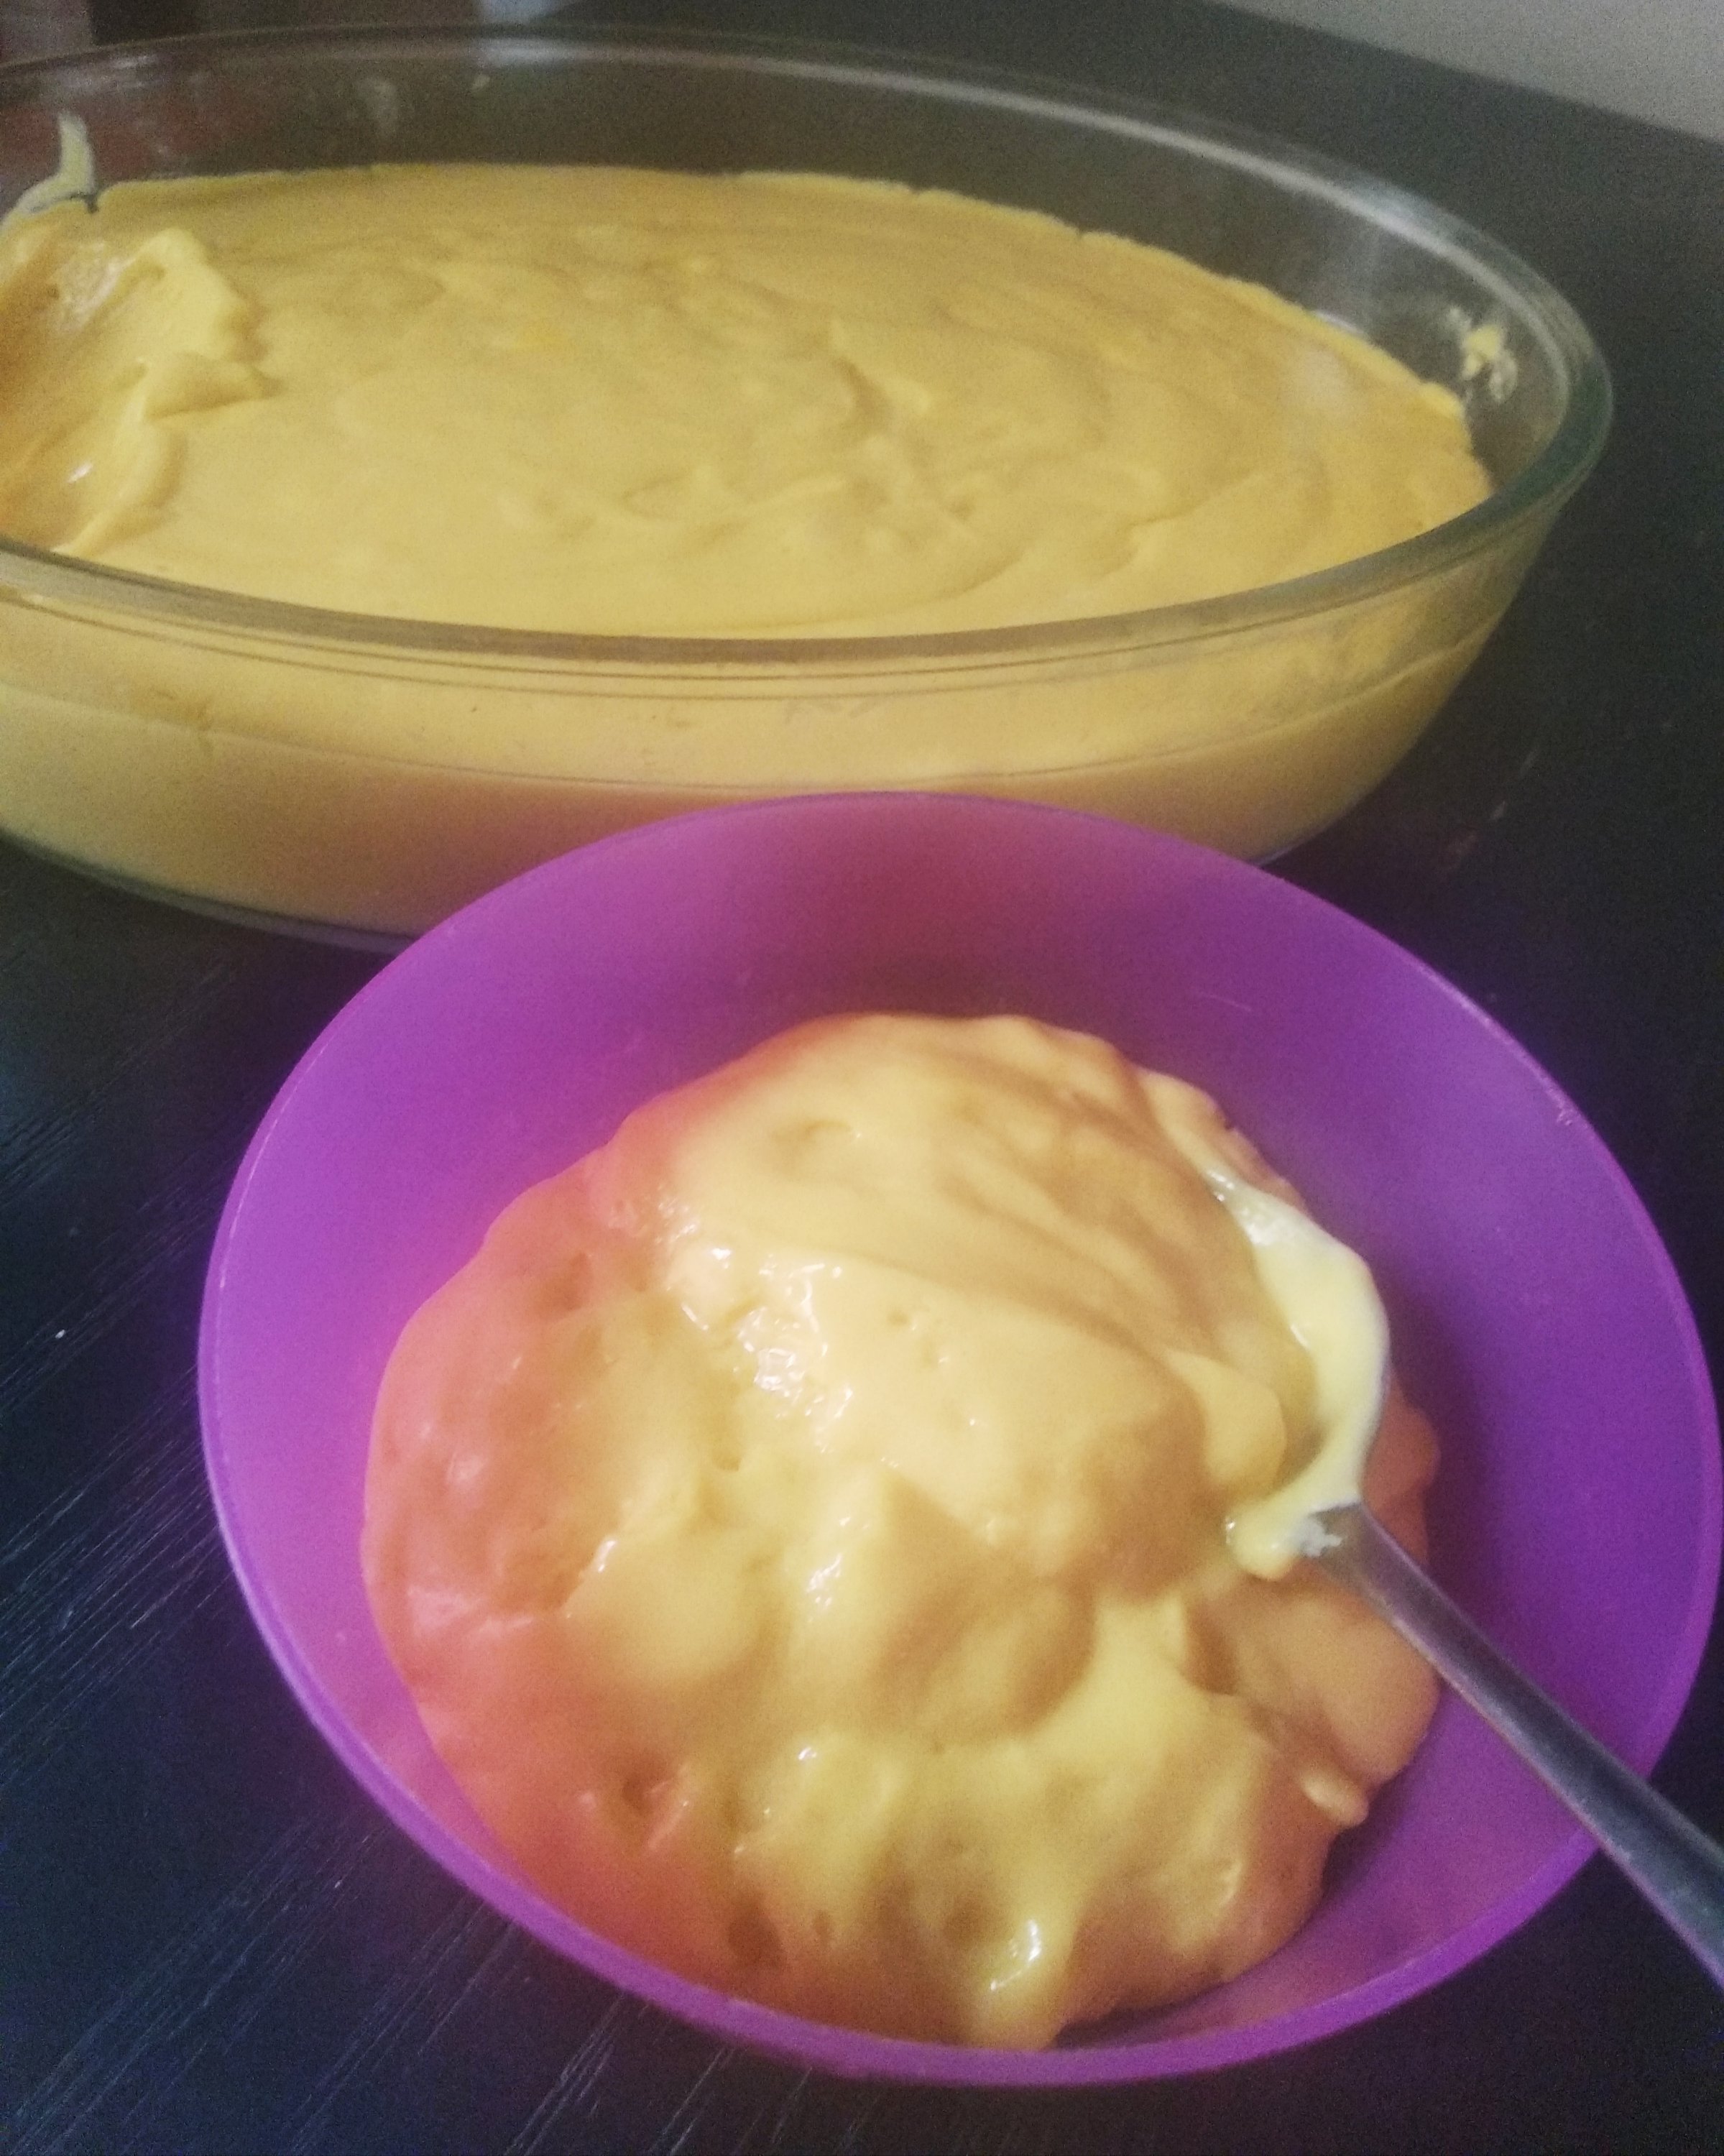
* I have also made in bulk for a party in disposable aluminium ware. You could use that too. Here is a picture:
Easy to serve individual portions. Note that I have filled less than half of the bowl. If you put large quantity, it won’t set.
* If kept for setting in a large casserole or bowl instead of small bowls, it does not set as much but still tastes the same. But please keep it to set in small size bowls if you can.
Creamy and delicious!
I have tried to note down as much points as possible so that it’s easy for you all to follow but if you still have any doubts, either comment here or message me on my Facebook page Healthy cooking with mitha or on my Instagram handle and I would be happy to help.
I have compiled some of my easiest healthy sweet recipes so that people who don’t have time, yet wish to make some delicious sweets can try. They are all sweets that can be made within 15 mins. Hope it will be helpful for all of you.