Tag Archives: Healthy bakes

Jowar Chocolate sponge cake |Gluten free millet cake

Click on the picture to save the recipe on Pinterest

I had always wanted to bake gluten free cakes as it had been the most requested recipe by my readers. But somehow I never got the confidence to shift from wheat flour to a millet flour completely.

Since few months, Jowar flour had become my best friend as I regularly make dosas, idlis and ladoos with it. So when I saw that people have been using it for baking too, I just could not resist trying it out.

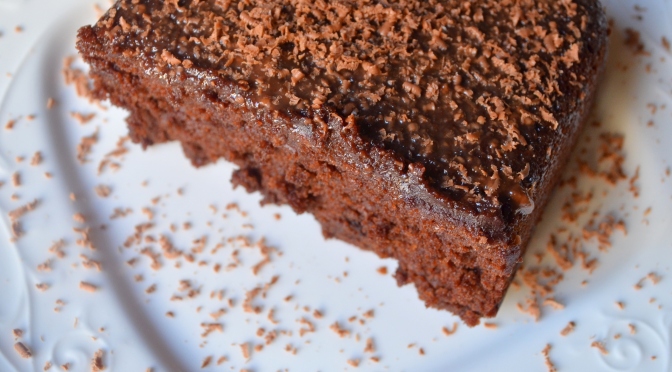
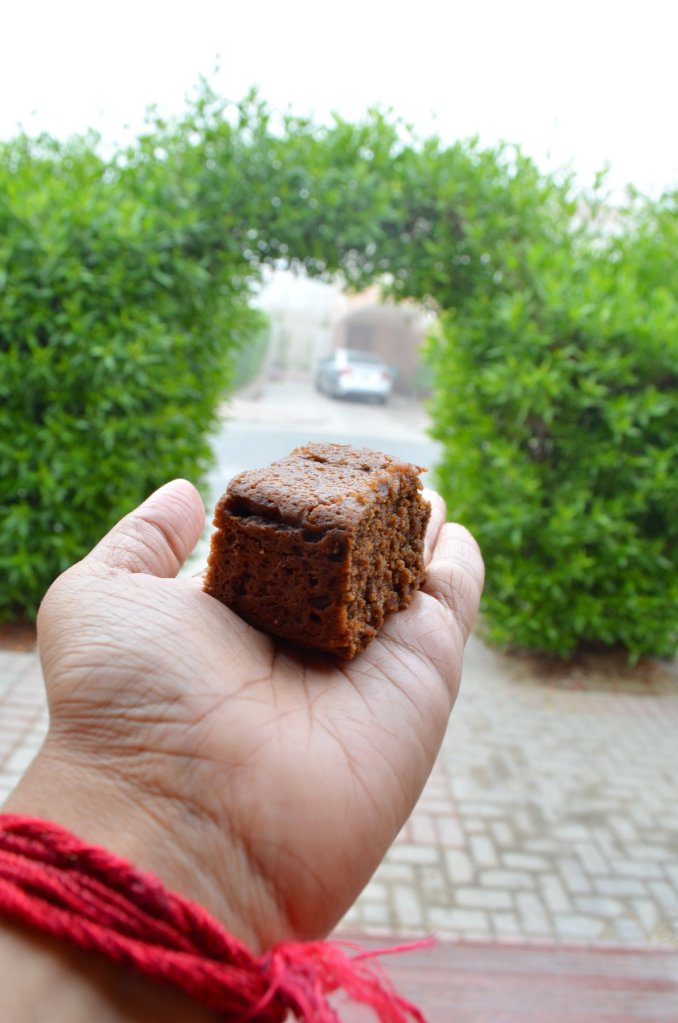
Even the first time I tried this cake, it came out so well that I could not believe my eyes. I cut it in squares and asked my family to taste it. As they ate it, they asked for more and more and finally finished off the cake within a day. It was really that tasty. My son even gave me a million marks for it and always asks me to bake it whenever he has craving for cake.

Click on the picture to save the recipe on Pinterest

This morning the weather is so beautiful and foggy here in Qatar that I felt like baking. Baking is truly a therapy for me ❤️ and what better cake than this Jowar chocolate cake, which I had to share with all of you too. So I took the pictures and dedicated it to the beautiful weather 😍

Hope you all try and love this healthy and tasty cake too. Do let me know if any doubts and it will be a pleasure to help. Happy and healthy cooking ❤️

RECIPE:

Ingredients:

My 1 Cup = 240 ml and even though I usually measure using cups, this time I also measured using my measuring scale for those readers who want accurate measurements.
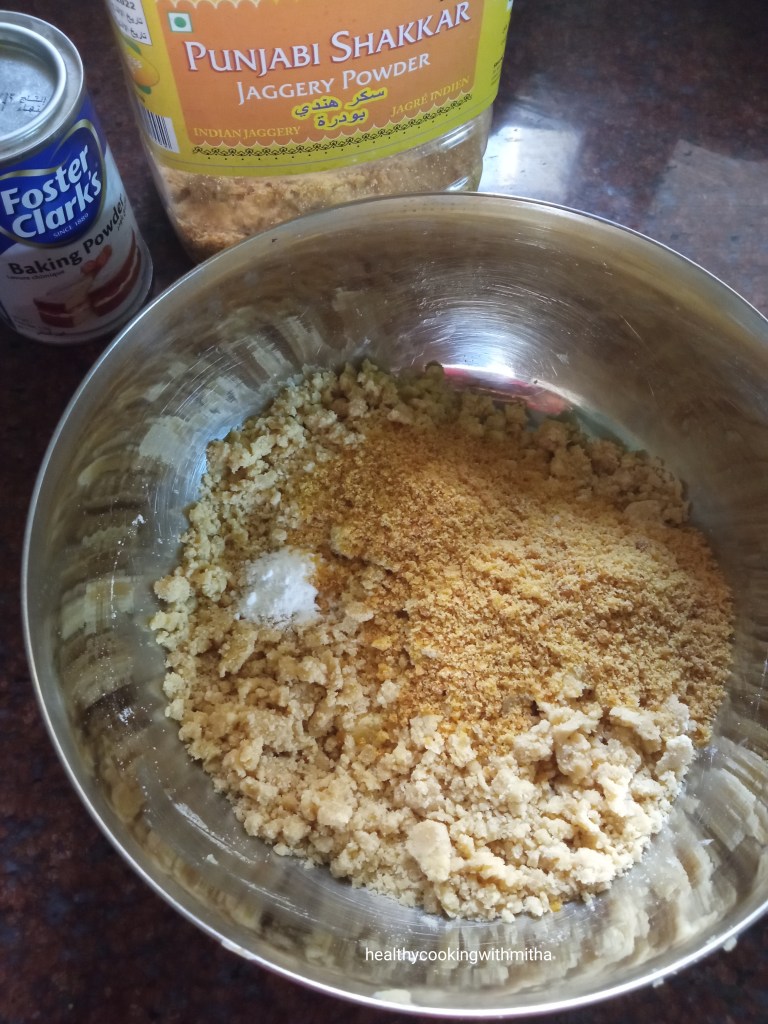
Dry Ingredients:

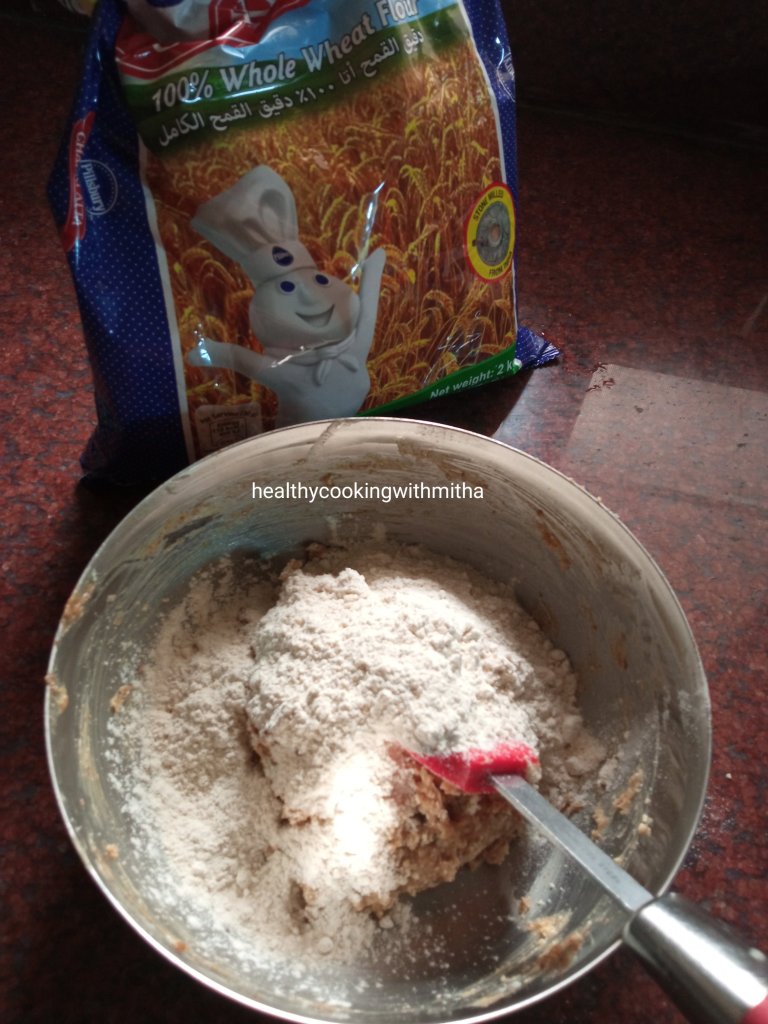
1 Cup Jowar flour (Sorghum flour) {106 grams}

2 Tbsp unsweetened Cocoa powder {10 grams}

1/2 tsp Baking powder

1/4 tsp Salt

Wet ingredient mix:

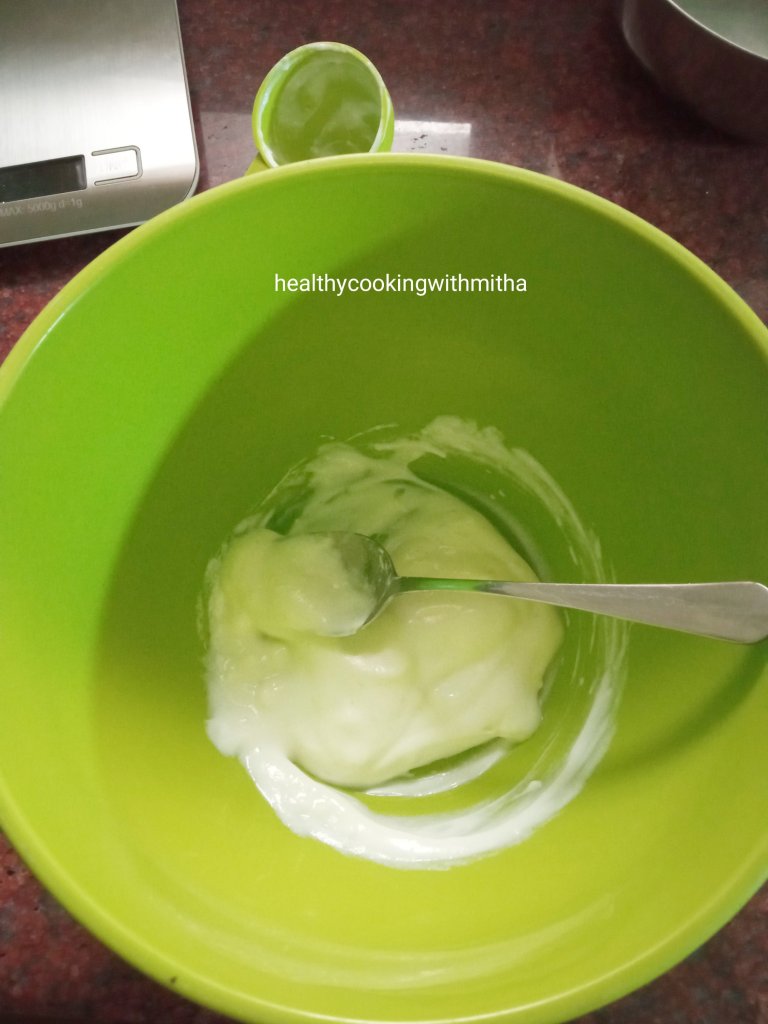
1/4 Cup thick Curd or Yogurt {60 ml}

1/4 tsp Baking soda

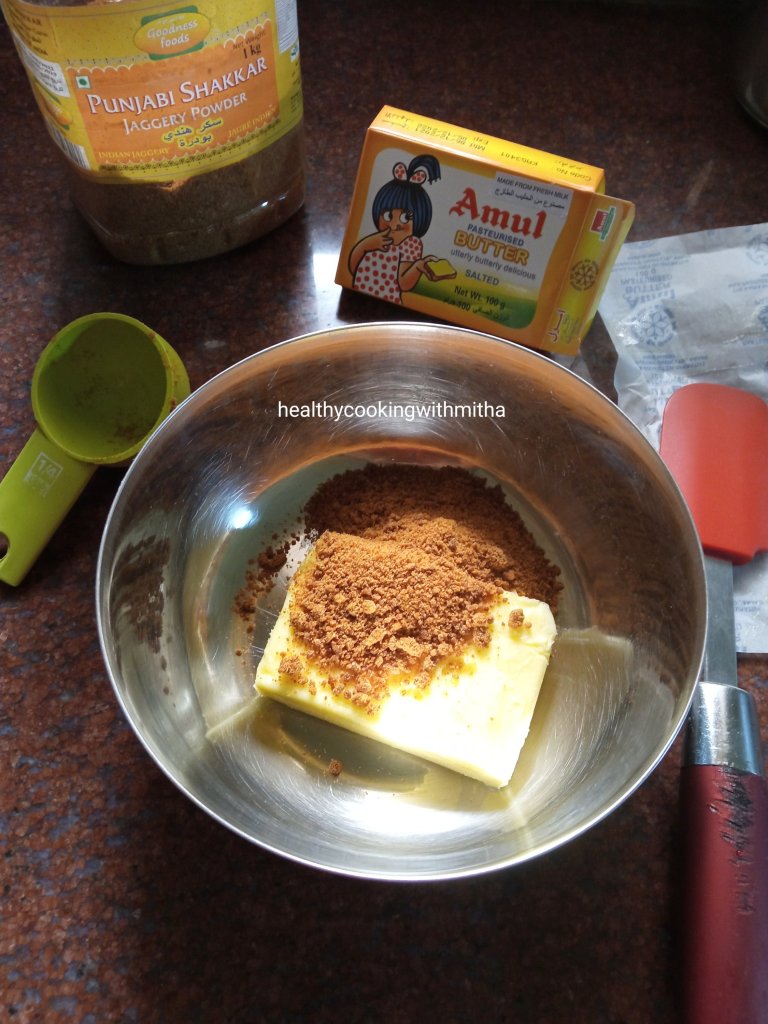
1/2 Cup Jaggery powder {66 grams}

1/2 Cup Milk {100 ml}

1/4 Cup Ghee {54 ml}

Step by step recipe:

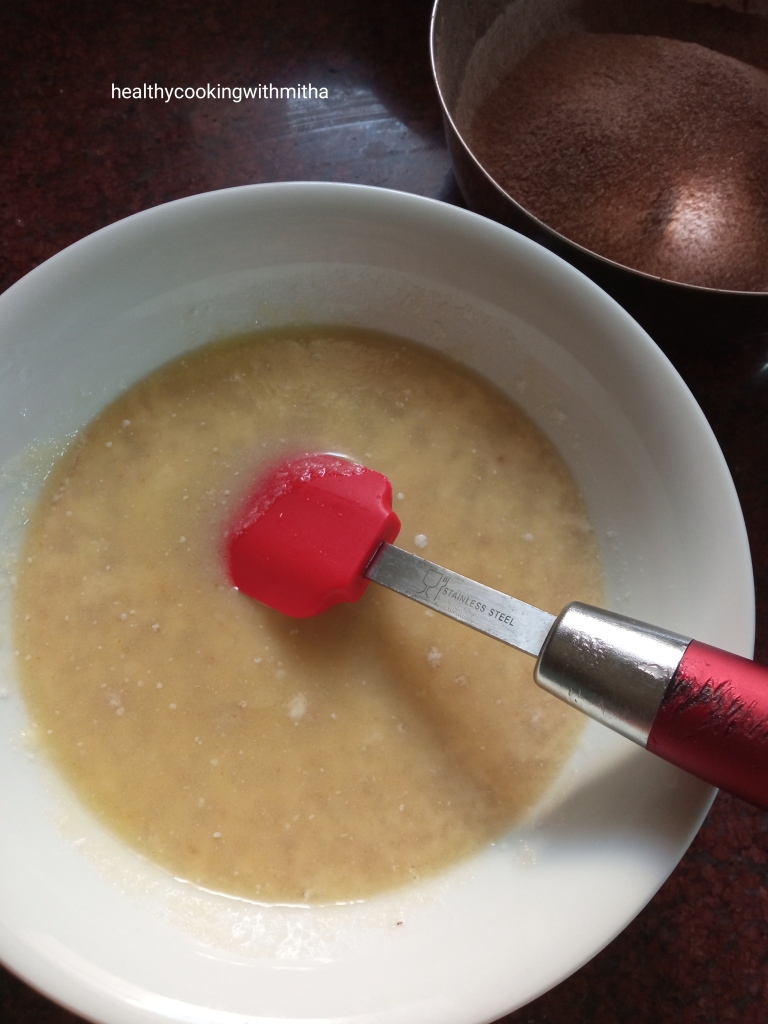
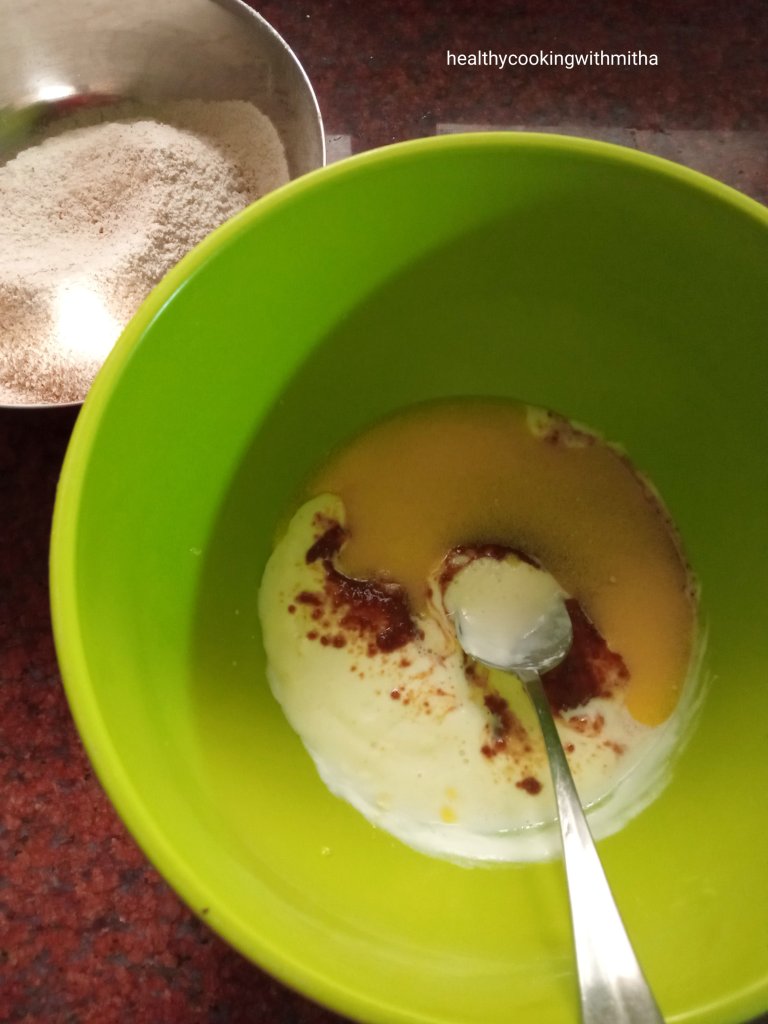
1. Take yogurt and baking soda in a bowl. Mix well. Keep aside. Also preheat the oven in the center rack at 180 C for 10 minutes.

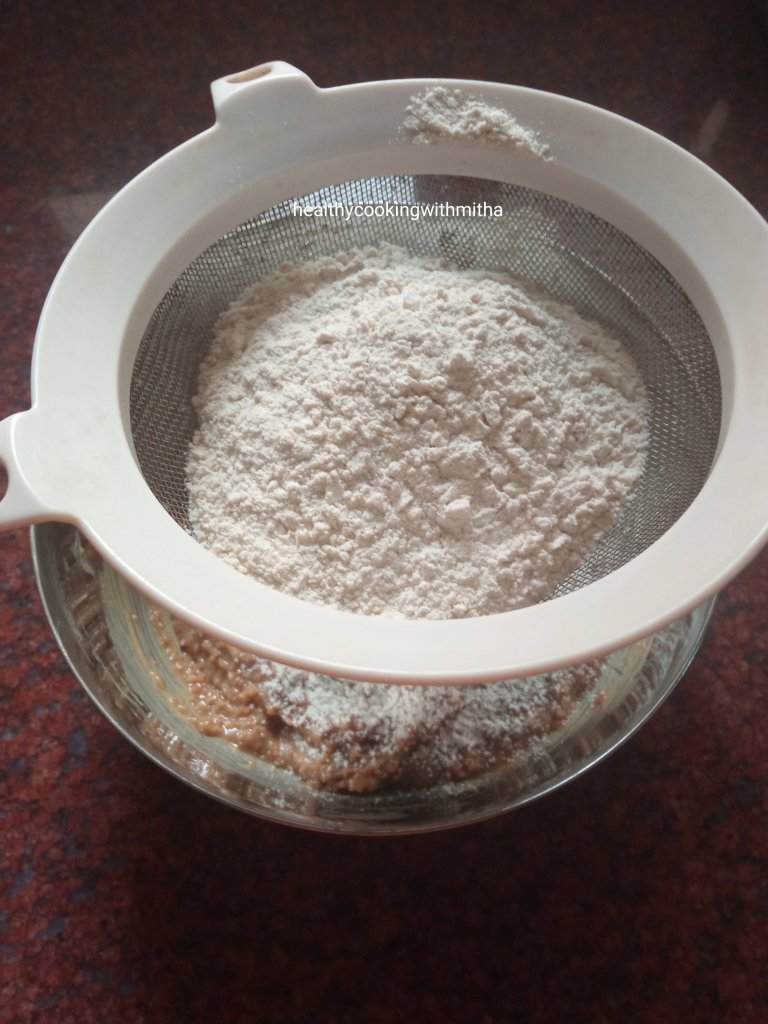
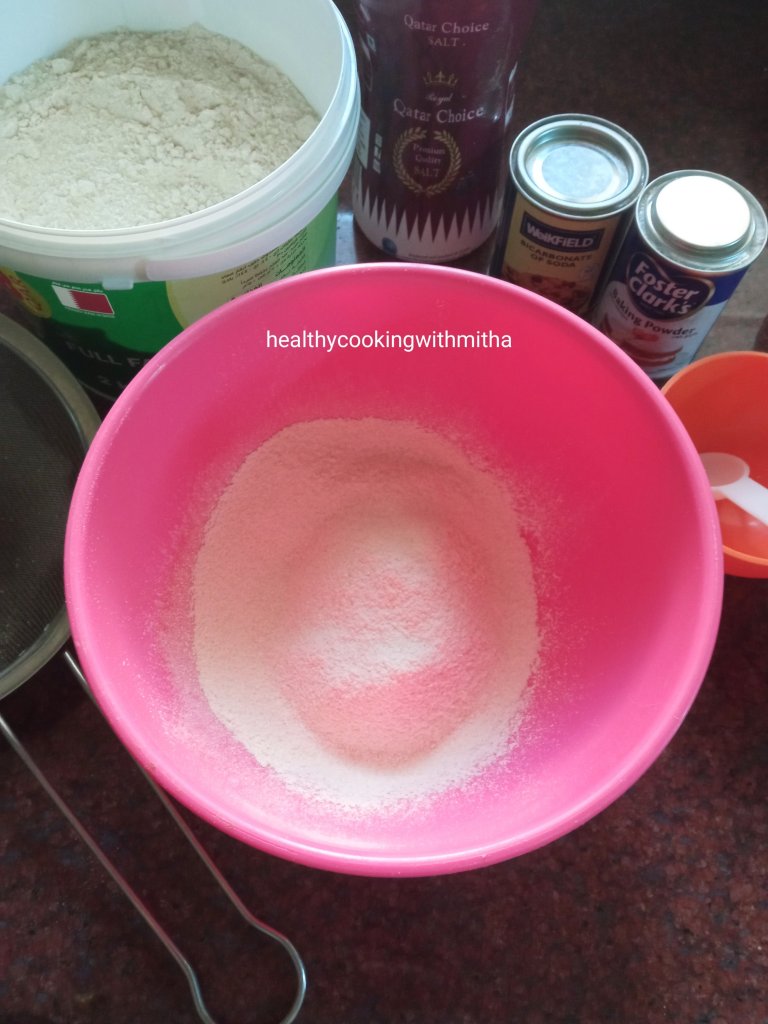
2. Now sieve together all the dry ingredients – Jowar flour, cocoa powder, baking powder and salt.

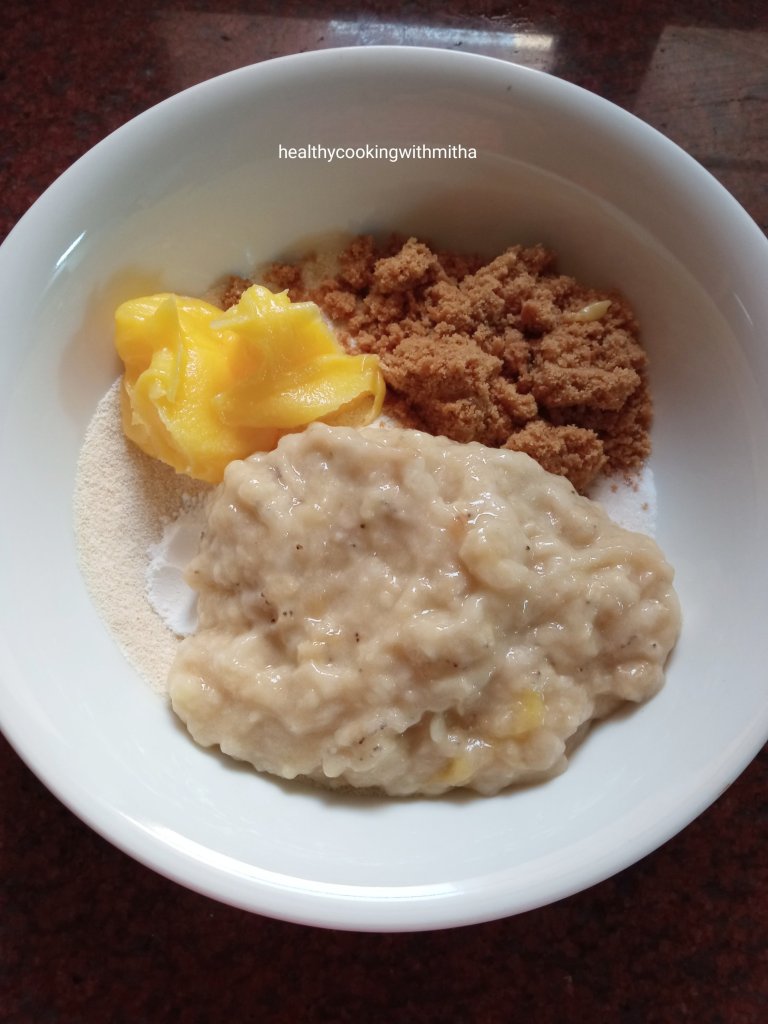
3. Keep the dry ingredient mix aside. Now to the yogurt- baking soda mix, add jaggery powder, milk and ghee. Mix well.

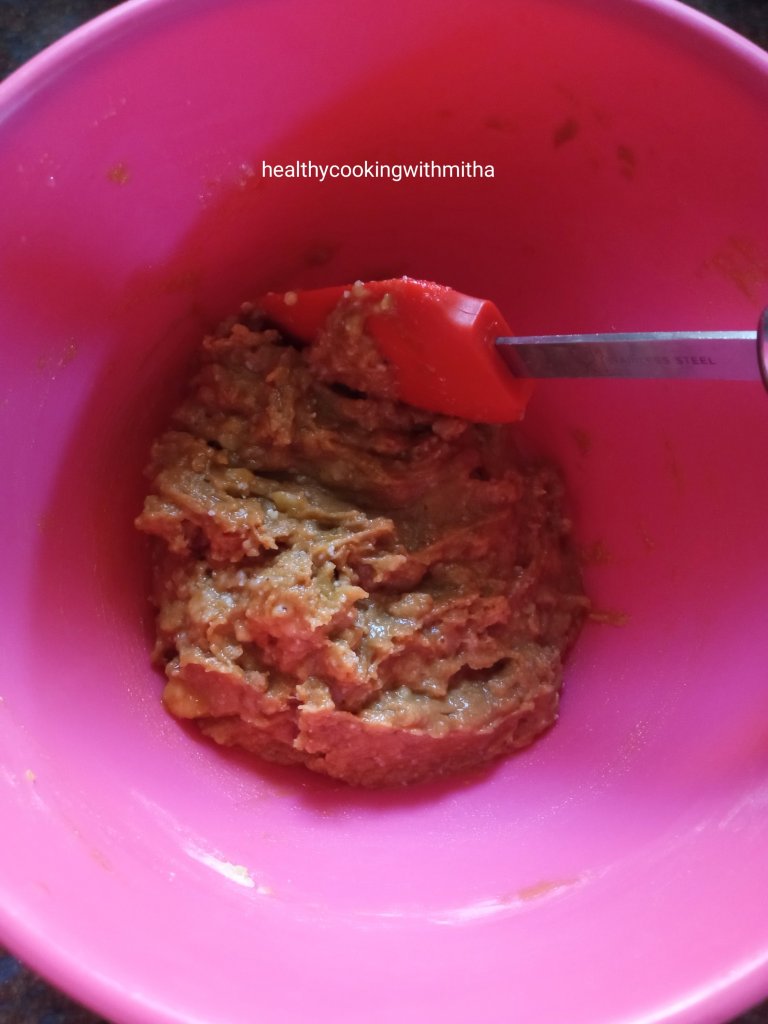
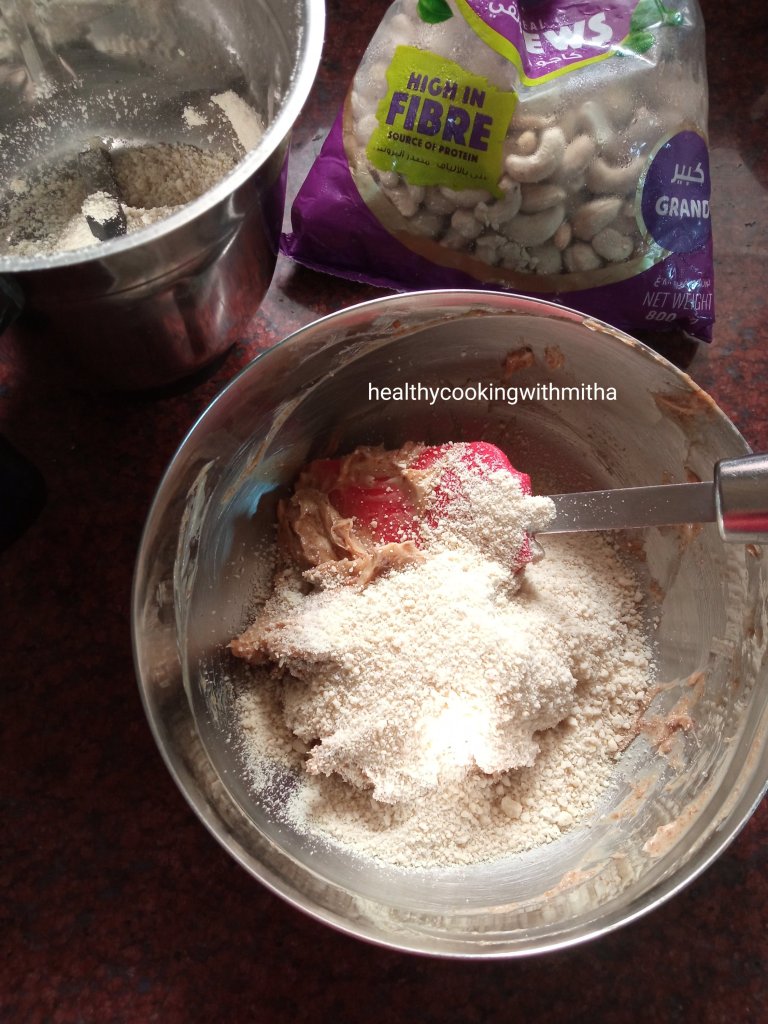
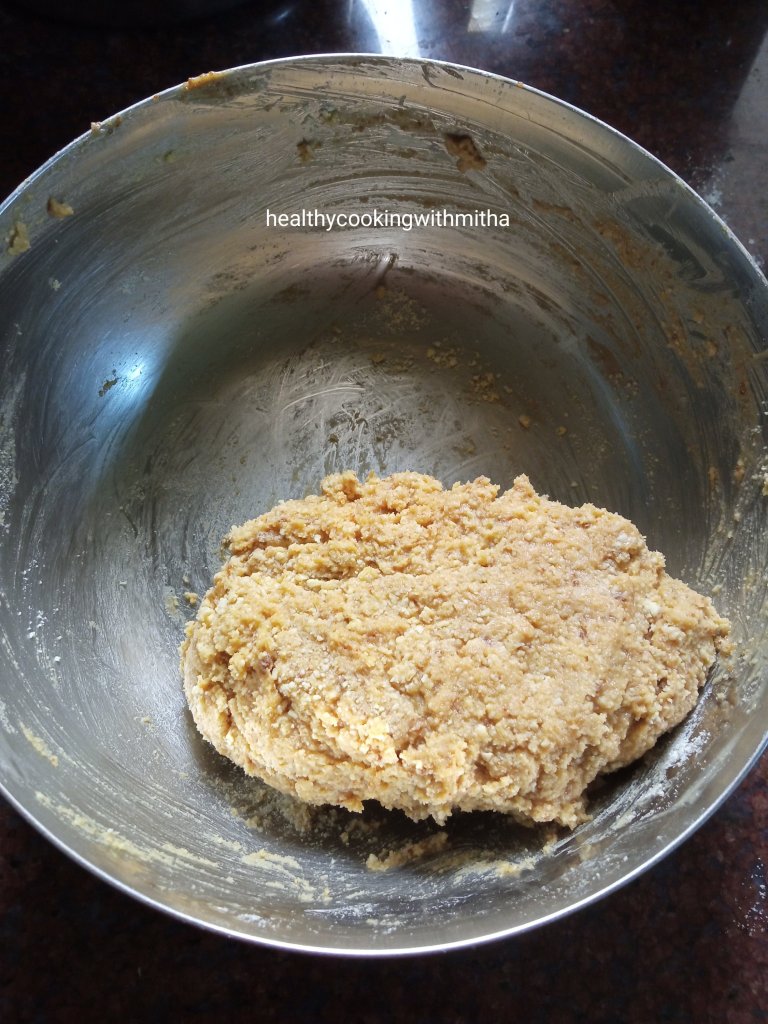
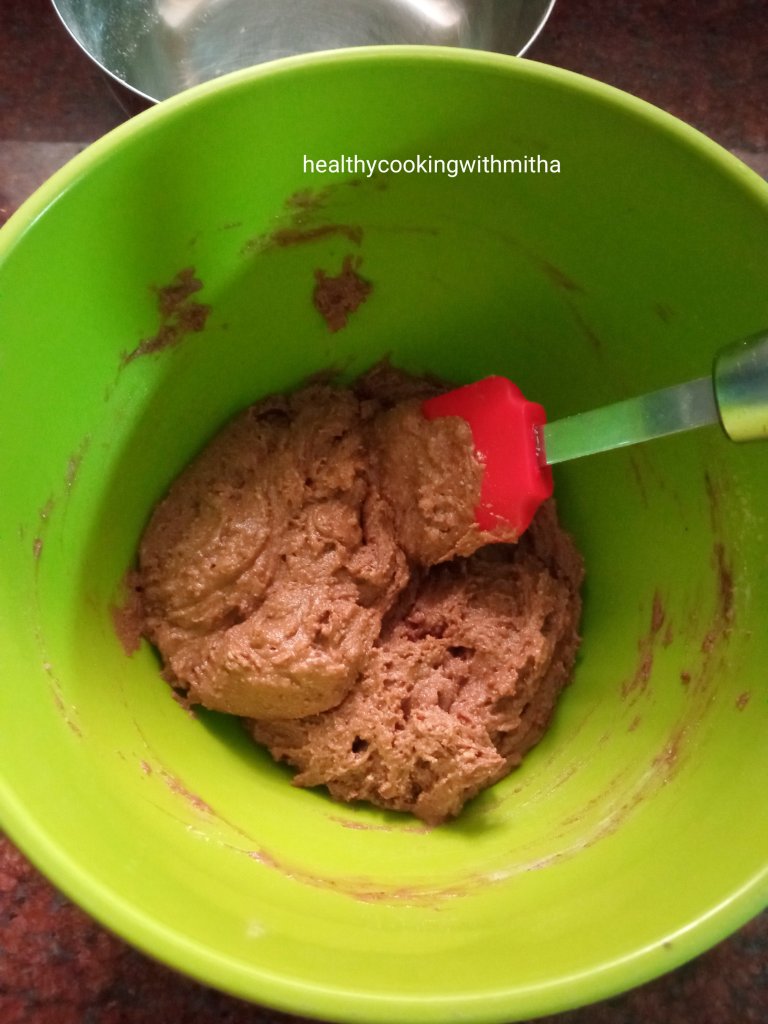
4. Now add the dry ingredient mix to the wet ingredients and mix using spatula. Don’t over mix and just fold until you can’t see any dry flour specks.

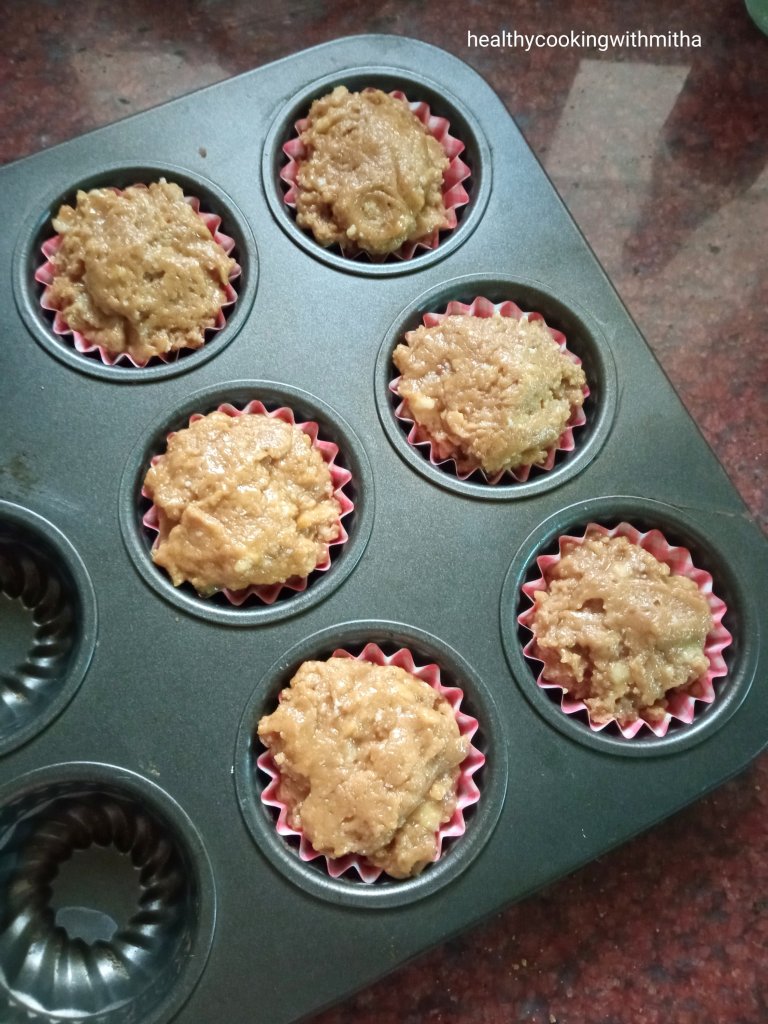
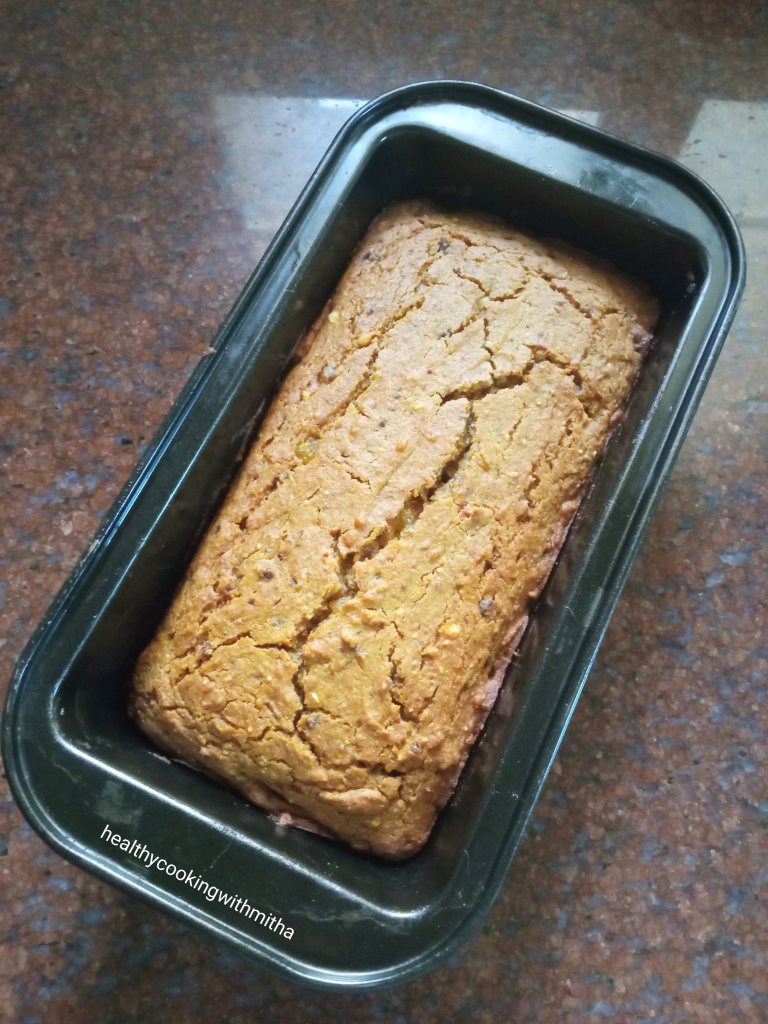
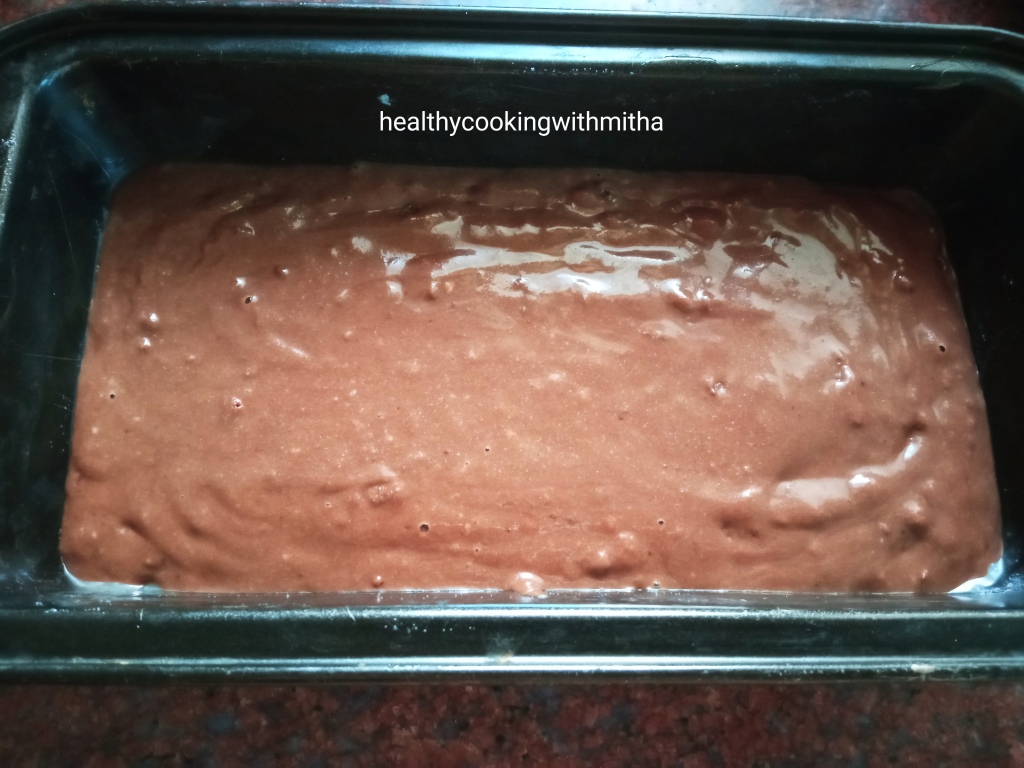
5. Now add the batter to the cake pan. I used a loaf pan of length 20 cm and width 7 cm. You can also use a square or round pan. Either grease with butter or ghee or use parchment/ baking paper. Spread the batter as evenly as possible.

6. Now add the pan to a preheated oven (read step 1) and bake at 180 C for 15 to 18 mins. In my square cake pan, it takes 15 mins as cake height is less but in my loaf pan it takes 18 mins since the cake has more height. So keep an eye after 15 mins.

Check for doneness by inserting a toothpick in the center. If comes out clear or with crumbs, cake is done. If it comes out wet, bake again for two mins or till done.

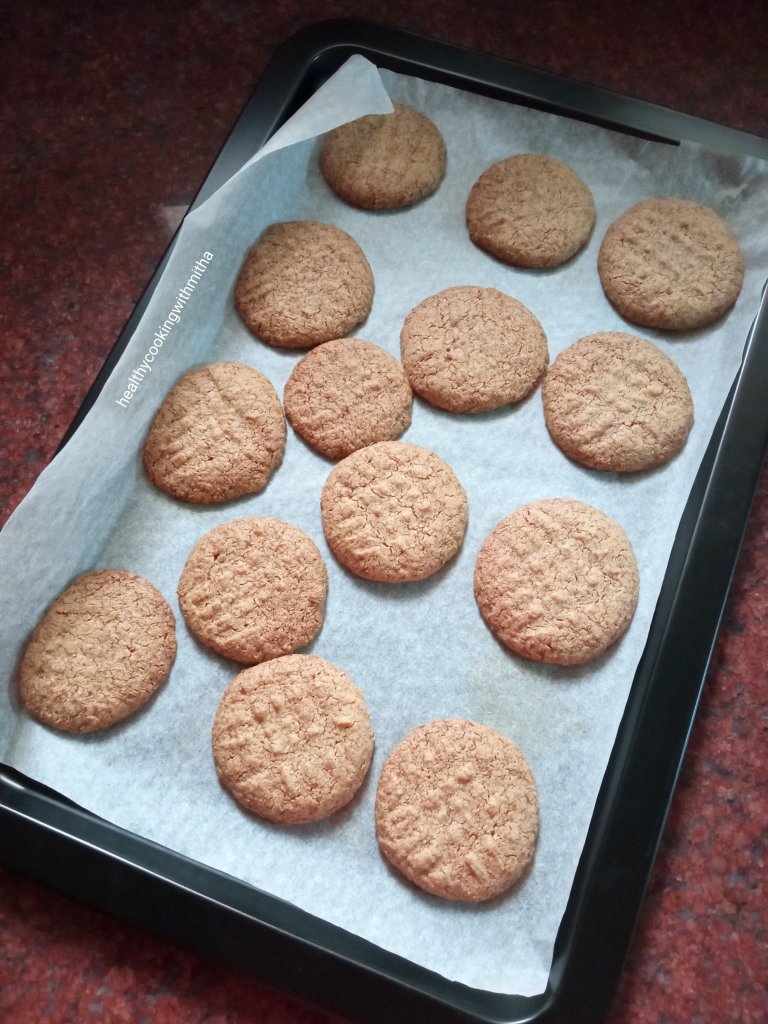
7. Allow it to cool. Once cooled, invert onto a plate.

Click on the picture to save the recipe on Pinterest

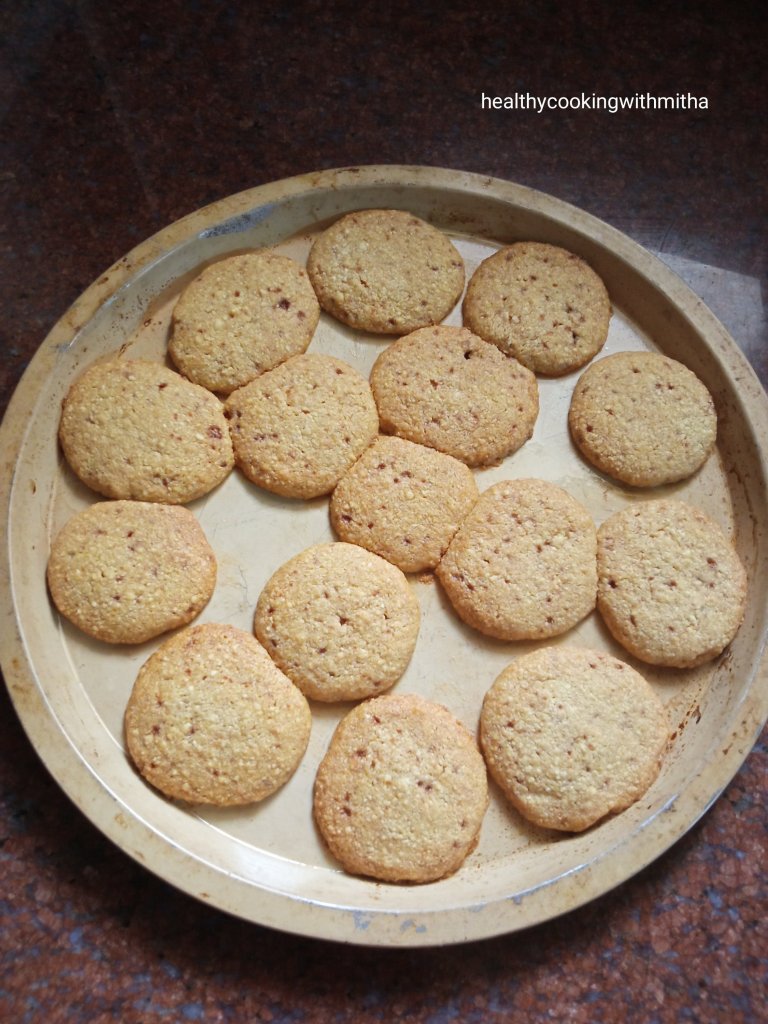
8. Cut into squares and serve. Store in a moisture free container.

Click on the picture to save the recipe on Pinterest

Notes:

* Lasts well at room temperature for a day. After that, I refrigerate since it has milk in it, it may spoil. While serving, I microwave for few seconds and it becomes soft again.

* I use Datar or Amlark brand of Jowar flour as it’s readily available in Lulu and other supermarkets here in Qatar.

* I had got many requests for measurements using scale, so I got one and measured the ingredients using the scale for this recipe. But I feel using Cup is so much easier and I recommend using Cups for just the ease of baking. Just make sure you have 1 Cup = 240 ml measuring cup set and you can use that for all my baking recipes without the need of measuring scale.

* This cake batter is a little thicker but the cake comes out very soft and spongy.

* I use both square and loaf pan for this cake and it bakes quicker in square pan at 15 mins. Loaf pan takes few minutes more as the cake height is more.

* Please remember to preheat the oven at 180 C for atleast 10 mins and don’t open over door for atleast 15 mins into the baking time. These are small but important tips while baking. If you are new to baking, I have written an article on the basics of baking. You can read it here: Baking basics for Beginners

* For more healthy cake and cookies recipes, you can check my page : Healthy cakes and cookies collection of recipes

* More recipes with Jowar flour:

Urad Jowar Dosa

Jowar Idli

Jowar Vegetable Bhakri

Instant Jowar dosa

Jowar flour ladoos

Peanut Butter Cookies |Eggless, whole wheat, easy

Click on the picture to save the recipe on Pinterest

Finally after many months of break, I am back with blogging. Had been to India for vacation and after that, my kids were home as it was their summer holidays. Once school started, my daughter had her half yearly exams ( which seems like my exams 😂). Now that it’s over, I feel free and can sit at peace to write when the kids go to school.

During my visit to India, I got few ingredients which are not easily available here in Qatar (atleast I have not found it in supermarkets) – Coconut Sugar, Palm Sugar and sugar free peanut butter. Once I returned to my kitchen, I have been using them in my cooking and love how natural it tastes as compared to refined sugar.

You can see my coconut sugar haul here from Treen foods . Love their sustainable packaging too in environment friendly paper.

The man behind this brand, Mr Brijesh Sereno explains about their Coconut Sugar and how it is different from others,

A Unique gentle processing method ensures nutrient retention, cleanliness, consistency, and enhanced absorbability for a pure and effective product.

Crisp Note on Health benefits of Coconut Sugar :  In addition to vitamins and minerals like iron, zinc, calcium, and potassium, coconut sugar contains inulin, a prebiotic fiber that supports a healthy gut microbiome, contributing to strengthened immunity.

At first I used it in my wheat pancakes substituting jaggery with coconut sugar and the kids loved it a lot. So I went ahead and started using it in baking too. Since I had requests for peanut butter cookies from my readers, I decided to use coconut sugar in these cookies too and it felt so good to see the cookies taste heavenly.

I have been baking Peanut butter cookies with coconut sugar regularly now and thought it’s high time I share the recipe with all of you too. Hope you all try and love it as well. Happy and healthy baking ❤️

RECIPE: 1 Cup = 240 ml

Ingredients: { Makes about 14 cookies }

1 Cup Whole wheat flour ( atta )

1/2 Cup sugar free Peanut Butter

3/4 Cup Coconut Sugar ( or Jaggery powder or brown sugar or cane sugar)

75 grams or 5 Tbsp Salted Butter

1/2 tsp Baking soda

* 2 Tbsp Milk, only if needed

Step by step recipe:

1. Keep butter at room temperature for a while till it turns soft. Don’t melt it. Just let it turn soft at room temperature. Now add peanut butter and coconut sugar to this.

2. Now mix together well with a spatula till the butter mixes well with peanut butter and coconut sugar.

3. Now sieve wheat flour and baking soda into this mixture.

4. Mix well with hands or use a spatula till it forms a soft dough. At this stage, if the dough is hard, add one to two Tbsp of milk to make it soft. Else if it is soft and sticky, let it be that way. We have to refrigerate it anyhow.

5. Refrigerate the mixture covered for about 10 mins.

6. Now preheat the oven at 180 C for 10 mins.

7. Meanwhile line a baking tray with parchment paper (baking paper) and take small portions of the cookie dough, form balls using palm, then place them equidistant, keeping enough place for them to expand.

While placing, just press lightly using fingers and then make marks using fork as shown.

8. Bake at 180 C for 10 mins in the center rack of the oven with both rods turned on. Keep an eye after 8 mins as every oven is different. Once the center turns slightly hard, edge of the cookie starts turning dark brown, the cookie is done.

9. Allow it to cool completely. It will harden as it cools and turn crisp. The texture of this cookie is similar to biscuit. Store it in a container and enjoy the cookies.

Notes:

* I used sugar free Pintola brand creamy peanut butter which I got from Amazon when I visited India. Loved how even without sugar, it tasted so yum as a spread. In these cookies too, the peanut butter adds such a wonderful flavour.

* The best advantage about using sugar free peanut butter is that you can use the sweetener of your choice in these cookies. I have used Organic Coconut sugar from Treen foods which I ordered from their website https://treenfoods.com/. I have been using this unrefined sugar for many months now and love its flavour and also how healthier it is as compared to refined sugar.

* You can substitute coconut sugar with jaggery powder or brown sugar in this recipe.

* As mentioned in the step by step recipe, add milk only if needed. If peanut butter has liquid content in it, the mixture will not be dry and you won’t need to add milk in it.

* Do refrigerate the cookie dough for atleast 10 mins so that it becomes easy to make cookies.

* Space the cookies a little far from each other as they spread while baking. You can check my picture and see how I have spaced them.

* The baking time can range from 8 to 12 mins depending on your oven. So keep an eye after 8 mins. Once the colour of the cookie turns dark brown and the edges turn crisp, the cookies are done.

* If you are new to baking, you can read my article on Baking for Beginners. It covers all my tips and tricks for newbie home bakers.

* You can also check my Healthy Cakes and Cookie recipes Compilation for more healthy baking.

* Other Cookies that I bake regularly with wheat flour are:

* Cafe style Chocolate chip cookies

* Ragi Butter Cookies

* Basic Wheat Jaggery Cookies

* Almond Butter Cookies

* Cashew butter cookies

Click on the picture to save the recipe on Pinterest

Eggless Wheat Banana Cupcakes | Healthy muffins | Easy recipe

Click on the image to save the recipe on Pinterest

I have been baking cakes and cupcakes with wheat flour, jaggery and ghee since many years now and I am happy to say that my kids too have got so much used to this flavour that they love it much more than store bought maida based cupcakes. I bake them for their school tiffin box and also as an evening snack before they go out to play. ❤️

Now that they are at home whole day (demanding for food quite often 😅), my cooking has also increased and while I was about to make these banana cupcakes, I realized I had not shared the recipe on the blog. So quickly took some pictures and here I am writing this recipe while they are enjoying the cupcakes. ❤️

Cinnamon gives a wonderful aroma and flavour to these cupcakes and that makes these cupcakes super tasty too. They come out so soft too and you can never say it does not have eggs in it.

Hope you all try these delicious, filling cupcakes too and I am sure you will love it too. Happy and healthy baking! ❤️

RECIPE:

Ingredients: { Makes 6 medium sized muffins }

1 Cup = 240 ml

Dry Ingredients:

1 Cup Whole Wheat flour / Atta

1/4 tsp Cinnamon powder (or Vanilla essence)

1/4 tsp Baking soda

A pinch of salt

Wet Ingredients:

1/4 Cup Mashed Bananas ( I took 2 small overripe Indian bananas)

1/2 Cup Jaggery powder

1/4 Cup Water

1/4 Cup Ghee

1 tsp Vinegar (or lemon juice)

Step by step recipe:

1. Sift together using a sieve 1 Cup wheat flour, 1/4 tsp Cinnamon powder, 1/4 tsp Baking soda and a pinch of salt. Keep aside.

Note: If using Vanilla essence, you can mix with wet ingredients.

2. In another mixing bowl, take 1/4 Cup mashed bananas, 1/2 Cup Jaggery powder, 1/4 Cup Water, 1/4 Cup Ghee and 1 tsp Vinegar. Mix very well using a spatula.

Note: I mashed two overripe Indian bananas and got 1/4 Cup of mashed bananas. Even if you use three Indian bananas, it’s fine. Cupcakes will come out well. Just take care to mash really well.

3. Now add the dry ingredients mix to the wet ingredients mix and fold using the spatula. Do NOT overmix. Just mix so that you don’t see any dry flour specks in the mixture.

4. Preheat the oven at 180 C for 10 to 15 mins in the center rack of the oven. If using microwave convection oven, choose the option of turning both rods on.

5. Meanwhile line the muffin pan with liners or just grease well with ghee or butter. Add a spoonful or two of the batter into each mold.

6. Bake at 180 C for 18 to 20 mins. Mine gets done exactly at 18 mins. Keep an eye after 15 mins into baking time so that the cupcakes don’t turn brown on the surface. Allow them to cool and then enjoy!

Note: To check if done, insert a toothpick in the center most cupcake. If it comes out clear or with tiny crumbs and is not wet, then the cupcakes are well baked. If it comes out wet, bake for few minutes more.

Click on the image to save the recipe on Pinterest

Notes:

* These cupcakes lasts well at room temperature for a day. Just keep in a moisture free container. After a day, refrigerate it and then microwave for few seconds before consuming.

* I have used 1/4 Cup mashed Bananas to 1/2 Cup mashed Bananas in this recipe and it does not make much difference. It depends on how many overripe bananas I have. If I have two, I add two and if I have three, I add all three. Just make sure to not increase the quantity more than 1/2 Cup though.

* I recommend using Cinnamon powder for this recipe as it gives such a wonderful aroma and flavour. But if you don’t have, you can use vanilla essence or even Cardamom powder too.

* Always remember to sieve the dry ingredients to get soft muffins, specially when using whole wheat flour.

* Ghee can be substituted with melted butter, Jaggery can be substituted with brown sugar or regular sugar and Vinegar can be substituted with lemon juice, all of same quantity.

* Don’t overmix both the dry and wet ingredients. Just mix well once. Overmixing can lead to hard muffins.

* Preheating the oven before placing the muffin pan is a very important step. Don’t forget it. Preheat at 180 C for 10 to 15 mins.

* Bake in the center rack of OTG or with both rods on in a microwave convection oven. Keep an eyes after 15 mins into baking time but don’t keep opening oven door before that. Mine gets done exactly at 18 mins in OTG.

* To check if done, insert a toothpick in the center most cupcake. If it comes out clear or with tiny crumbs and is not wet, then the cupcakes are well baked. If it comes out wet, bake for few minutes more.

* You can give this to kids as evening snack or in their tiffin box for a filling, tasty treat.

For more Healthy cakes, cupcakes and cookies recipes, you can check my collection:

Healthy Cakes, Cupcakes and Muffins

For Baking tips for Beginners, you can check:

Baking Tips for Beginners

More recipes with Bananas like Banana pancakes, Banana Rava Cupcakes, Chocolate banana cake:

Banana recipes Collection

Cashew Butter Cookies | Using wheat flour and Jaggery

Click on the image to save the recipe on Pinterest

Hello dear readers, I am back after a very long break. I know I have been taking many breaks now and then but I also know you all will understand me. I had travelled to India, to my hometown Udupi in Karnataka, last month which was after a period of 2.5 years and had a wonderful time with my Amma along with my dearest family members. ❤️

After coming back to Qatar, my kids started school, with my son joining kindergarten too. I miss the kids specially my son a lot as he was always stuck to me (fevicol ka jod 😄) but as they say, we have to accept whatever life brings and I have got accostomed to his absence in the mornings too (though I get teary eyed each time he leaves 😁 #motherhood).

When he comes back though, I get smothered with hugs and kisses from him which compensates for everything 😍😍. My daughter comes a little later and then an hour goes by with her narrating what happened at school. Her stories remind me of my younger self who used to tell each and everything to my mother after she came back from work. ❤️

When they are at school, I cook or bake something special just to see their excitement and the way they enjoy it. 😍 That’s how I baked these Cashew Butter Cookies which both the kids loved a lot.

These cookies are healthier as compared to store bought ones and very tasty too. Once you get the trick on how to make it well, it’s very easy and hardly takes 30 mins to bake a batch of cookies.

Hope you all try and love these cookies. Do let me know if any doubts and it will be a pleasure to help. Happy and healthy baking! ❤️

RECIPE: { My 1 Cup = 250 ml }

Ingredients: { Makes about 15 cookies }

100 grams Salted Butter ( 1/4 Cup + 3 Tbsp) (Add a pinch of salt if using unsalted butter)

3/4 Cup Whole wheat flour or Atta

1/2 Cup finely powdered Cashews ( + 2 to 3 Tbsp if needed)

1/4 Cup Jaggery powder

Step by step recipe:

1. Soften butter by keeping it at room temperature for little time. (Do NOT melt it in microwave or so.) Just place it at room temperature till it turns soft. Now add jaggery powder.

2. Combine both well with a spatula till jaggery powder blends with the butter.

3. Add cashew powder and mix well using the spatula.

4. Now add wheat flour.

5. Combine well to form a non sticky dough. At this step, if needed add extra cashew powder or wheat flour if the dough is very sticky. The dough should not be very hard but should not be sticky too. It sometimes takes me extra 2 Tbsp of cashew powder to get non sticky dough. Depends on your wheat flour/ butter brand.

6. Cover and refrigerate the dough for 10 to 15 mins so that the dough becomes firm. After that Preheat the oven for 180 C for 10 minutes in the center rack of the oven.

7. Now make roundels using your palm and place on a greased (with butter or ghee) oven proof plate. Grease your palm too if needed.

8. After the oven finishes pre heating, place this plate in the center rack of the oven and bake at 180 C for 12 to 15 mins. My cookies get done at 14 mins.

9. When done, the cookies turn slightly brown at the edges and are hard to touch in the center. If the cookies look underdone, bake for couple of mins more.

10. Once baked, allow the cookies to cool completely. As they cool down, they start getting firmer but these cookies are more on the soft side and not the crispy kind of cookies. Enjoy soft, melt in the mouth homemade cookies! ❤️

Notes:

* Store the cookies in a dry, air tight container and it lasts well for two to three days. Mine gets finished off by my family before that. Will last longer if handled well, free from moisture.

* They are very soft and break upon touching on warm. As they cool down, they will harden but still not very hard like store bought ones as we have used only butter. The texture is melt in the mouth softer version of cookies.

* These cookies do not need baking soda nor baking powder. They still grow in width during baking process. I too was amazed the first time I tried it as I always thought cookies needed either baking soda or powder.

Baking time depends on your oven. In some ovens, it can be done at 10 mins while in my OTG, it takes 14 mins. So keep an eye but don’t open the oven door before atleast 10 mins into the baking time. Else it will lead to uneven baking.

* Do refrigerate the dough for atleast 10 to 15 mins as it helps combine the ingredients well and also helps us form cookies well without sticking in our hands.

* Place the cookies in the center rack of your OTG or with both rods on if using microwave with conventional mode oven.

* I have not replaced butter with ghee or oil in this recipe. So can’t say about the outcome.

* I use Pillsbury brand of wheat flour for my bakes and it works very well for me.

* For making powdered Cashews, just put the cashews in a mixer and pulse it in regular intervals till it turns into fine powder. Keep checking in between so that it does not leave oil and become a paste.

* Leave space between cookie dough while keeping on the tray as they increase in width as they bake.

* When they fully bake, you can see the surface is free of raw dough and edges are slightly golden in colour. It is enough. You can remove the cookies out of the oven.

* Cashews can be replaced with Almonds like in these Almond Butter Cookies.

* You can check my Healthy Cakes and Cookies compilation for more cookies and cake recipes.

* For beginners in baking, you can check my Baking Basics for beginners post.

I have tried to note down as much points as possible so that it’s easy for you all to follow but if you still have any doubts, either comment here or message me on my Facebook page Healthy cooking with mitha or on my Instagram handle and I would be happy to help.

Click on the image to save the recipe on Pinterest

Dry fruit Cake | Eggless, whole wheat | Kids’ healthy snack box idea

Click on the image to save the recipe on Pinterest

It has been so long that I have posted a cake recipe, in fact the last one was in February which was this delicious Chocolate Sponge cake. The cake is so amazing that I have been making it regularly, mostly as cupcakes for my kids. It is also a great snack box option for my daughter who’s school has started regularly now (after months of online classes, my butterfly is happy to be flying again 😄).

Apart from chocolate cake and other cakes, I have also learned to make this healthy Dry fruit Cake which she takes to school and my 3 year old son too enjoys it as his morning snack. In fact I made it again today on their request and decided to take step by step pictures to share the recipe with all of you too. 😍

My son could not wait for me to complete taking pictures and he came to take a slice. I captured the moment and it came out so cute. Those tiny hands. 😍

Click on the image to save the recipe on Pinterest

He gobbled up two slices of the cake and the rest of them are waiting for my daughter to come back from school. It’s her favorite and I am sure she will be very happy to see it. ❤️

Hope you all try and love this cake too. They are a great way to add the healthy dry fruits in the kids’ diet and since it has wheat flour and ghee along with the nuts, they are filling too. Specially great for the winters now. I have also been making these easy Sesame seeds Burfi and Dry fruits ladoo for them which you can try as well. Happy and healthy cooking! ❤️

RECIPE:

Makes a single loaf cake in a loaf pan of length 20 cm and width 7 cm

Ingredients:

Dry Ingredients: { 1 Cup = 240 ml }

1 Cup Whole wheat flour (Regular Chapati atta)

1 tsp Baking powder

1 tsp Baking soda

1/4 tsp Salt

Wet Ingredients:

1 Cup Mixed nuts, raisins and dates (I take about 10 cashews, 10 Almonds, some raisins and 5 seedless dates which make a total of 1 Cup)

1 Cup Orange Juice (I use freshly squeezed)

1/4 Cup Jaggery powder

1/4 Cup Ghee

Step by step recipe:

1. Sieve together 1 Cup wheat flour, 1 tsp baking powder, 1 tsp baking soda, 1/4 tsp salt into a mixing bowl.

2. Take mixed nuts and raisins in a mixer. Deseed dates and halve them (Fine chop them if they are not very soft. It helps when you pulse later in the mixer). Keep aside.

3. Coarsely powder the nuts and raisins together using Pulse mode of the mixer. Don’t grind at one go or you will get a paste. Just pulse few times till the nuts turn into coarse powder. Now add the deseeded dates to it.

4. Pulse again till the dates blend together and it forms a coarse mixture as shown. (Small pieces of dates left in the mixture is fine. Gives a great bite in the cake.) Note that this mixture is in powder form and not paste. Pulse the mixer few times to get this. Don’t grind all at once as the nuts leave oil and the mixture becomes a paste.

5. Now preheat the oven at 180 C for 10 mins.

6. Meanwhile take this dry fruit mixture in a mixing bowl, along with jaggery powder and ghee. Keep orange juice ready too.

7. Add orange juice and mix well. Remember to sieve the orange juice if using fresh ones so that it does not have the pulp.

8. Now add the dry ingredients to the wet Ingredients. Mix well using light hands till you don’t see any dry flour specks. Don’t overmix or you will get a dense cake. Just few mixes till you don’t see dry flour is enough.

9. Add to a greased cake pan. I grease my pan with ghee. The size of my loaf pan is 20 cm length and 7 cm width. Using a spatula, flatten the surface.

10. Bake in a preheated oven at 180 C for 30 mins. Might take between 25 to 35 mins depending on your oven type. Keep an eye after 25 mins. Don’t keep opening the oven door before that. Using a skewer or toothpick, insert in the center of the cake. If it comes out clear or with dry crumbs, it is done. If it comes out wet, keep again for 5 mins and check again.

11. Allow it to cool for sometime. Once cooled, loosen the edges of the cake using a knife and invert onto a plate.

Click on the image to save the recipe on Pinterest

12. Slice and serve. Store in a moisture free container.

Notes:

* This cake lasts well at room temperature for a day. Mine gets over within that time but if yours lasts, you can refrigerate it. Microwave for few seconds before serving if needed.

* I always use Pillsbury wheat flour and it works well for all my bakes. Recently though I started baking with Lulu brand of wheat flour and they come out great as well. This particular bake was with Lulu wheat flour and I was happy to see the cake come out soft and tasty.

* I have used freshly squeezed and sieved orange juice for this cake. It enhances the flavour of the cake so much. You can use store bought ones too.

* Regarding the mixed nuts, raisins and dates, as I have mentioned above, I have used about 10 cashews, 10 Almonds, few raisins and 5 dates. This made 1 Cup. You can use other nuts too if you like but I prefer this combination. Don’t skip dates though as it adds to the sweetness of the cake.

* You can also finely chop all the nuts and dates but I prefer coarsely powdering it as my kids don’t like the bite of nuts in their cakes.

* I have used 1/4 Cup Jaggery powder. It makes the cake sweet like bakery ones. You can skip if you want to make it completely sugar free and also substitute with brown sugar if you want.

* I always use ghee or butter in my bakes as I make it mainly for my kids. So, not sure about the texture and flavour if oil is used instead.

* Don’t overmix the dry and wet Ingredients. Mix slowly with light hands till the mixture is free from dry flour specks.

* My cake gets done exactly at 30 mins. Since each oven type is different, please keep an eye on the cake after 35 mins. Mine is an OTG. In microwave convection oven, the time required to bake will be less. So keep an eye after 20 mins into the baking time.

* This cake is very soft and slightly moist due to the orange juice and dates. So be careful while slicing it and start slicing only after it cools completely. Else it can break apart as it’s very soft in texture.

* If you are new to baking, I have written an article combining all notes and pointers that I learnt in my decade long baking journey. You can check that if needed – Baking Basics for Beginners

* For all my healthy bake recipes – Healthy Cakes, Cookies and Breads

* This cake was an inspiration from my Sugar free Dates Carrot Cake which uses milk instead of orange juice and grated carrots instead of nuts.

* Dates in cakes taste so heavenly and my Dates Chocolate Brownie and Dates Oats Cake recipes are examples to that.

I have tried to note down as much points as possible so that it’s easy for you all to follow but if you still have any doubts, either comment here or message me on my Facebook page Healthy cooking with mitha and I would be happy to help. Happy baking!

Click on the image to save the recipe on Pinterest

Eggless Banana Rava Cupcakes | Easy one bowl Banana semolina muffins

Click on the image to save the recipe on Pinterest.

Bananas are the most brought fruit in our grocery shopping as my darling daughter loves it. 😍 She eats one daily after breakfast and also when she’s hungry in the evenings. But even then, due to the onset of summers here in Qatar, the bananas turn black and overripe very quickly. Though it is still tasty on the inside, they are slightly sticky to hold and I don’t feel like giving her to eat as it is (don’t want her love for bananas to diminish away 😍). But what to do with those bananas now? 😄

That’s when this mommy puts on her thinking caps (my brains work overtime now 🤣) as to how to use the leftover bananas who stare at me, pleading to be used up whenever I pass through them (dramatic much?? 😅 That’s me 😂). So one week it’s Jaggery Sheera with the bananas and the next week it’s banana chocolate cupcakes or Vastad rottis or the easiest wheat banana pancakes with them. Finally, when all these options got exhausted, I found out a new way of using the bananas.

Substituted mango pulp with mashed bananas in my Mango Rava Cupcake recipe and it came out so well that it has become a regular at my place (as of now 😅). So much that the bananas are purposely left to turn black 😅 to make these delicious cupcakes. 😍

By the way, did you notice the toy bananas in my picture? It is from my daughter’s food toy collection, which her brother too loves a lot and they both play in this set up which I have made for them. 😍 Though the places for the toys keeps changing throughout the day, before sleeping, I set it up like this so that our mornings are welcomed by this beautiful, cute scene. ❤️

You can also see my son’s vehicle collection which me and him arrange in various ways. We spend hours sitting there and I don’t realize how time passes with this little boy. ❤️

Anyhow, hope you all try these cupcakes and I am sure you will like it. Do let me know if any doubts and it will be a pleasure to help. Happy and healthy cooking! ❤️

RECIPE: { 1 Cup = 250 ml }

Ingredients: { Makes 7 cupcakes }

1 Cup mashed Bananas { I took 5 overripe small variety Indian Bananas }

1 Cup Semolina/ Rava / Sooji { regular variety }

1/2 Cup Jaggery powder

1/4 Cup Ghee

1 tsp Baking powder

1/4 tsp Salt

1/4 tsp Cardamom powder

Step by step recipe:

1. Preheat the oven at 180 C for 10 mins.

2. Take 1 Cup rava in a large mixing bowl. Add 1/2 Cup jaggery powder to it. Keep mashed bananas and other ingredients ready as well.

3. Now add the 1 Cup mashed bananas along with 1/4 Cup ghee, 1 tsp Baking powder, 1/4 tsp each of salt and cardamom powder.

4. Mix well into a even mixture using a spatula.

5. Now take a muffin pan ready and line with cupcake liners. If you don’t have liners, just grease well with ghee. Fill three fourth of the mould with the batter.

6. Bake in the preheated oven (which has been heated at 180 C for 10 mins) in the center rack of the oven at 180 C for 25 to 30 mins. Mine gets done at 25 mins exactly. Insert a toothpick in the center of the center most cupcake to see if done. If the toothpick comes out clear, it’s done. Else bake for couple of mins more or till done.

Click on the image to save the recipe on Pinterest.

7. Allow it to cool slightly. Then serve warm or at room temperature.

Notes:

* I keep in an airtight container for a day and it lasts well at room temperature for a day. Refrigerate after that and microwave slightly before consuming.

* I use the small variety Indian bananas which have turned overripe. You can use any variety of bananas but just make sure they are really ripe and mashed well.

* I used the rava that I use for making upma. It is not very fine but regular semolina size. Just don’t use very coarse semolina. If you only have coarse variety, powder it in a mixer first and then use.

* Grate jaggery finely and use if you don’t have jaggery powder.

* Ghee and cardamom powder gives the cupcakes a wonderful flavour. So don’t skip or replace it.

* 25 mins got my cupcakes to bake perfectly and 30 mins made the top part slightly crisp. So please check at 25 mins and if done in the center, remove from the oven.

* I got this idea of using mashed bananas from my Mango Rava Cupcakes where I use mango pulp instead.

* I also make these three recipes with leftover overripe bananas:

# Jaggery Sheera – I add mashed bananas towards and end along with jaggery water, mix well. Tastes very delicious. This tastes like Sapath which is made for Satyanarayana vrath prasad in many households.

In fact these Banana Rava cupcakes are a cake version of the Sapath prasad. The taste is quite similar to it.

# Vastad rotti – Tawa fried version of Mangalore Buns

# Eggless, whole wheat, Chocolate Banana Cake – Can be made as cupcakes too

# Wheat Banana Pancakes – Instant snack for the kids with bananas and wheat flour.

* If you are new to baking, you can check this post which I wrote to help my readers – Baking basics for Beginners

Click on the image to save the recipe on Pinterest.

Chocolate Sponge Cake | Eggless, whole wheat, jaggery chocolate cake

Click on the image to save the recipe on Pinterest

As a kid, I was always excited about my birthday (was pampered a lot by my parents and my bday was celebrated the whole of December 😅). And now there is a “mini me” here, (everyone says she’s just like me – super hyper talkative 😂) who’s even more excited about her birthday. So much that she’s been waiting for it since last year. Everyday I used to get the same question, how long for February, Amma? 😄

So now, when Mr Feb is finally here, I decided to announce it to her that her birthday month has finally arrived (much to my relief 😅) by baking her favorite chocolate sponge cake. Just like me, she too loves chocolate cake very much and this cake tastes as yummy as the McCafe ones here in Qatar (my fav chocolate cake is theirs and I go mmm yummm when I take each bite 😂😂 When will I grow up? 😅). Baking a similar one at home was my goal but did not know I would get the exact same taste and texture even with wheat flour. One of the bakes that I am very happy about and the way my kids enjoy it, it increases my confidence in the recipe each time I bake it. ❤️❤️

My daughter loved this surprise cake and even took it in her snack box to school to show her friends. She’s now eagerly waiting for her birthday on Feb 15th (right after Valentine’s day😍) which she will celebrate with her small kiddo gang from our lane (her daily evening playmates, her source of joy ❤️). Now that Feb has arrived, her next question is when will 15th come (the never ending story 😁). My solution to that – I have made a small calendar and stuck it on the wall. Have asked her to strike off each day and countdown till her birthday. #momideas 💡😄

Anyhow while I find solutions to her queries, hope you bake and enjoy this cake. Do let me know if you have any doubts. Will be a pleasure to help. Happy and healthy cooking! ❤️

RECIPE:

Ingredients: { 1 Cup = 250 ml }

Dry ingredients:

1 Cup Whole wheat flour or Atta

1/4 Cup unsweetened Cocoa powder

1/2 tsp Baking powder

1/2 tsp Baking soda

1/4 tsp Salt

Wet ingredients:

3/4 Cup Jaggery powder

1/2 Cup Hot water

1/2 Cup Milk

1/4 Cup Ghee

1/2 Tbsp Vinegar

Step by step recipe:

1. Preheat the oven at 180 C for 10 mins.

2. Sift the dry ingredients together in a bowl using a sieve.

3. Keep it aside.

4. In another bowl, add jaggery powder, hot water, milk (at room temperature), ghee and vinegar. Mix using a spatula.

5. Now add the dry ingredients to the wet ingredients. Mix only till you can’t see any dry flour specks. Do NOT over mix the batter as it can lead to dense cakes.

6. Add the batter to a greased cake pan (or lined with parchment paper). My rectangular loaf pan is 20 cm * 4 cm. Level the batter using a spatula.

7. Bake in a preheated oven at 180 C for 30 to 35 mins in the center rack of your OTG or with both rods on or bake mode in conventional oven. In my oven it took exactly 30 mins. Might vary depending on your oven type. Once done, a toothpick inserted in the center of the cake must come out clear or with crumbs. Should not be wet.

8. Allow it to cool. Invert onto a plate. Frost with melted chocolate- milk mixture. Have shared the process to do it in this Chocolate brownie recipe. Then grate chocolate over it. Slice and serve.

I had cut it into two halves. This is one of the halve.

Notes:

* I use Pillsbury brand of wheat flour for all my bakes. It really comes well with Pillsbury. I have tried with other brands but the texture of cakes, bread, pav and cookies is best with this.

* Please use milk at room temperature and not cold.

* If you don’t have jaggery powder, you can also substitute with cane sugar or brown sugar. Else just grate and powder jaggery in a mixer.

* When you add vinegar to the mixture, it will curdle. Don’t worry about it as it will give very spongy cake.

* When the cake is hot, it will crumble easily on slicing. Allow it to cool well atleast for an hour and then slice for firm slices.

* If frosting, check this Dates Chocolate brownie for easy melted chocolate frosting recipe which I have shared at the end of the step by step pictorial.

* If you are new to baking, here are some tips:

# Always preheat your oven at 180 C for atleast 10 mins. Temperature might be 200 C also. It varies according to the recipe but for cake, it’s usually 180 C.

# For whole wheat cakes, do sift the dry ingredients using a sieve for a soft texture of the cake.

# Do NOT overmix the batter. Just mix till you don’t see dry flour specks. Over mixing can lead to dense cakes.

# Do NOT open the oven door atleast till 25 mins into the baking time. Opening the oven door in between can lead to temperature variations leading to uneven baking.

# Always insert the toothpick or skewer in the center of the cake for accuracy. It should come out clear or with crumbs. Wet means it’s not done yet.

If you are new to baking, you can read this article which I wrote : Baking basics for Beginners

I have tried to note down as much points as possible so that it’s easy for you all to follow but if you still have any doubts, either comment here or message me on my Facebook page Healthy cooking with mitha or on my Instagram handle and I would be happy to help.

You can also check my Healthy cakes and cookies recipe collection.

Update: I just baked chocolate cupcakes with this batter and it comes out perfect with flat top, super spongy, soft and delicious. It gets done in 20 mins at 180 C in my oven and yields 10 cupcakes with the measurement given above. Look at how excited my kids were to see their favorite cupcakes. They loved it a lot. ❤️❤️

Falafel Flatbread | Vegan, gluten free flatbread recipe| Snack idea for kids

Though I don’t feel proud of myself quite often, just looking at this falafel flatbread is making me swell with pride that this is homemade by me. 😍 And how happy I am to share this with all of you as I know you will feel the same emotion when you bake these cute little breads for your family. ❤️

I am part of many facebook food groups and my news feed is always filled with delicious looking food posts by members of various groups (which I why I don’t browse fb when my son sleeps on me during evenings. Looking at fb makes me hungry and I can’t move 😭😭). Other times when I browse, I keep saving posts which attract me and these breads were one among them. As I checked the recipe, it was super easy. So I was so inspired that I made it the next day itself (for my love for falafel specially falafel wraps from our nearby Freshway cafe. Yum! 😋).

And the kids loved the bread so much that it got over and I hardly got a bite. 😄 So after that, these have become a weekly fare at my house for evening snack as the kids love it a lot (kids food preferences rule here 😅). Also did I mention it’s less job for me too. Just grind everything, spread on a plate, dump into the oven. Done! Easy peasy! 😁

Did you notice how beautiful do they look and I loved how the pictures came out too. Here’s one with the tomato plant in our garden filled with different plants (My husband’s babies, his love, his life 😄).

My orange thread also shows up in most of my pictures. It’s actually a prasad from Hanuman temple in Moodbidri near Udupi. I have been a devotee of Hanumanji since a child and used to wear his pendant until marriage. Whenever I feel scared, worried, lost, I hold the thread and feel he is always with me. I also have made a ritual to listen to Hanuman chalisa daily and also chant the Hanuman stothra with my kids before sleeping so that they don’t have bad dreams.

And *like always😬* I deviated from the main topic but I love sharing bits about my personal life with all of you as I consider all my readers, a part of my extended family. Hope you try this flatbread and if you have any doubts, please message me. It will be pleasure to help! ❤️

RECIPE:

Adapted from: CookwithK

Ingredients: { Makes about 4 regular bread sized flat breads}

1/2 Cup dried white Chickpeas

About 20 sprigs of Parsley leaves

About 10 sprigs of Coriander leaves

1 small sized Onion, roughly chopped

3 to 4 Garlic cloves, roughly chopped

1 Green chilly, optional

1/2 tsp Cumin powder

1/4 tsp Pepper powder

1/4 tsp Baking soda

Salt to taste

1/4 Cup + 3 Tbsp Gram flour or Besan

1 Tbsp Oil (I use coconut oil)

Oil for greasing the plate

Step by step recipe:

1. Soak the chickpeas in atleast double the water for 8 to 10 hours. Drain the water.

2. Add the chickpeas along with parsley leaves, coriander leaves, green chilly, onions, garlic, cumin powder, pepper powder, salt and baking soda into a food processor.

3. Grind, pulsing several times till it turns into a coarse grainy mixture. Pour into a bowl. Do NOT add water while grinding.

4. Refrigerate for 30 mins. Then remove and add chickpea flour. Mix well using your hands. It will be a loose mixture and not very firm, but still held together. Also add oil and mix well.

5. Preheat the oven at 200 C for 10 mins. Grease a oven proof plate generously with oil (or use parchment paper). Add this mixture over it and flatten evenly into a thin layer using your fingers as shown.

6. Bake in the center rack of your OTG (or with both rods on or in bake mode of your convectional mode oven) at 200 C for 20 to 25 mins till the edges get brown and the center is not soft, free from raw mixture and cooked well.

7. Now let it cool completely. Cut into squares or rectangles using pizza cutter.

8. While serving, top with cream cheese or hung curd along with pepper powder and add cucumber slices, tomato pieces, parsley leaves and olives. Get creative and garnish as you like!

Notes:

* No need to cook the chickpeas. It is soaked and ground directly with the herbs and spices.

* If you don’t have parsley, substitute with more of coriander leaves.

* I make this even without onion or garlic and it does not make much difference to the texture. So if you don’t eat onion/garlic, you can skip it.

* Be sure to grind the mixture to a coarse mixture and not smooth paste.

* Do NOT add water while grinding.

* It takes me 1/4 Cup + 3 Tbsp Chickpea powder to get the mixture bind perfectly. More chickpea powder might make the flatbread dry. So don’t add more than the mentioned measurement.

* I used coconut oil. You can use any oil that you use.

* Make sure to generously oil the plate so that the flatbread does not stick to it. Or use baking parchment. I always prefer oiling my plate though.

* Don’t keep opening the oven door atleast till 20 mins into the baking time. Mine takes exactly 25 mins to bake perfectly.

* They are dry on the surface but moist and soft inside. Don’t over bake as it can lead it to become hard.

* Topping with cream cheese is our favorite!

* You can also top it with Homemade Hummus or Eggless Mayonnaise. I have shared the recipe on the blog earlier. Garnish with veggies of your choice.

* These flatbread last well at room temperature for couple of days. Mine gets finished off before that by my family.

I have tried to note down as much points as possible so that it’s easy for you all to follow but if you still have any doubts, either comment here or message me on my Facebook page Healthy cooking with mitha or on my Instagram handle and I would be happy to help.

Gluten free Oats Pizza | Easy, healthy pizza recipe

Click on the image to save the recipe on Pinterest

If you had asked me some years back about gluten free food, I would have looked at you bewildered as I really had no idea about it. But as I started blogging, I started noting many gluten free recipes in food groups and have been getting many requests for it by my readers. So I had to share this Oats Pizza which was one of my successful trials sometime back (had to perfect it before blogging, hence the delay).

After the first try, I fell in love with it. ❤️ It was so delicious and I was hopping like a bunny at how amazing it came out. 😅 Then I have been making it regularly for my kids whenever they crave for pizza and I felt it was a great way to include oats in their diet (hidden in their fav pizza 😀). Even though they are huge fans of my whole wheat vegetable pizza, this came into their favorite list too and they hardly know the difference.

Click on the image to save the recipe on Pinterest

I would also like to share some free gyan (😄) about gluten free diet (for those new to it like me, other know-it-all people can skip 😁). Gluten is a protein found in wheat, barley and few other grains. People who have celiac disease have gluten intolerance where they get mild to severe allergic symptoms if they eat these grains. But doctors have advised people without this disease to not follow gluten free diet without any reason. So if you are planning to start one, do read well about it and make an informed choice.

As for me, as I always say, its always best to have a wholesome balanced diet including all kinds of healthy foods in different ways to keep it interesting, combining it with regular exercise or brisk walking.

Anyhow hope this recipe is helpful to those of you who love pizza, yet are on a gluten free diet or for people like me who love to try unique recipes 😁. Happy and healthy cooking! ❤️

RECIPE:

Ingredients: {Makes 2 mini pizzas}

For the pizza base:

1 1/2 Cups Instant Oats

1 tsp Instant yeast

1 tsp Honey

1/4 tsp Salt

1/4 Cup + 2 Tbsp Water (approx) (+ 2 Tbsp water after rise time)

For the toppings:

1/2 Cup finely chopped Mixed veggies (I used a mix of capsicum, corn, tomato, mushroom)

1/4 tsp Salt

1/4 tsp Mixed herb seasoning

2 Tbsp Pizza sauce (or any regular ketchup)

1/2 Cup grated Mozarella cheese

Sliced olives for garnish as needed

Oil to grease the oven proof pizza plate

Step by step recipe:

1. Take instant oats in a mixer and dry grind it till it turns into fine powder. 1 1/2 Cups oats gave me 1 1/4 Cups oats powder. Takes about 5 pulses and gets powdered very quickly. Add to a bowl. Also add instant yeast, honey and salt.

2. Now add water little by little till it forms a dough. It should be slightly sticky but still firm. Took me 1/4 Cup plus 2 Tbsp water to form the dough for 1 1/4 Cups Oats powder.

3. Keep the dough to rest, covered in a warm place for 1 hour.

4. Meanwhile add finely chopped veggies, herb seasoning, salt in a bowl. Mix with spoon. You can also add chilli flakes and pepper powder for spicy pizza. I don’t add as I make for my kids.

5. When one hour is done, Preheat the oven at 180 C for 10 mins.

6. Grease the oven proof plate generously with oil. Also oil your fingers. Divide the dough into two portions and make two balls with it. Flatten it onto the plate with your fingers as thin as you can. In simple words, this is like flattening your Bhakris, thalipeeth or akki rottis. 😅

Note: Dough before resting for one hour will be slightly sticky and firm. After resting it will turn hard. Does not rise too but don’t worry, just add 2 Tbsp water to make it soft and it will be easier to spread using fingers. Also oiling your fingers will help you spread it thinly.

7. Now top this with pizza sauce or ketchup. Add veggie mix over it. Top with mozarella cheese and olives.

8. Bake in a preheated oven at 180 C for about 15 to 18 mins or till the mozarella cheese has a light golden colour to it. Bake in the center rack of your OTG or use both rods option or bake option in conventional oven.

9. Let it cool slightly. Then slice and serve with ketchup or chilli sauce.

Notes:

* You can use oats flour instead of instant oats. Just measure 1 1/4 Cups of flour and continue with the process.

* I have not used rolled oats in this recipe but you could try using. Just that the water required may be little more to form the dough.

* You could substitute honey with sugar but I chose it as it a healthier option while making no change in the output. It is just for yeast to bloom.

* If using dry active yeast, use 1 1/2 tsp of it. Proof it separately in warm water and honey first and then add to the powdered oats, salt mix.

* Dough before resting will be slightly sticky and firm. After resting it will turn hard. Just add 2 Tbsp water to make it soft and it will be easier to spread using fingers. Also oiling your fingers will help you spread it thinly.

* This dough does not rise like regular yeast based dough but don’t worry, the pizza crust turns out very well. Soft, yet firm and delicious.

* Don’t spread thick or else it won’t cook well. Spread thin and evenly.

* I always make mini pizzas with this as it is easier to spread than one large pizza.

* Remember greasing the oven proof plate well with oil so that the pizza does not stick to the plate.

* Bake till the cheese turns light golden in colour. It takes me exactly 18 mins but might be quicker or later depending on your oven. Keep an eye after 14 mins.

* This pizza tastes better when kept for about 10 mins at room temperature as the base turns firm. When it is hot, it is very soft.

* You can add chilli flakes or other seasonings to the pizza. I make this in a very simple way as my kids love this way.

* You can also try this easy whole wheat vegetable pizza which I am making since many years and is my kids’, their friends’ and also my readers’ favorite.

I have tried to note down as much points as possible so that it’s easy for you all to follow but if you still have any doubts, either comment here or message me on my Facebook page Healthy cooking with mitha or on my Instagram handle and I would be happy to help.

Update:

Reader doubt: Oats absorbs more water , was 1/4 cup +2 tbsp water enough ?

My answer: Yes, it was enough for the first time before keeping it to rise. If you add more, it becomes very sticky and difficult to handle. After it rises, it absorbs all the water and becomes hard. Then add 2 Tbsp water again and make it soft enough to make it spreadable with oiled fingers.

Click on the image to save the recipe on Pinterest

Wheat Butter Cookies | Easy wheat jaggery cookies using 5 ingredients

As I start writing, I can’t believe this year has almost come to an end. 2020 has been a huge life changing year for me. A year which taught me many things. A year where I understood myself more than ever and an unforgettable year for sure. If you ask me why, it is the time I got being home bound , which otherwise was always filled with the chaos of busy life.

Would love to share some positives that this year has brought in my life with all of you.

# Restarted listening to music (my long lost love ❤️), all thanks to my favorite singer Arijit Singh and Spotify which was my best friend all throughout the year. Music is truly healing and I don’t know why I had forgotten it all these years. 2020 can be called the “musical” year of my life for the amount of songs that I have heard this year. 😅

# Found love in birds and nature ❤️. With all the time in the world, I started observing the birds sitting in the backyard and would spend hours there without getting bored looking at them fluttering around. Along with that, I found an amazing Insta handle of our family friend, @mvbhaktha through whom I saw many beautiful varieties of birds. Sharing one of my favorite here. The innocent eyes of the bird is which attracts me the most. 😍

# Got a little more closer to my Krishna by listening to his bhajans and also by reading more about the unconditional true love that Radha had for Krishna. It taught me the way to love truly in life, without any expectations and always praying for the happiness of our loved ones, no matter what happens. ❤️

# There are two youtubers who deserve mention as I spent most parts of these last few months looking at their videos. One is Patrick Micheal and the other is Shivesh Bhatia. Looking at Patrick sing, his magical voice, feeling the lyrics of the song, touches you so emotionally that my eyes welled up many a times listening to him. His singing is definitely very special and I am very happy to have found such a soulful singer. Sharing my playlist here if you like to listen too. It is mostly malayalam and tamil songs though.

# Shivesh Bhatia from “Bake with Shivesh” is a delight to look at and he is a boy with so much knowledge about baking that I am amazed each time. He has been my inspiration to bake and the Chocolate Chip cookies on my blog are his recipe. When I want to divert myself towards something productive, Shivesh videos it is!

Finally after all the talking about my year (hope it was not boring 😄) , I want to share about these cookies which are not only my kids’ favorite but became my neighbor’s son, Ryan’s favorite too. I had shared some with them for Christmas wondering if they would like it as it is made with wheat flour and jaggery. But when I got a message the next day by Ryan’s mother saying he loved it so much that he is sad that it got over, I felt so happy that he loved it and promised to bake again for him.

So I baked them again for him yesterday and these cookies are definitely special because of that. Ryan gave me a beautiful memory with these cookies forever and I will never forget how much he loves these. Also, it has given me confidence to try more cookies for next year. A new zeal for baking! ❤️

Here’s wishing all of you a very happy new year in advance. Hope you all have a wonderful year ahead filled with love and happiness. Loads of best wishes. Happy and healthy cooking! ❤️

RECIPE:

Ingredients: { Makes about 10 cookies }

1/2 Cup Wheat flour or Atta (I use Pillsbury brand)

50 grams salted Butter (1/4 Cup)

3 Tbsp Jaggery powder

1/2 tsp Baking powder

1 Tbsp Milk

Step by step recipe:

1. Take wheat flour in a bowl. Add cold butter, directly out of the fridge, cut into small cubes into it. Mix with your fingertips till the butter and wheat flour mix well resembling coarse texture. (Make sure there are no large chunks of butter and all the butter has been incorporated well into the wheat flour.)

2. Now add baking powder and jaggery powder to this. Sieve it if the baking powder or jaggery has big granules.

3. Mix once really well. Then add milk and bring the dough together. The dough will be little sticky. Refrigerate this dough for atleast 15 mins.

4. Preheat the oven at 180 C for 10 mins. Remove the dough from the fridge and make small balls out of it. Flatten it and cut using cookie cutter into different shapes. Place them on a greased (generously with ghee or butter) oven proof tray.

5. Bake in the center rack of your OTG (or bake mode or with both rods on in your conventional mode oven) at 180 C for 10 to 12 mins. The sides of the cookies will turn slightly brown and the surface will change colour to pale golden. The center surface of the cookies will also be hard and not soft. If you bake more than 12 mins, it will turn crispy.

6. Allow it to cool down. It will harden as it cools. Initially it will be very soft but will turn crispy as it is kept at room temperature. Enjoy the cookies!

Notes:

* Store in a container free from moisture. Will last for 3 to 5 days if handled well.

* I always use only Pillsbury brand of wheat flour for all my cakes, cookies and bread. It gives a great flavour and perfect bakes. Have tried with other brands but it does not give the desired result.

* I used salted butter. Add a pinch of salt if using unsalted butter.

* Don’t melt or soften the butter. Take it directly out of the fridge, cut into small cubes and mix into the wheat flour, crushing the butter with your finger tips. Make sure there are no large chunks of butter left in the mixture.

* Don’t add more milk then mentioned as it can lead to the mixture being very sticky. If by mistake, your mixture has become sticky, refrigerate longer and it will be easier to handle.

* Jaggery powder can be reduced too to make it plain biscuits. The sweetness in this measurement is not much though.

* Refrigerating the dough is very important to give it that firmness so that the dough can be easily handled while shaping them into cookies.

* These cookies turn soft if made in big sizes (like my heart shaped ones) and crispy if made in small sizes (like the flower shaped ones).

* If you have under baked the cookies by mistake (you realize the cookies are breaking after it has cooled down), preheat the oven and bake for 3 to 4 minutes again and it will be firm.

* If you over bake these cookies, they can turn very crispy.

* Best is to keep an eye after 10 mins and take them out when they turn brown at the edges. Remember that since they are small, cookies continue to cook on the tray even after removed from the oven. So best is not to over bake the cookies.

* These are two other cookie recipes which are a huge hit with my readers:

Ragi Butter Cookies and Almond Butter Cookies

I have tried to note down as much points as possible so that it’s easy for you all to follow but if you still have any doubts, either comment here or message me on my Facebook page Healthy cooking with mitha or on my Instagram handle and I would be happy to help.