I have shared many dosa, idli, sweets, baking recipes but curries are less on my blog as it’s regular dishes and I always feel all of you must already be knowing about it. But recently when I checked my blog statistics, I saw how people search for curry recipes and that’s when I realized that I must start sharing some of my quick yet tasty gravy recipes too.
This Paneer Kurma is a very delicious accompaniment with rice and chapatis which reminds you of South Indian restaurant curries. You can also add vegetables to this gravy to make Vegetable Kurma. I do that when I get fresh beans and carrots.
Today I made the Kurma with just Paneer as it’s holiday for kids and I wanted to make something special for them. Needless to say, they were very happy to see their favorite Paneer for lunch.
Hope you all try this curry. I am sure you will love it too. Happy and healthy cooking ❤️
RECIPE:
Ingredients:
200 grams Paneer cubes
2 Tbsp Ghee
A sprig of curry leaves
1 medium sized Onion
1 medium sized Tomato
1/4 tsp Turmeric powder
1 tsp Red chilli powder
1 tsp Garam Masala powder
1/4 Cup Coriander leaves, for garnish
Salt to taste
For ground masala:
1/4 Cup Coconut
5 to 6 Cashews
2 tsp Fennel seeds
2 Cardamom pods
3 cloves
About 10 Mint leaves
1 inch Ginger piece
3 Green chillies
Step by step recipe:
1. Take all the ingredients required to grind for masala in a mixer jar.
2. Add little water and grind to a smooth paste. Keep aside.
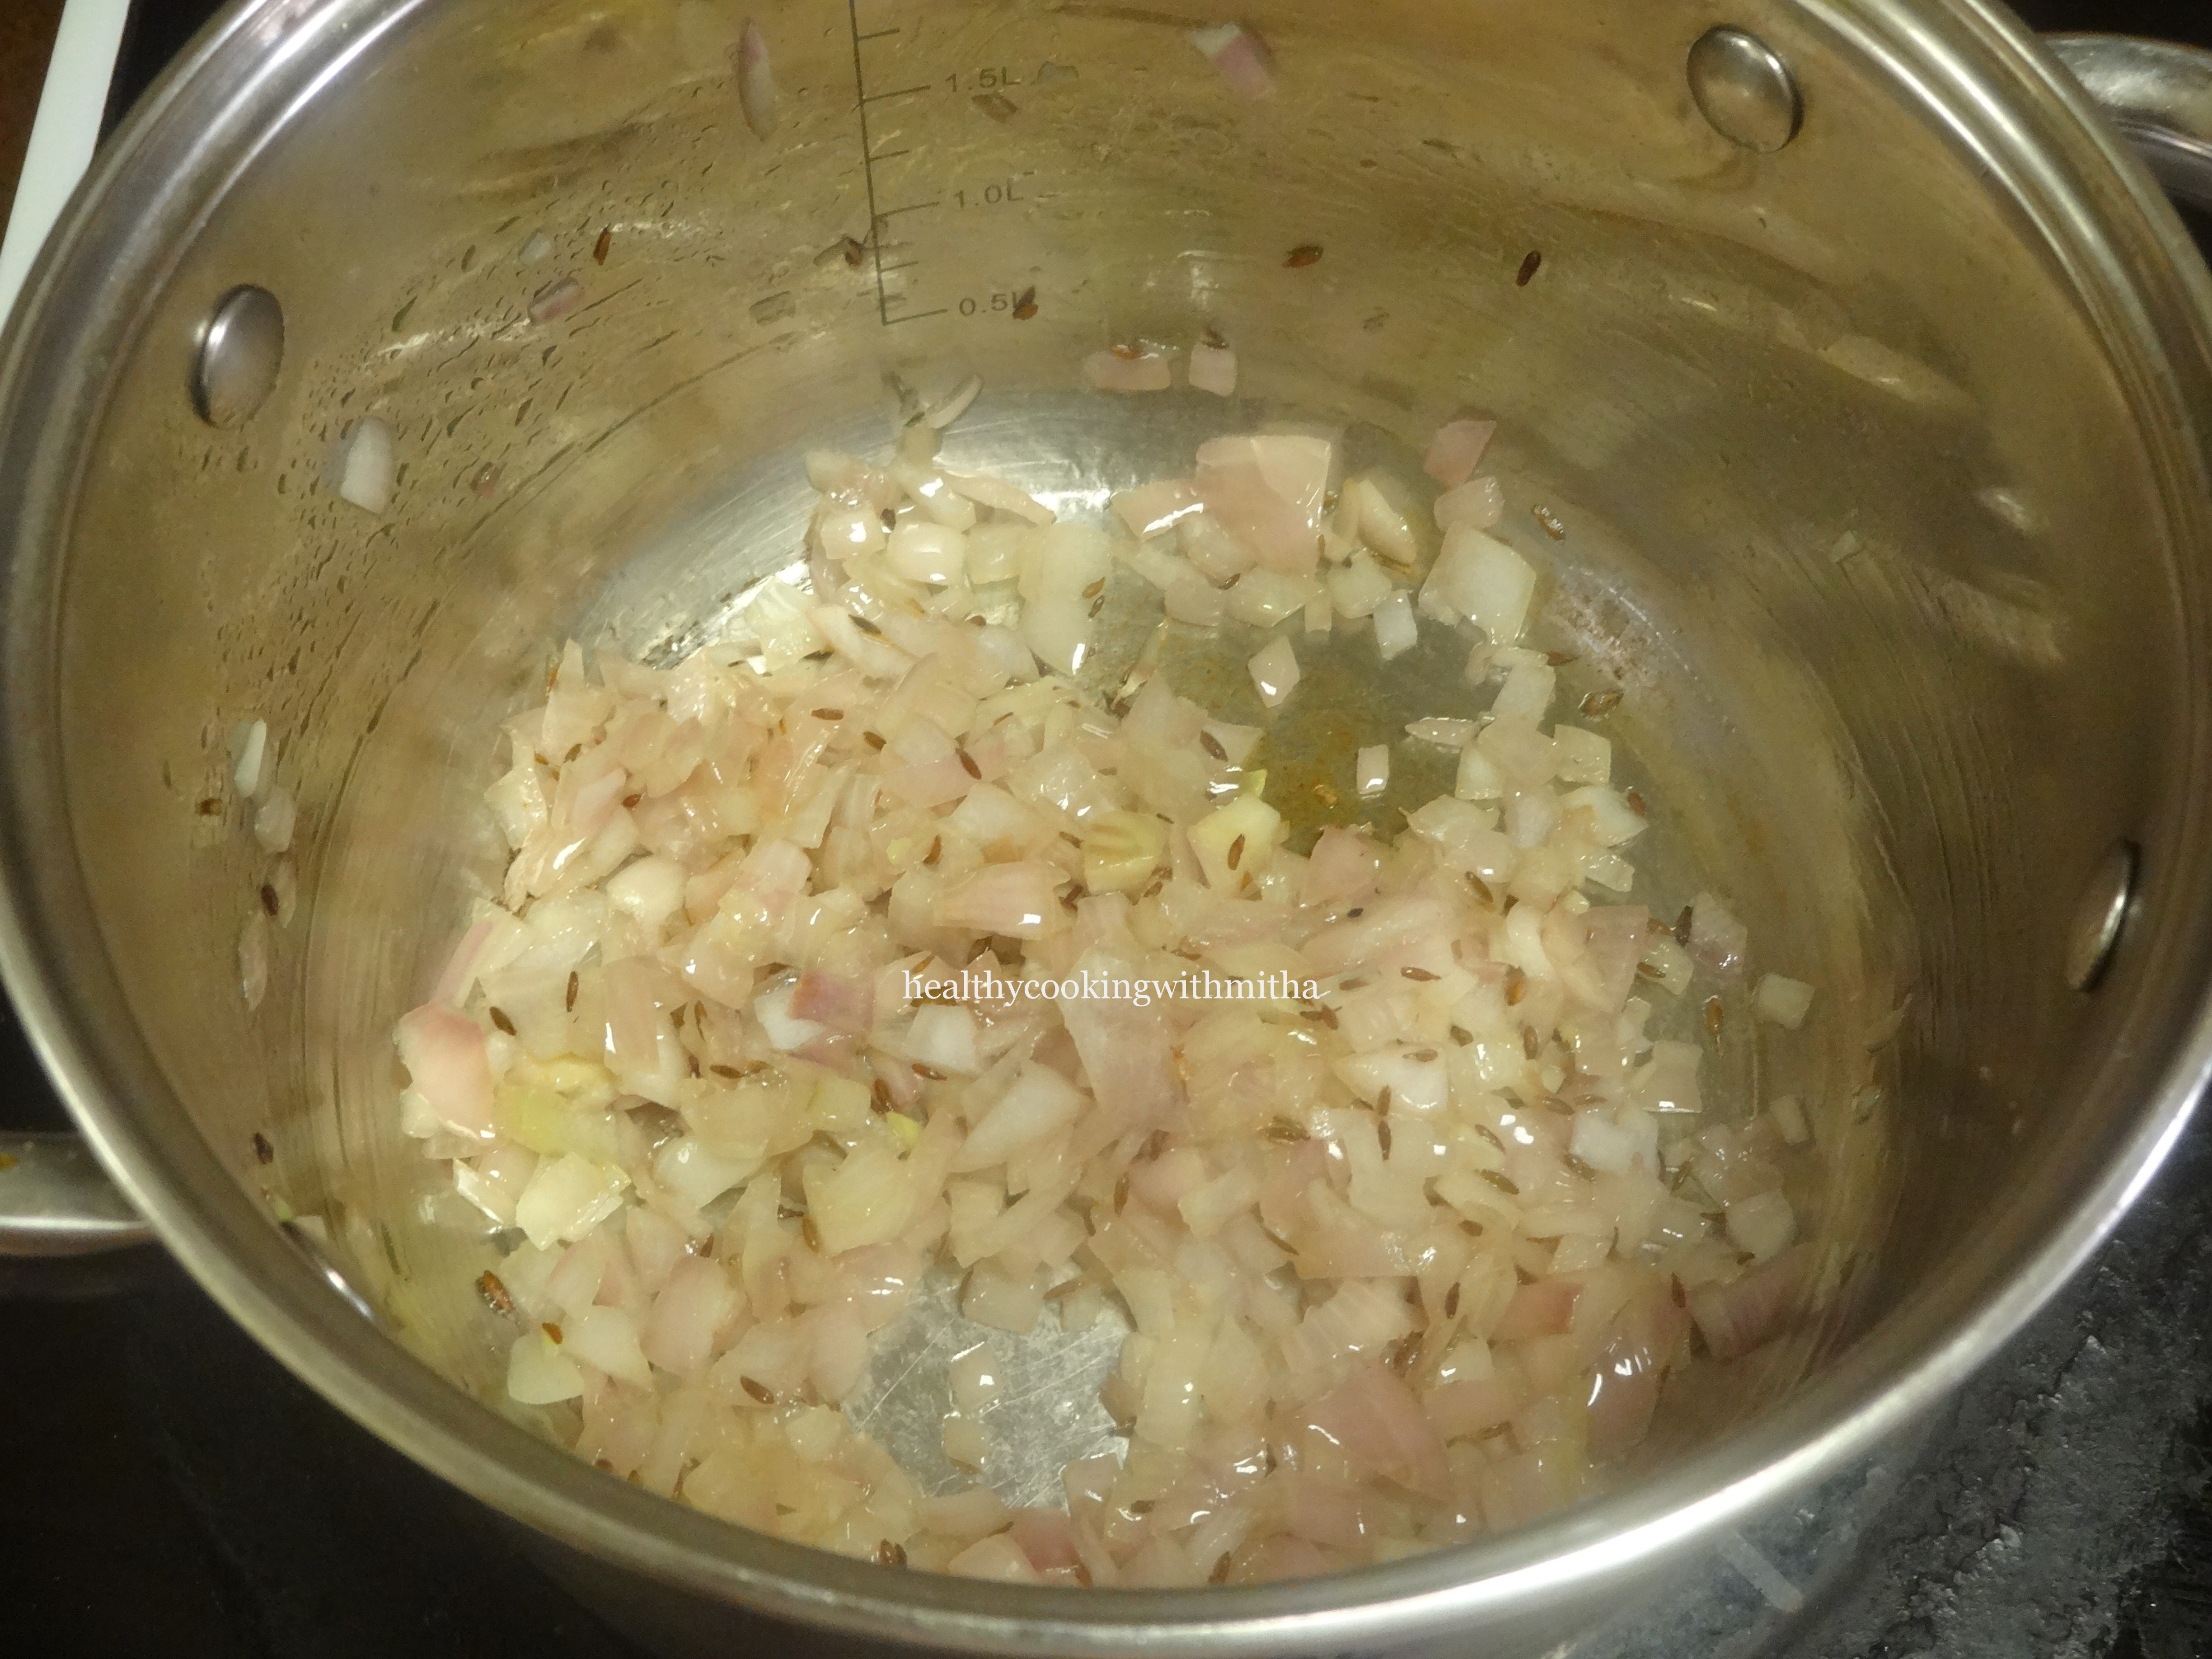
3. Heat ghee in a pan. Add curry leaves and finely chopped onion. Fry till onions turn translucent.
4. Now add chopped tomatoes and saute till tomatoes turn soft. Add little salt so that the tomatoes cook faster.
5. Add the ground masala with little water. Mix well and then add turmeric powder, red chilli powder and Garam masala powder. Keep sauteing on medium flame as the gravy can splatter due to cashews in the paste.
6. Saute for about 5 mins till the gravy thickens and cooks well. Also add salt.
7. Add paneer cubes, mix well, cover and cook on medium flame for about 10 more mins. Remove from flame and add chopped Coriander leaves.
8. Done! Serve with rice or puri or chapatis. I usually serve this with jeera rice.
Notes:
* You can also add mixed vegetables to this gravy to make Vegetable Kurma.
Click on the image to save the recipe on Pinterest
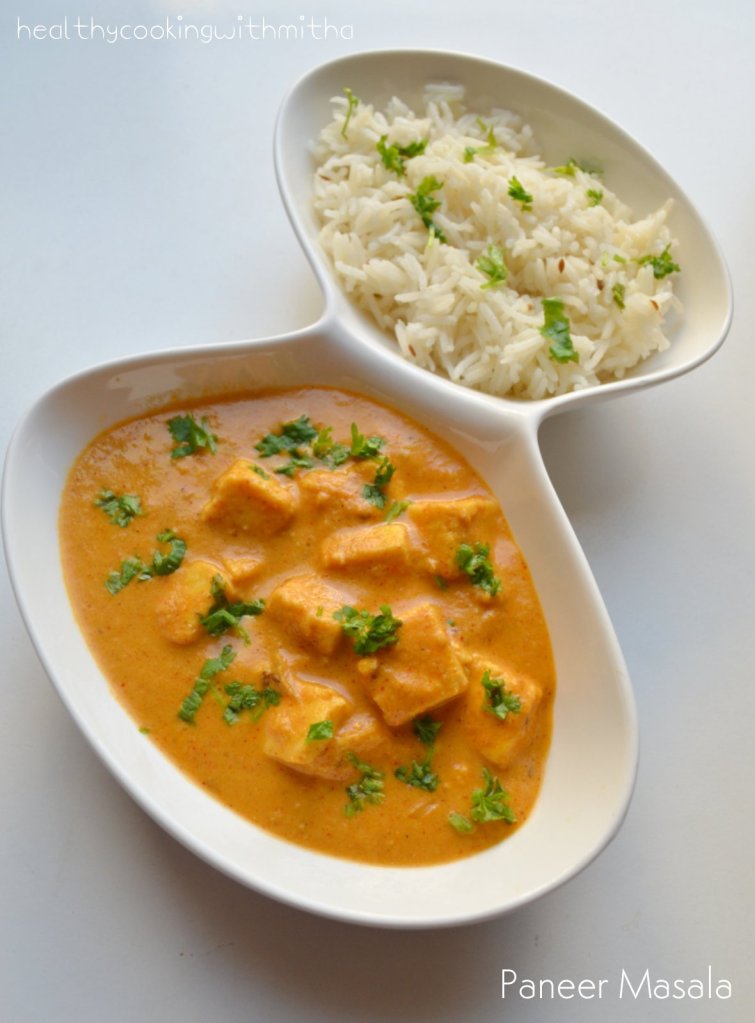
Paneer is our most favorite and I regularly make different paneer curries and kathi roll with it. But the most commonly made is this super easy and very tasty Paneer Masala which I made one day when I had 15 mins to cook before we went out. This quick fix curry was loved so much by my family that now, I mostly make Paneer only this way.
This along with jeera rice or chapatis makes a delicious meal which tastes better than even restaurant ones. I love how homemade food has a comfort of it’s own which can never be found in outside foods, no matter from which fancy restaurant.
Hope you all try and like this simple yet delicious curry too. Happy and healthy cooking! ❤️
RECIPE:
Ingredients:
300 grams Paneer cubes
To fry and make paste:
2 ripe medium sized Tomatoes
1 medium sized Onion
1 inch Ginger piece
About 10 to 12 Cashews
4 Cloves
2 Cardamom pods
1 Tsp Ghee
Other ingredients:
1/4 Cup Curd/ Yogurt
1 Tbsp Ghee
1 tsp Cumin seeds
1 Bay leaf
1/4 tsp Turmeric powder
1/2 tsp Amchoor powder
2 tsp Coriander powder
2 tsp Red chilli powder
2 tsp Garam Masala powder
A pinch of Sugar
Salt to taste
Finely chopped Coriander leaves for garnish
Step by step recipe:
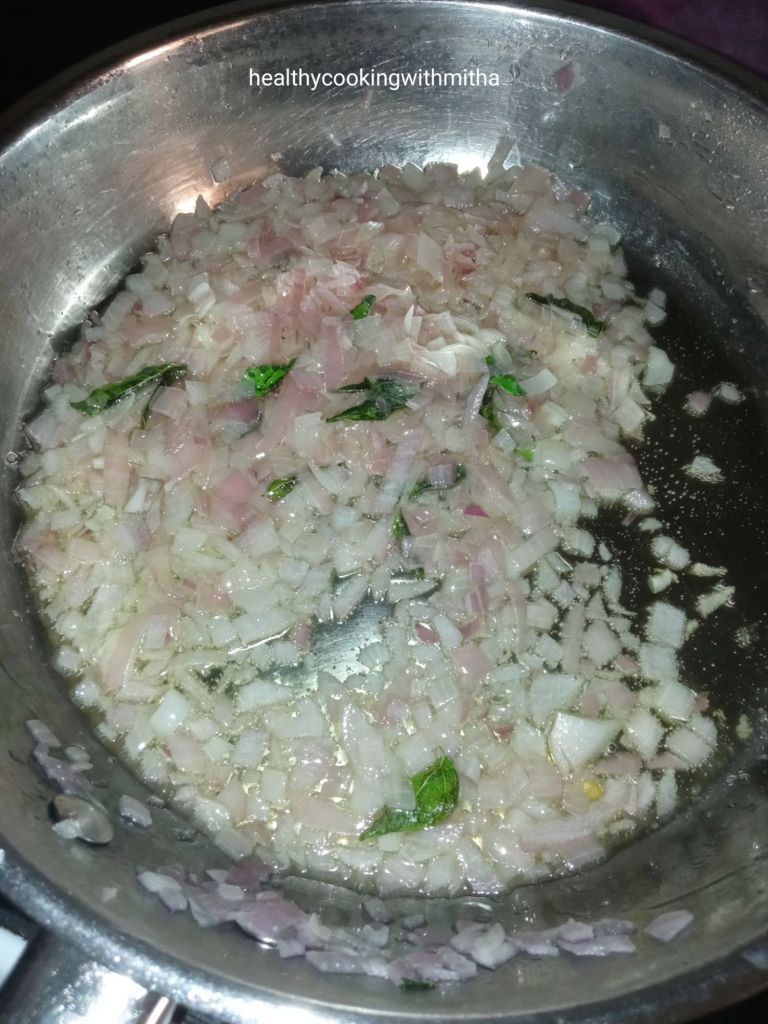
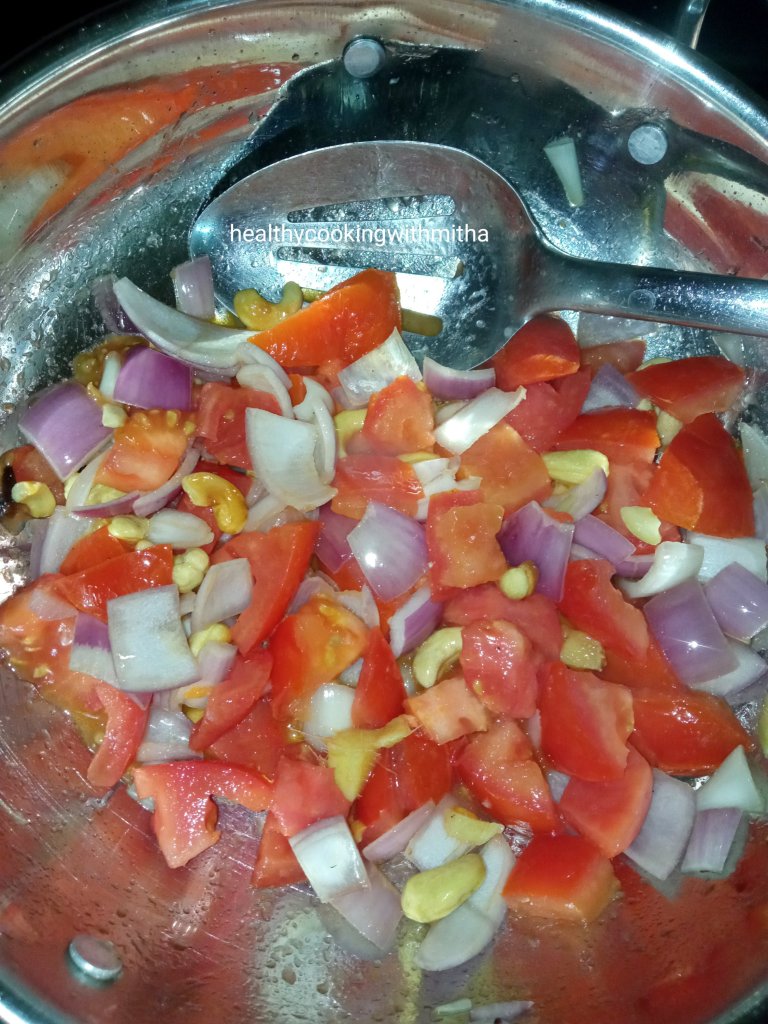
1. Heat 1 tsp Ghee in a pan. Add cloves and cardamom pods. Add Cashews and fry till brown. Now add roughly chopped ginger, onions and tomatoes.
2. Fry till the onions and tomatoes turn soft. Now allow it to cool.
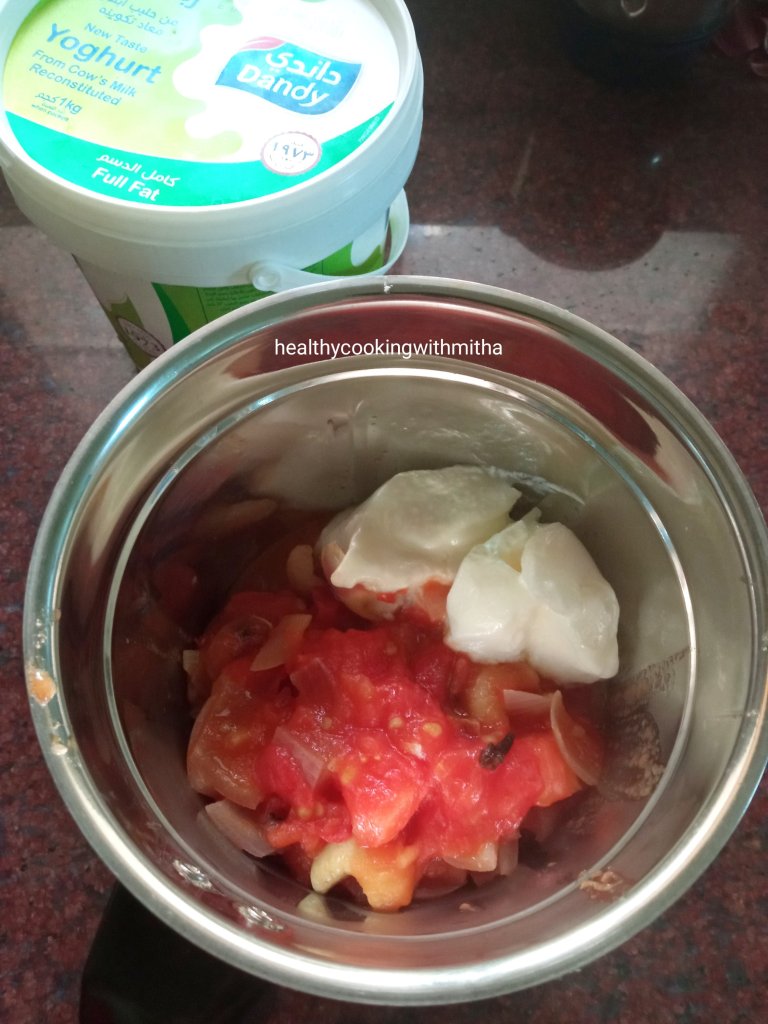
3. Now add this to a blender along with yogurt.
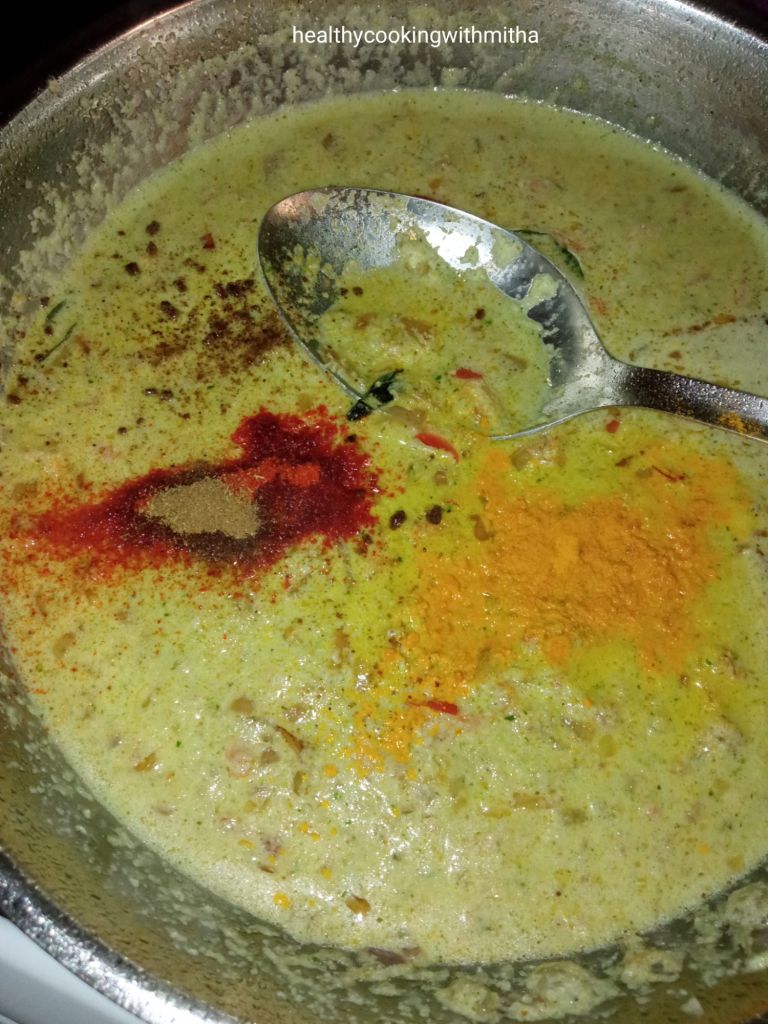
4. Blend to a smooth paste. Now heat Ghee in the same pan. Add cumin seeds and bay leaf. Fry till cumin seeds turn brown. Now add the ground paste.
5. Mix well for few minutes. Then add turmeric powder, Amchoor powder, coriander powder, red chilli powder, Garam masala powder, sugar and salt.
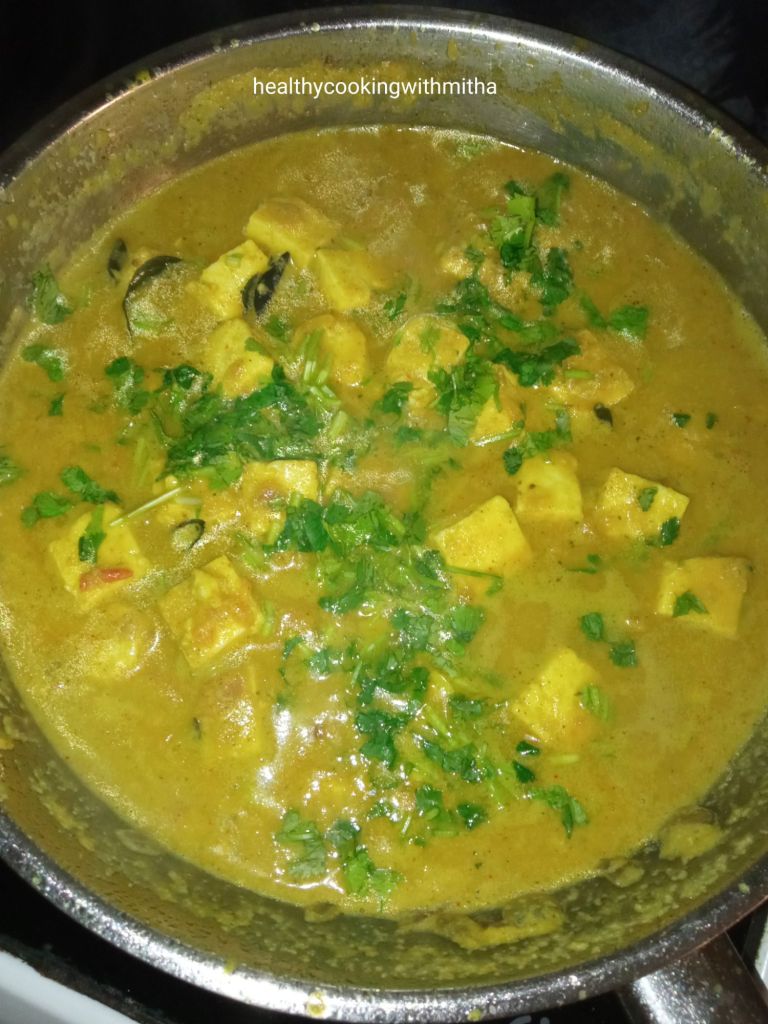
6. Mix well again continually for about 5 mins. Now add paneer cubes and cook on medium flame till paneer turns soft. Add water if needed to adjust consistency.
7. Remove from flame and garnish with finely chopped Coriander leaves.
Click on the image to save the recipe on Pinterest
Notes:
* I usually combine this with jeera rice or chapatis. For jeera rice, heat coconut oil and fry cumin seeds. Add rice, hot water and salt. Cook till rice turns soft. Garnish with coriander leaves.
* You can skip Amchoor powder if you don’t have. I add it since I have it. Yogurt and tomatoes are enough for the tangy flavour.
* A pinch of sugar enhances the overall flavour of the curry. So remember to add it.
* You can decrease the amount of cashews if you like a less thicker curry.
Click on the image to save the recipe on Pinterest.
Broccoli is not something I grew up eating. In fact, don’t remember even seeing this vegetable till few years back (Talk about being desi 😅). In the winter months here in Qatar, which is between November and March, there opens a Mahaseel festival which sells varieties of flowers, indoor/outdoor plants and also fresh vegetables grown in different Qatari local farms. Inspite of the quality of the veggies being so good, the rate is surprisingly very cheap. I found this “pretty green vegetable similar to cauliflower” (exactly what was in my mind 😂) in the festival and could not resist buying it. That started my love for Broccoli and my kids too love it so much now. ❤️
The Mahaseel festival is a treat to the eyes for flower lovers and I want to share a picture which I clicked when we went there in December 2019. Look at the beauties. 😍😍
This reminds me of my favorite song from the movie Silsila, Ye kahaan aa gaye hum.. That song too has been shot in midst of floral heaven. Admire how beautifully it has been picturized and such an eternal love song too. ❤️❤️
For me, merely looking at greenery, lush trees, mountains, fields, flowers, birds chirping, cows grazing, waves of the river, streams of water in a waterfall, early morning dewdrops on leaves, the heavenly aroma of the freshly wet soil in the first rain and so many similar such experiences brings so much unexplainable joy. ❤️ I don’t know about you all, but being with nature makes me feel so alive and refreshes me a lot. If I could, I would love to live atop a mountain, far away from the city, embracing nature in it’s purest form (One among my dreams in life. ❤️)
Among these, there is also the wonderful feel of cooking with freshly plucked vegetables. 😍 Now, since a year, these locally grown vegetables like Broccoli and cucumber are available in our nearby supermarket. It’s a boon since we can’t travel all the way to the Mahaseel festival due to the Covid situation.
My kids love these two ways of Broccoli that I make and they eat it as it is even without rice. Sharing it so that you can try for your family too. Hope you all try and love it too. Happy and healthy cooking! ❤️
RECIPE:
Ingredients:
For Broccoli stir fry:
2 Cups Broccoli florets 1 tsp Oil A pinch of Pepper powder Salt to taste
For Vegetable Paneer Chilly:
1 Cup Broccoli florets
1 Cup diced Carrots
1 Cup Paneer cubes
1/2 a medium sized Capsicum, cubed
1 medium sized Onion, cubed
3 Garlic cloves, finely chopped
3 to 4 Green chillies
2 Tbsp Tomato ketchup
2 tsp Chilli sauce
1 tsp Soya sauce
Pepper powder to taste
Salt to taste
1 tsp Vinegar
Finely chopped coriander leaves
Step by step recipe:
1. For Broccoli stir fry, take bite size broccoli florets in a bowl and wash it well. Drain and keep it ready.
2. Heat oil in a pan and add the broccoli florets. Also add salt and pepper. Fry on high flame for few seconds. Cover and cook on medium flame till the florets turn soft. Sprinkle water only if needed. You are done!
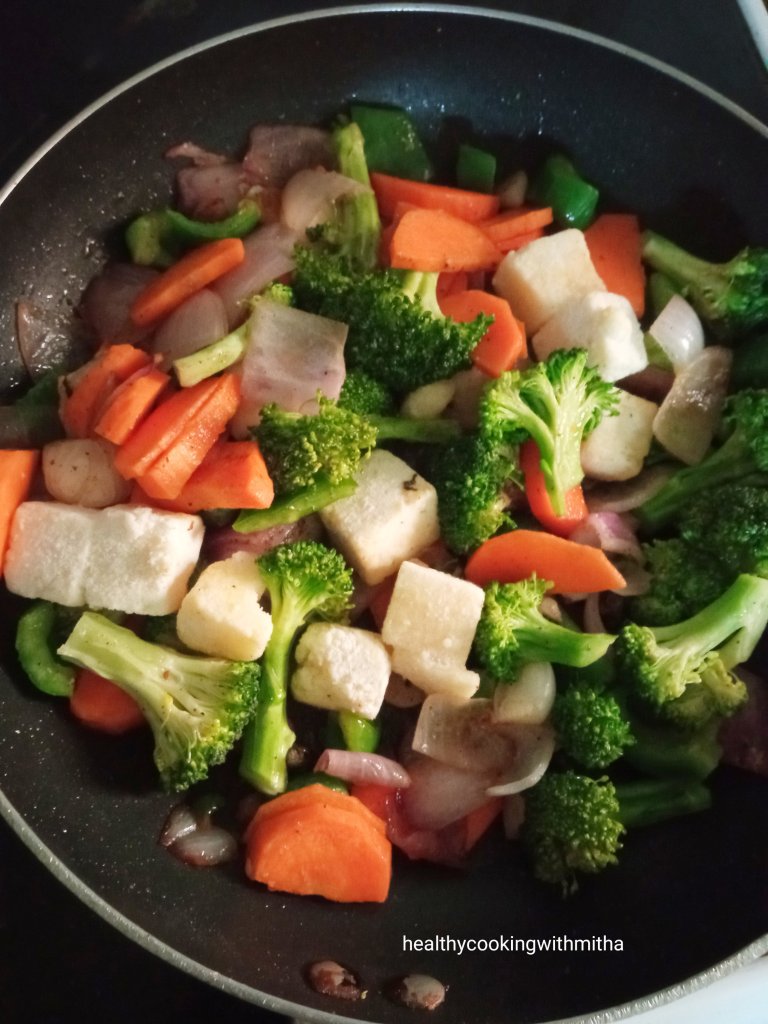
3. For Vegetable Paneer Chilly, take Broccoli florets, diced Carrots and cubed capsicum in a bowl.
4. In a pan, heat oil and fry the green chillies and garlic first. Then add cubed onions and fry till it turns translucent.
5. Now add the veggies along with Paneer and fry for few seconds.
6. Add very little water and cook till the veggies turn soft but don’t overcook them. Now add ketchup, chilli sauce, soya sauce, salt and pepper. Mix well and cook for 5 mins.
7. Remove and add vinegar. Mix well adding coriander leaves.
Serve both the Broccoli stir fry and Vegetable Paneer Chilly with fried rice or any variety rice or meals.
Click on the image to save the recipe on Pinterest.
Notes:
* I usually make easy Schezwan fried rice with this. You can check the recipe here.
* Skip Paneer if you don’t like it. Makes regular vegetable chilly.
* You can make it as a gravy if you want. Just add more ketchup and water. For a thicker gravy, add corn flour mixed in water to the gravy. It will make it very thick. I love this dry version though.
* The broccoli stir fry makes for a great snack for kids. My kids dip it it ketchup and eat by themselves. Great finger food for toddlers as well.
Click on the image to save the recipe on Pinterest.
If there is one event here in Qatar that I used to wait eagerly for (pre corona times), it is the Qatar International Food Festival or QIFF as it is called. My first visit to the QIFF was in 2016. It was held in one of my favorite parks here, the MIA park which is in a picturesque location. I love to sit there, just admiring the beauty and calmness of the gleaming blue waters 🌊. And enjoying food there made it extra special. That first experience of QIFF at MIA park was the best one till date. ❤️
Being vegetarians (who love Indian food ❤️) actually takes away the point of going to an “international” food festival (the irony 😁) but there were so many options from Indian restaurants that we got spoilt with choices. It was like finding all the famous Indian restaurants from Qatar in one place and you get to choose their best dishes from the menu. In short, Foodie heaven! 😍
After that, we made a point to go to the QIFF every year, for some variety chaats, north Indian platters, south Indian delicacies, sweets, ice creams and juices, hovering from stall to stall (basically rummaging into all theveg options 😂😂). I know it sounds like a lot of food but these food festivals make me go crazy and I forget all the healthy eating for a while (Sorry but not sorry, Mr Diet 😅😅).
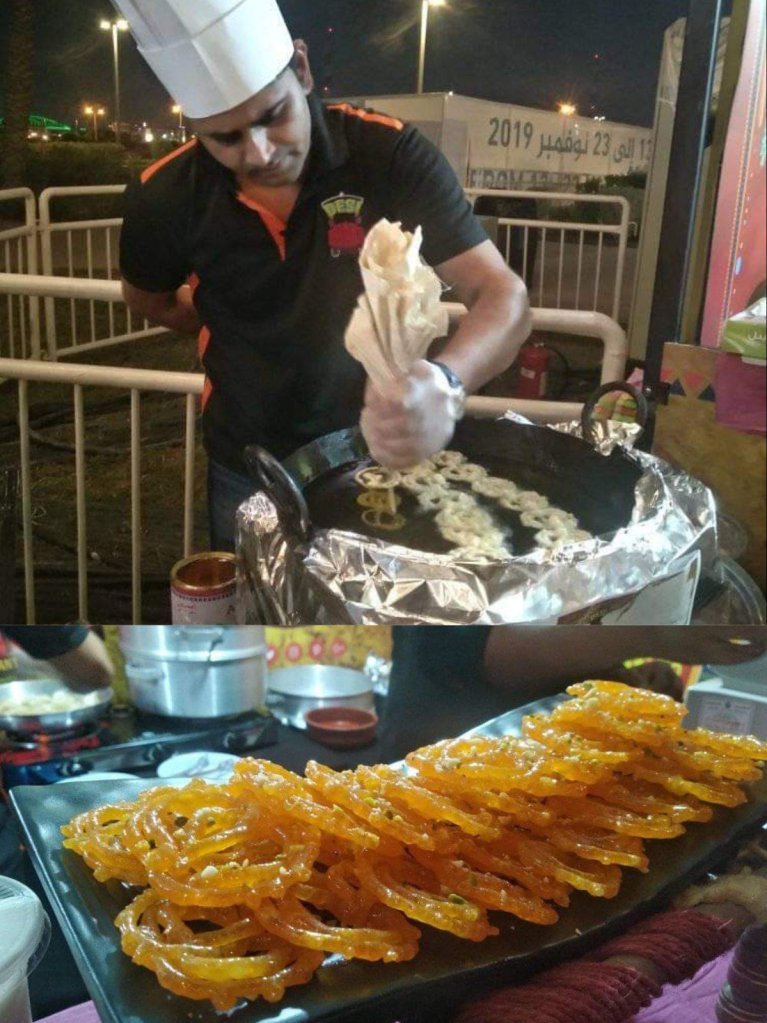
The last food festival we visited was held in November 2019 which was a street food festival. The chef at the live counter of Desi Dhaba restaurant making hot Jalebis fried in ghee was the highlight of the event for the sweet lover in me. Look at how delicious the Jalebis were! 😍 My mouth waters as I think about it. 😋
Another unforgettable food memory with these food festivals is the Paneer Kathi Rolls from Zaffran cafe stalls. I never missed it and it is the most delicious kathi rolls I have ever eaten. ❤️
Click on the image to save the recipe on Pinterest.
So since due to Covid, it has been more than an year of no food festivals (😭), I decided to recreate those Paneer Kathi Rolls at home and how amazing did it come out. Never knew making them at home was so easy. My kiddos too loved it so much that they could not stop saying “mmmmm yummyyyyy 😍😍” (gone ditto after me 🤣🤣 exactly how I can’t stop saying it when I eat something yummy, not caring for anyone else in the world. 😂)
So I thought I must share this yumminess of a recipe with you all too. Makes a filling evening snack or even a meal in itself. Also a great way to finish your leftover rotis. Hope you all try and like it. Happy and healthy cooking! ❤️
1. Take wheat flour and salt in a bowl. Add water and form a firm yet soft dough like that while making rotis. Keep aside.
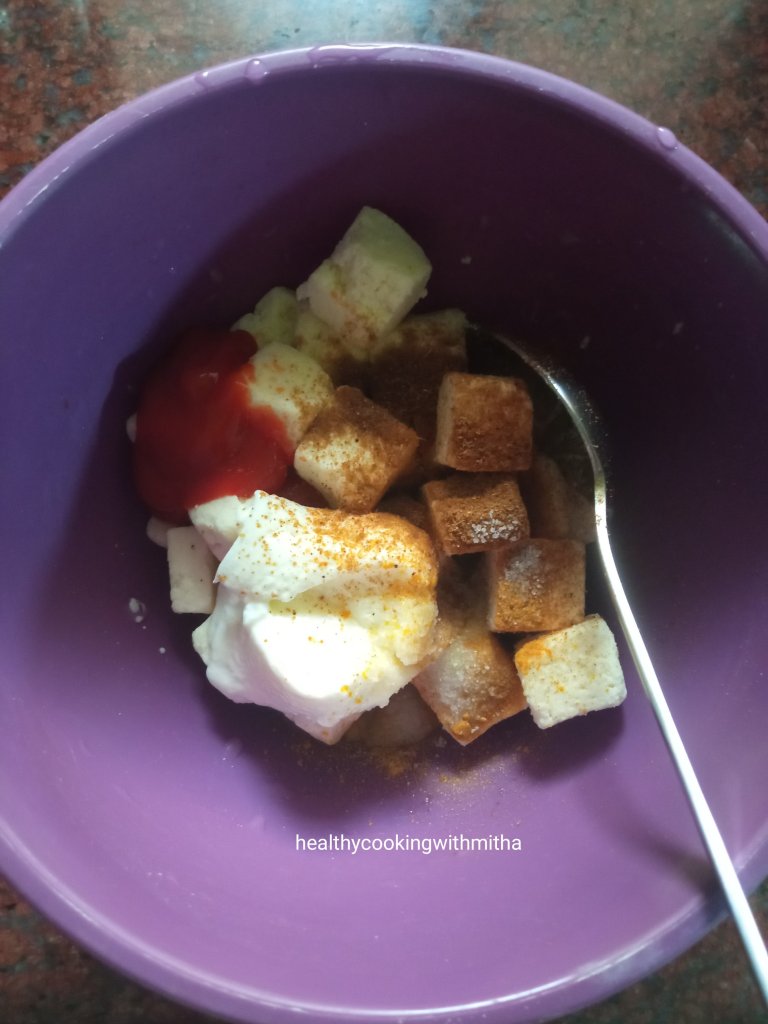
2. Now take paneer cubes in a bowl. Add yogurt, ketchup, cumin powder, Garam masala powder, Turmeric powder and salt.
3. Mix well.
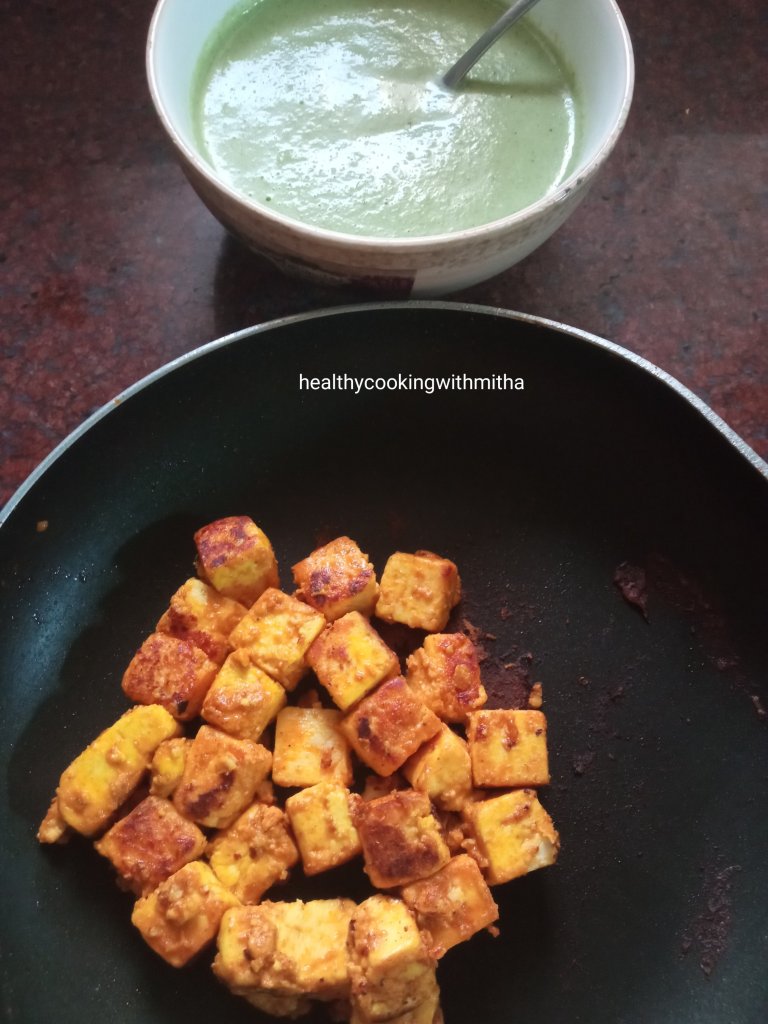
4. Now heat 2 tsp ghee in a frying pan and roast the paneer cubes on medium flame till the cubes get browned on all sides. Keep flipping as they turn brown each side.
5. Remove from the flame and keep aside. Also make the green chutney.
6. Take sliced onions and capsicums in a bowl. Add salt and vinegar. Mix well. Now the things ready for filling are ready.
7. Make roti like you make regularly. I make it almost like a square so that it’s easier to roll. Place in a plate. Spread with a spoon of the chutney. In the center, keep the paneer pieces are shown. Top with the salad.
8. Roll and serve!
Click on the image to save the recipe on Pinterest.
Notes:
* I make this roasted gram dal coriander leaves chutney for the roll. You can make regular Coriander leaves chutney for it too. Just remember to make the chutney thick and not liquidy as we have to spread it.
* You can add more veggies into the salad filling. I just keep it simple as I don’t want to overfill the rotis.
* Be careful to roast the marinated paneer on medium flame. Else due to Yogurt, it can turn black.
* You can also add red chilli powder to the marinate to make the paneer filling more spicy. I don’t add as I make for my kids too.
* These rolls are the best way to finish leftover rotis in a delicious and unique way. Also great for lunch box. Just make the chutney very thick if making for lunch box.
Click on the image to save the recipe on Pinterest.
Ideally I should be sleeping now as my kids have finally slept after chattering and more chattering (just like me 😁) but I decided to finish writing this (blog baby calls ❤️). Had planned to give it a break, actually fully from social media as I am someone who needs quiet time to focus inwards (the other side of me 😄) but that went for a toss as I got many beautiful feedbacks from my near and dear ones. So I had to post it and hence was active on my Facebook page (perfect example of how life never goes as per my plans 😬).
But I did listen to a lot of songs on repeat from Sanam and Maadhyam bands (my latest favourites ❤️❤️). The meaningful lyrics, combined with the singers’ soulful voices soothes me so much that I wonder what my life would have been without music. It’s as important as air and water for me (I know I am going overboard but that’s the truth 😁). Don’t know if anyone can understand this but once you fall in love with music, you just fall crazily and there’s no going back. 🎶❤️
That’s why I guess it’s called “falling” in love.. We slowly fall, without our control and by the time we know it, we have already fallen quite deeply into it.. ❤️ (sometimes there’s no way out and you don’t want to come out either 😍) – proof of my craziness 😅
Now coming back to today’s post before I lose my focus in my chatter (night time gives me ample time to think and write 😄), this combination is what I regularly make especially on days when we are fasting and don’t consume onion/garlic. The paneer butter masala comes out so delicious that you can never say it is a Satvik one. I make it only this way now and it can really beat restaurant ones anyday for sure (not exaggerating. Try it to know the magic 😍)
Hope you all try this and love it. Happy and healthy cooking! ❤️
RECIPE:
Ingredients:
200 grams Paneer cubes
1 Tbsp Butter or Ghee
1 Bay leaf
1/4 tsp Turmeric powder
1/2 tsp Coriander powder
1/2 tsp Cumin powder
1 tsp Red chilli powder or to taste
1 tsp Shahi Paneer Masala (I use catch brand) *substitute with any Garam masala powder of your choice
Salt to taste
2 Tbsp Milk
3 Tbsp Coriander leaves to garnish, finely chopped
To grind to paste:
2 to 3 medium sized Ripe Tomatoes
1 inch Ginger piece
2 Cloves
1 Cardamom
Step by step recipe:
1. Grind tomatoes, ginger, cloves and cardamom with about 1/4 Cup water to a smooth paste. Heat butter in a pan and add bay leaf along with the ground paste.
2. Allow it to cook, sauteing in between till the mixture turns thick (takes about 10 mins) and leaves the sides of the pan. Now add all the masala powders and salt.
3. Mix well. Now add milk and bring to a boil. Also add paneer cubes and cook for about 5 mins till paneer turns soft.
The colour looks orangy due to my kitchen lights and my mobile camera clarity. It comes out as shown in the main picture which was captured in daylight.
4. Remove from flame and garnish with coriander leaves. Mix well. Serve with rotis, rice or pulav.
Notes:
* I serve this with Peas Pulav. For peas pulav, heat 1 Tbsp ghee in a pan. Add bay leaf. Add washed and drained 1 Cup Rice along with about 1/2 Cup frozen peas and salt. Add water and cook till the rice turns soft yet firm. Amount of water depends on the variety of yourrice. Garnish with coriander leaves.
* Please use ripe and bright red tomatoes for best results as it really makes a difference in the flavour. You can increase the number of tomatoes to 3 if you want to make more of the gravy.
* Cooking the ground paste very well till the rawness completely goes away is the most important step in this recipe.
* You can also add 1 Tbsp Tomato ketchup to the curry along with the masala powders if you are not particular about “no onion no garlic”. I add when we are not fasting and it adds a wonderful flavour to the curry. ( Some brands of ketchup contains garlic paste.)
* I use Catch Shahi Paneer Masala to make this curry as the flavours are great and it does not contain garlic or onion powders. You can use any powder of your choice though.
* Milk can be substituted with cream for a richer version but add cream after cooking paneer and don’t cook much after adding it.
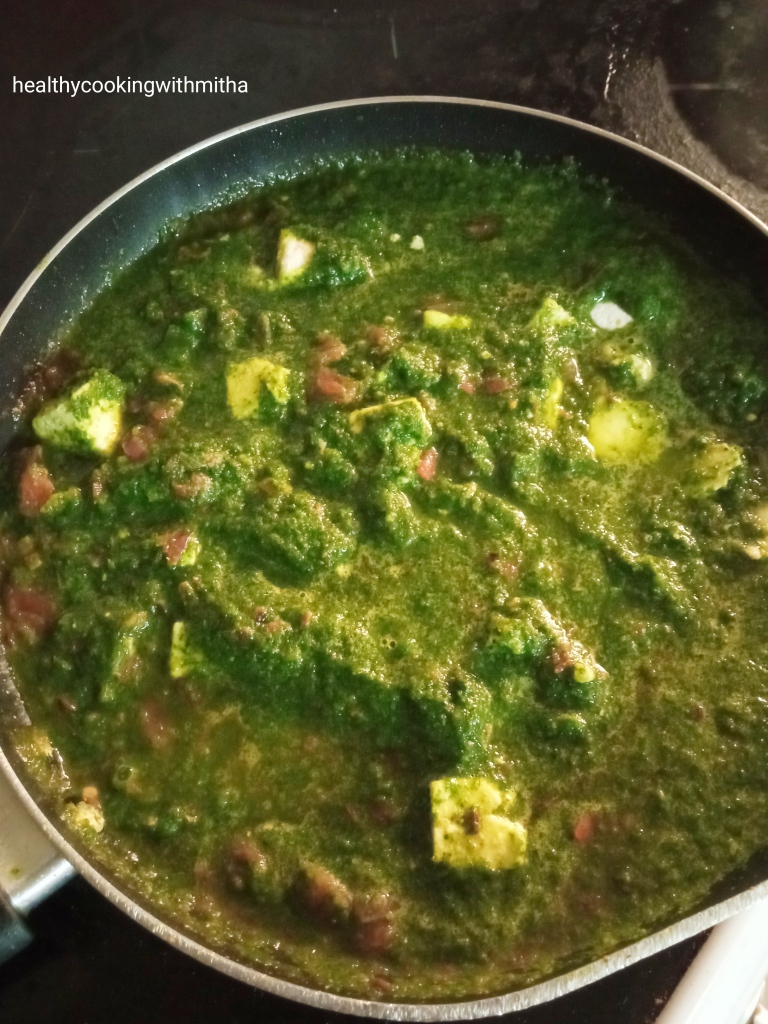
Palak paneer reminds me of only one person, someone who is very close to my heart and to whom I owe everything in life – My Amma ❤️. This is her favorite dish and I have so many memories with her love for Palak paneer. Each time I make it, I only wish she was here with me, just to see her eat with so much happiness. 😍
One of the first memories of Palak paneer and my Amma is when she was admitted in hospital during my 4th semester engineering exams due to Vertigo. It was one of my most difficult days as I could not bear to see her suffer and wanted to take care of her but I had my exams on.
Finally I decided to stay in the hospital with her and study, no matter what happens. Those days, when I used to come back after my exams, I brought her favorite foods to cheer her up. One of them was Palak paneer from a nearby restaurant. The glow on her face while eating it is still in my memories. Can never forget the small ray of happiness which this curry brought in those sad times. ❤️
And guess what? My 4th semester exam results were my most scored one in my entire engineering studies. I always say it’s only due to Amma’s blessings. 🙏
After that, I learned to make palak paneer from my aunt Anita Pai mai who was also the reason I started my blog. She encouraged me a lot during my initial cooking days. Amma loved my palak paneer so much that she said it tasted even better than restaurant ones. So whenever I visit them, I definitely make it for her. Just to see the glow on her face. 😍
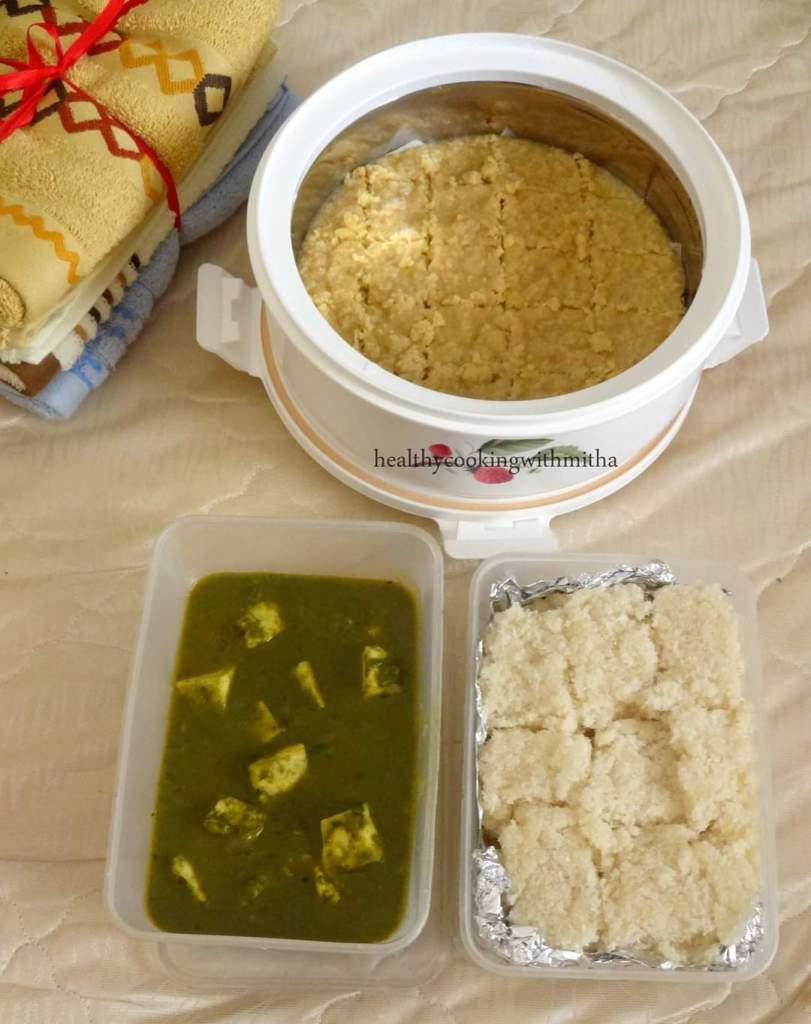
I had even made it for her and sent it with my brother when he had come here to Qatar on vacation. Here is a picture from my Facebook memories. Palak paneer with Coconut burfis and Til ki Burfi which travelled from Qatar to India, from a daughter to her mother, with loads of love. ❤️❤️
This post became quite a long one but I always wanted to write about these memories as they are very close to my heart. I know Amma will have tears in her eyes while reading this. Loads of love to you Amma. Don’t know when we can meet next but I will definitely make your favorite Palak paneer for you when we meet. ❤️
Hope you all try this curry with pulao. I thank Anita Pai mai for her recipe. Happy and healthy cooking!
RECIPE:
Ingredients:
300 grams Palak or Spinach leaves (about half a large bunch)
200 grams Paneer cubes
4 green chillies
1 Tbsp Ghee
1 tsp Cumin seeds/ Jeera
1 inch Ginger piece, finely chopped
4 to 5 Garlic cloves, finely chopped
1 medium sized Onion, finely chopped
1 large Tomato, finely chopped
1/4 tsp Turmeric powder
1 tsp Garam masala powder
1/2 tsp Red chilli powder
Salt to taste
Step by step recipe:
1. Clean the spinach leaves well and wash under running water till the dirt goes away.
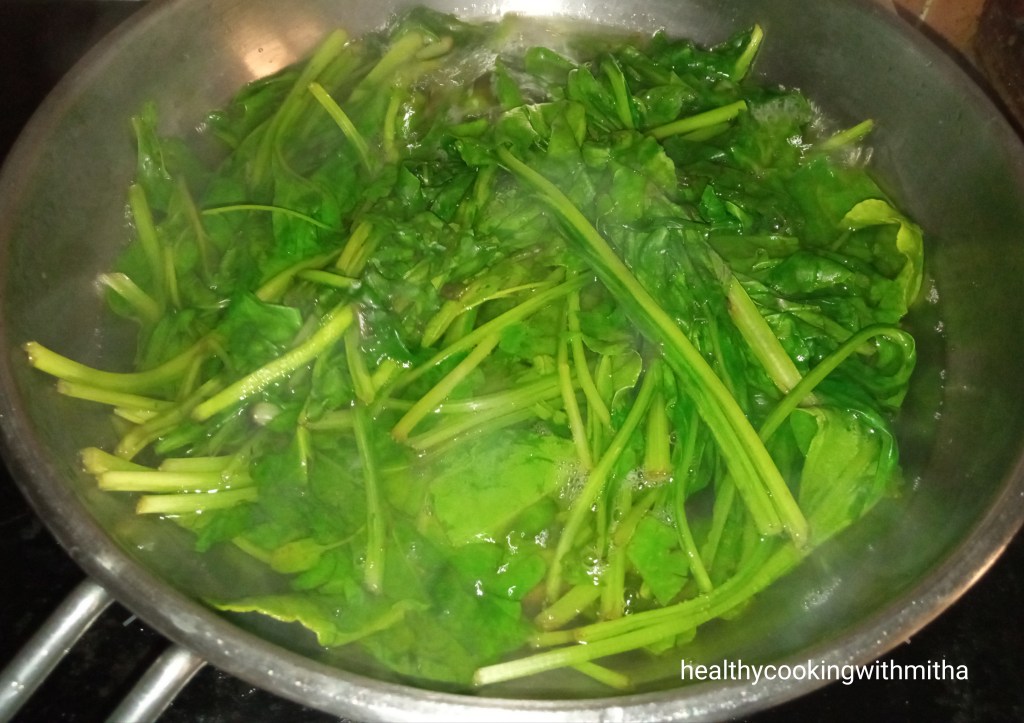
2. Now heat water with salt in a large pan. Add these leaves and bring to a boil.
3. As soon as it boils and the leaves start changing colour, immediately remove the leaves and wash it in cold water. Allow it to cool down.
4. Meanwhile heat ghee in a pan and add cumin seeds. When it changes colour, add Ginger and garlic. Fry for a minute. Add onion and fry till it turns translucent.
5. Now add finely chopped tomatoes and fry till it turns soft. Mash using the ladle. You can also puree tomatoes and add. Now add Haldi powder, Garam masala powder and red chilli powder.
6. Mix well. Grind the palak leaves along with green chillies and little water to a smooth paste. Add to this. Also add paneer cubes and salt.
7. Cook till the palak leaves changes colour and turns dark green. Remove from flame. Serve with rotis or rice. I usually make my simple vegetable pulao with it.
Notes:
* For vegetable pulao, soak basmati rice for about half an hour. In a pan, add ghee. Also add cloves, cardamom pods, bay leaf and some cashews. Fry till cashews turn brown. Now add drained rice along with frozen or fresh vegetables (about 1 cup for every 2 cups rice used). Cook in enough water adding salt till the rice turns soft. You can also add little milk and saffron when the rice is almost cooked for a richer version of pulao.
* Don’t cook the palak leaves in water as it will lose the nutrients. Just blanch it ie add to the hot water, bring to a boil and immediately drain and wash in running water in a colander. This helps retain the colour of palak leaves.
* I add the stalk part of palak too as it is healthy. Some people add only the leaves and discard the stalk/ stem. I feel if you grind it to smooth paste, then there is no problem in using the stem as well. In fact it gives a thickness to the gravy along with being nutritious too.
* Red chilli powder can be added only if needed since we are already adding green chillies while grinding.
* I used to add milk to the gravy towards the end when I started making palak paneer but now I don’t add as I feel it masks the palak flavour. You can add milk towards the end or garnish with fresh cream if you like it.
* You can substitute paneer with boiled chickpeas for Chole Palak and with boiled cubed Potatoes for Aloo palak or even with mushrooms for Kumbh Palak.
* Our favorite combination with Palak paneer is Vegetable pulao. I also make chapatis and it tastes great with this curry too.
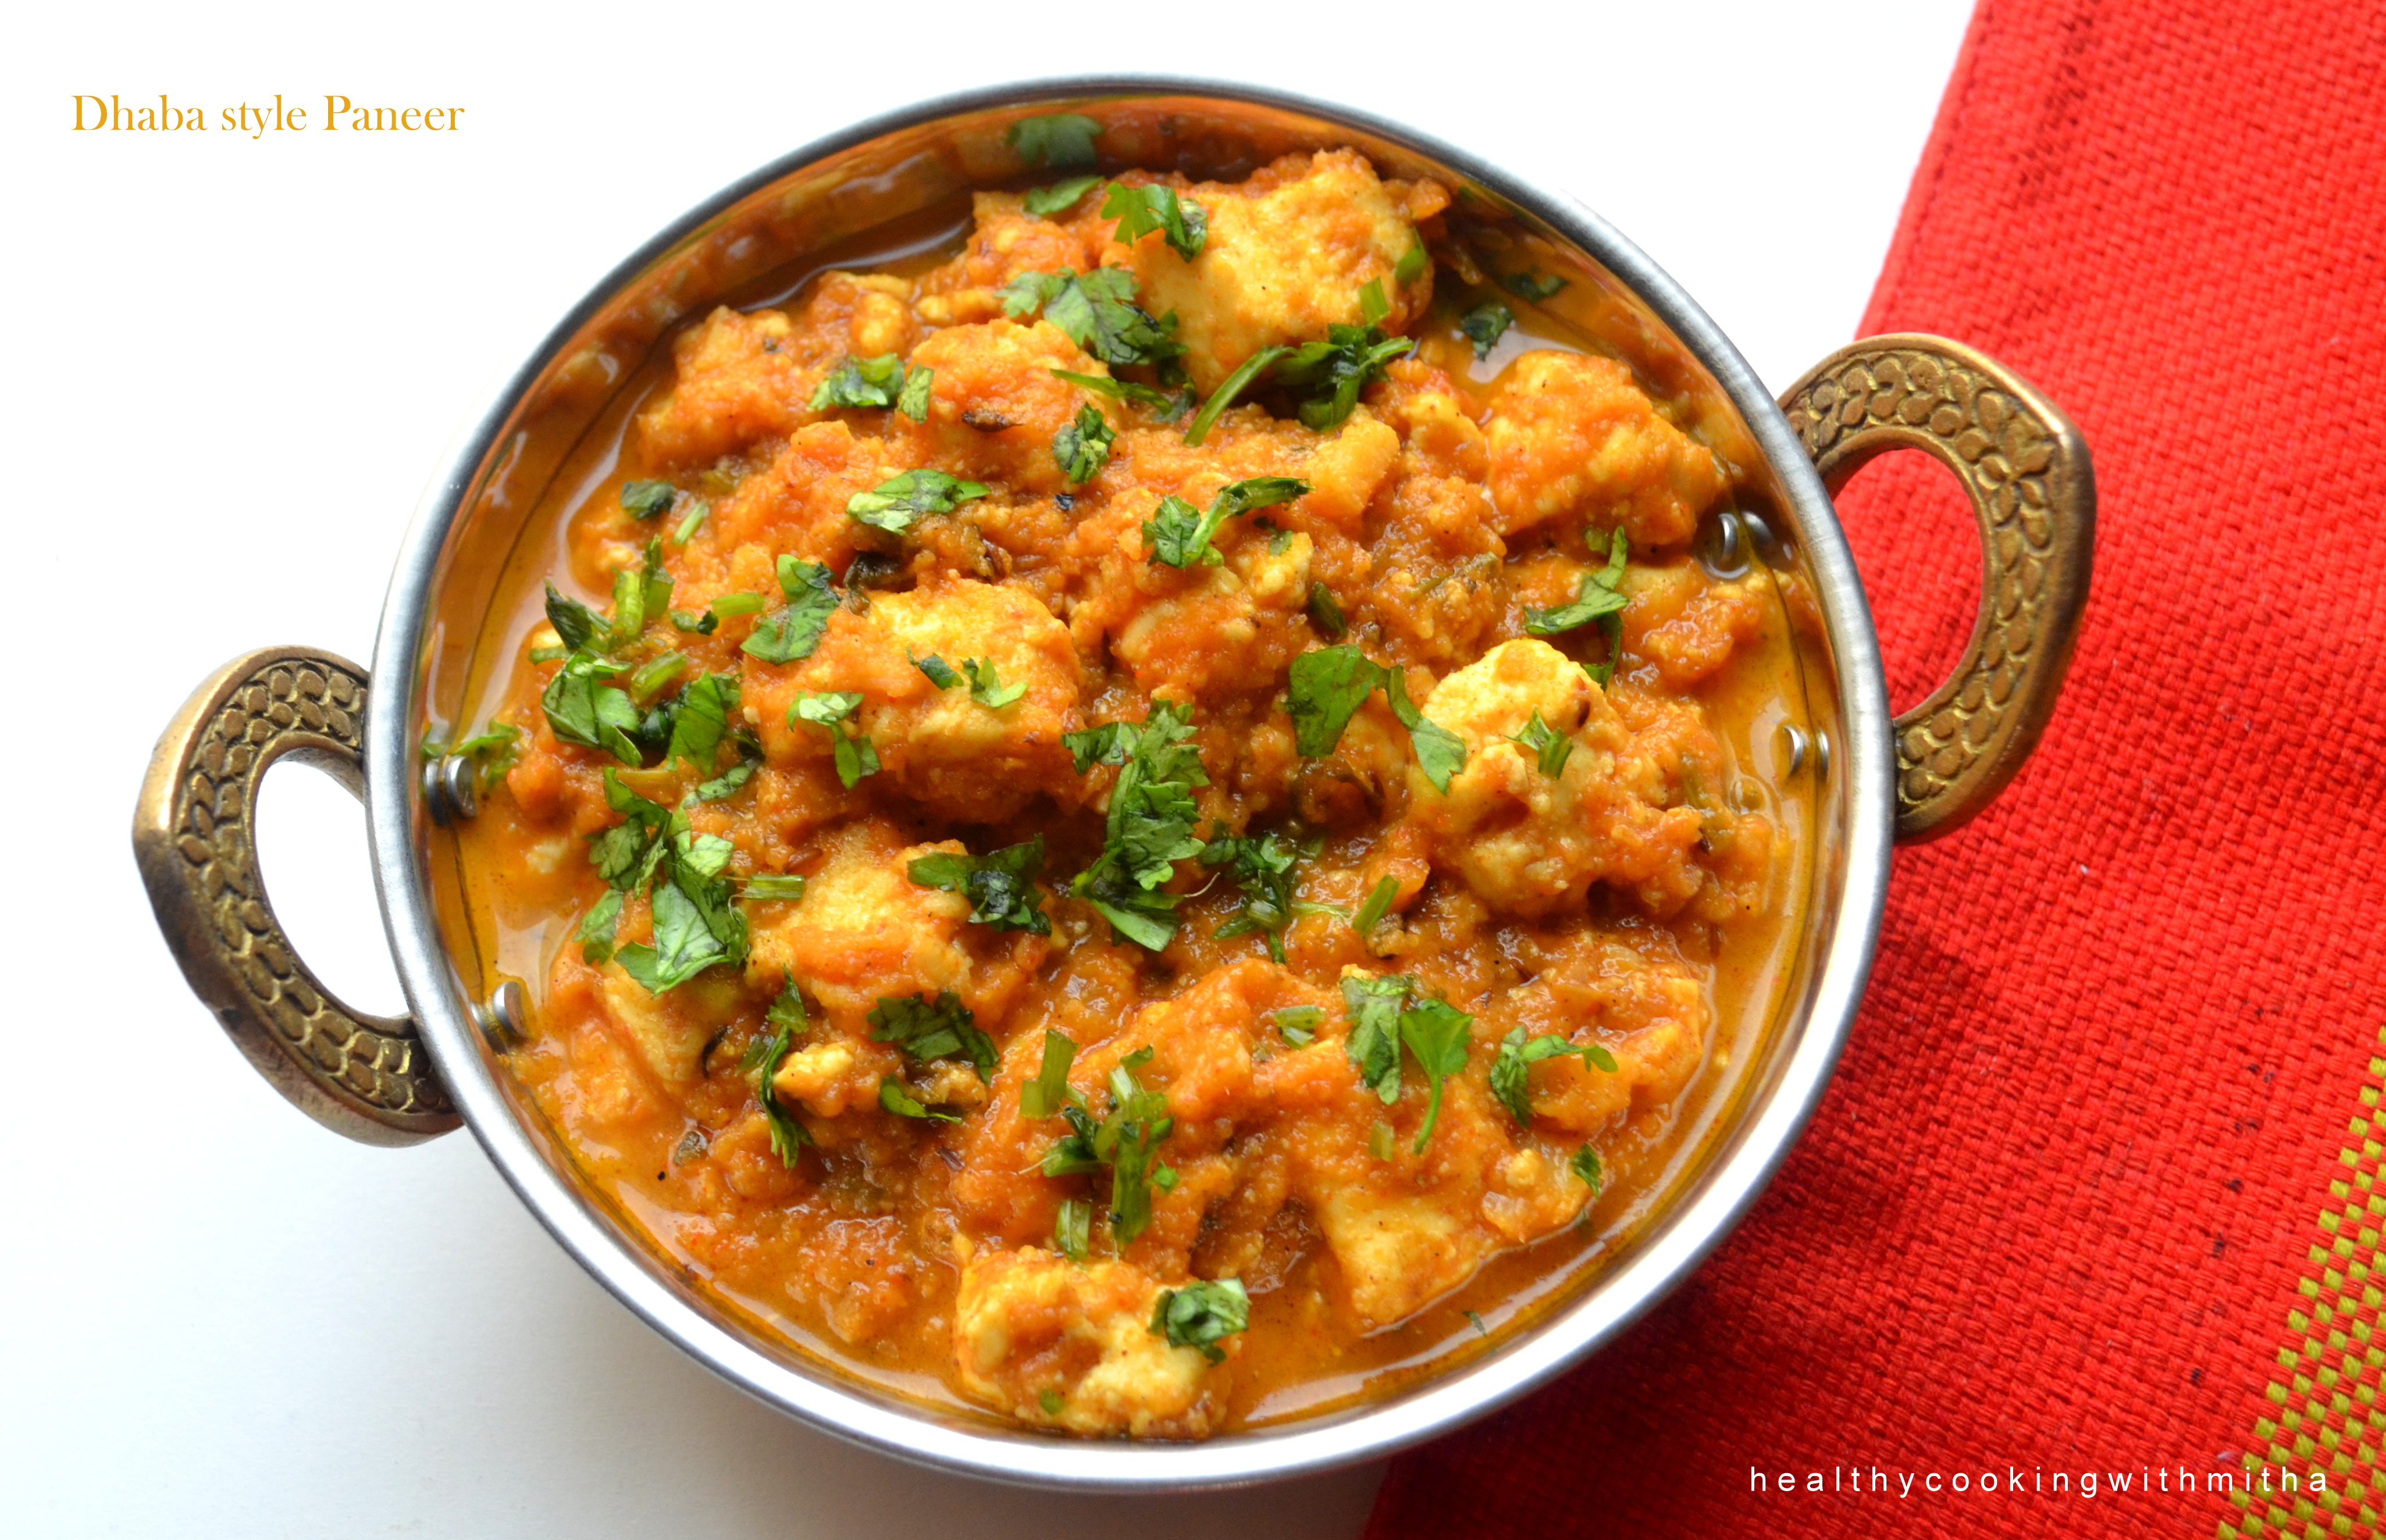
We are a paneer loving family and our idea of a special weekend dinner is incomplete without paneer. So when my dearest friend and soul sister Sumangala posted Dhaba style Paneer on her Instagram handle @onlyvegfoodie, I could not resist trying it instantly. It looked so so delicious.
And how amazing it came out too. My kids who usually make faces during dinner time ate whole heartedly and happily that day. My daughter even ate the curry as it is which is a rarity since she always finds everything spicy. So you can imagine how much she liked it.
I also want to write something about Sumangala. We first met through our GSB youth wing Elamakkara (where we lived in Kochi) during our college days. We were (still are 😁) both talkative and got along very well. She’s very loving and a down to earth person. I still remember my visits to her house and the nearby Shiva temple with her. Now we both are busy mommies with two kids of our own but our common love for cooking keeps us connected on Instagram. So glad to see you happy Suma. Love you. The memories with you are unforgettable. 😘
Hope you all try her recipe of Dhaba style Paneer and love it as much as we did. Happy and healthy cooking!
RECIPE:
Ingredients:
To marinate:
200 grams Paneer cubes
1 tsp Red chilli powder
1 tsp Coriander powder
2 tsp Garam masala powder
1/2 tsp Haldi powder
2 tsp Water
Other ingredients in order:
1 Tbsp Ghee
1 Tbsp Oil
2 Cardamom pods
2 Cloves
1/2 inch Cinnamon stick
1 Bay leaf
1 tsp Cumin seeds or Jeera
1 tsp minced Ginger
1 large Onion, blended in mixer
2 large Tomatoes, pureed in mixer
2 Tbsp Coriander leaves, while frying
1/2 tsp Kasuri methi, crushed between palm
1 tsp Red chilli powder
1 tsp Garam masala powder
2 tsp Besan/ Chickpea flour
Salt to taste
Coriander leaves for garnish
Step by step recipe:
1. Take Paneer cubes in a bowl. Add red chilli powder, garam masala powder, haldi powder and coriander powder along with little water. Mix well and keep aside for 30 mins.
2. Heat oil and ghee in a pan. Add jeera along with Cardamom pods, cloves, cinnamon stick, bay leaf. When jeera changes colour, add blended onion and ginger.
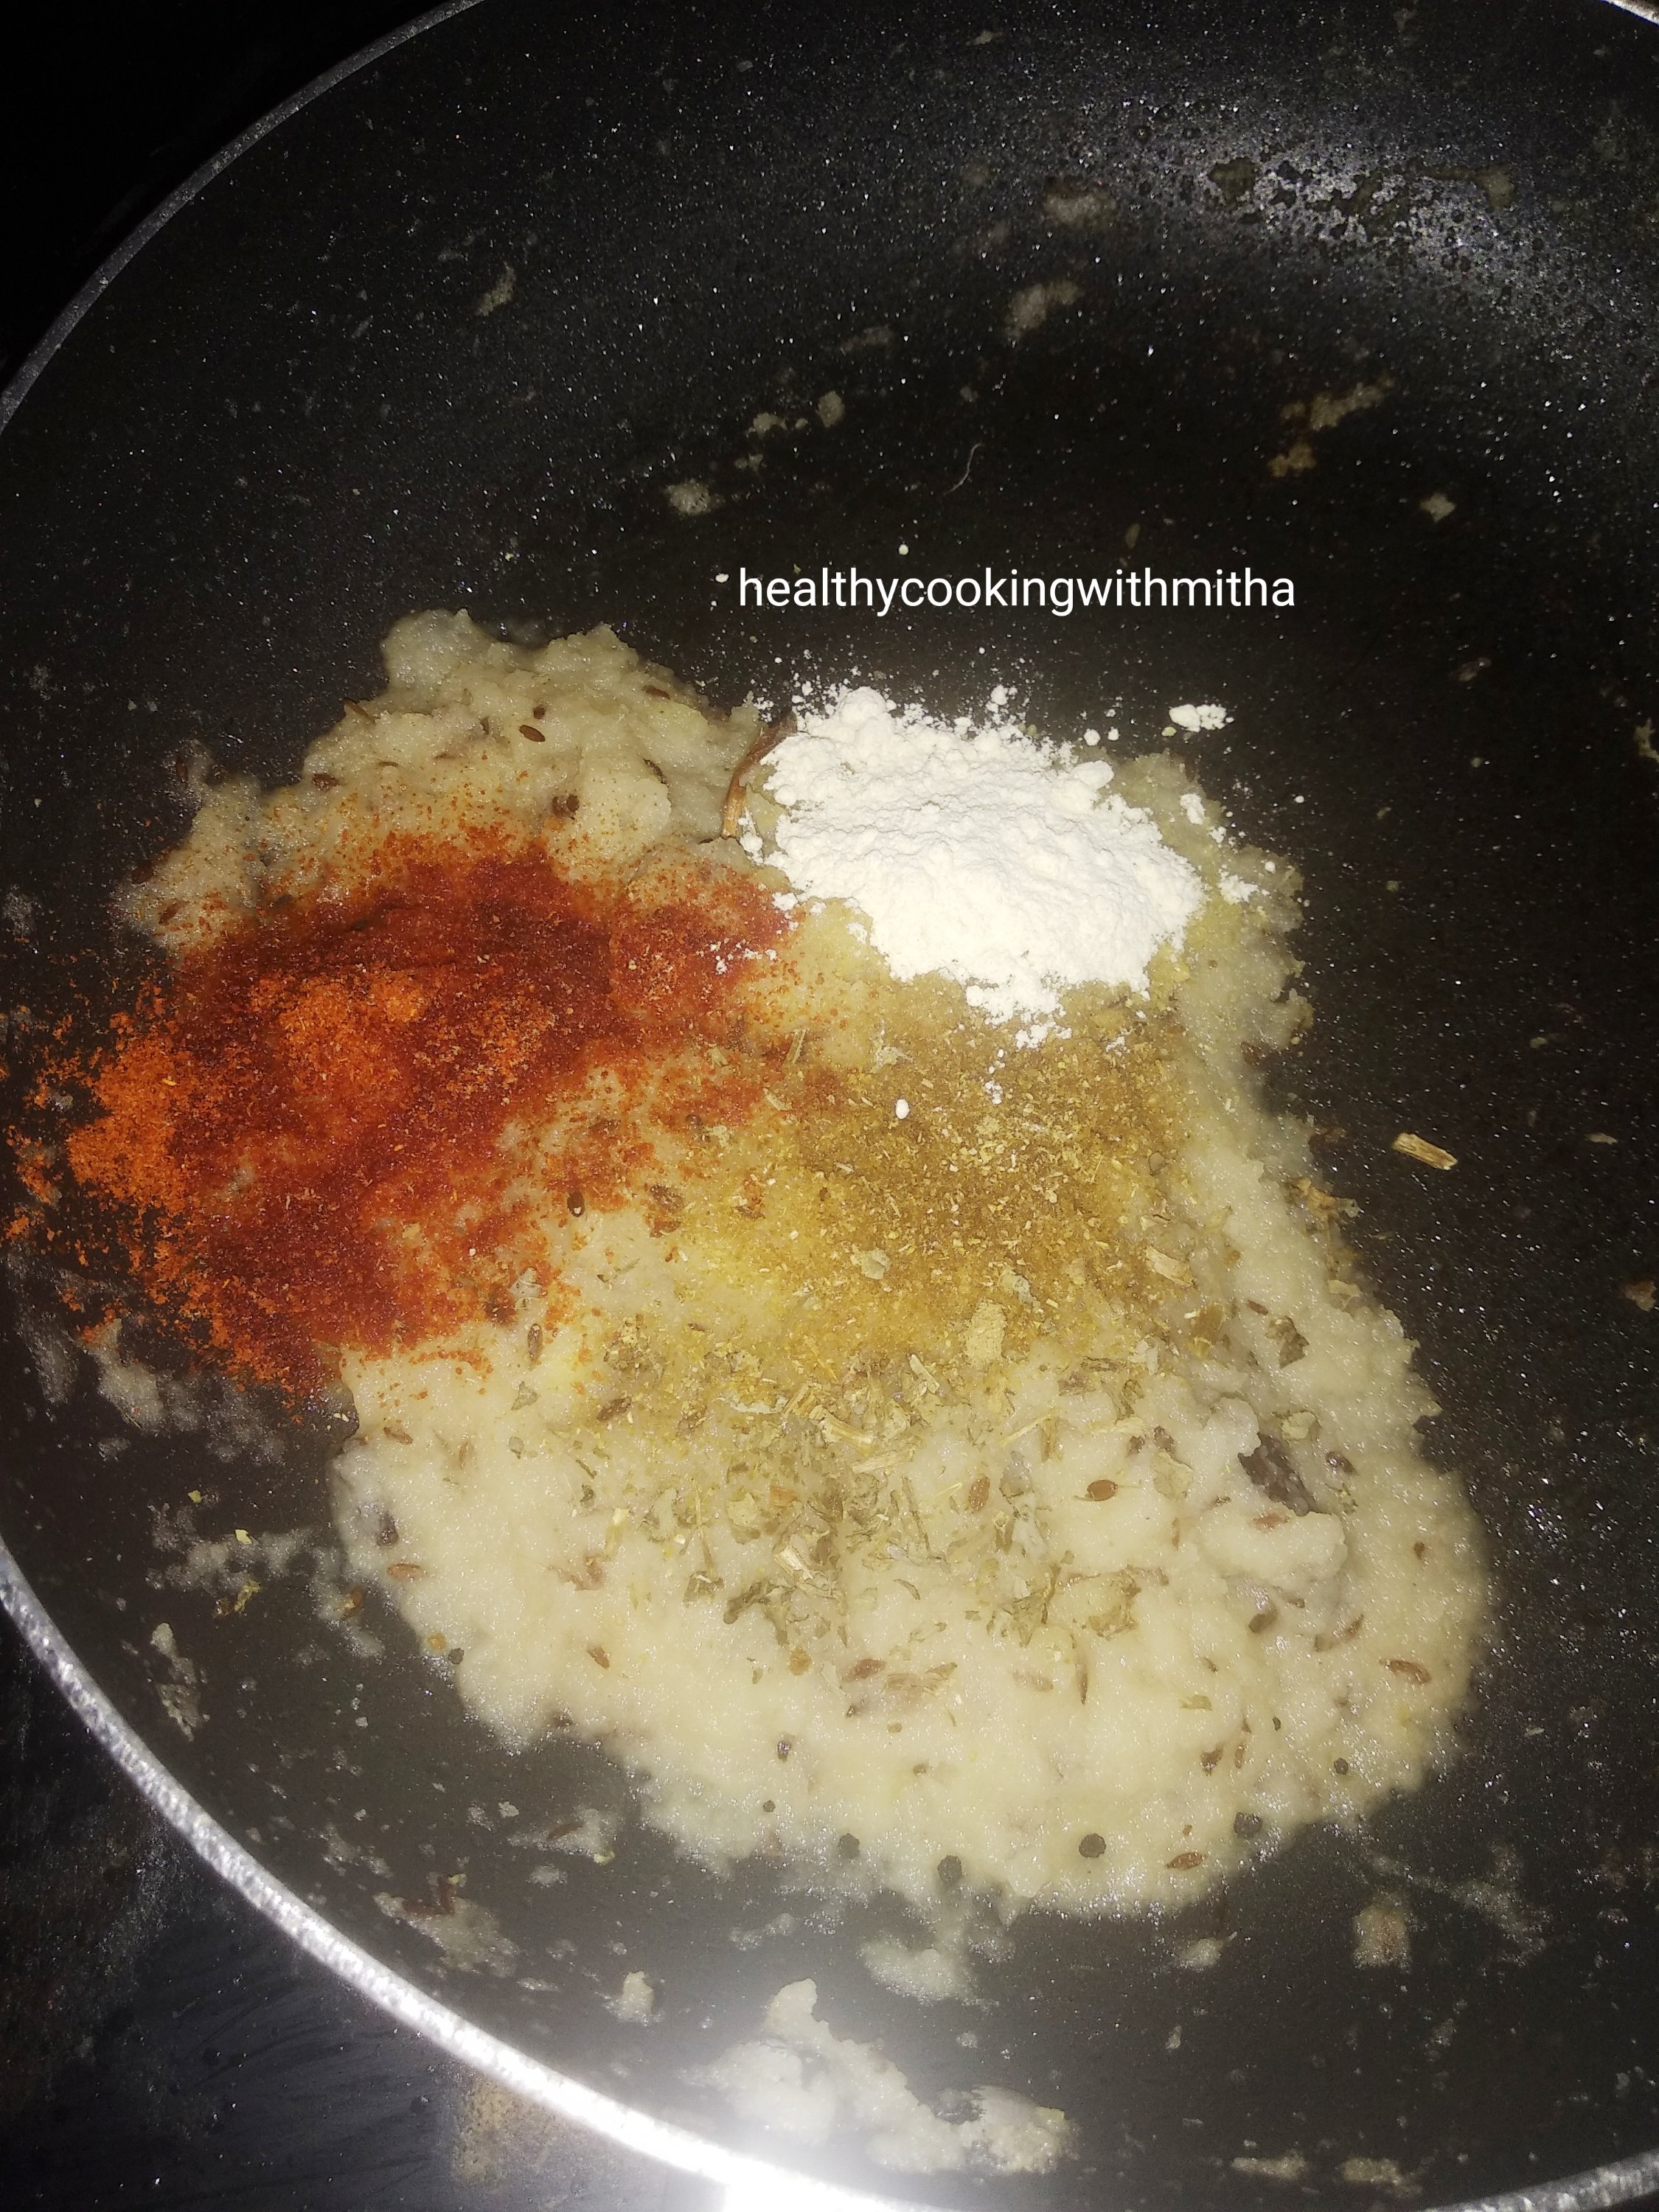
3. Keep frying continually till the raw smell goes away and the paste leaves the sides of the pan. Now add kasuri methi, red chilli powder, garam masala powder and besan.
4. Fry for two mins till the rawness of besan goes away. Now add tomato puree along with coriander leaves and cook covered for 6 to 8 mins till the mixture leaves the sides of the pan.
5. Now add paneer cubes and mix well. Cook again covered for 5 mins.
6. Remove from flame. Garnish with Coriander leaves. Serve with rotis or rice.
Notes:
* Paneer can be substituted with mushroom or cauliflower.
* You can fry the marinated paneer first before adding to the gravy for a firmer paneer. I skipped that step since we like the softness of paneer in gravies.
* Do remember to cook well after adding onion puree, after adding besan and after adding tomato puree. All three steps need some time to cook thoroughly but is very important to get the authentic dhaba style Paneer.
* You can skip the red chilli powder in the gravy and add only to the marinate if you don’t like too much spicy gravy. My kids loved it even though I added red chilli powder in both marinate and gravy.
Paneer is the star at my house and we all love paneer very much. But during both my pregnancies, I could bear to even smell it. And right after I delivered, my paneer love is back again. Weird right? 😁
The funniest part is both my kids are huge fan of paneer. So I ask them always, what happened when you were inside me? Why didn’t you like it then? 😂😂 I know I sound crazy 🙈
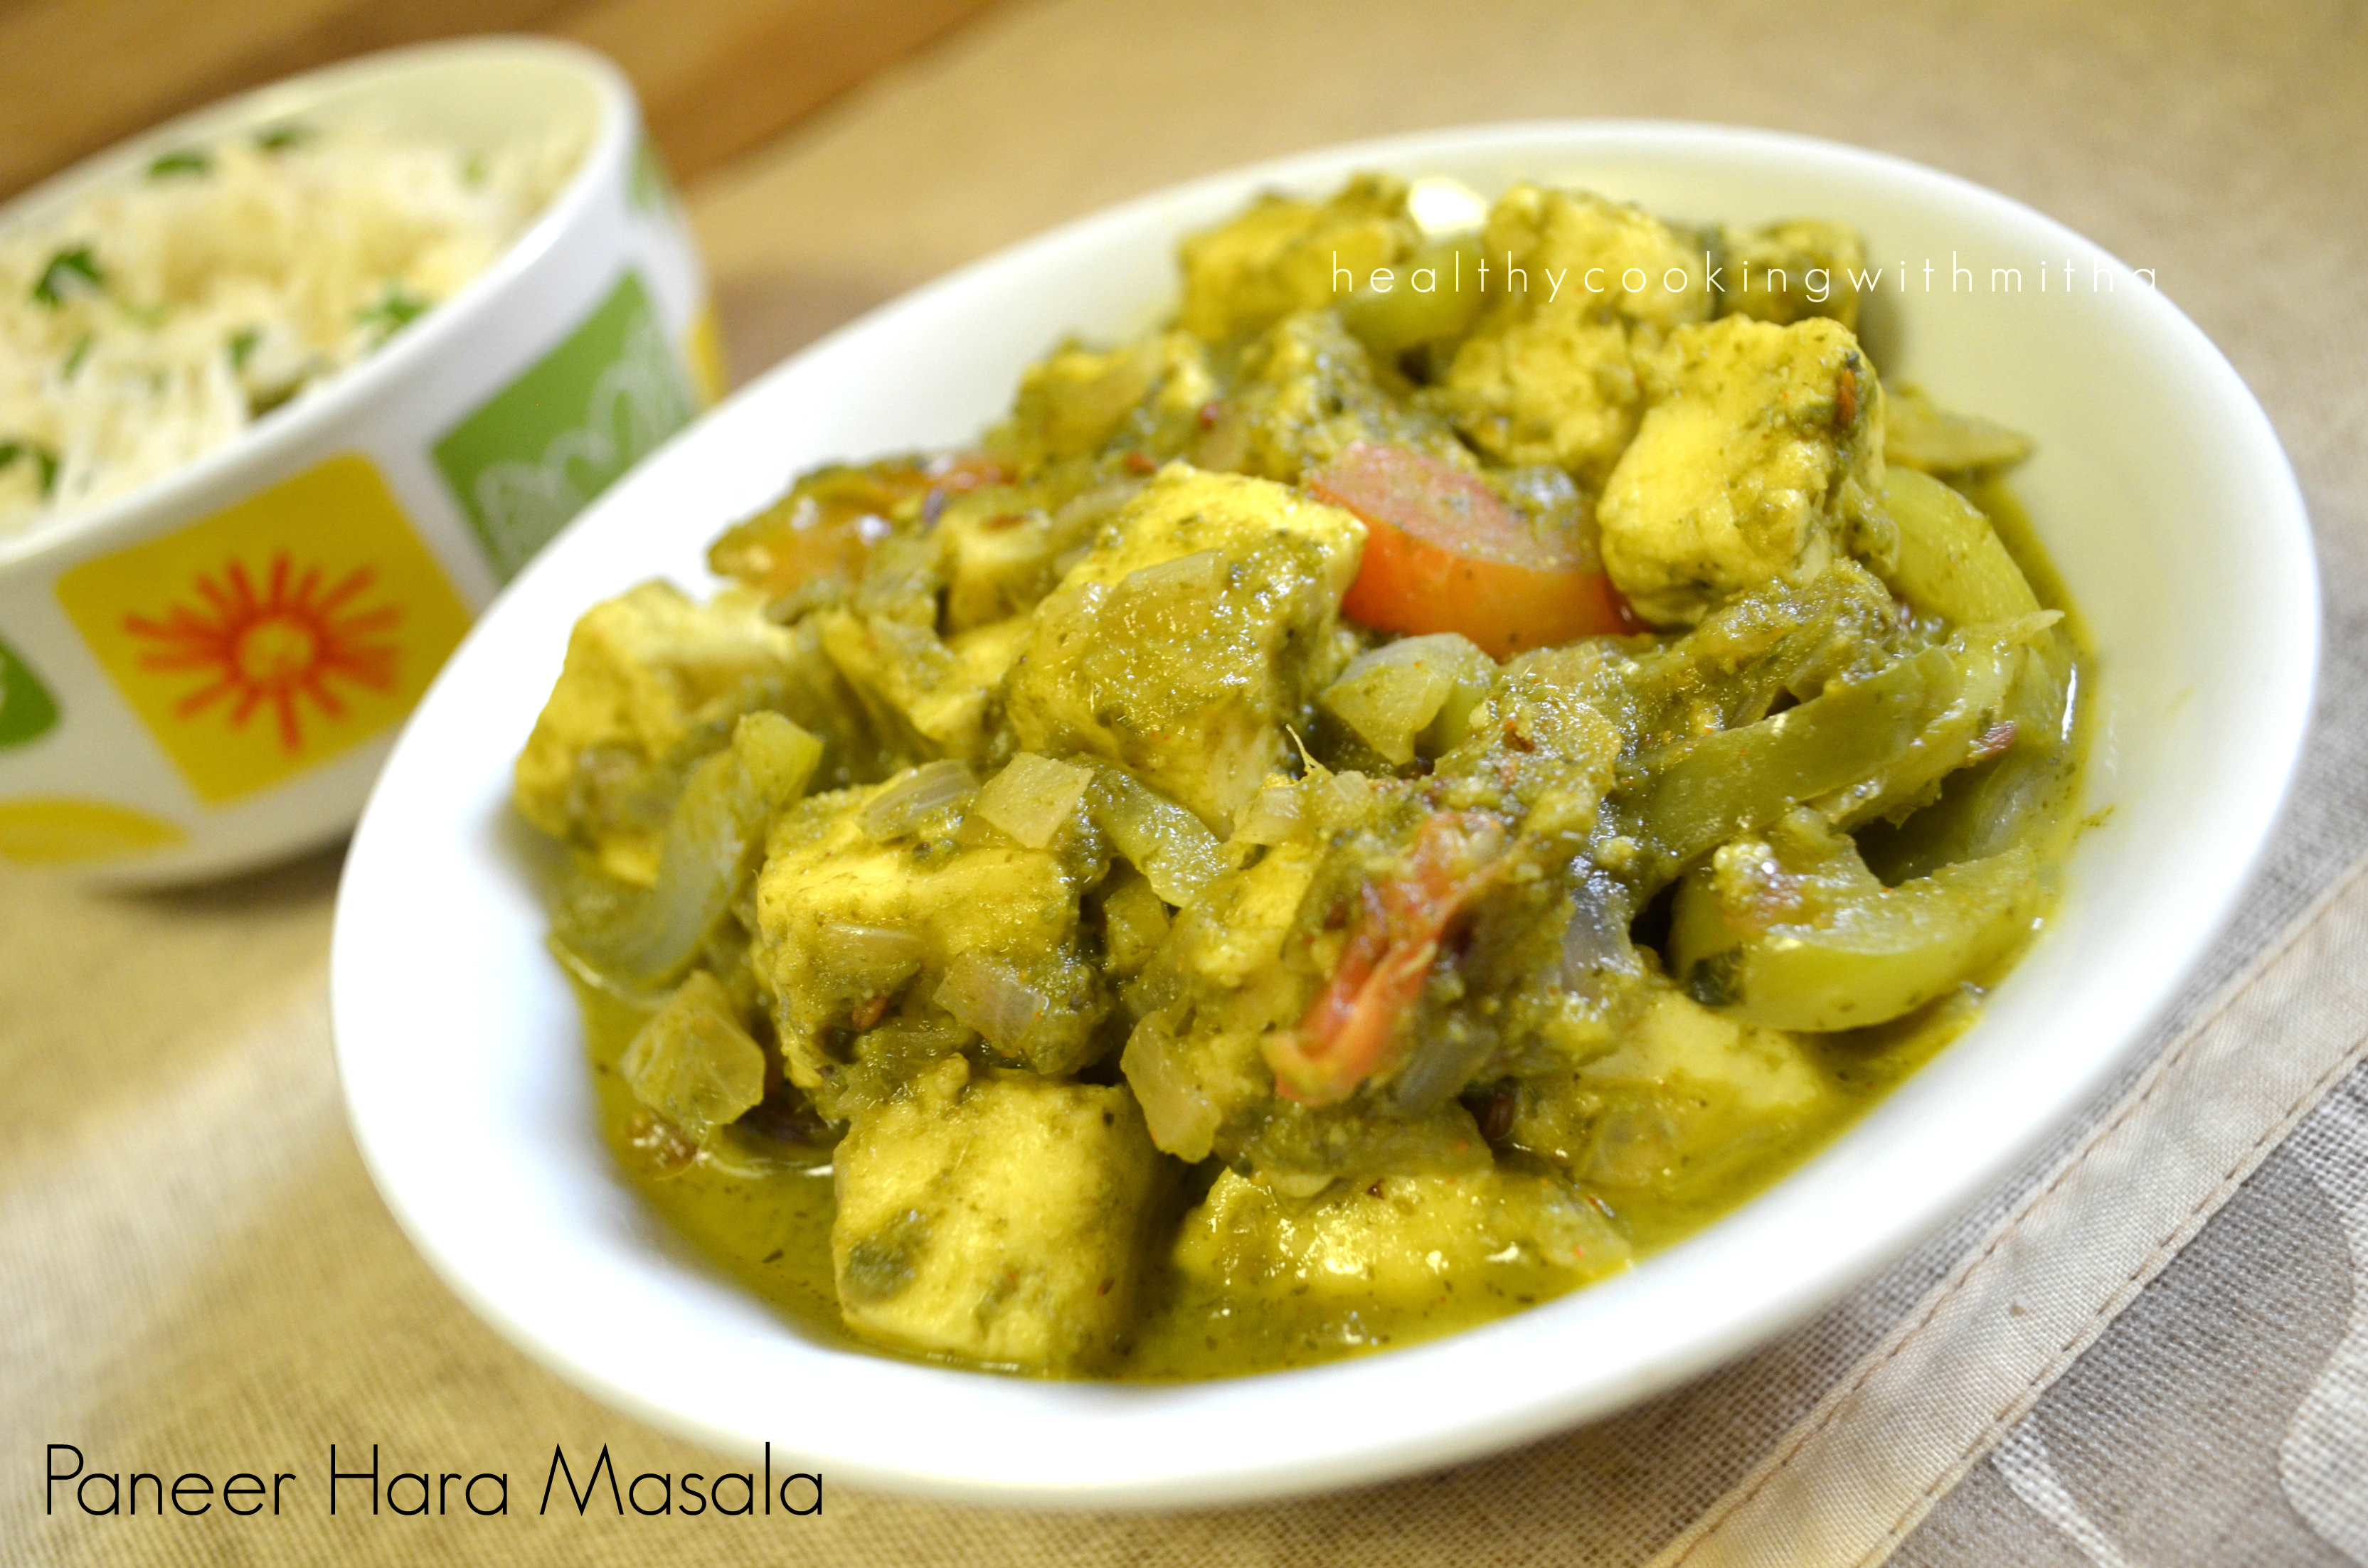
Anyhow this paneer Hara masala was an experiment with using the same masala that I use for Amma’s Carrot pulao since we love the aromatic masala paste. And it turned out super delicious. So was born paneer “Hara” masala, Hara meaning green in hindi.
Sharing this easy recipe with all you. Happy and healthy cooking!
RECIPE:
Ingredients:
200 grams Paneer cubes
1/2 Cup thinly sliced Capsicum
1/2 Cup roughly chopped Tomato
1/2 Cup finely chopped Onion
1 tsp Red chilli powder
1/2 tsp Garam masala powder
1 tsp Jeera/ cumin seeds
Salt to taste
1 Tbsp Oil/ Ghee
For the masala paste:
1/2 Cup Coriander leaves
1/4 Cup mint leaves
3 green chillies
3 cloves of Garlic
1/2 inch Ginger
Step by step paste:
1. Add the ingredients mentioned in the masala paste and grind to a smooth paste. Keep it aside.
2. Heat oil in a pan and add Jeera. Add chopped onions and fry till it turns translucent.
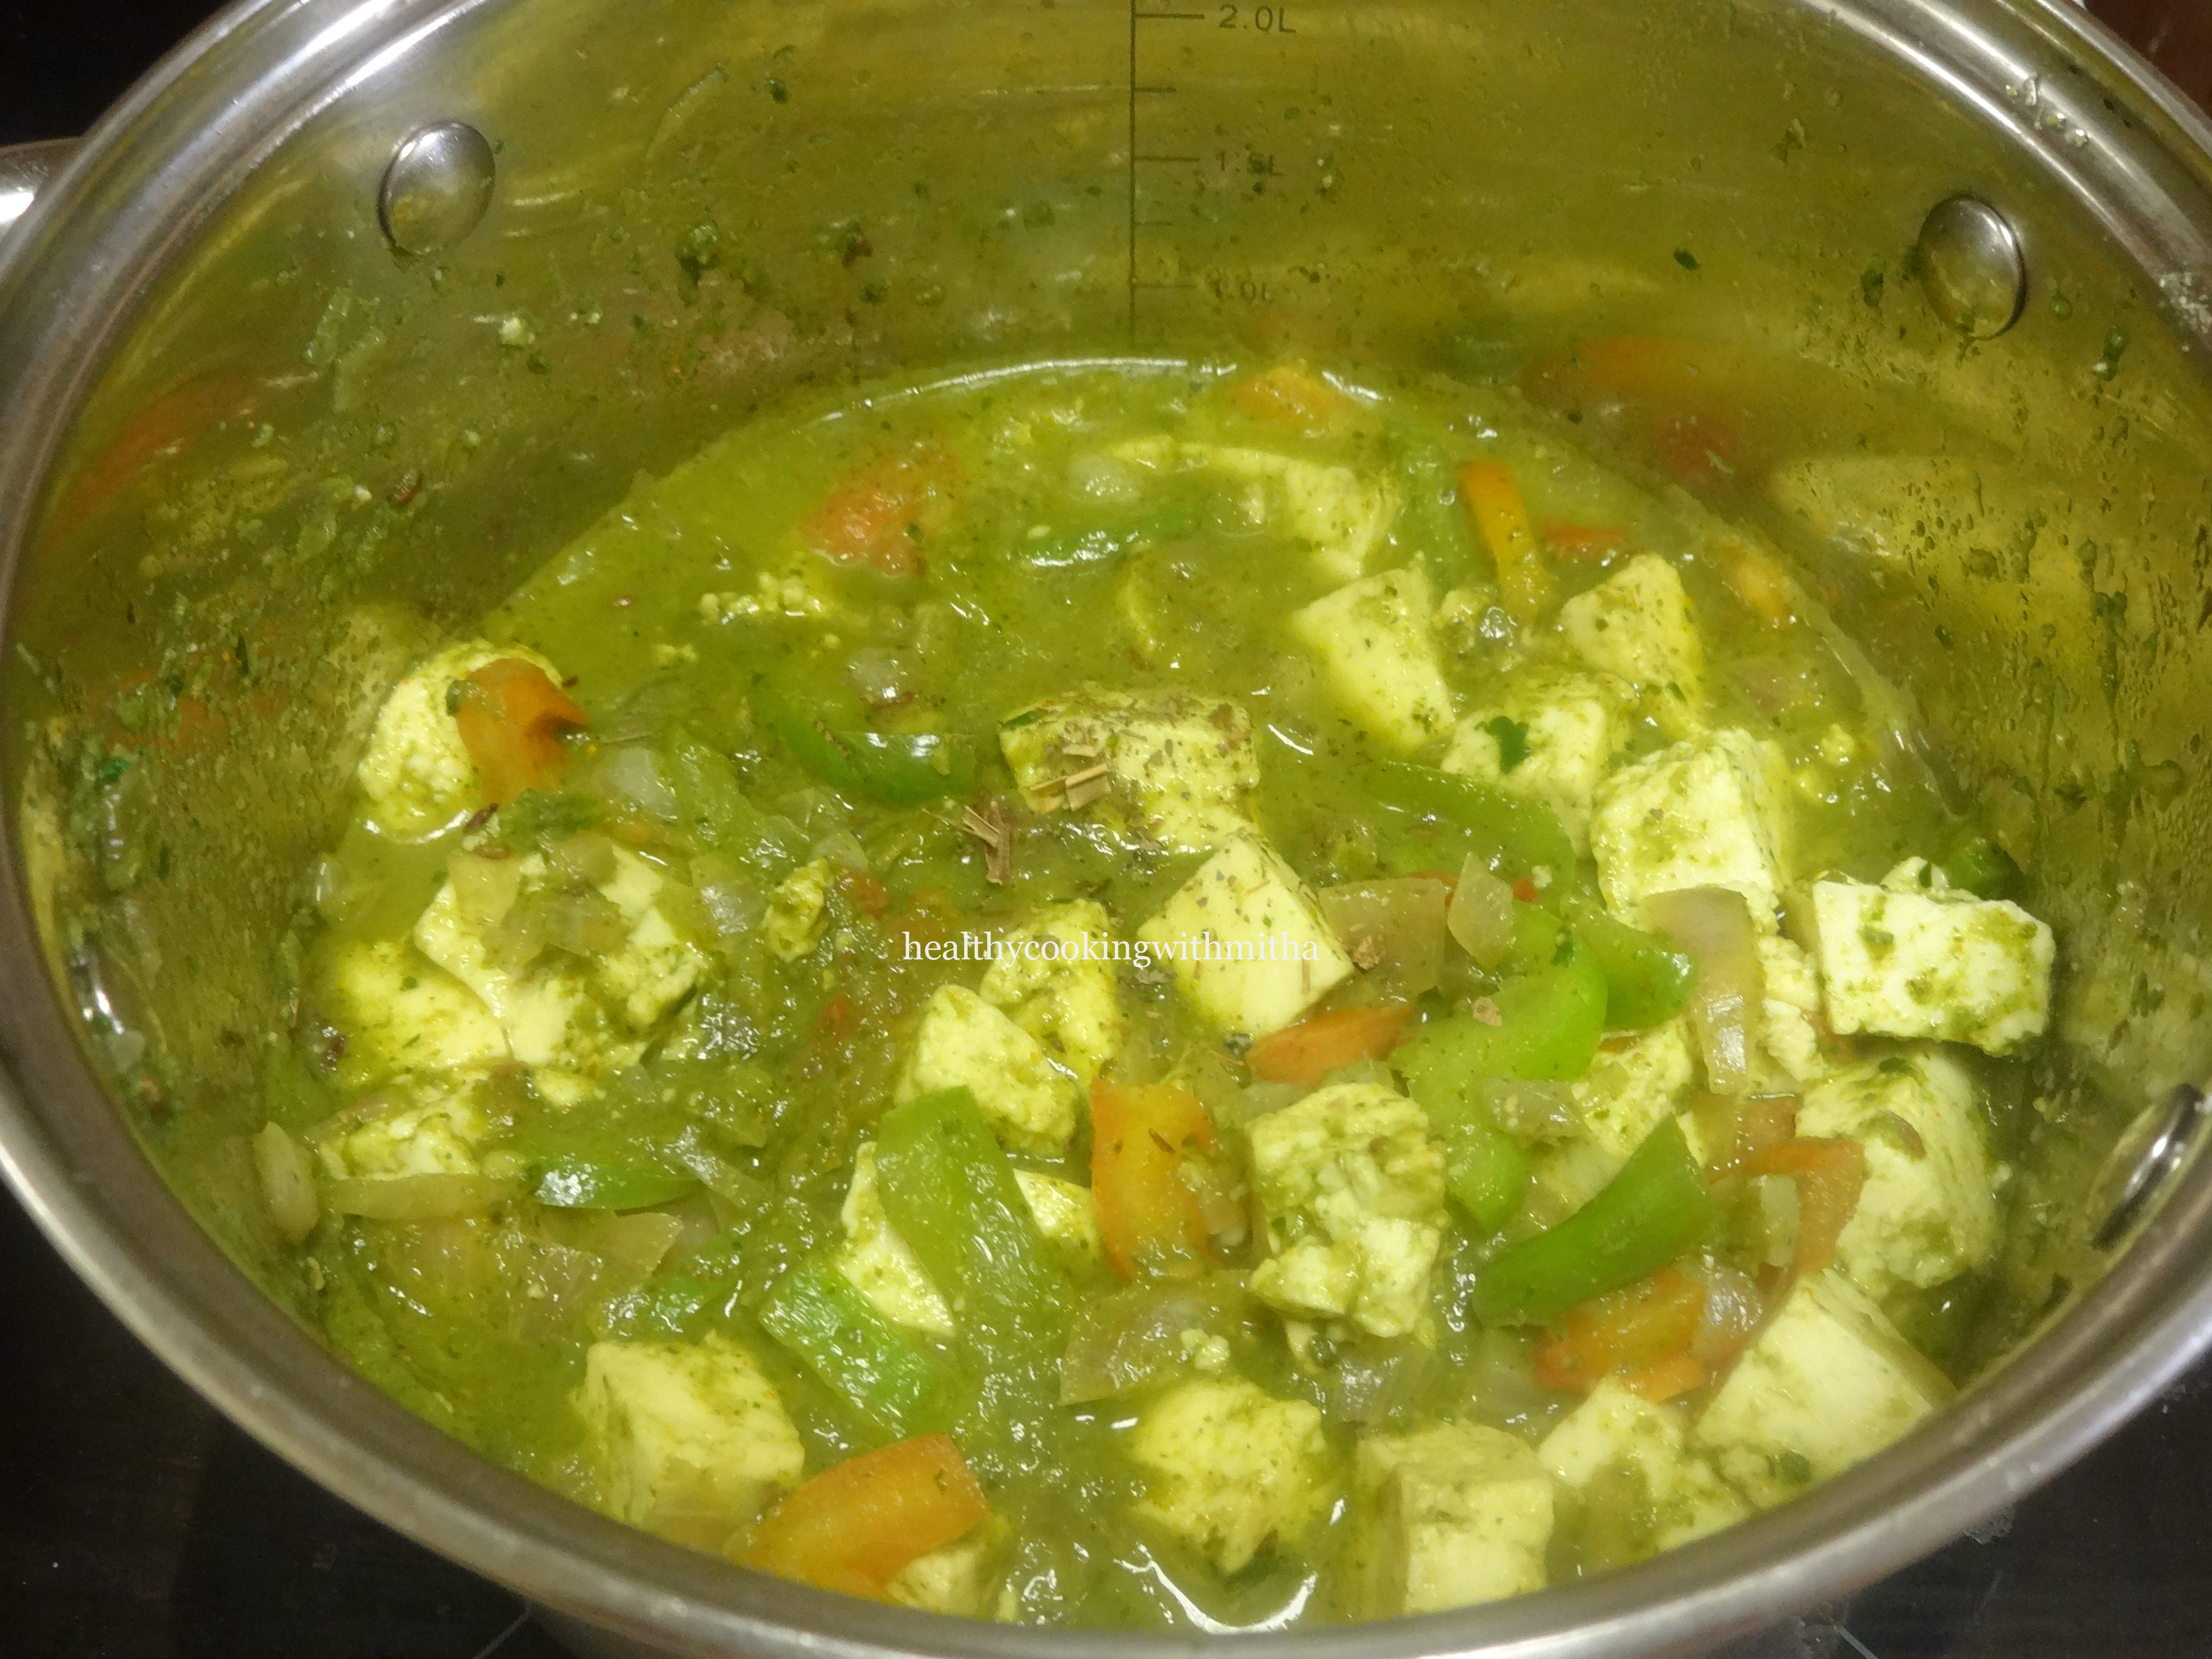
3. Add the ground masala paste and cook for few minutes till it turns dry.
3. Now add capsicum and tomatoes and mix well.
4. Now add red chilli powder and garam masala powder. Also add salt.
5. Add paneer cubes. Mix well. Cover and cook for 10 mins on medium flame.
6. Serve hot with rotis or rice.
Notes:
* You can skip mint leaves if you don’t have.
* If you like a slight crunch of capsicum, don’t cook it completely. If you don’t like it, you can cook till it turns soft or even skip it.
* Paneer can be substituted with mushrooms or cauliflower.
Pav Bhaji has to be one of my favourite chaats. I have so many memories of Pav bhaji eaten at various joints during our travels to Bangalore, Mumbai, Delhi, Shimla, Gujarat and even in Singapore. I have to try pav bhaji from every place we visit.
While there is Mr husband who loves the pav bhaji I make so much that he never orders them when we eat out and sticks to bhel puri.
Anyhow, ever since I learned how to bake perfect Wheat pav at home, we have hardly had them from outside. Pav bhaji with homemade wheat pav is not only healthy but turns out amazingly delicious. Since we are a paneer loving family, I take it a notch higher and make Paneer Pav Bhaji.
Hope you all try it and love it too. Nothing like homemade food ♥️ Happy and healthy cooking!
Ingredients:
1 Cup dry/ fresh/ frozen Green peas (dried ones need to be soaked overnight)
1 Cup Cauliflower florets
1 medium sized Potato
1/2 Cup roughly chopped Carrot
2 Tbsp Butter
1 inch Ginger piece
3 cloves of Garlic
3 Green chillies
1 medium sized Onion
1/4 Cup finely chopped Capsicum
1 medium sized Tomato
1 tsp Red chilli powder or to taste
2 Tbsp Pav Bhaji Masala powder
1 Cup Paneer, cut into small cubes
4 Tbsp Coriander leaves
Salt to taste
1 tsp Lemon juice
For toppings, finely chopped onions, coriander leaves, lemon wedges, butter.
Step by step recipe:
1. Take peas, cauliflower, potato and carrot in a pressure cooker. Pressure cook till very soft.
2. Mash using a potato masher or a ladle till there are no big chunks of veggies. Keep aside.
3. Heat a pan with butter. Add finely chopped ginger, garlic and green chillies. Saute till they give out an aroma.
4. Add finely chopped onion. Fry till it turns translucent.
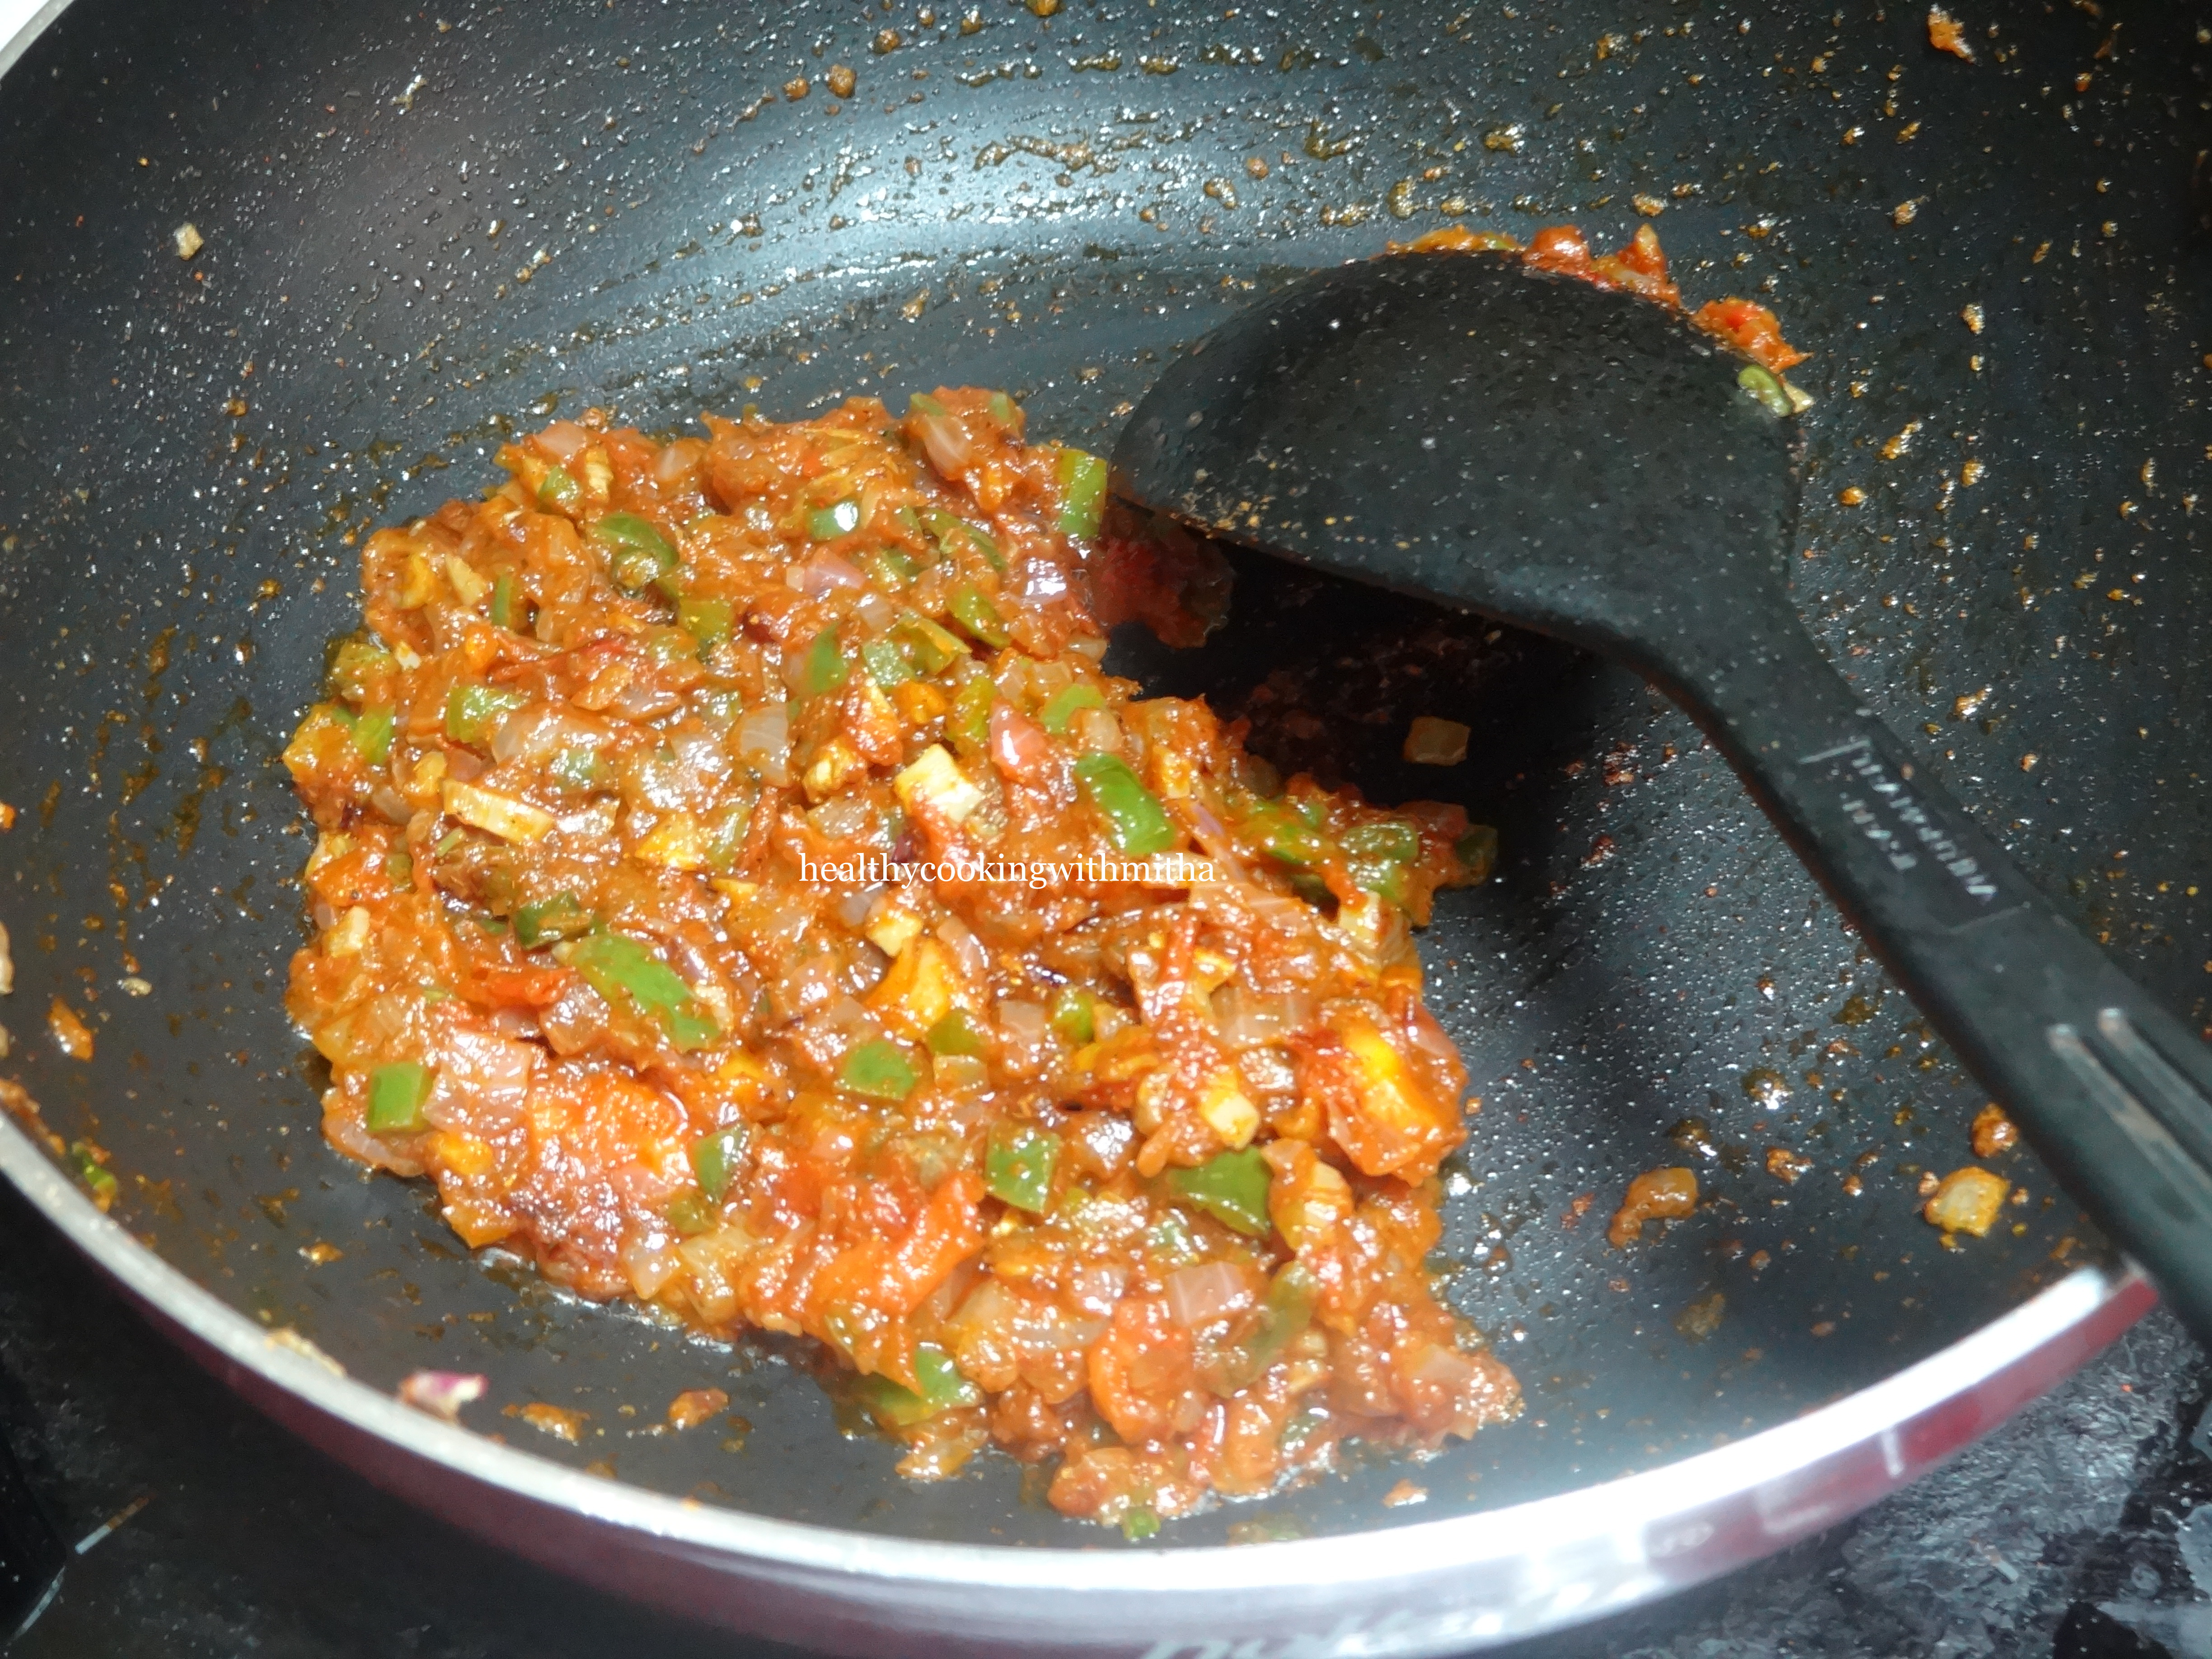
5. Add finely capsicum and fry for few seconds.
6. Add tomatoes and cook well.
7. Now add pav bhaji masala powder and red chilli powder. Fry till all water evaporates and the mixture turns out dry as shown.
8. Now add the mashed veggies and mix well. Add little water if the mixture is too dry. Allow it to come to a boil.
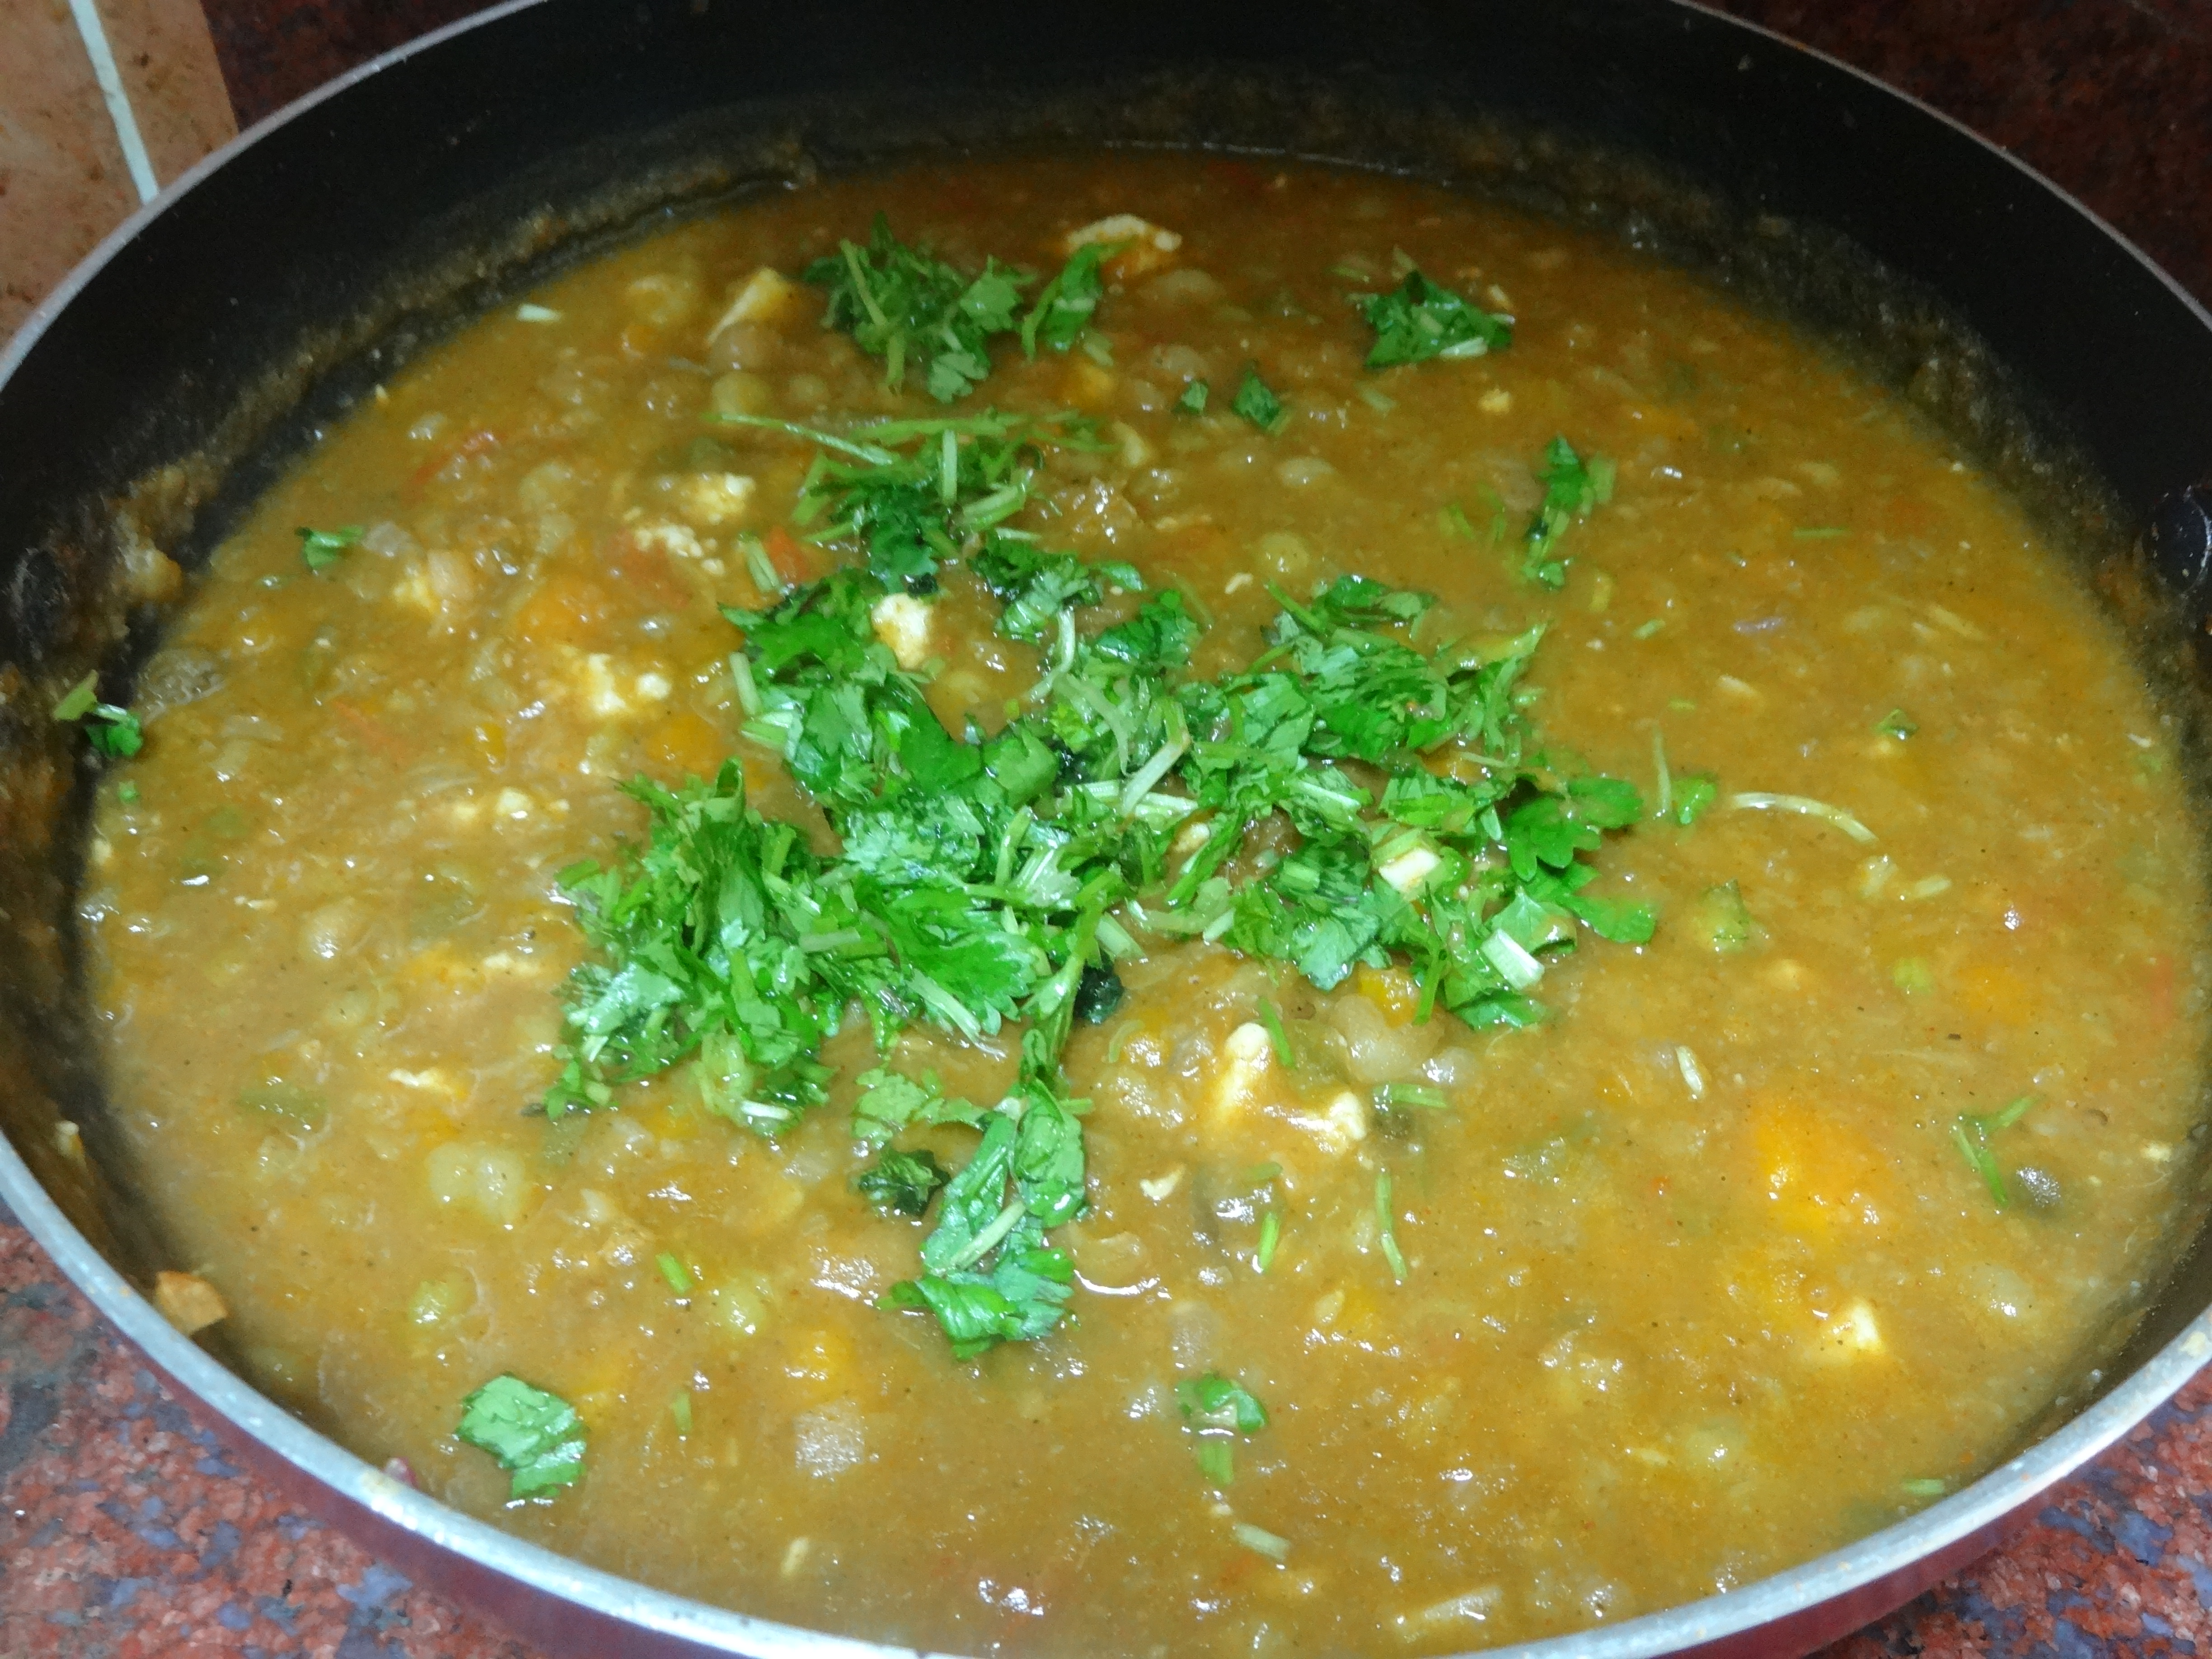
9. Add paneer cubes along with salt and cook for 5 more mins. After that, check for spices if needed. Add more pav bhaji masala or red chilli powder if needed.
10. Now add lemon juice and coriander leaves. Mix well. Done.
11. Serve along with pav and top with onions, coriander leaves and lemon wedges. Add more butter on top.
Notes:
* You can skip paneer and make regular pav bhaji if you don’t like it but paneer Pav Bhaji is a delight for paneer lovers.
* Pav bhaji masala can be added as desired as per your taste buds. If unavailable, you can add any garam masala powder.
* Cook the veggies really well for a smooth texture of pav bhaji.
* Butter gives a wonderful flavour. So I recommend using butter to cook.
I am actually a non vegetarian turned into vegetarian post marriage ( ie since 9 years now). People ask me how can I even turn just like that and don’t I crave for it. The truth is I was not much fan of chicken or fish even before marriage. So it was not much difficult to leave it completely.
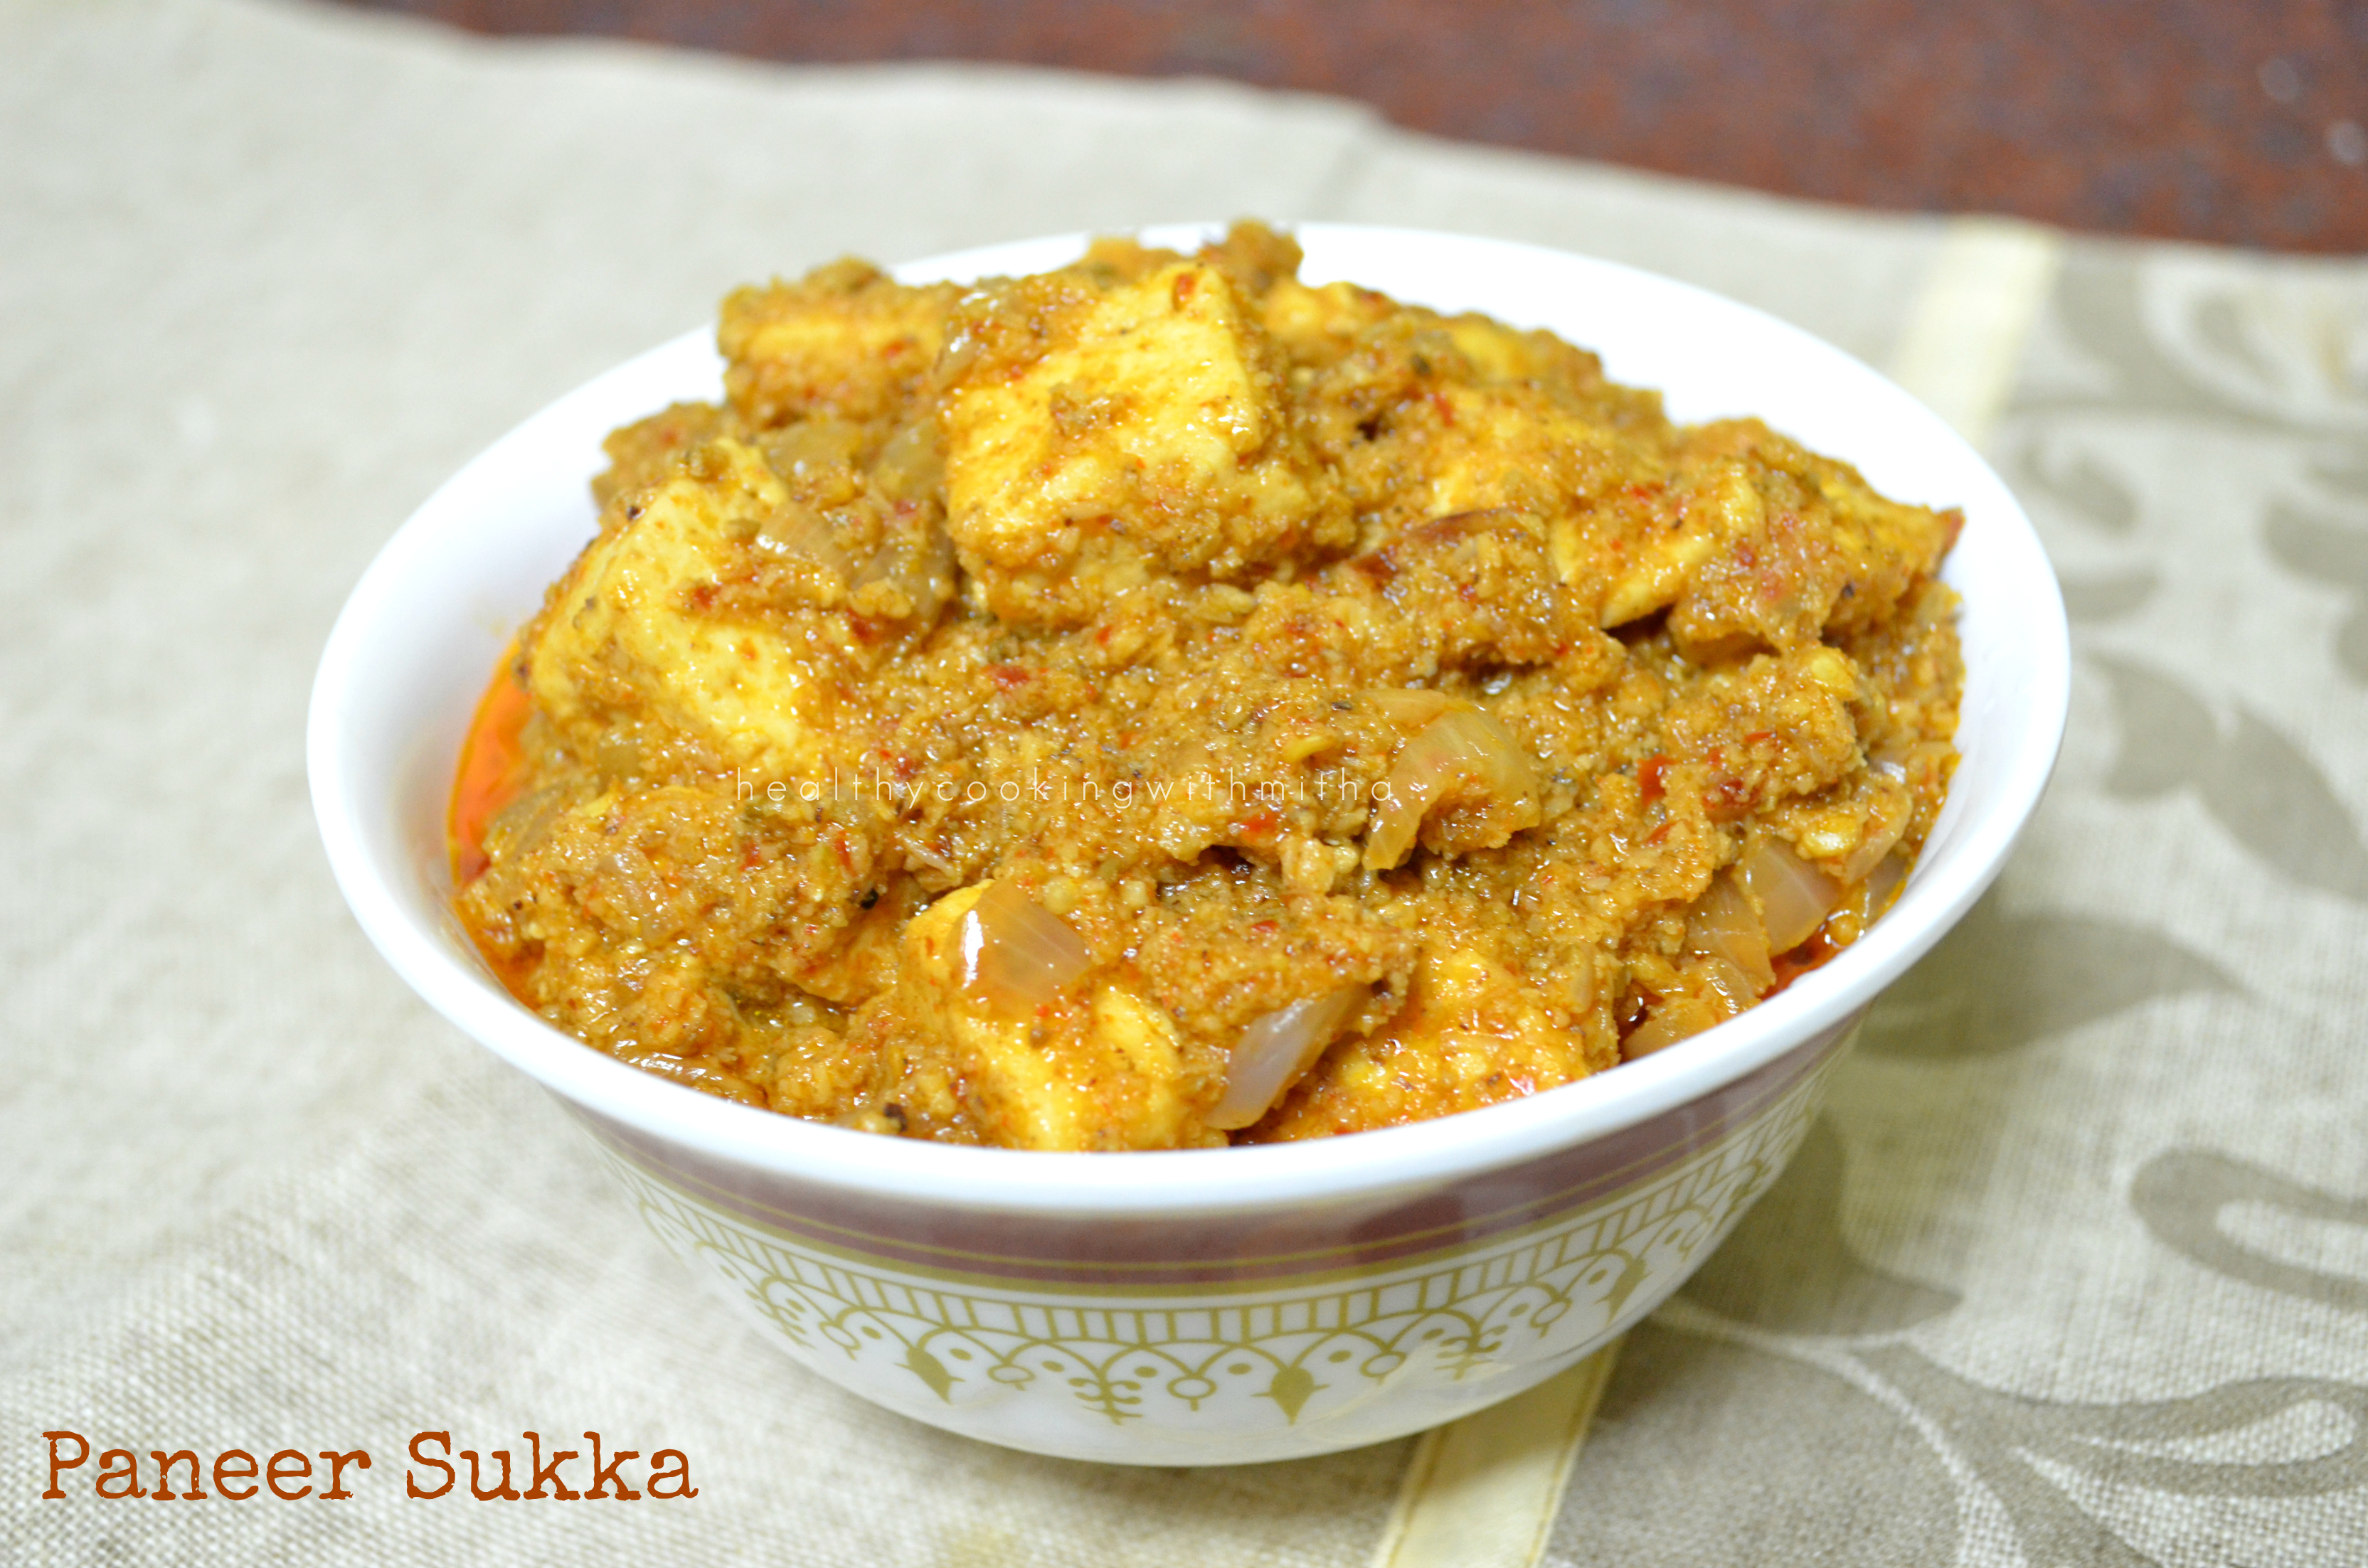
But there are some dishes that I loved in non veg especially the gravy and one of them is the south Karnataka speciality Chicken sukka. I remember how my aunt Shaila mhave used to ask a person who was an expert in making it to make specially for us when we visited her. The flavours of the gravy is unforgettable.
So after marriage, when I craved for it, I tried to recreate it and added the vegetarian favourite Paneer. My husband is a huge paneer lover and can eat it everyday. 😂 So was Paneer sukka born in my kitchen and we love it with Matta rice meal.
Hope you all try and love it too. Happy and healthy cooking!
RECIPE:
Ingredients:
200 gms Paneer cubes
1 large Onion
1 tsp red chilli powder
1/2 tsp garam masala powder
Salt to taste
2 tsp Oil
For the masala paste:
1 Cup fresh/ desiccated coconut
3 Kashmiri red chillies
1 tsp Coriander seeds (to be roasted)
2 tsp Cumin seeds (to be roasted)
Step by step recipe:
1. Heat a pan and dry roast coriander and cumin seeds for couple of minutes till it gives out an aroma.
2. Take coconut, red chillies in a mixer and add the roasted coriander- cumin to this.
3. Grind with water to a slightly coarse paste adding little water.
Note: Don’t add a lot of water. Also don’t make a fine paste.
4. Heat oil in pan and add finely chopped Onion. Fry till translucent.
5. Now add the ground paste.
6. Also add red chilli powder, garam masala powder with salt.
7. Cook till the mixture dries off which can take around 10 mins.
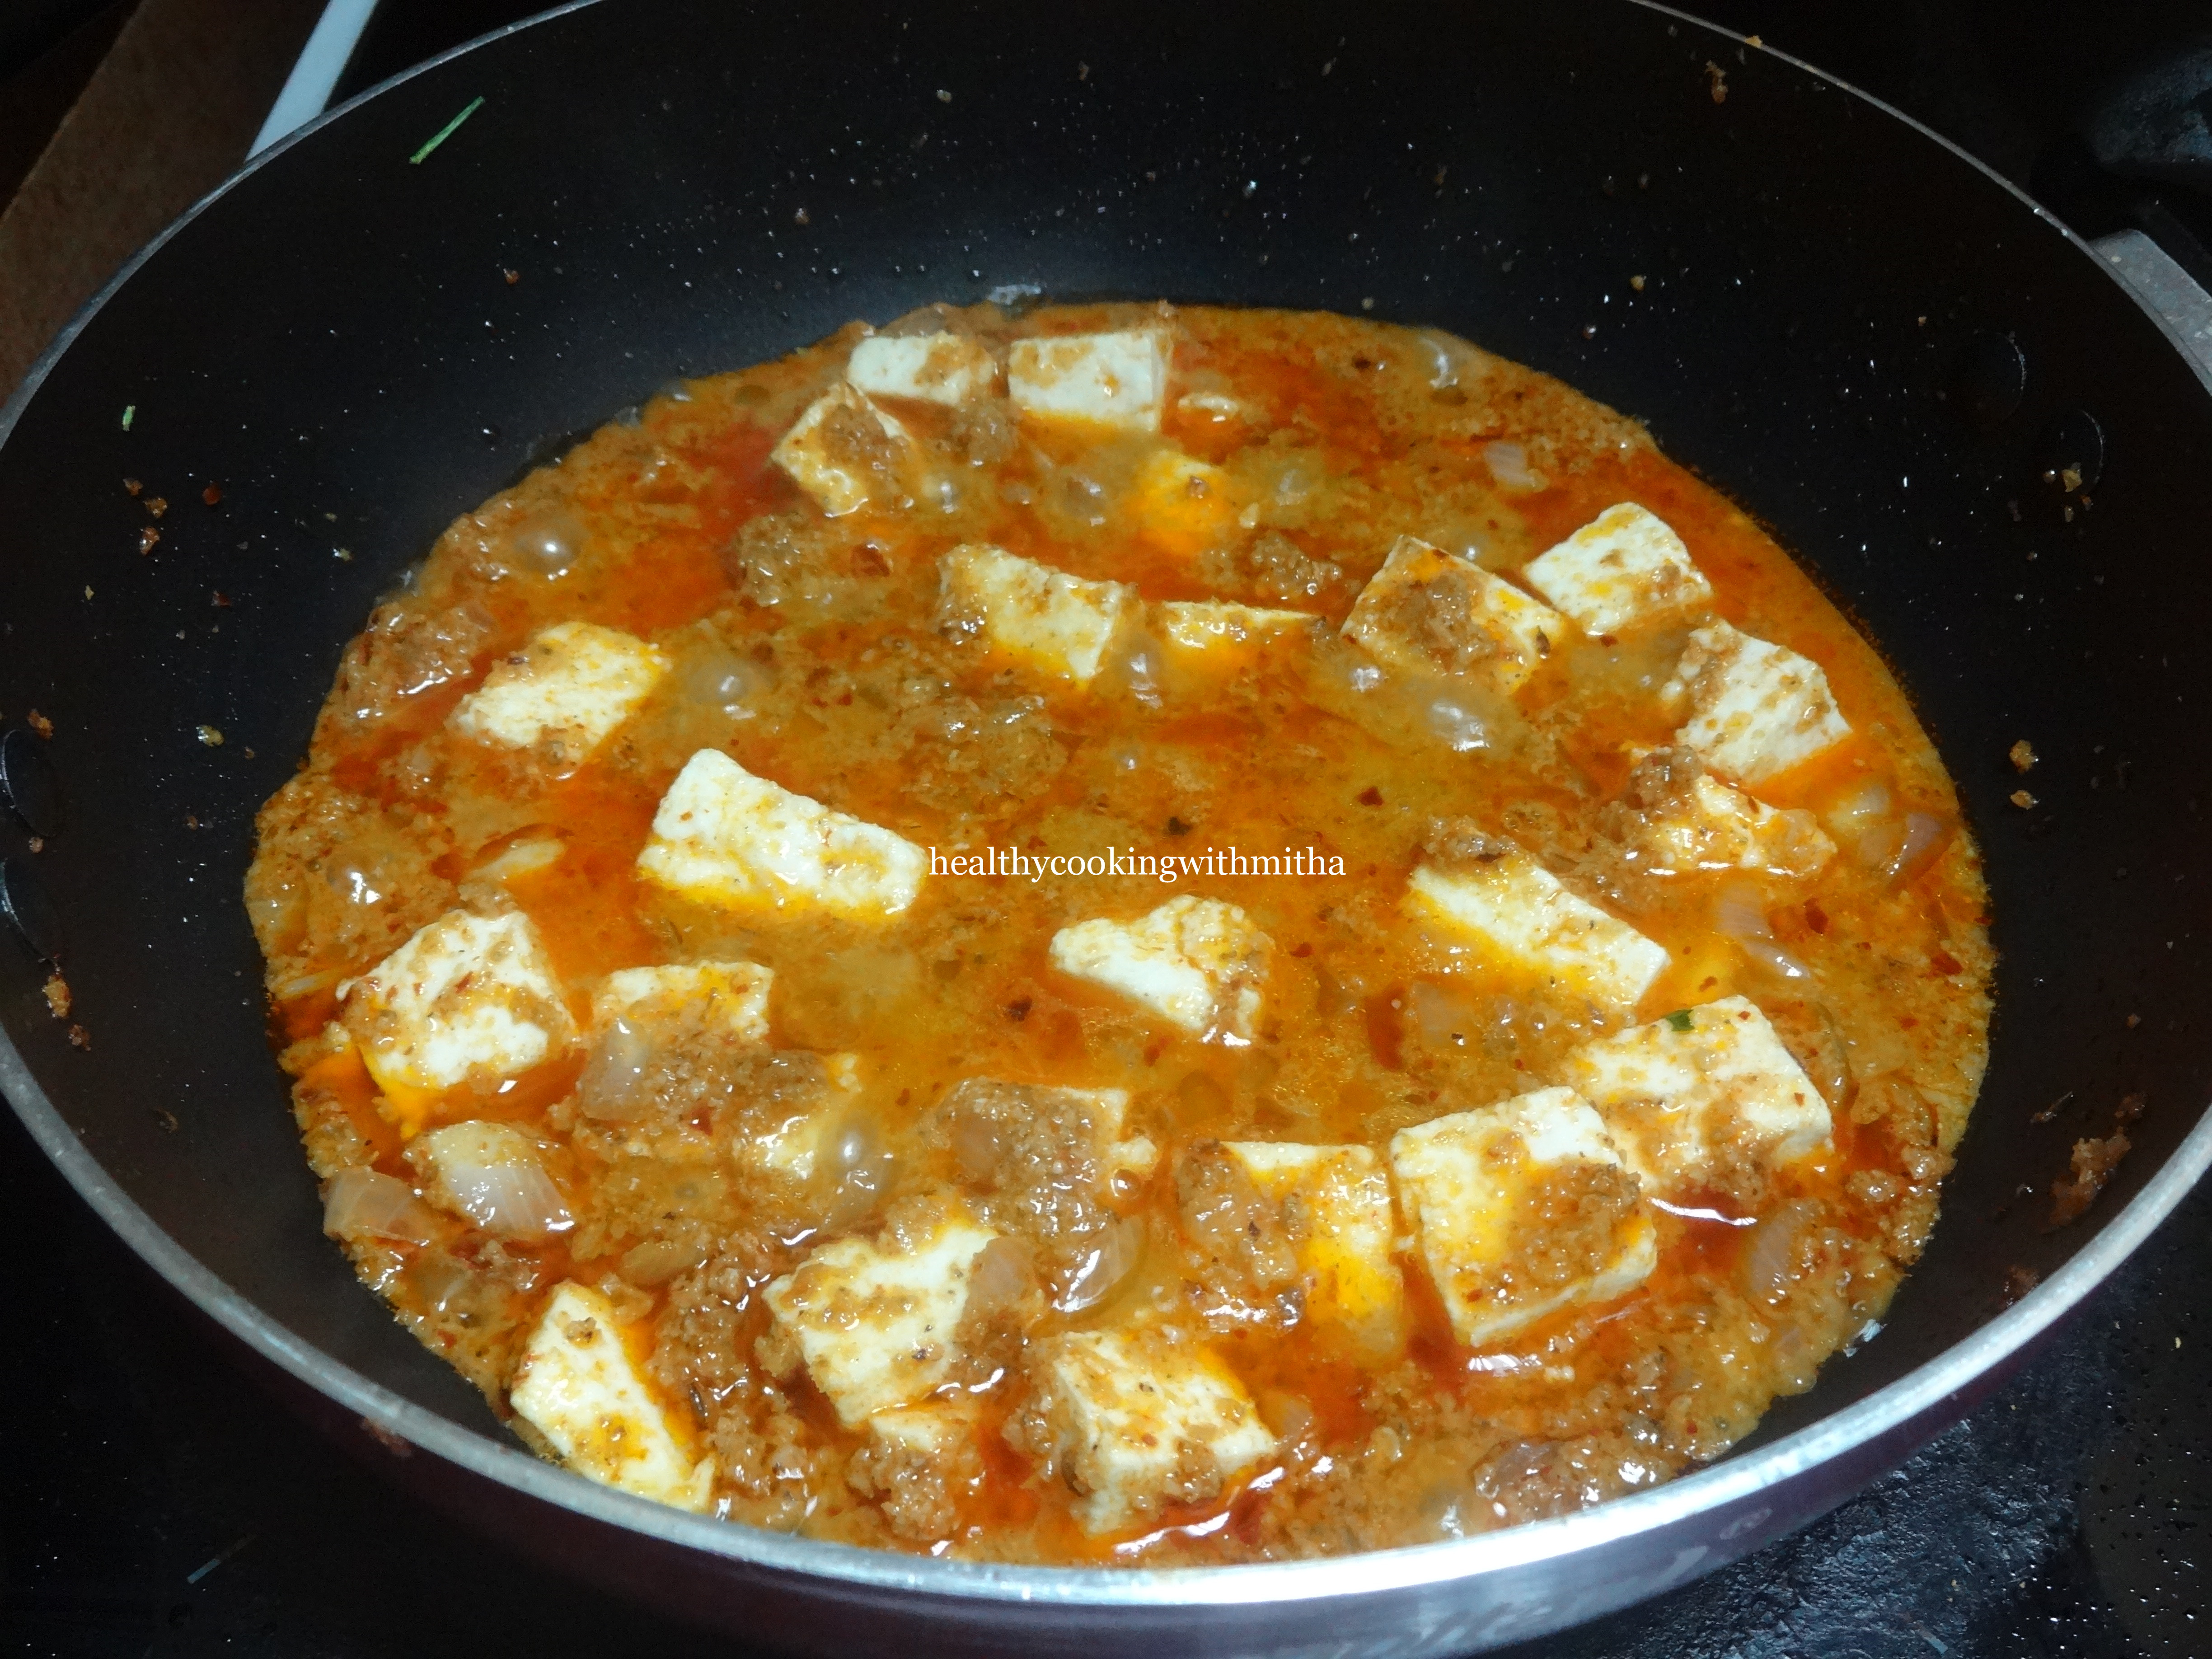
8. Now add paneer cubes with little water and allow to come to a boil.
9. Now put the flame on medium and cook till the mixture turns dry.
10. Paneer sukka is ready to be served with rotis, rice or Neeru dosas.
Notes:
* Paneer can be substituted with mushrooms or cauliflower too.
* The main part of this curry is to grind the paste slightly coarse and also to cook the paste well till it turns dry.
* If your red chillies are spicy, you can skip the red chilli powder.
Advertisements
Join me in my journey with a foodie husband and hungry kiddos while I make them eat healthy!