Tag Archives: Kerala recipes

Appam with Kadala curry | Kerala breakfast recipe

Click on the picture to save the recipe on Pinterest

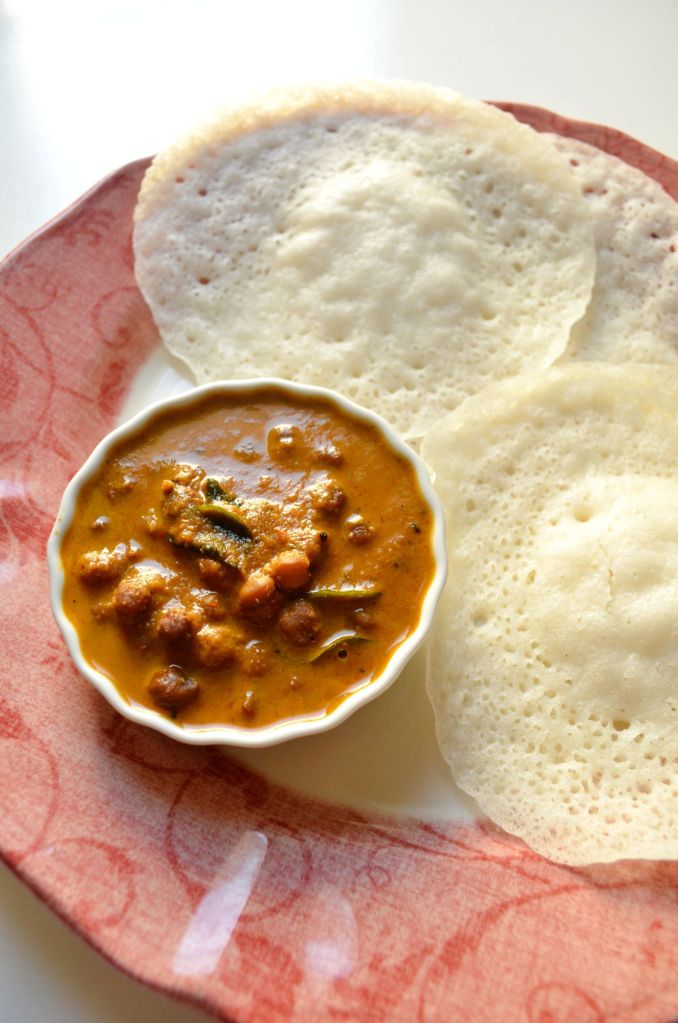
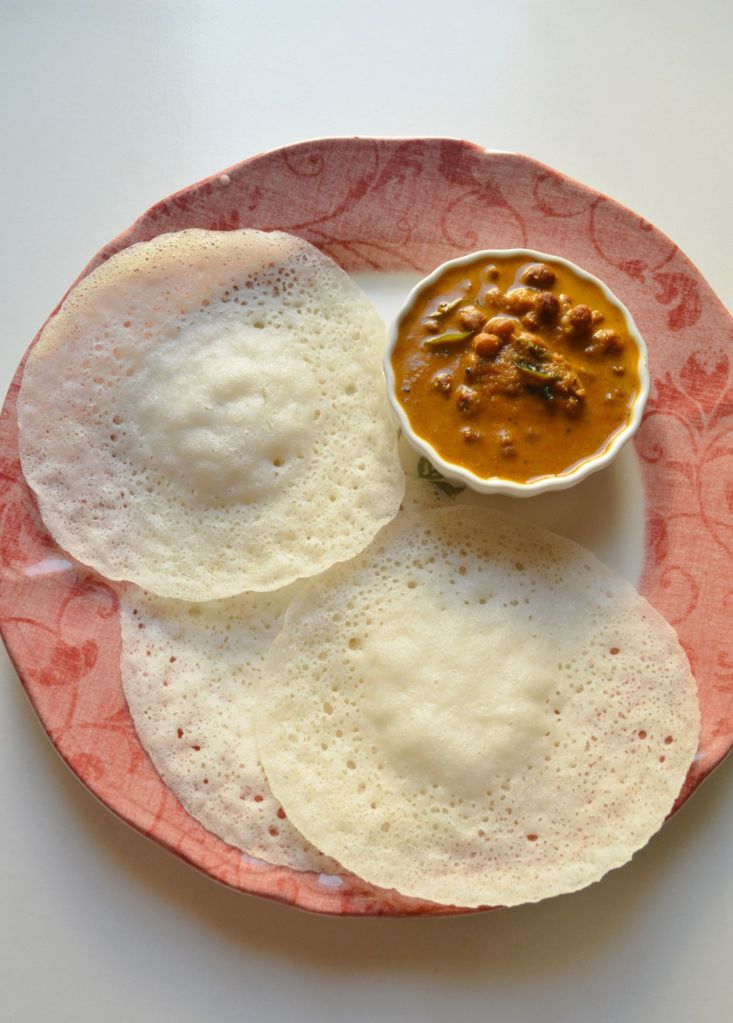
My mouth waters looking at the picture above even as I type this. That much I love Appam and Kadala curry. It’s one of my favorite breakfast combination and I feel very happy each time I make it.. Happy that finally I have learned to make perfect appam and a delicious tasting Kadala curry at home.

Growing up in Kerala, I have enjoyed Kadala curry with puttu, porotta and appams. My dad used to bring it as a treat from little hotels called thattu kadas and we used to relish it like anything. But I never thought I would learn to make it at home.

Over the years, I have tried many methods but finally with this one way, it comes out perfectly each time and I have stuck to it now. My kids love it a lot too. So I make it atleast once a week.

Sharing the recipe for those who want to make appams at home too. Hope you all try and love it. Happy and healthy cooking ❤️

RECIPE:

Ingredients:

1 Cup = 240 ml

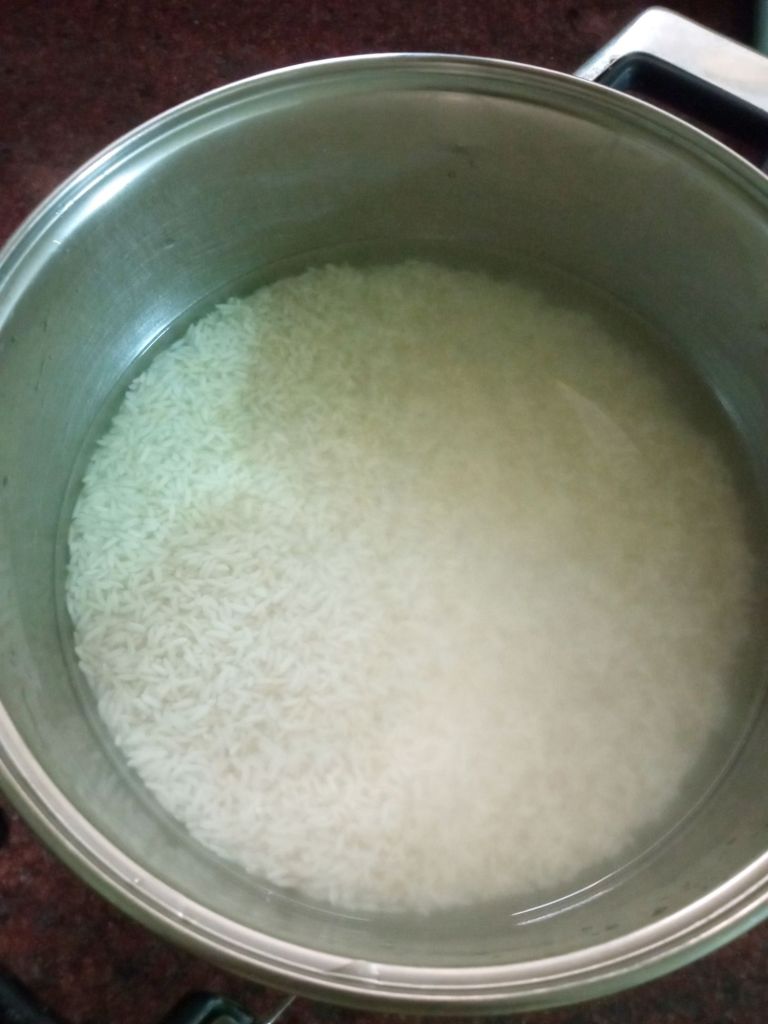
2 Cups White Raw rice

1/2 Cup thick Poha/ Aval/ flattened rice

1/2 Cup Coconut (desiccated or fresh)

1 Tbsp Sugar

1/4 tsp Instant yeast

Salt to taste

Step by step recipe:

  1. Wash well and soak raw rice in double the water for atleast 4 hours.

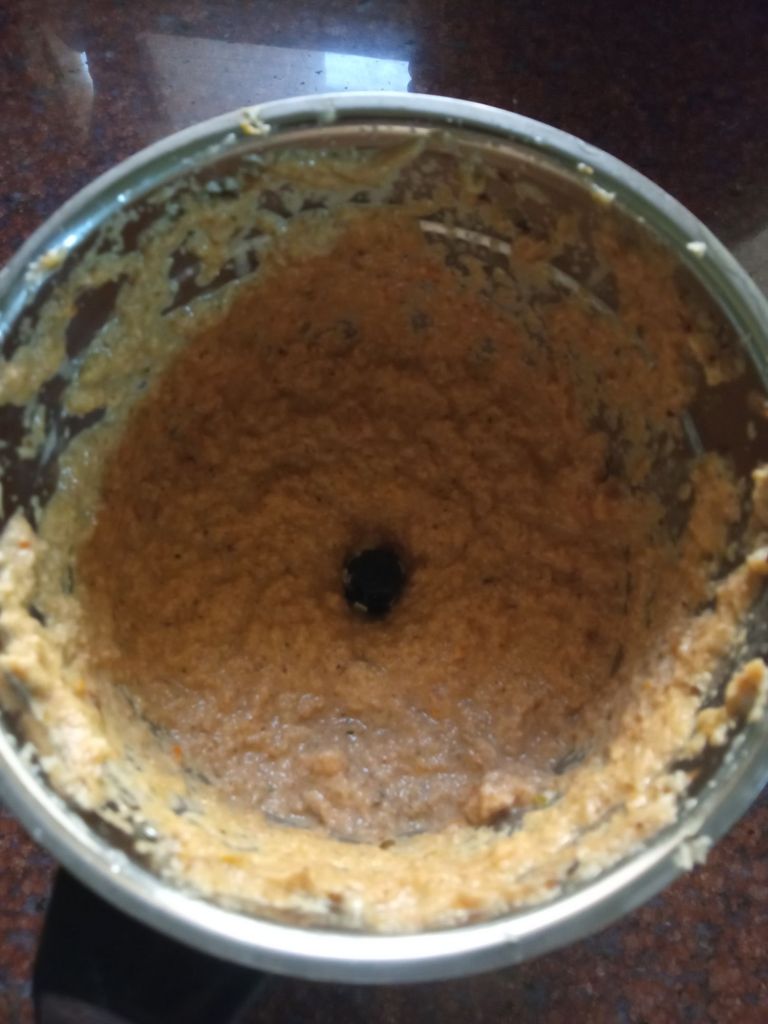
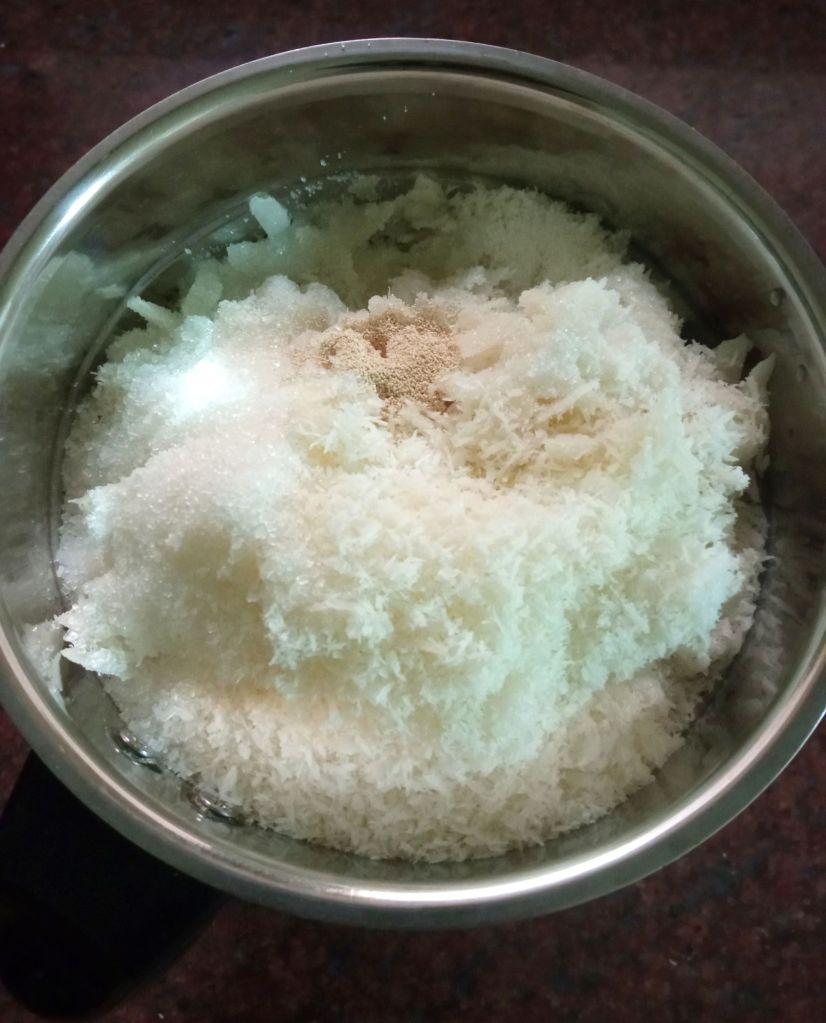
2. Once soaked, drain all the excess water and add to a mixer jar along with washed poha, coconut, sugar, salt and yeast.

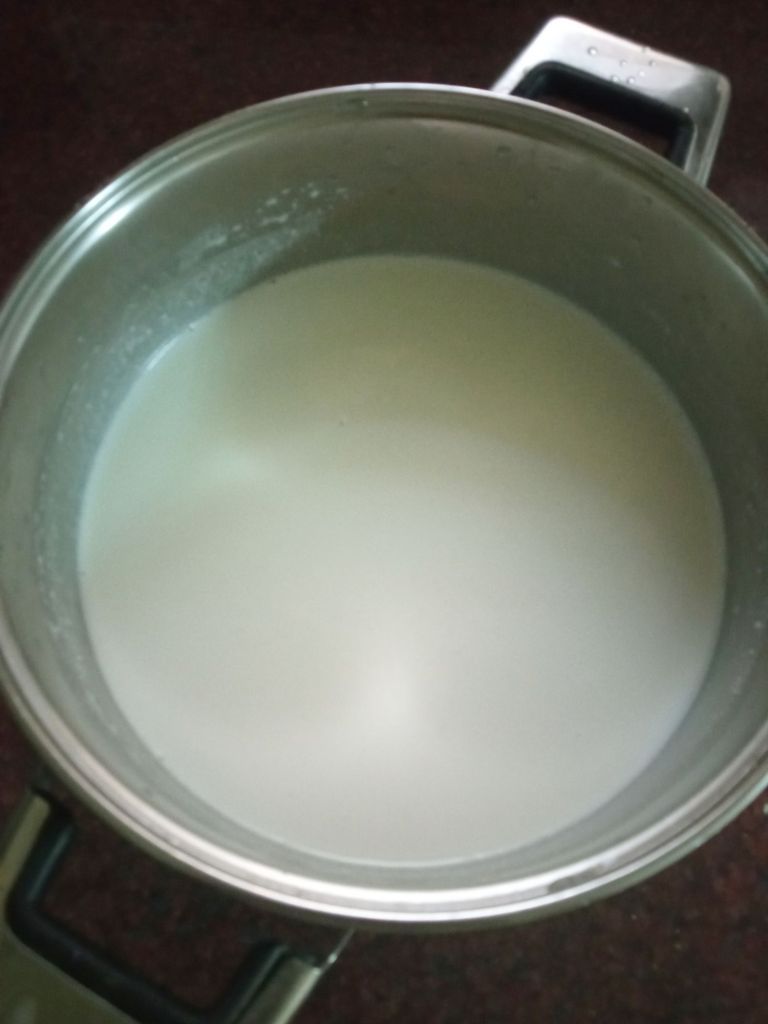
3. Add water as needed and grind to a smooth paste.

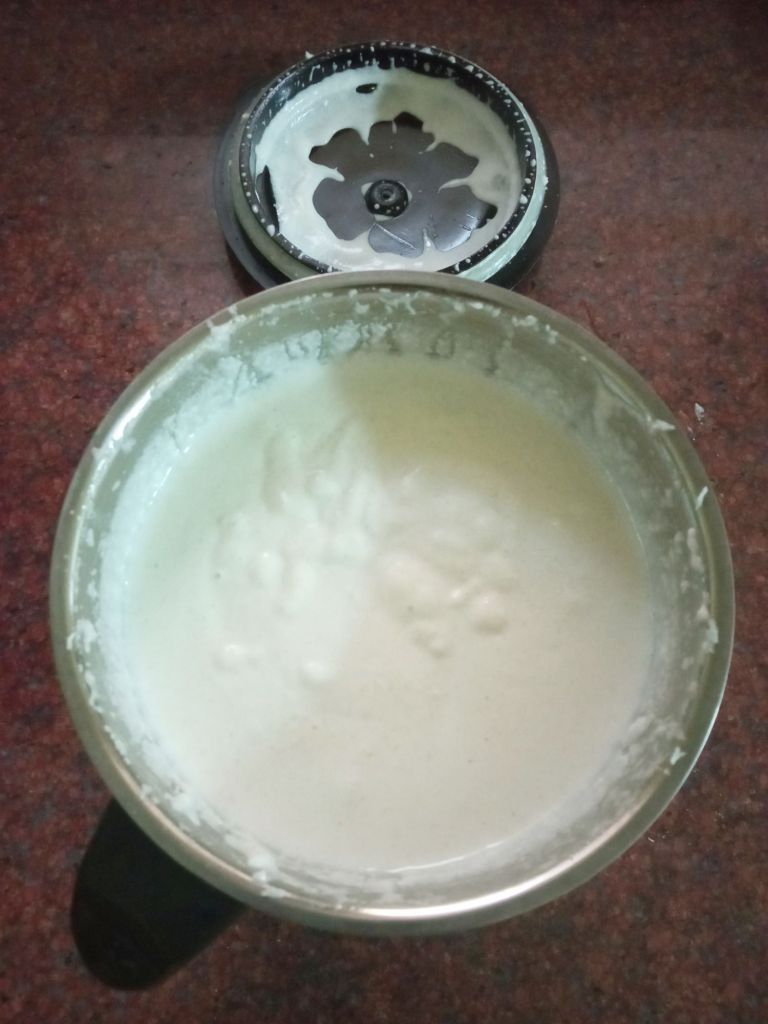
4. Now, add to a large vessel and make the batter to a consistency slightly thinner than Dosa batter. It should not be thick like dosa batter as it won’t spread well on the appam pan. Should be of free flowing consistency.

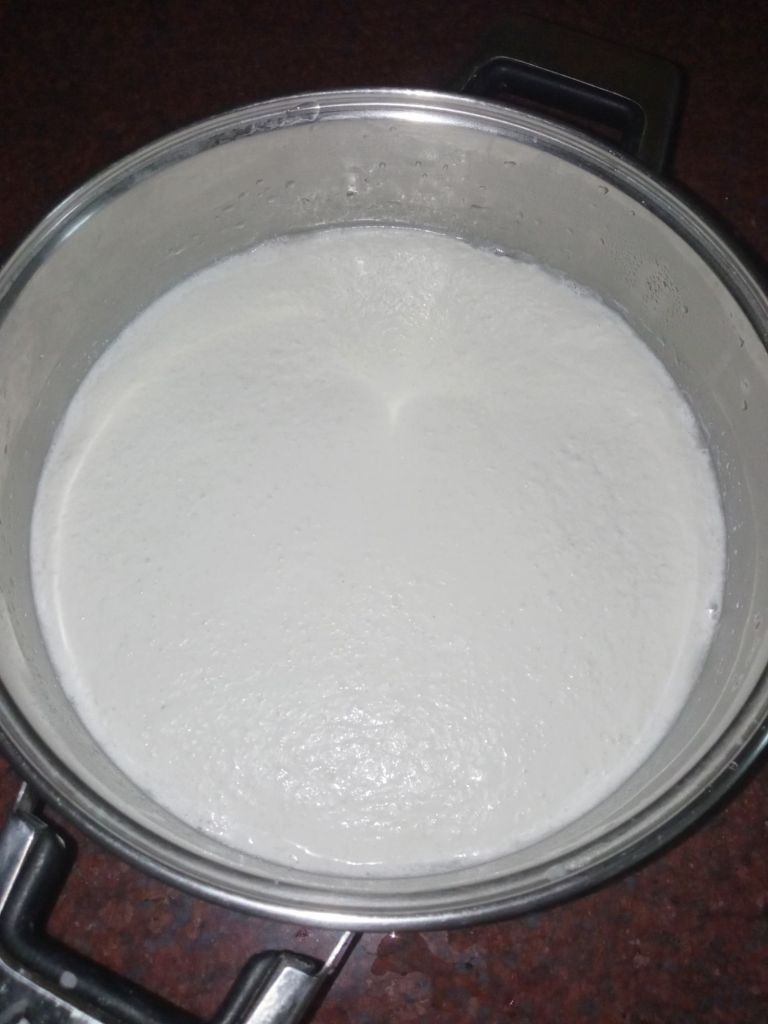
5. Now keep it covered in a warm place for 4 to 6 hours. In warm climate, the batter ferments very quickly but in cold climate, it takes 6 hours to ferment. The batter will rise as shown and you can get the fermented aroma.

6. I refrigerate the batter after this for next day morning breakfast. I soak rice in the morning, grind by noon and allow it to ferment till night. Then I refrigerate.

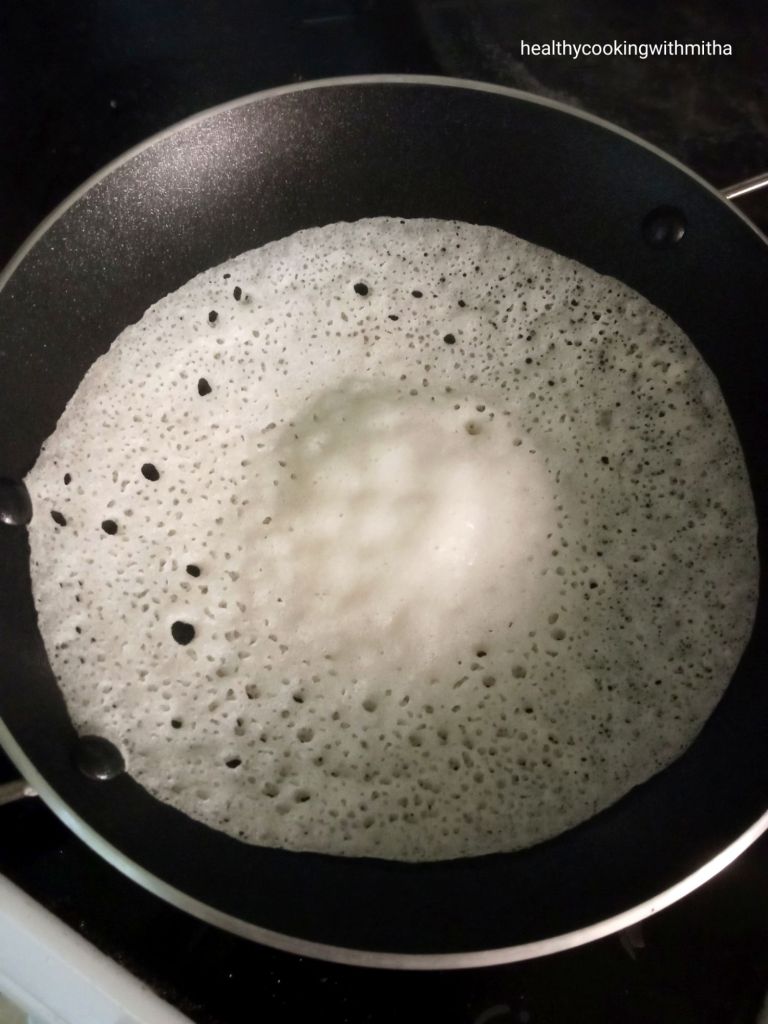
You can make appams as soon as the batter ferments. Just heat the appam pan and pour a ladle of batter in the center.

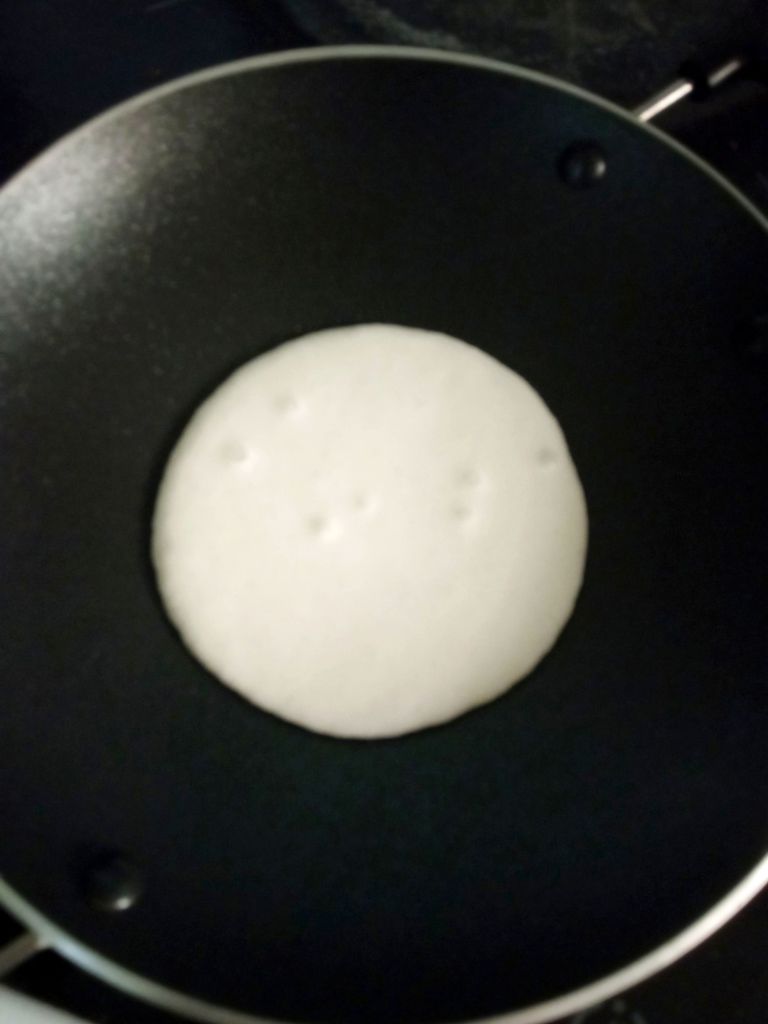
7. Now hold the pan handles and turn it in anti clockwise direction such that the batter spreads in a circle too. Center will have more batter and sides will be thin for appam.

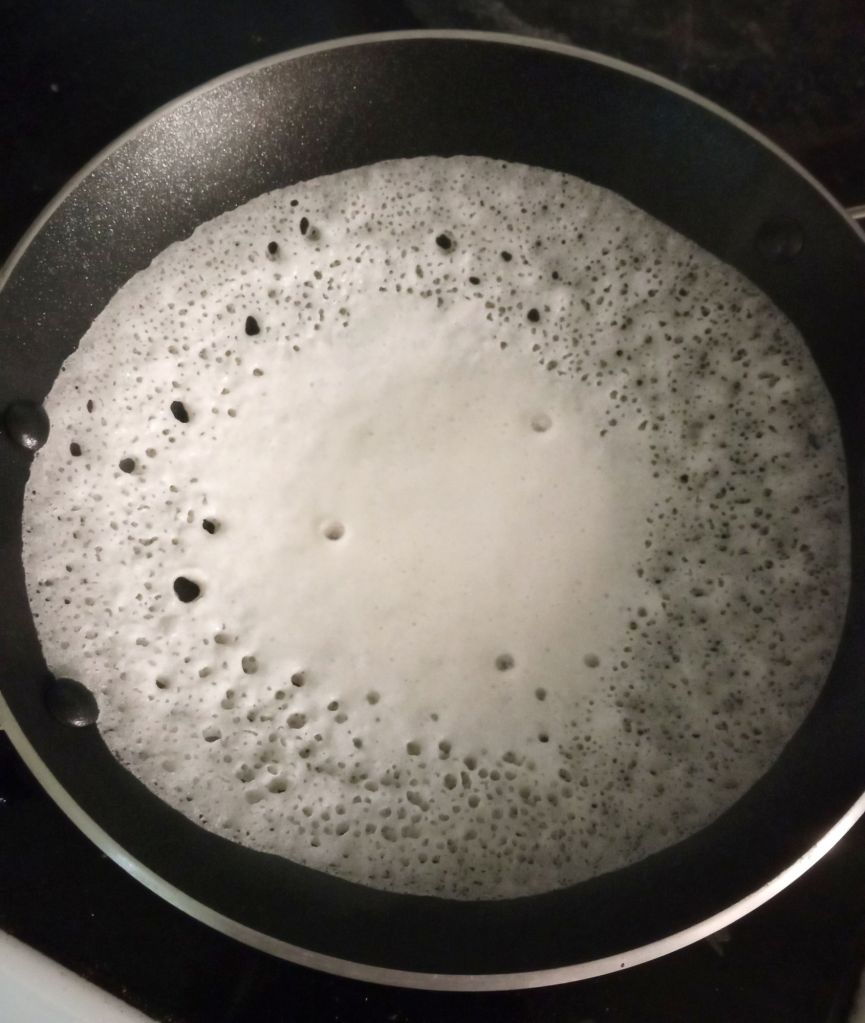
8. Cover and cook till the appam cooks well and the edges will release itself from the pan. If the center is thick, make sure it’s cooked well before removing from pan.

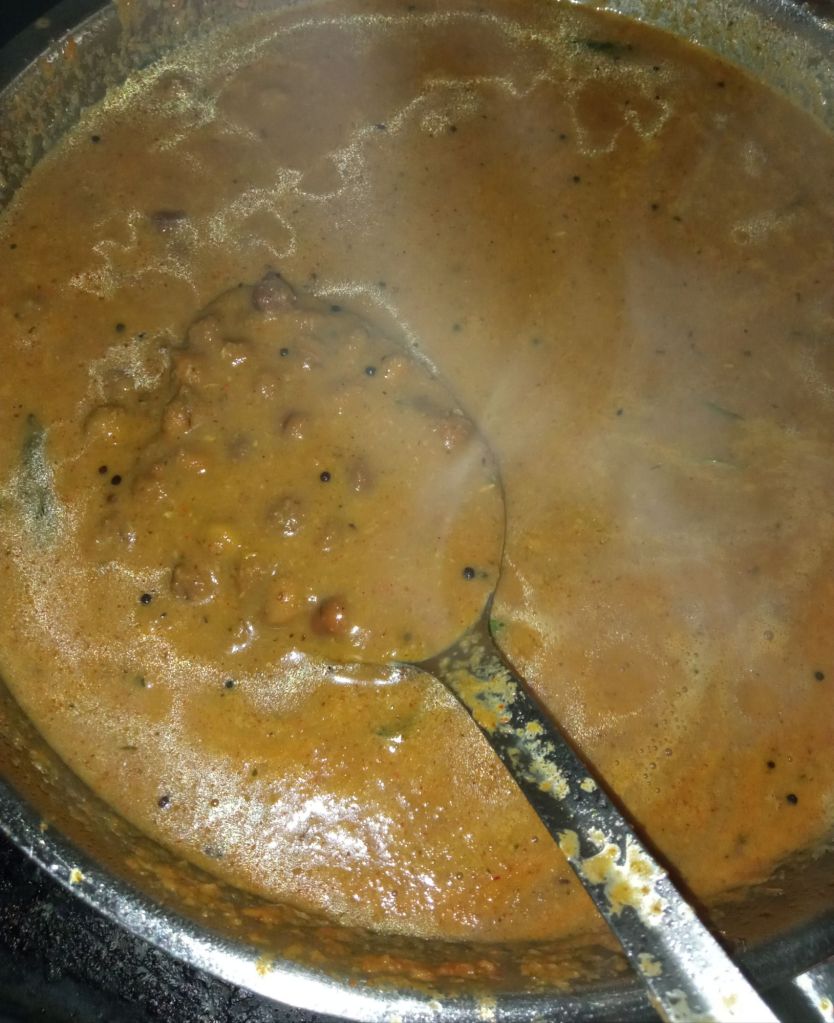
9. Remove from pan and enjoy appams with piping hot Kadala curry.

Click on the picture to save the recipe on Pinterest

Notes:

  • Any variety of white rice will work for this recipe.
  • I use thick poha, you can also use thin poha. Just wash before adding to the mixer jar.
  • Both fresh and desiccated coconut works well for making appams.
  • I use instant yeast while making appams. Have not used active dried yeast. So can’t say about the measurements.
  • If you live in a very cold place, you can also use 1/2 tsp Instant yeast in this recipe for faster fermentation of the batter.
  • With 1/4 tsp yeast, the batter ferments slowly but you hardly get the flavour of yeast in the appam.
  • The batter consistency should be thinner than regular Dosa batter. Else it will be difficult to swirl the batter in the pan.
  • Serve it with Kadala curry.
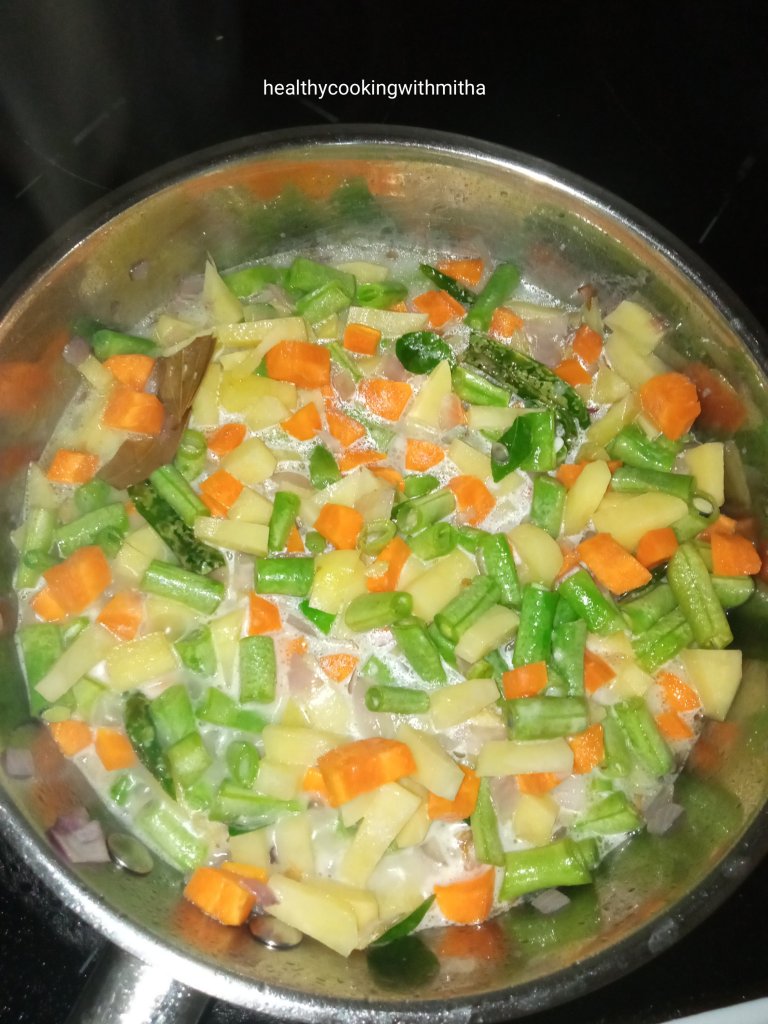
  • You can also serve appams with Vegetable Stew.

Kadala curry | For Appam, Puttu, Chapati, Porotta, Dosa

Click on the picture to save the recipe on Pinterest

Kadala curry is not just any curry but an emotion for me as someone who’s grown in Kerala. I can have it with anything as you can see from the heading of this recipe. May it be with Appams, puttu, porotta, chapati or even dosa. I absolutely love the flavours of Kadala curry. 😍

I am writing this recipe as a continued post to Appam recipe . So you can check that as well. Appam with Kadala curry is definitely a match made in heaven. ❤️

Hope you all try and love this combination too. Happy and healthy cooking ❤️

RECIPE:

Ingredients:

1 Cup = 240 ml

1 Cup black chickpeas/ Chana

1 Tbsp Coconut oil

2 tsp Mustard seeds

A sprig of curry leaves

1/4 tsp Turmeric powder

1/4 tsp Pepper powder

2 tsp Coriander powder

2 tsp Red chilli powder

Salt to taste

To fry and grind:

2 tsp Coconut oil

1 tsp Cumin seeds/ Jeera

1/2 tsp Fennel seeds/ Saunf

A sprig of curry leaves

2 Cloves

1 inch piece of Ginger

4 to 5 Garlic cloves

1 large Onion

1 large Tomato

1/4 Cup Desiccated or fresh Coconut

Step by step recipe:

  1. Wash well and soak the black chickpeas overnight or for 8 hours..

2. Drain the soaked water.  Add fresh water for atleast 1 cm above the level of chickpeas and pressure cook till soft. I have electric stovetop and I keep it for 15 mins on low flame after one whistle.

3. Now heat Coconut oil in a pan and add all ingredients mentioned under “to fry” one by one. Start with cumin seeds, fennel seeds, then add curry leaves, fry ginger garlic, then add onions. Once onions turn translucent, add tomatoes.

4. Once tomatoes turn soft, add coconut and fry for few minutes.

5. Remove from flame, allow it to cool. Once cooled, add to a mixer jar.

6. Grind to a smooth paste adding little water.

7. Now heat the pan again adding Coconut oil. Add mustard seeds and allow it to splutter. Add curry leaves and fry. Now add the ground paste. Mix well.

8. Now add turmeric powder, pepper powder, coriander powder and red chilli powder along with salt. Mix well.

9. Add cooked chickpeas and boil it in the masala for about 10 to 15 mins till the chickpeas absorb the masala. Mash a little of the chickpeas with a masher to make the gravy thick..

10. Serve Kadala curry with Appams, Puttu, Chapati, Porotta or Dosa.

I have served it with Appams and the combination is amazing 😍

Click on the picture to save the recipe on Pinterest

Ragi Ela Ada | Steamed Finger Millet snack | Vegan, Gluten free and Oil free

Click on the image to save the recipe on Pinterest

Kids’ schools have started after Eid holidays and days have started flying again. Waking up early, preparing their snack boxes, sending them to school, morning walk, cleaning the house, relaxing till they come back and after that hearing about their day at school, teaching them, walking again in the evening while they play outside, finally preparing for their next day at school and putting them to sleep.

Days are super busy but I would not want it any other way. I have realized being busy is actually great than sitting idle and overthinking. So it’s a blessing in disguise for me. ❤️

In midst of this, is cooking which I love and which brings me happiness. I listen to bhajans and songs while cooking which makes it so peaceful. Music is truly therapeutic. ❤️

Apart from breakfast, lunch and dinner, there is one meal of the day which is most difficult for me – Snack time. Finding a quick, healthy and tasty snack which the kids also love is very hard. So when I tried this Ragi ada inspired by my Kochi memories of the regular ada and it came out so well that we all loved it, I knew I had to share it with all of you too. ❤️

I don’t know why some people think Ragi is bitter. Ragi is such a tasty millet and I use it regularly in my cooking. It is tasty and very healthy too. Have shared all the recipes that I make using Ragi in the notes section towards the end. Do try and I think if you follow the recipe well, adapt it in your cooking, in few days, you will love Ragi too, just like we do. ❤️

Happy and healthy cooking ❤️

RECIPE:

Ingredients: { to make about 5 adas }

1 Cup = 240 ml

Banana leaves to make the ada

To make outer covering:

1 Cup Ragi flour ( finger millet powder)

Salt to taste

Approx 1 Cup hot water

To make inner filling:

3/4 Cup Jaggery

3/4 Cup freshly grated Coconut

1/4 tsp Cardamom powder

Step by step recipe:

1. Dry roast Ragi flour ( do NOT add oil while roasting) on medium flame till you get an aroma of the flour and it changes colour to a darker tone.

Note: Even if you have roasted ragi flour with you, dry roast for few minutes as it enhances the flavour a lot.

2. Transfer it to a bowl. Add salt.

3. Now add hot water, little by little. Mix as you add water.

4. As you add hot water, little by little, after mixing, the dough will look like this. Do NOT add water after this.

5. Now the dough will be warm. Using hands, mix together to form a smooth and soft dough.

6. Now make the inner filling. Take coconut and jaggery in a pan. Heat it together on medium flame till the jaggery melts and coconut will stick to jaggery. Remove from flame. Add Cardamom powder. Mix well.

7. Now cut the banana leaf into rectangle pieces as shown. Clean it with water and wipe it dry.

Also divide the ragi dough into equal sized balls. If you have taken 1 Cup (240 ml) of Ragi flour, you will get 5 balls.

8. Take a ball of ragi dough and spread it using slightly wet fingers as thin as possible.

9. Take a spoonful of the filling and place it on one half side. Spread it on the half side using spoon as shown in the image below.

10. Fold the banana leaf while closing both the halves as shown.

11. Seal the edges of the dough using fingers so that the filling does not come out.

12. Repeat the same with the rest of the dough balls. Place it on a idli steamer.

13. Steam for 20 to 25 mins on high flame till the ada cooks thoroughly. Remove from flame. Allow it to cool for 5 mins.

14. Now peel off the banana leaf, discard it and enjoy the warm Ragi ela adas. 😍

Click on the image to save the recipe on Pinterest

Just look at the inside of the ada. Sweet, juicy and so delicious 😍

Click on the image to save the recipe on Pinterest

Notes:

* As you can see from the above picture, the ada is of the right thickness and also steamed fully. This is due to spreading the dough thin over the banana leaf and also steaming for atleast 20 mins.

* Even if you have roasted ragi flour with you, dry roast for few minutes to get perfect aromatic ragi adas.

* Do use only hot water while preparing the dough. It took me around 1 Cup hot water for 1 Cup Ragi flour. Add only 1/4 Cup at a time and mix well till you get the dough as in step number 4. Then mix using hands to form a smooth dough.

* Don’t add a lot of water while making dough. It will be difficult to spread if dough is too soft.

* For 1 Cup Ragi flour, 3/4 Cup coconut and 3/4 Cup jaggery made the right filling for me. If you add a lot of filling, it will be difficult to seal the edges. So add only a spoonful to cover half of the ada.

* I have not made this without banana leaves. So can’t say the alternative to it. Spreading the dough on the leaf is easy and the ada turns aromatic too. So try to get the leaves if you can.

* These adas are best eaten soon after they are steamed but tastes yummy even after few hours too. So you can carry it in tiffin box and during travel too.

* A similar recipe with coconut jaggery filling is this Kerala style Nendrapazham nirachathu or stuffed Nendran Bananas..

Nendrapazham nirachathu

* I make many dishes using Ragi flour. You can check the recipes here:

Instant Ragi Rava dosa

Ragi Set Dosas

Instant Ragi Idlis

Ragi Urad Idlis

Ragi Malpuas/ Ragi Pancakes

Ragi Jaggery Ladoos

Ragi Butter cookies

Eggless Ragi Chocolate Cake

Kerala style Vegetable stew | easy stew recipe

Click on the image to save the recipe on Pinterest

I love different varieties of mixed vegetable curries and Vegetable Kurma is one of my favorite. Apart from that, I also make Vegetable stew for a change as it’s very quick to make, tastes divine and so aromatic too.

Though it is usually eaten with Appam and Idiyappam, it is a great combination with chapatis and pulav too. Today I made it with dosas for breakfast and it was amazing as well. The soft dosas dipped in this stew was a tasty and healthy breakfast.

Hope you all try this delicious stew and enjoy it’s aroma in your kitchen too. Happy and healthy cooking! ❤️

(Sorry for short writeups nowadays. My kids hardly give me time to write blogs as they need me always. But I really wanted to share this recipe right away. So writing this quickly for all of you. 😍)

RECIPE:

Ingredients:

2 Tbsp Coconut oil

2 Cardamom pods

2 Cloves

1 inch Cinnamon stick

1 Bay leaf

1 inch Ginger, finely chopped

1 medium sized Onion, finely chopped

1 long Carrot, diced (about 1 Cup)

10 to 15 medium sized Beans, chopped

2 medium sized Potatoes, diced

1/4 tsp Pepper powder

2 Cups thin Coconut milk

A sprig of Curry leaves

1 Cup thick Coconut milk

Salt to taste

Step by step recipe:

1. Prepare the vegetables first by peeling and dicing carrots, chopping beans into 1 inch pieces (discard the ends), peel and dice potatoes. Keep aside. Also cut green chillies into long pieces and finely chop onions and ginger.

2. Heat oil in a pan. Add a bay leaf, cloves, cardamom and cinnamon. Also add ginger, green chillies and onions. Fry till onions turn translucent.

3. Now add the vegetables along with curry leaves and mix well. Add the thin Coconut milk (about 2 Cups). Also add salt and pepper powder. Cover and cook till the veggies turn soft.

4. Once vegetables turn soft (about 10 mins), add thick Coconut milk ( 1 Cup) and mix well.

5. Let it simmer on medium flame for about 10 mins till the gravy thickens. Now adjust water and salt. Done ❤️

6. Vegetable stew is served with Appam or Idiyappam. You can also serve it with rice or pulav, chapatis or dosas. It is so simple yet aromatic and delicious. ❤️

Click on the image to save the recipe on Pinterest

Notes:

* You can also add fresh/ frozen/ dried peas if you have.

* There are so many variations to stew as some add turmeric powder and even Garam Masala powder but this is a basic recipe close to the authentic Kerala style Vegetable stew. You can make variations as per your taste.

* Thick Coconut milk means when you grind fresh coconut with little water and sieve.

* Thin Coconut milk means when you grind the sieved coconut again with water and sieve again. That is the second coconut milk.

* What I do is, I use coconut milk powder diluted with water to get thin Coconut milk and use canned coconut milk for thick Coconut milk.

* You can use fresh, powder or canned coconut milk in this recipe as per what is easily available for you.

* Cooking the vegetables in thin Coconut milk is what gives the stew it’s flavour. So don’t skip it.

* After adding thick Coconut milk, don’t cook it on high flame for long. Just simmer it till it boils and remove from flame.

* You can also try this recipe of Restaurant style Vegetable Kurma.