Category Archives: Konkani Recipes

Broken Wheat sweet khichdi | Gonva Khana Khichidi

Usually, I don’t time my recipes according to festivals as my blogging depends on the time I get after my household works along with taking care of two kids. But this time it is different. With the encouragement I got from my readers for my previous posts, this sweet recipe is definitely worth spending my sleep time on, just to post for Vijaya Dashami. Thank you readers! Without you to read this, I will never be motivated to write. ❤️

The significance of Vijaya Dashami has two stories from the Indian mythology. One is the killing of Ravana by Lord Rama and the second is the killing of Mahishasura by Goddess Durga, both of which are celebrated on this auspicious day signifying the victory of righteousness and goodness over evil.

My heartfelt prayers to God on this occasion is to not allow the bad qualities in me take over the good qualities at any moment and also let me not hurt anyone knowingly or unknowingly. As I write this, I know it is difficult as we are all humans and make mistakes. But if we continue praying, God will definitely help us overcome everything in life. We just need to leave everything to him and trust him. As my Amma says, do good and be good, that’s all we can do. Whatever has to happen, will happen according to God’s will and we can’t change it. Once we understand this, we are at peace.

On this spiritual (and a “letting out my heart” 😁) note, I would like to wish all of you a very happy Dussehra or Vijaya Dashami. Hope you all try this easy sweet which is loved in my family. May the sweetness always remain in your lives and may it be filled with happiness.

RECIPE:

Ingredients:

1 Cup Broken wheat/ Gonva Khan/ Daliya/ Lapsi

1 Cup Jaggery (powder or grated)

About 4 Cups hot Water

1/2 Cup thick Coconut milk *check notes

2 Tbsp Ghee

About 8 to 10 Cashews

About 2 Tbsp Raisins

1/2 tsp Cardamom powder

Step by step recipe:

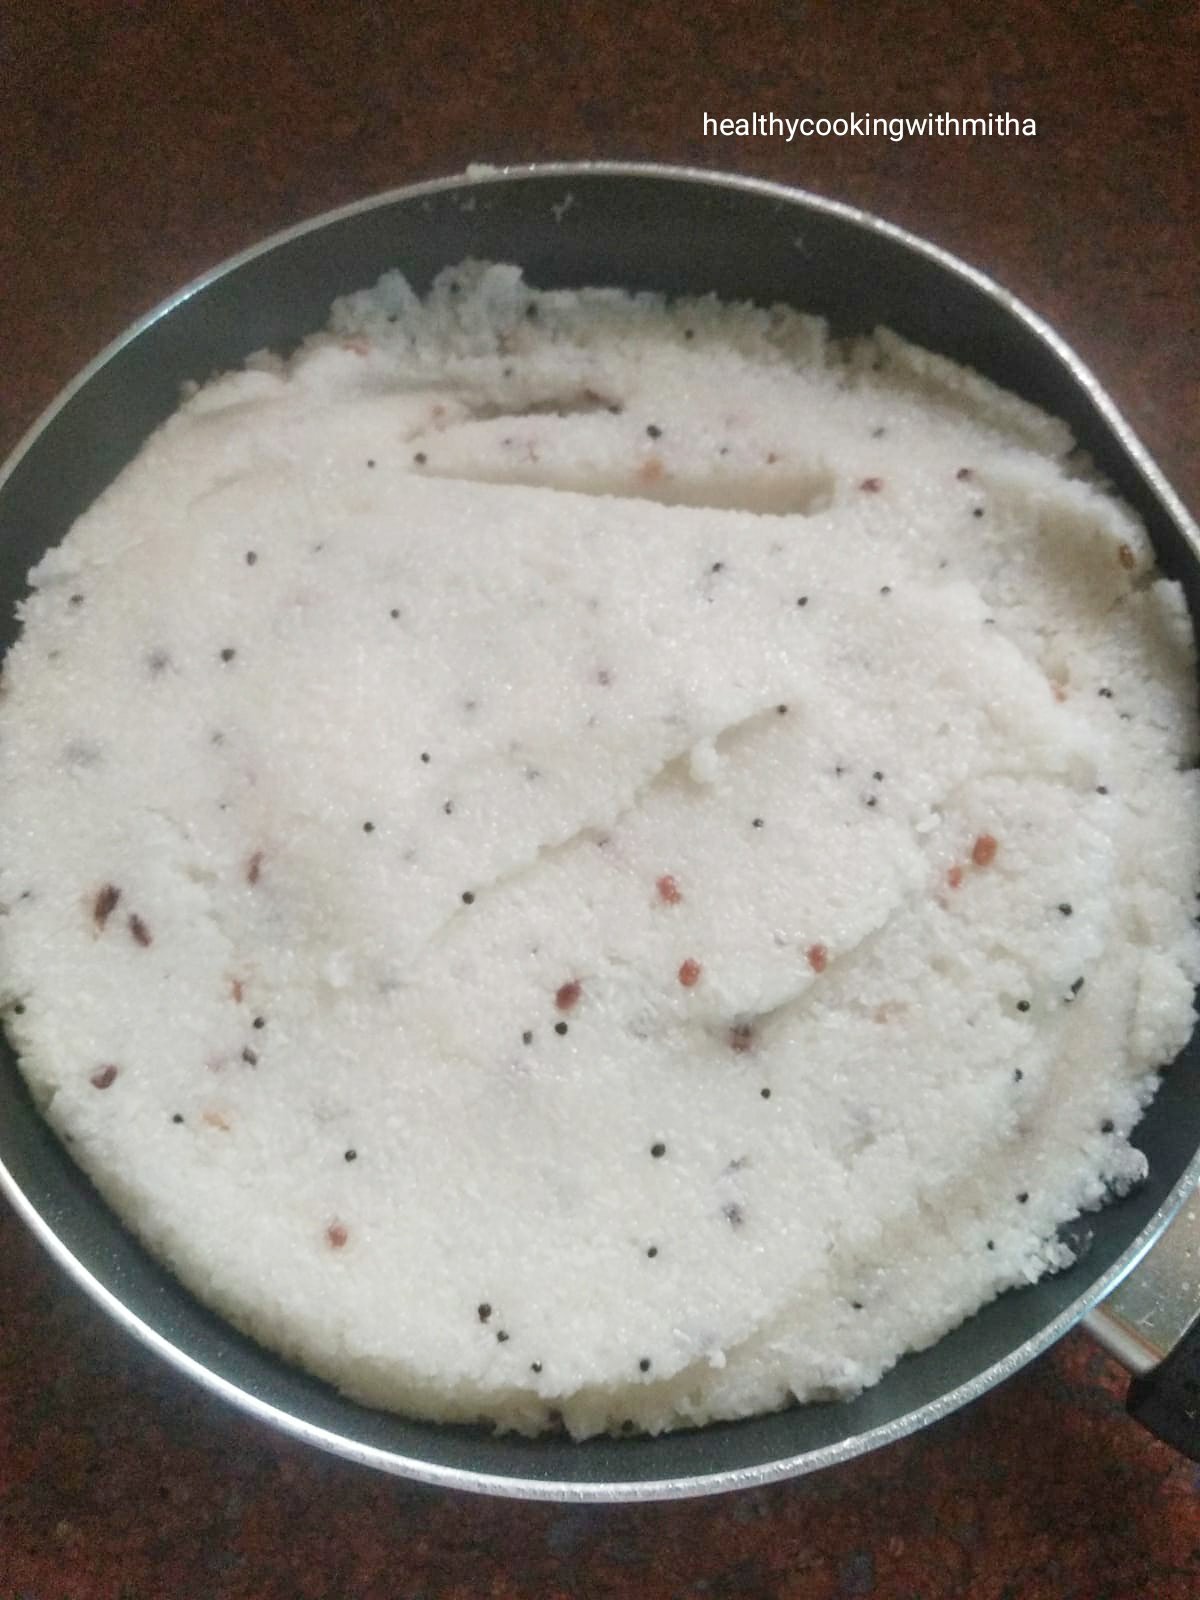
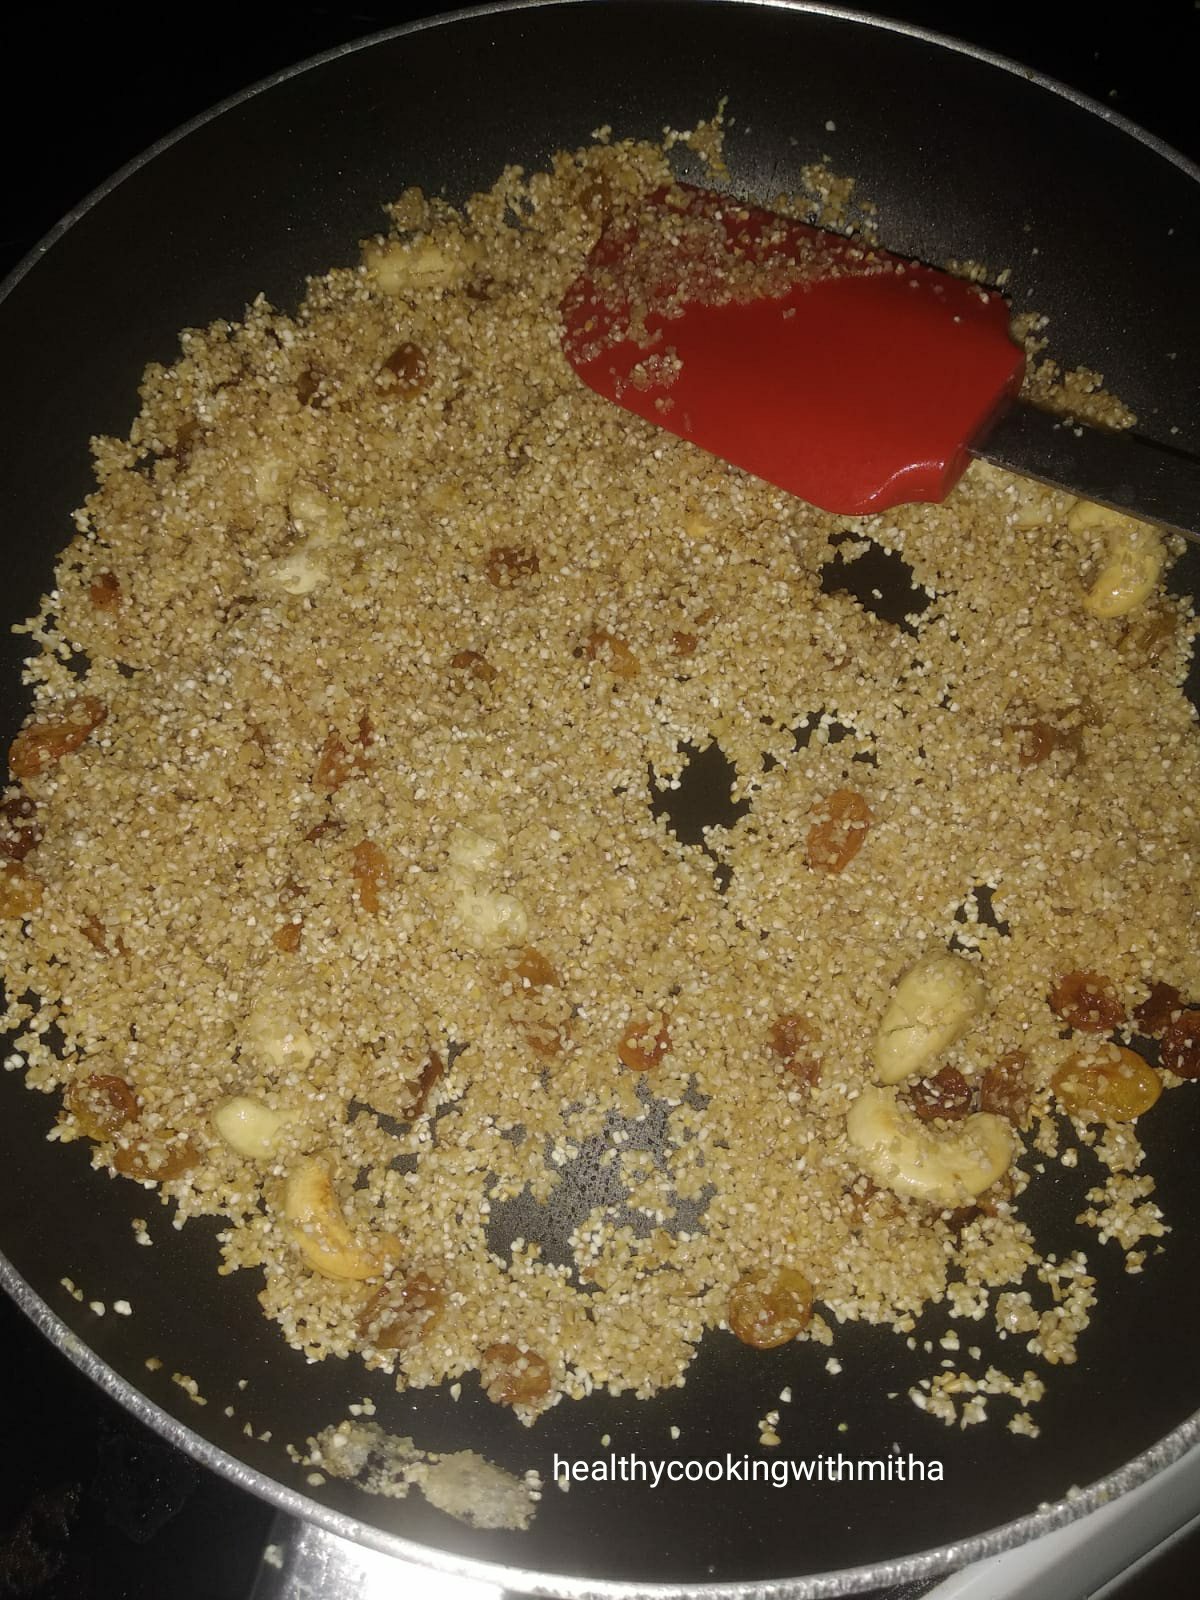
1. Heat ghee in a pan and add cashews and raisins. Fry till the cashews turn light brown and raisins plump up.

2. Add broken wheat and roast for a minute.

3. Now, add 2 Cups hot water (at first) and cook till it absorbs all the water. Then, add 1 Cup hot water and 1 Cup more if needed, along with 1/2 Cup coconut milk.

4. Cook till the broken wheat turns soft and swells.

(Took 4 Cups water for me in total for 1 Cup broken wheat. Might vary depending upon the variety of broken wheat.)

5. Now add jaggery and mix well.

6. Keep stirring and cook till the mixture leaves the sides of the pan. Add cardamom powder.

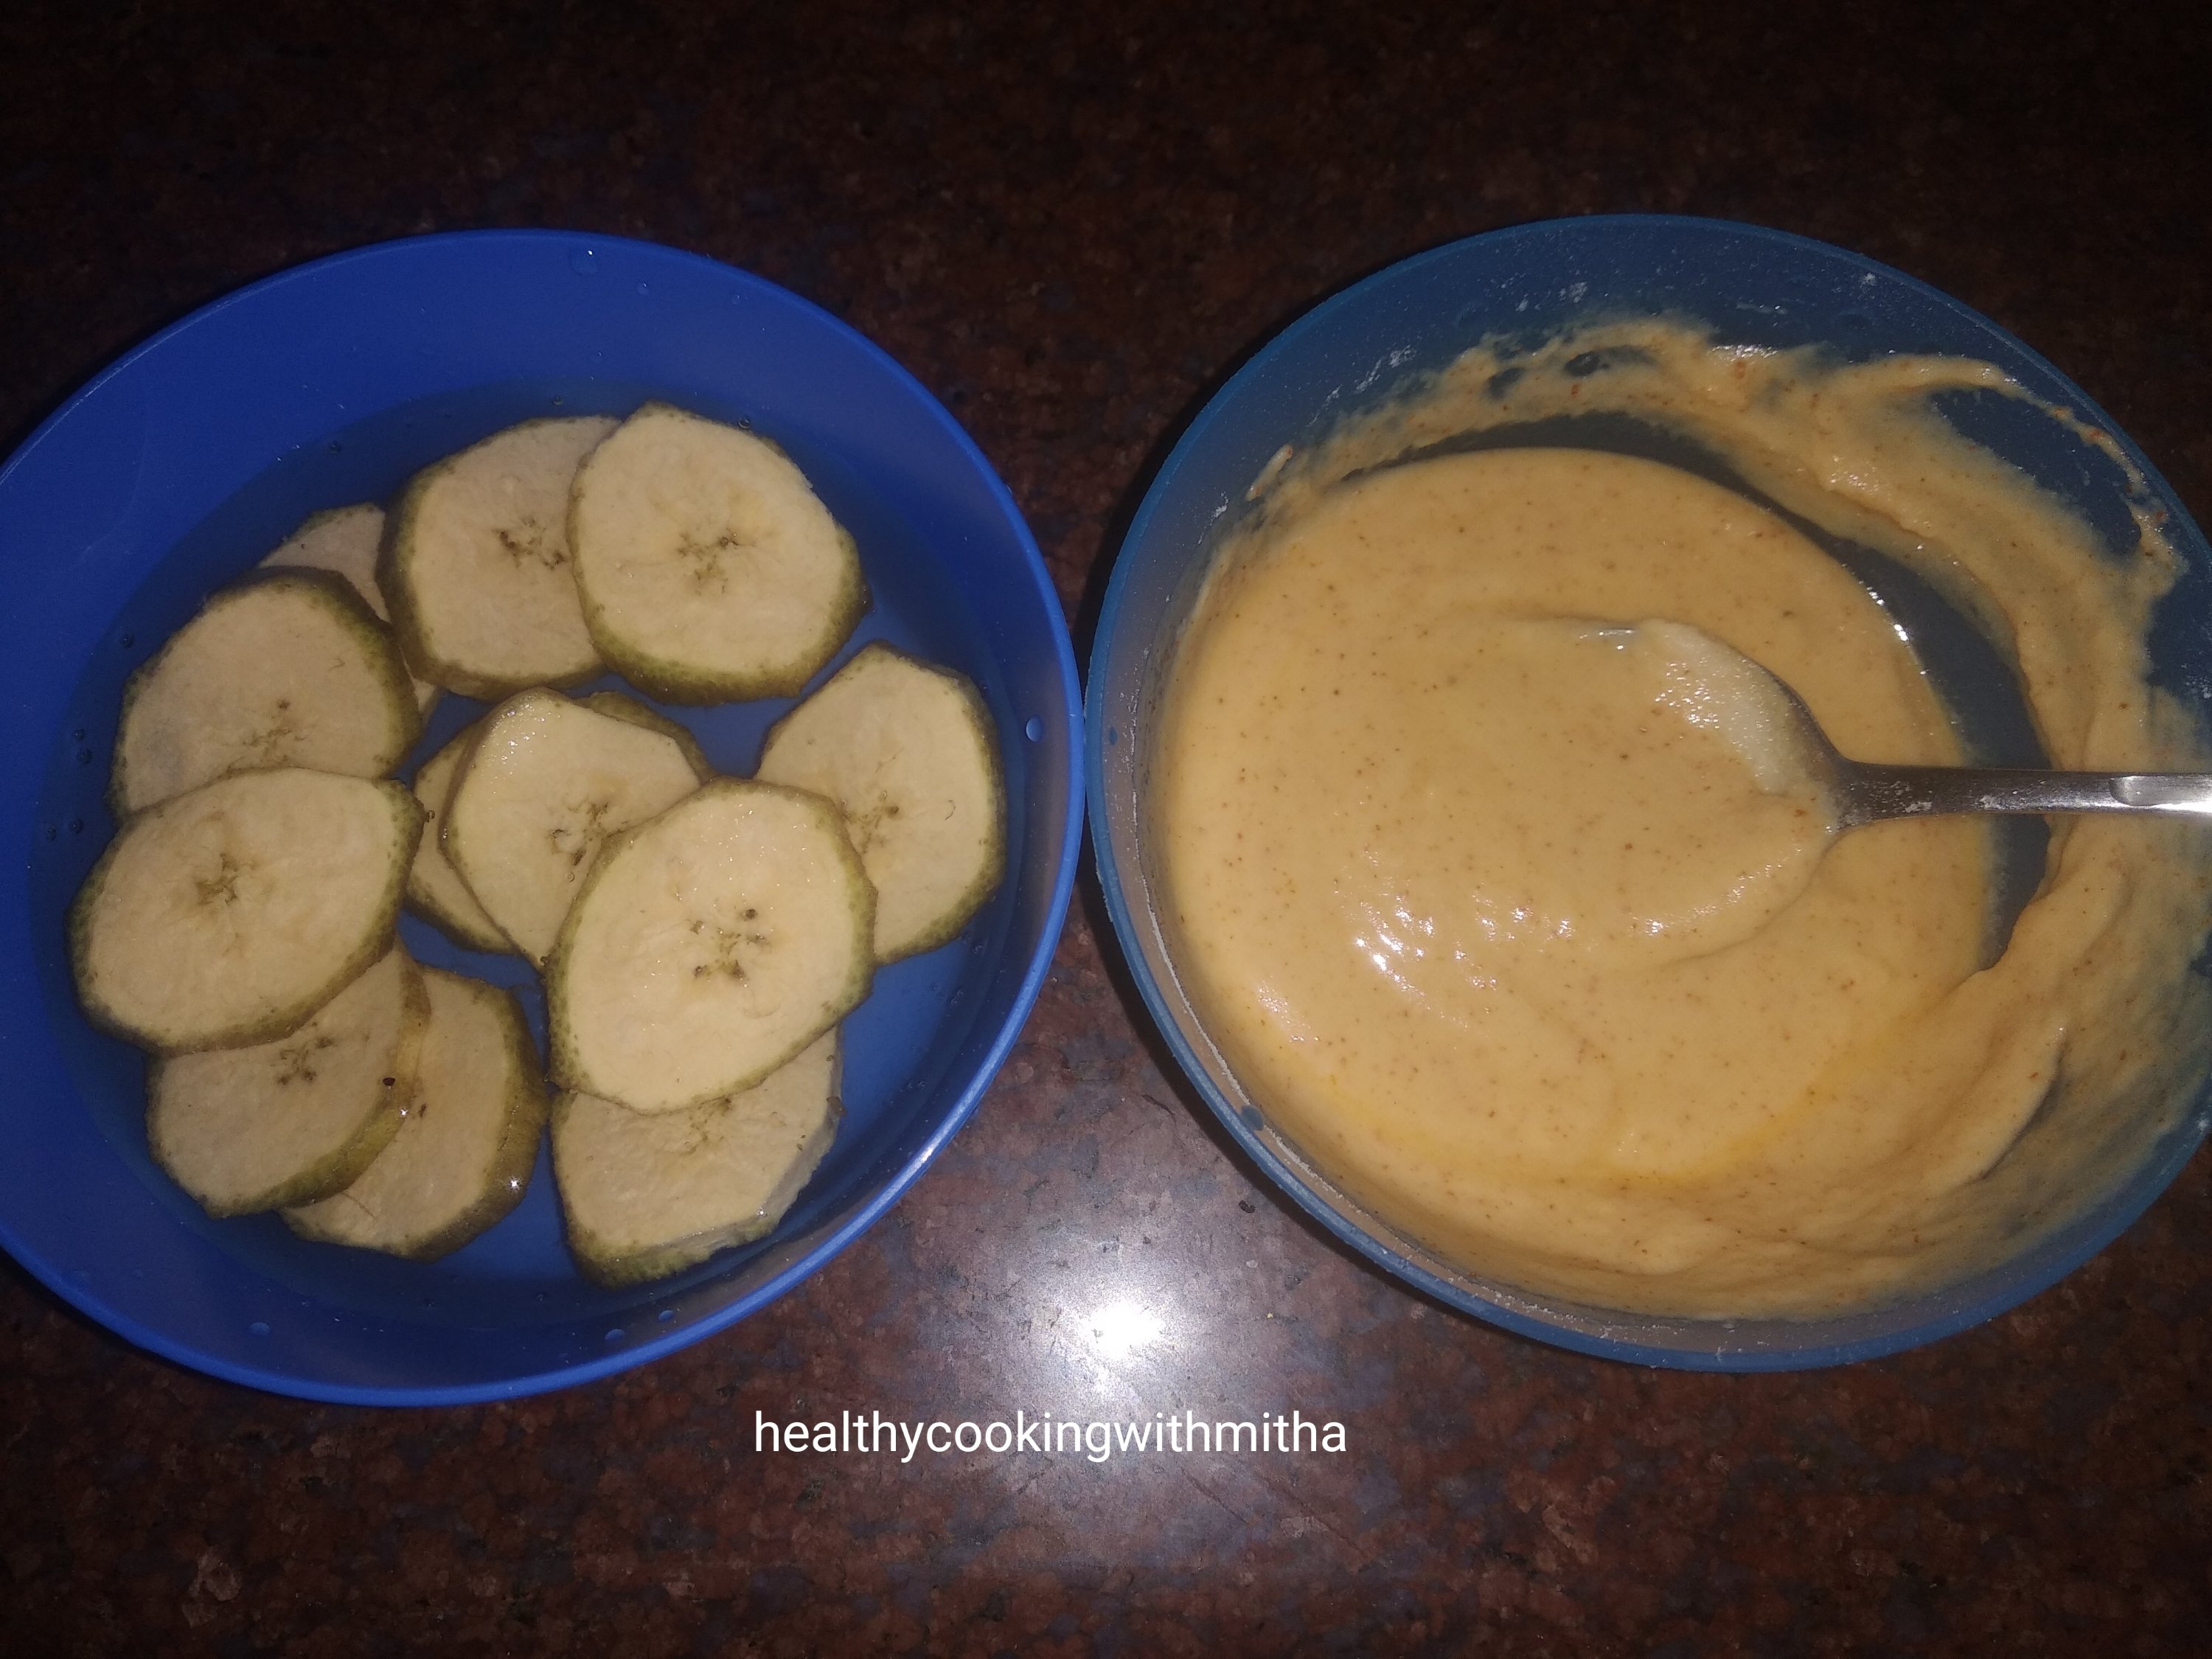
7. Remove and serve hot with banana slices as garnish if you have.

Notes:

* The only time consuming part while making this khichdi is for the broken wheat to cook fully. Add 2 Cups of hot water first and then 1 Cup each time while checking if the broken wheat is cooked or not.

* When it cooks fully, it will swell in size and you can no longer see it white grain like but will be very soft.

* For me, 1:4 ratio of broken wheat: hot water worked perfectly to get soft yet thick texture of khichdi. If you like a little thin texture of Khichdi, then you can increase the water content.

* I add this khichdi to a plate and cut into squares. It cools down and sets, giving perfect slices. You can serve that way too if you like.

* Coconut milk gives it the richness in taste. I make Coconut milk using coconut milk powder. You can use fresh coconut milk as well.

Surna Koot | Spicy Konkani style yam pickle

Elephant yam or Surnu is my favourite vegetable since childhood and my birthday lunch would always include Surna upkari or stir fried elephant yam which Amma never forgot to make. Her love made it even tastier. I can never make it that way. ❤️

During festive occasions, this elephant yam pickle or Surna koot is commonly made by my husband’s aunt and is my absolute favourite. She is an expert cook and my Guru who introduced me to cooking post marriage (before that, I was a Amma’s baby who was hardly allowed inside the kitchen 😍).

But after marriage, I learnt a lot from my husband’s aunt or mhave as I call her. The way she cooks so lovingly for everyone taking care of everyone’s likes and dislikes has been an inspiration for me.

So here’s sharing the recipe for the pickle. We love it a lot and I regularly make it when I get elephant yam. Hope you all try and love it too. Happy and healthy cooking!

RECIPE:

Ingredients:

2 Cups finely chopped Elephant Yam/ Chena/ Soornu

Salt to taste

2 Tbsp Oil ( to fry the yam)

For the masala paste:

5 to 6 dried Kashmiri red chillies or to taste

1 tsp Tamarind paste

1/2 tsp Hing or Asafoetida powder

1/2 tsp Coriander seeds + 1 tsp Mustard seeds + 1/2 tsp Methi seeds {to be fried in 1 tsp oil}

For the seasoning:

2 tsp Oil

1 tsp Mustard seeds

A sprig of Curry leaves

Step by step recipe:

1. Heat oil in a pan and add the finely chopped Elephant Yam pieces along with salt.

2. Fry till the pieces turn crisp. Keep aside. You can deep fry instead. But I prefer shallow frying it.

3. Take dried red chillies, tamarind paste, hing in a mixer. Fry coriander seeds, methi and mustard seeds in little oil. Cool and add to the mixer.

4. Add little water and grind to a smooth paste.

5. Heat oil in a pan and splutter mustard seeds. Add curry leaves and fry till it turns crisp. Now add the ground paste. Allow it to come to a boil.

6. Now add the shallow fried elephant yam pieces and allow to cook till the pieces turn soft. Also add salt if needed.

7. Adjust water and add red chilli powder if needed. Remove from flame. Serve with rice meals.

Notes:

* In this recipe, usually the yam pieces are deep fried after applying salt. You can do it too but since I don’t like deep frying, I shallow fry it till it turns crisp. Though it takes time, it is to avoid the extra oil.

* You can adjust salt, water and red chilli powder towards the end to make it as spicy or as thick or thin as you like. It’s usually had like a semi thick gravy with rice meals.

* We enjoy it with our Matta rice gruel (congee or pej) and it’s a comforting soulfood.

Sprouted Moong Methi sukke | Kerala Konkani style spicy curry

Click on the image to save the recipe on Pinterest

I have lived a major part of my life in Kerala. So inspite of being a Kannadiga, I love many dishes from the Kerala cuisine like Avial (especially in marriage sadyas 😁), Palada payasam ( Best bakery ones 😋), Puttu Kadala and Porottas (from thattu kadas ❤️), Appam stew (from my bestie’s lunch box 😅)… I can go on and on about it..

Also, since we lived among the Konkani GSB community in Elamakkara, we got a chance to taste dishes from their cuisine too. Many of them became just like our family and used to share whatever special they cook with us. And me being a foodie used to get so excited to taste something new.

One among the dish was this sprouted Moong Methi sukke which was made by an aunty whom we call Shyamala akka. She runs a catering service from her home and also sells snacks like chips and ladoos. So when we had a function at home, we ordered meals from her and this sukke was a part of it. We all loved it so much that we had to ask her for the recipe.

She was kind enough to share it in detail with us and after that, it’s a regular at my place. It is super healthy as it includes two variety of sprouts and is so delicious that you can’t stop eating it, that’s a promise.

Sprouting is very nutritious as it manifolds the health quotient of both moong and methi. Hope you all try this curry. I am sure you will love it. Happy and healthy cooking!

RECIPE:

Ingredients:

1/4 Cup dried Fenugreek seeds/ Methi {gives about 1 Cup methi sprouts}

1 Cup whole Moong/ Green gram {gives about 3 Cups moong sprouts}

3 Cups water or as needed

1 Tbsp Tamarind

2 tsp Red chilli powder

2 tsp Coconut oil

1 tsp Mustard seeds

A sprig of curry leaves

Salt to taste

1/4 Cup freshly grated Coconut

In the below steps by step pictures, I have taken 2 Cups Moong to sprout as I needed to use it for other dishes. For this recipe, only 1 Cup moong is required which yields about 3 Cups of sprouts.

Step by step recipe:

1. Wash well and soak Fenugreek seeds and whole moong separately in atleast thrice the amount of water overnight or for atleast 8 hours.

2. Now drain the water completely from it using a strainer. Do not forget to drain the water completely.

3. Now cover and keep aside for 10 to 12 hours.

4. Now when you open after 10 to 12 hours, you can see little sprouts have emerged depending upon the weather in your place. In hot weathers, sprouting happens in a faster pace then in cold weathers. Wash the sprouts well and drain again completely.

DAY 1 of SPROUTS

5. Keep again covered for 10 to 12 hours. Then you can see that the sprouts have increased in size. Now they are ready to be used. Wash them again and drain. Keep aside.

DAY 2 of SPROUTS

6. Heat oil in a pan. Splutter mustard seeds and add curry leaves. Now add both the sprouts together (1 Cup Methi sprouts + 3 Cups Moong sprouts). Mix well.

7. Add 3 cups of water and cook covered till the sprouts turn soft but still are firm. Add tamarind paste, salt and red chilli powder.

8. Mix well and cook for 5 more mins. Add water if needed and mix well.

9. Remove from flame and garnish with grated coconut.

Click on the image to save the recipe on Pinterest

Notes:

* Methi usually takes two days to sprout while moong sprouts within a day. But I sprout both for two days as it gives good sprouts for moong too.

* Remember to drain water completely before keeping for sprouting or else the sprouts can start smelling.

* Also remember to wash well atleast once daily to avoid the sprouts going bad.

* Red chilli powder is to taste. You can reduce or increase as per your taste.

* Don’t overcook the sprouts. Just cook till they turn soft yet are firm.

* The ratio of 1:3 of methi sprouts : moong sprouts gives perfect taste to this curry.

* The process of sprouting may look difficult but trust me, your work is very less. You just need to soak, drain and wash. That’s all. Rest work is done by the sprouts themselves. 😁 (I have just added a lot of step by step pictures so that it’s helpful for people who are new to sprouting.)

Horsegram Idlis | Kulitha idli

As a kid, I never liked many of the traditional Konkani recipes that my grandmother made and used to make a face at it. I loved bread for breakfast as compared to Idlis or dosas. My grandmother on the other hand used to make a face at bread and say “Is it even something eatable?” 😅

Now after about 15 years, I am in the same situation as hers. I don’t like store bought bread as much as I love Idlis and dosas. I love how filling, healthy, nutritious and delicious they are as compared to the bland bread (no offense Mr Bread 😁).

Coming to filling, these Horsegram Idlis are so filling that we don’t even need lunch the day I make these Idlis. It is so tasty too. My grandmother used to pour the batter in banana leaves in a large steamer called pedavan in Konkani and cut into wedges like a cake. I make them as regular Idlis though.

I want to share some health benefits of horsegram too. It is very high in iron, calcium and protein too. In fact, it has the highest calcium content among pulses and is one of the richest protein source for Vegetarians like us. Also, it is low in fat and slow digestive starch makes it ideal for diabetic and obese people.

Hope you all try these Idlis which are a “horsepower” of energy 😅 (which is why horsegram is fed to race horses) . Happy and healthy cooking!

RECIPE:

Ingredients: { Makes about 20 Idlis}

3/4 Cup Raw white rice

1/2 Cup Horsegram or Kulithu

1/2 Cup Urad dal

Salt to taste

Step by step recipe:

1. The first important step while making any dish with horsegram is to pick stones from it as even the good quality ones have stones in it. After that, wash well and soak horsegram along with Urad dal in a bowl. Soak rice in another vessel. Soaking time is 4 to 6 hours.

Check the number of stones below that I picked from 1/2 Cup Horsegram (between both the vessels). Don’t know if it is clear but kept it just to get you all an idea.

2. Now take the soaked Urad dal and horsegram to a mixer.

3. Grind to a smooth paste (it won’t be perfectly smooth due to horsegram but it should not be very coarse too) and pour into a large steel vessel. Also take the soaked rice to the mixer with little water.

4. Grind the rice to a slightly coarse paste and add to the horsegram-urad batter. Add salt and mix well.

5. You can make Idlis instantly with this batter. Add to idli plates and steam for 20 mins till done.

6. Or you can also ferment the batter overnight or for 6 to 8 hours and then steam for 20 mins. I prefer these Idlis more as they turn out softer.

Serve with a chutney of your choice. I have served with Hing Chutney.

Horsegram Idlis after the batter ferments overnight.

Note:

* These Idlis are usually made without fermenting as they turn soft even without fermentation process but I find fermentation gives even softer Idlis. So I keep the batter to ferment overnight.

* These Idlis are the ones that I made as soon as I ground the batter. They did turn out very tasty but not as soft as after the batter ferments.

Instant Horsegram Idlis

* They are traditionally served with hinga udhak (Asafoetida water with salt, chopped green chillies and coconut oil) but we love this Hing Chutney with these Idlis. I just grind coconut, green chillies, salt with hing powder and little water to a smooth paste.

Instant Cucumber Idlis | Thoushe idli

Click on the image to save the recipe on Pinterest

After the Undi with Piyava Gojju recipe which was viewed and tried by so many readers, I realised how much people love our traditional Konkani recipes. So I had to share these Cucumber Idlis or Thoushe Mudho as called in amchi households. They can be made instantly and are so tasty that you can’t stop eating them.

My grandmother and mother used to make them wrapped in banana leaves or turmeric leaves that has an aroma of its own. But since we don’t get them easily here, I make them in idli plates. Even then, while steaming these idlis, the whole house is filled with a heavenly aroma which stays for the whole day.

I love how our Indian breakfasts are so delicious yet healthy. I can never get satisfied by continental breakfasts. Those are for a day or two during vacations and then I am back to craving my Idlis, dosas, puri bhaji and upmas 😅. I am such an Indian food fan!

Hope you all try and love these Idlis as much we do. Happy and healthy cooking!

RECIPE:

Ingredients: { Makes about 22 Idlis}

2 Cups Idli Rava or Rice Rava

1/2 Cup Desiccated coconut or freshly grated coconut

2 Cups grated Cucumber {check notes for details}

1 inch Ginger piece, grated

1 Green chilly or to taste

1 1/2 Cups Water

Salt to taste

Step by step recipe:

1. Keep the steamer or idli cooker ready with water on the stovetop to boil.

2. Wash the Rice rava well twice or thrice till it leaves clear water. Drain the water completely.

3. Add grated Cucumbers, grated ginger and chopped green chilly along with coconut and salt.

4. Mix well adding little by little as need to make a batter. It should be thick yet some water should be there so that the Idlis turn soft.

Note: It took me 1 and half cups of water to get it to right consistency since my cucumbers did not ooze much water. Water depends upon the variety of cucumbers.

5. Add to greased idli plate like I have shown. Leave a little water in each plate along with the idli rava mixture. This ensures you get soft Idlis.

6. Steam for 15 to 20 mins till a knife inserted in the center of the idli comes out clear. Allow to cool slightly.

7. Remove and serve with a chutney of your choice.

Notes:

* Idli Rava or Rice rava is not regular upma rava which is made from wheat.

* I have used English Cucumbers which do not need peeling. I discard the sides and grate as it is. If using Indian cucumbers, do peel them.

* Green chilly can be increased as per taste or even skipped.

* You can also grind coconut, ginger and green chilly and add to the batter. I add as it is because I love the bite of ginger and green chilly in it.

* Do remember to leave a little water in each idli plate. It gives soft Idlis.

* If Idlis get leftover, just refrigerate in an airtight container. Microwave and it gets soft again.

* Drizzle a little coconut oil before serving these Idlis. Tastes heavenly!

* I served these Idlis with Coriander leaves- curry leaves chutney. For that, just grind coconut with ginger, green chillies, coriander leaves, curry leaves, salt and little water to a smooth paste. Season with mustard seeds and curry leaves. Mix well.

* Editing to add: I recently got few pieces of Banana leaves and I made these idlis in it. Took a picture to share with all of you. You can try it too. Just keep a piece of the leaf on the idli mould and add a spoonful of batter. Steam and you will get such aromatic cucumber idlis that you will enjoy them a lot.

* You can check all my Variety Idli Compilation here:

Variety Idli collection of recipes

* Other recipes with Cucumber:

Instant Cucumber dosa / Thoushe Bhakri

Khamang Kakdi / Maharashtra style Cucumber salad

Moong dal Kosambari/ Konkani style salad

Click on the image to save the recipe on Pinterest

Undi with Piyava Gojju | Konkani style rice dumplings

During my childhood days, our breakfast was a set schedule. Monday was any kind of dosas, Tuesday used be Chutney sandwich (my fav as a kid ❤️) or Puri Bhaji ( my fav even now ❤️❤️). Wednesday used to be Panpolos, Thursdays and Fridays were again dosa days. You can find all those dosa recipes in my Dosa corner page.

And then came weekends when Annama (my grandmother) and Amma used to make these special, aromatic undis along with my Annama’s special Piyava gojju which is still my most favourite. This spicy, tangy dip takes the undis to another level completely.

Amma taught me to make undis when she had come here to Qatar and I learnt the technique from her. So it’s definitely special for me as it’s something passed on to me by her. Hope I can pass on this to my kids too. If not me (owing to unpredictable life), maybe they will refer this blog and learn in future. 😀

Although all Konkani people know how to make it, this is for those who don’t know about it and my way to preserve our Konkani traditional recipes. Hope you all try and love it too. Happy and healthy cooking! ❤️

RECIPE:

Ingredients: { Makes about 40 small undis}

2 Cups Rice Rava or Idli Rava

4 Cups Water

1/2 Cup Desiccated coconut or freshly grated coconut

2 tsp Oil

1 tsp Mustard seeds

1 tsp Urad dal

1/2 tsp Methi seeds

Salt to taste

Step by step recipe:

1. Wash the rice rava well two to three times till the water turns clear. Drain the water and keep aside till use.

2. Heat oil in a thick bottomed steel or non stick pan. Add mustard seeds, Urad dal and methi seeds. Saute till mustard seeds splutter and urad dal turns light brown in colour.

3. Add 4 Cups Water (for 2 Cups rice rava). Also add salt and coconut. Bring it to a boil.

4. Now add the idli rava and keep mixing continuously on medium flame till the mixture leaves the sides of the pan and the rice rava cooks well.

This is the initial stage right after adding rice rava.

5. Remove from the flame and allow it to cool slightly.

This is when the rice rava has cooked well and leaves the sides of the pan.

6. When the mixture is still little hot but has cooled down enough to be handled, make small balls using hands and make a hole using finger as shown in the picture.

Note: The mixture should not cool down completely. It will be hard then. It should be warm when making the balls.

7. Repeat the same with the rest of the mixture.

I love how cute they look 😍

8. Now steam in a steamer for about 15 to 20 mins. Remove and serve hot drizzled with coconut oil on top with Piyava Gojju or any chutney of your choice.

Notes:

* I use only coconut oil or ghee in my cooking and this recipe uses coconut oil like all Konkani recipes. Please try to use the same for authentic flavour.

* For people who are new to making undis, it needs steaming after making the small dumplings. Please don’t forget the last step.

* Rice Rava or Idli Rava is not regular upma rava. This is coarser in texture and is made of rice.

* The combination of mustard seeds, Urad dal and methi gives it a wonderful aroma. Don’t skip any of it.

* Some people add broken red chillies in the seasoning but my mother made this way.

* If rice rava is not available, just soak and grind the rice to a coarse mix and add instead of rice rava. Though I have not tried it myself, I know many people who do it as rice rava is not easily available in their place.

* Don’t allow the mixture to cool completely before making undis. Make when it’s still warm. ( I actually make when it’s still hot as my kids will be behind me for breakfast. Though it burns my hands, a mom’s love is so and now I understand it. ❤️😅)

* For the Piyava Gojju, take finely chopped onion (2 medium sized) and about 3 Tbsp coriander leaves in a bowl. Add 2 to 3 tsp tamarind paste, salt and red chilli powder to taste depending on your spice level. Mix well adding about 1/4 Cup water and drizzle a little coconut oil on top. (You can add finely chopped green chillies too but I avoid for my kids.)

Raw banana tawa fry Konkani style | Harve kele polo

My mother suffers from muscular dystrophy in her legs since many years and can’t walk. After years of using walker to support her, now she has to use wheel chair for movement. Even then, she does whatever household chores she can, sitting in the wheelchair like washing dishes, cleaning the house and bathrooms. I really admire her mental strength and I am very much proud of her.

She dedicates her time towards devotion to God by singing bhajans, reading slokas, reading The Bhagavad Gita apart from video calling with us. Whatever good things I have learnt in my life is from her. She’s my best friend, my first and true love and my greatest support. ❤️

I am sharing about her today because this raw banana tawa fry is what she used to make for me as a kid. I used to get amazed by the beauty of this flower shaped dosa and used to stand beside her to see how it comes out.

Now whenever I make this dosa, I remember her a lot. Amma, this post of dedicated to you. Though I may not say it often, I love you a lot. 😘😘

Hope you all try and love this too. Happy and healthy cooking!

RECIPE:

Ingredients: {To make 2 flower shaped dosas}

1 medium sized Raw Banana

2 Tbsp Rice flour / rice powder

1/2 tsp Red chilli powder or to taste

1/4 tsp Asafoetida powder/ Hing

Salt to taste

Oil to cook the dosa

Step by step recipe:

1. Wash well and peel the raw bananas. Cut in circles which are not too thick nor too thin, in medium thickness as shown. Immediately put them in water so that they don’t turn black.

Note: I have also finely chopped the rest of the raw bananas to make stir fry or Upkari. Recipe in notes at the end.

2. Now make a thick paste with rice powder, red chilli powder, hing, salt and little water.

Note: Don’t make it thin as it won’t coat the raw bananas. Add only a Tbsp of water at a time.

3. Now heat a dosa pan. Drain all water from raw bananas. Dip the raw bananas one by one in the batter and place on the pan together in a flower shape.

4. Drizzle oil over it. Cover and cook till the surface cooks well. Do this on medium flame. It will take some time but still raw bananas cook quicker than potatoes. Flip and cook till it cooks completely.

5. Serve hot with rice meals or munch on as an evening snack.

Notes:

* Be careful to not cut the raw bananas too thick as it won’t cook well if done so.

* The batter should be thick or else it won’t coat the bananas well.

* Red chilli powder is to taste. I add less to accommodate my kids’ tastebuds.

* For the raw banana Upkari, heat oil in a pan. Splutter mustard seeds. Add hing and broken red chillies. Add finely chopped raw bananas with very little water. Add salt and cook till the bananas turn soft. Garnish with freshly grated coconut. Remove from flame.

Snake gourd seeds spicy dosa | Poddale beeye Sannapolo

After I posted Ridgegourd skin chutney, it reminded me of another “taste from waste” which my grandmother made regularly. It is these small dosas from the seeds of snake gourds. They are not the dosas that we have for breakfast but had with rice meals and called as sannapolo in Konkani.

There are so many varieties of sannapolos made with onion, cabbage, moringa leaves and many others. Those require soaking and grinding rice and toor dal. But this variety of sannapolo can be made instantly as it uses rava instead.

And anything that can be made instantly becomes instantly my favourite too 😉. What better way to use up the healthy part of this vegetable in a delicious way. A meal of these dosas with upkari and ukde pej (Matta rice congee) becomes a soulful meal for us. Something I can never get tired of. ❤️

Hope you all try this and love it like we do. Happy and healthy cooking!

RECIPE:

Ingredients:

3/4 Cup Snake gourds seeds (I took the core of two regular sized snakegourds)

1/2 inch Ginger piece

3 Green chillies

1/2 Cup Coconut (fresh or desiccated)

1 Cup Rava or Semolina

Salt to taste

Coconut oil to cook the dosa

Step by step recipe:

1. * Wash the snake gourd well and scrape the white skin with a knife.

* Then slice lengthwise and remove the core. Keep it aside.

* Chop the snakegourds to small pieces and keep it in another bowl to make Upkari. (Will share the recipe in notes) Soak 1/4 Cup chana dal for the Upkari for about 30 mins.

2. For the spicy dosa or sannapolo, grind the seeds along with coconut, ginger and green chillies to a slightly coarse paste.

Note: Don’t grind too much or it can taste bitter. Just pulse two to three times so that the seeds are crushed.

3. Add this paste to a bowl. Add rava and salt. With little water, make a thick batter.

4. Heat the dosa pan and make small dosas. Drizzle coconut oil and cook the dosas on both sides till they turn brown and crisp.

5. Remove and serve with rice meals. This is not the regular dosa had for breakfast. It tastes best with rice, rasam or dal and snake gourd stir fry (Upkari).

Notes:

* If the snake gourd seeds are very small and easily crushable with hands, then no need to grind it along with the other ingredients in the mixer. Just mix it with the ground paste.

* While grinding the seeds, don’t grind for too long. Just pulsing is enough. Grinding for too long can cause a bitter flavour.

* The rava that I use is normal upma rava. Since this is a thick dosa, don’t add a lot of water. Just enough water to make a thick batter.

* For the snake gourd Upkari, heat coconut oil in a pan. Splutter mustard seeds and add the soaked chana dal, green chillies and curry leaves. Add chopped snake gourd and hing along with salt and little water. Cook till the snake gourd turns soft. Garnish with grated coconut.

Ridge gourd skin Chutney | Ghosale sheere Chutney & Ridge gourd Upkari

We amchis (GSB Konkanis) are famous for not wasting anything when it comes to food. We use every possible part of any vegetable while cooking. I have seen my grandmother and mother do it and follow the same. It is not only economical but is very healthy too.

One of the most used “taste from waste” in my kitchen is watermelon rind (the white part of watermelon) which many people throw away. But you can make these sweet and spongy dosas called Surnalis with it. Also lipsmacking Halwa with jaggery can be made with it.

This chutney is yet another amazing example of using up vegetable peels. The chutney from ridgegourd skin tastes so yummy that I used to literally beg my dad to bring it so that my mother could make this chutney.

I love it so much that I peel the skin a little thicker than normal so that I get more chutney than Upkari 😅. Here’s sharing how my grandmother and mother make this chutney. Hope you all try and love it too. Happy and healthy cooking!

RECIPE:

Ingredients:

Skin or peel of one long Ridge Gourd

2 tsp Ghee

1 tsp Cumin seeds/ Jeera

1/2 tsp Hing or Asafoetida

3 Green chillies

1 Cup fresh or desiccated Coconut

1 tsp Tamarind paste

Salt to taste

Step by step recipe:

1. Remove the peel or the ridges of the ridge gourd and cut into pieces.

Note: Cut the ridge gourd into small pieces too for the Upkari or stir fry. Will share the recipe in the notes.

2. Heat ghee in a pan and add cumin seeds and hing. When it changes colour, add green chillies and ridge gourd skin. Fry well till the skin cooks well.

3. Now add coconut and fry till it turns brown in colour. Remove and allow it to cool.

4. Grind with tamarind, salt and little water to a smooth paste. This is a thick chutney.

Notes:

* My grandmother used to add couple of roasted Red chillies too to the chutney while grinding for extra flavour. I skip it so that it does not turn spicy for my kids.

* This is a thick chutney and along with Upkari makes an excellent combination with rice meals. You can enjoy with dosas too.

* I peel the ridge gourd little thick as I love this chutney. You can peel it thin if you are used to doing that way.

* For the Ridge Gourd Upkari, splutter mustard seeds in coconut oil. Add green chillies and the chopped ridge gourd. Add salt and cook without adding water till the pieces turn soft. Garnish with freshly grated coconut and remove from the flame.

Pejje Polo | Cumin flavoured dosa

As you all already know, we are a dosa loving family and on most days, our breakfast is any variety of dosa. I have already shared 15 varieties of dosas which I make regularly. Here’s sharing a dosa which my grandmother made atleast once a week – Pejje Polo.

This thick cumin flavoured dosa is actually served as prasad or offering to Lord Venkataramana in a temple in Karkala which is a place in south Karnataka. Though homemade ones can’t match the divine flavours of temple offering, it does taste very delicious. The aroma of cumin seeds take this dosa to another level.

I feel so happy to be sharing my Anama‘s (grandmother’s) recipe on the site. Hope my kids too read this recipe someday and prepare with love for their family just like how my Anama and Amma made it and taught me.

My family loves these soft on the inside yet crispy dosas very much. Hope you all try and love it too. Happy and healthy cooking!

RECIPE:

Ingredients: {About 18 small sized dosas}

2 Cups Raw white rice (any variety works well)

1 Cup Urad dal

1 Tbsp Cumin seeds/ Jeera

Oil or ghee to cook the dosa

Step by step recipe:

1. Wash well and soak urad dal and rice together for about 4 hours.

2. Drain the water and grind along with little water to a slightly coarse paste. Add cumin seeds and salt.

3. Now grind to a almost smooth but little grainy batter. (It’s okay to grind smooth too but this dosa has a little grainy texture)

Note: Consistency is like regular dosa batter (a thick batter but still pouring consistency).

4. Ferment the batter overnight or for 8 to 10 hours.

5. Now when making dosas, heat a dosa pan and pour a ladle of batter in the center of the pan. The dosa is small and slightly thick. No need to spread the dosa.

6. When the surface looks almost cooked, drizzle oil or ghee over the dosa. Flip and cook for a minute or so.

7. Serve hot with a chutney of your choice.

Notes:

* Cumin seeds are the highlight of this dosa. Don’t skip it. It gives a wonderful aroma and flavour to this dosa.

* Keep the batter consistency thick (like regular dosa batter) and slightly coarse for authentic texture of the dosa.

* Also cook both sides crisp for best taste.

* I serve this dosa with simple coconut chutney. Just grind coconut gratings with ginger, green chillies and salt with little water to a smooth paste. I don’t season this chutney. You can also season in coconut oil with mustard seeds, hing and curry leaves.