All posts by Healthy Cooking with Mitha

"Healthy food can be oh so delicious too!" Yes this site is all about that. Join me in my journey of healthy eating accompanied by my foodie of a husband and an equally foodie toddler.

Benda Uli/ Bhindi fry/ Spicy Lady’s finger fry

If there is one vegetable that I am not fond of, it is Lady’s finger. My all time favorite veggies are potato, elephant yam, beetroot, carrot ie all underground vegetables πŸ˜‹. But Mr hubby hates potato and beetroot. So all these years, we have never bought beetroot and rarely use potato except for masala dosa or chapati bhaji. Husband’s food choices replace mine (Kahaani ghar ghar ki, I suppose! πŸ˜†)

Now guess which veggie is his favorite? Yes, Lady’s finger πŸ™„πŸ˜…. So this lady makes way into our house more than quite often and he makes me eat it saying it is healthy 😬. So I have learnt to cook it in a way that I can atleast bear to eat it.

Benda Uli is commonly made at his place and the only dish he too likes with Bhindi. Though it is made little liquidy, I make it crisp so that it does not turn slimy (which I absolutely dislike). It turns out good and even my kids like it.

Hope you all try and like it as well. Happy and healthy cooking!

RECIPE:

Ingredients:

3 Cups chopped Lady’s finger / Bhindi/ Benda

2 Tbsp Coconut oil

1 medium sized Onion, finely sliced

1 medium sized Tomato, finely chopped

1 tsp Red chilli powder or to taste

Salt to taste

Step by step recipe:

1. This is how I prepare the Lady’s fingers for any curry. Wash them well under running water. Then allow it dry completely. Just keep it as such for little while and it will air dry. Chop off both ends of the Lady’s fingers and then cut into small pieces. Put in a bowl and keep aside.

Note: Ensuring that there is no water in the Lady’s fingers avoids the sliminess in the curry.

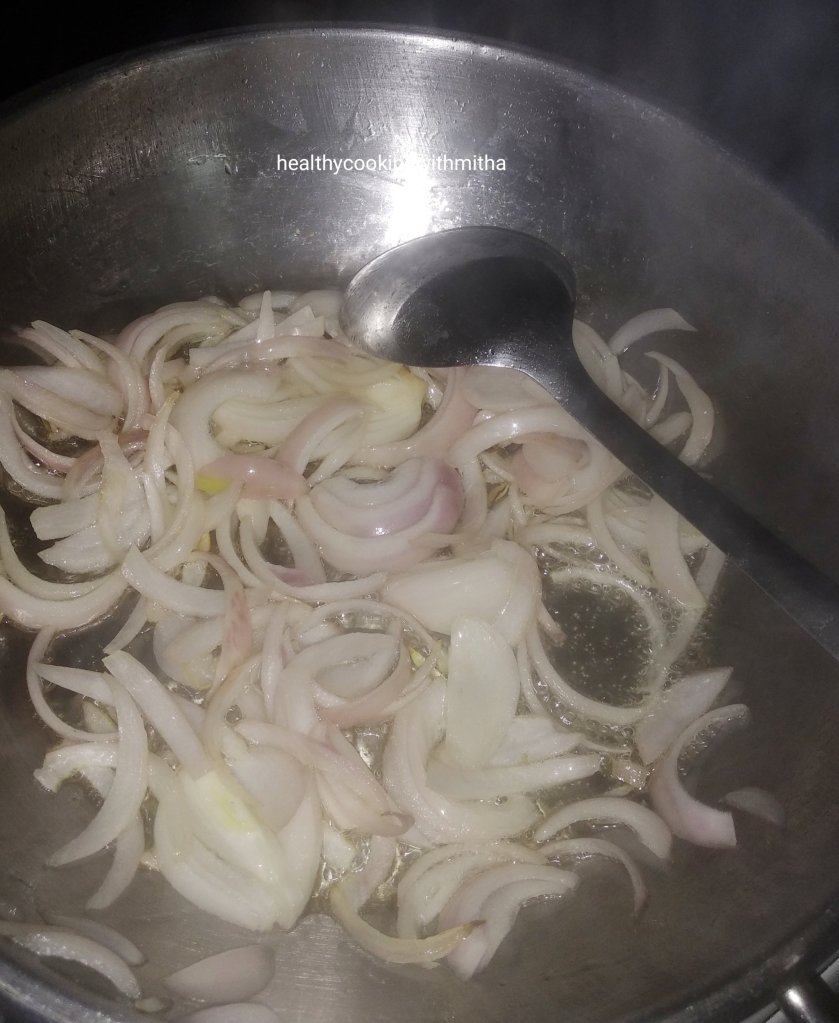
2. Now heat oil in a pan and add finely sliced onions. Fry till it turns translucent.

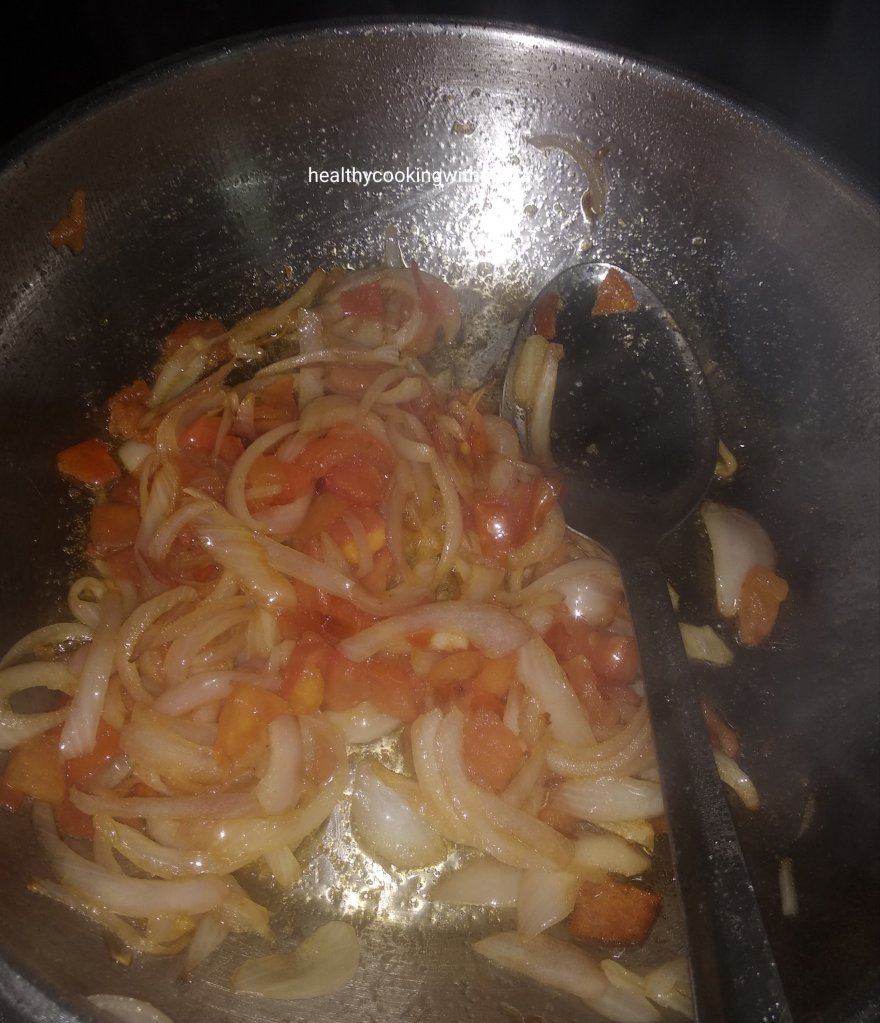
3. Now add tomatoes and fry till it turns soft.

3. Add the chopped Lady’s finger and fry it continually till it cooks. Don’t add water at all or else the curry turns slimy. It will take time but the texture of Lady’s finger will be very crispy and tasty.

5. Now add red chilli powder and salt. Mix well such that everything blends well. Cook for couple of minutes.

6. Remove from flame. Serve with rice meals.

Notes:

* Towards the end of frying, I purposely allow it to get little burnt ( to a little brownish tinge and not to black ). It gives it a very good flavour to the curry.

* For Lady’s finger, the most important part is preparing the vegetable. Wash first and then allow it to dry off completely. This ensures that slimes don’t form while cooking the Lady’s finger.

* Usually Benda Uli is made little liquidy but I prefer this method of cooking it (water free) as it gives crispy and tasty curry.

* Red chilli powder is to taste.

Rava Bhakri /Rullanva Doddaka/ Instant Semolina savory pancakes

I am a huge fan of our age old amchi (Konkani) dishes. They are not only easy to make but very healthy and super delicious too. Also, I am a firm believer that breakfast should be the most filling meal as it gives us energy for the day and keeps us away from snacking often.

This Rava Bhakri is exactly that. Very filling and super tasty too. It’s my go to breakfast when I have forgotten to soak for dosas or idlis. My kids call it “Rullanva bobbo” and demand it whenever they feel hungry. So this “bobbo” becomes their snack too when they come tired after playing. And the best part is, it hardly takes 10 mins from start to finish to make this.

Now that’s how I love my dishes. Less time in the kitchen, yet healthy, kid friendly and delicious. Most Konkanis know this recipe but sharing for those who don’t know. Hope you all try it too. Happy and healthy cooking!

RECIPE:

Ingredients:

2 and 1/2 Cups Semolina (wheat rava, upma rava, sooji)

Approx 3 Cups Water

1/4 Cup Wheat flour (Atta)

1/4 Cup freshly grated Coconut

1/4 Cup Yogurt/ Buttermilk (optional)

2 to 3 Green chillies

1 inch Ginger piece, grated

1 Tbsp Sugar

Salt to taste

Ghee or coconut oil to cook the dosa

Step by step recipe:

1. Take Semolina, wheat flour, sugar, salt and coconut in a mixing bowl.

2. Add yogurt, water, Ginger and green chillies. Mix well and make a lump free batter of thick consistency. (It took me 3 Cups water for 21/2 cups rava. Might vary depending on the brand of rava.)

3. Now heat a dosa pan and add a ladle of dosa batter. Spread it into a thick dosa.

4. Cover and cook till the surface cooks. Add ghee or oil on top.

5. Flip and cook for a minute.

6. Serve hot with butter and pickle.

Notes:

* Rava absorbs a lot of water very quickly. But it varies with the brand of rava. So best is to add water one cup at a time in the beginning and then add little by little to make a batter thicker than dosa batter consistency.

* This batter can be made before hand and refrigerated. I make it at night and refrigerate for breakfast the next day as it saves a lot of time in the morning. Just that the rava absorbs all the water. So it needs and addition of about a cup of water to bring it back to pourable consistency.

* The addition of yogurt or buttermilk is optional but gives a nice tangy flavour to it.

* You can also grind the coconut along with Ginger and green chillies. Then add to the batter but I love the bite of green chillies. So I don’t do that way.

* I don’t even need pickle with this. Butter is an excellent accompaniment to this bhakri.

* You can also add an mashed overripe banana to this batter. Tastes really delicious!

* You can also add grated cucumbers to this to make Instant Cucumber dosas or Thoushe Bhakris.

Banana flower/ Bondi Chutney & Bondi Upkari

Banana flower is very healthy especially for our digestive system and kidney function. So I always try to include it in our meals at least once a week. This chutney is my favourite which my mother used to make regularly.

As good as it is for health, it is also lipsmackingly delicious . We enjoy it with our rice meals and also with dosas. Here’s sharing how my Amma used to make this chutney and also the upkari.

Do try it and you will definitely love it. Happy and healthy cooking! ❀️

RECIPE:

Ingredients:

1/2 a medium sized Banana flower/ Bondi (I took the other half for upkari)

1/2 Cup fresh or desiccated Coconut

2 tsp Oil

1 tsp Mustard seeds

1 tsp Cumin seeds/ Jeera

A sprig of curry leaves

1 tsp Tamarind paste

3 dried Red chillies or to taste

Salt to taste

Step by step recipe:

1. First of all, remove the outer layers of the banana flower along with the small white flowers inside. Just two or three layers will do till you get the inner firm banana flower. Chop it finely and immediately add to a bowl with water.

Note: I got 5 Cups of chopped banana flower in total. Took 2 cups for chutney and 3 cups for upkari.

2. Heat a pan with oil and add mustard seeds, cumin seeds and curry leaves.

3. When mustard seeds splutter, add the drained chopped banana flower to it. Fry well and cook with very little water till it turns soft.

4. Now add coconut and fry till it turns light brown in colour.

5. Allow it to cool. When it cools down, grind it along with red chillies, Tamarind and salt to a smooth paste adding water little by little as needed as it’s a thick chutney.

6. Remove in a bowl and serve with rice meals.

Notes:

* For the upkari or stir fry, Heat oil in a pan and add finely chopped garlic. Fry till garlic turns light brown in colour. Add the drained chopped banana flower and cook till it turns soft adding salt and red chilli powder as it cooks. Garnish with grated coconut on top. {On days that we don’t eat garlic especially during fasting days, I add Hing or asafoetida instead to the seasoning and it tastes delicious too.}

* While discarding the outer layers of the banana flower, discard the two or three hard and outermost ones. Rest are consumable.

* Immediately add the chopped banana flower to water or else it will turn black.

* Cook the banana flower well or else the chutney will have a raw flavour.

* This chutney is thick and can be enjoyed with rice meals or even with dosa.

* If refrigerated, it can last well for two days.

Whole wheat cheesy garlic bread

We have still not started eating from outside much to the surprise of our friends here. But honestly, after learning to cook clean and delicious food at home, we don’t actually feel like ordering from outside. For me, the main turn off is the oil. I am so used to either coconut oil or ghee in my cooking that when I am reminded of the oily restaurant foods (mostly sunflower or some mix of refined oils), I don’t feel like eating out at all. I can’t believe I used to find it tasty. Life has changed so much in every way.

Not only curries, even pizza and garlic bread are homemade now. This Whole wheat Pizza is not only easy to make but tastes so yummilicious apart from being healthier too. I also happened to try cheesy garlic bread sometime back and we all loved it. So it had to be on the blog as well. I made it many times to recheck the recipe (also to devour it 😁) but could not get good clicks as the kids are always in urgency to gobble it up. πŸ˜€

I finally gave up and decided to share these somewhat okay pictures itself on the blog. Don’t go by the picture, it’s really very tasty and much better than outside ones. We absolutely love it. It’s not very difficult to make too if you follow the step by step pictures well.

Hope you all try and love it too. Happy and healthy baking! ❀️

RECIPE:

Ingredients:

1 and 1/2 Cups Whole wheat flour or gehun ka Atta (I use Pillsbury brand)

About 1/2 Cup Water to knead the dough (depends on the flour brand)

1 tsp Instant yeast (or 1 and 1/2 tsp dry active yeast)

1/2 tsp Sugar

1/4 tsp Salt

About 1/2 Cup grated Mozzarella cheese

For the garlic dressing:

2 Tbsp salted Butter (if using unsalted, add salt to this dressing)

5 Garlic pods

2 Tbsp finely chopped Coriander leaves

1 tsp Dried mixed herbs seasoning

Step by step recipe:

1. Take wheat flour, instant yeast, salt and sugar in a mixing bowl.

Note: If using dry active yeast, it needs proofing ie put the yeast along with sugar in lukewarm water and then add to the flour and salt once the yeast has risen (takes about 5 mins).

2. Now add water little by little and form the dough like regular chapati dough – Soft and smooth. No need to knead.

3. Keep for rest covered in a warm place for an hour.

Note: It might not rise much but that’s fine, it will have a yeasty smell to it which shows it has acted in the dough. In cold places, keep for 2 hours since it will take longer for the yeast to act.

4. While it’s kept for rest, prepare the dressing. Melt the butter in a microwave or in a pan. Add finely chopped garlic, coriander leaves and herb seasoning. Also add chilli flakes if you like (I avoid for my kids)

5. Once the dough has finished resting, preheat the oven at 200 C for 10 mins. Take a oven proof plate. Grease with oil and sprinkle dry wheat flour over it. Spread the dough in circle shape over it as shown.

6. Now apply half of the dressing evenly over it.

7. Spread mozzarella cheese evenly over it.

8. Fold and seal the edges as shown.

9. Apply the rest of the dressing over it and make evenly spaced cuts over it till three fourth of the semicircle. (reminds me of maths lessons 😁😁)

10. Bake in the preheated oven at 200 C for 15 mins in the center rack or till the surface turns golden brown in colour.

11. Allow it to cool slightly. Enjoy served with ketchup.

Notes:

* I use Pillsbury wheat flour for all my bakes. Love the flour as it makes the baked goodies perfect.

* There is no need to knead the dough. Just bring them together like chapati dough. That’s enough. But make sure the instant yeast is of good quality. If using dry active yeast, make sure to proof it as mentioned above in the step by step recipe.

* You can grate the garlic if you don’t like garlic bites in your garlic bread. Also add chilli flakes if you like it.

* Don’t keep opening the oven door while baking. Open only after 10 to 12 mins into the baking time. Else it can hinder the baking process.

* Preheating the oven is a very important step. Don’t forget it.

* This tastes best when eaten hot and consumed immediately after baking.

* The dough can be made beforehand and refrigerated to be used within two days.

* This is the same dough that I use for my Whole wheat Pizza which is a regular fare at my house and my kids’ favourite.

Broken Wheat sweet khichdi | Gonva Khana Khichidi

Usually, I don’t time my recipes according to festivals as my blogging depends on the time I get after my household works along with taking care of two kids. But this time it is different. With the encouragement I got from my readers for my previous posts, this sweet recipe is definitely worth spending my sleep time on, just to post for Vijaya Dashami. Thank you readers! Without you to read this, I will never be motivated to write. ❀️

The significance of Vijaya Dashami has two stories from the Indian mythology. One is the killing of Ravana by Lord Rama and the second is the killing of Mahishasura by Goddess Durga, both of which are celebrated on this auspicious day signifying the victory of righteousness and goodness over evil.

My heartfelt prayers to God on this occasion is to not allow the bad qualities in me take over the good qualities at any moment and also let me not hurt anyone knowingly or unknowingly. As I write this, I know it is difficult as we are all humans and make mistakes. But if we continue praying, God will definitely help us overcome everything in life. We just need to leave everything to him and trust him. As my Amma says, do good and be good, that’s all we can do. Whatever has to happen, will happen according to God’s will and we can’t change it. Once we understand this, we are at peace.

On this spiritual (and a “letting out my heart” 😁) note, I would like to wish all of you a very happy Dussehra or Vijaya Dashami. Hope you all try this easy sweet which is loved in my family. May the sweetness always remain in your lives and may it be filled with happiness.

RECIPE:

Ingredients:

1 Cup Broken wheat/ Gonva Khan/ Daliya/ Lapsi

1 Cup Jaggery (powder or grated)

About 4 Cups hot Water

1/2 Cup thick Coconut milk *check notes

2 Tbsp Ghee

About 8 to 10 Cashews

About 2 Tbsp Raisins

1/2 tsp Cardamom powder

Step by step recipe:

1. Heat ghee in a pan and add cashews and raisins. Fry till the cashews turn light brown and raisins plump up.

2. Add broken wheat and roast for a minute.

3. Now, add 2 Cups hot water (at first) and cook till it absorbs all the water. Then, add 1 Cup hot water and 1 Cup more if needed, along with 1/2 Cup coconut milk.

4. Cook till the broken wheat turns soft and swells.

(Took 4 Cups water for me in total for 1 Cup broken wheat. Might vary depending upon the variety of broken wheat.)

5. Now add jaggery and mix well.

6. Keep stirring and cook till the mixture leaves the sides of the pan. Add cardamom powder.

7. Remove and serve hot with banana slices as garnish if you have.

Notes:

* The only time consuming part while making this khichdi is for the broken wheat to cook fully. Add 2 Cups of hot water first and then 1 Cup each time while checking if the broken wheat is cooked or not.

* When it cooks fully, it will swell in size and you can no longer see it white grain like but will be very soft.

* For me, 1:4 ratio of broken wheat: hot water worked perfectly to get soft yet thick texture of khichdi. If you like a little thin texture of Khichdi, then you can increase the water content.

* I add this khichdi to a plate and cut into squares. It cools down and sets, giving perfect slices. You can serve that way too if you like.

* Coconut milk gives it the richness in taste. I make Coconut milk using coconut milk powder. You can use fresh coconut milk as well.

Urad – Whole moong dosa and idli | “No rice” recipe

Some dishes may not look as appealing to the eyes but they are simply delicious. These whole moong idlis are the perfect example of that. They are not as pristine beautiful like regular idlis but taste so good and are very healthy too.

I got the idea of this recipe from my friend Ashwini Kulkarni who always sends me pictures and recipes of dosas that she makes for her “dosa loving” family (just like mine). She did not make idlis with it but I made them as my son is a huge fan of “iddis(as he calls them πŸ˜€). Since I planned to make idlis, I added methi seeds too to the batter and it made the idlis very soft.

This is a “no rice” recipe like many of my idli and dosa recipes. So it’s good for those who want to avoid rice in their diet. Hope you all try and love it too. Happy and healthy cooking!

RECIPE:

Ingredients: {Gives 13 Idlis and about 6 dosas}

1 Cup Urad dal (I used split Urad dal)

1 Cup Whole moong / Green gram

1/2 Tbsp Methi / Fenugreek seeds

Salt to taste

Oil to grease the Idli plates and ghee to cook the dosa

Step by step recipe:

1. Take Urad dal, whole moong and methi in a bowl.

2. Wash well and soak in atleast double the amount of water for about 4 to 6 hours. Now drain the soaked water and add the soaked urad-moong-methi to the mixer.

3. Grind to a smooth paste. It took me 1 Cup water while grinding (this information is for people who ask me for water measurement). Pour in a large preferably steel vessel.

4. Keep covered at room temperature for fermentation overnight or for about 8 hours.

5. If making Idlis, add the batter to greased idli moulds.

6. Steam for 20 mins or till done.

7. If making dosas, heat a dosa pan and pour a ladle of the batter. Spread using the back of the ladle to circle shape.

8. Add ghee or oil to the dosa. Cook till the surface cooks. Then flip and cook for few seconds.

9. Serve both dosas and Idlis with a chutney of your choice.

Notes:

* The whole moong might not grind fully but have little skin in the batter. That is okay.

* Cook the dosas only one side if you like soft dosas and cook both sides till crisp for crispy dosas.

* I served this with two kinds of chutney:

** Peanut Hing Chutney: Grind coconut with ginger, green chillies, hing powder, salt and skinned peanuts with little water to a smooth paste.

** Mint Coriander Chutney: Grind coconut with mint leaves, coriander leaves, curry leaves, green chillies, ginger and salt to a smooth paste. Add lemon juice over it.

Both these chutneys don’t need seasoning and goes well with Urad moong Idlis and dosas.

Surna Koot | Spicy Konkani style yam pickle

Elephant yam or Surnu is my favourite vegetable since childhood and my birthday lunch would always include Surna upkari or stir fried elephant yam which Amma never forgot to make. Her love made it even tastier. I can never make it that way. ❀️

During festive occasions, this elephant yam pickle or Surna koot is commonly made by my husband’s aunt and is my absolute favourite. She is an expert cook and my Guru who introduced me to cooking post marriage (before that, I was a Amma’s baby who was hardly allowed inside the kitchen 😍).

But after marriage, I learnt a lot from my husband’s aunt or mhave as I call her. The way she cooks so lovingly for everyone taking care of everyone’s likes and dislikes has been an inspiration for me.

So here’s sharing the recipe for the pickle. We love it a lot and I regularly make it when I get elephant yam. Hope you all try and love it too. Happy and healthy cooking!

RECIPE:

Ingredients:

2 Cups finely chopped Elephant Yam/ Chena/ Soornu

Salt to taste

2 Tbsp Oil ( to fry the yam)

For the masala paste:

5 to 6 dried Kashmiri red chillies or to taste

1 tsp Tamarind paste

1/2 tsp Hing or Asafoetida powder

1/2 tsp Coriander seeds + 1 tsp Mustard seeds + 1/2 tsp Methi seeds {to be fried in 1 tsp oil}

For the seasoning:

2 tsp Oil

1 tsp Mustard seeds

A sprig of Curry leaves

Step by step recipe:

1. Heat oil in a pan and add the finely chopped Elephant Yam pieces along with salt.

2. Fry till the pieces turn crisp. Keep aside. You can deep fry instead. But I prefer shallow frying it.

3. Take dried red chillies, tamarind paste, hing in a mixer. Fry coriander seeds, methi and mustard seeds in little oil. Cool and add to the mixer.

4. Add little water and grind to a smooth paste.

5. Heat oil in a pan and splutter mustard seeds. Add curry leaves and fry till it turns crisp. Now add the ground paste. Allow it to come to a boil.

6. Now add the shallow fried elephant yam pieces and allow to cook till the pieces turn soft. Also add salt if needed.

7. Adjust water and add red chilli powder if needed. Remove from flame. Serve with rice meals.

Notes:

* In this recipe, usually the yam pieces are deep fried after applying salt. You can do it too but since I don’t like deep frying, I shallow fry it till it turns crisp. Though it takes time, it is to avoid the extra oil.

* You can adjust salt, water and red chilli powder towards the end to make it as spicy or as thick or thin as you like. It’s usually had like a semi thick gravy with rice meals.

* We enjoy it with our Matta rice gruel (congee or pej) and it’s a comforting soulfood.

Sugar free Dates Carrot Halwa

My second sweet recipe for Navaratri after Mango Kesar Peda is this sugar free dates carrot halwa which is not only tasty but very healthy too. A healthier alternative to the regular carrot halwa which uses refined sugar.

I got this idea from my Dates Carrot cake which does not need sugar nor jaggery for its sweetness. Dates and carrots combine so well making it a heaven made match that it does not need anything else for sweetness.

So I decided to use this perfect match to make a healthier version of carrot halwa and I was so happy when it came out so delicious. My kids who absolutely adore carrot halwa did not realise the difference at all. They relished it a lot and I was one happy mommy. After that, it’s become a regular dessert for us and I can’t be happier.

Hope you all try and love it too. Healthier alternatives are not only an option but a need too. We should respect our body and eat as healthy as possible. Happy and healthy cooking!

RECIPE:

Ingredients:

3 Cups grated Carrots {I took 3 large carrots}

8 Dates { I used Khudri variety} * to make 1 Cup Dates paste

2 Tbsp Ghee

3 to 4 Dates

8 to 10 Cashews

8 to 10 golden Raisins

Step by step recipe:

1. Soak the 8 dates (deseeded) in water enough to soak it, for about 15 mins. Also keep grated carrots ready.

2. Grind dates in the soaked water to a smooth paste (in about 3 Tbsp water). Keep aside. (It gave me 1 Cup Dates paste.)

3. Heat ghee in a pan and add deseeded and quartered dates, cashews and raisins. Fry till cashews turn golden.

4. Now add the grated carrots and fry on medium flame till the carrots loses its rawness and change colour. Takes about 5 mins.

5. Now add the dates paste and mix well. Cook on medium flame till the carrots turn soft and the mixture leaves the sides of the pan getting well combined. (Takes another 5 to 8 mins. Do a taste test to see if the carrots are cooked well. If not, cook for little while more.)

6. Remove from flame and serve warm.

Notes:

* This halwa gets tastier when kept for couple of hours before serving as the carrots absorb the dates paste well and gets more delicious. So prepare little while beforehand if you have time.

* This is not like the regular carrot halwa with milk and sugar but definitely a healthier alternative and very tasty too for sure.

* I have purposely not added milk to this as dates is an ingredient. Dates are rich in iron whereas milk is calcium rich. Calcium hinders iron absorption in the body when consumed together. So I skipped milk in this halwa to make it more beneficial to the body. {Just as an after note, Vitamin C rich foods (lemon, tomato, orange) enhance absorption of iron in the body. So always consume them together with iron rich foods when possible.}

* 8 dates making 1 cup dates paste is perfect sweet for 3 Cups grated carrots. Lesser than that might not taste as good and more might be extra sweet while masking the taste of carrots.

* I have also not cooked carrots for long like traditional carrot halwa recipe as I did not want to reduce the nutritional value by doing so. Just saute well in ghee for 5 mins and then cook in dates paste for 5 to 8 mins. It will cook well.

Mango Kesar Peda | Easy Peda recipe

Click on the image to save the recipe on Pinterest

As our most prominent festival Navaratri is approaching, I decided to share some sweet recipes which I make regularly during festive occasions. One among them is this Mango Kesar peda which is our favourite (especially mine as I love mangoes and sweets. So this is a heaven made match for me ❀️❀️)

Navaratri during childhood meant pooja days in Kerala as books were kept in front of Goddess Saraswati for blessings and we would take it on the 10th day ie on Vijaya Dashami day. {I would actually be more happier that pooja days meant no school and no studies too. πŸ˜€πŸ˜€}

After marriage, in my husband’s home, they follow satvik meals all through the 9 days of Navaratri and don’t eat onion or garlic. On Vijaya Dashami day, there is a family get together and we enjoy a “navve javan” or new meal meaning we are celebrating a new beginning. We prepare huge number of dishes and eat them together while chattering our hearts off. {Yes, they all are as talkative as me and I am their leader “Ammi” as they call me! πŸ˜€}

We usually take vacations to India during this time to be with the family during “navve javan”. This will be the first year we will be missing it due to Covid situation.

Anyhow, I hope to celebrate the Navaratri days and Vijaya Dashami by making sweets, enjoying simple satvik meals and most importantly remembering Goddess Durga in all her forms. Essentially, celebrate to remember that good always triumphs. So, never let your goodness diminish even in difficult times and keep praying.

So here is the recipe for the peda. Hope you all try and love it too. Happy cooking! Shubh Navaratri and Vijaya Dashami to all of you! πŸ™

RECIPE:

Ingredients: {Makes about 12 pedas}

1 1/2 Cups Milk Powder ( full fat milk powder)

1 Cup thick Mango Pulp (fresh or canned) * I use Mother’s recipe brand of Alphonso mango pulp

2 Tbsp Jaggery powder ( can skip if using sweetened mango pulp)

1 Tbsp Ghee

1/4 tsp Cardamom powder (optional)

Saffron strands to garnish on top of the peda

{ I have doubled the measurements in the below pictures and hence the quantity seems so much. It yielded me 24 pedas.}

Step by step recipe:

1. Take milk powder, mango pulp and jaggery powder in a bowl.

2. Mix well using a spatula so that the mixture is free from lumps.

3. Heat ghee in a non stick pan and add this mixture. Keep the flame on medium.

4. Keep stirring on medium flame till the mixture starts to thicken and leaves the sides of the pan. Add cardamom powder and mix well. Takes about 8 to 10 mins.

5. Remove from the flame and allow it to cool completely. Take a small ball of the mixture and press between your palms to bring to the shape of the peda. If you find it difficult to shape them, grease your palms with ghee and they will come out well.

6. Repeat the same with the rest of the mixture. I also made some small pedas for my kids as it looks cute to them. Garnish with saffron strands.

Click on the image to save the recipe on Pinterest

Notes:

* This ratio of ingredients lead to very soft pedas. If you like slightly harder pedas, then reduce mango pulp to 3/4 Cup instead of 1 Cup.

* I used regular milk powder available at grocery stores. I live in Qatar and the brands available here are local to this region. You can use Nestle milk powder or any full fat milk powder.

* The mixture will be very soft when hot. It will turn hard as it cools down. For quicker hardening of the mixture, you can refrigerate the mixture for some time and then form pedas. The pedas will harden as they are kept in room temperature.

* I refrigerate them in an airtight container so that they last well. They last well till 4 days if handled well. Mine got finished off by then.

* I have used both sweetened mango pulp and unsweetened ones to make this. Sweetened mango pulp does not need the addition of jaggery while unsweetened ones requires the little amount of jaggery powder.

* Be careful to stir the mixture on medium flame as high flame can burn the mixture.

* You can also add saffron strands into the mixture but I prefer to garnish as they look pretty.

Update: I am getting many messages about what other option is available for those who don’t have mango pulp. If mango pulp is not available, there is another peda which I make with milk powder and condensed milk. For 1 tin condensed milk ie 397 grams, mix 1 and 1/2 Cups milk powder. Heat ghee and add Kesar. Pour this mixture and cook till it leaves the sides of the pan. Then make pedas. Though it’s not as healthy, tastes very delicious. I have made this peda many times and it comes out perfect each time.

Wheat Banana pancakes | Snack idea for kids

My daughter gets attracted by fancy names and few months back, she came to me saying “Amma, I want pancakes!”. She had seen it in some video. I told her pancakes are nothing but our dosas, just sweet version of it like our amchi Surnalis. She just would not accept it and wanted me to make the original pancakes for her.

So, I had to look up for pancake recipe (since I had never made nor eaten it before) but found it rather unhealthy with maida (which we never buy) and sugar. So I substituted it with wheat flour and jaggery. It came out very well and she was very happy to see it. ❀️

From that day onwards, when she’s hungry, she asks me to make these pancakes. I have improvised it by adding bananas to it too as it helps me finish off the over ripe bananas (who stare at me to use them up 😁) and also makes the pancakes more nutritious.

My 2 year old son too loves it a lot and it fills my heart with happiness when I see them eating together dipping the little pancakes in honey and eating with their tiny hands. Beautiful memories which will be in me forever. ❀️

Hope you all try and love these pancakes too. Happy and healthy cooking!

RECIPE:

Ingredients: {Makes about 18 to 20 small pancakes}

2 Cups Whole wheat flour/ Atta

1 Cup mashed overipe Bananas

1/4 Cup Milk

1 Tbsp Jaggery powder (optional)

1/4 tsp Baking soda (skip if making for kids aged less than one year) * check notes

Salt to taste

Step by step recipe:

1. Add the mashed bananas and jaggery powder in a bowl. Mix well.

2. Sieve wheat flour, baking soda and salt in the same bowl.

3. Add milk and water to form a smooth, thick, lump free batter of slightly thick consistency.

4. Heat a flat pan and when it gets hot, pour the batter using a spoon onto the pan making small pancakes as shown.

5. Cover and cook on medium flame till the surface cooks. Add ghee over it.

Note: Be careful to cook on medium flame as high flame can cause the pancake to turn black underneath due to bananas.

6. Flip gently and cook for couple of minutes.

7. Remove and serve with bananas, butter and honey.

Notes:

* I make these pancakes without baking soda too and my kids love it that way as well. They don’t turn fluffy but turn out very soft like dosas.

* You can skip bananas if you don’t have. It comes out like regular pancakes.

* You can skip jaggery if the bananas are very sweet. Use overripe bananas for best results.

* I make sweet dosas similar to this. Just mix together wheat flour, jaggery and salt with water and make a slightly thick batter. Good for quick to make evening snacks for kids.

* For kids, cook the pancakes in ghee and serve with butter and honey with bananas on the side. It’s very filling and they are sure to love it too.

* Do cook these pancakes in medium flame and not high flame as it can cause it to turn black underneath.