Protein rich healthy ladoos | Hurikadle Peanuts Sesame seeds ladoo

Click on the picture to save the recipe on Pinterest

A blog after long and what time better than Deepavali to make a comeback and what sweet better than ladoo (my nickname 😀) to start with.. ❤️

This recipe was shared by my dearest aunt and close friend, Mamta Baliga Shenoy mai.. She might be related to me slightly distantly but our hearts are not far apart at all.. She has been my greatest cheerleader and someone to have tried the most recipes from my blog.. So to add her recipe on the blog is a loving tribute by me to her.. ❤️

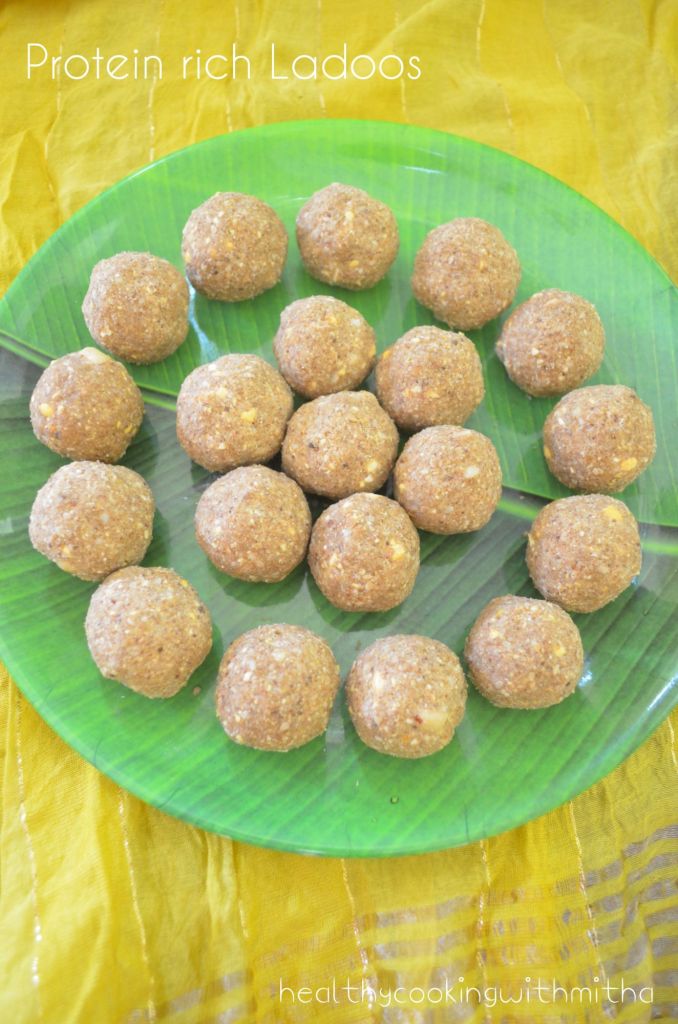
These ladoos are quite easy to make, simple to look at but very tasty and healthy too.. Combining the nutrients of roasted Bengal gram or hurikadle, peanuts and sesame seeds, they are rightly named by her, protein rich ladoos..

Thank you so much for your recipe mai..It’s an honour to add the recipe on my blog.. Love you loads and hope our friendship lasts all our life.. ❤️

RECIPE:

1 Cup = 250 ml

Ingredients: { Makes around 20 medium sized ladoos }

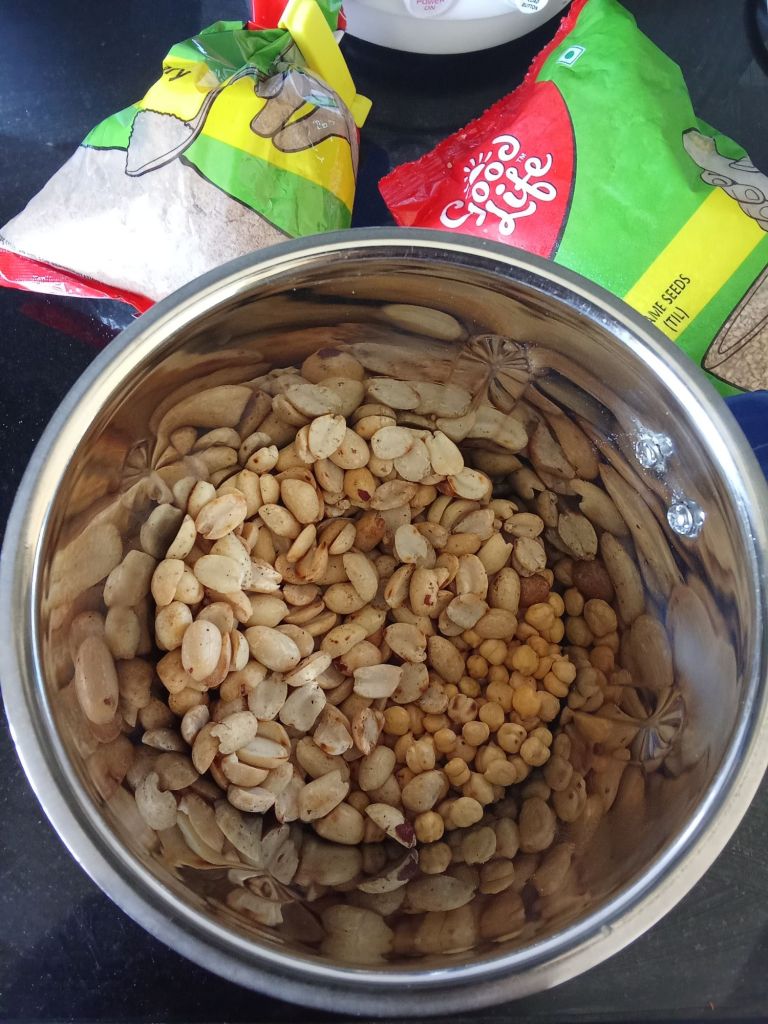
1 Cup Hurikadle / roasted Bengal gram (whole or halved), peeled

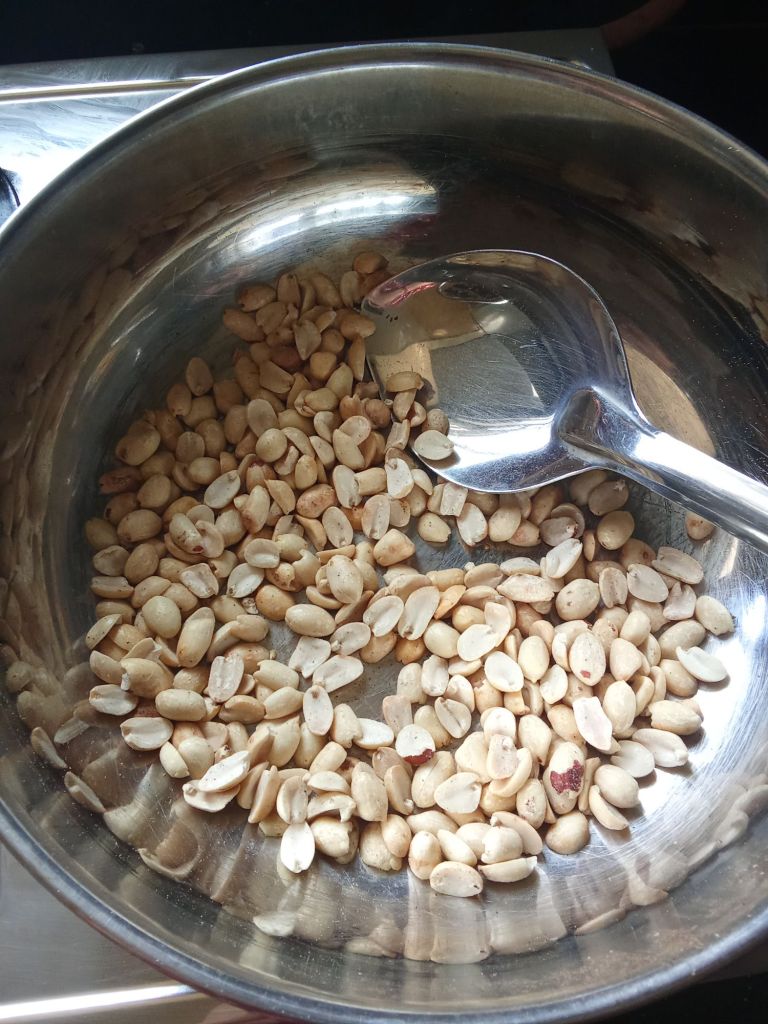
1 Cup peeled Peanuts/ Groundnuts

1/2 Cup roasted white Til or sesame seeds

1 Cup Jaggery powder

9 spoons (Tbsp) of melted Ghee

Seeds of two Cardamom pods

Step by step recipe:

  1. Dry roast hurikadle on low flame till it changes colour slightly and gives out an aroma.. Remove from flame and allow it to cool.. You can use both whole or halved hurikadle..

2. Now in the same pan, dry roast peanuts on low flame till it turns slightly brown.. Remove from flame and allow to cool down.. I had peeled Peanuts with me.. If you have whole unpeeled ones, roast and then remove peels..

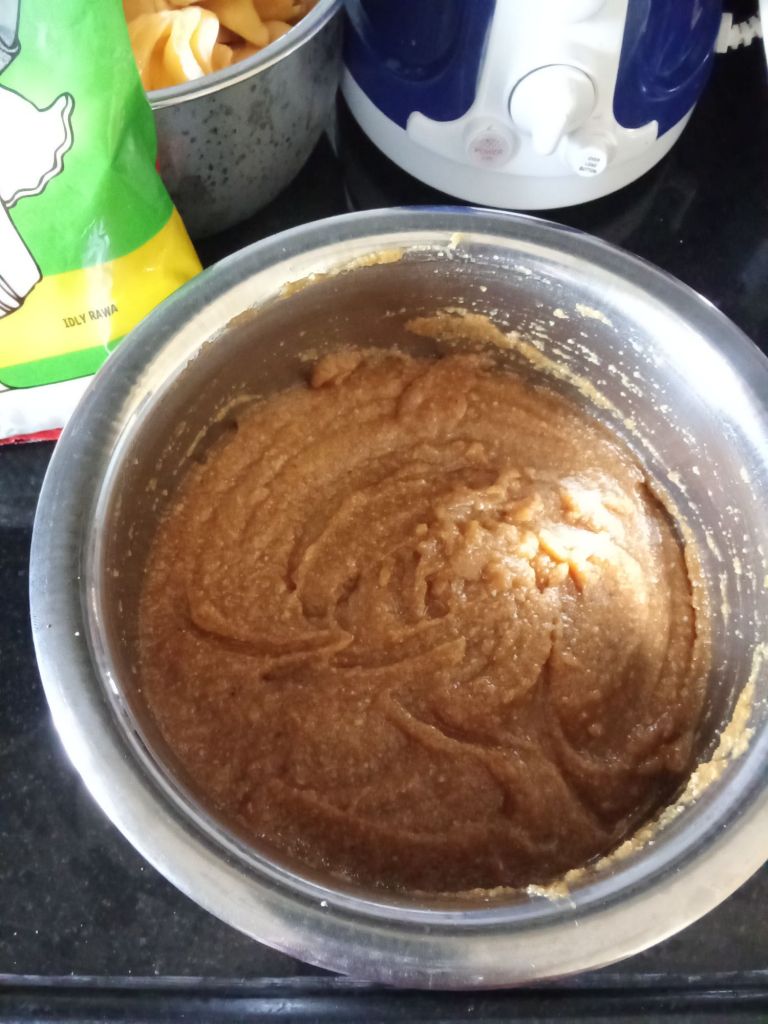
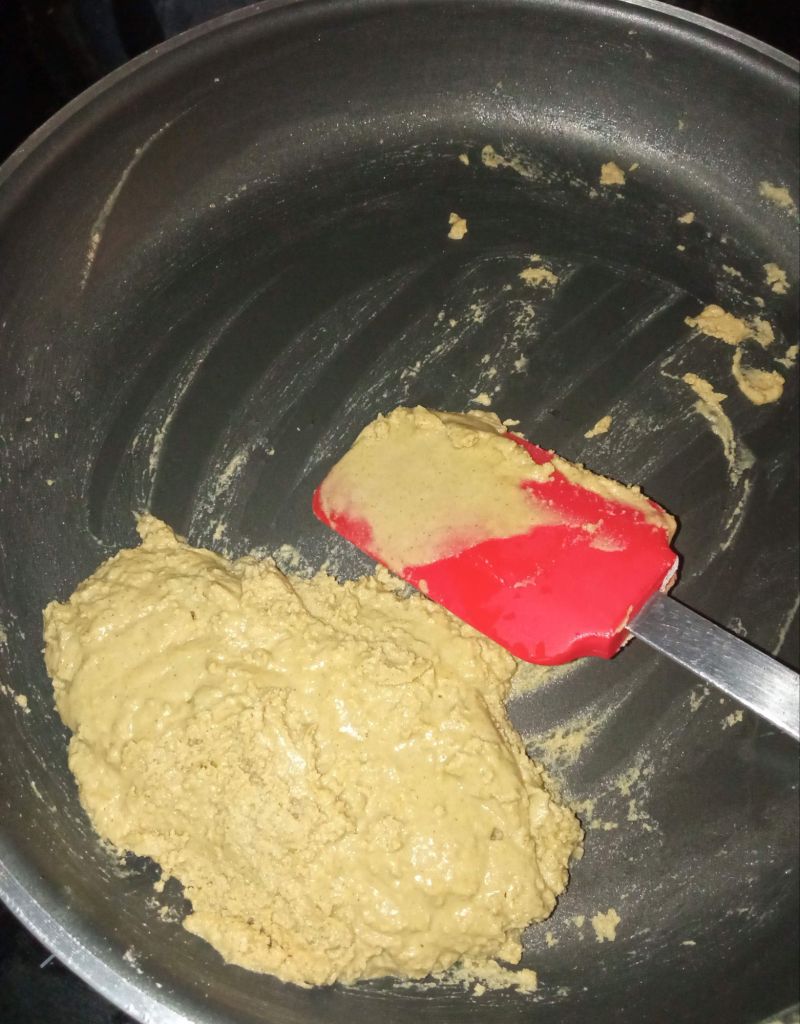
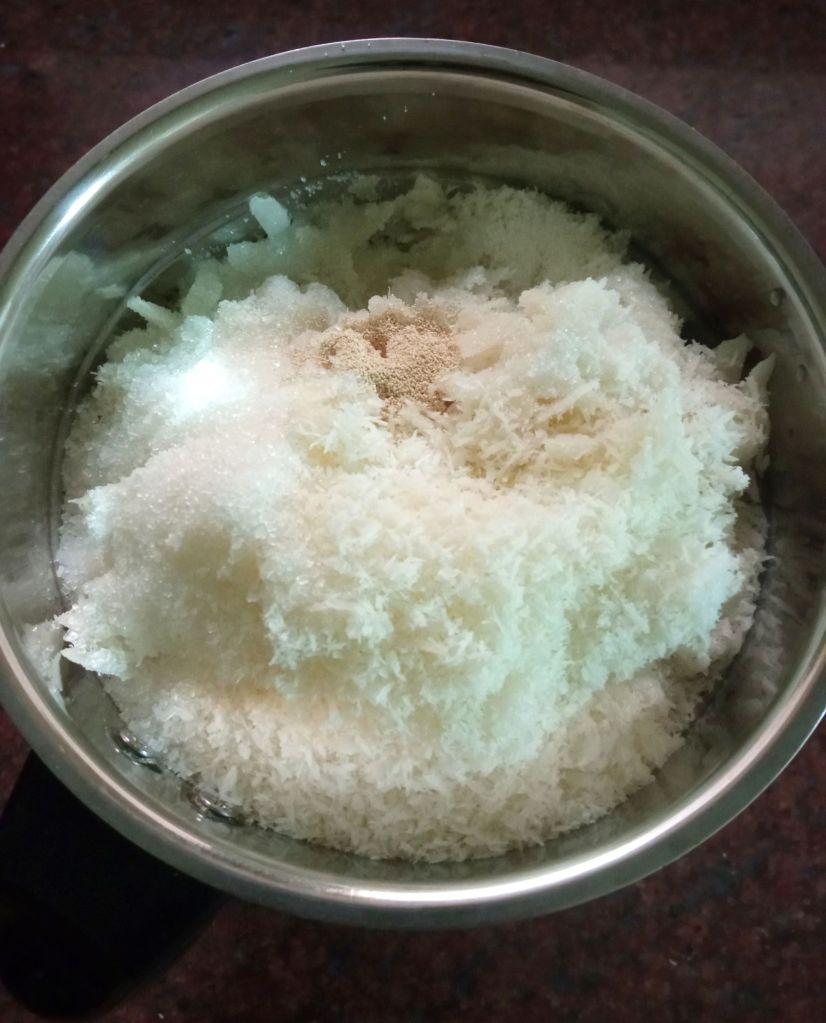
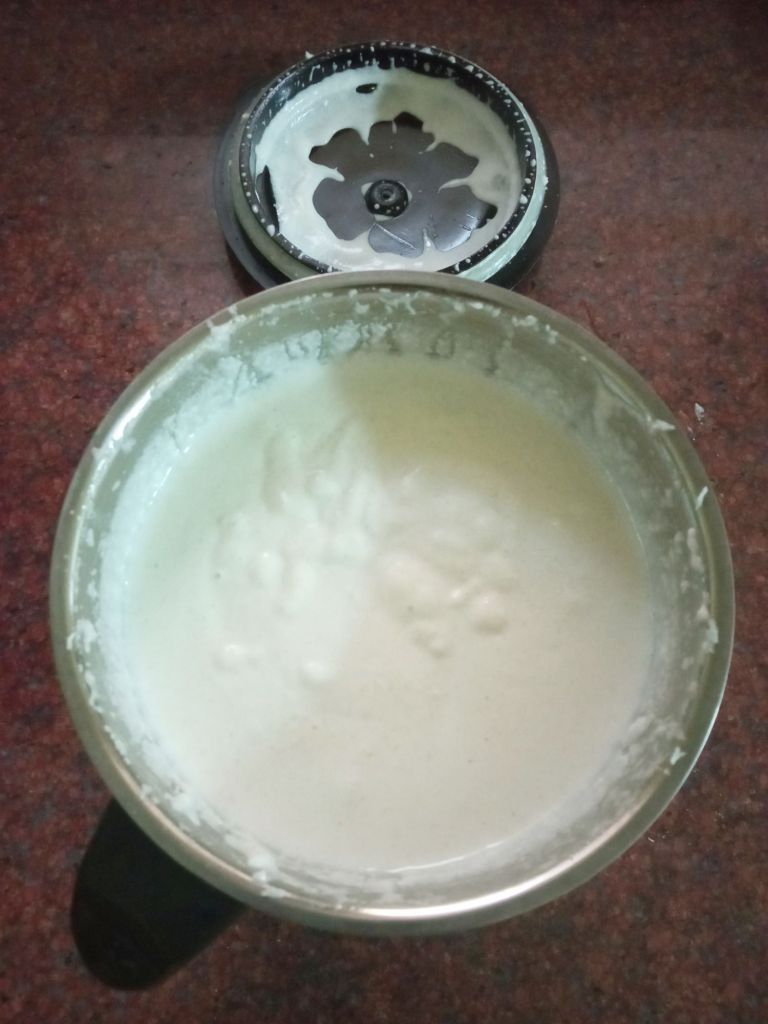
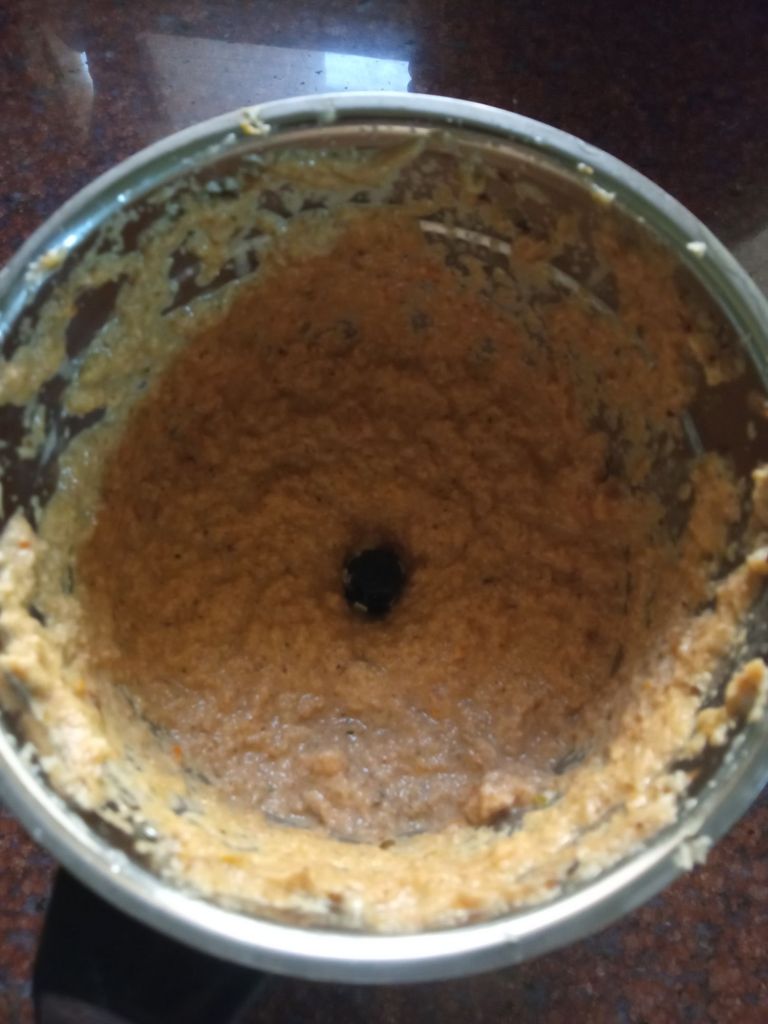
3. Now add both roasted hurikadle and peanuts in a mixer jar and make powder of it. If it is slightly coarse, it’s fine..

4. Now add roasted til or sesame seeds and jaggery along with Cardamom seeds.

5. Make fine powder and add to a vessel.

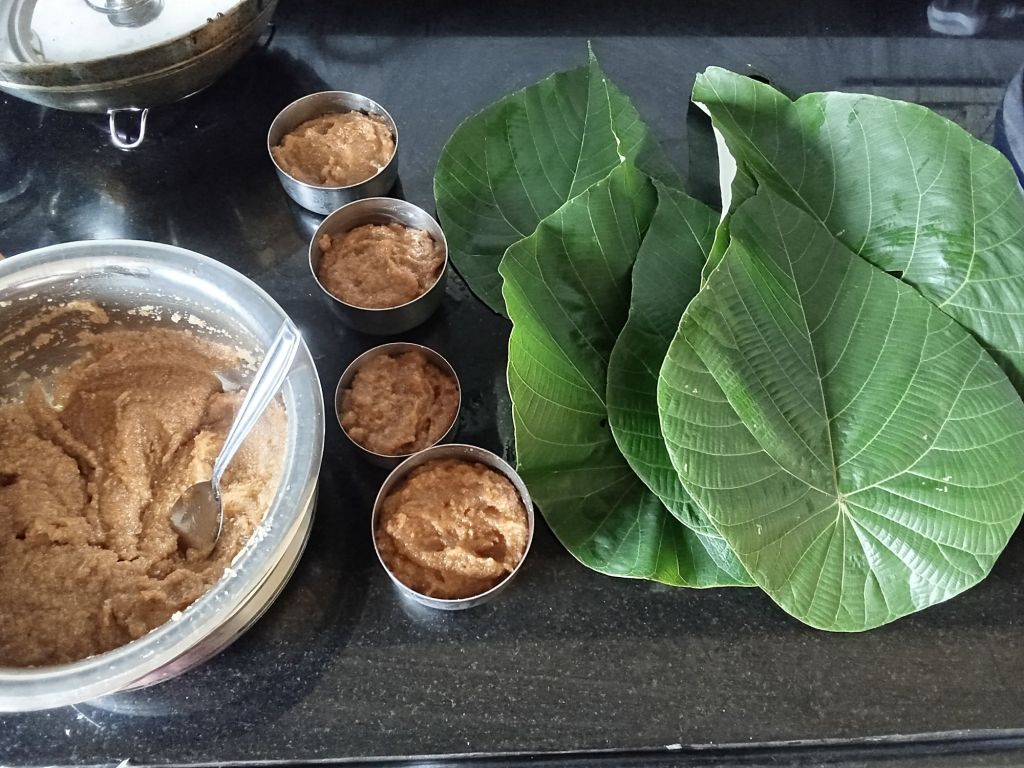
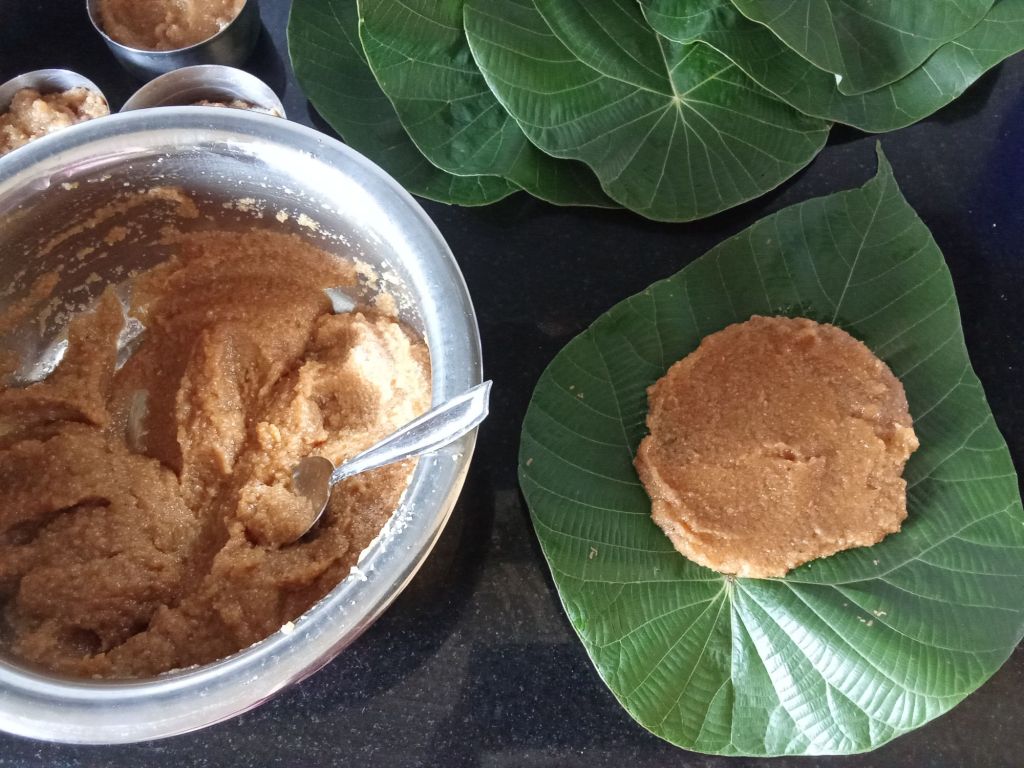
6. Now add ghee as required so that you can form ladoos from the mixture.. It took me 9 spoons of ghee.. You can add more too if needed..

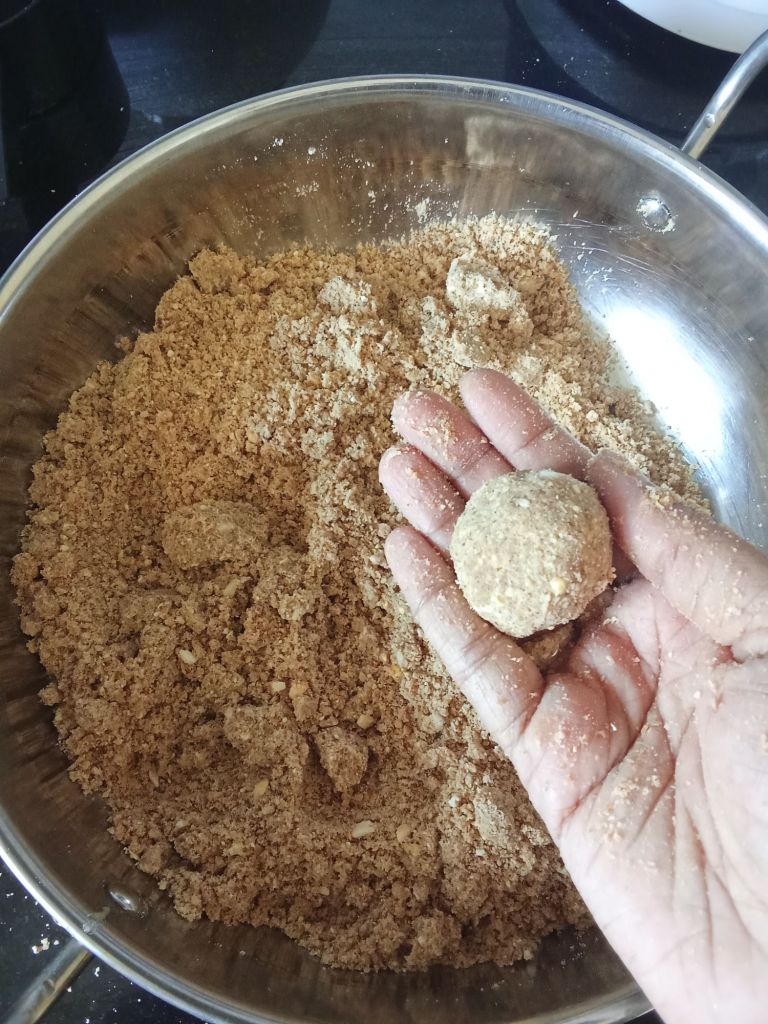
10. Taking small portions of the mixture in your palm, make ladoos as shown.. Done 🙂

Click on the picture to save the recipe on Pinterest

Notes:

  • Store in an air tight container, free from moisture.
  • Lasts well for a week atleast. Mine gets finished off by then.. 😀
  • If you have halved hurikadle, it’s even quicker to blend in mixer as compared to whole ones is what I noticed.
  • Since I had peeled halved peanuts, I used those and my job was easier. If you have whole peanuts, dry roast, peel and then use..
  • I had roasted white sesame seeds, so I did not roast it again. If you have plain sesame seeds, make sure to roast it lightly before using.
  • These ladoos are rightly sweet and not over sweet. If you are a sweet lover, add around 2 spoons more of jaggery powder if you feel like. Taste the mixture and decide accordingly.
  • If you are unable to bind the ladoos, add more ghee..

For more easy sweet recipes, here is my Easy 15 mins healthy sweet recipes Compilation for you to check..

Gova shevai usli | Konkani style seasoned wheat noodles

Gova Shevai is not just any dish for me.. It’s childhood, nostalgia, love and loads of memories packed together.. My favorite breakfast which I eat the whole day whenever it is made.. 😍

My parents know this and always make one big kadhai for me to devour.. ❤️ Amma’s smile when she sees me enjoy it is still in front of my eyes. 😍

And it’s not only now, Gova Shevai usli has been my favorite since as long as I can remember. But the wheat noodles or gova shevai was not available in Kochi or Qatar.. Hence was a rare treat for me.. Not anymore though.. In Udupi it’s readily available and now I enjoy it always.

I am relishing different kinds of food here after many years and it’s indeed a blessing.. Sharing my happiness with all of you too.. Happy and healthy cooking ❤️

RECIPE:

Ingredients: ( serves 4 )

Dry wheat noodles (gova shevai) half packet

3 Green chillies

A sprig of Curry leaves

1 tsp Mustard seeds

1 tsp Cumin seeds

1 Tbsp Coconut oil

2 tsp Sugar

Salt to taste

Grated Coconut for garnishing

Step by step recipe:

  1. Take the gova shevai packet. We get it this size here. Not sure about the weight of the packet. I take half of this packet which makes 4 servings.

2. Soak the wheat noodles in normal water for about 30 mins.

3. In 30 mins, it will turn soft in texture.

4. Drain the water completely and using fingers, crush the noodles into little pieces. Now add salt and sugar to this and mix well. (The noodles already contains little salt in it, so be mindful while adding.)

5. Heat coconut oil, add mustard seeds and cumin seeds.. When mustard seeds splutter, add curry leaves and green chillies. Fry for few seconds. Now add the crushed noodles. Mix well on medium flame. Cover and keep for 5 mins.

6. Garnish with grated coconut and serve hot.

Note : You can also add split urad dal in the seasoning.

Ekpani Chutney | Brahmi leaves Chutney

Click on the picture to save the recipe on Pinterest

What I love the most being in native is that I am not only close to my loved ones but also very close to nature. As I say jokingly to my kids, it’s like living inside National Geographic channel. The variety of trees and plants, their leaves, the beautiful flowers and the pretty little butterflies along with insects that sit on them.. A delight to watch for a nature lover like me.. 💚

Along with observing them, I also use edible leaves for my cooking. They are not only tasty but high in medicinal value. One such leaf is Brahmi or Ekpani leaves which is very beneficial for the brain specially for kids.

My kids love any kind of chutney and don’t realize what’s inside it. So whenever I find Ekpani leaves, I make this chutney so that they consume these leaves regularly. I learned this recipe from my husband’s aunt Mrs Geetha Shankar Hegde ( mave )who is a great cook and someone who inspired me to cook during my first few months as a newly wed bride.

I have to mention one more person, someone very dear to me, Prabha Vaman Bhat mai who was kind enough to share her Ekpani plant along with the pot and also many other plants for our garden. Her plants are yielding such beautiful flowers in our house. Thank you so much Prabha mai. ❤️🙏

Here’s sharing mave’s recipe and hope you all will try this tasty chutney too. Happy and healthy cooking! ❤️

RECIPE:

Ingredients:

About 10 to 12 Brahmi or Ekpani leaves with stem and root

3 Green chillies

1 tsp Cumin seeds

2 tsp Ghee

1/2 Cup Coconut gratings

A small pebble sized ball of Tamarind

Salt to taste

Step by step recipe:

  1. Wash the Brahmi leaves with stem and root very well in a bowl to remove the soil in the root. Roots are very important and healthy but if not available, you can use only the leaves for this chutney too.
  2. Heat ghee in a pan and add cumin seeds. When it changes colour, add green chillies. Now add the washed ekpani leaves.

3. Fry for few seconds until the leaves wilt a little.

4. Now add this to a mixer jar along with coconut, tamarind, salt and little water.

5. Grind to a smooth paste adding water as per desired consistency.

6. Done! Enjoy with dosas, idlis or rice.

Click on the picture to

Notes:

Ponsa mudho |Ripe Jackfruit sweet idli Konkani style

Click on the picture to save the recipe on Pinterest

Every year during Jackfruit time, I used to crave for it but could not enjoy as it was super expensive in Qatar. My dad however used to fry it in ghee when in season and freeze it for me when I came during vacation.. Then we used to make ponsa mudho or polo (thick dosa) with it which I used to devour to my heart’s content.

Not this year though.. Being in Udupi and pampered by everyone around 😍, I am getting freshly ripened Jackfruit every now and then, which I am enjoying like someone who’s never tasted it before..😂 With what was left after eating it fresh, I made this mudho and took pictures to share it with all of you..

We have a Uppalige tree right in front of our house and what’s better than making ponsa mudho in uppalige leaves.. The aroma was divine and heavenly to say the least.. I steamed them in my grandma’s steamer or pedavan which Amma gave me when I came to this new house.. While it was steaming, I was reminded of the various dishes my grandmother and mother made in it and felt very nostalgic.. ❤️

Since Jackfruit is still in season, hope you will try these idlis or ponsa mudho as we call it. Happy and healthy cooking ❤️

RECIPE:

Ingredients: Makes around 12 to 15 idlis depending on how you steam it

3 Cups ripe Jackfruit segments (around 30)

1 Cup grated Coconut

1.5 Cups Jaggery powder

1.5 Cups Idli Rava or Rice Rava (can also replace with upma rava or bombay rava)

A pinch of salt

A pinch of Cardamom powder

Ghee to grease the idli container

Step by step recipe:

  1. In a mixer jar, add 3 Cups or around 30 ripe Jackfruit segments along with 1 Cup grated Coconut..

2. Grind to a smooth paste adding very little water only if needed. Do NOT add a lot of water. Add water only to aid grinding.

3. Now add jaggery powder and blend once again to a smooth paste.

4. Add this into a bowl and add rice rava along with salt and cardamom powder. Mix well to form a thick batter.

5. Now keep water to steam in a steamer. I used a pedavan as is called in Konkani. Meanwhile grease idli container with ghee. Add the batter into it. If using uppalige leaves or banana leaves, clean it by wiping with a cloth.

6. Now spread the batter in the center of the leaf as shown.

7. Fold from all sides and make like a little parcel.

8. Place it gently in the steamer with the open side placed face down as shown. I have placed all these on a banana leaf inside the steamer. You can skip that if not available.

9. Steam covered on high flame for 20 to 25 mins.

10. Enjoy them warm with ghee.. 😍

Click on the picture to save the recipe of

Notes:

  • You can steam them in regular idli stand or even in banana leaves..
  • Idli rava or Rice Rava can be replaced by Bombay Rava or Upma Rava.. Quantity will vary slightly depending on the texture of the rava. Just make a thick batter and not very free flowing.
  • Jaggery powder is to taste. You can vary as per your choice.
  • I have compiled all my variety idli recipes in one page.. Here is the page:
  • Idli recipes Collection

Nendrabaale kele Gojju | Easy Nendran Banana sweet spicy side dish

Hello dear readers.. I am back after yet another break but this time after a huge life change, having shifted permanently from Qatar to India.. Been close to two months here in Udupi and one month in my kitchen which I had planned so eagerly as it’s my favorite place in the house.. ❤️

As you all know I love cooking for my family and now it’s not only for my husband and kids, but also for my parents and brother. I am so happy to share whatever I cook with them and it feels soul satisfying to see them relish my dishes.. ❤️

Along with that, I have been making nostalgic dishes which I missed in Qatar all these years, some due to lack of ingredients and some having forgotten about it.. This Nendrabaale kele Gojju or a spicy sweet delight of a side dish is one among them.. ❤️

Having lived many years in Kerala, this banana was a common ingredient in our house and apart from Pazhampori or kele phodi, Amma always used to make this gojju.. Being a sweet and spicy lover , I used to relish this gojju as it is after my main meal.. Even now, after all these years, when I made this gojju and enjoyed it post my meal, it brought back all my childhood memories.. ❤️

Feels happy to share this nostalgic recipe with all of you and what could have been better than this as a first post from Udupi. Dedicating this to my Amma and thank you Amma for being the kindest, sweetest and my moga Amma always.  Love you so much.. ❤️❤️❤️❤️❤️❤️❤️

RECIPE:

Ingredients:

2 overripe Nendran Bananas

3 Green chillies

1 Tbsp Jaggery

Salt to taste

For seasoning:

1 Tbsp Ghee

1 tsp Mustard seeds

A sprig of Curry leaves

2 Red chillies, cut into little pieces

Step by step recipe:

  1. Peel off the Nendran Bananas and make pieces of it using hands. Add to a mixer jar. Also add chopped green chillies, jaggery and salt.

2. Grind to a smooth paste adding very little water ( just a spoon or two) to aid grinding. It should be thick consistency. Add to a bowl.

3. Now heat ghee in a pan, add mustard seeds. When it splutters, add curry leaves and red chillies. Fry till it turns crisp. Now pour over the chutney.

4. Mix well. Enjoy with rice or as it is like me 😍

Notes:

  • Always best to use overripe Nendran Bananas for this gojju as it will blend easily and taste is more delicious too..
  • You can adjust chillies, jaggery and salt as per your taste.
  • Add very less water while blending as we don’t want a watery gojju.
  • I usually pair it with rice, rasam and a simple upkari or stir fry and it tastes heavenly with its sweet spicy notes.
  • I make two other recipes with Nendran Bananas. Sharing them below:
  • Nendran Banana Halwa
  • Nendra pazham nirachathu

Jowar flour Halwa | Jowar jaggery sheera | Gluten free sweet

Click on the picture to save the recipe on Pinterest

The sweet lover in me, the Meetha in Mitha 😅 always finds ways to add sweets in her life and when life (rather grand mall) gave me two kgs of Jowar flour on offer, I made Meetha out of it too.. 😂😂

Jowar flour and Ragi flour are my favorite in millet flours and I regularly make Dosa, idli, ladoos and cake with it. Halwa or Sheera as we call in Konkani tastes only good with Rava was my assumption.. until I substituted it with Jowar flour one day and this delicious Jowar Sheera was born.. 😍

Can you believe I am no longer making my childhood favorite Rava sheera as am completely smitten by this Jowar flour sheera instead.. It tastes divine and like temple prasad .. A must try for sure.. ❤️

Dedicating this to sweet lovers like me with loads of love ❤️

Happy and healthy cooking!

RECIPE:

Ingredients: {Serves about 4 people}

1 Cup = 240 ml

1 Cup Jowar flour

3/4 Cup Jaggery powder

2 Cups Water

3 Tbsp Ghee

3 Tbsp Cashews

3 Tbsp Raisins

1/2 tsp Cardamom powder

Step by step recipe:

  1. Heat 1 Tbsp Ghee in a heavy bottomed pan and fry cashews and raisins in it till cashews turn golden brown.

2. Now remove the cashews and raisins in a plate. In the same pan add 2 Tbsp more Ghee and add jowar flour. Start roasting it on a medium flame.

3. Roast continually till the colour changes to a darker shade and an aroma starts to come. Usually takes about 8 to 10 mins.

4. Now boil 2 cups water with 3/4 Cup jaggery powder in it. When the water boils, Jaggery will melt. Add this hot jaggery water to this roasted jowar flour, little by little, mixing well with spatula.

5. Keep mixing well with spatula, removing lumps if any by pressing it using the spatula. It will take another 8 to 10 mins of mixing well using the spatula till the jowar flour absorbs all the water and the mixture starts leaving the sides of the pan.

6. In this stage, add the roasted cashews and raisins and cardamom powder. Mix well.

7. Done! Serve it warm with love ❤️

Notes:

** The measurement is of perfect ratio ie 1 Cup Jowar flour to 3/4 Cup Jaggery to 2 Cups water. Don’t alter it or the consistency and taste of halwa will not come well.

** One thing to be taken care while making this halwa is when you add the hot jaggery water to the roasted jowar flour. Add little by little, mixing well to avoid lumps. Even if lumps get formed, don’t worry, just press it while mixing using spatula, the lumps will go while doing so.

** Sharing few dishes that I make regularly using Jowar flour:

** More recipes with Millets :

Millet Recipes

Appam with Kadala curry | Kerala breakfast recipe

Click on the picture to save the recipe on Pinterest

My mouth waters looking at the picture above even as I type this. That much I love Appam and Kadala curry. It’s one of my favorite breakfast combination and I feel very happy each time I make it.. Happy that finally I have learned to make perfect appam and a delicious tasting Kadala curry at home.

Growing up in Kerala, I have enjoyed Kadala curry with puttu, porotta and appams. My dad used to bring it as a treat from little hotels called thattu kadas and we used to relish it like anything. But I never thought I would learn to make it at home.

Over the years, I have tried many methods but finally with this one way, it comes out perfectly each time and I have stuck to it now. My kids love it a lot too. So I make it atleast once a week.

Sharing the recipe for those who want to make appams at home too. Hope you all try and love it. Happy and healthy cooking ❤️

RECIPE:

Ingredients:

1 Cup = 240 ml

2 Cups White Raw rice

1/2 Cup thick Poha/ Aval/ flattened rice

1/2 Cup Coconut (desiccated or fresh)

1 Tbsp Sugar

1/4 tsp Instant yeast

Salt to taste

Step by step recipe:

  1. Wash well and soak raw rice in double the water for atleast 4 hours.

2. Once soaked, drain all the excess water and add to a mixer jar along with washed poha, coconut, sugar, salt and yeast.

3. Add water as needed and grind to a smooth paste.

4. Now, add to a large vessel and make the batter to a consistency slightly thinner than Dosa batter. It should not be thick like dosa batter as it won’t spread well on the appam pan. Should be of free flowing consistency.

5. Now keep it covered in a warm place for 4 to 6 hours. In warm climate, the batter ferments very quickly but in cold climate, it takes 6 hours to ferment. The batter will rise as shown and you can get the fermented aroma.

6. I refrigerate the batter after this for next day morning breakfast. I soak rice in the morning, grind by noon and allow it to ferment till night. Then I refrigerate.

You can make appams as soon as the batter ferments. Just heat the appam pan and pour a ladle of batter in the center.

7. Now hold the pan handles and turn it in anti clockwise direction such that the batter spreads in a circle too. Center will have more batter and sides will be thin for appam.

8. Cover and cook till the appam cooks well and the edges will release itself from the pan. If the center is thick, make sure it’s cooked well before removing from pan.

9. Remove from pan and enjoy appams with piping hot Kadala curry.

Click on the picture to save the recipe on Pinterest

Notes:

  • Any variety of white rice will work for this recipe.
  • I use thick poha, you can also use thin poha. Just wash before adding to the mixer jar.
  • Both fresh and desiccated coconut works well for making appams.
  • I use instant yeast while making appams. Have not used active dried yeast. So can’t say about the measurements.
  • If you live in a very cold place, you can also use 1/2 tsp Instant yeast in this recipe for faster fermentation of the batter.
  • With 1/4 tsp yeast, the batter ferments slowly but you hardly get the flavour of yeast in the appam.
  • The batter consistency should be thinner than regular Dosa batter. Else it will be difficult to swirl the batter in the pan.
  • Serve it with Kadala curry.
  • You can also serve appams with Vegetable Stew.

Kadala curry | For Appam, Puttu, Chapati, Porotta, Dosa

Click on the picture to save the recipe on Pinterest

Kadala curry is not just any curry but an emotion for me as someone who’s grown in Kerala. I can have it with anything as you can see from the heading of this recipe. May it be with Appams, puttu, porotta, chapati or even dosa. I absolutely love the flavours of Kadala curry. 😍

I am writing this recipe as a continued post to Appam recipe . So you can check that as well. Appam with Kadala curry is definitely a match made in heaven. ❤️

Hope you all try and love this combination too. Happy and healthy cooking ❤️

RECIPE:

Ingredients:

1 Cup = 240 ml

1 Cup black chickpeas/ Chana

1 Tbsp Coconut oil

2 tsp Mustard seeds

A sprig of curry leaves

1/4 tsp Turmeric powder

1/4 tsp Pepper powder

2 tsp Coriander powder

2 tsp Red chilli powder

Salt to taste

To fry and grind:

2 tsp Coconut oil

1 tsp Cumin seeds/ Jeera

1/2 tsp Fennel seeds/ Saunf

A sprig of curry leaves

2 Cloves

1 inch piece of Ginger

4 to 5 Garlic cloves

1 large Onion

1 large Tomato

1/4 Cup Desiccated or fresh Coconut

Step by step recipe:

  1. Wash well and soak the black chickpeas overnight or for 8 hours..

2. Drain the soaked water.  Add fresh water for atleast 1 cm above the level of chickpeas and pressure cook till soft. I have electric stovetop and I keep it for 15 mins on low flame after one whistle.

3. Now heat Coconut oil in a pan and add all ingredients mentioned under “to fry” one by one. Start with cumin seeds, fennel seeds, then add curry leaves, fry ginger garlic, then add onions. Once onions turn translucent, add tomatoes.

4. Once tomatoes turn soft, add coconut and fry for few minutes.

5. Remove from flame, allow it to cool. Once cooled, add to a mixer jar.

6. Grind to a smooth paste adding little water.

7. Now heat the pan again adding Coconut oil. Add mustard seeds and allow it to splutter. Add curry leaves and fry. Now add the ground paste. Mix well.

8. Now add turmeric powder, pepper powder, coriander powder and red chilli powder along with salt. Mix well.

9. Add cooked chickpeas and boil it in the masala for about 10 to 15 mins till the chickpeas absorb the masala. Mash a little of the chickpeas with a masher to make the gravy thick..

10. Serve Kadala curry with Appams, Puttu, Chapati, Porotta or Dosa.

I have served it with Appams and the combination is amazing 😍

Click on the picture to save the recipe on Pinterest

Red sauce pasta | Kids snack recipe | Easy pasta recipe

Click on the picture to save the recipe on Pinterest

Now that my kids have grown ( 9 and 6 years), their food taste is evolving and they no longer want the same food everyday. Though dosa and idli tops the list anytime, for evening snacks, they want something different and unique.

My brain after becoming a mommy runs overtime 😀 and I keep scanning the supermarket seeing what else I can buy to cook a dish which they like. So in that pursuit, I bought pasta shells few months back which they had never tasted before. Made white sauce pasta with wheat flour and they did not like it as much.

So next I tried this red sauce pasta with fingers crossed and to my happiness, they loved it so much that now, I get requests for it to be made regularly. My son specially has become a huge lover of this pasta. Though I have limited it to once in a week as I know if they eat more than that, they will get bored of it, I honestly feel happy when they enjoy eating what I make at home..

This pasta recipe is super easy yet tastes heavenly. I am not a pasta fan but I love this one. So you can definitely try for a change. Hope you all love it too. Happy and healthy cooking ❤️

RECIPE:

Ingredients: {Serves 2 to 3 people}

1 Cup = 240 ml

1 Cup Pasta shells of any shape you like

1 large Tomato

3 to 4 Garlic cloves

1 medium sized Onion

2 tsp Oil

2 tsp Butter

Red Chilli powder, to taste

1 tsp dried Oregano or mixed herb seasoning

1 Cheese slice or cheese cube

Salt to taste

Step by step recipe:

  1. Boil water with little salt and once it comes to a rolling boil, add pasta shells. Cook till it turns soft yet not fully cooked.

2. Now strain using a strainer and run tap water over it so that it stops the cooking process. Keep it aside.

3. Add garlic and chopped tomato in a mixer and grind to a paste. Don’t add water while grinding.

4. Now heat oil in a pan and add chopped onions. Fry till it turns translucent.

5. Add the tomato garlic paste along with red chilli powder and cook till the mixture leaves oil.

6. Now add butter, oregano and salt. Mix well.

7. Add cheese slice or cube and mix till the cheese melts. Adjust water consistency to make a thick sauce.

8. Add the cooked pasta and mix well, adjusting water consistency if necessary.

Red sauce pasta is ready! Serve hot and kids will love it..

Click on the picture to save the recipe on Pinterest

Notes:

  • I usually buy small sized pasta shells as it’s easy for the kids to eat. You can buy any pasta of your choice.
  • My kids love the red sauce pasta to be less liquidy. You can adjust the consistency as per your taste.
  • Red chilli powder, oregano and cheese can be adjusted to your taste too.
  • More snacks that I make for my kids:
  • Homemade Popcorn
  • Poha Vegetable Cutlet
  • Paneer Kathi Roll
  • Whole wheat Vegetable Pizza

Kananga Usli – Theek phovu | Sweet potato stir fry – Spicy thin Poha | Konkani breakfast or snack

Click on the picture to save the recipe on Pinterest

The weather here in Qatar is so good now that winters have started and the hungry me is even hungrier during evening time. 😍 Specially since I walk atleast for an hour, late in the evening, I make sure I have ample energy for that. 😄 And what’s more filling than our own age old combination of Kananga usli and theek phovu or sweet potato stir fry with spicy poha. ❤️

The mushy sweet potatoes with spicy and slightly crunchy poha makes for a heaven made pair making me go nostalgic, reminding me of my childhood when Amma and Anama used to make it for me. I was, am and forever will be a huge fan of our amchi food. ❤️

Nothing satisfies my tummy and soul more than Konkani delicacies. I have also realized that our food is so easy and quick to make along with being healthy and tasty too. ❤️

So here is me, sharing my favorite breakfast or snack dish. Hope you try and love it too. Happy and healthy cooking ❤️

RECIPE:

Ingredients:

For Sweet potato stir fry:

3 Medium sized Sweet potato

3 to 4 Green chillies

A sprig of curry leaves

2 tsp Mustard seeds

2 tsp Cumin seeds

Pinch of Hing or Asafoetida

1 Tbsp Jaggery powder

2 Tbsp Coconut oil

3 Tbsp freshly grated Coconut

Salt to taste

For theek phovu:

2 Cups Thin Poha/ Aval/ Flattened rice

1/2 Cup Freshly grated Coconut

2 tsp Coconut oil

1 tsp Mustard seeds

A sprig Curry leaves

2 tsp Sambar powder

1 tsp Red Chilli powder or to taste

1 tsp Jaggery powder

Salt to taste

Step by step recipe:

  1. Take sweet potato as shown. Wash them well. Cut off the sides and cut into bite size pieces. I don’t peel it.

2. Now heat Coconut oil in a pan, add mustard seeds and cumin seeds. When mustard seeds splutter, add curry leaves and green chillies.

3. When green chillies start to change colour, add the chopped sweet potatoes. Mix well adding salt.

4. Add little water, cover and cook on medium flame till the sweet potatoes turn a little soft. Now add jaggery and hing powder.

5. Mix again, cover and cook till the sweet potatoes turn soft. Mash using masher to make it into slightly mushy consistency. It’s optional but we love our usli that way.

6. Remove from flame, garnish with fresly grated coconut and mix well.

Sweet potato stir fry or Kananga usli is done!

7. For the theek phovu or spicy poha, heat Coconut oil in a small pan and add mustard seeds and curry leaves. When the seeds splutter,remove from flame.

8. Now in a bowl, take freshly grated coconut, add the seasoning from step 7, sambar powder, red chilli powder, jaggery and salt.

9. Now add the thin poha, one cup at a time and mix well crushing it lightly with hands.

10. Do a taste test to see if you need to add more red chilli powder, jaggery or salt.

Theek phovu is done too!

Click on the picture to save the recipe on Pinterest

Enjoy Kananga usli with theek phovu. This sweet spicy combination will win your heart for sure ❤️

Notes:

Join me in my journey with a foodie husband and hungry kiddos while I make them eat healthy!