Tag Archives: Instant

Cabbage Kosambari | Easy Cabbage salad

Click on the image to save the recipe on Pinterest

As my kids are finally asleep, I can sit to write a new recipe now. A recipe I had been wanting to add to the blog since long but could not find time. With Eid holidays going on here, kids sleep till late in the morning and thus, my son skips his evening nap. Him skipping his nap = I don’t get time to sit for long in a place = I can’t blog. So night time is blog time as of now. πŸ˜„

Is night time also a time for deep thoughts for any of you? (or is it just me πŸ˜…) I find the silence of night so peaceful and comforting that I get time to talk to the divine, to understand myself, to over think (πŸ˜„), to listen to my favorite music and to relax too. After all this, when I finally sleep, I dream a lot, also remembering my dreams completely when I wake up. I see myself going back to my school days, my college days, the tension of exams, the fun of enjoying with my friends, chatting with Amma along with seeing people close to my heart, in my favorite places like the mountains and beaches, every night in my dreams. ❀️ I feel very happy when I wake up that, so what if I can’t see them for real, atleast they visit me in my dreams. 😍 So, thank you my dream companions for coming in this crazy girl’s dream world. πŸ˜„β€οΈ

So that was about night time which is my own “me” time. And what about my day time? Here is a glimpse into it:

My son making towers, cars, trucks, ships, tents, caves, houses, see saw, slides and what not with our sofa cushions. πŸ˜‚πŸ˜‚ These cushions are his inhouse park and me being a child with them, don’t stop him too πŸ˜… (I just see that he does not go overboard and is safe.) He has taught his elder sister as well and both of them enjoy making their own creations with these cushions. 😍

By the way, did any of you notice his dress? Yes, he loves wearing his Akka’s frock, specially this red one. Reminds me of how my brother used to love wearing my dresses too as a kid. Such wonderful memories. ❀️ His sister also adorns him with necklaces and accessories to doll him up. One of their favorite games. Look at him admiring his bangle. 😍

My daughter also loves to draw and colour, which can be clearly seen from the first picture above. Almost all of our walls are stuck with her paintings. She also likes to create various dress designs and here is one among them. I admire her for her creative ideas in art and craft, which I lack completely. πŸ˜‚

So these two bundles of joy (sometimes also the reason for my 1 minute angers πŸ˜‚πŸ˜‚) make my mornings worth waking up and are huge entertainment in my daytime. I don’t realize how my day passes with them. Also, I am so glad they have each other for company in these home bound times. ❀️❀️

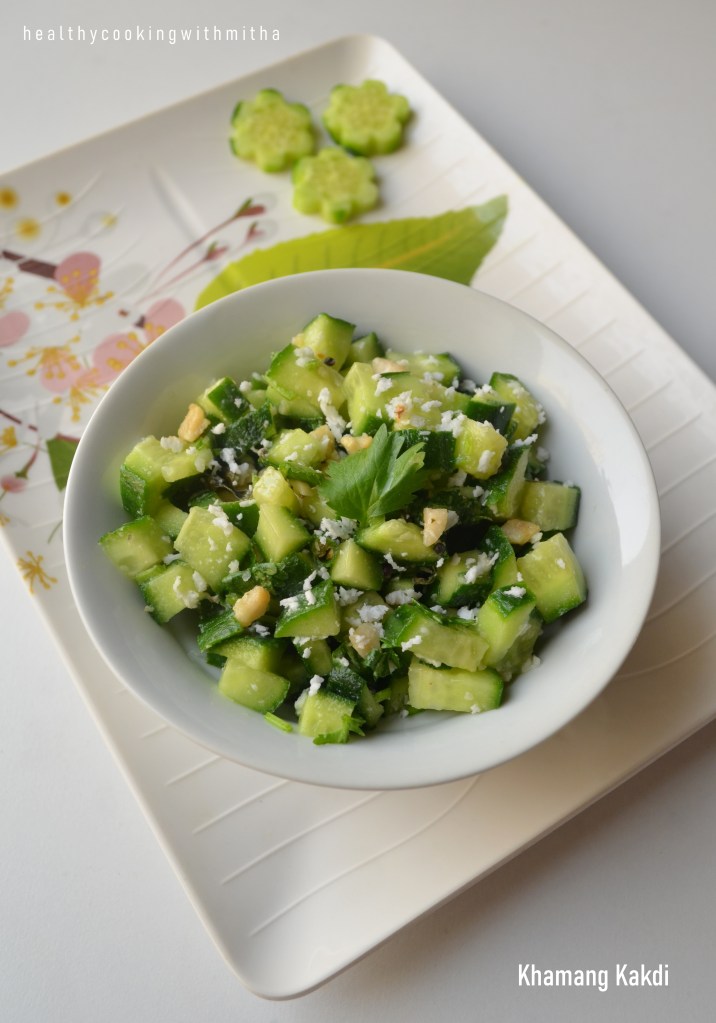
Finally after my long chatter, here’s sharing the recipe of this simple yet very delicious Cabbage Kosambari which I learnt recently from my dear friend, Ambratha Shenoy. This is too tasty for words and definitely a must try recipe. Hope you all like it too. Happy and healthy cooking! ❀️

Thank you Ambratha for sharing this recipe! β€οΈπŸ™

RECIPE:

Ingredients:

2 Cups grated Cabbage

1 medium Onion, finely chopped

3 Green chillies

1/4 Cup finely chopped Coriander leaves

3 Tbsp freshly grated Coconut

Juice from 1 Indian lemon or to taste

Salt to taste

Step by step recipe:

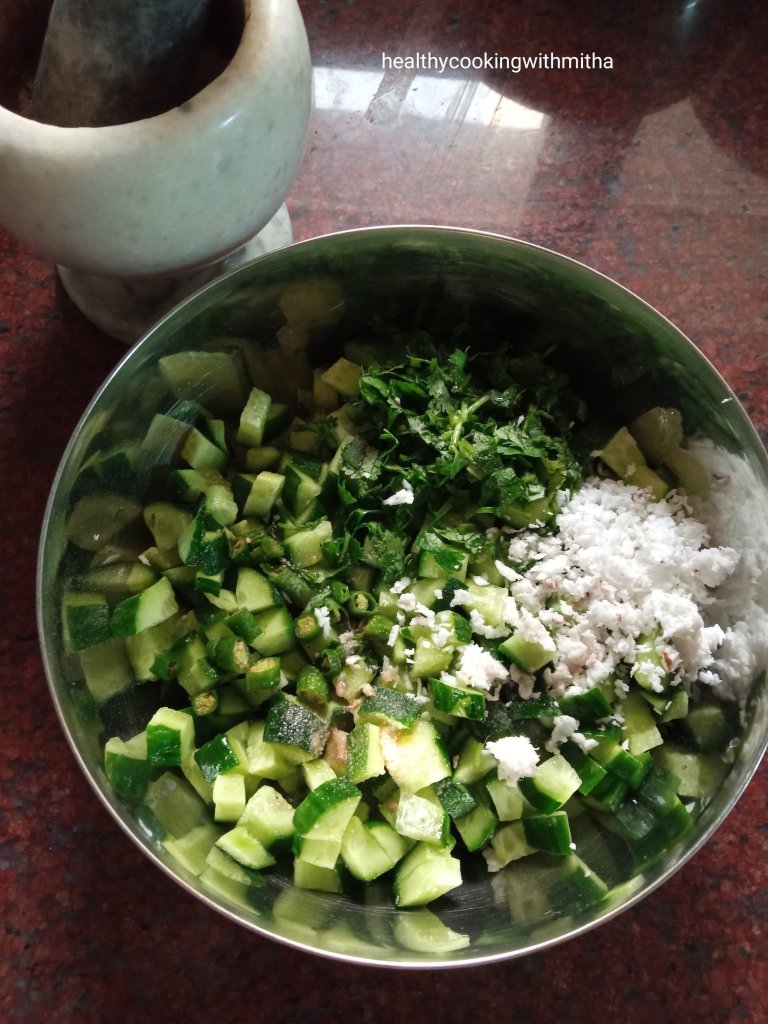
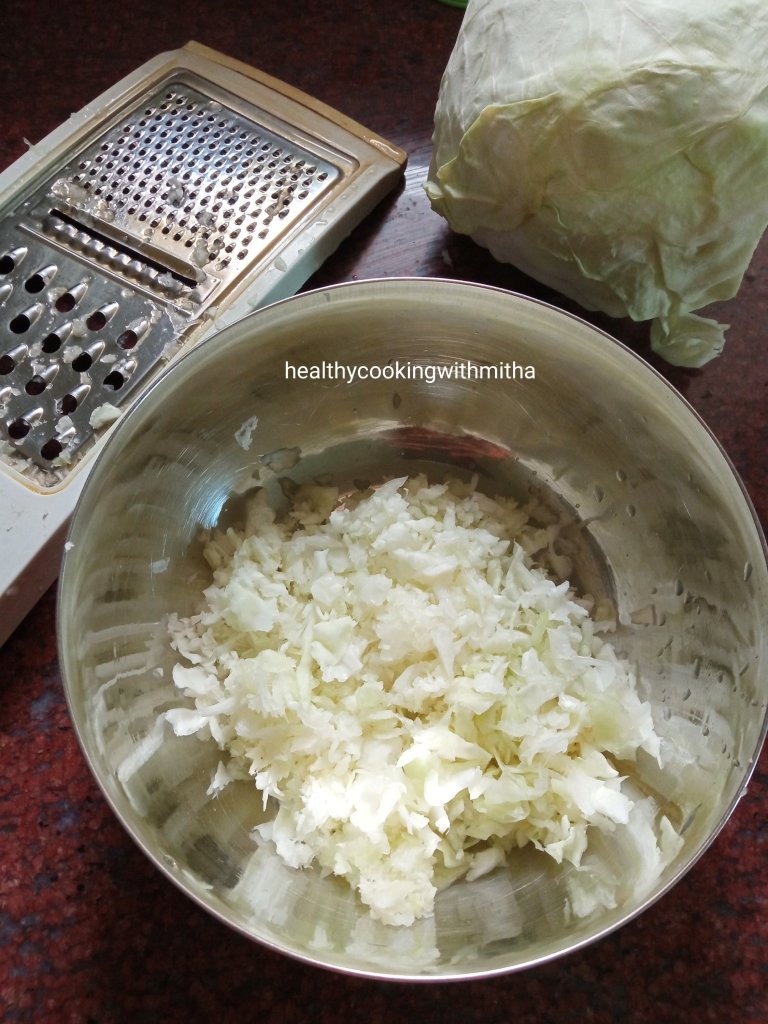
1. Take the grated Cabbage in a mixing bowl. { I grated the cabbage as much as possible and finely chopped the end pieces}

2. Now add finely chopped onion, green chillies, coriander leaves, coconut and salt.

3. Add lemon juice and mix well.

4. Mix well and serve as an accompaniment to meals.

Click on the image to save the recipe on Pinterest

Notes:

* Try to serve freshly made as much as possible as onions may start to leave water if kept for long as it has salt in it. Else you could salt just before serving.

* You could increase or decrease lemon juice and coconut as per your taste.

* Instead of grating cabbage, you could also very finely chop it. I combine both ways. Grate as much as I can and then finely chop the end pieces.

* Tastes very good as an accompaniment to rice meals.

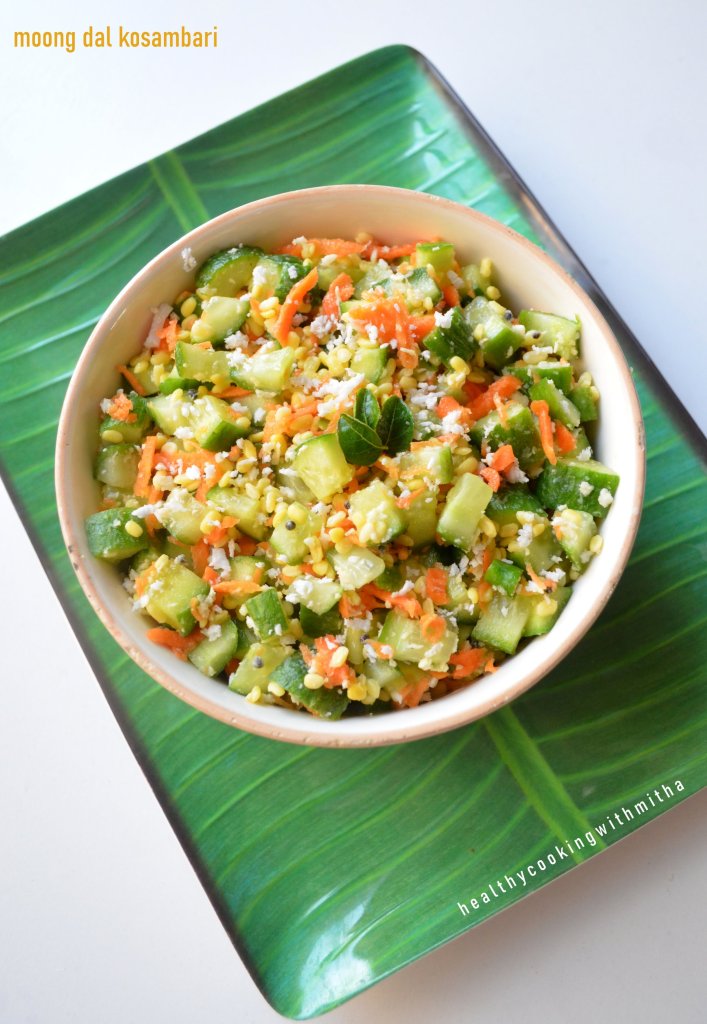
* You could also try these three South Indian style salads that I make regularly:

1. Moong dal Kosambari with Cucumber and carrots

2. Carrot Kismuri

3. Khamang Kakdi

Instant Pumpkin idlis | Dudhi idli | Dudhe Kadamb

Click on the image to save the recipe on Pinterest

With online classes becoming the new way of life, my mornings are busy juggling between my daughter (who wants me to be with her during the class), my son (who needs me to be close to him as he always spends the first hour after waking up in my arms and nowhere else 😍) while preparing breakfast which we have to eat right after the class which gets over by 10 15 am. So, since I can’t spend time in kitchen making dosas, idlis are my best friend these days!! ❀️

I have shared many varieties of idlis which you can check in my Idli recipes collection. They have been very helpful for me nowadays as I can just put them to steam while sitting with both my kids and the idlis get ready by themselves. πŸ˜…

My daughter’s first term exam is soon coming (she’s only in 1st std πŸ˜„) but I take studies very seriously (aadat se majboor since my school days 😁). So made a little planner last night which I want to share with all of you. I started making such planners for each of her term exams since last year (when she was only in KG 2 πŸ˜†) but it has been very helpful for both of us. I get to know when her exams are and what to teach her as this is always in front of my eyes. She also reads the spellings daily which makes her learn it very quickly. Sharing in case it is useful for any of you. Teaching small kids is not easy but this way has helped me a lot.

I have stuck it in front of our dining table or our makeshift study table or mainly our artist’s table πŸ˜„ as both my kids love to draw, colour and paint sitting on it. Here is a glimpse of it with my son wondering what Amma is upto πŸ˜… while my daughter is busy writing.

Life changes a lot post kids and all our attention goes into their studies plus playing plus activities plus cooking for them, but I am grateful that they keep me very busy which is essential to not overthink, for the very sensitive me. Whenever I feel I am getting overwhelmed by thoughts, I make myself super busy with them so that I forget everything else. They are my blessings. β€οΈβ€οΈπŸ™πŸ™

On this note, sharing the recipe of these delicious idlis with all of you. This is a traditional Konkani recipe and makes me so happy to add this on my blog. Happy and healthy cooking! ❀️

RECIPE:

Ingredients: { Makes about 22 idlis }

2 Cups Idli Rava/ Rice Rava

2 Cups peeled and grated Pumpkin

1/2 Cup fresh or desiccated Coconut

1/2 Cup powdered or grated Jaggery

Salt to taste

1/8 tsp Cardamom powder

Note: Skip jaggery to make plain pumpkin idlis.

Step by step recipe:

1. Wash the Idli rava well two to three times. Then drain the water completely. Add grated pumpkin.

2. Now add coconut, salt, cardamom powder and about 2 cups water to make a slightly thick batter.

3. Grease idli moulds with oil/ghee and add the batter into each moulds. Let there be little water in each mould as shown.

Note: I filled half of the moulds with plain idli batter and added jaggery to the rest of the batter. Then filled the rest of the moulds with sweet idli batter.

4. Steam for 20 mins or till done.

Serve hot with a simple coconut chutney or sambar. Sweet ones can be relished with ghee.

Click on the image to save the recipe on Pinterest

Notes:

* If you are not much of a pumpkin or sweet lover, you can make a spicy chutney with these idlis. It masks the pumpkin flavour and balances the sweetness of the idlis well.

* You can skip jaggery completely if making plain ones.

* Cardamom powder is also optional for plain ones but gives a great aroma and flavour.

* You can also make extra sweet ones adding 1/4 Cup more of jaggery with raisins and cashews. Steam them in a vessel and cut into pieces. It is called Dudde Sannan if made that way.

* The 2 cups water is perfect for my idli rava. You can reduce or increase if needed. Don’t make the batter very thick nor very thin. There should be little water in each mould of the idli container. That’s what makes soft idlis.

* They are authentically steamed in Banana leaves but I make them in idli moulds. Still tastes delicious. Add little less water to the batter if steaming in banana leaves.

* I make a similar idli with Cucumber called Thoushe idli or Instant Cucumber idlis.

* One more instant idli with idli rava – Instant Poha Idlis

* You can check all my Idli recipes here – Idli recipes collection.

Khamang Kakdi | Seasoned Maharashtrian style Cucumber salad

Click on the image to save the recipe on Pinterest

Mr Google says Khamang means savory, tasty, spicy in Marathi and Kakdi means cucumbers. That’s exactly what this salad is! Savory spicy tasty cucumber salad. I have been making Khamang Kakdi since many years now and it is my 2.5 year old son’s favorite salad. Whenever I make it, he has to eat it as soon as it is done, along with his meal and afterwards, with my meal too. πŸ˜…πŸ˜… In short, most of this salad goes into his tummy. 😍

My mother will not be pleased to read this, I know, πŸ˜… as she always wants me to eat well. That’s why I keep updating her over voice messages whatever I eat all throughout the day. It makes her happy and she sends all the possible love smileys in the world to show her joy. 😍❀️

We can’t talk for hours like before or video call as her grandkids snatch the phone from me to talk to their “moga mamama” (loving grandma). So we just send voice messages to each other. I give her updates regarding what I am doing every hour and she does the same. Our day starts with good morning to each other and ends with good night kisses. That’s what is called true love, being far from each other physically, yet closest to one another, in thoughts, in feelings and in heart, not separated ever. ❀️

Writing the above line just overwhelmed me to tears and I won’t be able to write anymore.. This girl with loads of thoughts, feelings, memories is never going to change.. ❀️

Hope you all try this easy cucumber salad, Khamang Kakdi. Happy and healthy cooking!

RECIPE:

Ingredients:

3 regular sized English Cucumbers (or 1 Indian Cucumber)

1/4 Cup Peanuts

1/4 Cup freshly grated Coconut

3 Green chillies

3 Tbsp finely chopped Coriander leaves

Lemon juice from 1 Indian lemon or to taste

Salt to taste

For seasoning:

2 tsp Coconut oil

1 tsp Mustard seeds

5 to 7 Curry leaves

A pinch of Hing/ Asafoetida

Step by step recipe:

1. Dry roast the peanuts in a pan till it browns. Allow it to cool. Now using a mortar pestle, crush it to a coarse mixture. Keep aside.

2. Take chopped cucumbers, green chillies, coriander leaves and coconut in a bowl. Add salt.

3. Now add the crushed peanuts to this. Also, heat oil in a pan. Splutter mustard seeds, add curry leaves and hing. Pour this seasoning over the cucumbers.

4. Add lemon juice and mix well. Do a taste test for salt and also add more lemon juice if you like.

5. Serve with rice meals or enjoy as it is!

Click on the image to save the recipe on Pinterest

Notes:

* I used English Cucumbers which do not need peeling. If using Indian cucumbers, peel and remove seeds. Then chop and use.

* You can make ahead and keep at room temperature. Maybe add salt later if your cucumber leaves a lot of water after adding salt.

* I also make this Moong dal Kosambari regularly with cucumbers and carrots. You can check that.

Click on the image for the recipe

* Another Konkani style salad that I make always is Carrot Kismuri.

* I also use Cucumbers in this Instant Cucumber dosa and Instant Cucumber Idli.

Roasted gram dal and coriander leaves chutney

Click on the image to Pin the recipe on Pinterest.

As much as I love my dosas and idlis, there is no denying that they are incomplete without a good chutney. I usually discuss which chutney to make with my family in the morning while making dosas/ steaming idlis and the demand is either for Hing chutney ** (by Mr Husband) and Tomato Chutney (by Miss Daughter). My son is just like me who loves any kind of chutney. 😍

But ever since I made this roasted gram dal coriander leaves chutney, the common demand by everyone including my son has been for this “green chutney”. My 2.5 year old son who is talking a lot now (inspired by you know who πŸ˜‚) calls it “geen chechi” and it sounds so cute that I can’t make any other chutney ever. πŸ˜„

So here is the recipe for the green chutney which tastes too delicious for words. A must try chutney for sure!

Thank you so much Vinaya Prabhu Akka for this keeper of a recipe. ❀️ We have become such huge fans of this chutney that we no longer like any other chutney now. 😍

Happy and healthy cooking everyone!

{** recipe for Hing chutney mentioned above is in the notes section of this Urad Rava idli recipe }

RECIPE:

Adapted from: Vinaya’s Culinary delights

Ingredients: Serves 2 to 3 people

1/4 Cup Gram dal

1/2 Cup freshly grated or desiccated Coconut

3 to 4 Green chillies

5 to 6 sprigs of Coriander leaves

6 to 8 Curry leaves

1 tsp Tamarind paste

Salt to taste

Step by step recipe:

1. Dry roast the gram dal on medium flame till it turns brown in colour. Don’t allow it to turn black. Cool down and powder in a mixer.

You can see the gram dal packet in the background for those who are new to it.

2. Now add coconut, green chillies, coriander leaves, curry leaves, tamarind paste and salt.

3. First grind once without adding water. Then add water as needed (about 1/4 to 1/2 Cup) to make a smooth paste. Dilute with more water to your desired consistency of thickness.

Click on the image to Pin the recipe on Pinterest.

Notes:

* This chutney does not need seasoning with mustard seeds/ curry leaves.

* Be careful while roasting the gram dal as few extra seconds of roasting can make the dal turn black and burning it which can spoil the flavour of the chutney. Roast only till the dal starts turning brown.

* If you don’t have gram dal, then just increase the quantity of coconut to 1 Cup and skip the gram dal. That’s how I make my regular coriander chutney.

* I made this chutney with Barnyard Millet Idlis and it made a super delicious combo.

Click on the image for the recipe.

Check all my Chutney recipes here.

Poha Sheera | Aval Kesari with Jaggery | Easy 15 min sweet recipe

Click on the image to save the recipe on Pinterest.

A new recipe after nearly two months! Both Feb and March were filled with so much uncertainties and many sad days due to losing my loved ones that I did not even feel like trying something new or blogging recipes. If there was something that kept me going without breaking down, it is my love for music. I kept listening to my daily shlokas, bhajans and my favorite songs on youtube all day, which gave me peace of mind. Youtube has become my favorite app now! ❀️

Music really has healing powers and when you don’t feel like talking with anyone, immerse yourself in the world of music and it will definitely bring you peace! ❀️

In devotional music, Guru Raghavendra Swamy’s bhajans and shlokas are my favorite. Whenever I feel nobody can understand me, and also when there are instances in my life which I can’t share with anyone else (not even with my Amma as I don’t want to worry her ❀️), that’s when Guru Raghavendra Swamy comes to my aid. Through his bhajans, I talk to him and he shows me the way. Not all would believe, but I get the answer to my talks within a day. That’s the power of my relation with him and those who believe in him will know how he’s always with us, taking care of us, knowing all the battles that we face in life.

Sharing my favorite picture of Guru Raghavendra Swamy with all of you. The way he is hugging Krishna depicts so much love that I feel very happy just looking at this picture. ❀️

So, I am dedicating this sweet that I learnt recently from Usha Thukaram mai, which we loved a lot, to my Guru Raghavendra Swamy. πŸ™ Today is Thursday (Guruvaar) and my Guru’s day. An apt day to post this Sheera as prasad to him. Om Shree Guru Raghavendraya Namaha πŸ™

This sweet is very easy to make and a unique twist of adding roasted poha powder instead of semolina, gives it a wonderful flavour. Do try for a change and I am sure you will love it. Happy and healthy cooking!

Thank you Usha Thukaram mai for your recipe. You had once said that you see me as your daughter. Just want to say that I will never forget that and always admire you for your amazing dishes that you post. Love, respects and seeking blessings from you! β€οΈπŸ™

RECIPE: { Serves 2 }

Ingredients:

1 Cup thick or thin Poha / Aval / Flattened rice / Beaten rice

3/4 Cup Jaggery (I used powder)

2 Tbsp Ghee

6 to 8 chopped Cashews

6 to 8 Raisins

2 Cups Water

1 tsp Cardamom powder

Step by step recipe:

1. Heat 1 Tbsp ghee in a pan and roast the poha on medium flame till it turns light brown in colour. Allow it to cool.

2. Add to a mixer and powder it finely.

3. Now heat the rest 1 Tbsp ghee in the pan and fry cashews and raisins in it till cashews turn brown in colour. Add 2 Cups water and bring to a boil.

4. Add the powdered poha along with jaggery powder. (If adding jaggery as blocks, melt jaggery first in the water and then add the poha powder.) Mix continually removing lumps if any.

5. Now cook mixing continually on medium flame till the mixture leaves the sides of the pan. Takes about 8 mins.

6. Add cardamom powder. Mix well and remove from the flame. Serve hot or cold. Both tastes yummy.

Click on the image to save the recipe on Pinterest

Notes:

* You can use both thick or thin Poha for this recipe.

* Make sure to not burn the poha while roasting. Remove from flame as soon as it starts turning brown in colour.

* For 1 Cup Poha, 2 Cups water and 3/4 Cup jaggery works well for me. It turns out sweet enough for our taste buds. If you have a extra sweet tooth, you could increase the quantity of jaggery to upto 1 Cup.

* When poha powder is added to the hot water, there is chance of it forming lumps. So mix continually with a spatula removing lumps if any.

* If using jaggery blocks instead of powder, melt it in the water and then add the poha powder.

* Also, if the jaggery you use has impurities in it, make jaggery water separately (3/4 Cup jaggery in 2 Cups water). Sieve and then add the water to the roasted cashews and raisins.

* Don’t skip the cardamom powder as it enhances the flavour so much.

* I found that as the Sheera is kept in room temperature, it increases the taste than when had hot. So I would suggest to make this sweet a bit ahead of time for the poha to absorb the flavours well. The tagline behind this Sheera is ” As time went by, the Sheera kept tasting better and better! πŸ˜„”

* Here is yet another Sheera that I make always with Rava/ Semolina: Jaggery Sheera

* This is the compilation of all my Easy 15 mins sweet recipes.

Radish Chutney

In my last post of Ragi Jaggery ladoos, I had mentioned about our relocating back to India but I had never expected my readers to comment and message me with their best wishes. It really made me so happy that people actually take time to read the full writeup and also write such heartfelt words for me. ❀️ I always consider my readers to be a part of my extended family and the love showered on me in the past couple of days proves that my readers feel the same, which means the world to me. Thank you dear readers. Love and blessings is what I need the most now. β€οΈπŸ™

I had actually decided to stop blogging for a while as I am not in the right frame of mind to write. Most of the families we know will be separated, even us, as only me and kids will shift back as of now. But we knew this since a year, were mentally prepared for it and specially as I have a great support system in my parents, we are not much worried. But there are many families who don’t have that and hearing their situations make me feel very sad too. Praying that God blesses all of them and they can survive this change well. πŸ™

Sorry that this is turning out to be such a emotional write-up which is why I did not want to blog but I guess you all will understand, like always. ❀️

Coming to this chutney, it is my way to sneak radish in my kids’ diet as they love dosas with chutneys. So making them eat vegetable in this form too. I learned this chutney long back from a cookbook but have changed it to suit our tastebuds. Comes out very tasty and you can never say it has radish in the chutney.

Hope you all try and love this chutney. Happy and healthy cooking! ❀️

RECIPE:

Ingredients:

1 Cup peeled and grated Radish

1/4 Cup Coconut

1 Tbsp Coconut Oil (+ 1 tsp)

4 Red chillies

1 tsp Urad dal

1 tsp Cumin seeds

1/4 tsp Hing or Asafoetida powder

Salt to taste

Step by step recipe:

1. Heat 1 Tbsp Oil in a pan. Add grated Radish and saute on medium flame till the raw smell of radish goes away and the radish turns dry. Takes about 5 mins. Now remove from flame and allow it to cool.

2. Now add the radish to a mixer along with coconut. In that pan, heat 1 tsp Oil and add Hing, 1 tsp Urad dal and 1 tsp Cumin seeds. Also add red chillies. Fry till Urad turns brown. Allow it to cool.

3. Now add the fried chilies, Urad dal, cumin seeds to the radish- coconut. Also add salt and about 1/4 Cup Water or as needed. Grind to a smooth paste. This is a thick chutney. Remove to a serving bowl.

Notes:

* Do fry the radish till the rawness goes away. Else the chutney will have the raw taste.

* This chutney is not seasoned with mustard seeds but you can season if needed.

* Can be had with rice meals or dosa/idli.

* Here is my Chutney/dips recipe collection that I make always.

Ragi Jaggery Ladoos | Easy to make healthy ladoos

Click on the image to save the recipe on Pinterest

I can’t believe till some time back, I thought making ladoos were the most difficult among sweets. Now, if you give me 15 mins, I can make ladoos for you. πŸ˜„ That’s the change which practice has brought in me. Now I can understand the real meaning of “Practice makes a man perfect”. Though not perfect by looks (I am reaching there 😬), these ladoos come out looking like ladoos πŸ˜‚ and tastes so delicious that my kids love it a lot. So I thought it was worth sharing with all of you.

Hope you all try these healthy and delicious ladoos. Happy and healthy cooking! ❀️

RECIPE:

Ingredients: {Makes about 12 ladoos}

1 Cup Ragi or finger millet powder

3/4 Cup Jaggery powder

1/4 Cup + 2 Tbsp Ghee

2 Tbsp Raisins

Step by step recipe:

1. Heat 2 Tbsp Ghee in a pan and add 2 Tbsp Raisins. Fry till the raisins puff up. Remove to a bowl.

2. Now melt 1/4 Cup Ghee in the pan and add 1 Cup ragi flour. On medium flame, saute the flour in the ghee. Saute till the ghee and ragi flour combines well.

3. Now, keep sauteing on medium flame till the mixture comes together as shown below. It will take about 6 to 8 mins. The mixture turns aromatic and raw smell of the flour goes away.

4. Remove it in the bowl where we had put the raisins. Also add 3/4 Cup jaggery powder.


5. Mix well and allow it to cool slightly. When it still warm, bind to make ladoos. I am attaching some pictures that I took when making these ladoos. Hope it helps all of you.

Keep it in your palm and open close your fingers. Keep doing it till it forms round shape.

6. Repeat the same with the rest of the mixture. Enjoy the ladoos!

Notes:

* Store in a moisture free container at room temperature. Stays well for atleast 2 to 3 days. Mine gets finished off before that.

* Don’t reduce the amount of ghee or you won’t be able to bind the ladoos well.

* Add little ghee to the mixture and on your palms if you find it difficult to form ladoos.

* Do remember to saute the ragi flour well in the ghee so that there is no raw taste in the ladoos.

* You can add cardamom powder too if you like.

* Substitute ragi flour with wheat flour to make Churmundos or wheat flour ladoos. They come out delicious too.

* These ladoos are very soft when freshly made but turns hard as they cool down and tastes much better when kept for little while.

You can check all recipes with Ragi that I make regularly like Ragi idlis, Ragi dosas, Ragi cake, Ragi cookies, Ragi Malpua in this Ragi recipes collection.

Ragi Set Dosas

Instant Ragi Rava Dosas

Instant Ragi Idlis

Ragi Urad Idlis

Ragi Ela Ada

Ragi Butter cookies

Eggless Ragi Chocolate Cake

Ragi Malpua

All Millet Recipes

Click on the image to save the recipe on Pinterest

You can also check my 15 mins healthy sweets recipes collection.

Jowar Vegetable Bhakri

Click on the image to save the recipe on Pinterest

I have mentioned before that I always believe in following our age old traditional recipes for a healthy lifestyle. So when I found a youtube channel through food groups named NK Food & Lifestyle by Mr Krishnamurthy Setty sharing similar beliefs as mine, I felt happy and subscribed instantly.

I don’t follow many channels just for the sake of it, but only those whom I really feel are worthy enough (I am choosy that way πŸ˜„). This channel is in Kannada language showcasing Uttar Karnataka dishes, which makes me even more interested being from the south part of Karnataka. All their recipes are unique, simple and healthy, making me want to try that time itself.

This Jowar Bhakri, which they call as thalipittu was tried following their video, even though I chose to make it as thick ones rather than thin as my kids prefer that way and it’s easier too (for the busy mommy me πŸ˜€). My kids, specially my 2 year old son loved it so much that he became a fan of it. Can you believe this has radish too in it which goes into the tummy in a secret way 😁. We all loved it very much. A must try recipe for sure!

On a side note, I read something which made me think a lot (me and my best friend – my thoughts πŸ˜…). I was reading about how we should be kind and supportive even to strangers as we don’t know what they must be going through. We all have that facade which we show to the world but inside we might be suffering which is hidden deep inside us. So, as much as possible we must show empathy towards everyone. Have you ever noted how kindness showed by a stranger increases your faith in humanity? And what if you were the person who was kind to someone whom you don’t even know, without expecting anything in return? Doesn’t that make you happy?

That happiness is what I feel while sharing about Mr Krishnamurthy Setty’s youtube channel. He thanked me many times when I shared my feedback and said I would be writing about his channel on my blog. The way he expressed gratitude made me confident that I am on the right path.

So, support everyone, even strangers without expectations and love your loved ones with all your heart without conditions. Though expectations are human nature and unconditional love is not easy at all, once we experience it, we understand life fully. ❀️

After this long heartfelt writeup, here’s sharing the recipe with all of you. Do try. This comes out very delicious. Happy and healthy cooking!

RECIPE:

Recipe adapted from: NK Food & Lifestyle

Ingredients: {Makes about 7 to 8 thick Bhakris}

1 Cup Jowar flour

3/4 Cup Whole wheat flour

1/2 Cup Chickpea flour or Besan

1/4 Cup finely grated Radish

1/4 Cup finely grated Carrot

1/4 Cup finely grated Cucumber

1/4 Cup finely chopped Onion

1/4 Cup finely chopped Coriander leaves

2 to 3 Green chillies

Salt to taste

Ghee to cook the Bhakris

Step by step recipe:

1. Take Jowar flour, wheat flour, chickpea flour and salt in a bowl.

2. Now add finely grated Radish, carrot, cucumber and finely chopped onion, coriander leaves and green chillies.

3. Mix everything once with hands so that the veggies mix well into the flours. Now if making thalipeet, add very little water and make into a soft dough. Since I made Bhakris, I added water to bring it to a thick dosa batter consistency (about 1 1/2 to 2 Cups of water).

4. Now heat a dosa pan and add a ladle of dosa in the center of the pan. Spread to make a thick dosa. Drizzle ghee over the surface.

5. When the surface cooks, flip and cook for about 1 to 2 mins.

6. Serve hot with butter and a chutney of your choice.

Notes:

* I refrigerate the leftover batter for use the next day. It lasts well and there is no taste change in the Bhakris.

* Skip radish if you don’t have but it’s a great way to include the vegetable in your diet as you can never find out that the bhakris have radish in it.

* I have not tried these Bhakris without wheat flour. So can’t say about the result.

* Chickpea flour gives a good flavour to this. So don’t skip it.

* You can spread it like thalipeet but I find them making like Bhakris easier.

* Cook both sides well as this takes time to cook than regular Bhakris due to Jowar flour in it.

* I served these with Coriander leaves chutney. For the chutney, grind together coconut with green chillies, ginger, coriander leaves, salt with little water to a smooth paste. Season in coconut oil with mustard seeds and curry leaves.

* You can check all my bhakri recipes in this recipe compilation post.

* Other recipes with Jowar flour:

Jowar Idlis

Jowar Dosa

* All my Millet based dishes : Millet recipes collection

Click on the image to save the recipe on Pinterest

Til Jaggery Burfi | Easy 15 min, 3 ingredient sweet recipe

Click on the image to save the recipe on Pinterest

I was supposed to write this blog last night after putting my kids to sleep but their tired mommy fell asleep before them πŸ˜… and so here I am, writing it atleast before they wake up (and the double storms start 😁😁). Had a great sleep after long though, with so many dream sessions. I have been a person who gets loads of dreams, about people whom I think of during daytime, about places that I wish to go, some hidden desires which only I know about, all of it gets fulfilled (atleast πŸ˜„) in my dreams ❀️. And I remember it even after I wake up. Am I weird or is it the same with all of you too? πŸ˜€

Anyhow, after some heart to heart talk, let me get back to these burfis which I am sharing as it is Makara Sankranthi in two days. Til and Jaggery are important ingredients that people consume on the festival in different forms like ladoos, chikkis, burfis and many other ways. Makara Sankranthi is celebrated all over the country marking the end of winter with the sun starting it’s northward journey or the Uttarayan journey and signifies new beginnings.

I love how each of our festival gives such positive vibes and also the dishes consumed are so healthy. Til and jaggery are both warm foods to the body, also loaded with health benefits, so this festival makes sure we consume it atleast on this day.

Hope you all try this easy to make Burfi which requires only 3 ingredients. I always prefer to make such quick sweets as I don’t like to spend my whole day in the kitchen for sweets. Also, this is very healthy and perfect for the festive occasion as well. Wishing you all a very happy Makara Sankranthi. πŸ™πŸ™

RECIPE:

Ingredients: { Makes about 12 small pieces of burfis}

I usually double this recipe when I make for my family

1 Cup white sesame seeds/ Til

1/2 Cup Jaggery (I use powder)

2 Tbsp Ghee

Sliced almonds for garnish (optional)

Step by step recipe:

1. Roast 1 Cup sesame seeds in a pan on medium flame till it starts browning on the edges. Don’t allow to burn as it can taste bitter. As soon it starts turning brown, remove onto a plate. Allow it to cool. Now powder coarsely in a mixer.

2. Now add 2 Tbsp ghee, 1/2 Cup jaggery and 2 Tbsp water in a pan. Allow jaggery to melt in the water and form bubbles on top like shown.

3. Immediately reduce flame to medium and add the powdered sesame seeds. Mix well continually for about 3 to 5 mins till everything comes together and the mixture leaves the sides of the pan.

4. Keep a plate greased with ghee ready. Pour this mixture and spread evenly using spatula. Allow it to cool.

5. Garnish with almond slices to enhance the beauty of the Burfi. Slice and serve.

Notes:

* Don’t burn the sesame seeds while dry roasting it. Sesame seeds get roasted quite quickly and we have to be very careful while roasting it so that it does not turn black. As soon as it starts turning browning, immediately transfer it to a plate to cool.

* Powder coarsely in the mixer. Gets done very quickly. Don’t grind too much as sesame seeds can leave oil.

* You can skip ghee for a vegan version but ghee adds a wonderful aroma.

* 1/2 Cup Jaggery + 2 Tbsp Water makes a correct ratio. Adding more water can make the burfi turn into halwa. πŸ˜€

* Add the sesame seeds powder as soon as you see bubbles forming in the jaggery water. Mix well for few minutes and then remove immediately. Keeping in the hot pan itself can make it form a crisp layer on the bottom.

* This Burfi hardens as you keep it. So don’t worry if it’s soft first. Just slice with knife and keep it to cool. Remove after it hardens.

* You can also add cardamom powder if your want and garnish with any other dry fruits too or just leave it plain.

Click on the image to save the recipe on Pinterest

You can also check my other 15 mins sweets recipe collection.

Peanut Jaggery ladoos | 2 ingredient easy Ladoos

Click on the image to save the recipe on Pinterest

I am someone who gets emotional and get tears very quickly (no matter how much I show that I am strong from outside πŸ˜€) and right now I am having tears of joy in my eyes. The reason is that the blockade which was imposed on Qatar (where I live) by some neighboring countries has been lifted after more than 3 years. It is definitely a happy news for people living here as well as people in those countries as finally things have got normal like before (most importantly many families reuniting ❀️).

It takes me back to the time when this sudden blockade was imposed. We were really worried as we did not have much grocery, veggies or milk as people were stocking up everything. The supermarkets were empty. Milk and milk products which used to come from Saudi and UAE stopped coming. There was utter chaos.

But our King handled everything very well and within few months, we became self sufficient with milk industry doing great production and even fresh veggies being available locally. Really proud of him, the way the situation was managed. πŸ™Œ

Now when things have got back to normal, it makes me happy that whatever misunderstanding there was between the countries have been solved and they are back together like before. I don’t belong here and mostly will shift back to India within an year or so, but that does not stop me from being proud of this country and celebrating this happy news. ❀️

So here’s sharing a very easy 2 ingredient Peanut Ladoo that I learnt from my friend Trupti Rao who is a great cook and someone who encourages me a lot. Thank you so much dear for your amazing recipe. We all loved it a lot. ❀️

Dedicating these ladoos to Qatar πŸ‡ΆπŸ‡¦. May this country always be as amazing as it is and more power to our King. πŸ™Œ

RECIPE:

Ingredients: {Makes about 10 ladoos}

1 Cup Peanuts

1/2 Cup Jaggery powder

Step by step recipe:

1. Dry roast the peanuts on medium flame till the peanuts get brown spots on it showing it has got roasted. Don’t burn it. Remove as soon as it starts getting brown spots. Allow it to cool.

2. If using peanuts with skin, you need to remove the skin after the peanuts cool down. Since I have used skinned peanuts, I have skipped this step.

3. Add to a mixer along with jaggery powder or grated jaggery.

4. Now grind the mixture,not in one go but pulsing, removing after few seconds and scraping the sides, grinding again and repeating till peanut leaves oil and the mixture turns little wet from powder form. It took me about 5 times of grinding, scraping the sides and grinding again till I got the perfect mixture.

5. Now add to a bowl. Take little quantity of mixture in your hands and form small ladoos by pressing well using your palm and fingers.

6. Do the same with the rest of the mixture.

Notes:

* Store in a moisture free container. Lasts well for couple of days. Mine gets finished off by then.

* If using peanuts with skin, roast, cool, remove skin and then add to the mixer.

* Roast on medium flame only and remove as soon it starts turning brown. Else burnt peanuts will have a bitter after taste in the ladoos.

* Use grated jaggery instead of powdered ones.

* Main part here is grinding it till it turns from powder to slightly wet but not such that peanuts leave oil completely. So just pulse (grind only for few seconds), scrape the sides of the mixer and continue doing so. I usually check if I can form small ladoos. If I can, it means the mixture is ready.

* Learning to bind ladoos takes few attempts to get perfect but once you get the knack of it, it’s very easy. Just take a handful of mixture in your palm and continue pressing while opening and closing your fist giving it the shape.

* You can check my Wheat jaggery ladoos/ Churmundos recipe too. Very easy to make and tastes heavenly.

* I also make Peanut Jaggery Ubbattis or Holiges or Puranpoli which comes out very delicious.

Click on the image to save the recipe on Pinterest