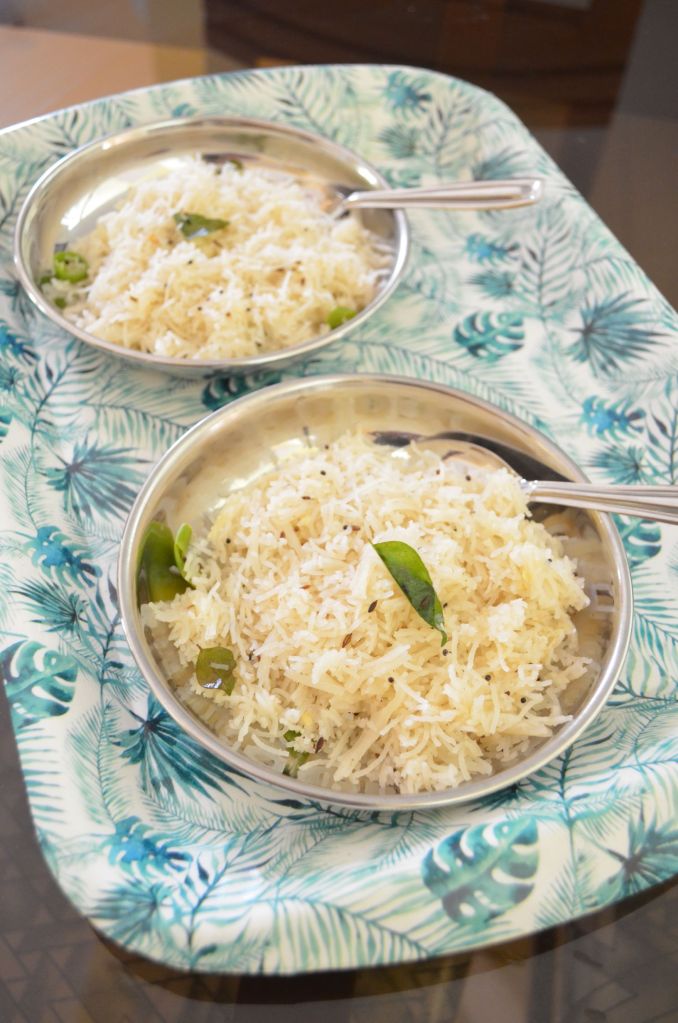
Gova Shevai is not just any dish for me.. It’s childhood, nostalgia, love and loads of memories packed together.. My favorite breakfast which I eat the whole day whenever it is made.. 😍
My parents know this and always make one big kadhai for me to devour.. ❤️ Amma’s smile when she sees me enjoy it is still in front of my eyes. 😍
And it’s not only now, Gova Shevai usli has been my favorite since as long as I can remember. But the wheat noodles or gova shevai was not available in Kochi or Qatar.. Hence was a rare treat for me.. Not anymore though.. In Udupi it’s readily available and now I enjoy it always.
I am relishing different kinds of food here after many years and it’s indeed a blessing.. Sharing my happiness with all of you too.. Happy and healthy cooking ❤️
RECIPE:
Ingredients: ( serves 4 )
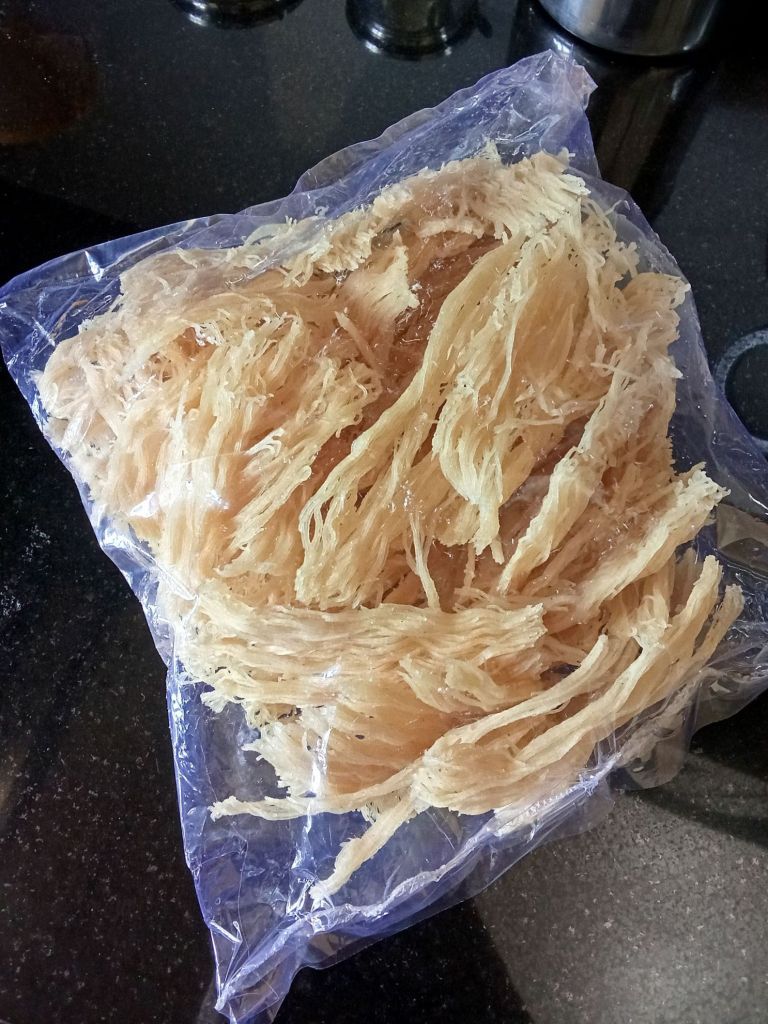
Dry wheat noodles (gova shevai) half packet
3 Green chillies
A sprig of Curry leaves
1 tsp Mustard seeds
1 tsp Cumin seeds
1 Tbsp Coconut oil
2 tsp Sugar
Salt to taste
Grated Coconut for garnishing
Step by step recipe:
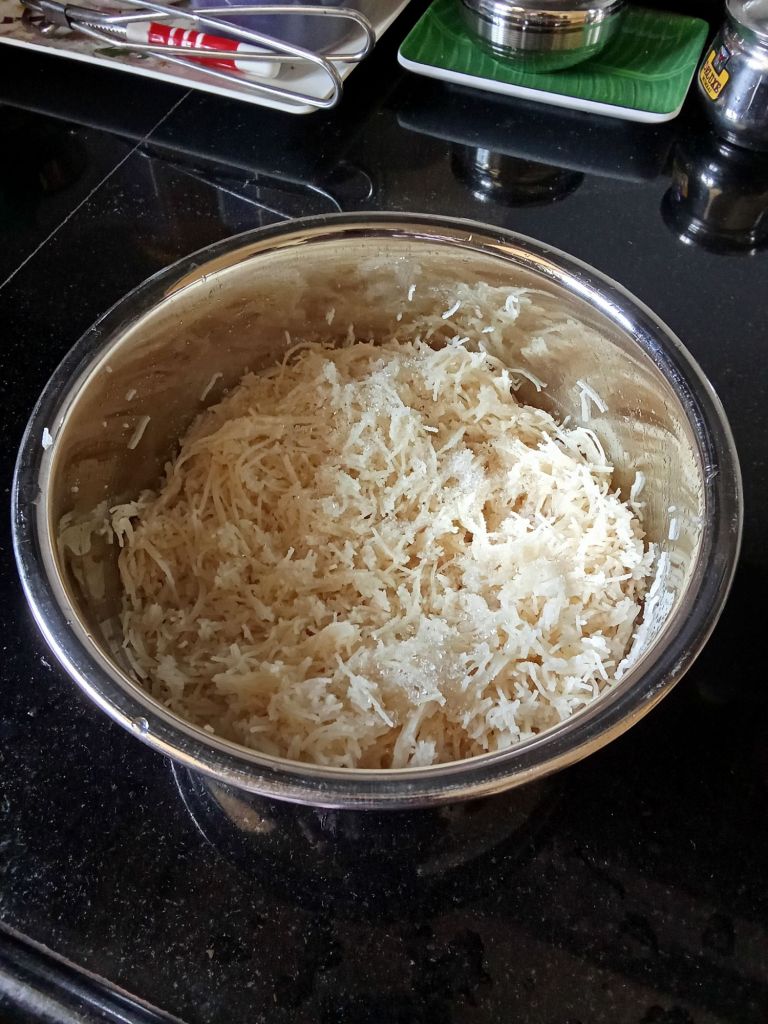
Take the gova shevai packet. We get it this size here. Not sure about the weight of the packet. I take half of this packet which makes 4 servings.
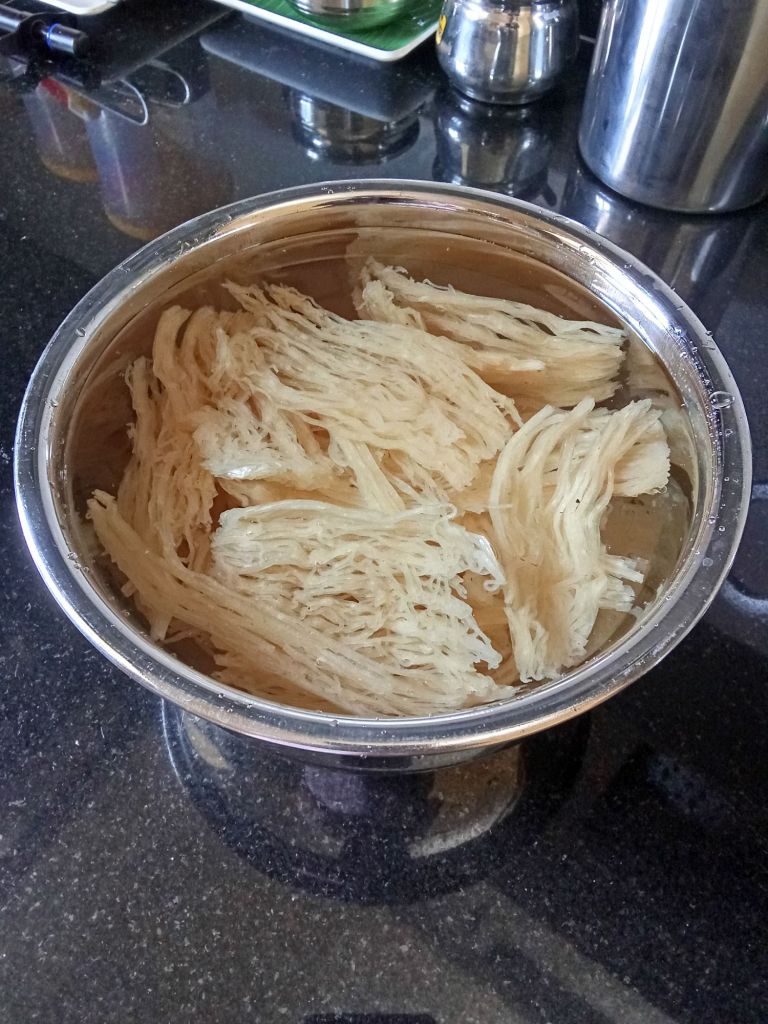
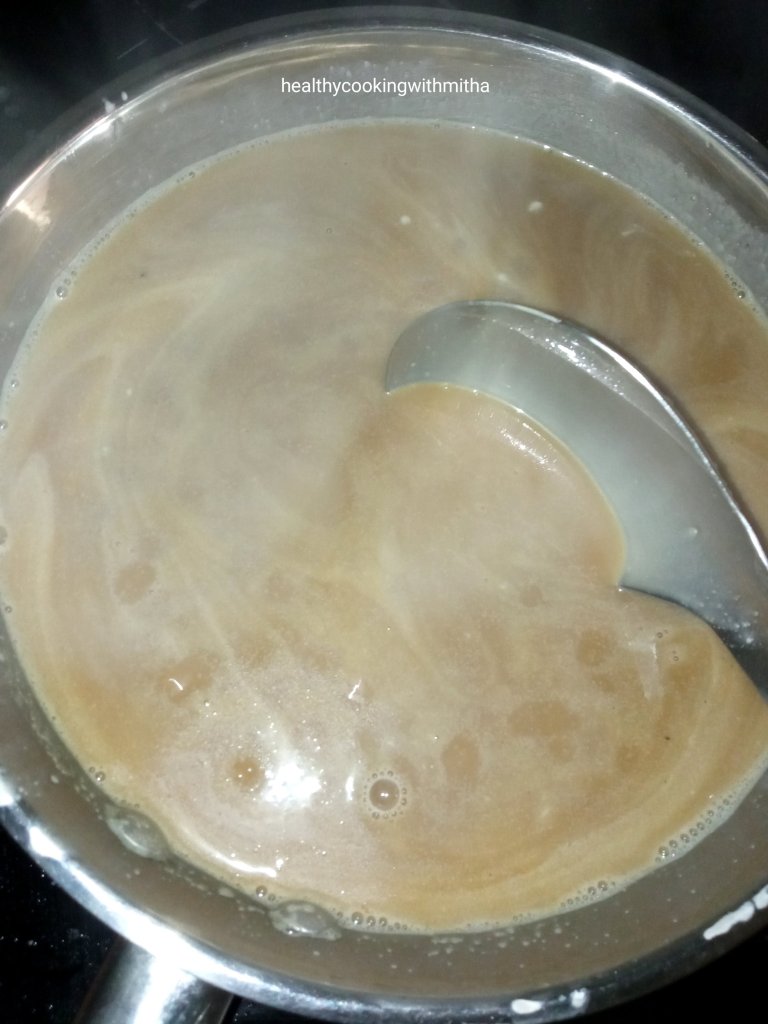
2. Soak the wheat noodles in normal water for about 30 mins.
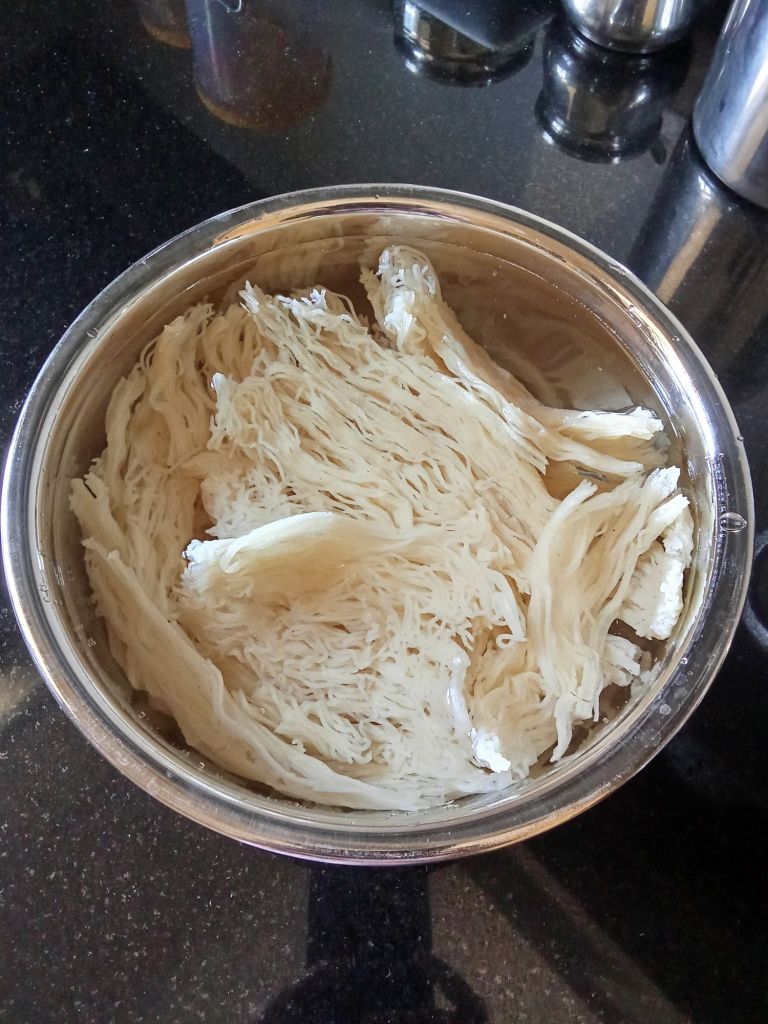
3. In 30 mins, it will turn soft in texture.
4. Drain the water completely and using fingers, crush the noodles into little pieces. Now add salt and sugar to this and mix well. (The noodles already contains little salt in it, so be mindful while adding.)
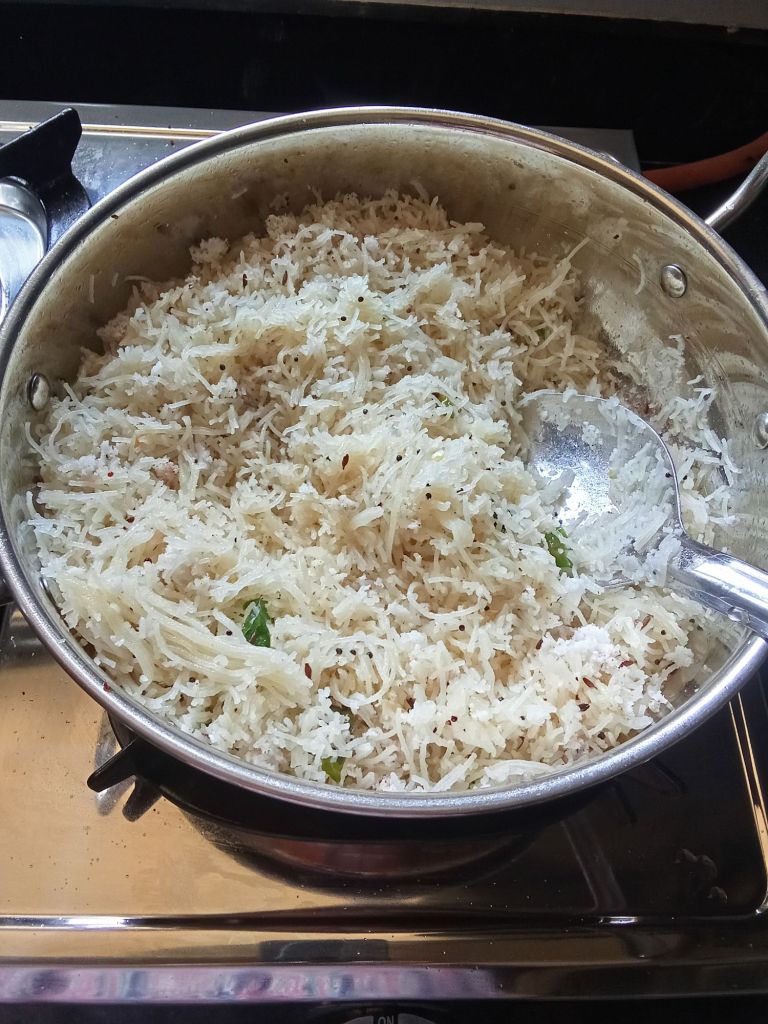
5. Heat coconut oil, add mustard seeds and cumin seeds.. When mustard seeds splutter, add curry leaves and green chillies. Fry for few seconds. Now add the crushed noodles. Mix well on medium flame. Cover and keep for 5 mins.
6. Garnish with grated coconut and serve hot.
Note : You can also add split urad dal in the seasoning.
Click on the picture to save the recipe on Pinterest
What I love the most being in native is that I am not only close to my loved ones but also very close to nature. As I say jokingly to my kids, it’s like living inside National Geographic channel. The variety of trees and plants, their leaves, the beautiful flowers and the pretty little butterflies along with insects that sit on them.. A delight to watch for a nature lover like me.. 💚
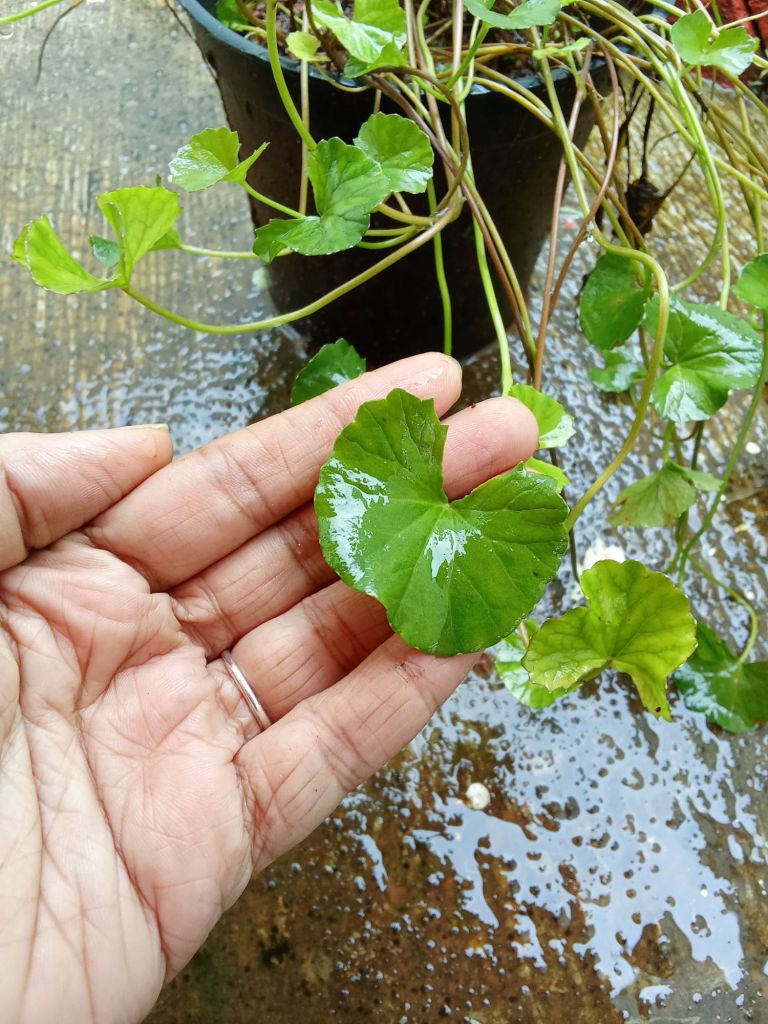
Along with observing them, I also use edible leaves for my cooking. They are not only tasty but high in medicinal value. One such leaf is Brahmi or Ekpani leaves which is very beneficial for the brain specially for kids.
My kids love any kind of chutney and don’t realize what’s inside it. So whenever I find Ekpani leaves, I make this chutney so that they consume these leaves regularly. I learned this recipe from my husband’s aunt Mrs Geetha Shankar Hegde ( mave )who is a great cook and someone who inspired me to cook during my first few months as a newly wed bride.
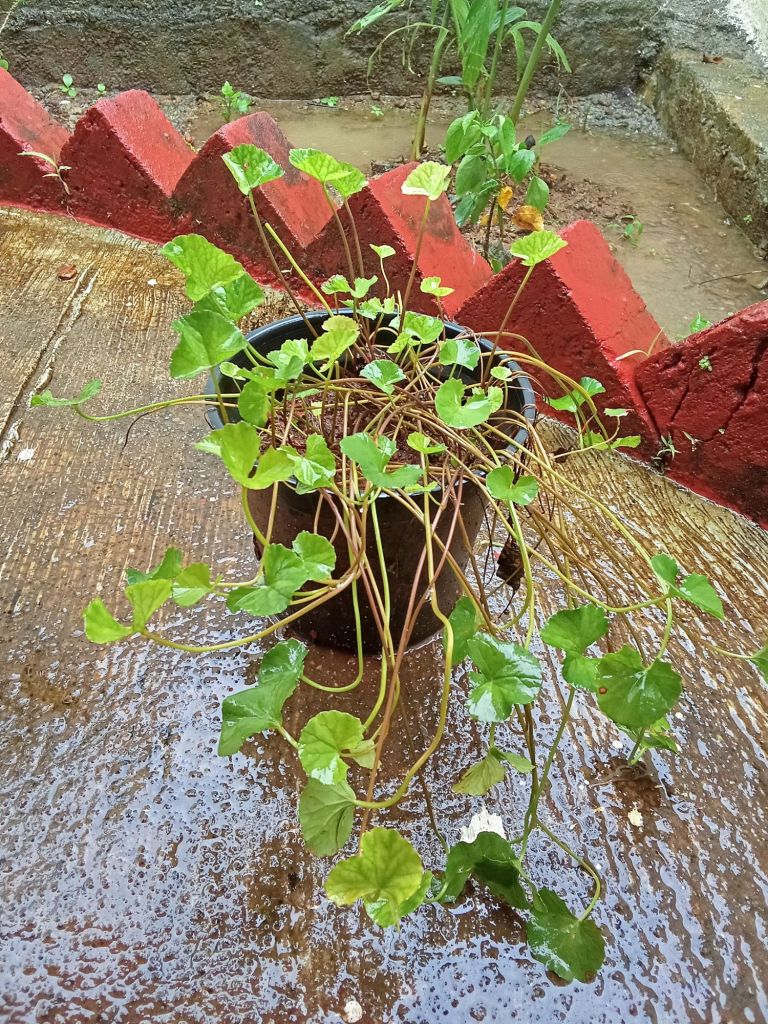
I have to mention one more person, someone very dear to me, Prabha Vaman Bhat mai who was kind enough to share her Ekpani plant along with the pot and also many other plants for our garden. Her plants are yielding such beautiful flowers in our house. Thank you so much Prabha mai. ❤️🙏
Here’s sharing mave’s recipe and hope you all will try this tasty chutney too. Happy and healthy cooking! ❤️
RECIPE:
Ingredients:
About 10 to 12 Brahmi or Ekpani leaves with stem and root
3 Green chillies
1 tsp Cumin seeds
2 tsp Ghee
1/2 Cup Coconut gratings
A small pebble sized ball of Tamarind
Salt to taste
Step by step recipe:
Wash the Brahmi leaves with stem and root very well in a bowl to remove the soil in the root. Roots are very important and healthy but if not available, you can use only the leaves for this chutney too.
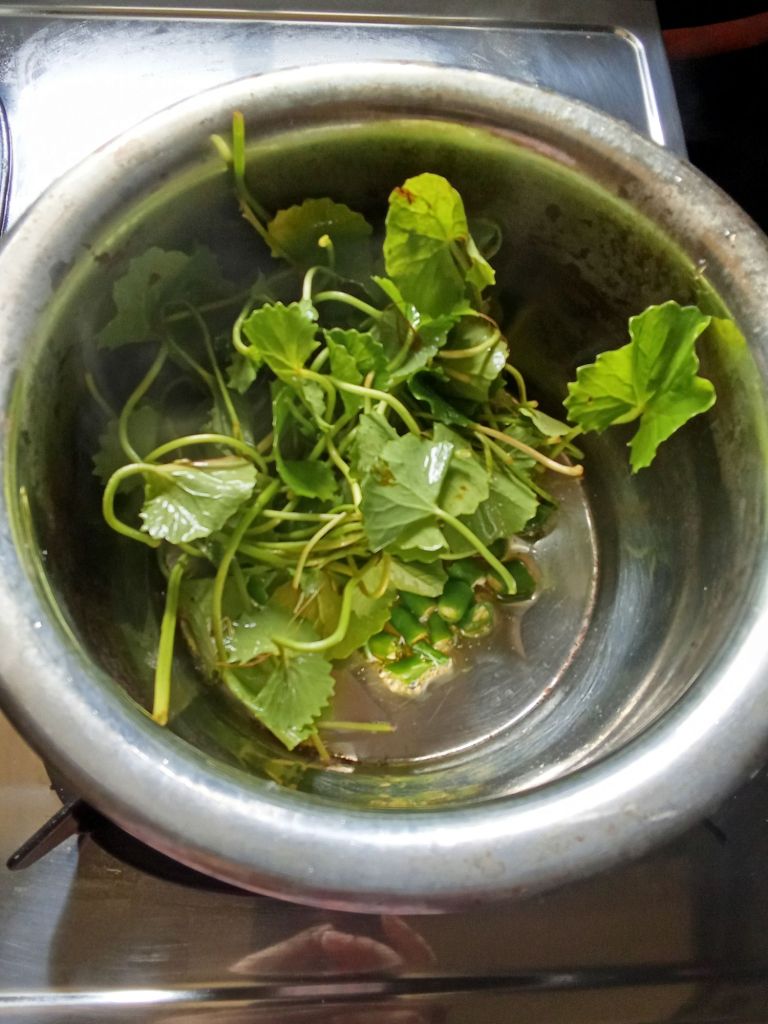
Heat ghee in a pan and add cumin seeds. When it changes colour, add green chillies. Now add the washed ekpani leaves.
3. Fry for few seconds until the leaves wilt a little.
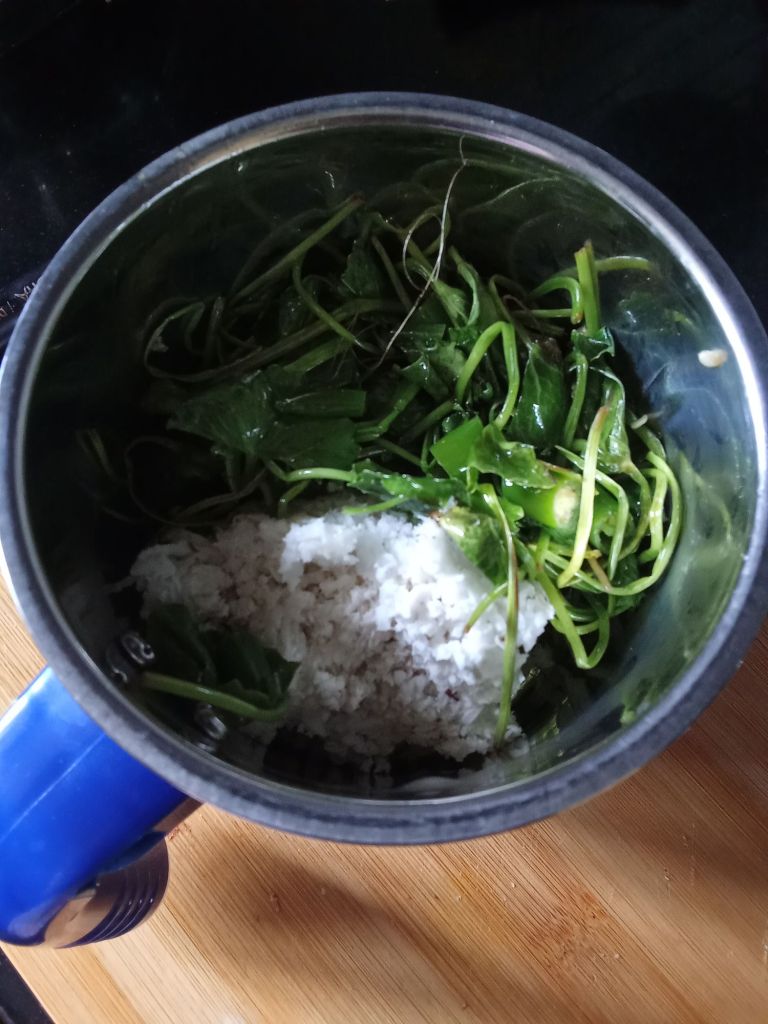
4. Now add this to a mixer jar along with coconut, tamarind, salt and little water.
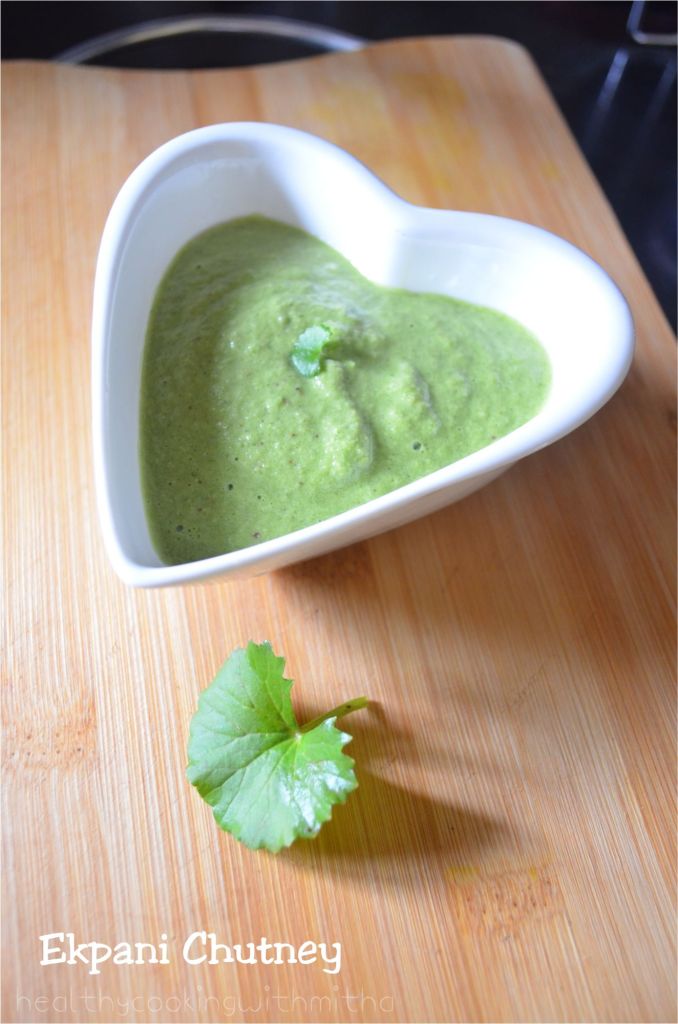
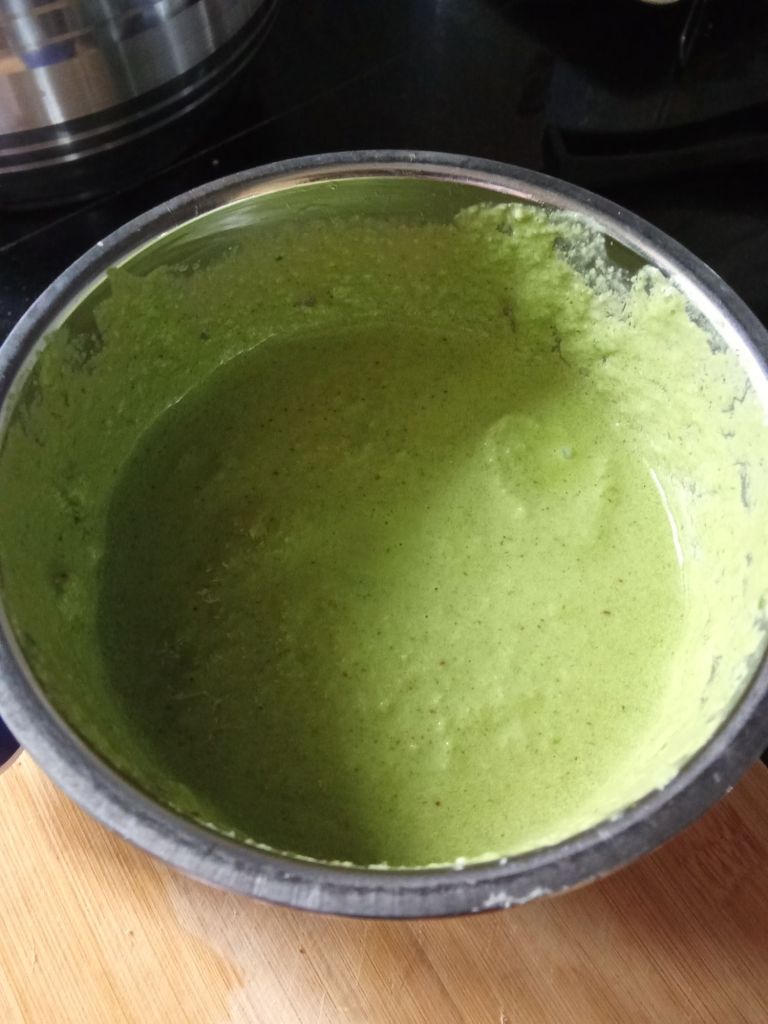
5. Grind to a smooth paste adding water as per desired consistency.
6. Done! Enjoy with dosas, idlis or rice.
Click on the picture to
Notes:
You can use the same recipe to make chutney from different leaves like sambarpalli or moringa leaves too..
Another way of making this chutney is to grind the leaves without frying along with coconut, green chillies, ginger, garlic, tamarind and salt. That tastes good too. I learned it from my neighbour here.
Click on the picture to save the recipe on Pinterest
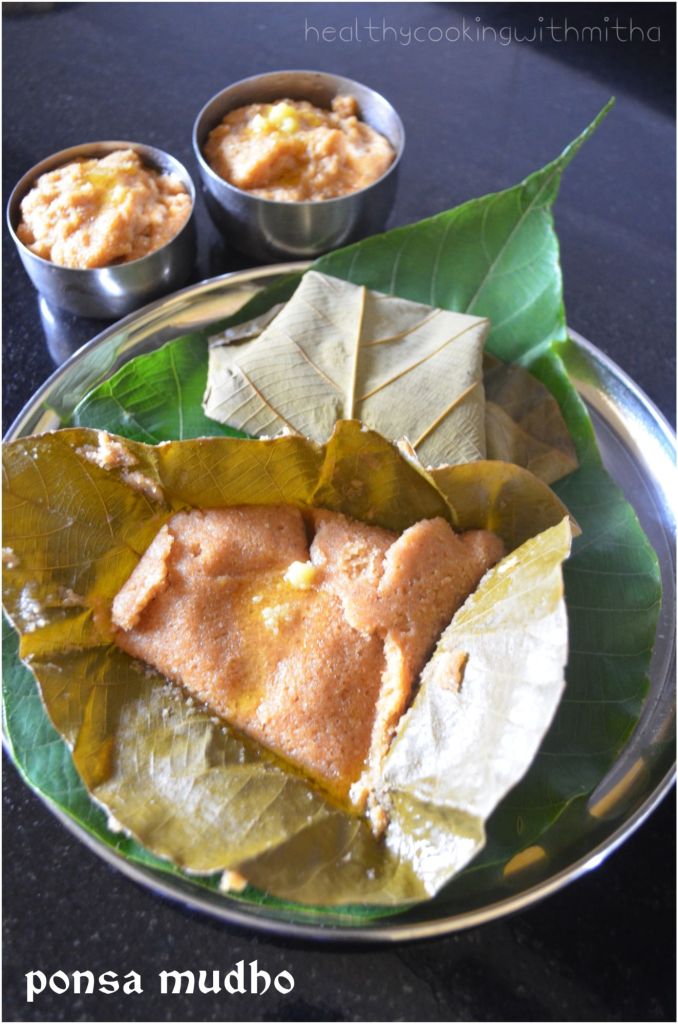
Every year during Jackfruit time, I used to crave for it but could not enjoy as it was super expensive in Qatar. My dad however used to fry it in ghee when in season and freeze it for me when I came during vacation.. Then we used to make ponsa mudho or polo (thick dosa) with it which I used to devour to my heart’s content.
Not this year though.. Being in Udupi and pampered by everyone around 😍, I am getting freshly ripened Jackfruit every now and then, which I am enjoying like someone who’s never tasted it before..😂 With what was left after eating it fresh, I made this mudho and took pictures to share it with all of you..
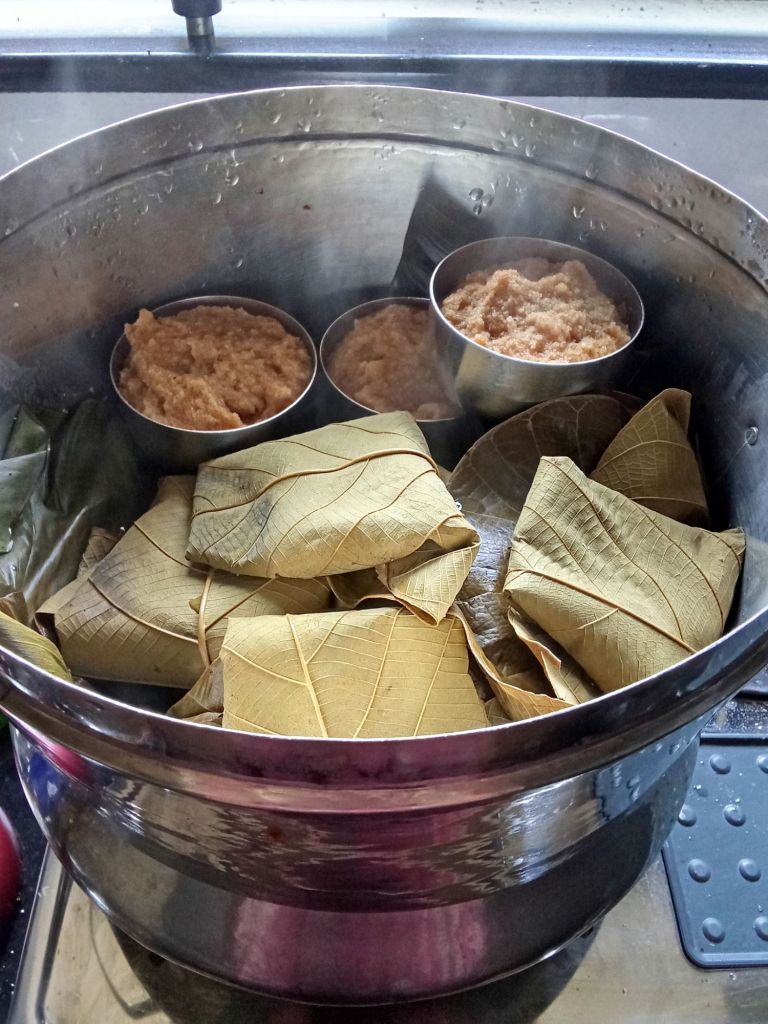
We have a Uppalige tree right in front of our house and what’s better than making ponsa mudho in uppalige leaves.. The aroma was divine and heavenly to say the least.. I steamed them in my grandma’s steamer or pedavan which Amma gave me when I came to this new house.. While it was steaming, I was reminded of the various dishes my grandmother and mother made in it and felt very nostalgic.. ❤️
Since Jackfruit is still in season, hope you will try these idlis or ponsa mudho as we call it. Happy and healthy cooking ❤️
RECIPE:
Ingredients:Makes around 12 to 15 idlis depending on how you steam it
3 Cups ripe Jackfruit segments (around 30)
1 Cup grated Coconut
1.5 Cups Jaggery powder
1.5 Cups Idli Rava or Rice Rava (can also replace with upma rava or bombay rava)
A pinch of salt
A pinch of Cardamom powder
Ghee to grease the idli container
Step by step recipe:
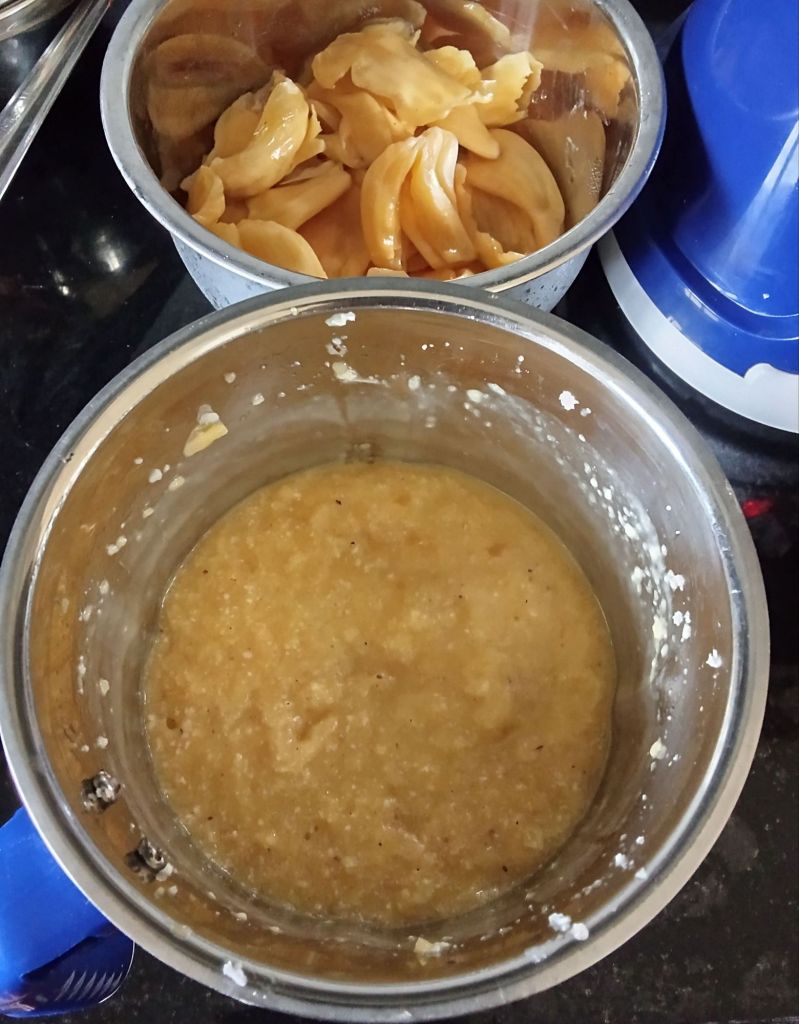
In a mixer jar, add 3 Cups or around 30 ripe Jackfruit segments along with 1 Cup grated Coconut..
2. Grind to a smooth paste adding very little water only if needed. Do NOT add a lot of water. Add water only to aid grinding.
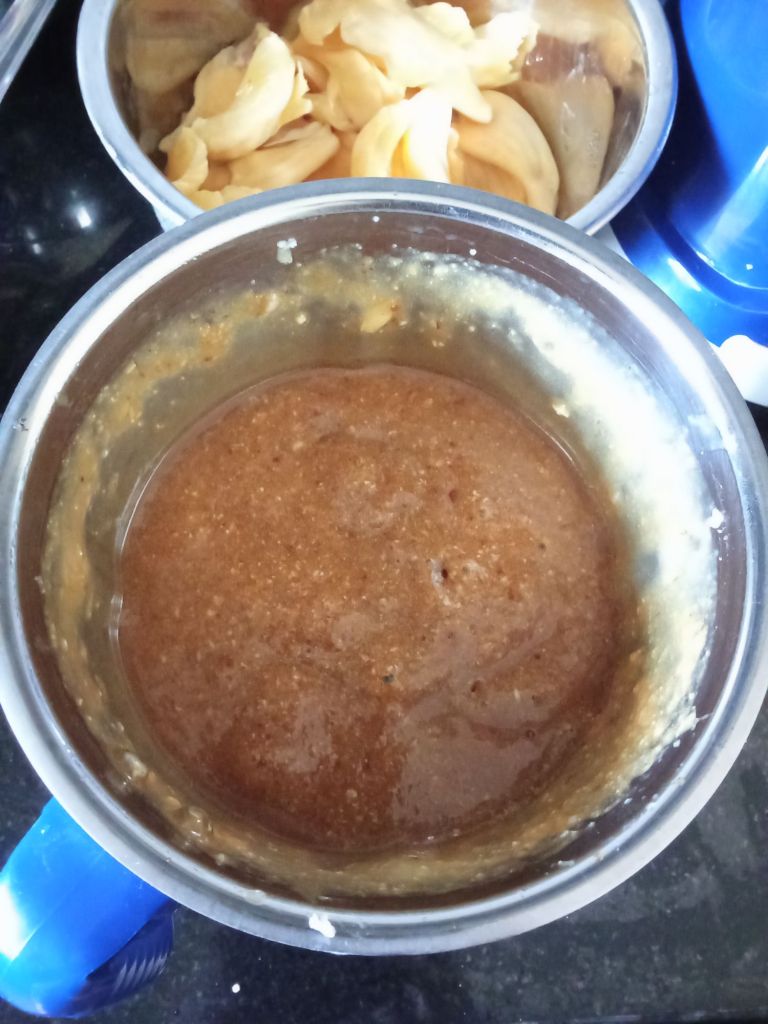
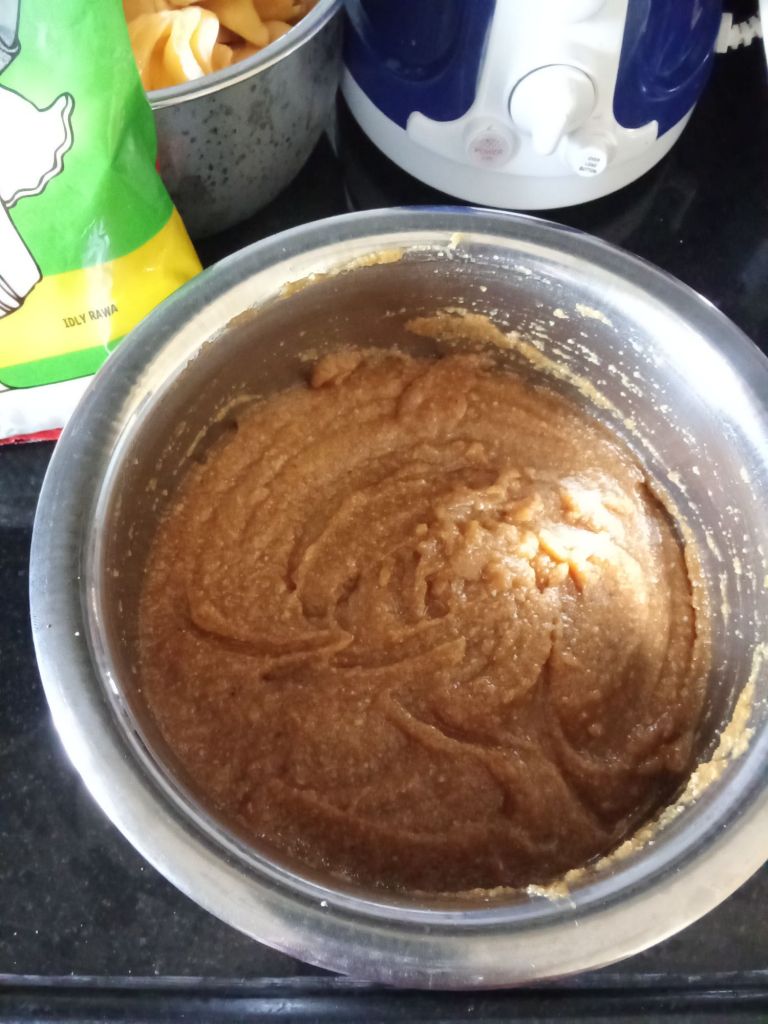
3. Now add jaggery powder and blend once again to a smooth paste.
4. Add this into a bowl and add rice rava along with salt and cardamom powder. Mix well to form a thick batter.
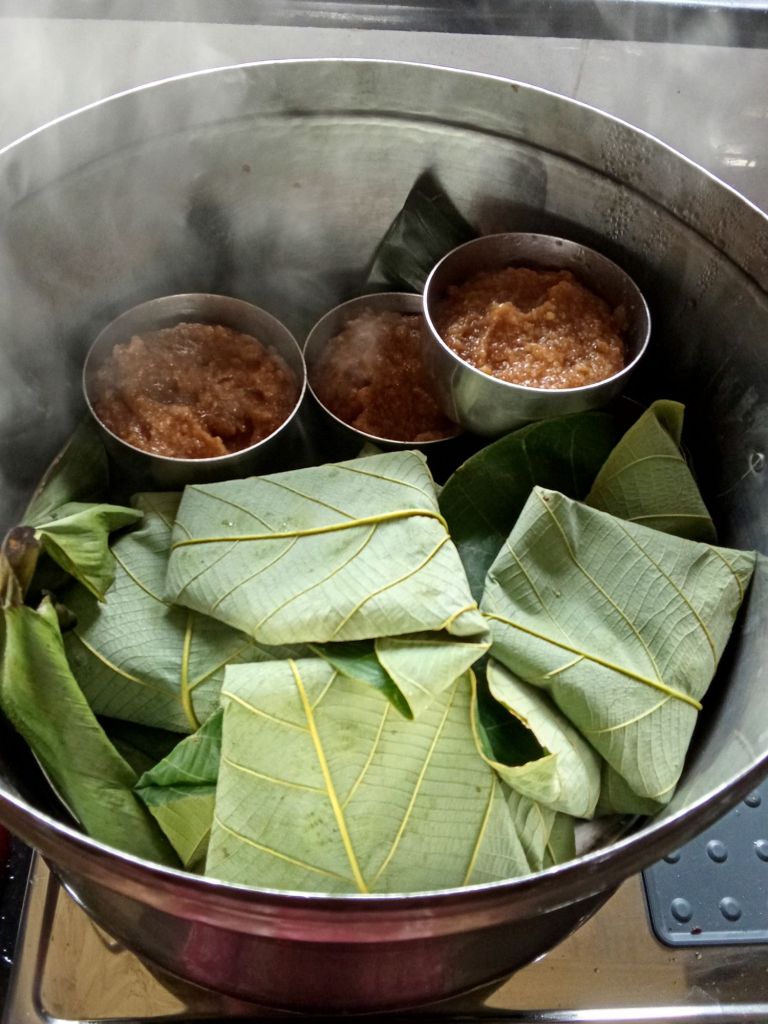
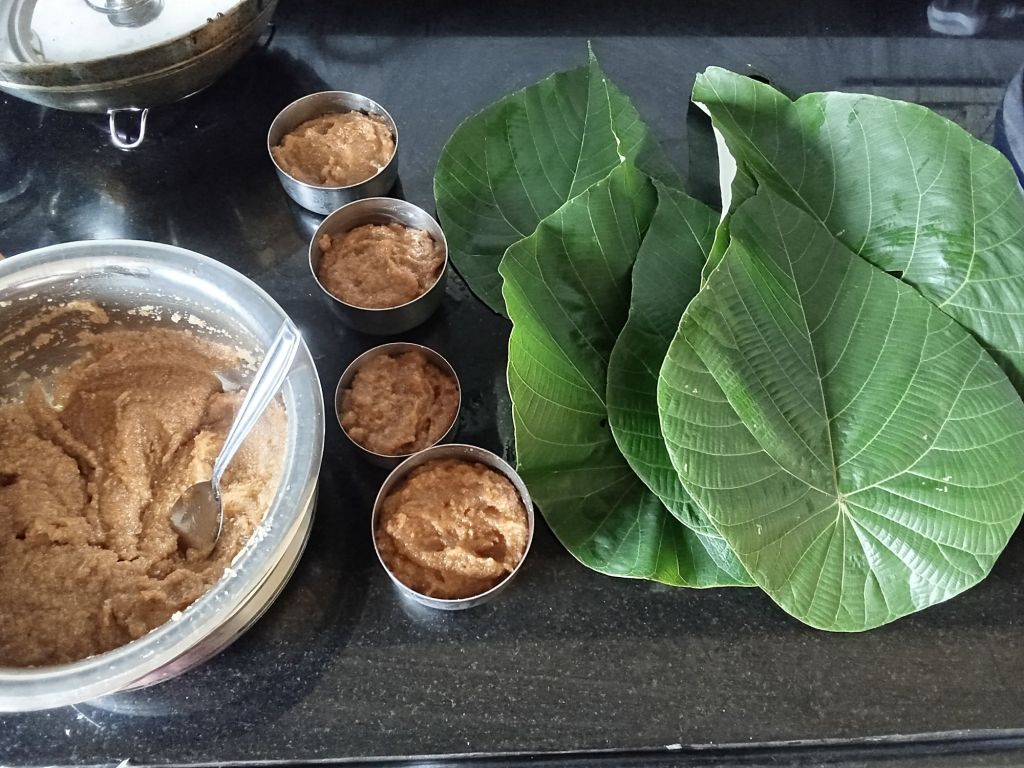
5. Now keep water to steam in a steamer. I used a pedavan as is called in Konkani. Meanwhile grease idli container with ghee. Add the batter into it. If using uppalige leaves or banana leaves, clean it by wiping with a cloth.
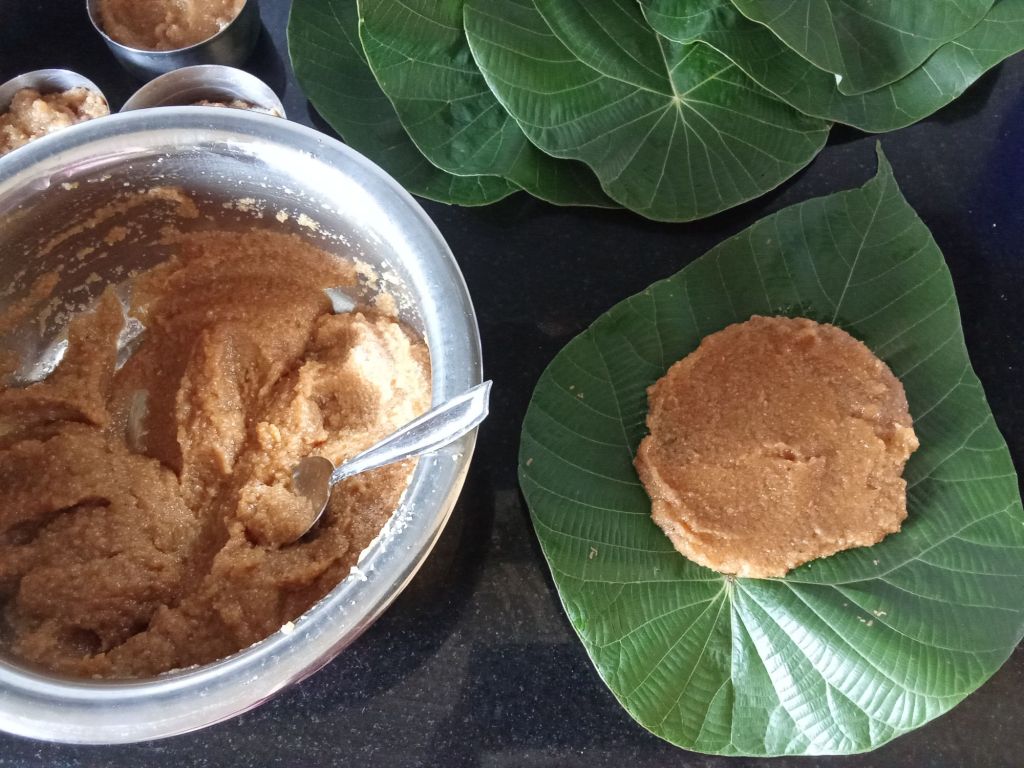
6. Now spread the batter in the center of the leaf as shown.
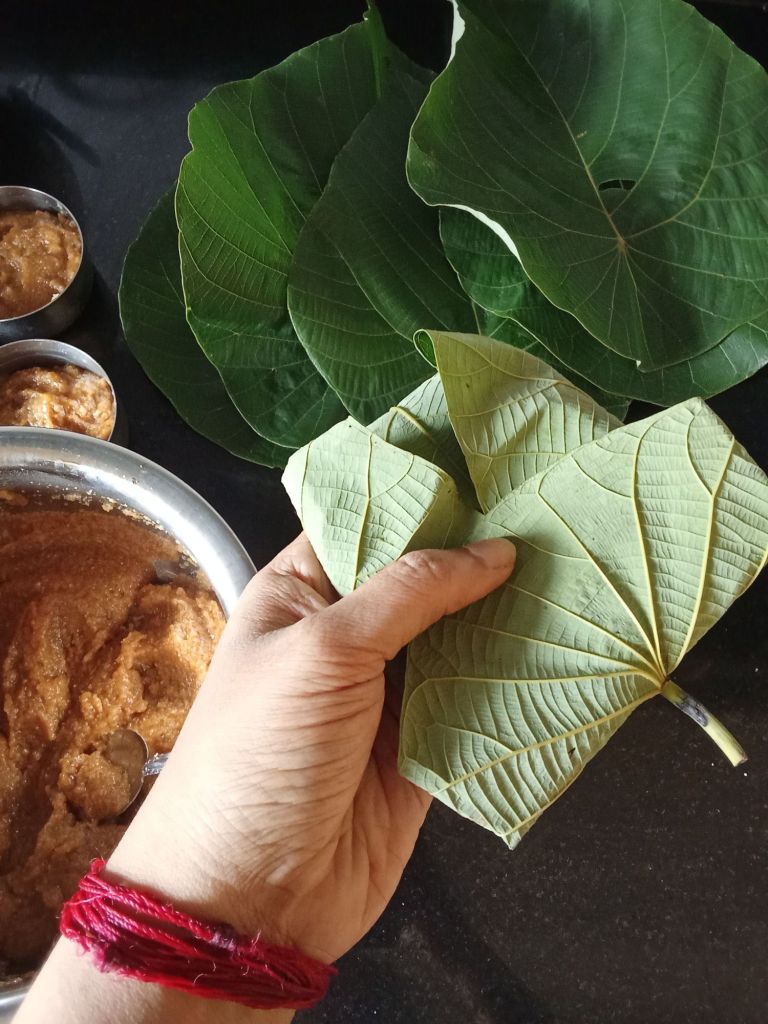
7. Fold from all sides and make like a little parcel.
8. Place it gently in the steamer with the open side placed face down as shown. I have placed all these on a banana leaf inside the steamer. You can skip that if not available.
9. Steam covered on high flame for 20 to 25 mins.
10. Enjoy them warm with ghee.. 😍
Click on the picture to save the recipe of
Notes:
You can steam them in regular idli stand or even in banana leaves..
Idli rava or Rice Rava can be replaced by Bombay Rava or Upma Rava.. Quantity will vary slightly depending on the texture of the rava. Just make a thick batter and not very free flowing.
Jaggery powder is to taste. You can vary as per your choice.
I have compiled all my variety idli recipes in one page.. Here is the page:
Click on the picture to save the recipe on Pinterest
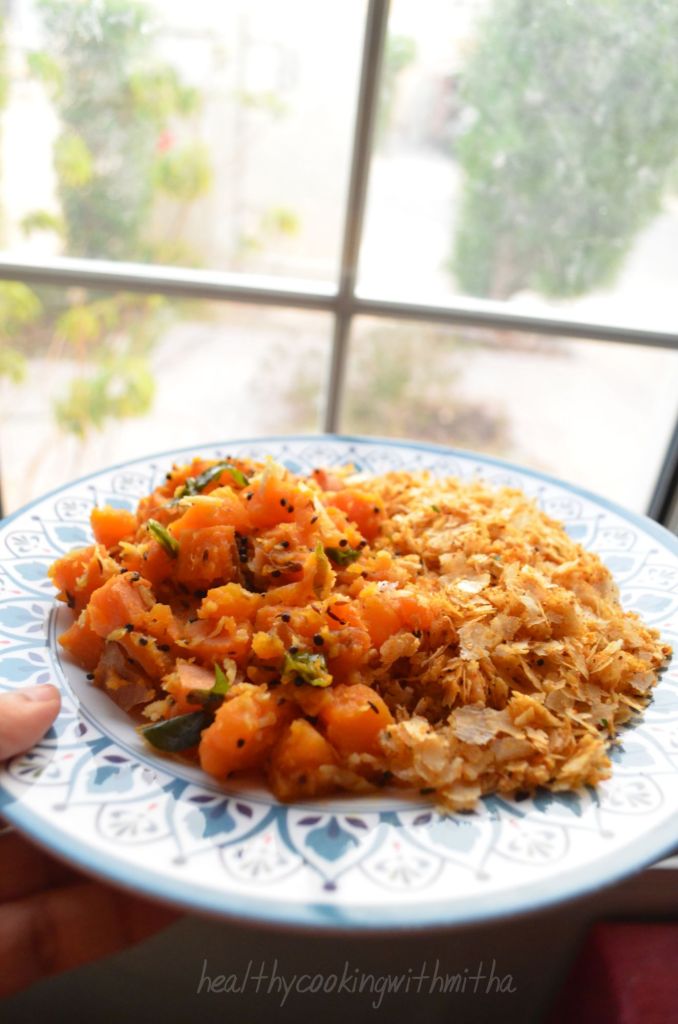
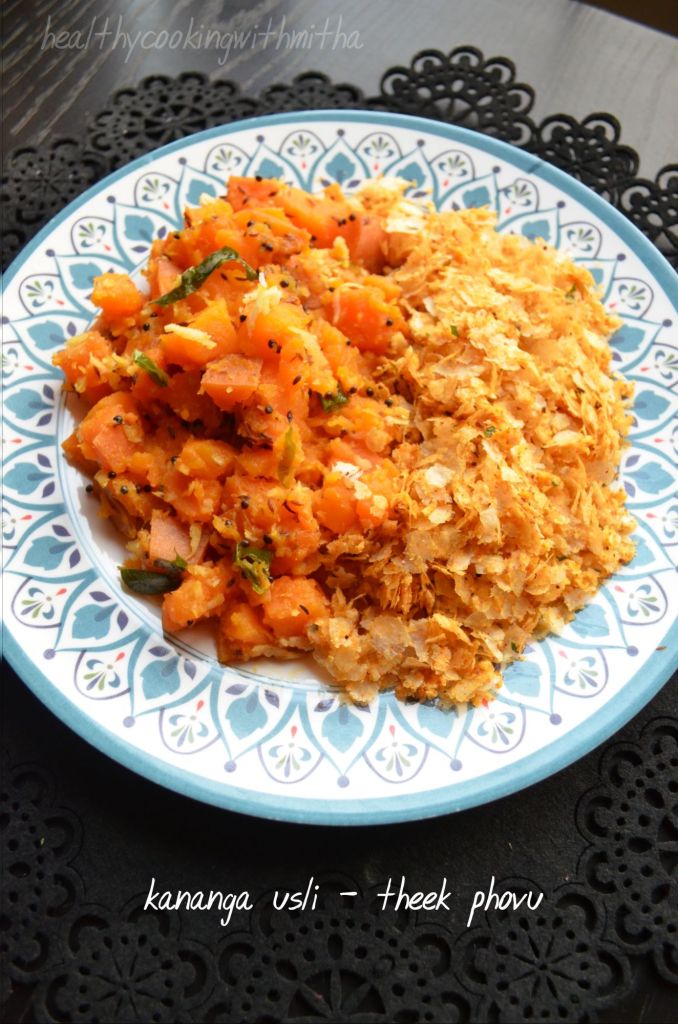
The weather here in Qatar is so good now that winters have started and the hungry me is even hungrier during evening time. 😍 Specially since I walk atleast for an hour, late in the evening, I make sure I have ample energy for that. 😄 And what’s more filling than our own age old combination of Kananga usli and theek phovu or sweet potato stir fry with spicy poha. ❤️
The mushy sweet potatoes with spicy and slightly crunchy poha makes for a heaven made pair making me go nostalgic, reminding me of my childhood when Amma and Anama used to make it for me. I was, am and forever will be a huge fan of our amchi food. ❤️
Nothing satisfies my tummy and soul more than Konkani delicacies. I have also realized that our food is so easy and quick to make along with being healthy and tasty too. ❤️
So here is me, sharing my favorite breakfast or snack dish. Hope you try and love it too. Happy and healthy cooking ❤️
RECIPE:
Ingredients:
For Sweet potato stir fry:
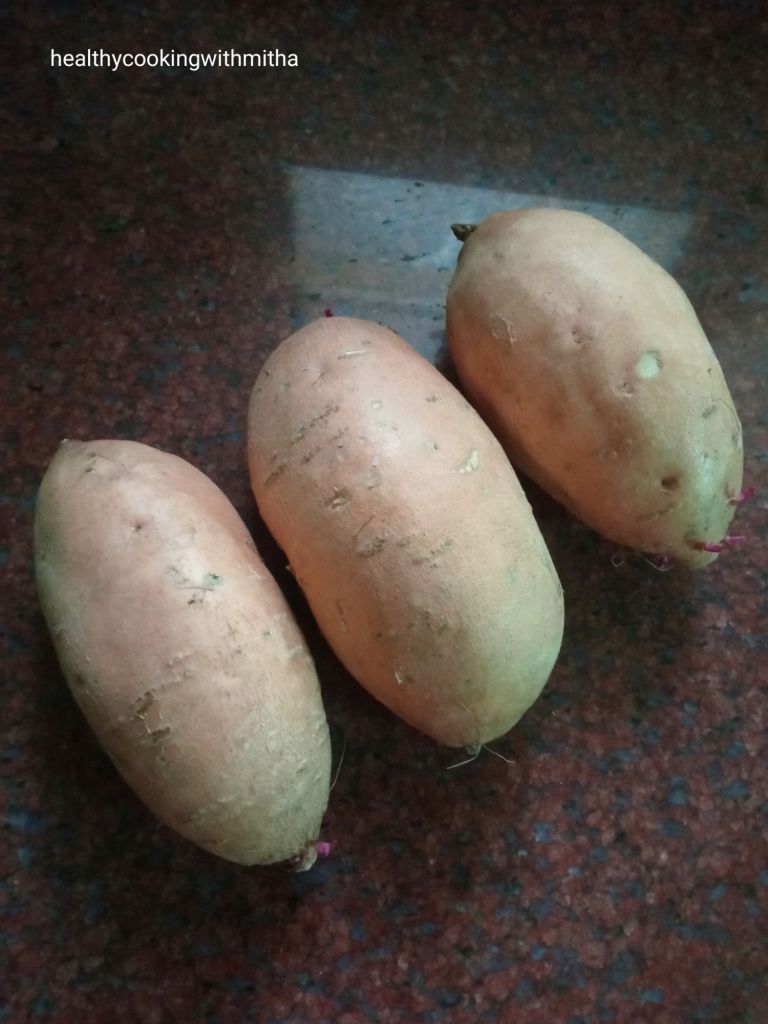
3 Medium sized Sweet potato
3 to 4 Green chillies
A sprig of curry leaves
2 tsp Mustard seeds
2 tsp Cumin seeds
Pinch of Hing or Asafoetida
1 Tbsp Jaggery powder
2 Tbsp Coconut oil
3 Tbsp freshly grated Coconut
Salt to taste
For theek phovu:
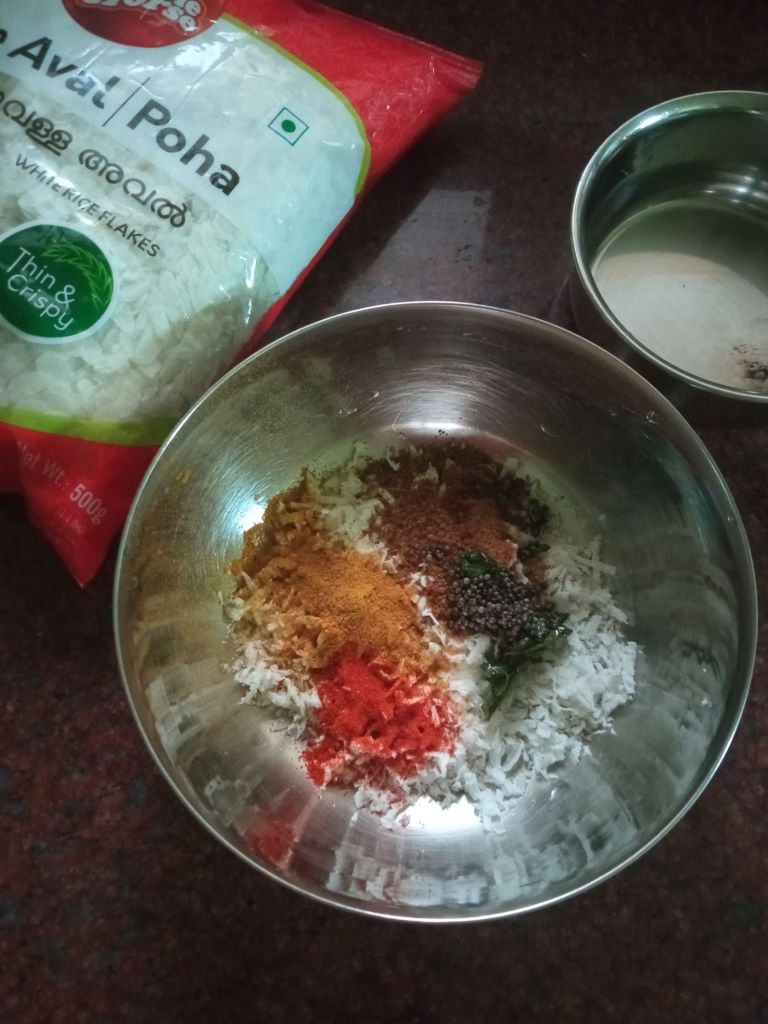
2 Cups Thin Poha/ Aval/ Flattened rice
1/2 Cup Freshly grated Coconut
2 tsp Coconut oil
1 tsp Mustard seeds
A sprig Curry leaves
2 tsp Sambar powder
1 tsp Red Chilli powder or to taste
1 tsp Jaggery powder
Salt to taste
Step by step recipe:
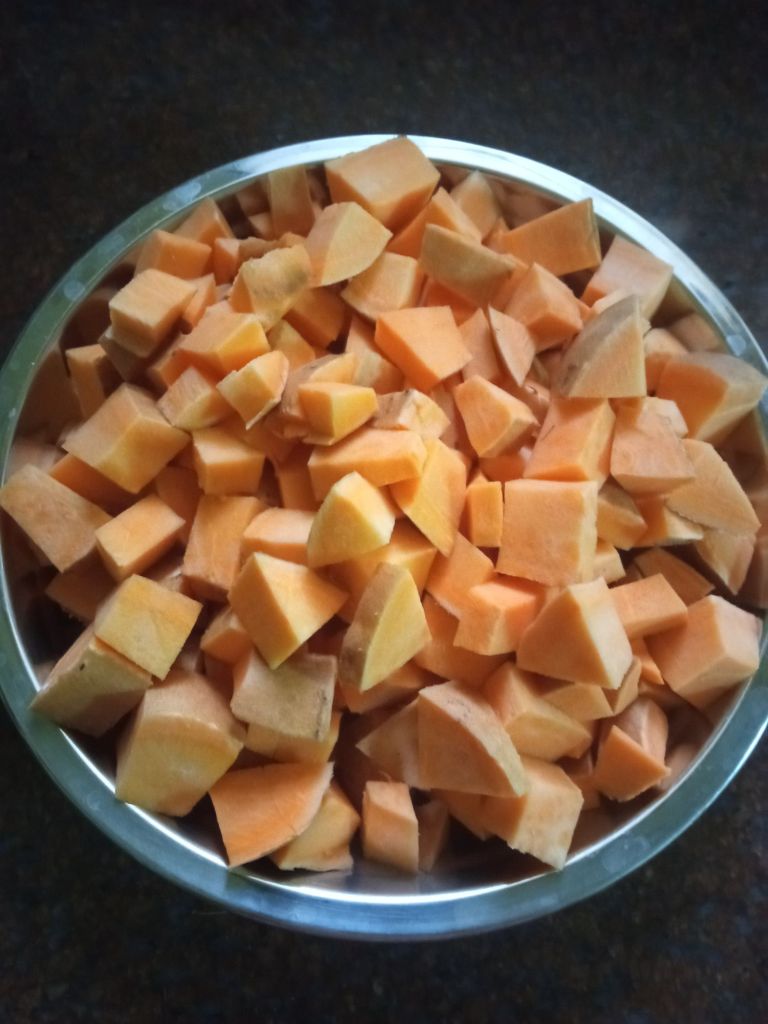
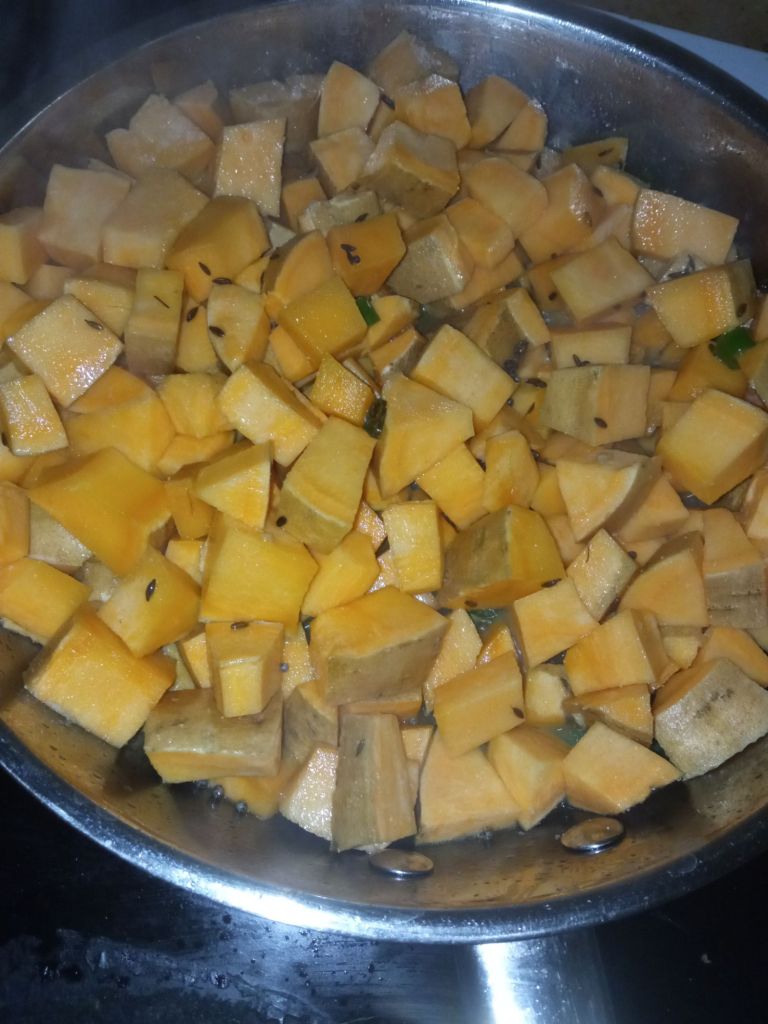
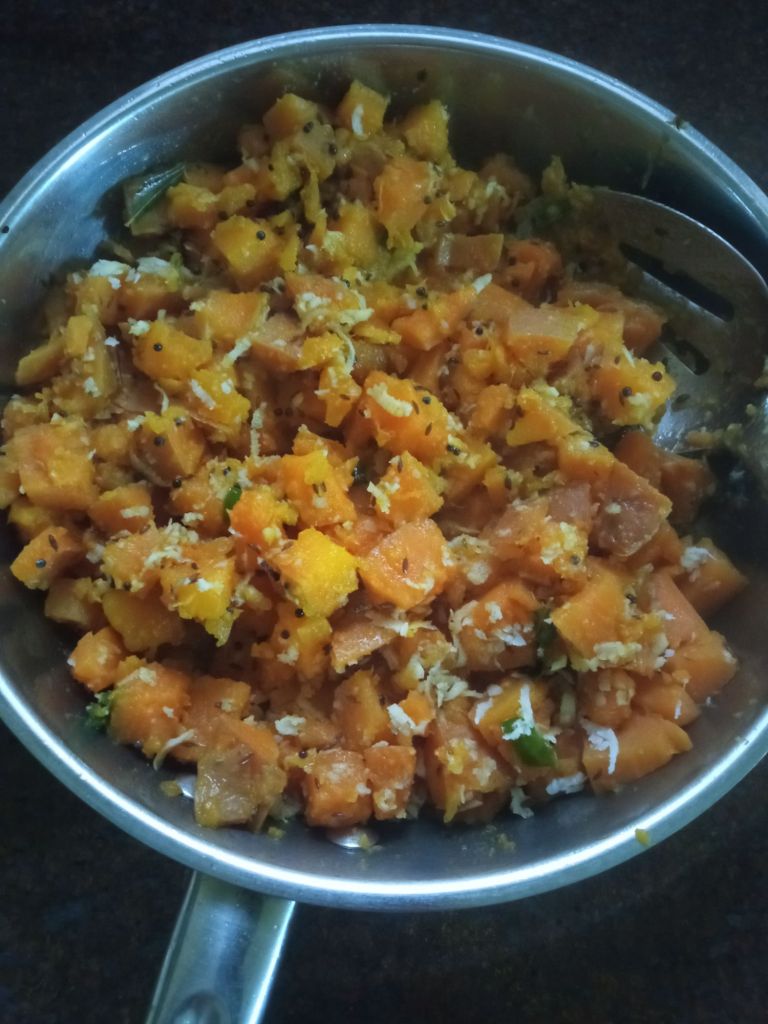
Take sweet potato as shown. Wash them well. Cut off the sides and cut into bite size pieces. I don’t peel it.
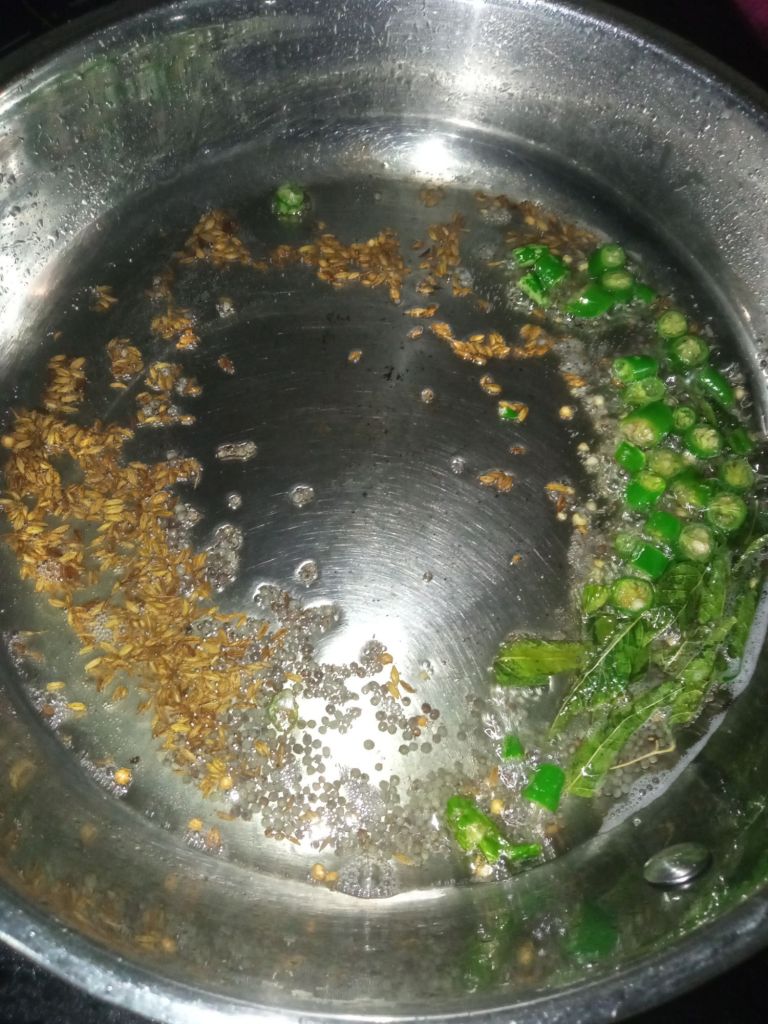
2. Now heat Coconut oil in a pan, add mustard seeds and cumin seeds. When mustard seeds splutter, add curry leaves and green chillies.
3. When green chillies start to change colour, add the chopped sweet potatoes. Mix well adding salt.
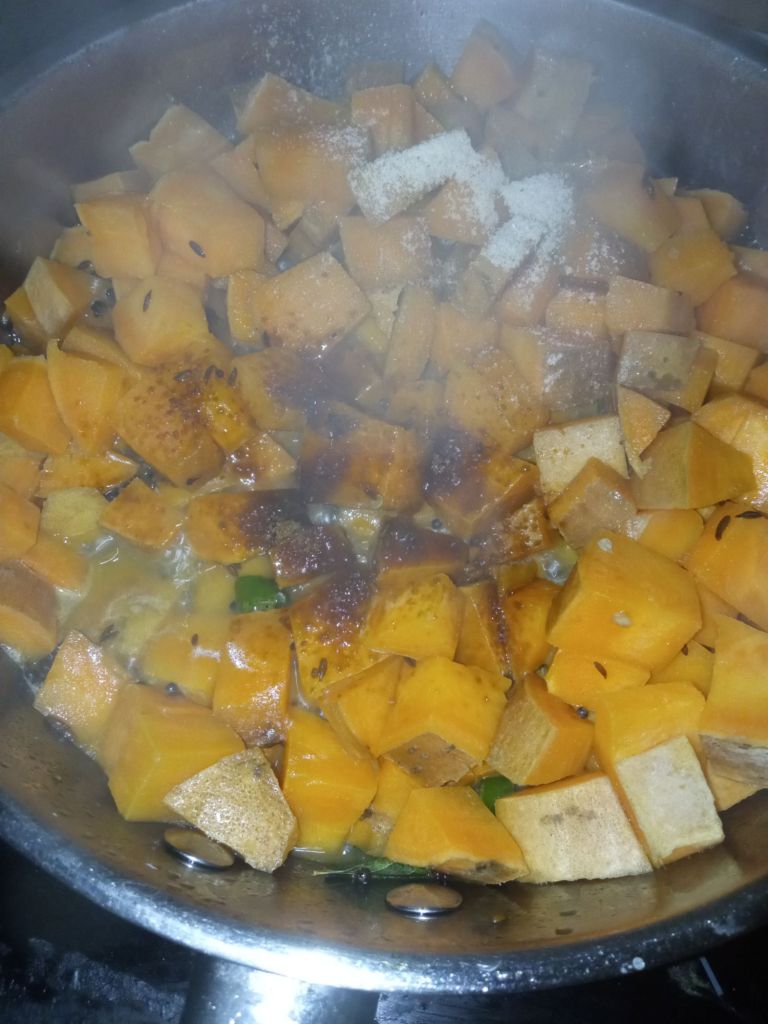
4. Add little water, cover and cook on medium flame till the sweet potatoes turn a little soft. Now add jaggery and hing powder.
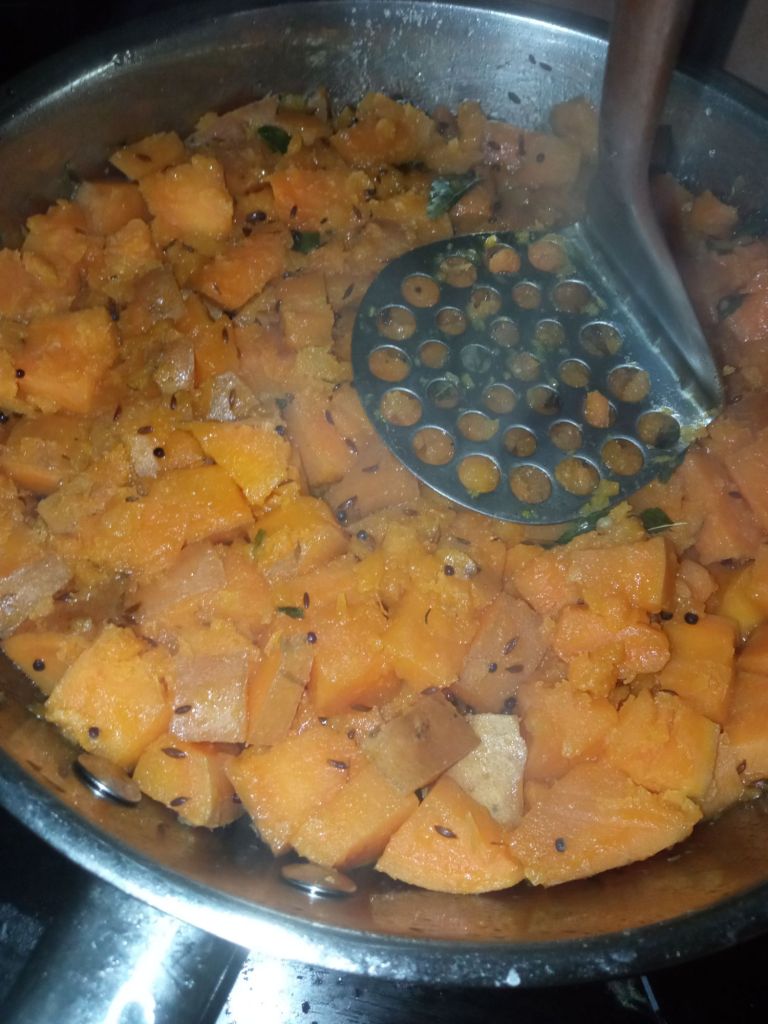
5. Mix again, cover and cook till the sweet potatoes turn soft. Mash using masher to make it into slightly mushy consistency. It’s optional but we love our usli that way.
6. Remove from flame, garnish with fresly grated coconut and mix well.
Sweet potato stir fry or Kananga usli is done!
7. For the theek phovu or spicy poha, heat Coconut oil in a small pan and add mustard seeds and curry leaves. When the seeds splutter,remove from flame.
8. Now in a bowl, take freshly grated coconut, add the seasoning from step 7, sambar powder, red chilli powder, jaggery and salt.
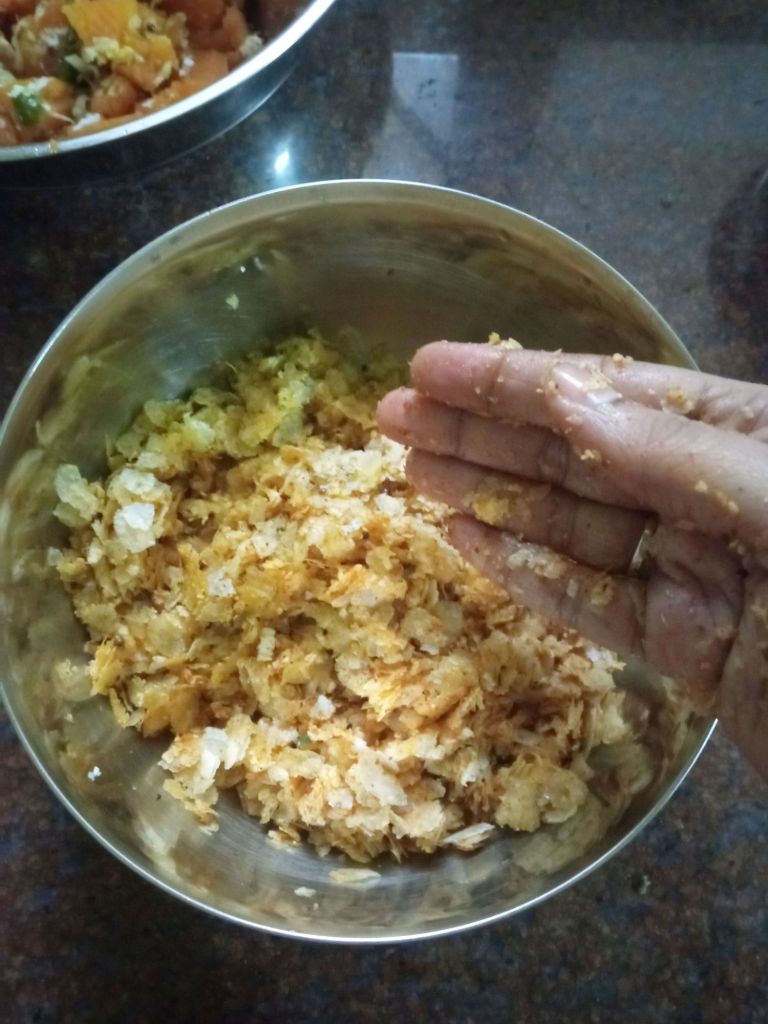
9. Now add the thin poha, one cup at a time and mix well crushing it lightly with hands.
10. Do a taste test to see if you need to add more red chilli powder, jaggery or salt.
Theek phovu is done too!
Click on the picture to save the recipe on Pinterest
Enjoy Kananga usli with theek phovu. This sweet spicy combination will win your heart for sure ❤️
Notes:
I live in Qatar and we get Egyptian sweet potatoes here. The size is medium. If using large ones, one large will suffice if making for two people.
I don’t peel the sweet potatoes as the peel is nutrient dense. Also, the peel is very thin here. So we don’t realize while eating.
You can replace sambar powder with Rasam powder too in theek phovu recipe.
Make sure to use only thin poha and not thick poha for this recipe.
Click on the picture to save the recipe on Pinterest
I have been sharing many Konkani recipes on the blog which have been loved by all of you. So nowadays when I cook something from our amchi cuisine which is loved a lot by us, I immediately take pictures to share on the blog, even if it’s a very simple dish like this Pumpkin upkari.
Mostly all our upkaris or stir fries are very simple with mustard seeds, curry leaves, green chillies or red chillies in seasoning with hing or garlic or onion seasoning. This particular stir fry is my most favorite with jaggery added that enhances the taste a lot. The simplicity is what makes it extra special and I can eat it as it is, even without rice. 😍
We are getting locally grown pumpkin in Qatar and it’s flavour and texture is amazing. Very quick to cook and super tasty. So I have been making this upkari almost every week. Also it’s one of the healthiest vegetable too. Hope you all try and love this delicious upkari. Happy and healthy cooking ❤️
RECIPE:
Ingredients:1 Cup = 240 ml
1 medium sized Pumpkin ( about 4 cups chopped)
3 Green chillies
1 to 2 Tbsp Jaggery or to taste
For seasoning:
2 Tbsp Coconut Oil
1 tsp Mustard seeds
A sprig of Curry leaves
A pinch of Hing/ Asafoetida
Salt to taste
Freshly grated Coconut for garnish
Step by step recipe:
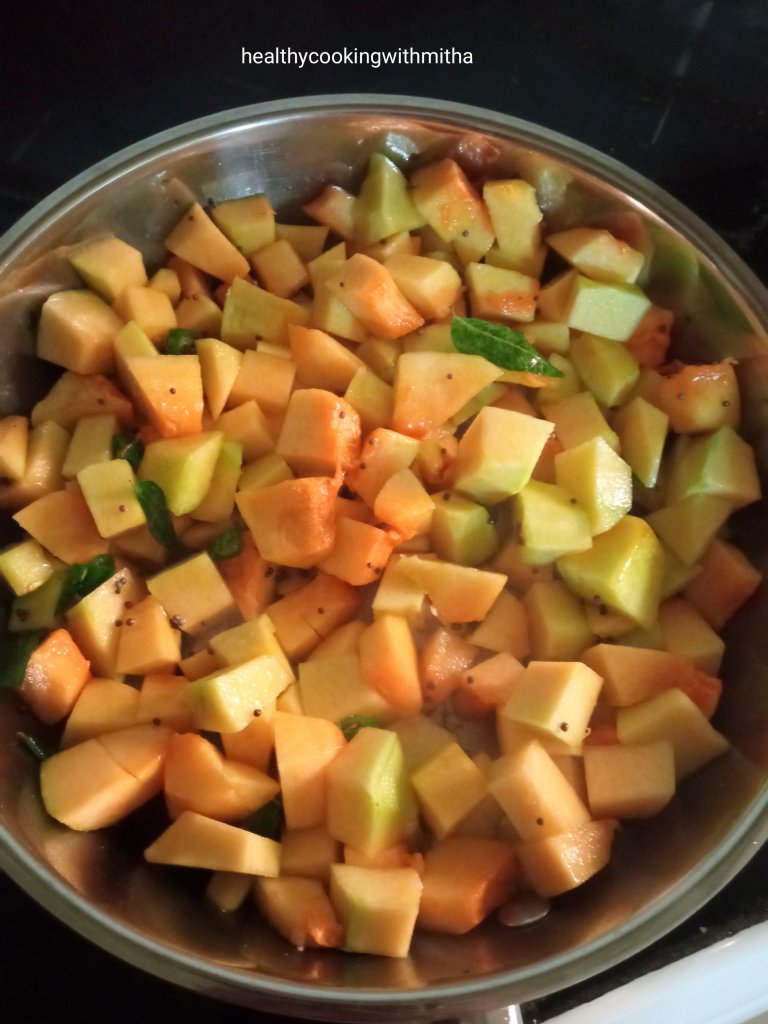
1. Wash well, remove the core, peel the skin of the pumpkin. Chop into bite sized cubes as shown in the picture.
2. Heat oil in a pan, add mustard seeds, hing, curry leaves and green chillies. Let mustard seeds splutter.
3. Now add the chopped pumpkin pieces along with salt. Mix well.
Cover and cook on medium flame. Don’t add much water while cooking as pumpkin releases its own water as it cooks. If needed, that is if you feel it’s sticking in the bottom of the pan, add just a spoonful of water.
4. Pumpkin cooks very quickly and within 5 mins, you will see that it has turned soft. Now add jaggery.
5. Mix well. Cover and cook on low flame for 5 more mins or till the pumpkin pieces turn very soft. Now garnish with freshly grated coconut. Check for salt/ jaggery. Done. 🙂
6. Enjoy dudde upkari with pej (matta rice gruel) and Kosambari or with rice and rasam.
Click on the picture to save the recipe on Pinterest
Notes:
* You can use any variety of Pumpkin for this upkari. I use the local one available in Qatar.
* Some people don’t peel the pumpkin but I love it when peeled.
* Hing and jaggery are very important to give flavour to the upkari. So please don’t forget it. You can add jaggery, less or more, as per your taste.
* Don’t add much water while cooking this upkari as pumpkin releases its own water. Just add a spoon in the beginning if you feel pumpkin is sticking to the pan. Once you cook it covered on medium flame, it will start turning soft and release water.
Click on the picture to save the recipe on Pinterest
I recently got a comment on my Surna Koot (elephant yam pickle) post from a really sweet reader who said she was pleasantly surprised to find a Konkani recipe on my blog. She had been following me for my baking recipes but never knew I was a Konkani too, just like her. All thanks to Mr Google for bringing up my Soorna Koot recipe and and connecting me with more of my Konkani family. ❤️
Even though I post many kind of recipes, what we eat regularly are dishes from our cuisine as that’s what comforts us the most. The flavours always takes us back to our childhood, those festive lunches together with family and the divine temple meals. Nothing can compare with the simple, soulful meals that are served at temples. ❤️
One dish that always reminds me of festivals and temple meals is Puli Koddel. This curry is a burst of flavours as you can see from the ingredient list itself and every bite is truly heavenly. ❤️
I know many of my Konkani friends already know the recipe and there might be changes in each of your recipe too but here’s sharing how I make it. Hope it is helpful to atleast some of you. Happy and healthy cooking ❤️
RECIPE:
Ingredients: ( 1 Cup = 240 ml )
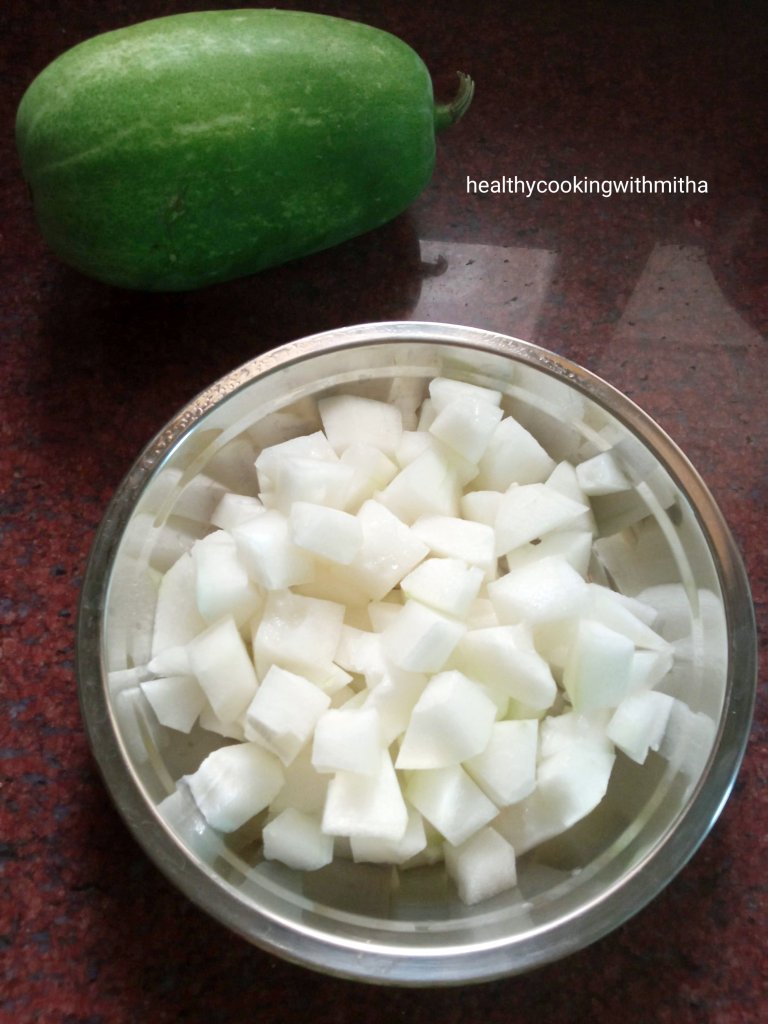
1 medium sized Ash Gourd/ Kuvale/ Kumbalakayi/ Kumbalanga/ Petha (can replace with Mangalore cucumber or Bottle Gourd)
For masala:
1 Tbsp Coconut oil
1 Cup Coconut gratings
1 Tbsp white Sesame seeds/ Til
1 Tbsp Raw rice (uncooked)
1/2 Tbsp Coriander seeds
1 tsp Cumin seeds/ Jeera
1 tsp Mustard seeds
1 tsp Fenugreek seeds/ Methi
5 to 6 Dry Red chillies or to taste
1/2 Tbsp Tamarind paste or to taste
2 Tbsp Jaggery or to taste
A pinch of Asafoetida/ Hing
For seasoning:
1 Tbsp Coconut oil
1 tsp Mustard seeds
A sprig of Curry leaves
Salt to taste
Step by step recipe:
1. Wash and peel the Ash gourd. Remove the core. Now cut the white portion into bite sized pieces as shown.
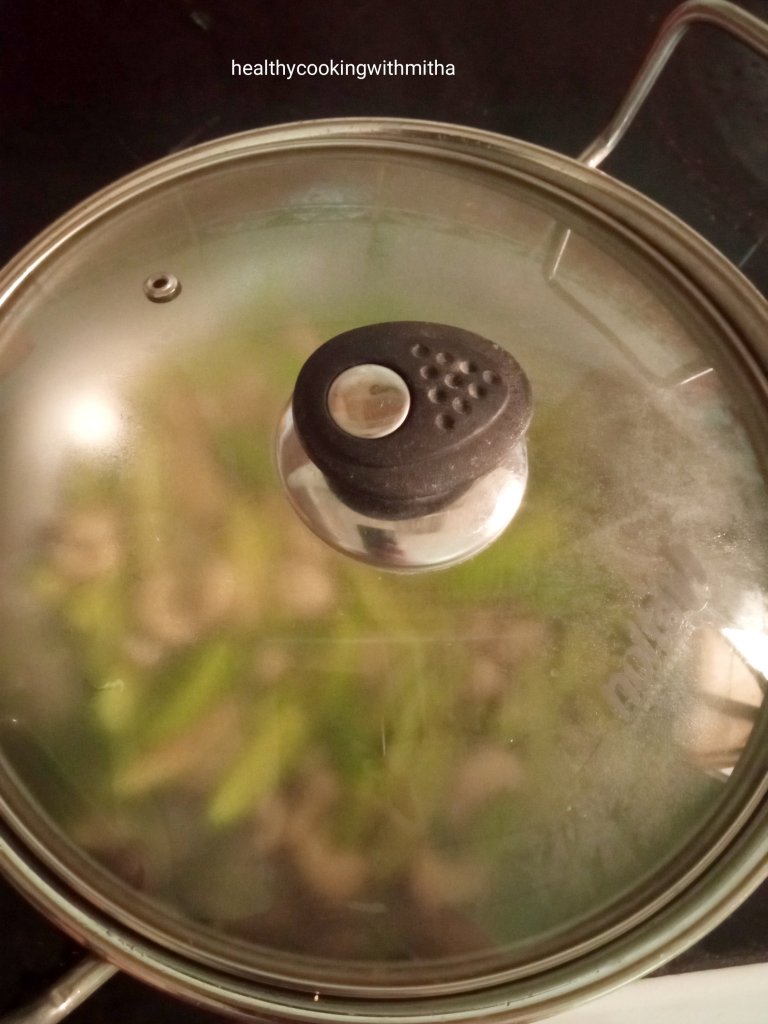
2. Add to a bowl or pressure cooker with water just enough for it to immerse. Cook till it turns soft.
3. Meanwhile heat coconut oil in a pan and add in the order, mustard seeds, cumin seeds, fenugreek seeds, Coriander seeds, raw rice, sesame seeds, Red chillies and coconut gratings. Roast till the coconut turns brown in colour. Make sure the flame is medium to low as we don’t want to burn the spices. Remove from flame. Allow to cool.
4. When it cools down, add to a mixer along with tamarind paste, hing and jaggery. Grind to a smooth paste.
5. Now in a pan, combine the masala and the cooked Ash gourd pieces. Allow it to come to a boil on high flame and then cook on medium flame for about 10 mins so that the Ash gourd pieces absorb the masala. Also add salt. Check for the jaggery and tamarind paste. If needed, add more. Also adjust thickness by adding little water if necessary.
6. Now prepare seasoning by heating coconut oil, adding mustard seeds, allowing it to splutter, add curry leaves. When it turns crisp, remove from flame, pour over the curry.
7. Puli Koddel is ready to be enjoyed with rice and papad. For Konkanis reading this, we have it with Ukde sheeth ani batate happolu. Heavenly meal ❤️
Click on the picture to save the recipe on Pinterest
Notes:
* As mentioned above, you can replace Ash Gourd with Mangalore cucumber ( Magge) or even Bottle Gourd (Gardudde). I do it when Ash gourd is not available.
* Even Ash gourd is available in different varieties and the one shown in the picture is what I used here. You can use any variety for this curry.
* The rice used in the masala is raw rice. Please don’t use cooked rice.
* Roast the ingredients on medium to low flame and don’t burn it. Else the taste of the curry will not be good.
* Red chillies, jaggery and tamarind measurements can change as per your individual preference. If you like it more sweet, you can add more jaggery, else one Tbsp will be enough. Same is for tamarind too.
* I have been sharing many Konkani recipes on the blog. Will share some of my favorites below.
Click on the image to save the recipe on Pinterest
Having grown up now (though I would love to be a child 😍), I realize how much my food choice has changed over the years. From loving hotel food as a kid to now, loving all the dishes that were made at home by my Amma and Grandma, recreating them in my kitchen and remembering my childhood memories with the dishes, I have come a long way. ❤️
Even though I still like to enjoy restaurant dishes occasionally, my comfort will always be the simple dishes that I make daily. We have pej or matta rice gruel for dinner and any kind of stir fry or upkari (as we call in Konkani) is a must with it.
So whenever I get good ivy gourd, I make this tendle kajjubi upkari which is an alternative to the famous Konkani dish called Tendle Bibbe upkari which is made with Bibbo or Fresh Cashews. They are available during our new year festival or Ugadi and in every Konkani household, either Bibbe upkari or Tendle Bibbe upkari is made.
Since I live in Qatar and we don’t get fresh cashews here, I make this upkari with regular cashews and it tastes delicious too. I made it yesterday and decided to share this easy recipe with all of you too. I know Konkanis already know this easy recipe but I am sure it will be new to atleast some of my readers.
So here’s sharing the recipe. Hope you all try and love this yummy dish. Happy and healthy cooking! ❤️
RECIPE:
Ingredients:
1 1/2 Tbsp Coconut Oil
1 tsp Mustard seeds
A sprig of Curry leaves
3 Green chillies
About 20 Ivy Gourds/ Tindora/ Tendle (2 Cups sliced)
3/4 to 1 Cup Cashews (regular ones)
Salt to taste
2 Tbsp freshly grated Coconut for garnish
Step by step recipe:
1. Wash ivy gourds well, then chop off the ends and slice them as shown. You can slice one ivy gourd into 6 long pieces.
2. Heat oil in a pan, add mustard seeds, allow it to splutter. Now add curry leaves and green chillies. Fry for few seconds.
3. Now add the sliced ivy gourds and cashews together. Mix well.
4. Add little water ( about 1/4 cup) along with salt. Cover and cook on medium flame for about 10 mins. Check in between if the water has evaporated. Add little more if needed.
5. Once the ivy gourds change colour to light green and turns soft along with cashews turning soft too, the upkari is done. If water is remaining in the stir fry, just keep the flame on high and fry till the mixture turns dry. Now garnish with freshly grated Coconut. Done 🙂
6. Serve with rice meals or with congee (pej/rice gruel). Tastes so yum ❤️
Click on the image to save the recipe on Pinterest
Notes:
* The ratio of ivy gourd to cashew is upto you. We love cashew in this upkari. So I add 1 Cup for 2 Cups sliced ivy gourd. You can also add just a handful. Tastes good even then.
* Remember to cook both the ivy gourd and cashews till soft. Ivy gourd takes time to cook, so keep the flame on medium, add little by little water and cook till it changes to light green and soft.
* We Konkanis make this with Bibbo or fresh, tender Cashewnuts during our New year festival called Ugadi. But since I live in Qatar and am here during Ugadi, I make it with cashews.
Click on the image to save the recipe on Pinterest
As a kid, whenever my Anama (grandmother) or Amma made idlis, I would ask them to keep some extra to make idli usli as breakfast for next day. The super soft hing flavoured idli usli with bites of green chillies in it was, is and will always be one among my most favorite breakfast. Childhood nostalgia. ❤️
Now in my kitchen, where I am the manager 😂😂, I purposely make a whole batch of idlis extra just to savour idli usli the next day. My family too likes it ( Thank God! 😁), so two days breakfast is set when I make idlis.
Even though I make it every couple of weeks, it never occured to me that I could share this easy recipe with all of you too. But yesterday when I was about to make it, the idlis in my steel case looked so beautiful that as I admired it, I thought why not share this recipe on the blog too. If it helps even one of you, I will be very happy. ❤️
So here’s me sharing this super easy, quick and very tasty recipe of Idli Usli, Konkani style. Hope you all try it and remember me while enjoying it. Happy and healthy cooking! ❤️
About 10 to 15 Leftover idlis (depends on how much you have)
1/4 tsp Hing/ Asafoetida
1 tsp Sugar
Salt to taste (be mindful as idlis already have salt)
For seasoning:
2 Tbsp Coconut oil
2 tsp Mustard seeds
2 tsp Cumin seeds/ Jeera
2 tsp Urad dal
A sprig of Curry leaves
3 to 4 Green chillies
Freshly grated Coconut for garnish
Step by step recipe:
1. Leftover idlis : I keep them in the refrigerator the previous night. Since they are cold and slightly hard, it’s easy to crumble them. You can also use idlis that are at room temperature. Fresh idlis need to be cooled completely before making usli.
2. Crumble them using hands as shown in the picture. Add salt ( be mindful as idlis already have salt) , sugar and hing.
3. Mix everything well and evenly with hands. Keep aside.
4. Heat coconut oil in a pan. Add mustard seeds. Allow it to splutter. Now add cumin seeds, urad dal, curry leaves and green chillies. Fry on medium flame till urad dal turns brown.
5. Now add the crumbled idlis and mix well on medium flame. Cover and keep for 5 mins.
6. Garnish with freshly grated coconut and serve hot. Done 🙂
Click on the image to save the recipe on Pinterest
Notes:
* If you don’t have leftover idlis, you can make the same recipe using Thick Poha. Only addition is peanuts in the seasoning which needs to be fried till crisp. Rest recipe is same. I make this regularly for a light and tasty evening snack. In Konkani it is called Phova Usli.
* I make regular idlis using this recipe of Mallige idlis. They come out super soft and very tasty.
* Since I love Idli Usli, I make an extra batch of Mallige idlis and refrigerate. Next day morning for breakfast, I make Idli usli.
* In this recipe, you can adjust the seasoning according to how many idlis you have leftover. I even make the usli when I have 6 to 8 idlis. It serves two people.
* Do remember to add less salt as idlis already have salt in them. Hing gives a wonderful aroma in the usli. So don’t skip it. Sugar gives a good balance in flavours too. Just a little is enough.
* You can also check these seasoned breakfast recipes that I make often:
Click on the image to save the recipe on Pinterest
Whenever I ask my husband what breakfast he would like to eat when there is no dosa or idli batter, he immediately says “Batat Phovu”. 😄 And to imagine that he used to simply dislike potatoes when we got married. I used to beg him to please get us some potatoes as it used to be my favorite vegetable. Yes, “used to be” 😂 Now I have joined him in not liking potatoes so much but he is slowly liking them in some dishes and one of them is this Batat Phovu. 😍
In fact, it is he who suggested me that I should definitely share this recipe on the blog while I was sceptical as this is quite a well known recipe. “Everyone makes this and everyone knows the recipe..”, I told him. “But don’t think anyone can make it as perfectly as yours!”, was his reply instantly. (This man really loves what I cook 😂😂)
So I decided to share the recipe on the blog. Because if it helps even one, I will consider my efforts worthwhile. Though I am not a perfect cook in any way, some dishes I cook comes out really tasty and Batat Phovu is one among them.
Here’s sharing the simple recipe for those who don’t know yet. Hope it’s helpful for you. Happy and healthy cooking! ❤️
RECIPE:
Ingredients: {Serves 2 to 3 people}
1 Cup = 240 ml
2 Cups Thick Poha / Rice flakes / Beaten rice
2 Tbsp Coconut Oil
1 tsp Ghee
1 tsp Mustard seeds
1 tsp Cumin seeds
2 Tbsp Peanuts
Few Curry leaves
3 Green chillies
1 medium sized Onion
2 medium sized Potatoes
1/4 tsp Turmeric powder
A pinch of Asafoetida/ Hing
2 tsp Sugar
Salt to taste
2 Tbsp Coriander leaves, for garnish
2 Tbsp freshly grated Coconut, for garnish
Juice of 1/2 an Indian lemon
Step by step recipe:
1. Heat oil + ghee in a pan. Add mustard seeds and cumin seeds. Allow mustard seeds to splutter. Now add peanuts, curry leaves and finely chopped green chillies. Fry for few seconds till peanuts get roasted.
2. Now add finely chopped Onion and fry till onions turn translucent.
3. Add peeled and finely chopped Potatoes and turmeric powder. Mix well and fry the potatoes for a minute. Now add few spoons of water. Cover and cook till the potatoes turn soft. Will take about 5 mins.
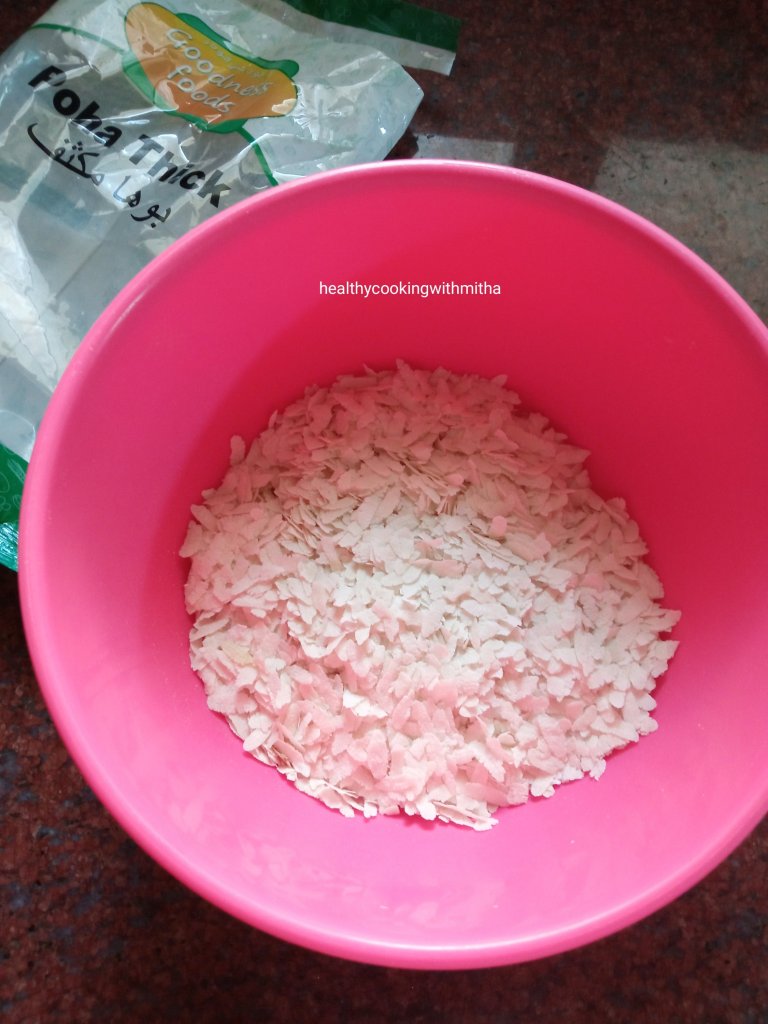
4. Meanwhile take Thick Poha in a bowl. Note to take thick variety of Poha and not the thin variety of Poha.
5. Now wash it well once or twice to remove impurities from it. Drain water completely after washing. Poha turns soft now. Add salt, sugar and hing powder. Mix well.
6. Once potatoes turn soft, add poha to it and mix well continually till the mixture combines. Cover and keep for 5 mins on very low flame.
7. Now remove from flame and garnish with finely chopped coriander leaves and grated coconut. Drizzle lemon juice on top. Mix well. Serve hot. Done! ❤️
Click on the image to save the recipe on Pinterest
Notes:
* We like the Poha soft and moist. So I wash really well and also cook after adding to the pan. If you don’t like it soft, you can wash only once and just mix in the pan and remove from flame without covering it.
* Batat Phovu is best had hot when freshly made. If kept for long, it tends to get dry. In case you have to make ahead, just sprinkle few drops of water while reheating before serving. That makes it moist again.
* You can skip potatoes if you don’t like and make simple Kanda Poha with only onions.
* Some people also add carrots, capsicum and peas to this making it Vegetable Poha which is even healthier but my family loves Batat Phovu the authentic way only. Just shared as I thought it’s a great idea.
* I add oil + ghee to enhance the flavour of the Batat Phovu. You can add only oil if you like.
* I mix salt, sugar and hing in the washed Poha instead of adding in the pan as I have seen it results in even mixing and tastes really good.
* The thick Poha I use does not need soaking at all and turns soft when I wash it twice. If your Poha is very hard, you will need to soak for few minutes to make it soft before use.
Click on the image to save the recipe on Pinterest
Though I am not an expert at making traditional Konkani dishes, if there is one Konkani sweet dish I can make really well, it is Madgane. Madgane is made on Ugadi day which is new year for us, as per Hindu calendar. When I made it for Ugadi few months back, I realized I had not shared this delicious recipe on the blog.
That’s when I decided to make it again during Navaratri which is yet another important festival for us and share with all of you. Today is a final day of Navaratri, tomorrow being Vijayadashami or Dussehra. 🙏
If there is something I miss the most living in Qatar, it is going to temples specially during festivals. My dad has been going to all Devi temples across Udupi and sends me pictures of beautifully adorned Devis. 🙏 Feels so happy for him. ❤️ It is a great blessing from the divine which we don’t realize the value untill we are away from it.
Wishing all of you a blessed Navaratri and Vijayadashami. 🙏
Hope you all try Madgane and relish it like we do. Happy and healthy cooking! ❤️
RECIPE:
Ingredients: ( makes about 6 bowls/ servings)
1/2 Cup Chana dal
1 3/4 Cups Coconut milk ( about 400 ml)
1 Cup Jaggery powder
2 Tbsp Rice flour
1 Tbsp Ghee
About 10 Cashews and few raisins
1/2 tsp Cardamom powder
Step by step recipe:
1. Roast Chana dal on medium to low flame till it starts letting out an aroma and starts browning.
2. Immediately remove from flame and wash well. Add fresh water, a little above the level of Chana dal, as shown in the picture.
3. Pressure cook till soft but not mushy. Chana dal should retain shape. I cook on high till 2 whistles, then keep on medium flame for 10 mins in my electric stovetop.
4. Now add cooked Chana dal, coconut milk and Jaggery in a thick bottomed pan.
5. Mix well and bring to a boil. Cook for 5 mins on high flame.
6. Take 2 Tbsp Rice flour and mix with 2 to 3 Tbsp water to form a paste free form lumps.
7. Add it to the Chana dal payasa while stirring continually so that it does not form lumps. Cook for 5 to 10 mins on medium flame till the mixture becomes thick. Remove from flame.
8. In another pan, take ghee, add cashews and raisins. Fry till raisins plump up. Add to the payasa. Also add Cardamom powder. Mix well.
9. Serve warm.
Click on the image to save the recipe on
Notes:
* I have used tinned coconut milk from Lulu hypermarket. If you are making fresh coconut milk, then take about 2 Cups of coconut gratings, grind it with little water to a fine paste in a mixer. Sieve it once to get thick coconut milk. Grind again with water, sieve to get thin coconut milk. Add thin coconut milk along with jaggery in step 4 and thick coconut milk along with rice flour paste.
* Be careful while roasting Chana dal as it burns very quickly. Roast on medium flame and remove as soon as it starts turning brown. Roasting is an important step as it gives a wonderful flavour to the payasa.
* While pressure cooking Chana dal, ensure that it retains shape and is not mushy. In Madgane, the bite of chana dal is important.
* Don’t add a lot of water while pressure cooking and even after that as that payasa will become watery.
* 1/2 Cup Chana dal to 1 Cup Jaggery works perfectly for me. You can vary as per your taste.
* Rice flour paste is added to give thickness to the Madgane. Don’t skip it as it enhances the texture so much.
* Traditionally, fresh Cashew or Bibbo is added to Madgane. I don’t get it, so I add regular Cashews roasting only slightly along with raisins.
* Don’t forget Cardamom powder as it gives a wonderful aroma to Madgane.
* Leftover Madgane can be refrigerated and had next day.
Advertisements
Join me in my journey with a foodie husband and hungry kiddos while I make them eat healthy!