Category Archives: Snacks

Falafel Flatbread | Vegan, gluten free flatbread recipe| Snack idea for kids

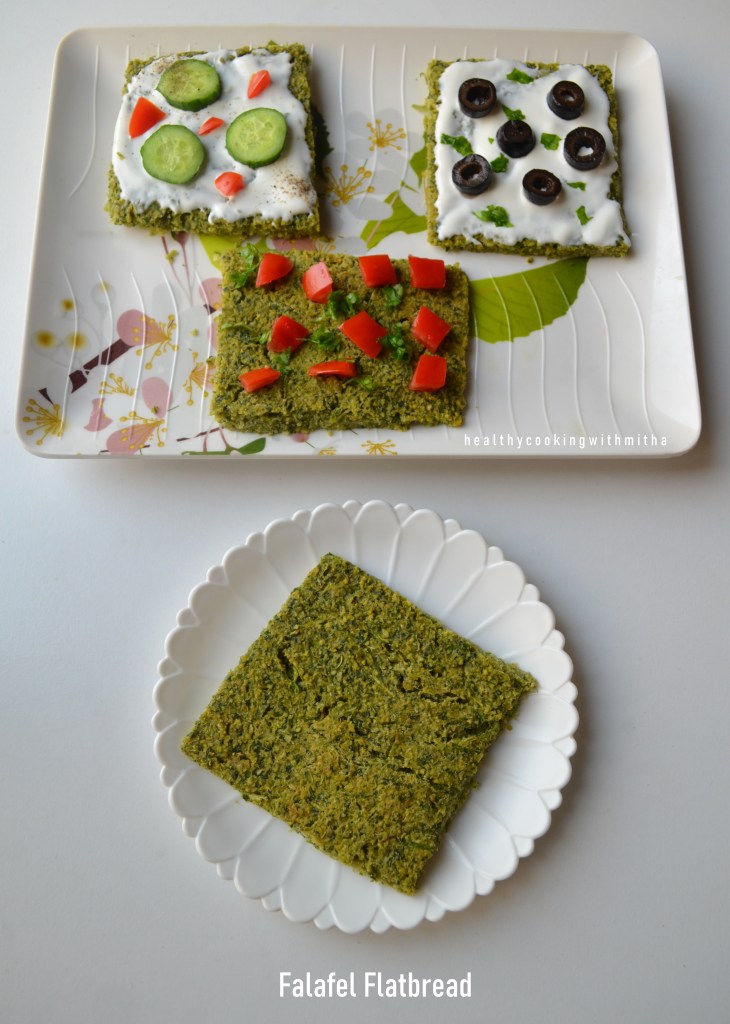
Though I don’t feel proud of myself quite often, just looking at this falafel flatbread is making me swell with pride that this is homemade by me. 😍 And how happy I am to share this with all of you as I know you will feel the same emotion when you bake these cute little breads for your family. ❀️

I am part of many facebook food groups and my news feed is always filled with delicious looking food posts by members of various groups (which I why I don’t browse fb when my son sleeps on me during evenings. Looking at fb makes me hungry and I can’t move 😭😭). Other times when I browse, I keep saving posts which attract me and these breads were one among them. As I checked the recipe, it was super easy. So I was so inspired that I made it the next day itself (for my love for falafel specially falafel wraps from our nearby Freshway cafe. Yum! πŸ˜‹).

And the kids loved the bread so much that it got over and I hardly got a bite. πŸ˜„ So after that, these have become a weekly fare at my house for evening snack as the kids love it a lot (kids food preferences rule here πŸ˜…). Also did I mention it’s less job for me too. Just grind everything, spread on a plate, dump into the oven. Done! Easy peasy! 😁

Did you notice how beautiful do they look and I loved how the pictures came out too. Here’s one with the tomato plant in our garden filled with different plants (My husband’s babies, his love, his life πŸ˜„).

My orange thread also shows up in most of my pictures. It’s actually a prasad from Hanuman temple in Moodbidri near Udupi. I have been a devotee of Hanumanji since a child and used to wear his pendant until marriage. Whenever I feel scared, worried, lost, I hold the thread and feel he is always with me. I also have made a ritual to listen to Hanuman chalisa daily and also chant the Hanuman stothra with my kids before sleeping so that they don’t have bad dreams.

And *like always😬* I deviated from the main topic but I love sharing bits about my personal life with all of you as I consider all my readers, a part of my extended family. Hope you try this flatbread and if you have any doubts, please message me. It will be pleasure to help! ❀️

RECIPE:

Adapted from: CookwithK

Ingredients: { Makes about 4 regular bread sized flat breads}

1/2 Cup dried white Chickpeas

About 20 sprigs of Parsley leaves

About 10 sprigs of Coriander leaves

1 small sized Onion, roughly chopped

3 to 4 Garlic cloves, roughly chopped

1 Green chilly, optional

1/2 tsp Cumin powder

1/4 tsp Pepper powder

1/4 tsp Baking soda

Salt to taste

1/4 Cup + 3 Tbsp Gram flour or Besan

1 Tbsp Oil (I use coconut oil)

Oil for greasing the plate

Step by step recipe:

1. Soak the chickpeas in atleast double the water for 8 to 10 hours. Drain the water.

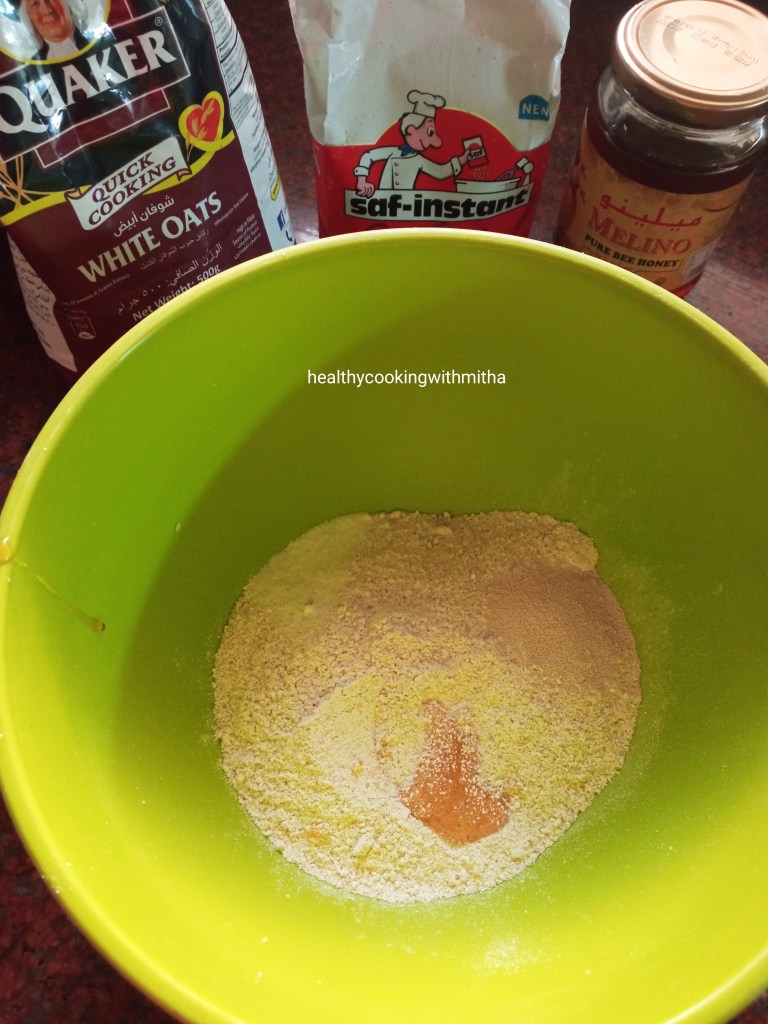
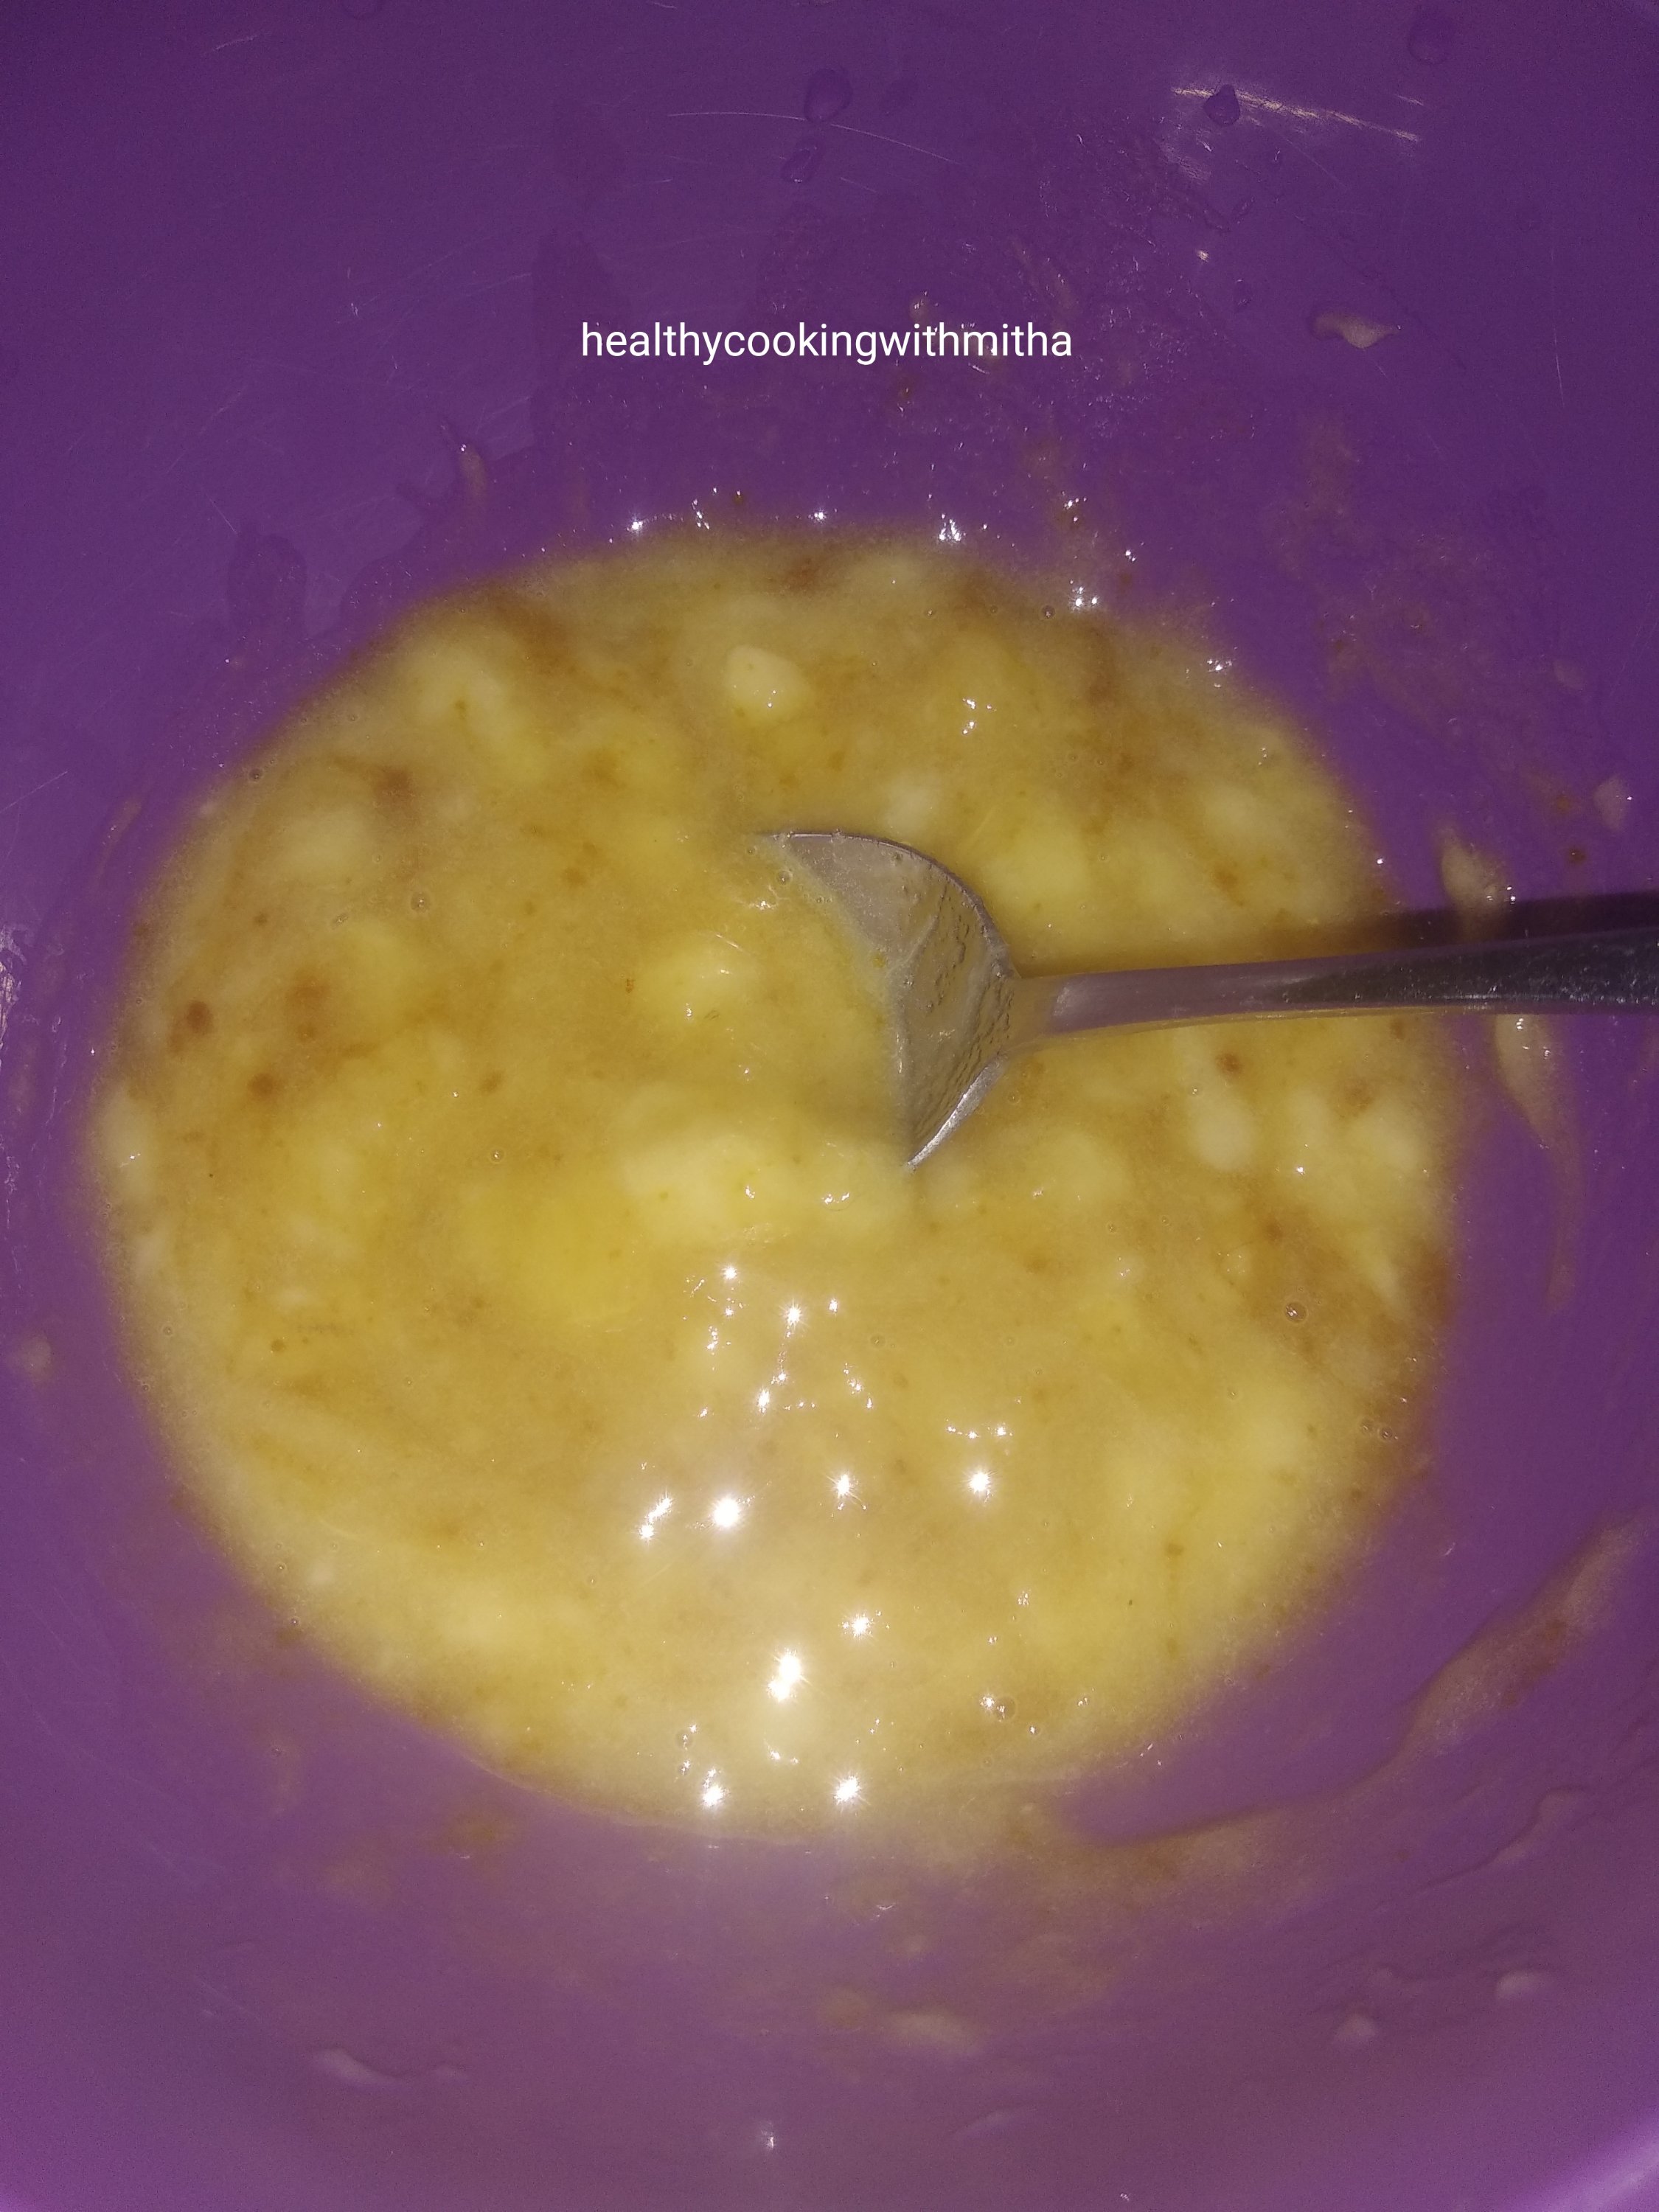
2. Add the chickpeas along with parsley leaves, coriander leaves, green chilly, onions, garlic, cumin powder, pepper powder, salt and baking soda into a food processor.

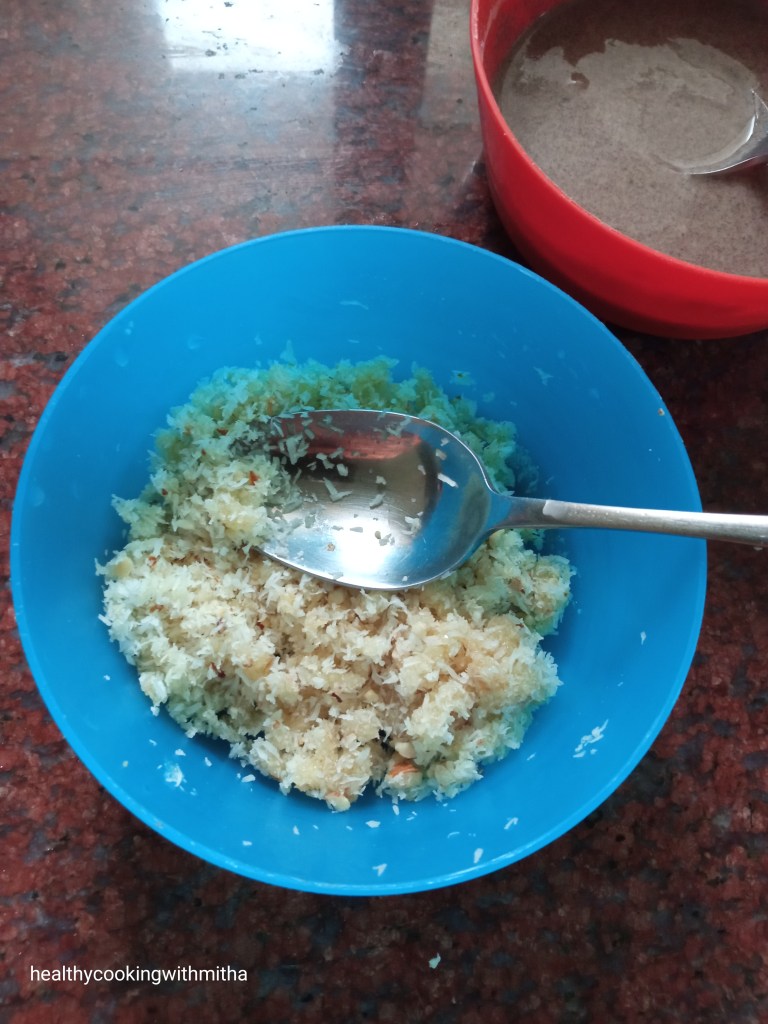
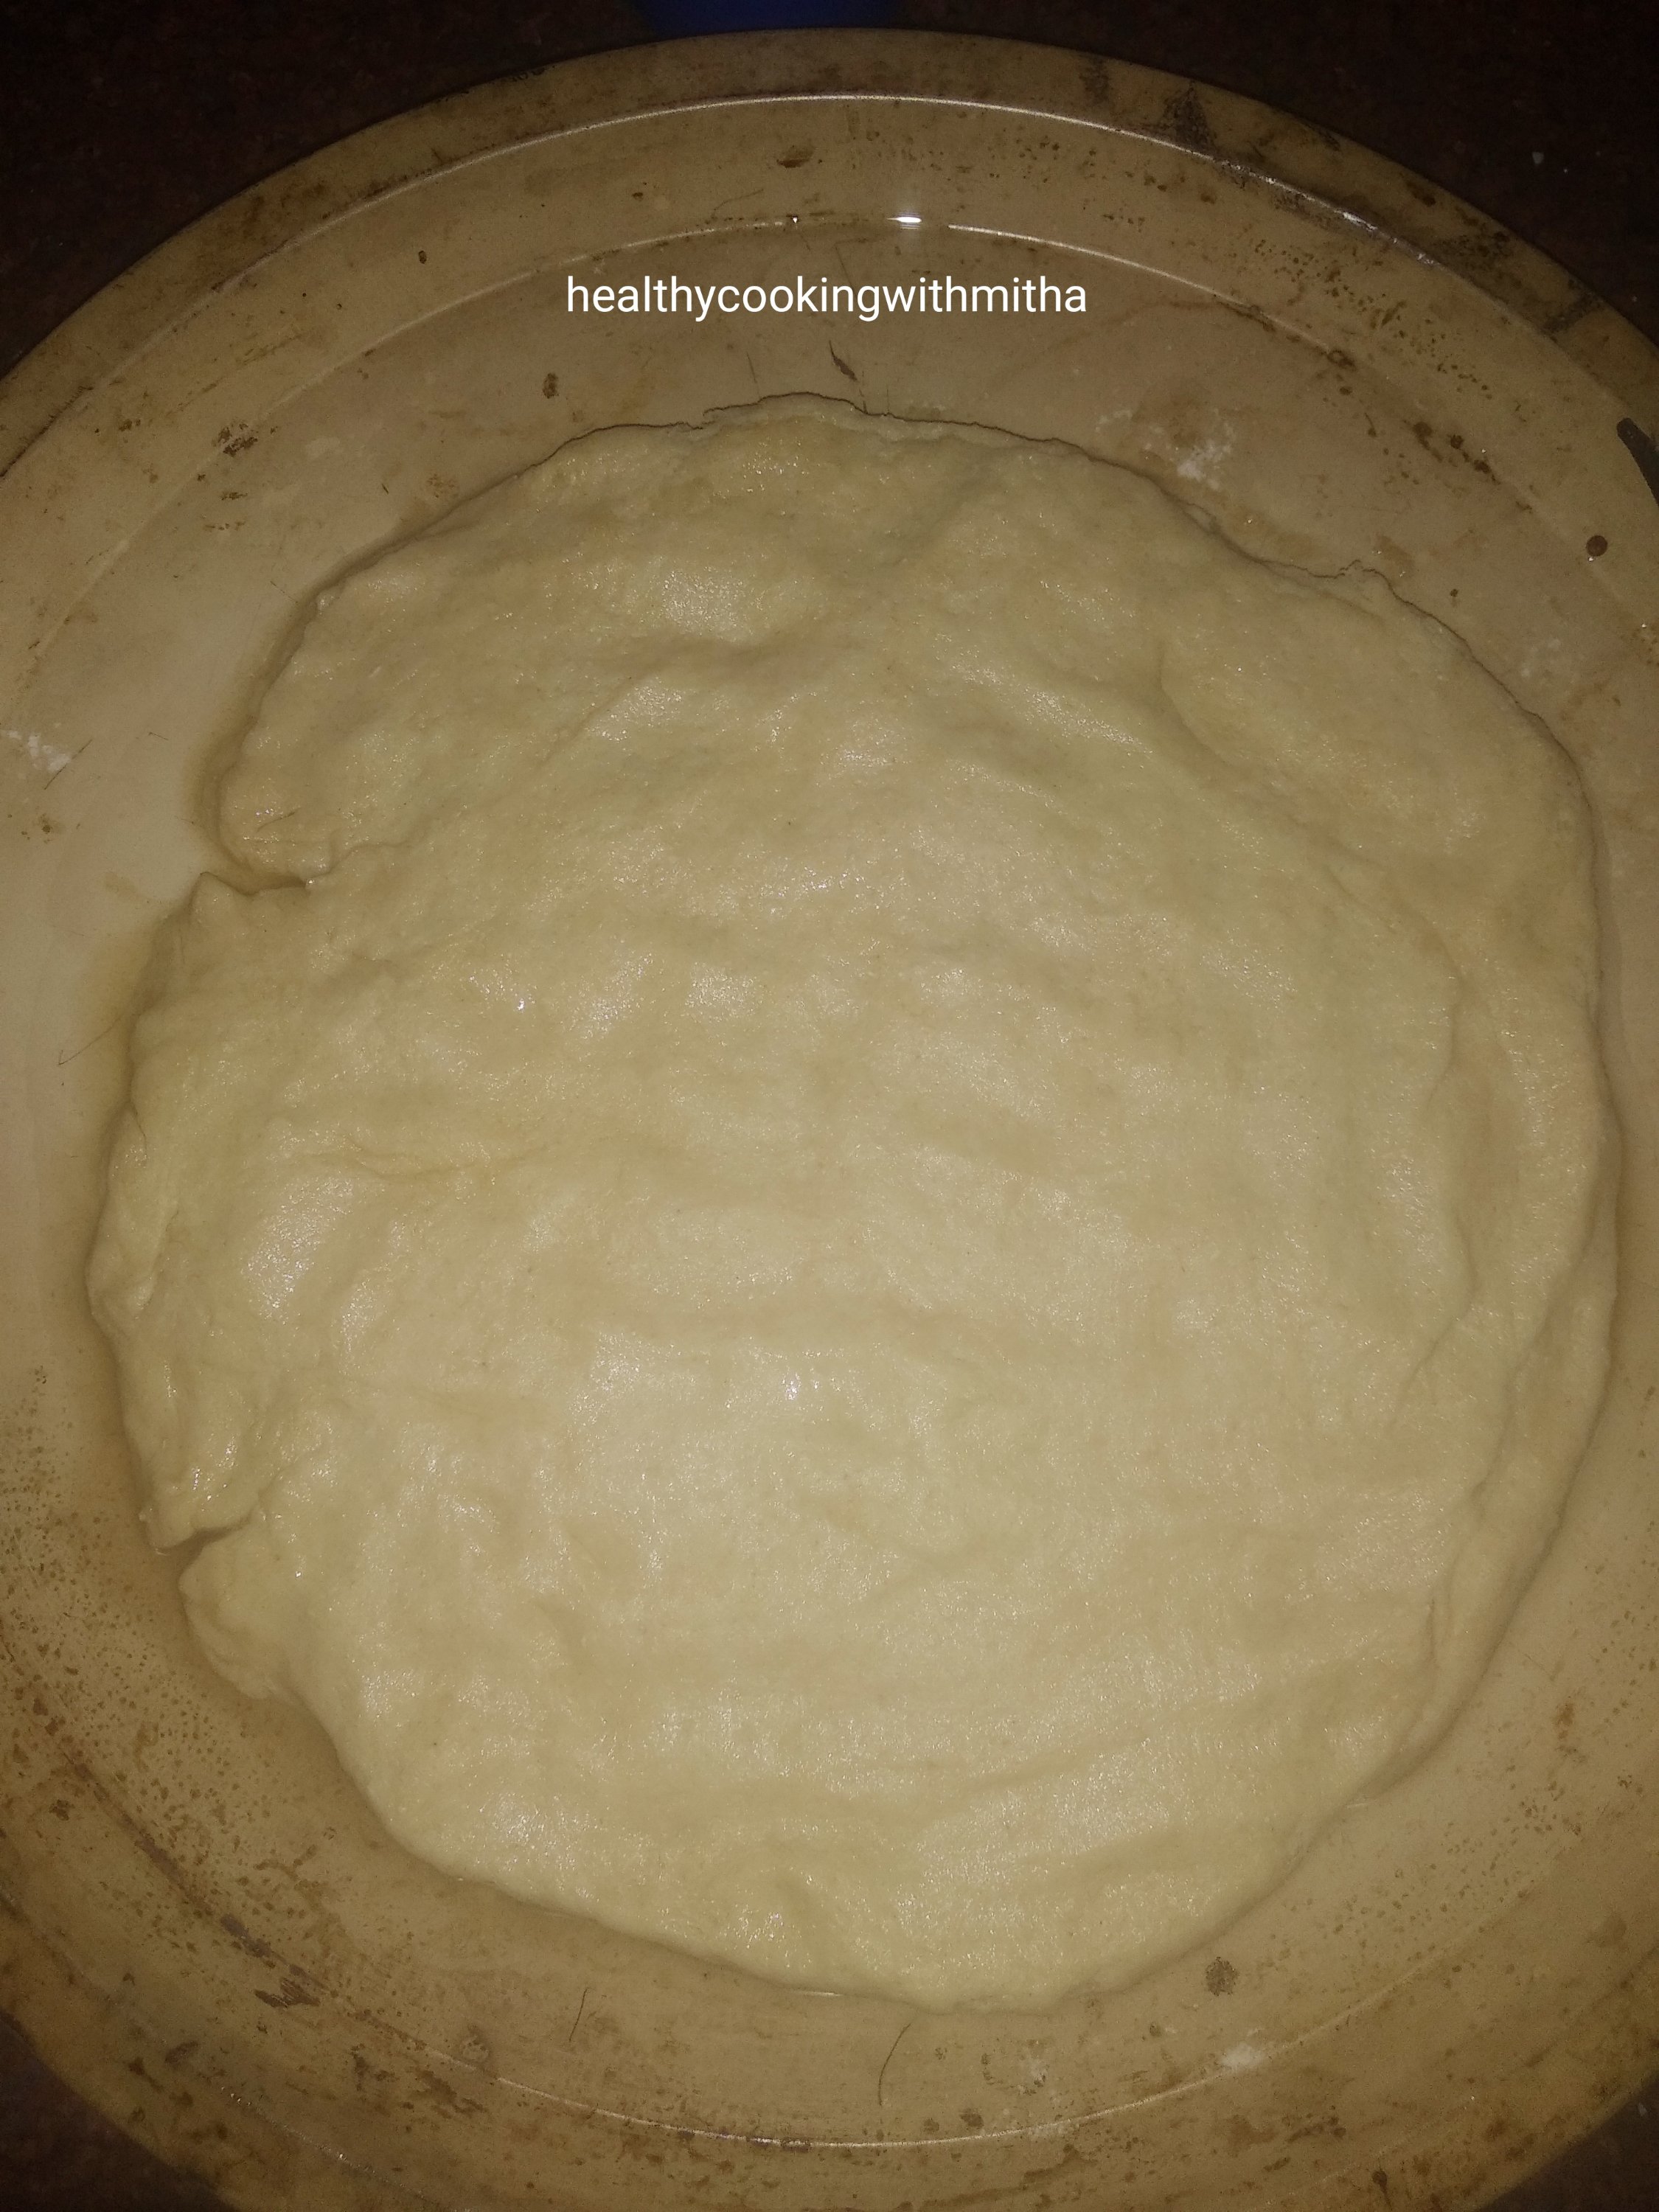
3. Grind, pulsing several times till it turns into a coarse grainy mixture. Pour into a bowl. Do NOT add water while grinding.

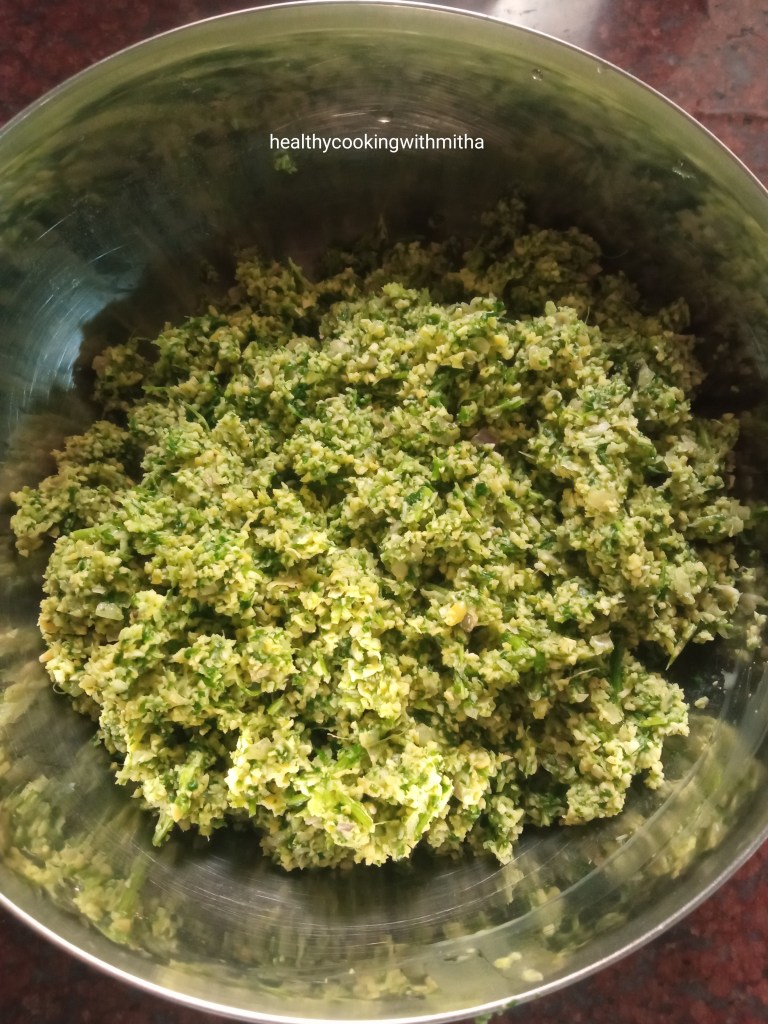
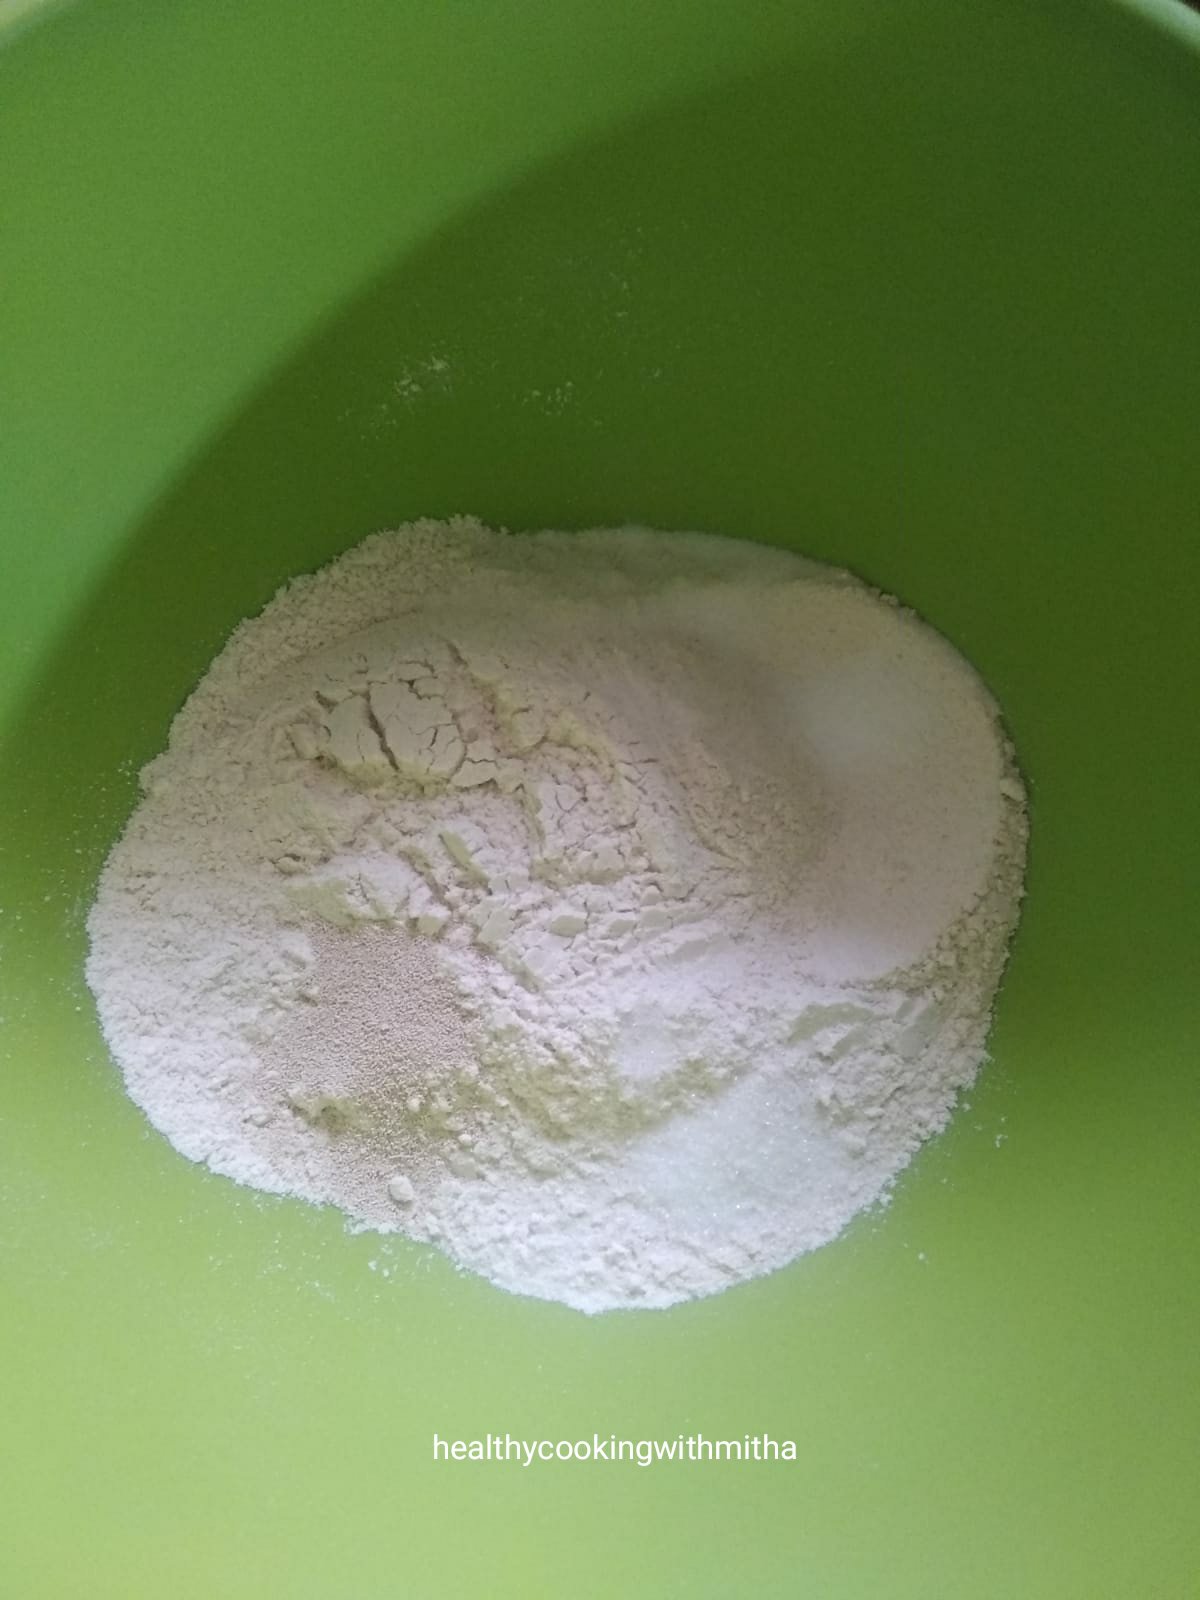
4. Refrigerate for 30 mins. Then remove and add chickpea flour. Mix well using your hands. It will be a loose mixture and not very firm, but still held together. Also add oil and mix well.

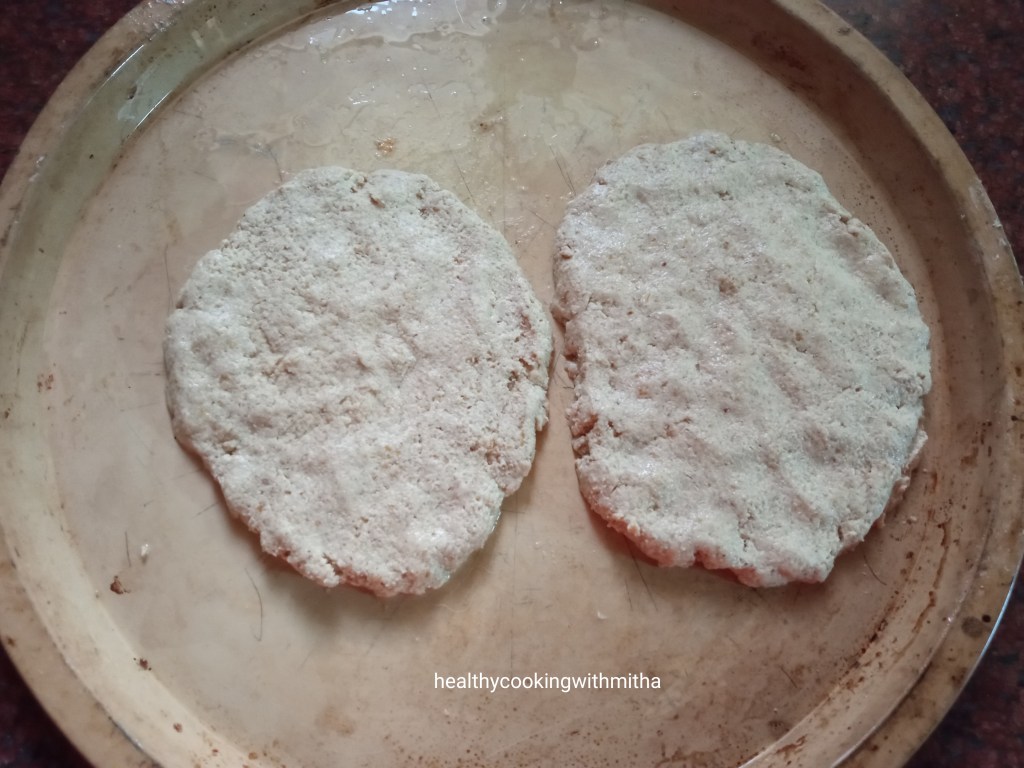
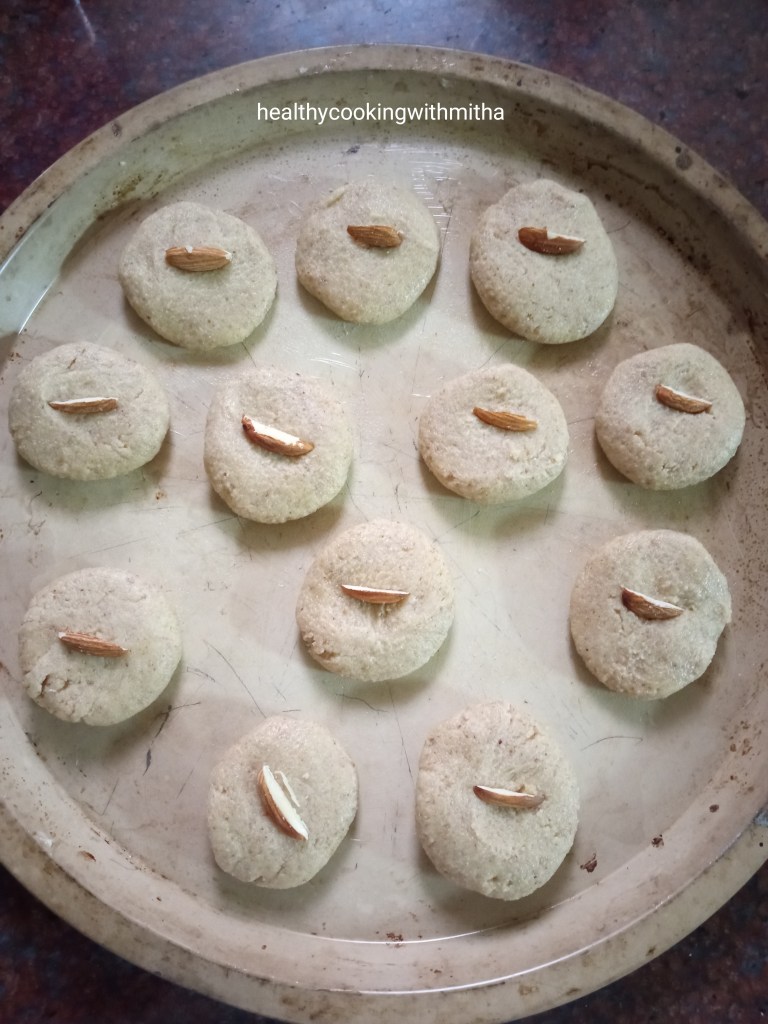
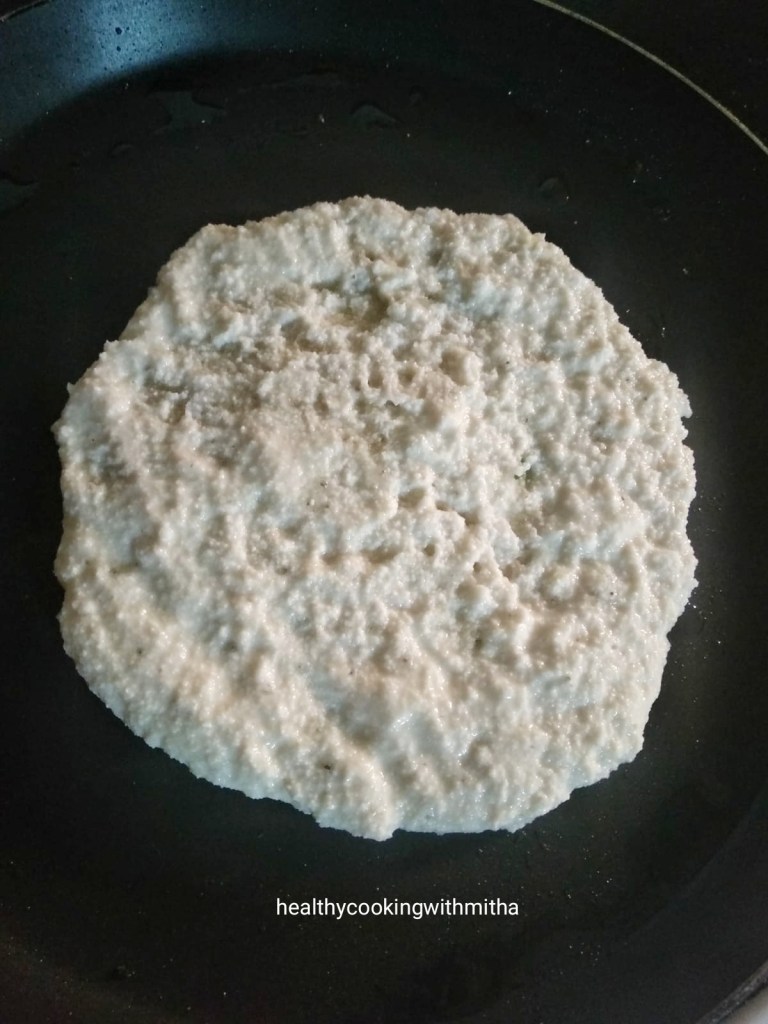
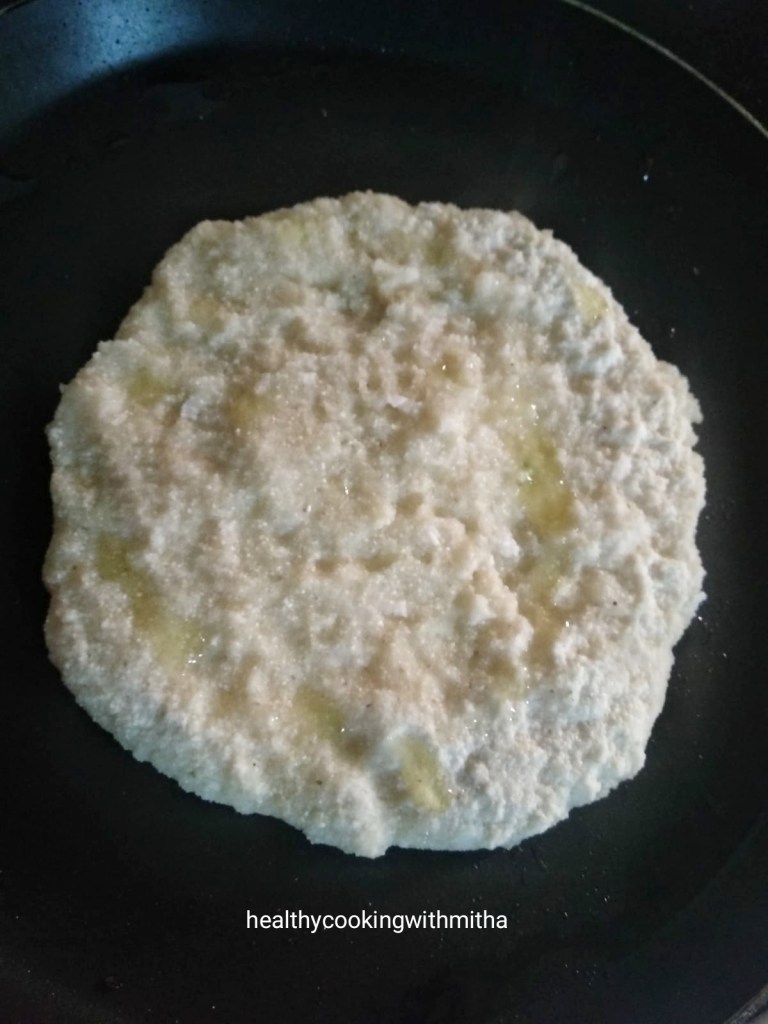
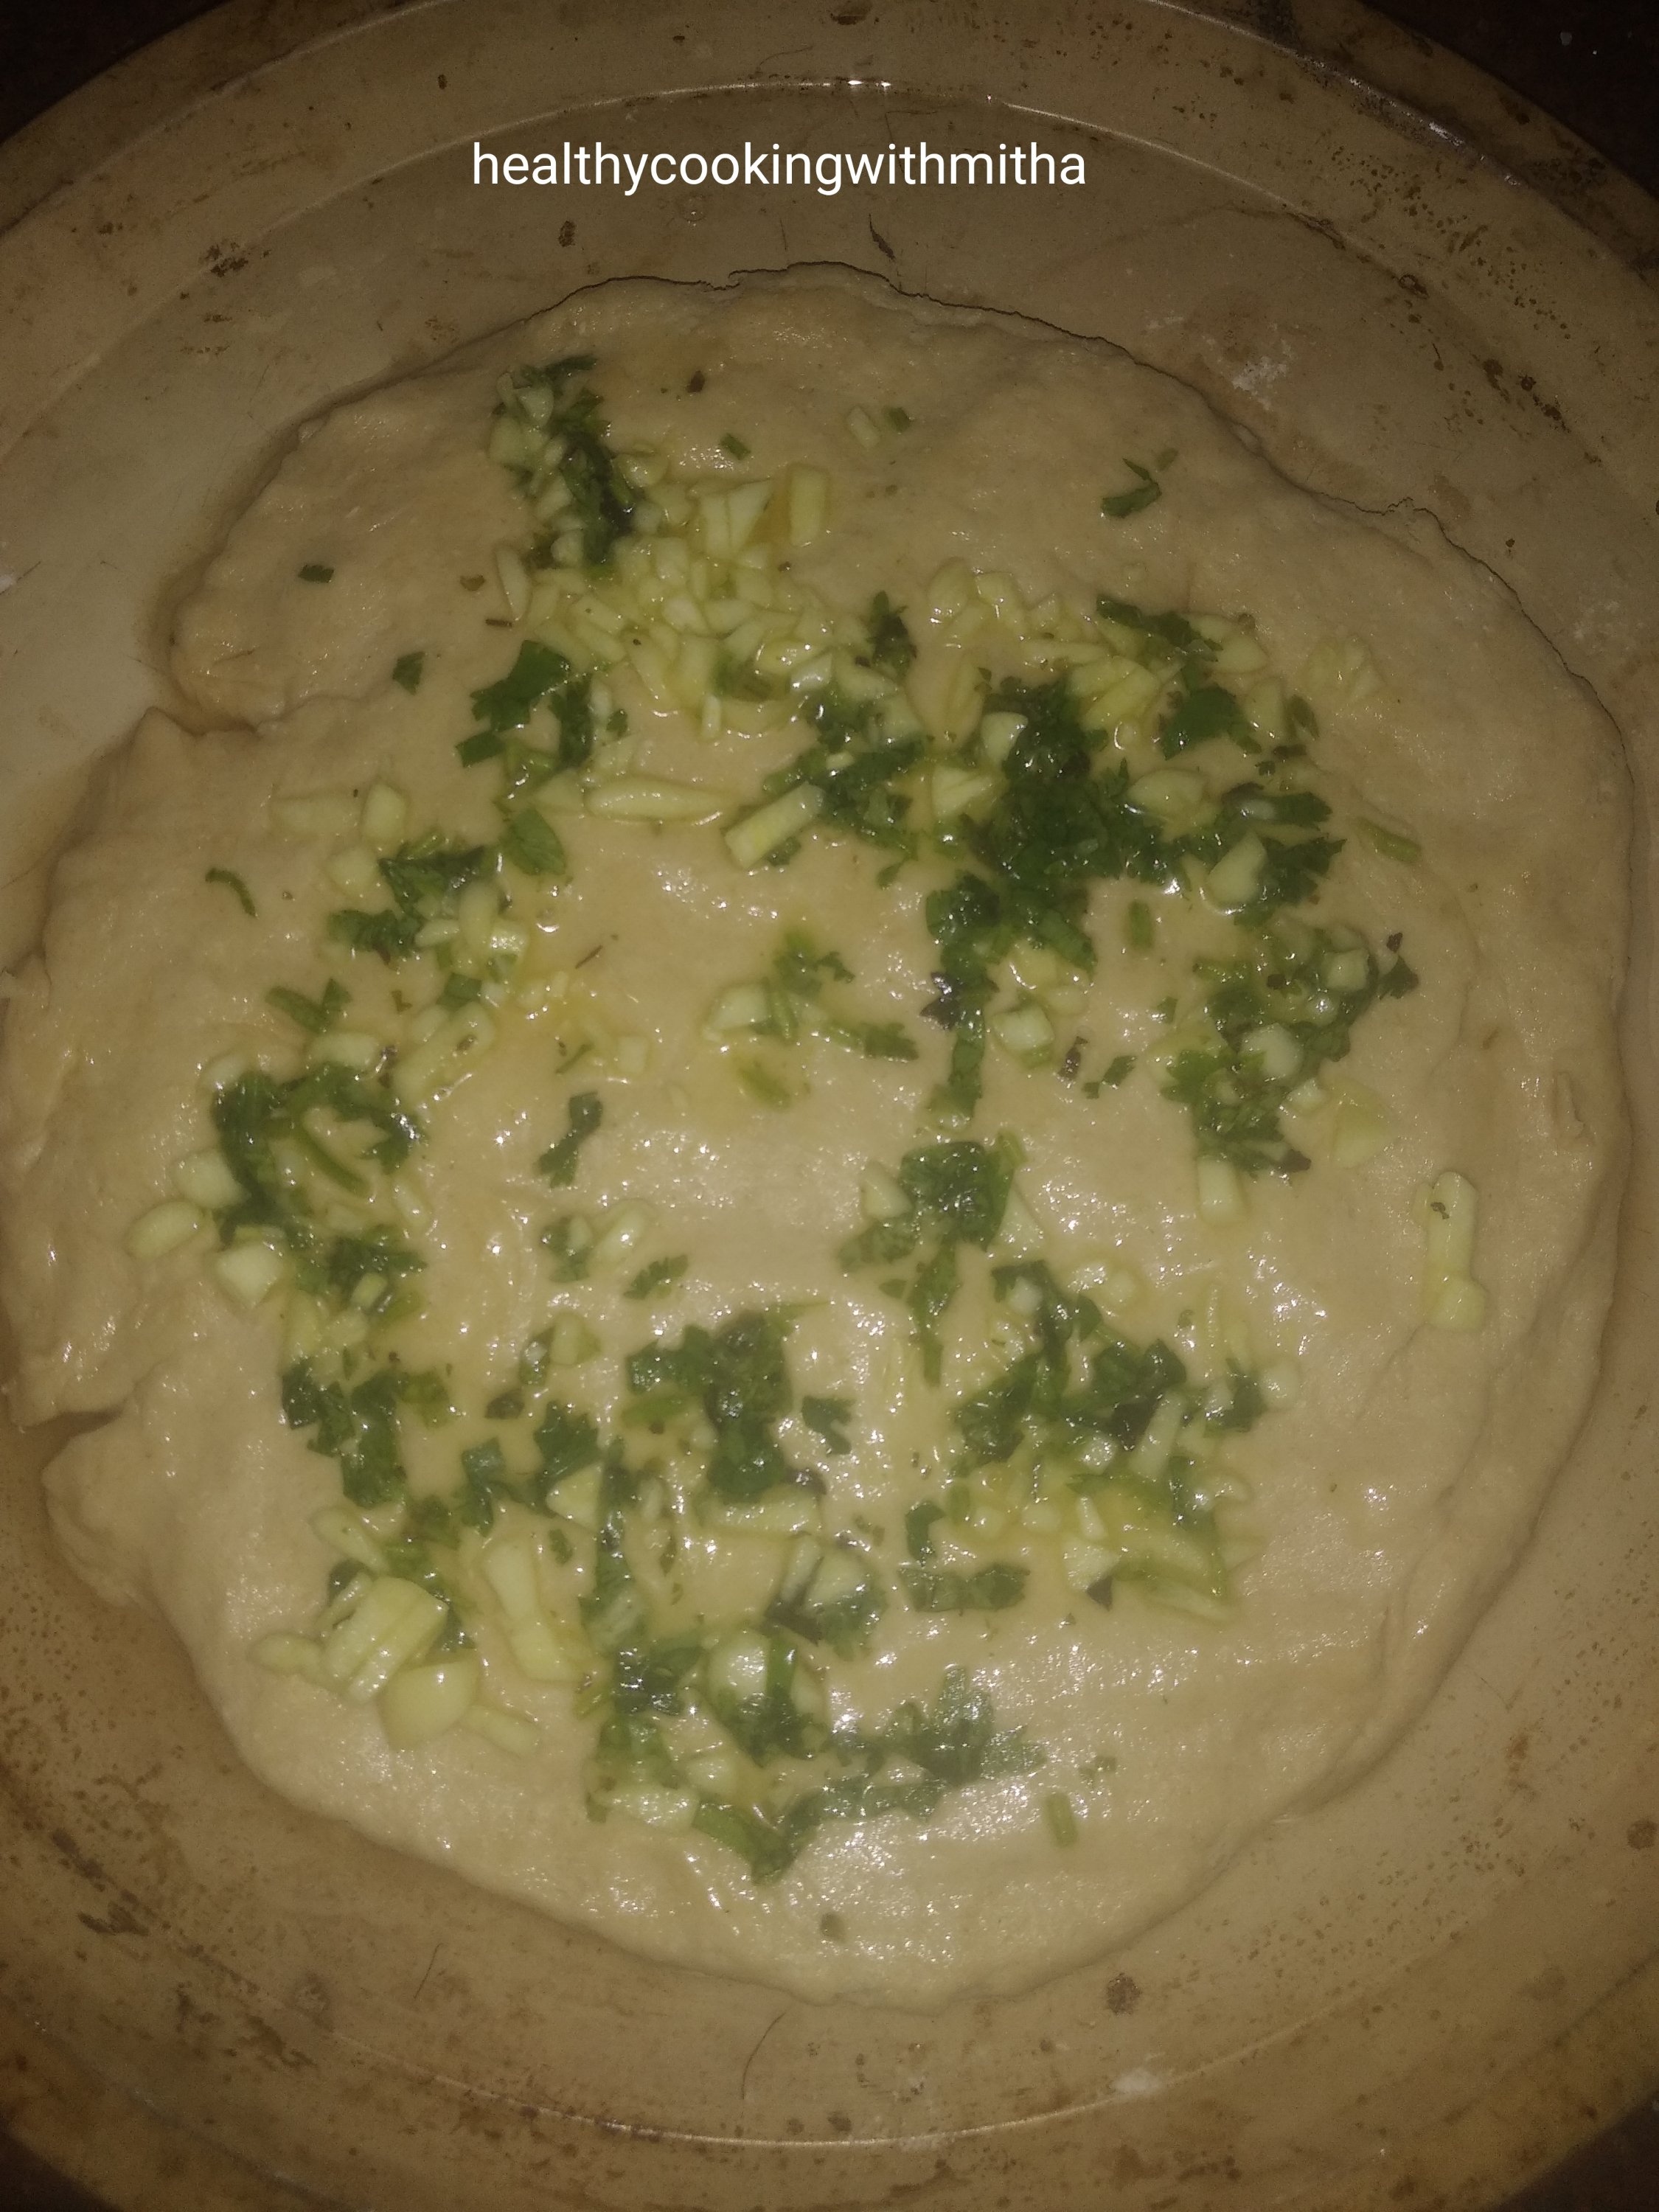
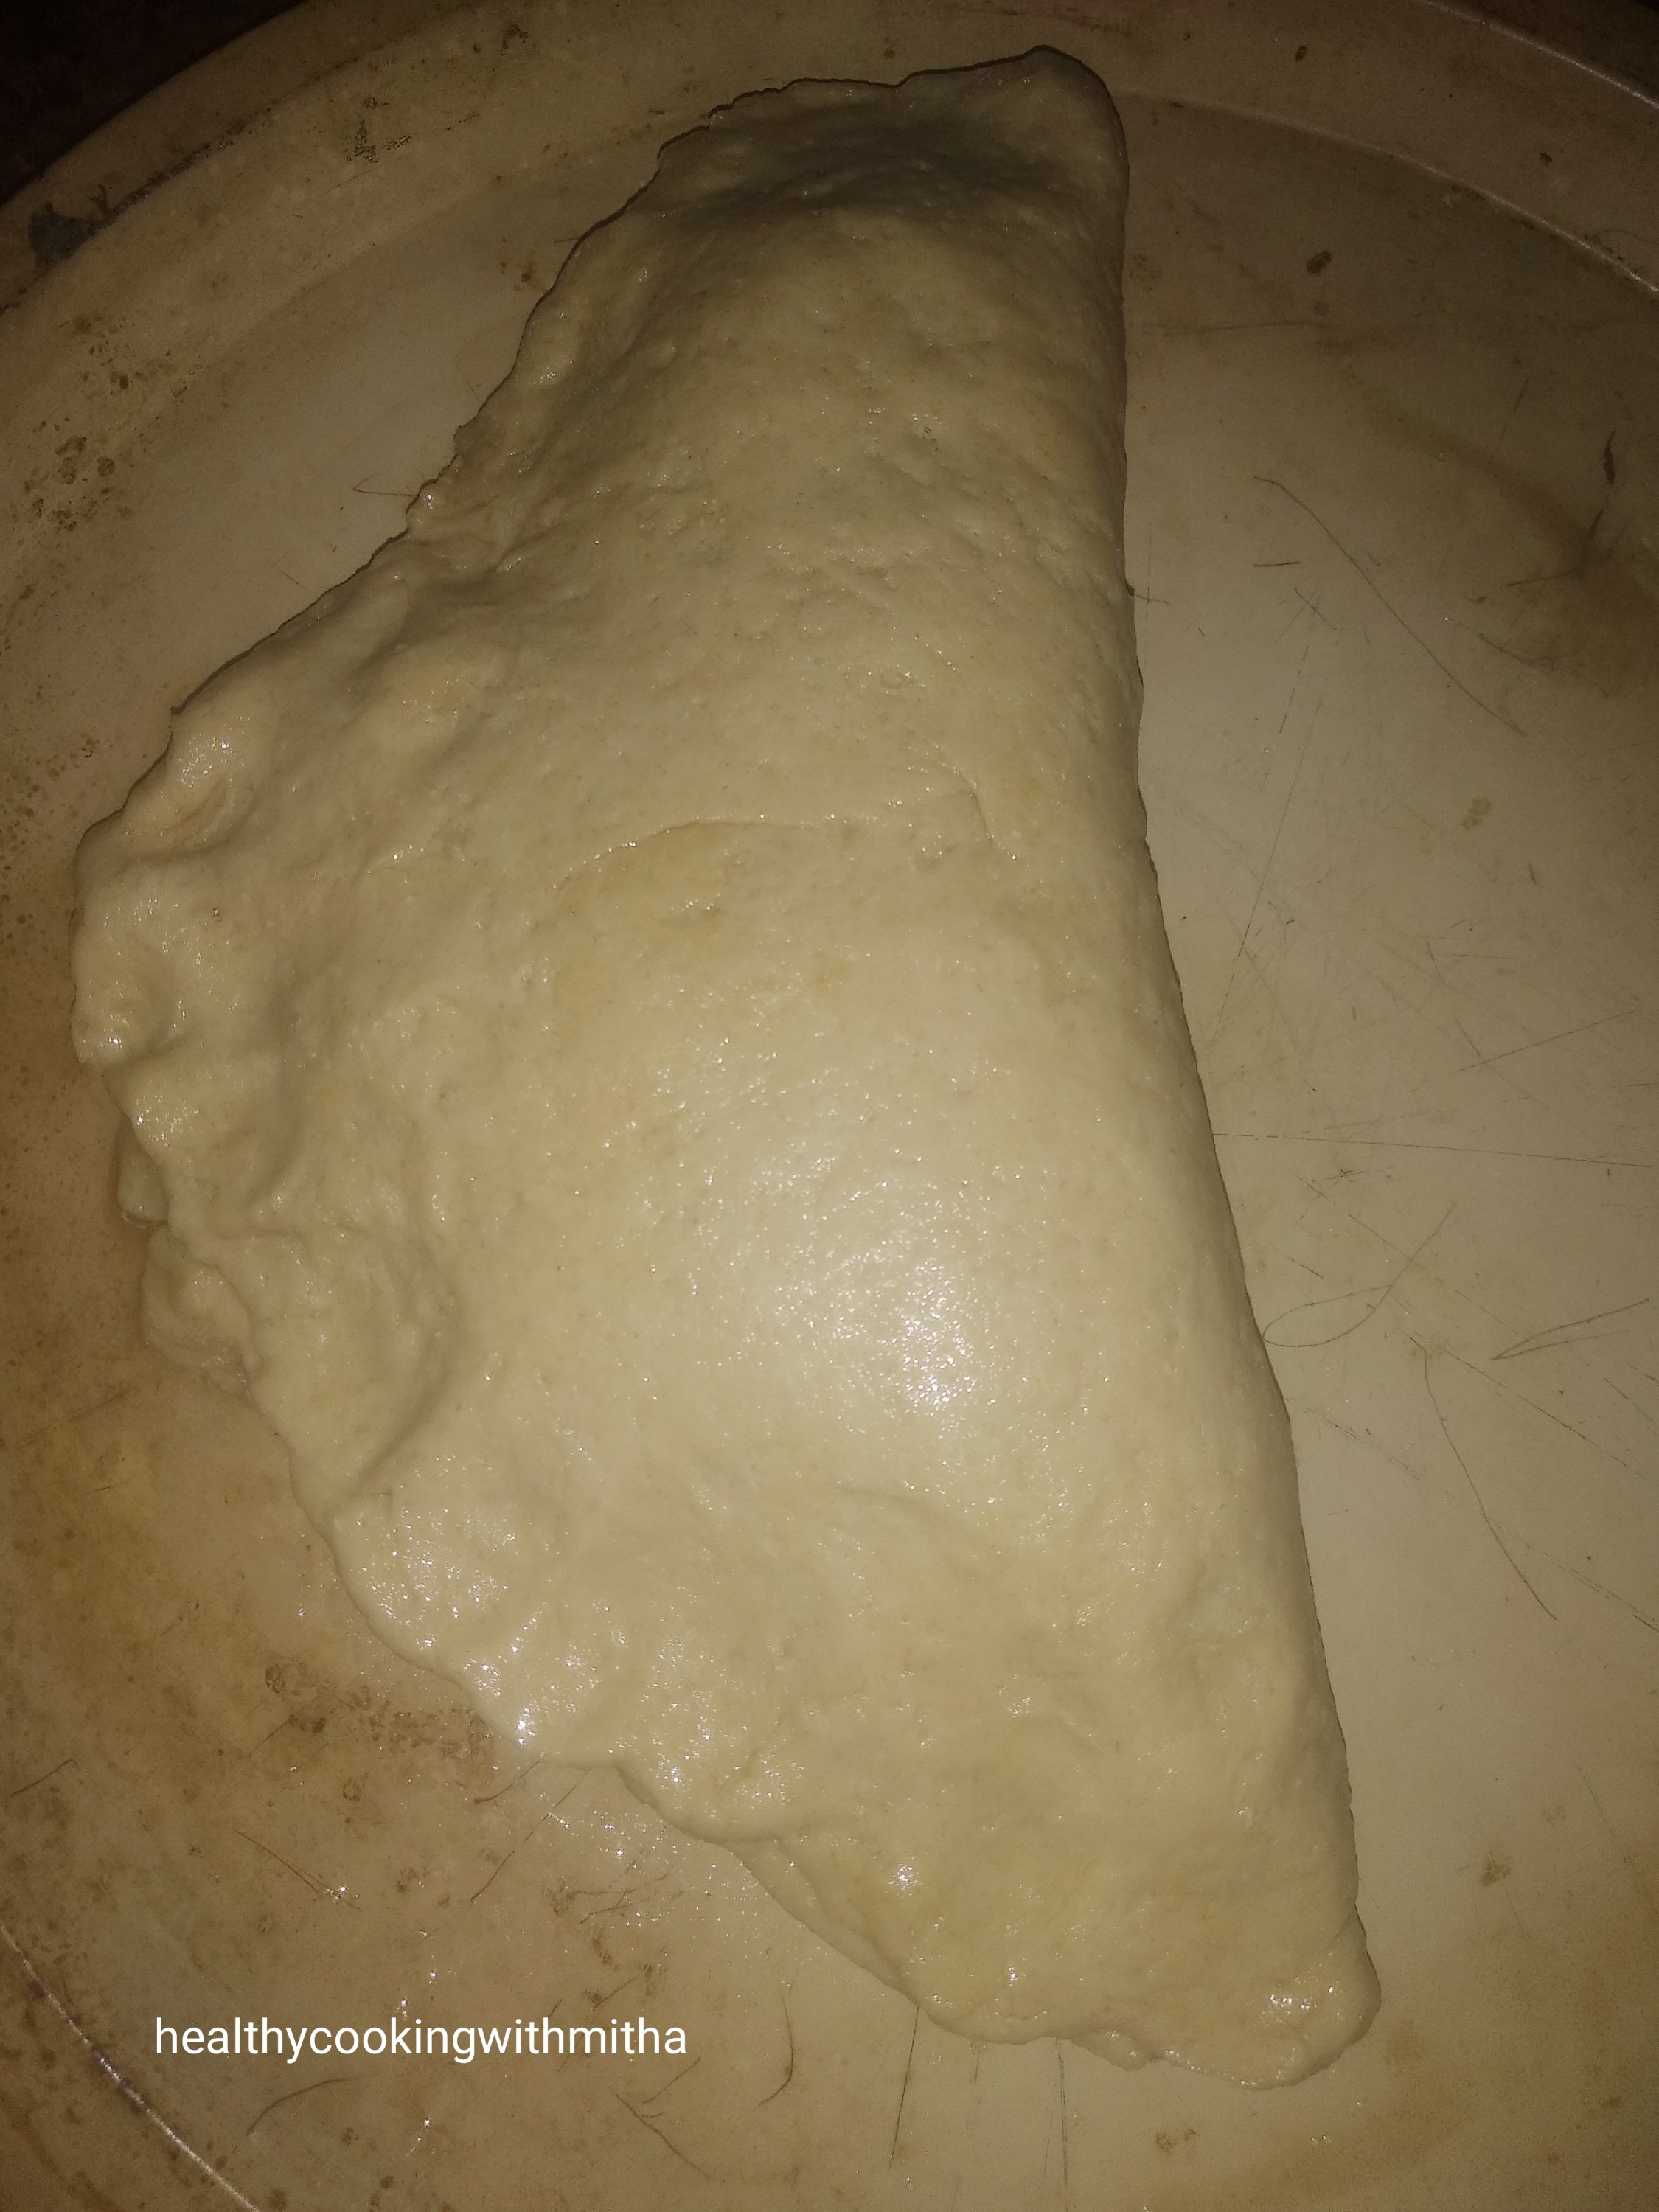
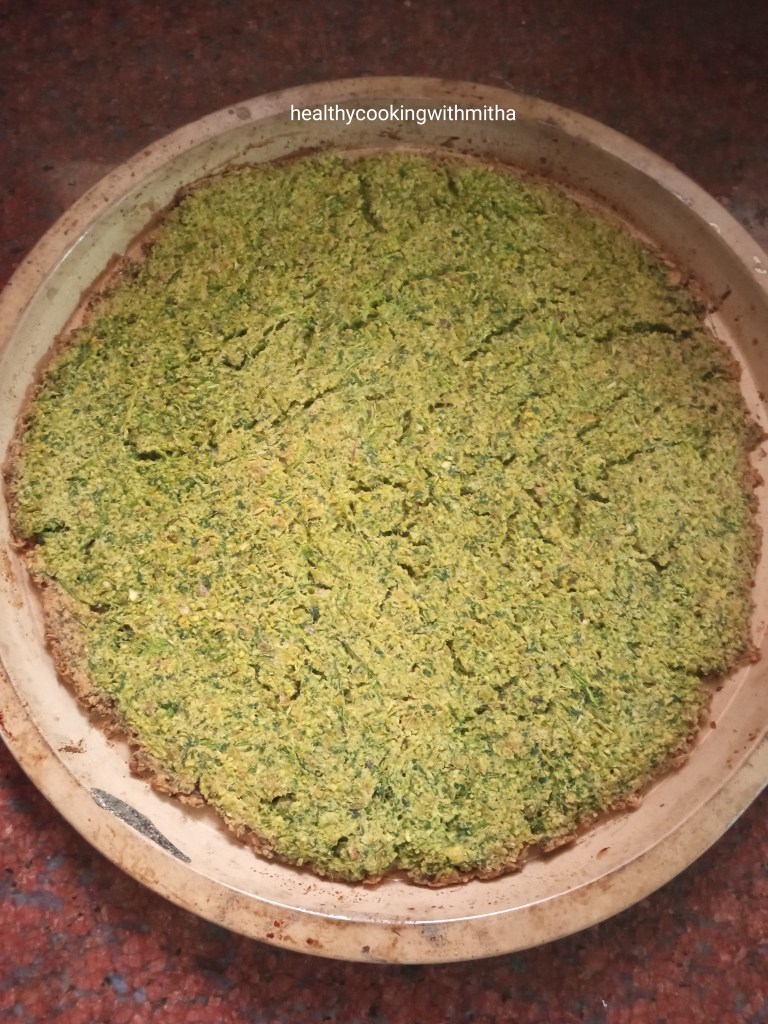
5. Preheat the oven at 200 C for 10 mins. Grease a oven proof plate generously with oil (or use parchment paper). Add this mixture over it and flatten evenly into a thin layer using your fingers as shown.

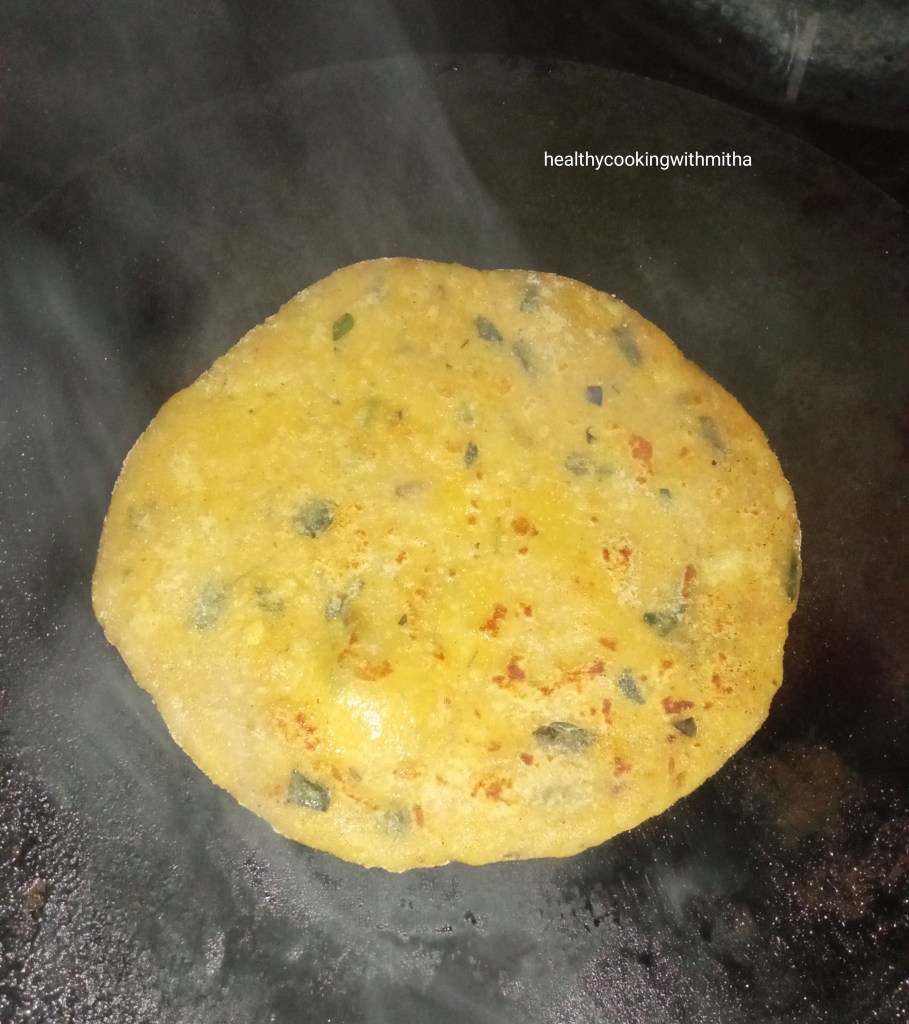
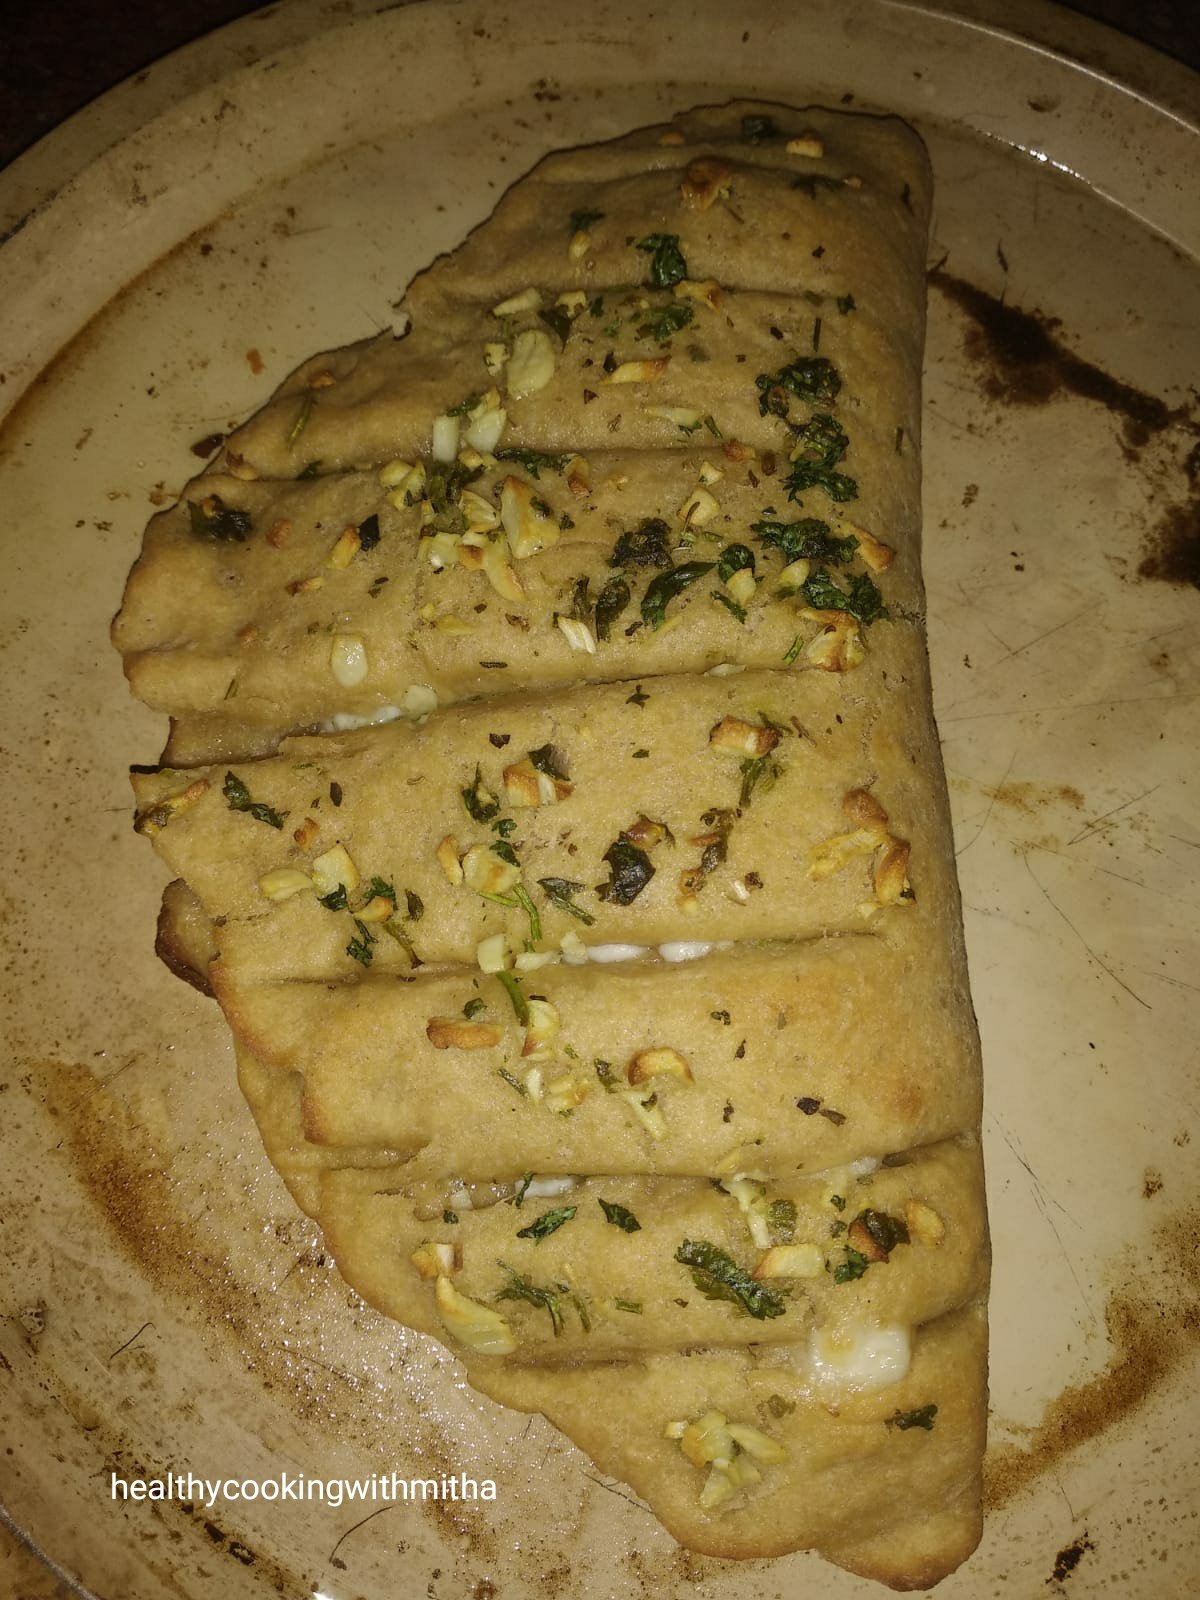
6. Bake in the center rack of your OTG (or with both rods on or in bake mode of your convectional mode oven) at 200 C for 20 to 25 mins till the edges get brown and the center is not soft, free from raw mixture and cooked well.

7. Now let it cool completely. Cut into squares or rectangles using pizza cutter.

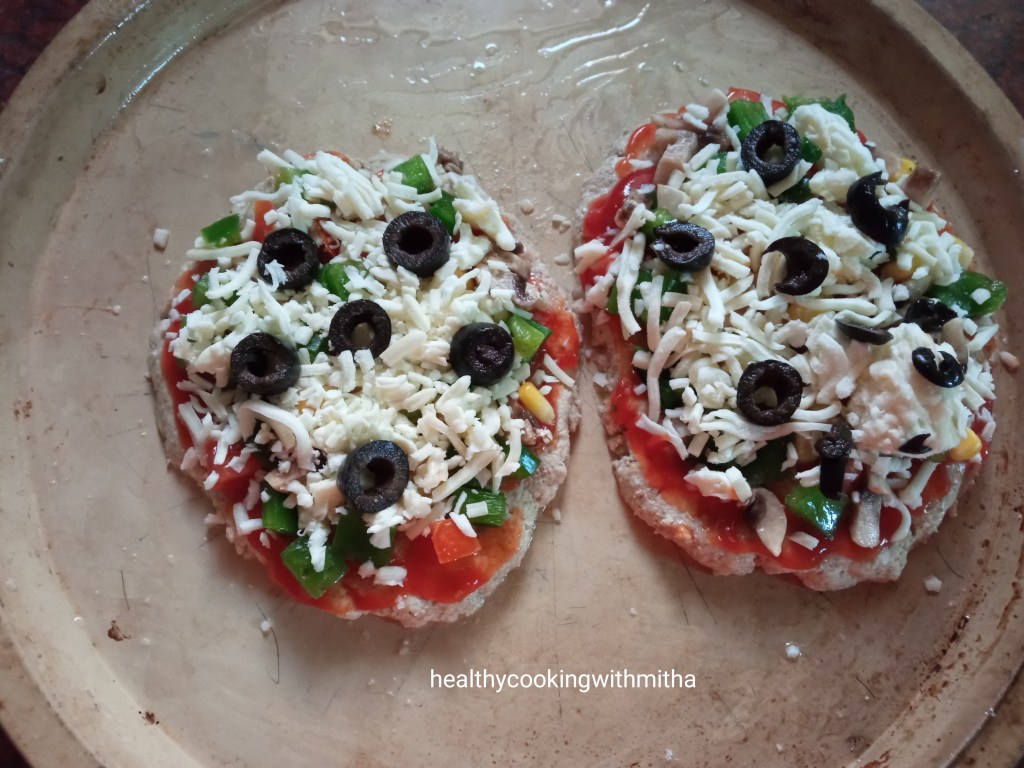
8. While serving, top with cream cheese or hung curd along with pepper powder and add cucumber slices, tomato pieces, parsley leaves and olives. Get creative and garnish as you like!

Notes:

* No need to cook the chickpeas. It is soaked and ground directly with the herbs and spices.

* If you don’t have parsley, substitute with more of coriander leaves.

* I make this even without onion or garlic and it does not make much difference to the texture. So if you don’t eat onion/garlic, you can skip it.

* Be sure to grind the mixture to a coarse mixture and not smooth paste.

* Do NOT add water while grinding.

* It takes me 1/4 Cup + 3 Tbsp Chickpea powder to get the mixture bind perfectly. More chickpea powder might make the flatbread dry. So don’t add more than the mentioned measurement.

* I used coconut oil. You can use any oil that you use.

* Make sure to generously oil the plate so that the flatbread does not stick to it. Or use baking parchment. I always prefer oiling my plate though.

* Don’t keep opening the oven door atleast till 20 mins into the baking time. Mine takes exactly 25 mins to bake perfectly.

* They are dry on the surface but moist and soft inside. Don’t over bake as it can lead it to become hard.

* Topping with cream cheese is our favorite!

* You can also top it with Homemade Hummus or Eggless Mayonnaise. I have shared the recipe on the blog earlier. Garnish with veggies of your choice.

* These flatbread last well at room temperature for couple of days. Mine gets finished off before that by my family.

I have tried to note down as much points as possible so that it’s easy for you all to follow but if you still have any doubts, either comment here or message me on my Facebook page Healthy cooking with mitha or on my Instagram handle and I would be happy to help.

Jowar Vegetable Bhakri

Click on the image to save the recipe on Pinterest

I have mentioned before that I always believe in following our age old traditional recipes for a healthy lifestyle. So when I found a youtube channel through food groups named NK Food & Lifestyle by Mr Krishnamurthy Setty sharing similar beliefs as mine, I felt happy and subscribed instantly.

I don’t follow many channels just for the sake of it, but only those whom I really feel are worthy enough (I am choosy that way πŸ˜„). This channel is in Kannada language showcasing Uttar Karnataka dishes, which makes me even more interested being from the south part of Karnataka. All their recipes are unique, simple and healthy, making me want to try that time itself.

This Jowar Bhakri, which they call as thalipittu was tried following their video, even though I chose to make it as thick ones rather than thin as my kids prefer that way and it’s easier too (for the busy mommy me πŸ˜€). My kids, specially my 2 year old son loved it so much that he became a fan of it. Can you believe this has radish too in it which goes into the tummy in a secret way 😁. We all loved it very much. A must try recipe for sure!

On a side note, I read something which made me think a lot (me and my best friend – my thoughts πŸ˜…). I was reading about how we should be kind and supportive even to strangers as we don’t know what they must be going through. We all have that facade which we show to the world but inside we might be suffering which is hidden deep inside us. So, as much as possible we must show empathy towards everyone. Have you ever noted how kindness showed by a stranger increases your faith in humanity? And what if you were the person who was kind to someone whom you don’t even know, without expecting anything in return? Doesn’t that make you happy?

That happiness is what I feel while sharing about Mr Krishnamurthy Setty’s youtube channel. He thanked me many times when I shared my feedback and said I would be writing about his channel on my blog. The way he expressed gratitude made me confident that I am on the right path.

So, support everyone, even strangers without expectations and love your loved ones with all your heart without conditions. Though expectations are human nature and unconditional love is not easy at all, once we experience it, we understand life fully. ❀️

After this long heartfelt writeup, here’s sharing the recipe with all of you. Do try. This comes out very delicious. Happy and healthy cooking!

RECIPE:

Recipe adapted from: NK Food & Lifestyle

Ingredients: {Makes about 7 to 8 thick Bhakris}

1 Cup Jowar flour

3/4 Cup Whole wheat flour

1/2 Cup Chickpea flour or Besan

1/4 Cup finely grated Radish

1/4 Cup finely grated Carrot

1/4 Cup finely grated Cucumber

1/4 Cup finely chopped Onion

1/4 Cup finely chopped Coriander leaves

2 to 3 Green chillies

Salt to taste

Ghee to cook the Bhakris

Step by step recipe:

1. Take Jowar flour, wheat flour, chickpea flour and salt in a bowl.

2. Now add finely grated Radish, carrot, cucumber and finely chopped onion, coriander leaves and green chillies.

3. Mix everything once with hands so that the veggies mix well into the flours. Now if making thalipeet, add very little water and make into a soft dough. Since I made Bhakris, I added water to bring it to a thick dosa batter consistency (about 1 1/2 to 2 Cups of water).

4. Now heat a dosa pan and add a ladle of dosa in the center of the pan. Spread to make a thick dosa. Drizzle ghee over the surface.

5. When the surface cooks, flip and cook for about 1 to 2 mins.

6. Serve hot with butter and a chutney of your choice.

Notes:

* I refrigerate the leftover batter for use the next day. It lasts well and there is no taste change in the Bhakris.

* Skip radish if you don’t have but it’s a great way to include the vegetable in your diet as you can never find out that the bhakris have radish in it.

* I have not tried these Bhakris without wheat flour. So can’t say about the result.

* Chickpea flour gives a good flavour to this. So don’t skip it.

* You can spread it like thalipeet but I find them making like Bhakris easier.

* Cook both sides well as this takes time to cook than regular Bhakris due to Jowar flour in it.

* I served these with Coriander leaves chutney. For the chutney, grind together coconut with green chillies, ginger, coriander leaves, salt with little water to a smooth paste. Season in coconut oil with mustard seeds and curry leaves.

* You can check all my bhakri recipes in this recipe compilation post.

* Other recipes with Jowar flour:

Jowar Idlis

Jowar Dosa

* All my Millet based dishes : Millet recipes collection

Click on the image to save the recipe on Pinterest

Gluten free Oats Pizza | Easy, healthy pizza recipe

Click on the image to save the recipe on Pinterest

If you had asked me some years back about gluten free food, I would have looked at you bewildered as I really had no idea about it. But as I started blogging, I started noting many gluten free recipes in food groups and have been getting many requests for it by my readers. So I had to share this Oats Pizza which was one of my successful trials sometime back (had to perfect it before blogging, hence the delay).

After the first try, I fell in love with it. ❀️ It was so delicious and I was hopping like a bunny at how amazing it came out. πŸ˜… Then I have been making it regularly for my kids whenever they crave for pizza and I felt it was a great way to include oats in their diet (hidden in their fav pizza πŸ˜€). Even though they are huge fans of my whole wheat vegetable pizza, this came into their favorite list too and they hardly know the difference.

Click on the image to save the recipe on Pinterest

I would also like to share some free gyan (πŸ˜„) about gluten free diet (for those new to it like me, other know-it-all people can skip 😁). Gluten is a protein found in wheat, barley and few other grains. People who have celiac disease have gluten intolerance where they get mild to severe allergic symptoms if they eat these grains. But doctors have advised people without this disease to not follow gluten free diet without any reason. So if you are planning to start one, do read well about it and make an informed choice.

As for me, as I always say, its always best to have a wholesome balanced diet including all kinds of healthy foods in different ways to keep it interesting, combining it with regular exercise or brisk walking.

Anyhow hope this recipe is helpful to those of you who love pizza, yet are on a gluten free diet or for people like me who love to try unique recipes 😁. Happy and healthy cooking! ❀️

RECIPE:

Ingredients: {Makes 2 mini pizzas}

For the pizza base:

1 1/2 Cups Instant Oats

1 tsp Instant yeast

1 tsp Honey

1/4 tsp Salt

1/4 Cup + 2 Tbsp Water (approx) (+ 2 Tbsp water after rise time)

For the toppings:

1/2 Cup finely chopped Mixed veggies (I used a mix of capsicum, corn, tomato, mushroom)

1/4 tsp Salt

1/4 tsp Mixed herb seasoning

2 Tbsp Pizza sauce (or any regular ketchup)

1/2 Cup grated Mozarella cheese

Sliced olives for garnish as needed

Oil to grease the oven proof pizza plate

Step by step recipe:

1. Take instant oats in a mixer and dry grind it till it turns into fine powder. 1 1/2 Cups oats gave me 1 1/4 Cups oats powder. Takes about 5 pulses and gets powdered very quickly. Add to a bowl. Also add instant yeast, honey and salt.

2. Now add water little by little till it forms a dough. It should be slightly sticky but still firm. Took me 1/4 Cup plus 2 Tbsp water to form the dough for 1 1/4 Cups Oats powder.

3. Keep the dough to rest, covered in a warm place for 1 hour.

4. Meanwhile add finely chopped veggies, herb seasoning, salt in a bowl. Mix with spoon. You can also add chilli flakes and pepper powder for spicy pizza. I don’t add as I make for my kids.

5. When one hour is done, Preheat the oven at 180 C for 10 mins.

6. Grease the oven proof plate generously with oil. Also oil your fingers. Divide the dough into two portions and make two balls with it. Flatten it onto the plate with your fingers as thin as you can. In simple words, this is like flattening your Bhakris, thalipeeth or akki rottis. πŸ˜…

Note: Dough before resting for one hour will be slightly sticky and firm. After resting it will turn hard. Does not rise too but don’t worry, just add 2 Tbsp water to make it soft and it will be easier to spread using fingers. Also oiling your fingers will help you spread it thinly.

7. Now top this with pizza sauce or ketchup. Add veggie mix over it. Top with mozarella cheese and olives.

8. Bake in a preheated oven at 180 C for about 15 to 18 mins or till the mozarella cheese has a light golden colour to it. Bake in the center rack of your OTG or use both rods option or bake option in conventional oven.

9. Let it cool slightly. Then slice and serve with ketchup or chilli sauce.

Notes:

* You can use oats flour instead of instant oats. Just measure 1 1/4 Cups of flour and continue with the process.

* I have not used rolled oats in this recipe but you could try using. Just that the water required may be little more to form the dough.

* You could substitute honey with sugar but I chose it as it a healthier option while making no change in the output. It is just for yeast to bloom.

* If using dry active yeast, use 1 1/2 tsp of it. Proof it separately in warm water and honey first and then add to the powdered oats, salt mix.

* Dough before resting will be slightly sticky and firm. After resting it will turn hard. Just add 2 Tbsp water to make it soft and it will be easier to spread using fingers. Also oiling your fingers will help you spread it thinly.

* This dough does not rise like regular yeast based dough but don’t worry, the pizza crust turns out very well. Soft, yet firm and delicious.

* Don’t spread thick or else it won’t cook well. Spread thin and evenly.

* I always make mini pizzas with this as it is easier to spread than one large pizza.

* Remember greasing the oven proof plate well with oil so that the pizza does not stick to the plate.

* Bake till the cheese turns light golden in colour. It takes me exactly 18 mins but might be quicker or later depending on your oven. Keep an eye after 14 mins.

* This pizza tastes better when kept for about 10 mins at room temperature as the base turns firm. When it is hot, it is very soft.

* You can add chilli flakes or other seasonings to the pizza. I make this in a very simple way as my kids love this way.

* You can also try this easy whole wheat vegetable pizza which I am making since many years and is my kids’, their friends’ and also my readers’ favorite.

I have tried to note down as much points as possible so that it’s easy for you all to follow but if you still have any doubts, either comment here or message me on my Facebook page Healthy cooking with mitha or on my Instagram handle and I would be happy to help.

Update:

Reader doubt: Oats absorbs more water , was 1/4 cup +2 tbsp water enough ?

My answer: Yes, it was enough for the first time before keeping it to rise. If you add more, it becomes very sticky and difficult to handle. After it rises, it absorbs all the water and becomes hard. Then add 2 Tbsp water again and make it soft enough to make it spreadable with oiled fingers.

Click on the image to save the recipe on Pinterest

Ragi Malpua | Quick sweet idea | Healthy snack for kids

I have already shared a chocolate cake, cookies, idlis and a dosa with Ragi flour. You can check all the recipes here. This recipe of Ragi Malpua was my first post on my old blog and one of my first trials with Ragi flour back in 2013. Now when my kids love it, it makes me very happy (one of my successful experiments πŸ˜„).

These little rolls of yumminess comes handy during their “Amma, we are hungry. Give us something right now!” kind of hunger πŸ˜‚. Yes, as a mother, we always have to be ready as such hunger pangs can strike anytime (proportional to their naughtiness 😬). I quickly make these Ragi malpuas and they enjoy it while playing. Seeing them eat happily is one of the best moments in the day for me. ❀️

I never realized how someone else’s happiness can be more important than mine before becoming a mother. But now, all I think is how to make them happy (even though I do scold them if they get extra naughty 😁) and all my wishes have got replaced by theirs too. My daughter asked me yesterday what wish do I have in life (she was talking about her wish to be a princess πŸ˜†πŸ˜). I said I no longer wish for anything as nothing is in our hands and all depends on God’s will, but I do wish and pray that all your wishes get fulfilled. She was so happy with that answer that she gave me a tight hug saying thank you. It made my day! πŸ₯°

Both of them fill my heart with their talks, smiles, naughtiness and love. Can’t imagine my life without them. ❀️❀️

Here’s sharing their favorite snack, these Ragi malpuas. Hope you all try and love it too. Happy and healthy cooking! ❀️

RECIPE:

Ingredients: { Makes 3 Malpuas }

4 Tbsp Ragi / Finger millet flour

2 Tbsp Atta/ Wheat flour

1 Tbsp Jaggery

Salt to taste

5 Tbsp Milk

For the filling:

1/4 Cup Desiccated or Fresh Coconut

1 Tbsp Honey or as needed

1 Tbsp finely chopped Dry fruits ( I use a mix of cashews, almonds and pistachios)

1/4 tsp Cardamom powder

Ghee to cook the malpua

Honey and Pistachios for garnish

Step by step recipe:

1. Take ragi flour, wheat flour, jaggery and salt in a bowl.

2. Mix it once using a spoon. Now add milk, one spoon at a time and make a thick batter free from lumps. Keep it aside.

3. Now for the filling, take coconut in another bowl. Add honey, finely chopped dry fruits and cardamom powder. Mix well.

4. Now heat a dosa pan well. Then reduce flame to medium. Add about two spoons of the malpua batter in the center of the pan. Spread in round shape. Add ghee and cook till the surface cooks.

5. Flip and cook for a minute.

6. Remove into a plate and fill with the filling. Roll and serve. Drizzle with honey on top and garnish with chopped pistachios.

Notes:

* I have not skipped wheat flour in this recipe as it needs little wheat flour for that soft yet firm texture.

* You can increase the amount of honey on the filling or jaggery in the batter for more sweet malpuas. I prefer it in this quantity.

* Skip jaggery in the batter if you don’t have much sweet tooth.

* They are best enjoyed as soon as made. Keeping them for little while can make it dry.

* Don’t make the batter very thin. The batter is free flowing yet thick. It took me 5 Tbsp milk for 4 Tbsp Ragi flour and 2 Tbsp wheat flour to get the perfect consistency.

* This snack is really handy as it is healthy as well as tastes delicious. Hardly takes 10 mins to make too.

* You can check all my Ragi recipes here.

Almond Butter Cookies | Easy 4 ingredient healthy recipe using wheat flour and jaggery

Click on the image to save the recipe on Pinterest

When I posted the Ragi Butter Cookies which was my friend Anvy’s recipe, she asked me if I had tried the almond cookies that she had shared on her Insta handle, Homemade by Anvy. I told her I don’t have almond meal with me (it sounded so exotic 😬) but I did have loads of almonds with me (which I had bought to eat daily to increase my memory. Now if anyone would remind me to eat them πŸ˜‚).

So she told me almond meal was nothing but powdered Almonds (my plinggg moment!! 🀣). So I had to try it and imagine my happiness when it came out so good. I already made them thrice in the past week as it tasted so heavenly and since it was so easy to make with only 4 ingredients. Also, never knew homemade almond cookies could turn out so pretty. Could not keep the beauties down. 😍

Click on the image to save the recipe on Pinterest

Off they went into my kids’ “choti bhook waala dabba” (their snack box for mid meal hunger and mine too for my sweet tooth 😬).

Click on the image to save the recipe on Pinterest

It has been only an year since I joined Instagram and as much I like it, there have been times when I wanted to just come out of it as I had a tendency of over sharing stories. Finally, got rid of that habit ( some self control that was πŸ˜„) and now just using instagram to post my recipes while following some amazing accounts like that of Anvy’s.

Thank you so much dear Anvy @homemadebyanvy for yet another great recipe of yours. We absolutely love it! ❀️

Hope you all try it too. You will definitely love it. Happy and healthy baking!

RECIPE: { My 1 Cup = 240 ml }

Ingredients: { Makes about 12 cookies }

100 grams Salted Butter ( 1/4 Cup + 3 Tbsp) (Add a pinch of salt if using unsalted butter)

3/4 Cup Whole wheat flour or Atta

1/2 Cup finely powdered Almonds (or Almond meal)

1/4 Cup Jaggery powder

Sliced Almonds for garnish (optional)

Step by step recipe:

1. Soften butter by keeping it at room temperature for little time. (Do NOT melt it in microwave or so.) Just place it at room temperature till it turns soft. Now add jaggery and mix both together using a spatula till they combine. Also add the finely powdered Almonds.

2. Now add wheat flour and mix using hands till it forms a dough. It will come together and will be slightly sticky. Refrigerate for about 15 mins. It will turn firm.

3. Meanwhile preheat the oven at 180 C for 10 mins. Take small balls of the dough and flatten with your fingers. Place them on a greased (with ghee/butter) oven proof tray leaving space among them as it increases width on baking. Decorate each with slices of almonds.

4. Bake in the preheated oven at 180 degree Celsius (350 – 375 F) for 10 to 14 mins in the center rack of your oven or with both rods on in your conventional oven. Mine gets done at 14 mins.

The colour of the cookies are brown and not the colour above. It is due to the reflection of my kitchen lights that the cookies have a light shade in the picture. I still added it to show how much the cookies increased in width after baking.

5. Remove and allow it to cool completely. As you keep it to rest, it turns hard but not very hard as butter cookies are supposed to be melt in the mouth and on the softer side.

Notes:

* Store the cookies in a dry, air tight container and it lasts well for two to three days. Mine gets finished off by my family before that. Will last longer if handled well, free from moisture.

* They are very soft and break upon touching on warm. As they cool down, they will harden but still not very hard like store bought ones as we have used only butter. The texture is melt in the mouth softer version of cookies.

* These cookies do not need baking soda nor baking powder. They still grow in width during baking process. I too was amazed the first time I tried it as I always thought cookies needed either baking soda or powder.

* Baking time depends on your oven. In some ovens, it can be done at 10 mins while in my OTG, it takes 14 mins. So keep an eye but don’t open the oven door before atleast 10 mins into the baking time. Else it will lead to uneven baking.

* Do refrigerate the dough for atleast 10 to 15 mins as it helps combine the ingredients well and also helps us form cookies well without sticking in our hands.

* Place the cookies in the center rack of your OTG or with both rods on if using microwave with conventional mode oven.

* I have not replaced butter with ghee or oil in this recipe. So can’t say about the outcome.

* For making powdered Almonds, just put the almonds in a mixer and pulse it in regular intervals till it turns into fine powder. Keep checking in between so that it does not leave oil and become a paste.

* Leave space between cookie dough while keeping on the tray as they increase in width as they bake.

* When they fully bake, you can see the surface is free of raw dough and edges are slightly golden in colour. It is enough. You can remove the cookies out of the oven.

* Garnishing with almond slices are optional. Avoid the slices if making for kids less than 2 years as it can be a choking hazard. Else just finely chop and garnish. Anyhow, the cookies tastes good even without it.

* You can check my Healthy Cakes and Cookies compilation.

* For beginners in baking, you can check my Baking Basics for beginners post.

I have tried to note down as much points as possible so that it’s easy for you all to follow but if you still have any doubts, either comment here or message me on my Facebook page Healthy cooking with mitha or on my Instagram handle and I would be happy to help.

Click on the image to save the recipe on Pinterest

Drumstick leaves Aloo Roti | Easy snack and lunch box idea

Finding healthy evening snacks are the most difficult for me as most of the snack ideas that are available online are deep fried ones or with bread. Though I bake my own wheat bread and we enjoy it with fresh cream cheese spread, still I have to think of varieties each day to feed my kids who get bored very quickly. πŸ˜€

I am also sorry that I always write about my kids. It’s because all my recipe ideas are inspired by what they like and I keep making the dishes they absolutely love. ❀️ Hope it is helpful to mothers like me who want to make their kids eat healthy yet get run out of ideas.

These rotis were found on a day when I had leftover drumstick leaves potato curry and I had to make something quick for the kids. I just added wheat flour and made rotis with it. The kids loved it so much that it has now become a regular in our place whenever I get drumstick or Methi leaves (best way to get leaves in their tiny tummies 😍😍).

This is very filling, yet tasty and very healthy. Best part is it stays soft after many hours. So you can give for lunch box too. Hope you all try and love it too. Happy and healthy cooking! ❀️

RECIPE:

Ingredients: { Makes 5 Rotis }

1 Tbsp Ghee

1 tsp Jeera/ Cumin seeds

1 Cup mashed Potatoes (Pressure cook potatoes till soft, peel and mash well)

1/4 Cup Drumstick leaves / Moringa leaves

1/4 tsp Turmeric powder

1/2 tsp Red chilli powder

1/2 tsp Garam masala powder

2 Cups Wheat flour

1/2 Cup Water

Salt to taste

Ghee to cook the rotis

Step by step recipe:

1. Heat ghee in a pan (I use my iron kadhai for this recipe.). Add Jeera. Fry little and add mashed potatoes along with drumstick leaves, Turmeric powder, Garam masala powder, red chilli powder and salt. Mix everything well and cook for two mins.

2. Allow it to cool. Then add wheat flour and water to make a smooth dough. You can add a pinch of salt to this if needed.

3. Make small balls of this dough, dust in dry wheat flour and spread using a rolling pin into rotis of medium thickness (slightly thicker than chapatis).

4. Cook on a hot tawa and use ghee while frying both sides.

5. Remove from flame and serve with mint chutney and curd.

Notes:

* I serve this with Pudina Lehsun chutney and curd. Makes a great combination.

* You can substitute drumstick leaves with Methi or fenugreek leaves too.

* I make and keep these in a steel container and it stays soft even after many hours. So really good idea for lunch boxes.

* The dough also can be made beforehand and refrigerated in an airtight container. Lasts well for a day.

* I add 1/4 Cup leaves to 1 Cup mashed potatoes and 2 cups wheat flour. You can increase the quantity of leaves if you want. I find this ratio good for my kids as the taste is not very overpowering while it gives them the nutrition too.

* You can also check the spicy idlis with drumstick leaves which we Konkanis call Mashinga palle sannamuddo.

* Do try these rotis or your regular parathas with Pudina Lehsun chutney. Tastes amazing.

* One more snack idea which is very filling and my kids’ favorite are these Masala Oats Parathas. Very delicious!

Rava Bhakri /Rullanva Doddaka/ Instant Semolina savory pancakes

I am a huge fan of our age old amchi (Konkani) dishes. They are not only easy to make but very healthy and super delicious too. Also, I am a firm believer that breakfast should be the most filling meal as it gives us energy for the day and keeps us away from snacking often.

This Rava Bhakri is exactly that. Very filling and super tasty too. It’s my go to breakfast when I have forgotten to soak for dosas or idlis. My kids call it “Rullanva bobbo” and demand it whenever they feel hungry. So this “bobbo” becomes their snack too when they come tired after playing. And the best part is, it hardly takes 10 mins from start to finish to make this.

Now that’s how I love my dishes. Less time in the kitchen, yet healthy, kid friendly and delicious. Most Konkanis know this recipe but sharing for those who don’t know. Hope you all try it too. Happy and healthy cooking!

RECIPE:

Ingredients:

2 and 1/2 Cups Semolina (wheat rava, upma rava, sooji)

Approx 3 Cups Water

1/4 Cup Wheat flour (Atta)

1/4 Cup freshly grated Coconut

1/4 Cup Yogurt/ Buttermilk (optional)

2 to 3 Green chillies

1 inch Ginger piece, grated

1 Tbsp Sugar

Salt to taste

Ghee or coconut oil to cook the dosa

Step by step recipe:

1. Take Semolina, wheat flour, sugar, salt and coconut in a mixing bowl.

2. Add yogurt, water, Ginger and green chillies. Mix well and make a lump free batter of thick consistency. (It took me 3 Cups water for 21/2 cups rava. Might vary depending on the brand of rava.)

3. Now heat a dosa pan and add a ladle of dosa batter. Spread it into a thick dosa.

4. Cover and cook till the surface cooks. Add ghee or oil on top.

5. Flip and cook for a minute.

6. Serve hot with butter and pickle.

Notes:

* Rava absorbs a lot of water very quickly. But it varies with the brand of rava. So best is to add water one cup at a time in the beginning and then add little by little to make a batter thicker than dosa batter consistency.

* This batter can be made before hand and refrigerated. I make it at night and refrigerate for breakfast the next day as it saves a lot of time in the morning. Just that the rava absorbs all the water. So it needs and addition of about a cup of water to bring it back to pourable consistency.

* The addition of yogurt or buttermilk is optional but gives a nice tangy flavour to it.

* You can also grind the coconut along with Ginger and green chillies. Then add to the batter but I love the bite of green chillies. So I don’t do that way.

* I don’t even need pickle with this. Butter is an excellent accompaniment to this bhakri.

* You can also add an mashed overripe banana to this batter. Tastes really delicious!

* You can also add grated cucumbers to this to make Instant Cucumber dosas or Thoushe Bhakris.

Whole wheat cheesy garlic bread

We have still not started eating from outside much to the surprise of our friends here. But honestly, after learning to cook clean and delicious food at home, we don’t actually feel like ordering from outside. For me, the main turn off is the oil. I am so used to either coconut oil or ghee in my cooking that when I am reminded of the oily restaurant foods (mostly sunflower or some mix of refined oils), I don’t feel like eating out at all. I can’t believe I used to find it tasty. Life has changed so much in every way.

Not only curries, even pizza and garlic bread are homemade now. This Whole wheat Pizza is not only easy to make but tastes so yummilicious apart from being healthier too. I also happened to try cheesy garlic bread sometime back and we all loved it. So it had to be on the blog as well. I made it many times to recheck the recipe (also to devour it 😁) but could not get good clicks as the kids are always in urgency to gobble it up. πŸ˜€

I finally gave up and decided to share these somewhat okay pictures itself on the blog. Don’t go by the picture, it’s really very tasty and much better than outside ones. We absolutely love it. It’s not very difficult to make too if you follow the step by step pictures well.

Hope you all try and love it too. Happy and healthy baking! ❀️

RECIPE:

Ingredients:

1 and 1/2 Cups Whole wheat flour or gehun ka Atta (I use Pillsbury brand)

About 1/2 Cup Water to knead the dough (depends on the flour brand)

1 tsp Instant yeast (or 1 and 1/2 tsp dry active yeast)

1/2 tsp Sugar

1/4 tsp Salt

About 1/2 Cup grated Mozzarella cheese

For the garlic dressing:

2 Tbsp salted Butter (if using unsalted, add salt to this dressing)

5 Garlic pods

2 Tbsp finely chopped Coriander leaves

1 tsp Dried mixed herbs seasoning

Step by step recipe:

1. Take wheat flour, instant yeast, salt and sugar in a mixing bowl.

Note: If using dry active yeast, it needs proofing ie put the yeast along with sugar in lukewarm water and then add to the flour and salt once the yeast has risen (takes about 5 mins).

2. Now add water little by little and form the dough like regular chapati dough – Soft and smooth. No need to knead.

3. Keep for rest covered in a warm place for an hour.

Note: It might not rise much but that’s fine, it will have a yeasty smell to it which shows it has acted in the dough. In cold places, keep for 2 hours since it will take longer for the yeast to act.

4. While it’s kept for rest, prepare the dressing. Melt the butter in a microwave or in a pan. Add finely chopped garlic, coriander leaves and herb seasoning. Also add chilli flakes if you like (I avoid for my kids)

5. Once the dough has finished resting, preheat the oven at 200 C for 10 mins. Take a oven proof plate. Grease with oil and sprinkle dry wheat flour over it. Spread the dough in circle shape over it as shown.

6. Now apply half of the dressing evenly over it.

7. Spread mozzarella cheese evenly over it.

8. Fold and seal the edges as shown.

9. Apply the rest of the dressing over it and make evenly spaced cuts over it till three fourth of the semicircle. (reminds me of maths lessons 😁😁)

10. Bake in the preheated oven at 200 C for 15 mins in the center rack or till the surface turns golden brown in colour.

11. Allow it to cool slightly. Enjoy served with ketchup.

Notes:

* I use Pillsbury wheat flour for all my bakes. Love the flour as it makes the baked goodies perfect.

* There is no need to knead the dough. Just bring them together like chapati dough. That’s enough. But make sure the instant yeast is of good quality. If using dry active yeast, make sure to proof it as mentioned above in the step by step recipe.

* You can grate the garlic if you don’t like garlic bites in your garlic bread. Also add chilli flakes if you like it.

* Don’t keep opening the oven door while baking. Open only after 10 to 12 mins into the baking time. Else it can hinder the baking process.

* Preheating the oven is a very important step. Don’t forget it.

* This tastes best when eaten hot and consumed immediately after baking.

* The dough can be made beforehand and refrigerated to be used within two days.

* This is the same dough that I use for my Whole wheat Pizza which is a regular fare at my house and my kids’ favourite.

Wheat Banana pancakes | Snack idea for kids

My daughter gets attracted by fancy names and few months back, she came to me saying “Amma, I want pancakes!”. She had seen it in some video. I told her pancakes are nothing but our dosas, just sweet version of it like our amchi Surnalis. She just would not accept it and wanted me to make the original pancakes for her.

So, I had to look up for pancake recipe (since I had never made nor eaten it before) but found it rather unhealthy with maida (which we never buy) and sugar. So I substituted it with wheat flour and jaggery. It came out very well and she was very happy to see it. ❀️

From that day onwards, when she’s hungry, she asks me to make these pancakes. I have improvised it by adding bananas to it too as it helps me finish off the over ripe bananas (who stare at me to use them up 😁) and also makes the pancakes more nutritious.

My 2 year old son too loves it a lot and it fills my heart with happiness when I see them eating together dipping the little pancakes in honey and eating with their tiny hands. Beautiful memories which will be in me forever. ❀️

Hope you all try and love these pancakes too. Happy and healthy cooking!

RECIPE:

Ingredients: {Makes about 18 to 20 small pancakes}

2 Cups Whole wheat flour/ Atta

1 Cup mashed overipe Bananas

1/4 Cup Milk

1 Tbsp Jaggery powder (optional)

1/4 tsp Baking soda (skip if making for kids aged less than one year) * check notes

Salt to taste

Step by step recipe:

1. Add the mashed bananas and jaggery powder in a bowl. Mix well.

2. Sieve wheat flour, baking soda and salt in the same bowl.

3. Add milk and water to form a smooth, thick, lump free batter of slightly thick consistency.

4. Heat a flat pan and when it gets hot, pour the batter using a spoon onto the pan making small pancakes as shown.

5. Cover and cook on medium flame till the surface cooks. Add ghee over it.

Note: Be careful to cook on medium flame as high flame can cause the pancake to turn black underneath due to bananas.

6. Flip gently and cook for couple of minutes.

7. Remove and serve with bananas, butter and honey.

Notes:

* I make these pancakes without baking soda too and my kids love it that way as well. They don’t turn fluffy but turn out very soft like dosas.

* You can skip bananas if you don’t have. It comes out like regular pancakes.

* You can skip jaggery if the bananas are very sweet. Use overripe bananas for best results.

* I make sweet dosas similar to this. Just mix together wheat flour, jaggery and salt with water and make a slightly thick batter. Good for quick to make evening snacks for kids.

* For kids, cook the pancakes in ghee and serve with butter and honey with bananas on the side. It’s very filling and they are sure to love it too.

* Do cook these pancakes in medium flame and not high flame as it can cause it to turn black underneath.

Sprouted Moong chaat | Sev puri and Dahi puri

Welcoming my favourite chaat into my Chaat street page – Sev puri and Dahi puri. Since we don’t have any option of going out to enjoy chaats like before, I have learned to make them at home. Honestly, I am loving homemade ones more now as it turns so much tastier and I can customise it to make it healthy. These ones only have sprouts for filling instead of potatoes but still are loved a lot by my kids.

Children have this attraction to colourful unique looking foods and these puris are no less. They come running when I assemble them and can’t wait to gobble them down. My daughter is someone who can’t tolerate spice at all (she finds regular ketchup spicy sometimes and hates onion as she says it’s spicy too πŸ˜‘πŸ˜‘), so her puris are only with moong filling, date chutney, yogurt mix, coriander leaves and bhujiya. Still she goes “oohh Ammaaaa. Yummmmmyyyyyy” over it. 😁

My two year old is a huge fan of onions and eats his with loads of onions and sprouted moong in it. Also a huge spice lover (who eats green chillies as it is from my upma and gives his best smile when I show shock on my face πŸ˜…), so green chutney too for him.

This is how my kids enjoy this chaat. Hope your kids enjoy it too. Happy and healthy cooking!

RECIPE:

Ingredients:

2 Cups Sprouted Green gram or Moong (check how to sprout moong here)

1 medium sized Onion, finely chopped

4 Tbsp finely chopped Coriander leaves

Coriander leaves – Mint chutney (as needed) *check notes

Dates Tamarind chutney (as needed) * check notes

1/4 Cup Yogurt or thick Curd (for dahi puri)

1 tsp Pani Puri masala or chaat masala

Salt to taste

Bhujiya or Sev (as needed)

Step by step recipe:

1. Pressure cook the sprouted moong with little salt and water enough to cover it for 2 whistles (depends on the cooking range) or till they turn soft.

2. Keep the coriander leaves – mint chutney ready (check recipe in notes). Also keep the dates Tamarind chutney ready. For making homemade Tamarind chutney, check notes below the recipe.

3. Keep the finely chopped onions and coriander leaves ready. Also mix together yogurt with salt and Pani Puri masala or chaat masala together free from lumps.

4. I microwave the readymade papads and they puff up well. Check notes for more details. Bring all the ingredients together.

5. Make a hole with your fingers in each puri and add little boiled moong along with onions and coriander leaves.

6. Now add both coriander leaves chutney and Dates Tamarind chutney along with bhujiya for Sev puri. Add the Yogurt mix too for Dahi puri. Top with more bhujiya.

7. Serve immediately or else it will turn soggy.

Notes:

* You can check how to sprout moong here. I have added detailed step by step pictures there.

* For coriander leaves- mint chutney, grind together about 6 to 8 sprigs of coriander leaves with about 10 mint leaves and 3 green chillies with salt, Pani Puri masala / chaat masala and little water to a smooth paste. You can also refrigerate this and use when needed.

** For making Pani for Pani puri, grind together 6 to 8 sprigs of coriander leaves with 1 Cup mint leaves, 2 green chillies, salt and Pani puri masala or Chaat masala with water to a smooth paste. Sieve this in a bowl. Add water as needed to make Pani. Add lemon juice as per your taste.

* I use Mother’s recipe brand of Dates Tamarind chutney. For making it at home, Soak about 6 to 8 dates for 30 mins in warm water and grind along with tamarind, jaggery and salt to a smooth paste.

* For the puris, I have bought these ready to be fried puris long back (more than 2 years actually) and still they are good. I just microwave it on high for 1 minute and they are ready. You can get these readymade puris like papads in your grocery stores.

Alternatively, you can also deep fry like you do for papads..

* You can add mashed potatoes too for filling but I add only boiled sprouted moong so that my kids eat more of the sprouts. In fact, this chaat is their favourite and they don’t realise they are eating sprouts as this is a unique way for them. (Mommy tricks 😁)

* You can check my Chaat Street page for chaats like Masala puri, Bhel puri, Charmbure Upkari and Paneer pav bhaji.

* Also, since my kids love dosas, I also make this Moong sprouts and Oats dosa for them which they love.