Tag Archives: Carrot

Carrot Kismuri | Konkani style salad

Click on the image to save the recipe on Pinterest

Most days, our dinner is just ukde pej (matta rice cooked soft, eaten with its gruel) and couple of accompaniments to go with it. As much as it may seem from my posts that I cook a lot, our daily meals are very simple and basic.

One of the reason why I don’t (or rather can’t) cook elaborate meals are my kids who hardly give me time in the kitchen (I know it’s hard to believe πŸ˜€). My son pulls my dress (he literally roams around behind me with his fingers clutching my dress πŸ˜‚ #fevicolkajod πŸ˜…) asking me to play football with him while my daughter who loves colouring asks me to draw something for her to colour (One is making me a footballer and the other, an artist 😬😬).

But my time passes very well and both the activities are so good to calm the mind. Never knew drawing is such a stress reliever. And about football, try playing it with a two year old who knows only to laugh when you kick the ball. It’s such precious source of happiness that I can’t thank God enough for blessing me with both of them. ❀️

And on days when they don’t leave me to cook at all, this carrot kismuri or Konkani style salad is our accompaniment for the day. Very quick to make, hardly taking 10 mins and tastes heavenly with pej and some pickle to go with it. The kids love it very much which makes it a perfect side dish for busy days.

Hope you all try and love it too. Happy and healthy cooking!

RECIPE:

Ingredients:

2 large Carrots, peeled and grated (about 2 Cups grated carrots)

3 Green chillies or to taste

1/4 Cup freshly grated Coconut

3 Tbsp finely chopped Coriander leaves

Juice from 1 1/2 Indian lemons

Salt to taste

For seasoning:

1 tsp Coconut oil

1/2 tsp Mustard seeds

A pinch of Hing or asafoetida

One sprig of curry leaves

Step by step recipe:

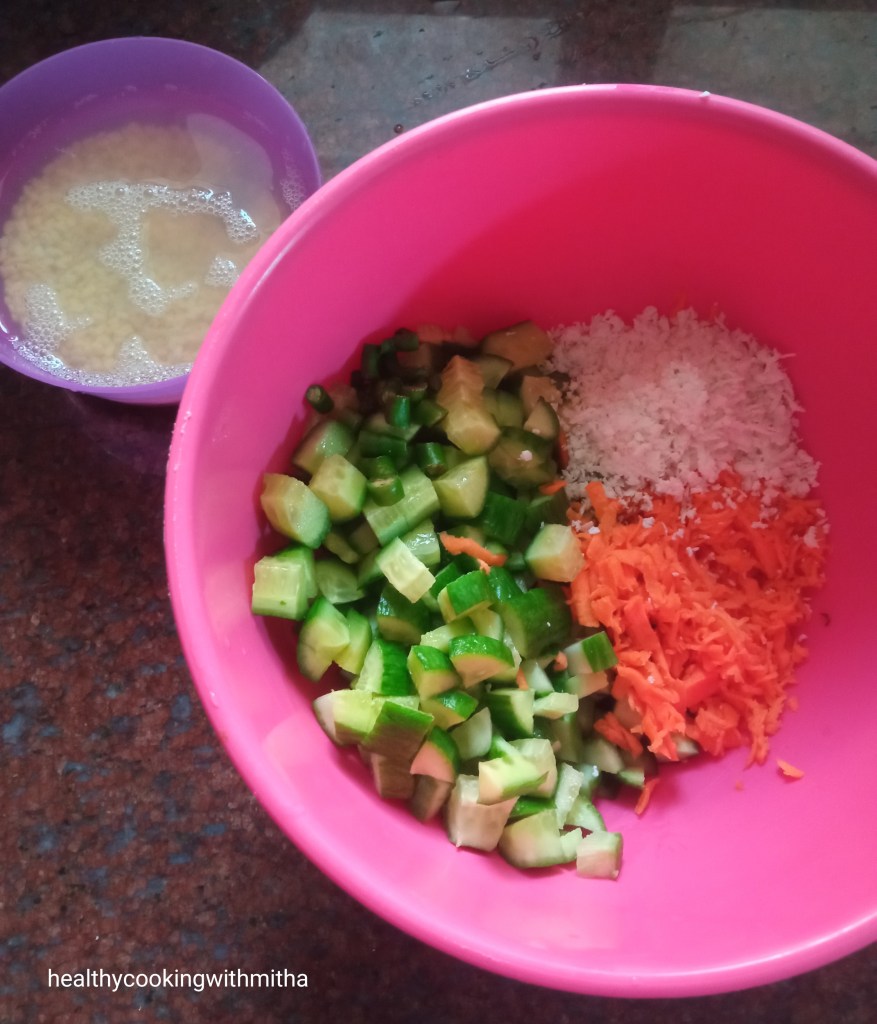
1. Take the grated carrots in a large mixing bowl. Add grated coconut, green chillies, salt and lemon juice.

2. Now heat oil in a pan and splutter mustard seeds, add Hing and curry leaves. Fry till curry leaves turn crisp. Pour seasoning over the carrots. Mix everything well. Done!

3. It’s really that simple. Serve along with white rice and rasam or matta rice gruel with some pickle. Trust me, it tastes delicious!

Notes:

* You can add finely chopped onions to this too but I skip as after a while, it starts smelling. If made without onions, I can make even couple of hours beforehand and keep at room temperature.

* Some people add a tsp of Urad dal to the seasoning but I prefer only mustard seeds in it.

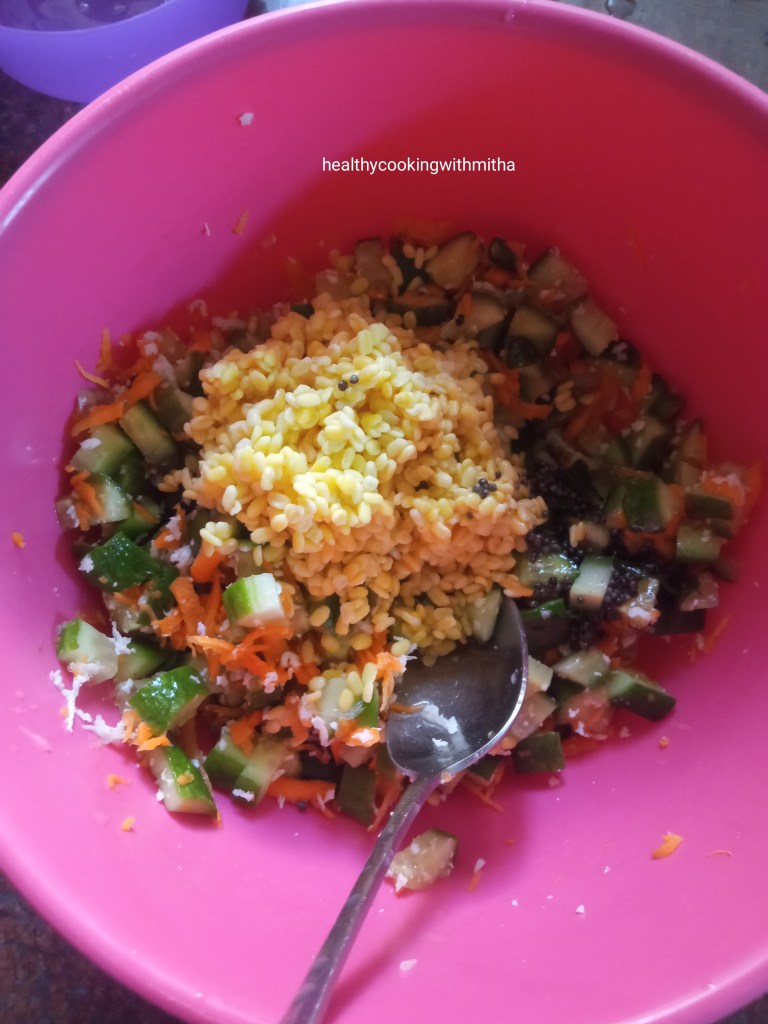
* If you add soaked moong dal and cucumbers to this, it becomes Kosambari which is another accompaniment that I make regularly. You can check the recipe here.

Click on the image to save the recipe on Pinterest

Moong dal Kosambari | Konkani style seasoned salad

Click on the image to save the recipe on Pinterest.

I have been blogging continually for a week now and my readers must be wondering what kind of energy has got into me πŸ˜…. Actually I realized how much time I was wasting in overthinking and felt it was best if I deviate my time towards something productive. So here I am with my son sleeping in my arms completing his evening sleep while I am blogging with my favorite songs in the background on spotify instead of random browsing or feeding my moody thoughts (which are sometimes too much to handle for the sensitive me 😬).

This kosambari is my favorite accompaniment to our rice meals. It is quick to assemble, very healthy with protein rich moong dal and tastes yummy too. People from Karnataka and Konkanis know this as they have grown up eating it at home, in temples and even in weddings.

There are many variations but this is how I make kosambari. It can beat any exotic salad in terms of taste and I am sure will won’t be able to stop eating it. It’s a favorite of my family and I have to make a huge bowl of it. Even then I hardly get to eat couple of spoons of it (my son comes when I eat my dinner and finishes off my share of the kosambari too πŸ˜‚).

Hope those who don’t know will try and love it. Happy and healthy cooking!

RECIPE:

Ingredients:

1/4 Cup Moong dal

3 English cucumbers ( I use them as Indian ones are rarely available here)

1 Carrot, peeled and grated

3 Green chillies or to taste

3 Tbsp freshly grated coconut

Juice of one Indian lemon

Salt to taste

For seasoning:

1 tsp Coconut oil

1 tsp Mustard seeds

Few curry leaves

A pinch of Hing powder

Step by step recipe:

1. Soak moong dal in almost double the amount of water for about 30 to 45 mins. It will swell in size and when you bite, there will be no rawness in it. Then you can use it. Meanwhile, also wash well and chop cucumbers. Add cucumbers, grated carrot, green chillies and grated coconut in a mixing bowl.

2. When the moong dal is soaked, drain water from it completely and add to this along with salt.. Also heat oil in a pan, splutter mustard seeds and fry curry leaves slightly in it. Add Hing powder too. Then pour the seasoning over this.

3. Finally add lemon juice and mix well.

4. Serve with rice meals or enjoy as it is.

Note:

* Make sure to soak the moong dal well. When you taste and see by 30 mins, you will know whether it has rawness or can be eaten. If you feel it’s still raw, soak for more time. Anyhow, by maximum one hour, it will swell well and will be ready to be added to the salad.

* You can make this with cucumber alone or carrot alone but I love mixing both as it gives a good flavour and looks good too.

* Goes well as an accompaniment with rice and rasam.

Click on the image to save the recipe on Pinterest.

Sugar free Dates Carrot Halwa

My second sweet recipe for Navaratri after Mango Kesar Peda is this sugar free dates carrot halwa which is not only tasty but very healthy too. A healthier alternative to the regular carrot halwa which uses refined sugar.

I got this idea from my Dates Carrot cake which does not need sugar nor jaggery for its sweetness. Dates and carrots combine so well making it a heaven made match that it does not need anything else for sweetness.

So I decided to use this perfect match to make a healthier version of carrot halwa and I was so happy when it came out so delicious. My kids who absolutely adore carrot halwa did not realise the difference at all. They relished it a lot and I was one happy mommy. After that, it’s become a regular dessert for us and I can’t be happier.

Hope you all try and love it too. Healthier alternatives are not only an option but a need too. We should respect our body and eat as healthy as possible. Happy and healthy cooking!

RECIPE:

Ingredients:

3 Cups grated Carrots {I took 3 large carrots}

8 Dates { I used Khudri variety} * to make 1 Cup Dates paste

2 Tbsp Ghee

3 to 4 Dates

8 to 10 Cashews

8 to 10 golden Raisins

Step by step recipe:

1. Soak the 8 dates (deseeded) in water enough to soak it, for about 15 mins. Also keep grated carrots ready.

2. Grind dates in the soaked water to a smooth paste (in about 3 Tbsp water). Keep aside. (It gave me 1 Cup Dates paste.)

3. Heat ghee in a pan and add deseeded and quartered dates, cashews and raisins. Fry till cashews turn golden.

4. Now add the grated carrots and fry on medium flame till the carrots loses its rawness and change colour. Takes about 5 mins.

5. Now add the dates paste and mix well. Cook on medium flame till the carrots turn soft and the mixture leaves the sides of the pan getting well combined. (Takes another 5 to 8 mins. Do a taste test to see if the carrots are cooked well. If not, cook for little while more.)

6. Remove from flame and serve warm.

Notes:

* This halwa gets tastier when kept for couple of hours before serving as the carrots absorb the dates paste well and gets more delicious. So prepare little while beforehand if you have time.

* This is not like the regular carrot halwa with milk and sugar but definitely a healthier alternative and very tasty too for sure.

* I have purposely not added milk to this as dates is an ingredient. Dates are rich in iron whereas milk is calcium rich. Calcium hinders iron absorption in the body when consumed together. So I skipped milk in this halwa to make it more beneficial to the body. {Just as an after note, Vitamin C rich foods (lemon, tomato, orange) enhance absorption of iron in the body. So always consume them together with iron rich foods when possible.}

* 8 dates making 1 cup dates paste is perfect sweet for 3 Cups grated carrots. Lesser than that might not taste as good and more might be extra sweet while masking the taste of carrots.

* I have also not cooked carrots for long like traditional carrot halwa recipe as I did not want to reduce the nutritional value by doing so. Just saute well in ghee for 5 mins and then cook in dates paste for 5 to 8 mins. It will cook well.

Easy Vegetable Biriyani | Layered style

Before this Covid situation, our weekends would be Veg Biriyani from the nearby restaurant and I used to wait for it after bored of my own cooking. But since March, we have stopped restaurant foods completely and I started making Biriyani at home.

Though the initial few times it did not come out so well, now my husband says it comes out even better than restaurant ones. So I thought I must share this recipe with my readers as I know most of you must be cooking only at home and missing Biriyani from restaurants.

I feel homemade ones taste better mainly because of the pure ingredients that we use such as ghee as compared to the refined oil used in restaurants. Now I can’t imagine eating that and feel satisfied when my family loves the Biriyani I make. Don’t think we will ever go back to eating out. One of the many positives that Corona has taught us, I must say.

Hope you all try for your family and love it too. Happy and healthy cooking. Stay safe!

RECIPE:

Ingredients: {Serves 3}

For the rice layer:

1 1/2 Cups raw Basmati or any long grain rice, soaked for 30 mins

Salt to taste

2 Cardamom pods

2 Cloves

1 Bay leaf

For the gravy layer:

2 Tbsp Ghee

1 Tbsp Oil

1 tsp Cumin seeds or Jeera

1 tsp Fennel seeds

1 tsp Peppercorns

2 Cardamom pods

2 Cloves

1 Bay leaf

6 to 8 Cashews

1 large Onion, thinly sliced

2 Cups Mixed Vegetables (carrot, potato, beans, green peas) { I used frozen peas}

1/2 Cup Yogurt or thick Curd

2 tsp Red chilli powder or to taste

2 tsp Garam masala powder

1/2 tsp Haldi powder

Salt to taste

Other ingredients:

4 Tbsp finely chopped Mint or Pudina leaves

4 Tbsp finely chopped Coriander leaves

1/4 Cup Milk

A pinch of Saffron strands

Step by step recipe:

1. Boil water in a large pan. Add soaked and drained Basmati rice along with salt, cardamom, cloves and bay leaf. Cook till the rice is almost done. Keep aside to cool.

2. Heat ghee plus oil and add jeera, fennel seeds, peppercorns, cardamom pods, cloves, bay leaf and cashews. Fry till cashews turn brown. Add thinly sliced onions (with a pinch of salt) and fry till they start turning brown.

3. Now add the mixed vegetables and fry well for couple of minutes.

4. Add little water and cook the vegetables till almost done. Now mix Yogurt with turmeric powder, red chilli powder and garam masala powder till there are no lumps and it turns a smooth paste. Add to the cooked vegetables while mixing well on low flame.

5. Cook on low flame for about 5 mins. Remove from flame. Keep aside.

6. Now heat the saffron stands in milk for little while. I microwave on high for 1 minute till the colour of milk changes.

7. Now start layering. Take a large pan and first add a layer of the curry. I use the same pan in which I cooked the rice.

8. Now add a layer of the cooked rice (half of it) evenly over it. Add half of the saffron milk and half of the finely chopped Mint – coriander leaves evenly over it.

9. Now layer the rest of the curry over it.

10. And finally the rest of the rice along with the saffron milk and mint coriander leaves evenly over it.

11. Now take another large pan with little water in it. Place this layered Biriyani pan in it and cook covered well for atleast 20 mins in the lowest flame possible.

12. Remove and serve with raita.

Notes:

* Don’t cook the rice fully in the first step or it will get mashed when steaming after layering.

* This style of Biriyani may seem difficult than one pot ones but trust me, it tastes very delicious and is easier than other layered Biriyanis.

* The spice level is to taste. I don’t make the Biriyani spicy as my kids eat it as well. You can add more red chilli powder in the Yogurt if desired.

* Make the gravy thick and dry, not watery or the Biriyani won’t come out well.

* For raita, I add finely chopped tomatoes, onions, cucumbers, coriander leaves to yogurt with little water, salt and chaat masala. Mix well.

Instant Oats Vegetable Bhakri | Quick Oats Uthappam

Click on the image to save the recipe on Pinterest

As my regular readers know already, my kids love dosas and our morning usually starts with any variety of dosa. I have already posted many of them on my Dosa corner page.

Even though I make sure that I always have dosa batter handy for their dosa love, there are some days when it gets over and I am left wondering what to do apart from the Instant Oats Poha dosa that I make always when I don’t have dosa batter.

That is when I started making these oats vegetable bhakris and it was loved a lot by both kids. It hardly takes 15 mins to get the batter ready and it is very tasty and filling. Also a healthy snack option for evenings.

Hope you all try and love it too. Happy and healthy cooking!

RECIPE:

Ingredients:

2 Cups Instant Oats (I use Quaker or Saffola instant Oats)

1 Cup wheat Semolina/ Rava/ Sooji

1/4 Cup Curd or Yogurt (optional)

3 Cups water or as required

1/2 Cup grated Carrots

1/4 Cup finely chopped Capsicum

1/4 Cup finely chopped Onion

2 to 3 Green chillies or to taste

2 Tbsp finely chopped Coriander leaves

Salt to taste

Oil or ghee to cook the uthappams

Step by step recipe:

1. Take 2 Cups oats, 1 Cup rava, 1/4 Cup curd and salt in a large mixing bowl.

2. Add 3 Cups water and mix well to remove any lumps.

3. Add grated carrots, finely chopped capsicum and onions, green chillies and coriander leaves.

4. Mix well.

5. Heat a dosa pan and add a ladle of the batter. Spread into a thick dosa as shown.

6. Cover and cook till the surface cooks well.

7. Now add oil or ghee. Flip and cook for few minutes.

8. Serve hot with butter and chutney.

Notes:

* You can skip onion if you want but it gives a wonderful bite and flavour to the bhakri. Don’t skip capsicum though. It’s a main ingredient.

* I sometimes don’t need chutney with it too. Just the bhakri with butter tastes so delicious.

* Don’t spread the bhakri too thick or else it won’t cook inside. Cook both sides very well on medium to high flame.

* I have used instant Oats as it is (without powdering or roasting). You can use rolled oats but it might need powdering.

* You can skip curd if you don’t have. I make without it too sometimes. Does not make much difference.

Do let me know if you have any doubts. Will be a pleasure to help. πŸ™‚

Did you know Oats is such a versatile ingredient, you could make Cake, Idli, Paratha, varieties of dosas and even gluten free pizza with it?

Sharing all varieties of dishes in which I use Oats and make regularly. Eat healthy, be happy. ❀️

Variety Oats recipes Compilation

Click on the image to save the recipe on Pinterest

Dates & Carrot cake | Sugar free

Click on the picture to save the recipe on Pinterest

I love baking during my free time. Especially healthy bakes without sugar and using wheat flour instead of maida. My kids have been eating these cakes since they were babies and love them a lot. So I keep experimenting with different proportions and ingredients.

Dates and carrot cake is a commonly found cake in bakeries specially in Cochin where I have spent 13 years of my life. I used to ask my Aanu (my dad) to bring it for me when he went out to buy groceries. I never thought then that I would bake this cake at home and it would turn out exactly the same taste and texture.

Also this cake uses dates paste as main sweetening agent. So does not need sugar at all. Jaggery can also be skipped if you don’t have an extra sweet tooth. Hence best for people who don’t want any form of refined sugar in their diet.

I feel happy to share my bakes as I am really proud of them. Hope you all try and love it too. Happy and healthy baking!

RECIPE:

Ingredients: { 1 Cup = 240 ml}

Dry ingredients:

1 Cup whole wheat flour/ Gehun ka Atta (I use Pillsbury brand)

1 tsp Baking powder

1 tsp Baking soda

1/2 tsp Salt

Wet ingredients:

1 Cup peeled and grated Carrots

1 Cup Milk (Use 1/2 Cup to soak the dates and 1/2 Cup to add to the mixture)

3/4 Cup Dates (after removing seeds)

1/4 Cup Ghee

1/4 Cup Jaggery powder (Optional)* check notes

Step by step recipe:

1. Soak dates in 1/2 Cup milk for about 30 mins to an hour till it turns soft. Grind the soaked dates and the milk to a smooth paste. After that preheat the oven at 180 C for 10 mins.

2. Sieve together wheat flour, baking powder, baking soda and salt in a bowl. Keep aside.

3. In another bowl, take the dates paste, grated carrots, ghee and jaggery (if using).

4. Mix well using spatula. Now add the dry ingredients to wet ingredients and fold well. Do NOT overmix. Just mix once so that the flour specks are not seen.

5. Now add the rest of the 1/2 Cup milk and mix once.

6. Grease the loaf pan with ghee and pour the batter into the pan. Level using spatula.

7. Bake at 180 C for 30 to 35 mins or till a toothpick inserted in the center comes out clean.

Note: Every oven is different. So keep an eye after 25 mins so that the surface doesn’t turn black.

8. Allow it to cool completely. The top surface may be hard when you touch. It will be super soft as it cools down. Invert, slice and serve.

Notes:

* This cake tastes sweet even without jaggery as it has dates paste and carrots but since my kids have an extra sweet tooth, I add 1/4 Cup Jaggery. You can reduce or completely skip it if you don’t like cakes extra sweet.

* Please see that you divide the 1 Cup milk into two halves. 1/2 Cup milk to soak the dates and 1/2 Cup milk to add to the mixture as last step.

* Grind the dates in the soaked milk itself. Don’t add extra milk or water while grinding.

* My cake takes exactly 30 mins at 180 C. Every oven is different. So keep an eye after 25 mins so that the surface doesn’t turn black.

*Allow the cake to cool completely. The top surface may be hard when you touch. It will be super soft as it cools down.

* Lasts well for couple of days at room temperature if kept in an airtight container and handled well. Tastes even better the next day and the texture turns even softer.

* If you are new to baking, I have written an article combining all notes and pointers that I learnt in my decade long baking journey. You can check that if needed – Baking Basics for Beginners

* You can also check my Healthy Cakes and Cookie recipes Compilation for more healthy baking.

* Dates in cakes taste so heavenly and my Dates Chocolate Brownie and Dates Oats Cake recipes are examples to that.

I have tried to note down as much points as possible so that it’s easy for you all to follow but if you still have any doubts, either comment here or message me on my Facebook pageΒ Healthy cooking with mitha and I would be happy to help. Happy baking!

Click on the picture to save the recipe on Pinterest

Narangi Shorba | Orange flavoured Pumpkin soup

Pumpkin is a common vegetable in our home as we love making simple upkari (stir fry konkani style) with it to go with our matta rice congee (gruel) for dinner. It’s a simple soul food that we enjoy during week days. Kids too love pumpkin very much.

Along with upkari, I also make this soup regularly specially as evening snack for kids. It is filling, tasty and very healthy. Also since pumpkin is thick in texture, there is no need to add any thickening agent like corn flour or cream to this soup.

It not only turns thick but also delicious to slurp on. Orange juice gives it the tangy flavour and also the gorgeous colour. Hope you all try it too. Happy and healthy cooking!

RECIPE:

Ingredients:

2 Cups peeled and chopped Pumpkin

1/2 Cup peeled and chopped Carrot

1/2 Cup chopped Onion

1/4 Cup freshly squeezed Orange juice

3 Green chillies

1 Tbsp Butter

1/2 tsp Pepper powder

Salt to taste

Step by step recipe:

1. Add the pumpkin pieces, carrots, onions and green chillies with little water in a pot and cook till the veggies turn soft and water almost evaporates.

2. Grind to a fine paste adding water only if needed.

3. Pour into the pot and add water to bring it to pouring consistency (use water to clean the mixer). Add butter, salt and pepper powder.

4. Mix well and add orange juice. Bring to a boil.

5. Remove and serve hot.

Notes:

* Skip orange juice if you don’t have and add lemon juice instead after removing from flame to get the tangy flavour.

* You can garnish with cream too if needed but we prefer it plain.

* Enjoy with bread croutons or crisps.