Tag Archives: Easy

Easy to make, healthy and delicious sweet recipes |Ready in 15 mins sweets

I am in many Facebook food groups and it is now filled with people posting many varieties of sweets along with savories as they are all set to welcome the most favorite festival, Diwali. It makes my heart warm to see the enthusiasm and happiness of everyone in the groups. Many of the members have become so close to me that I feel like they are my own family. Their encouragement for a beginner like me is truly very overwhelming. Thank you to all my readers from food groups. ❤️

This is just a compilation of my easy sweet recipes for people who have not yet made any sweets and want to make atleast one to celebrate the occasion. These get ready in about 15 mins and are healthy along with being kid friendly too. So good for busy mommies like me. Hope you all try and like them.

Wishing all of you a very happy Diwali. May the festival of lights bring happiness in your lives. ❤️

Please click on the name or the picture for the recipe.

1. Easy Coconut Burfi: These are really easy to make which I learned from “The Konkani Saraswat Cookbook” by my dearest Asha Satish Philar mai. It was one of the first sweets that I learnt and even my 5 year old daughter knows to make it.

Recipe here: Easy Coconut Burfi

2. Microwave Mango Coconut ladoos: This is yet another easy recipe which I learned in my initial days of cooking. Hardly takes few minutes to make but tastes really amazing. Do try if you have mango pulp with you and you love coconut.

Recipe here: Microwave Mango Coconut ladoos

3. Jaggery Sheera: One of the most made sweet in my house as it is my family’s favorite. I used to make Sheera with sugar initially but switched to jaggery many years back and have never looked back. Tastes really delicious!

Recipe here: Jaggery Sheera

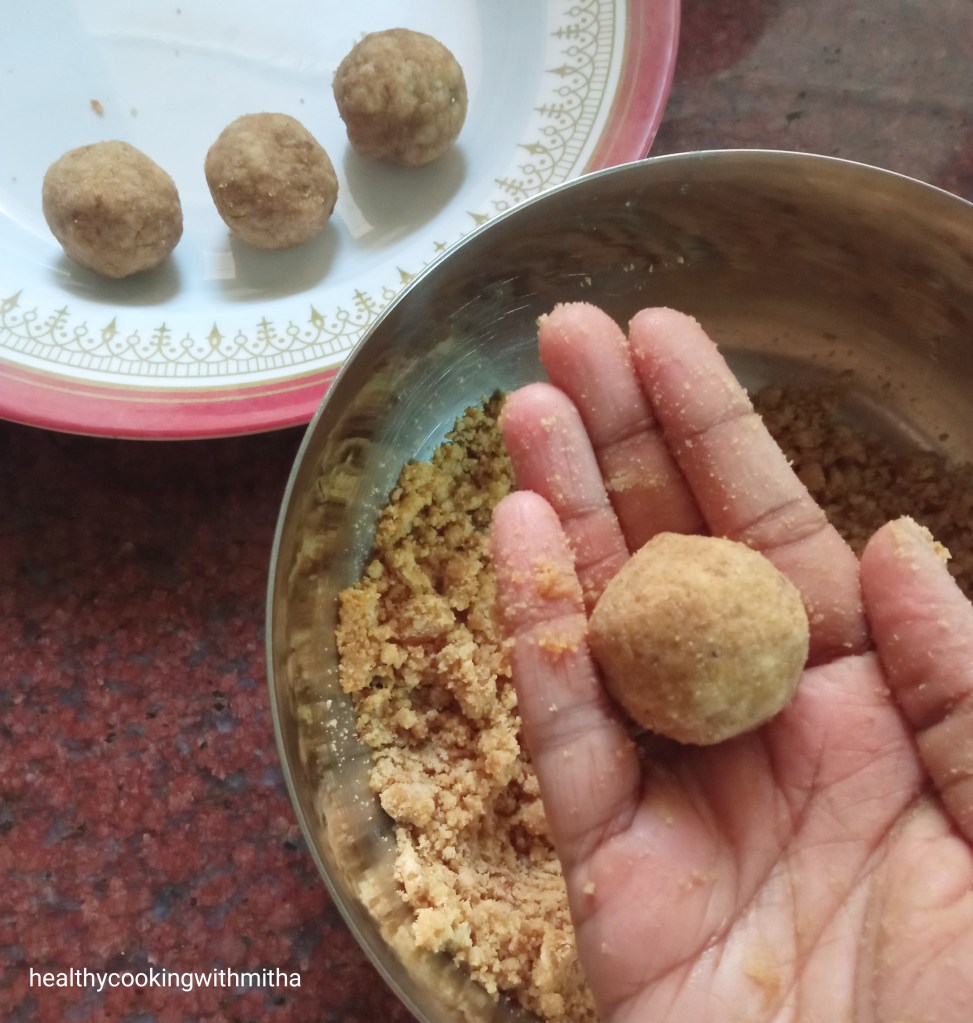
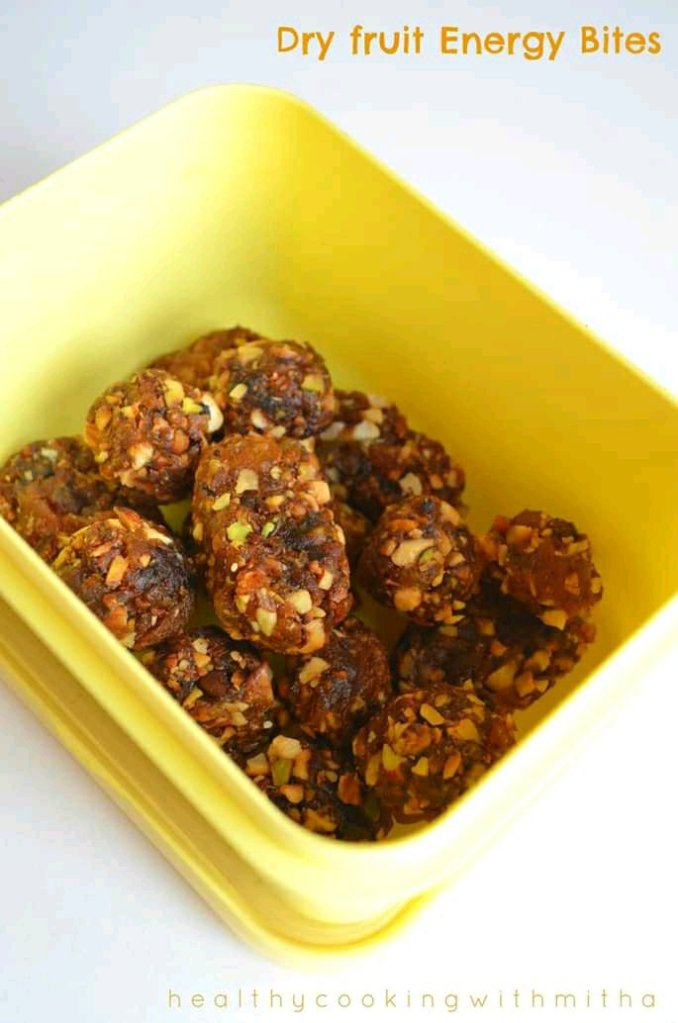
4. Dry fruit bites: These are sugar free and very tasty along with being very healthy too. My way to feed dry fruits to my kids which are very beneficial to their growing body if consumed regularly in limited quantity.

Recipe here: Dry fruit bites

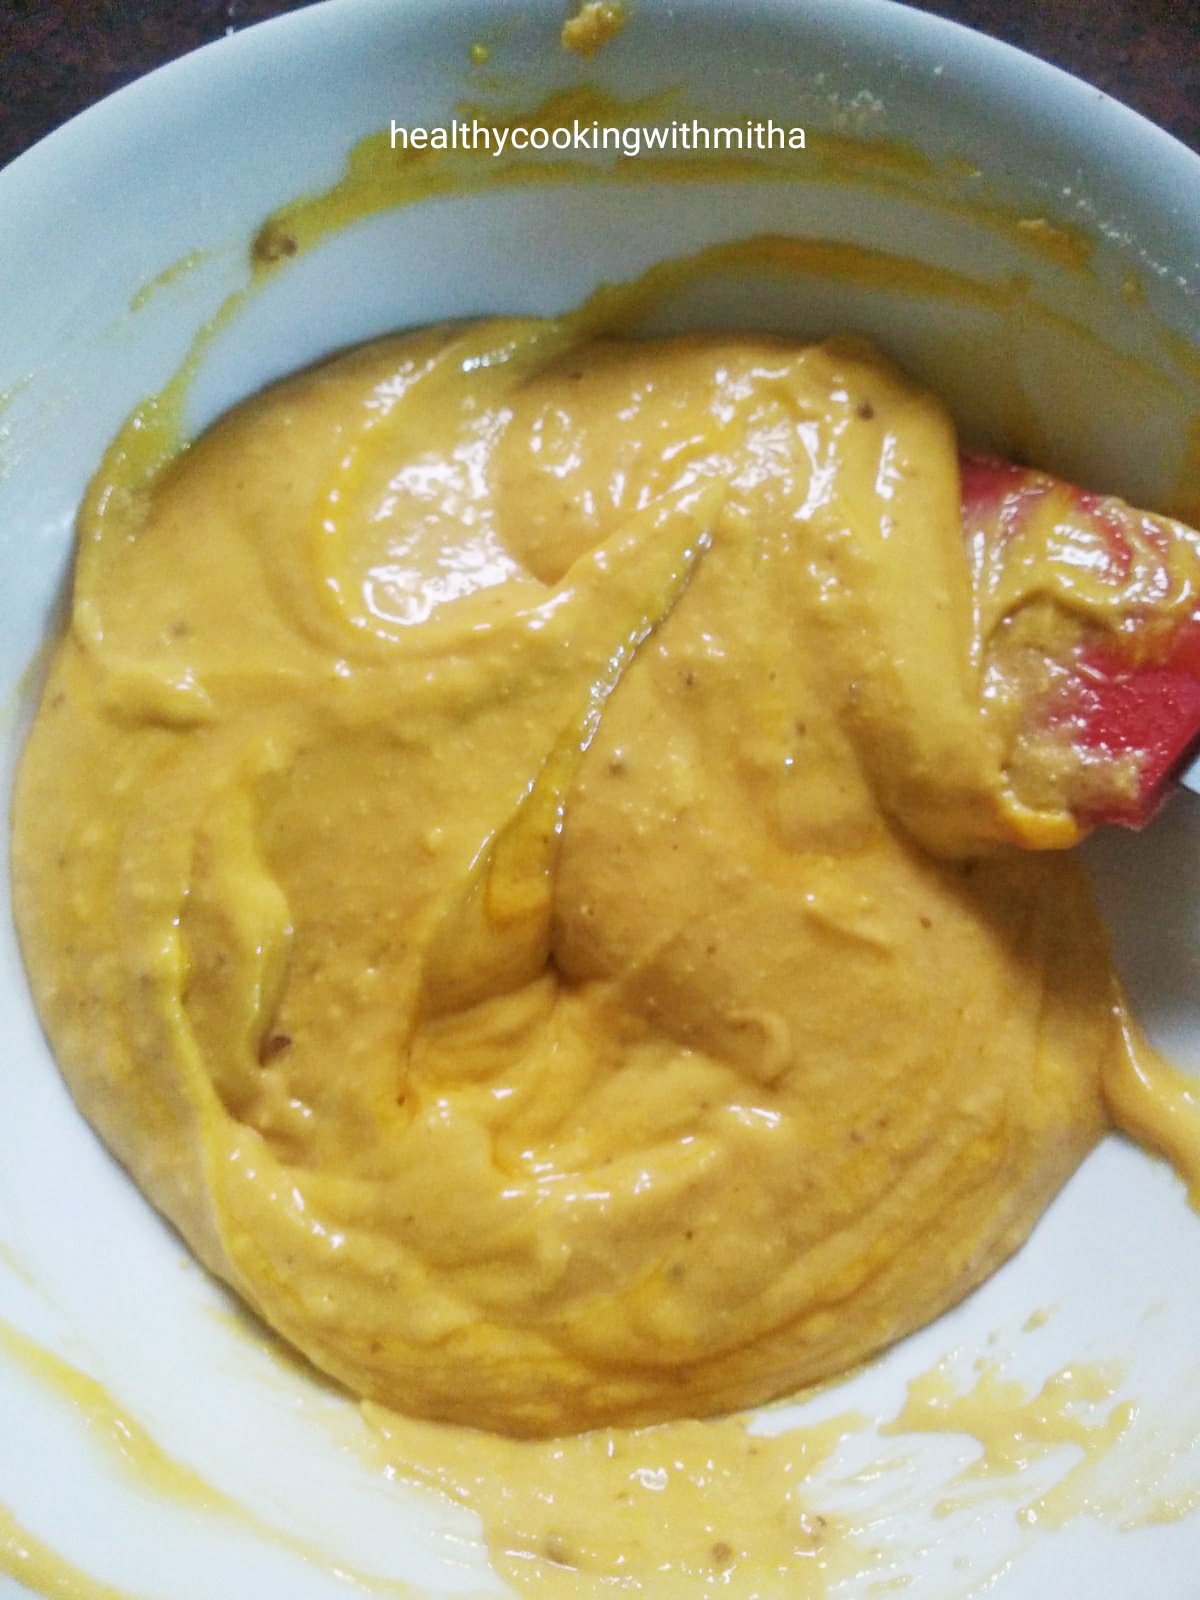
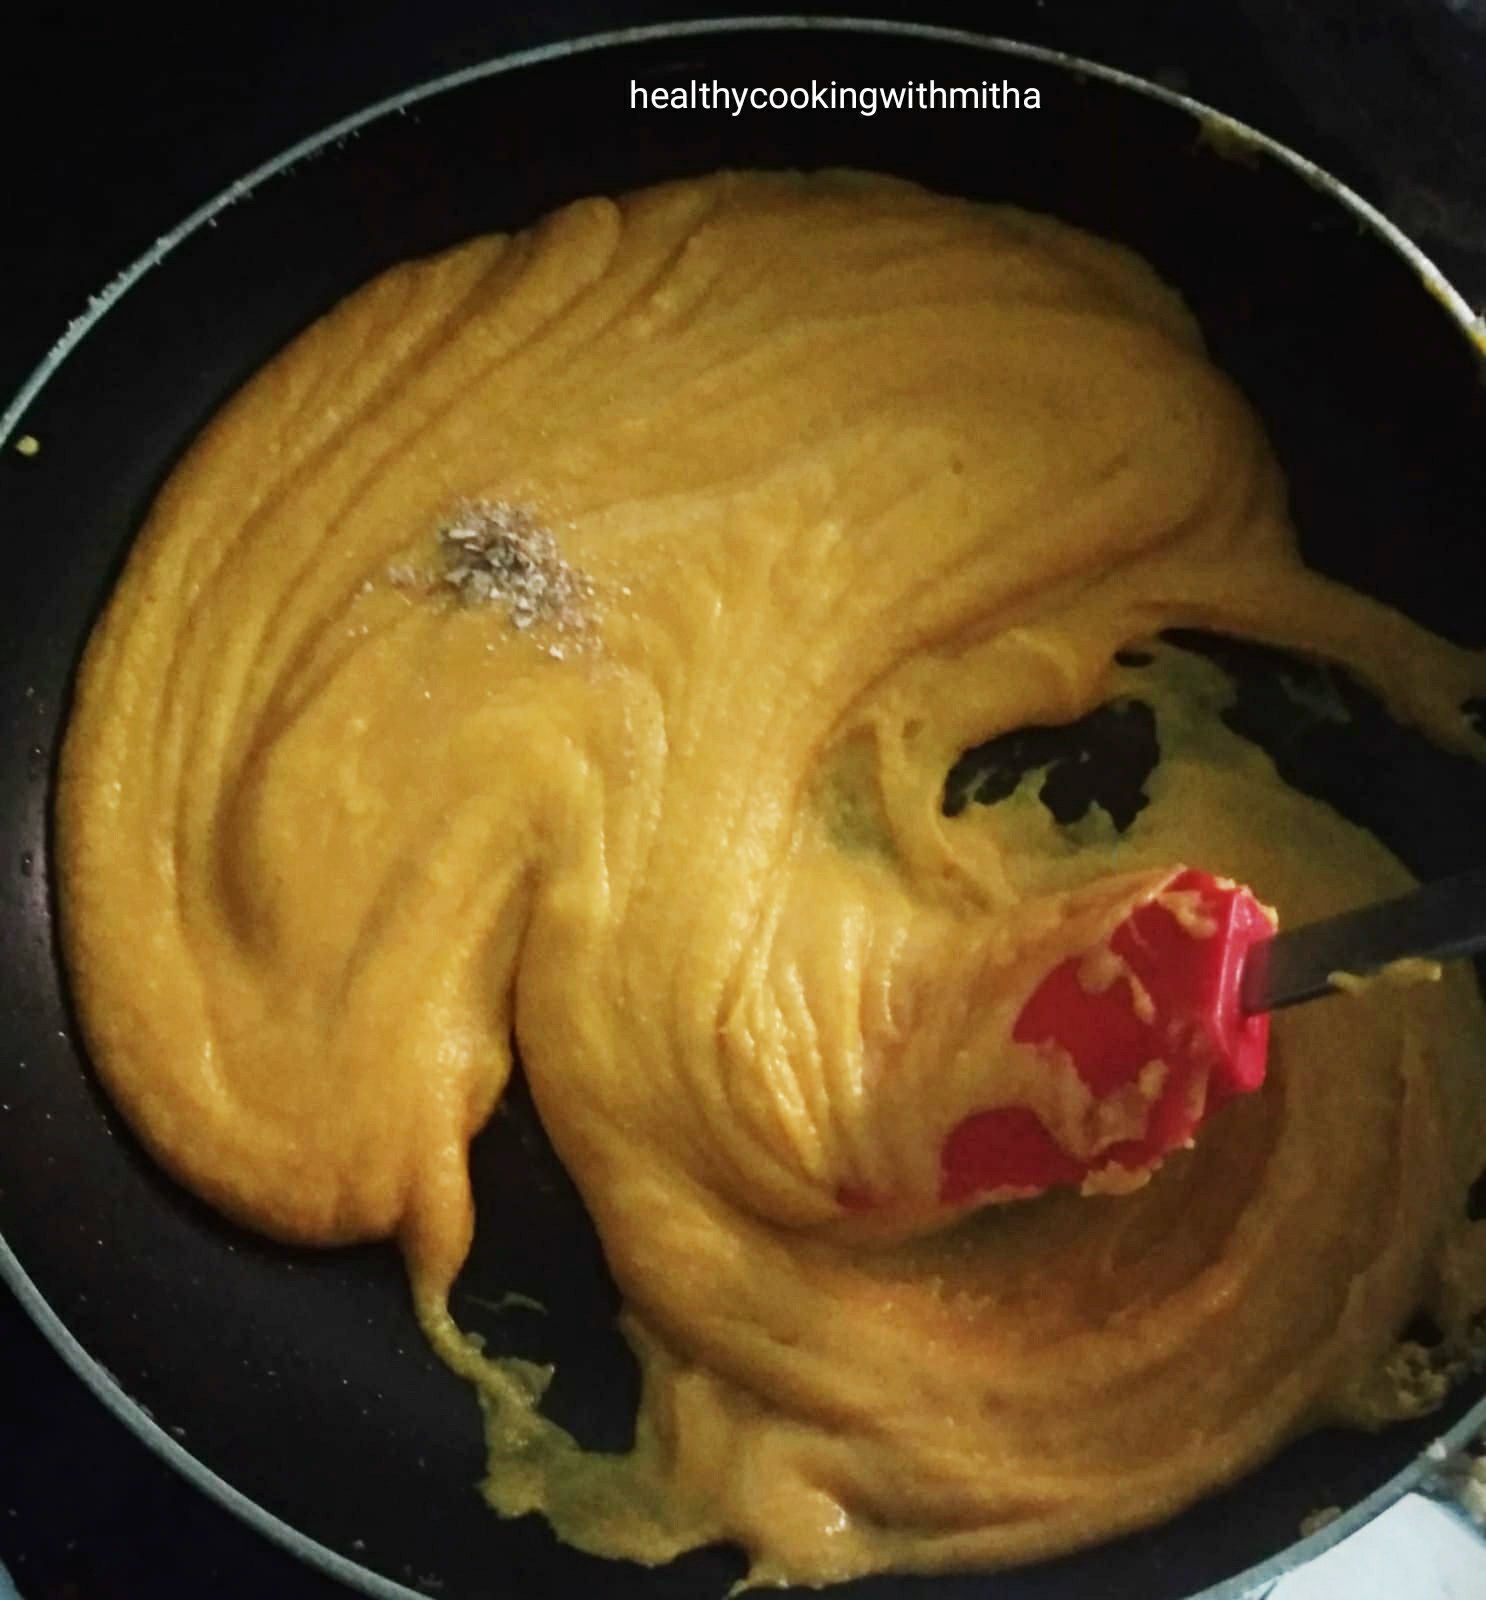
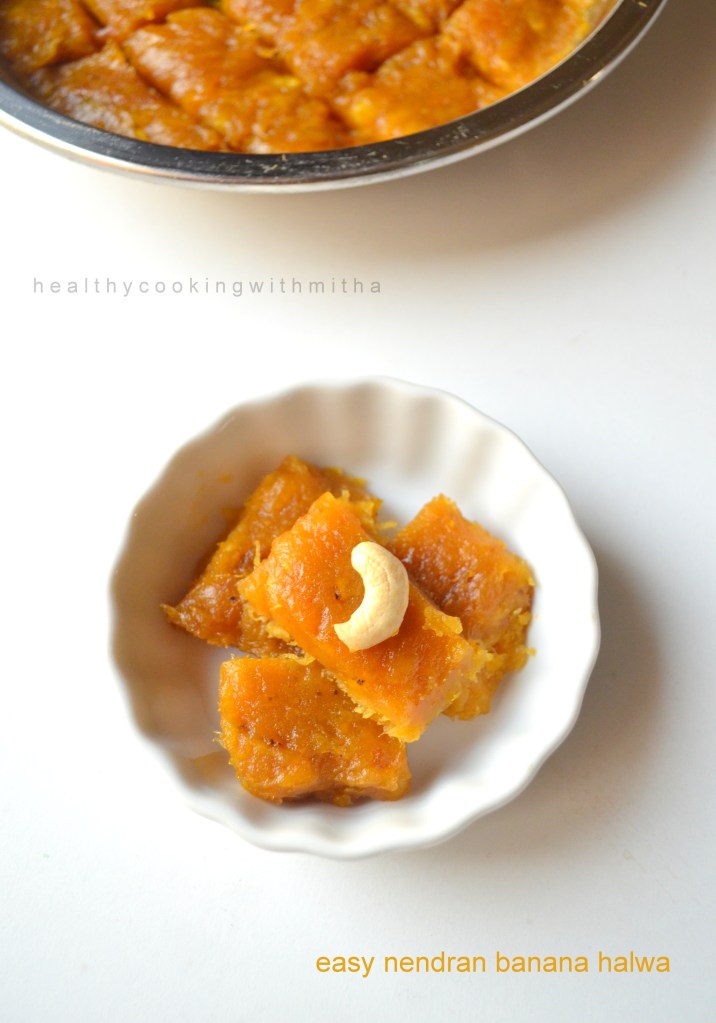
5. Nendran Banana halwa with Jaggery: This is the easiest version of the halwa which gets ready within 15 mins. Many of my readers have tried and loved this. It is another way to feed this healthy banana to my kids who love this halwa.

Recipe here: Nendran Banana halwa with Jaggery

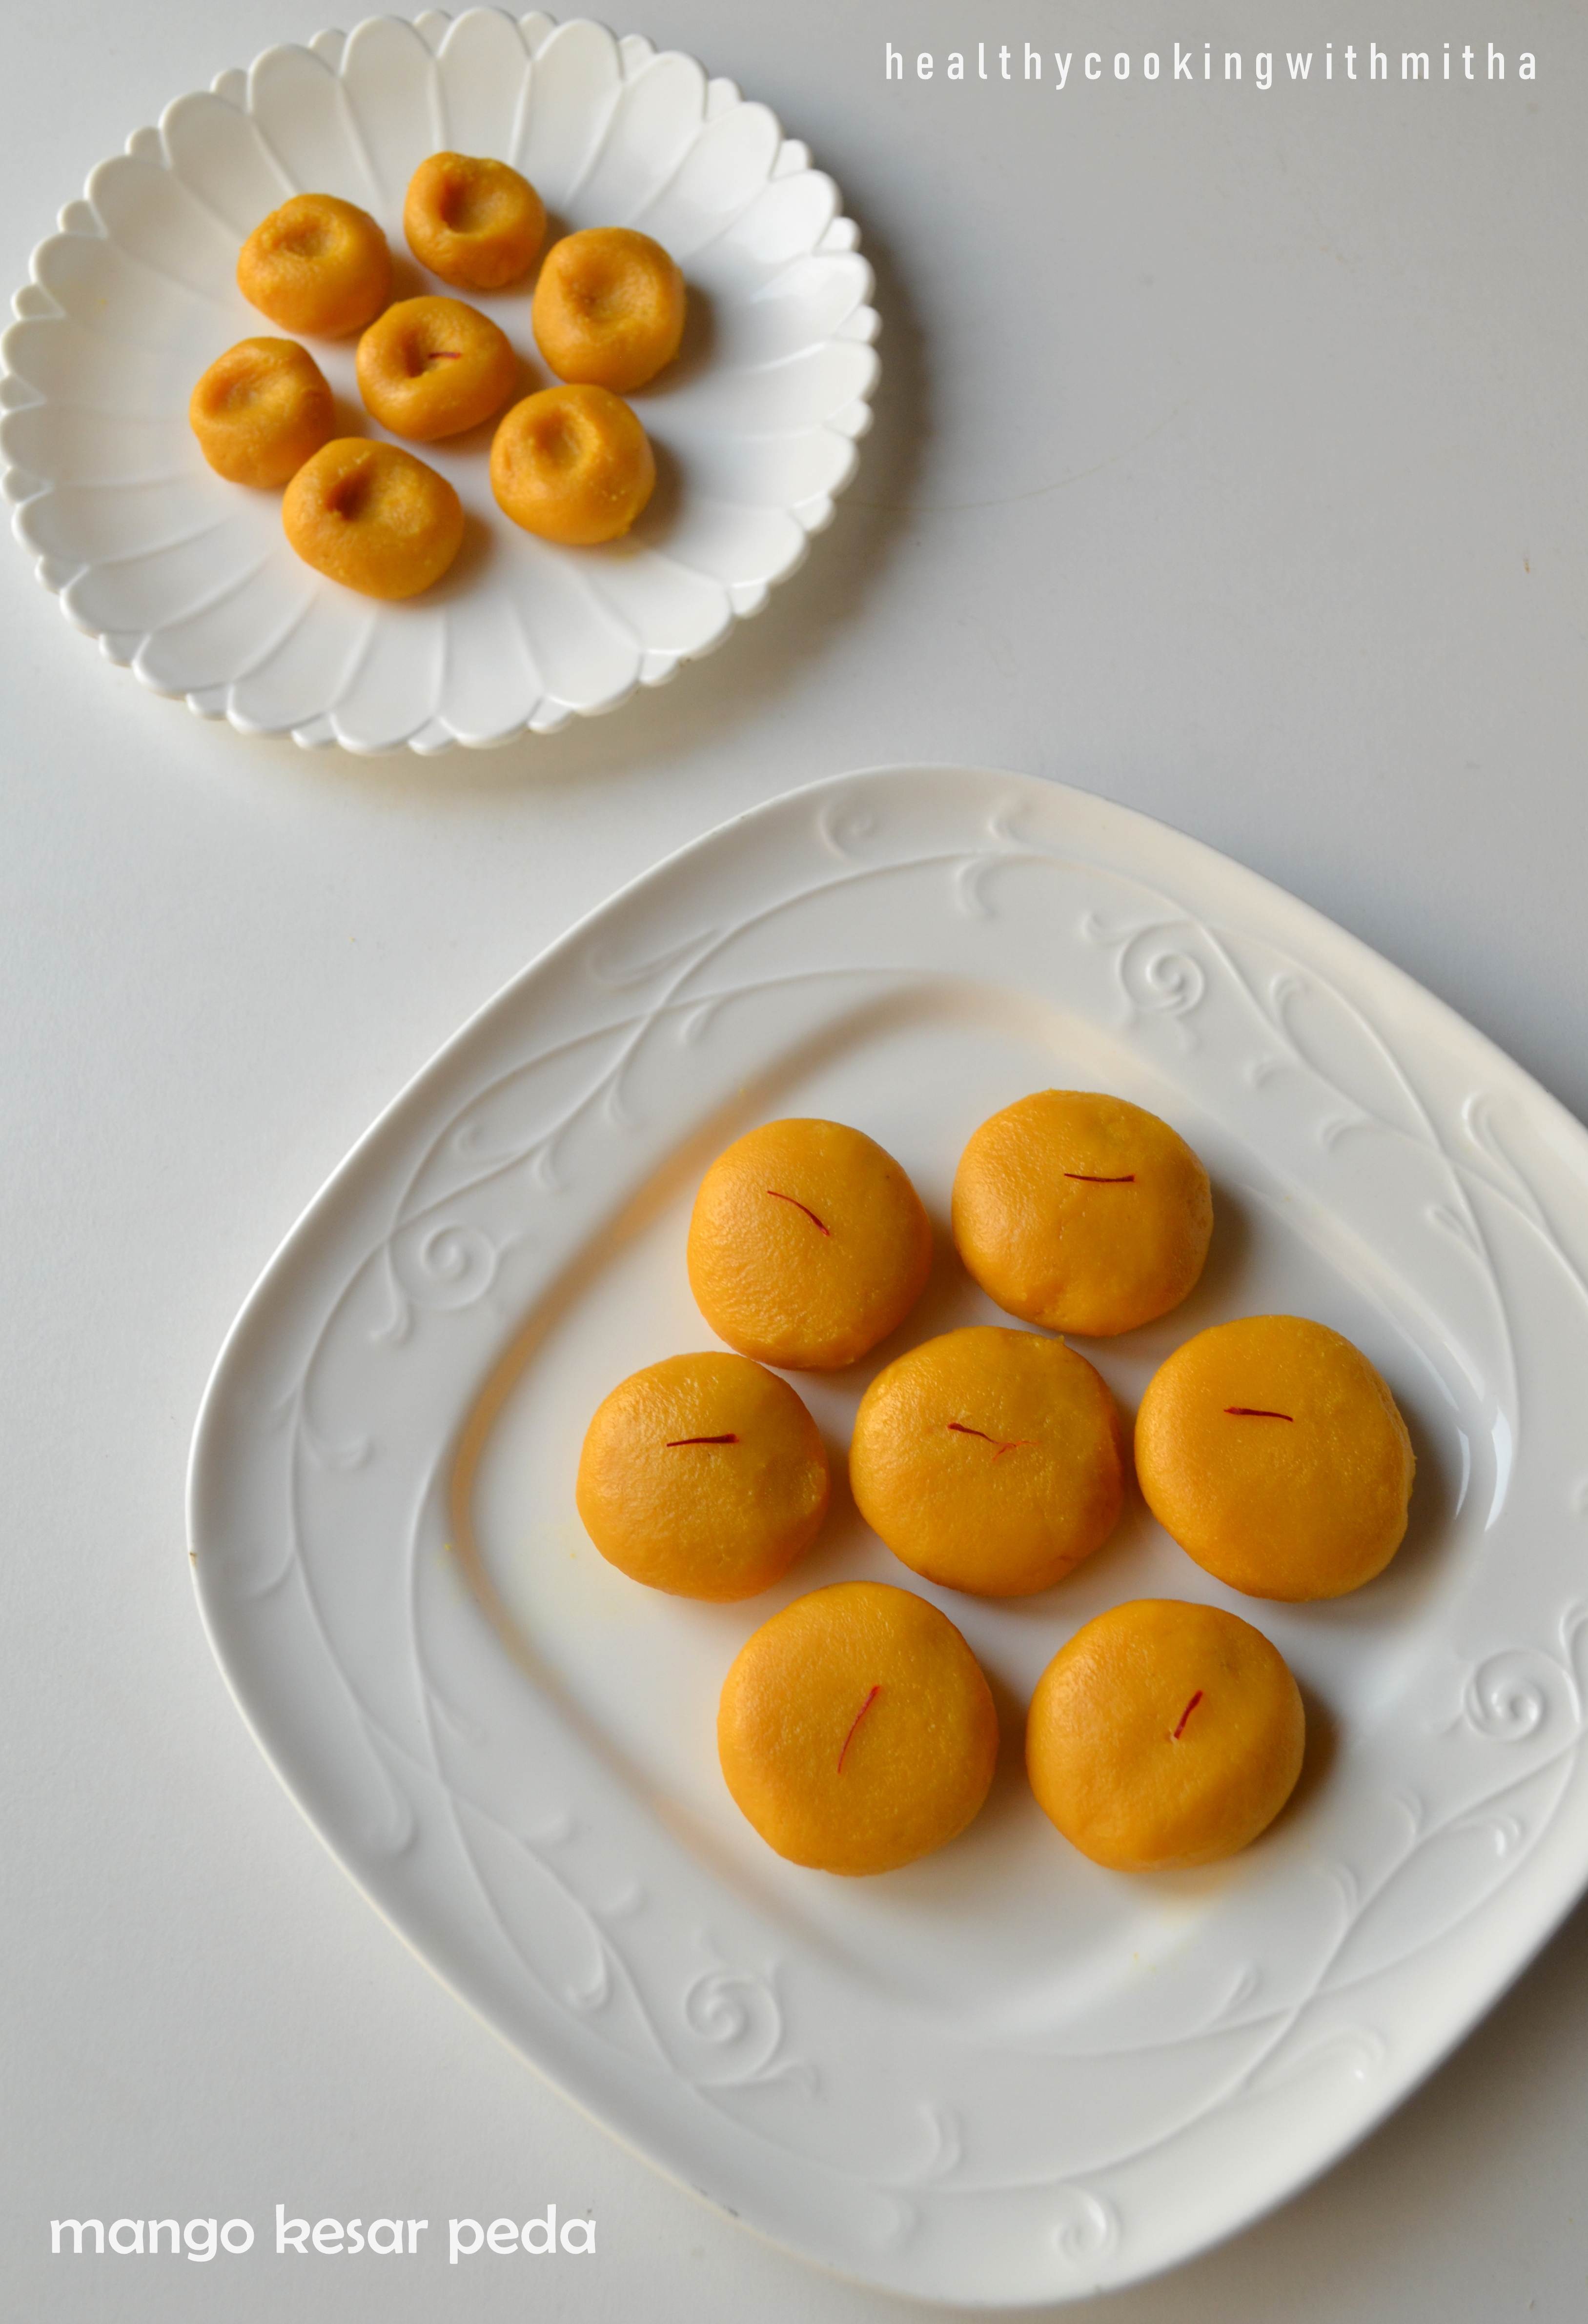
6. Mango Kesar pedas: The tastiest pedas you can ever make. Very easy too and gets ready within 15 mins. If you have mango pulp, do try this and you won’t regret it. I love how beautiful they look too.

Recipe here: Mango Kesar pedas

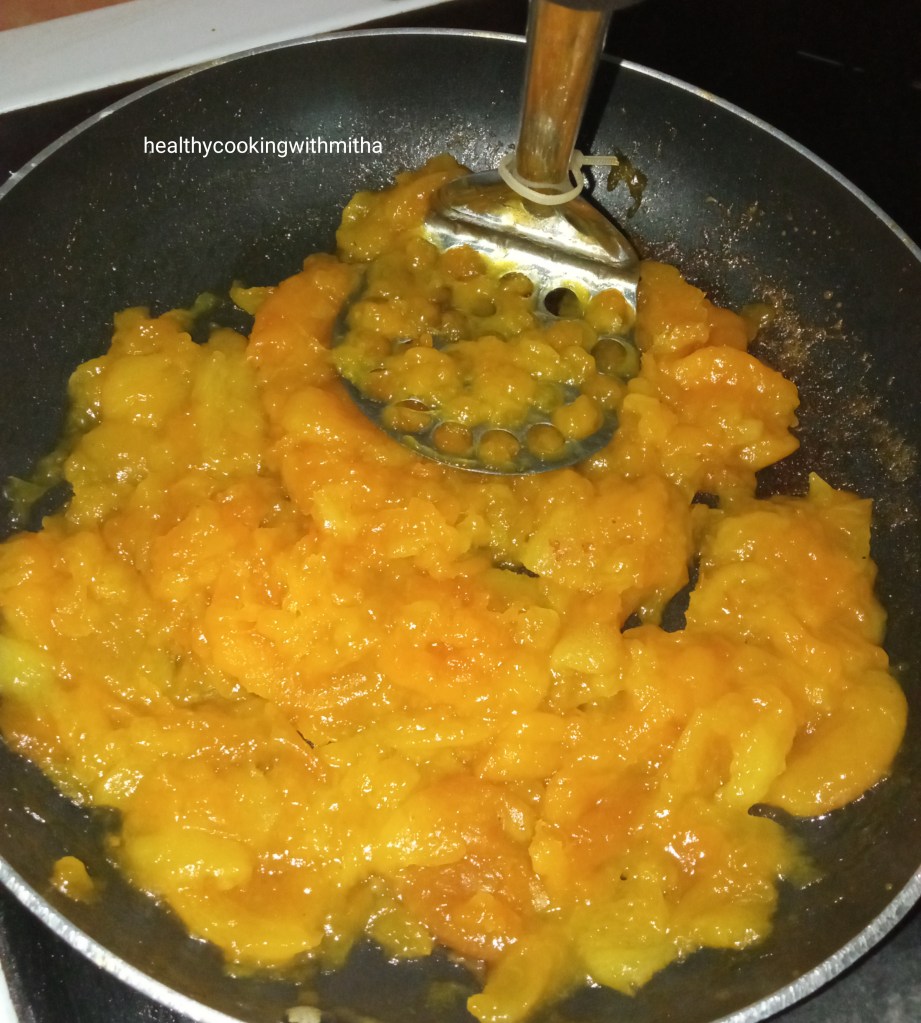
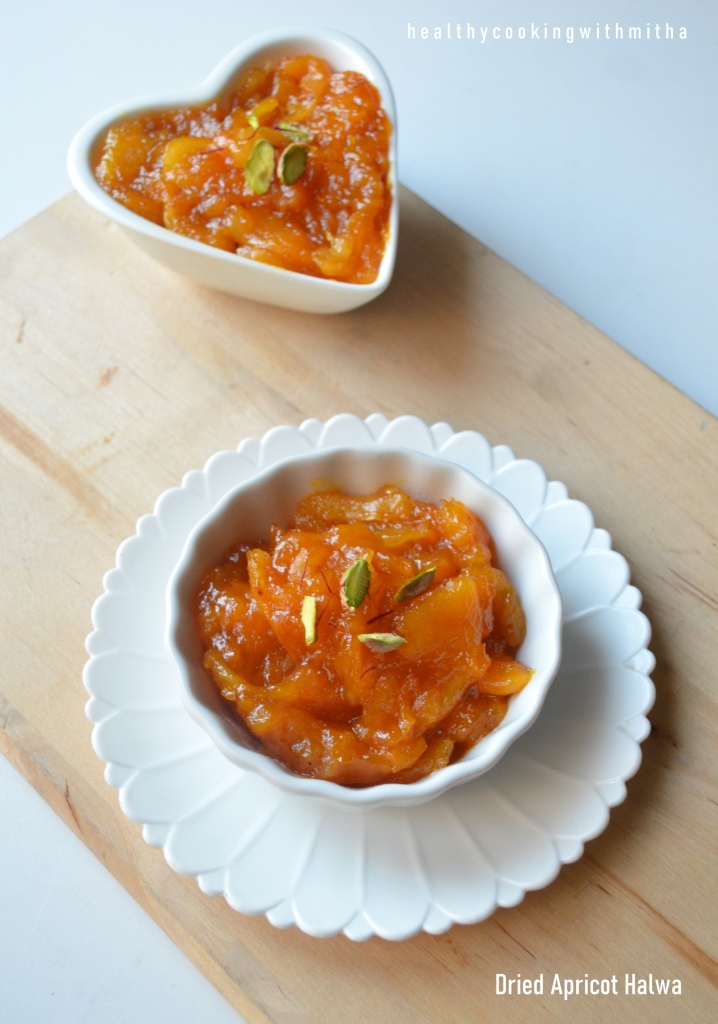
7. Dried Apricot Halwa: Something which I tried to finish off my apricots but came so delicious that this has become our favorite. Too easy to be true kind of recipe. Doesn’t it look royal too? 😀

Recipe here: Dried Apricot Halwa

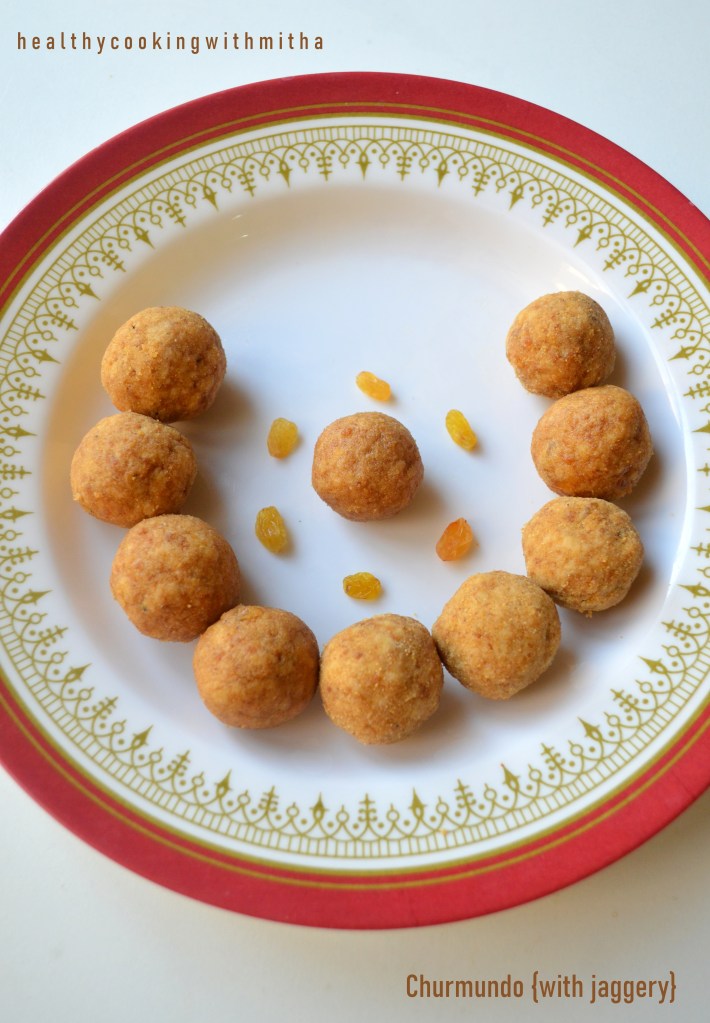
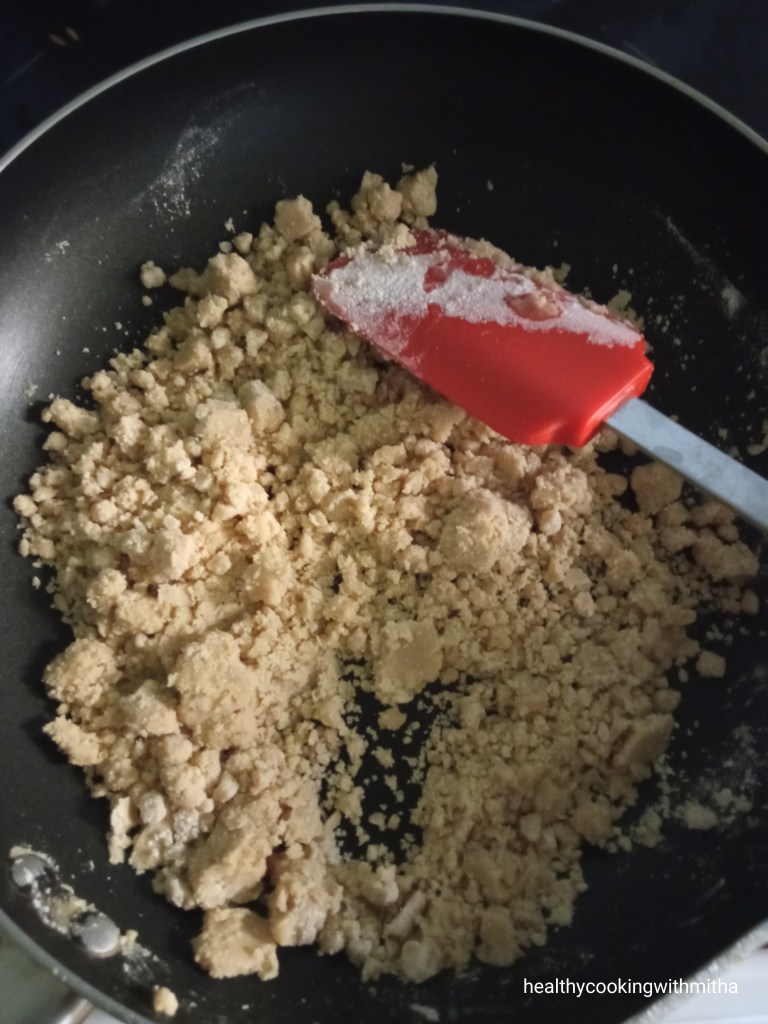
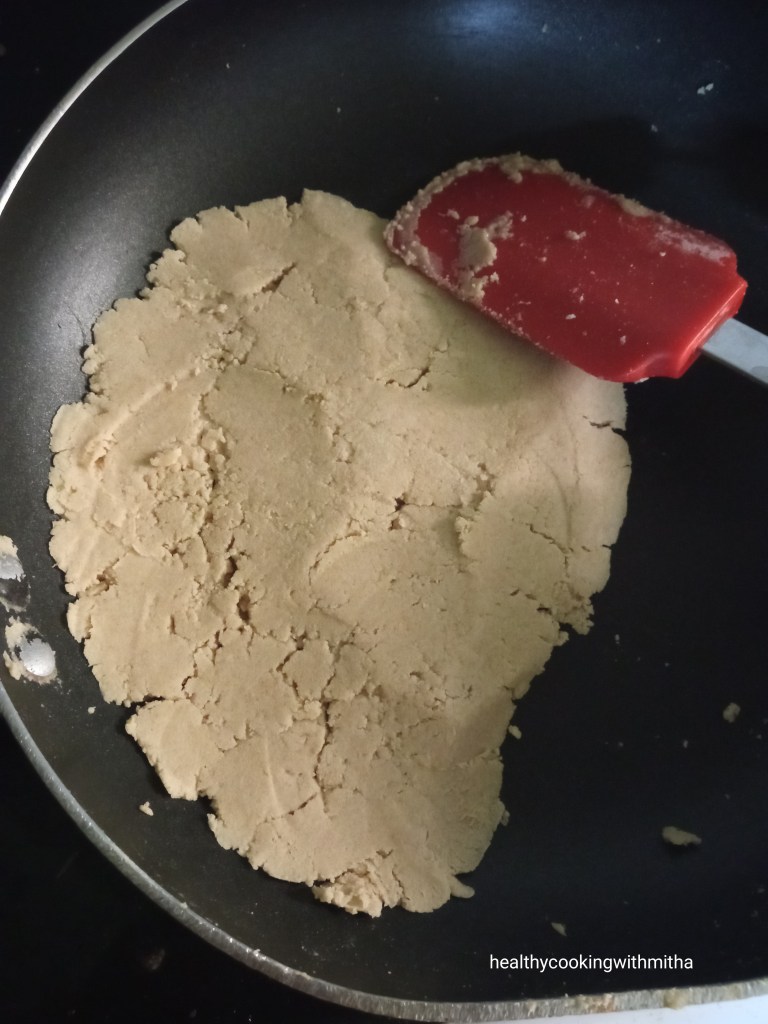
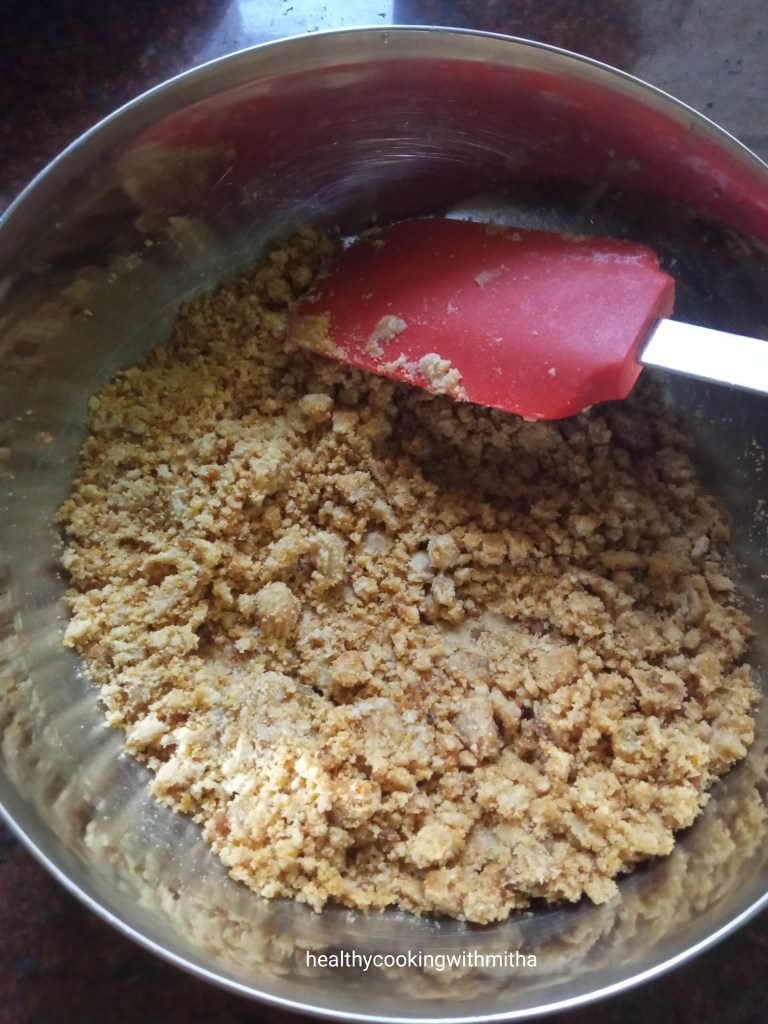
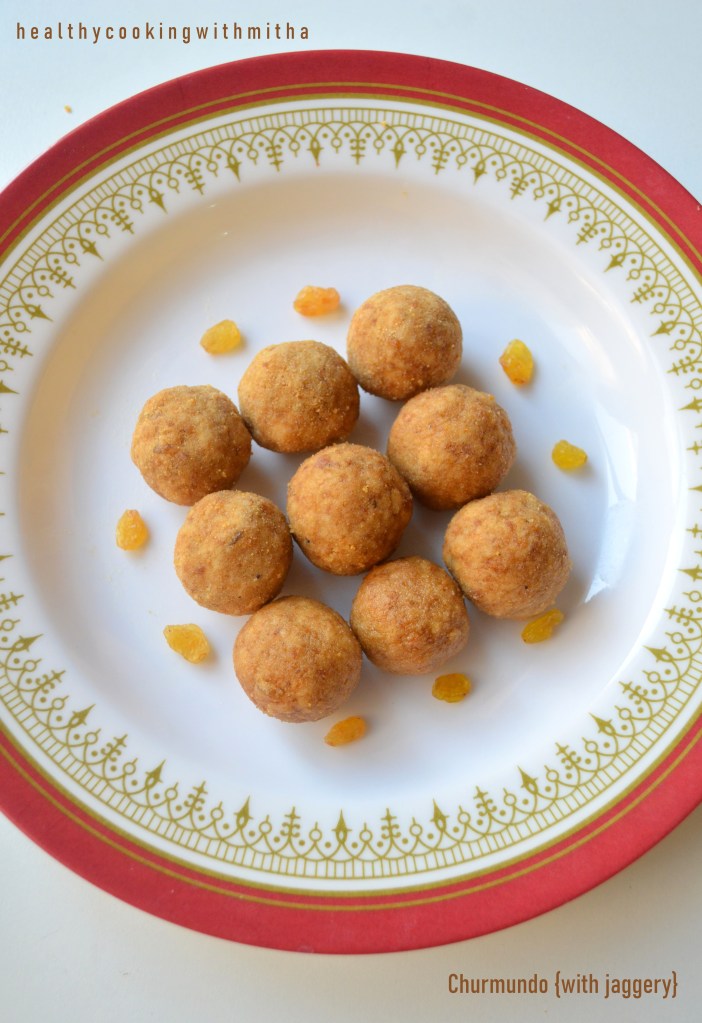
8. Churmundo | Easy wheat flour jaggery ladoos: These are Konkani people’s all time favorite ladoos. I use jaggery instead of sugar though. Tastes so heavenly that we feel at loss of words when devouring them. So quick to make too.

Recipe here: Churmundo | Easy wheat flour jaggery ladoos

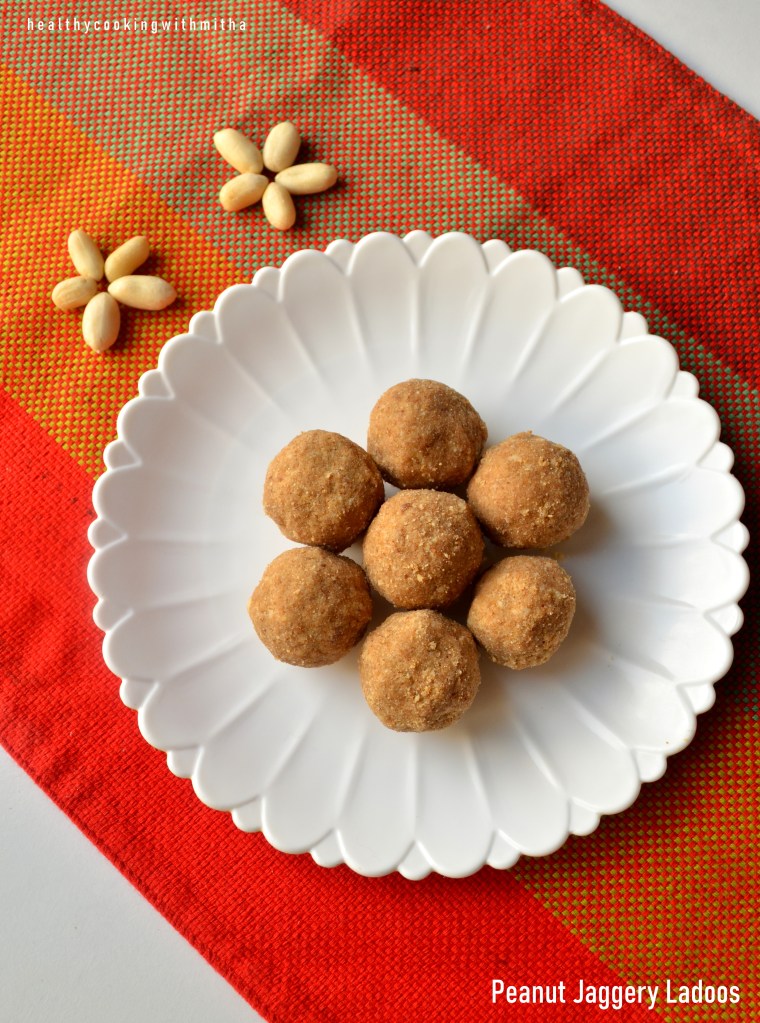
9. Peanut Jaggery ladoos: Needs only two ingredients and hardly takes about 10 mins to make. Very tasty and healthy ladoos too.

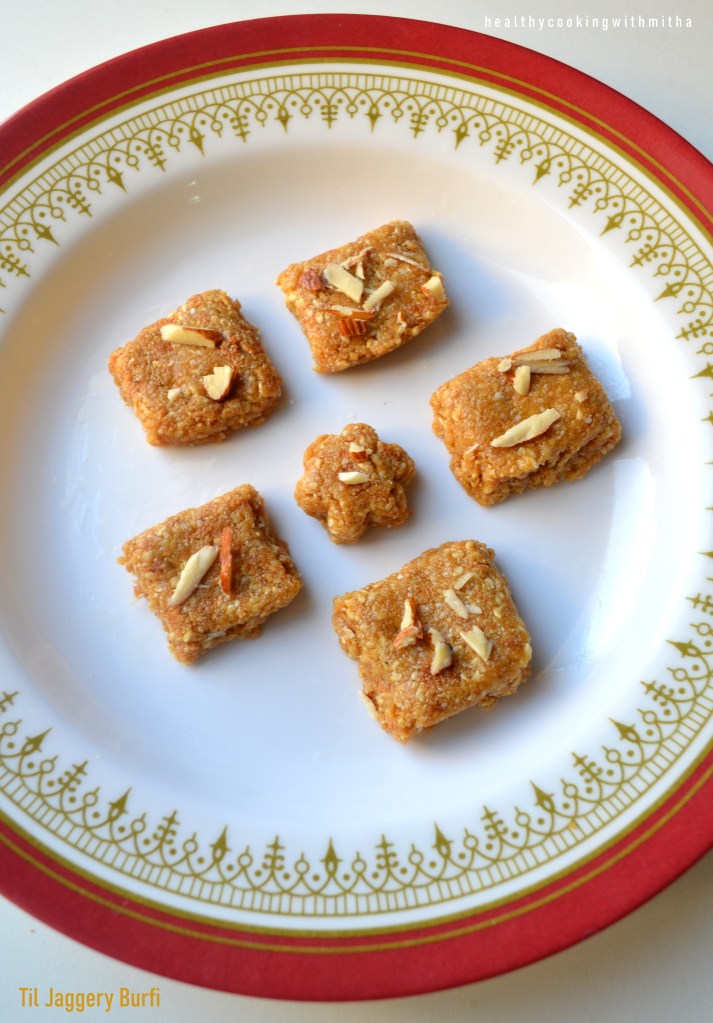
10. Til Jaggery Burfi : A very tasty, easy to make sweet made from sesame seeds and jaggery.

11. Ragi Jaggery ladoos: Soft, melt in the mouth delicious ladoos made with Ragi or finger millet and jaggery.

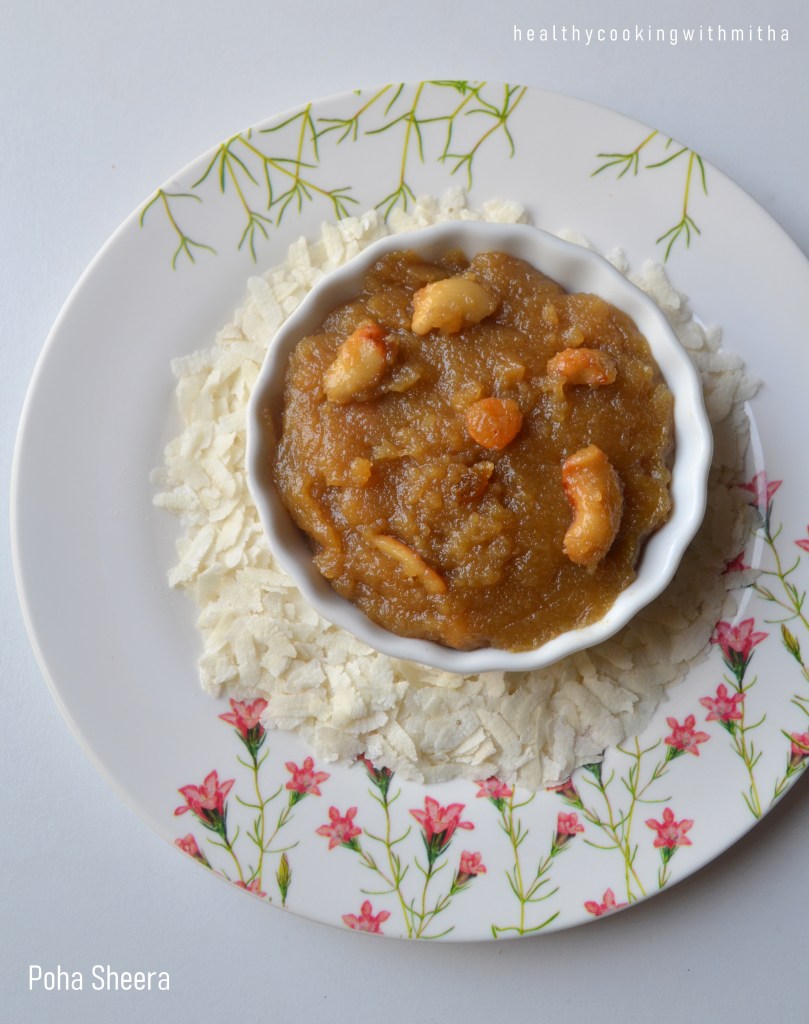
12. Poha Sheera – An easy to make unique sweet from rice flakes or beaten rice that I learnt to make recently which we all loved a lot. Tried and loved by my readers too.

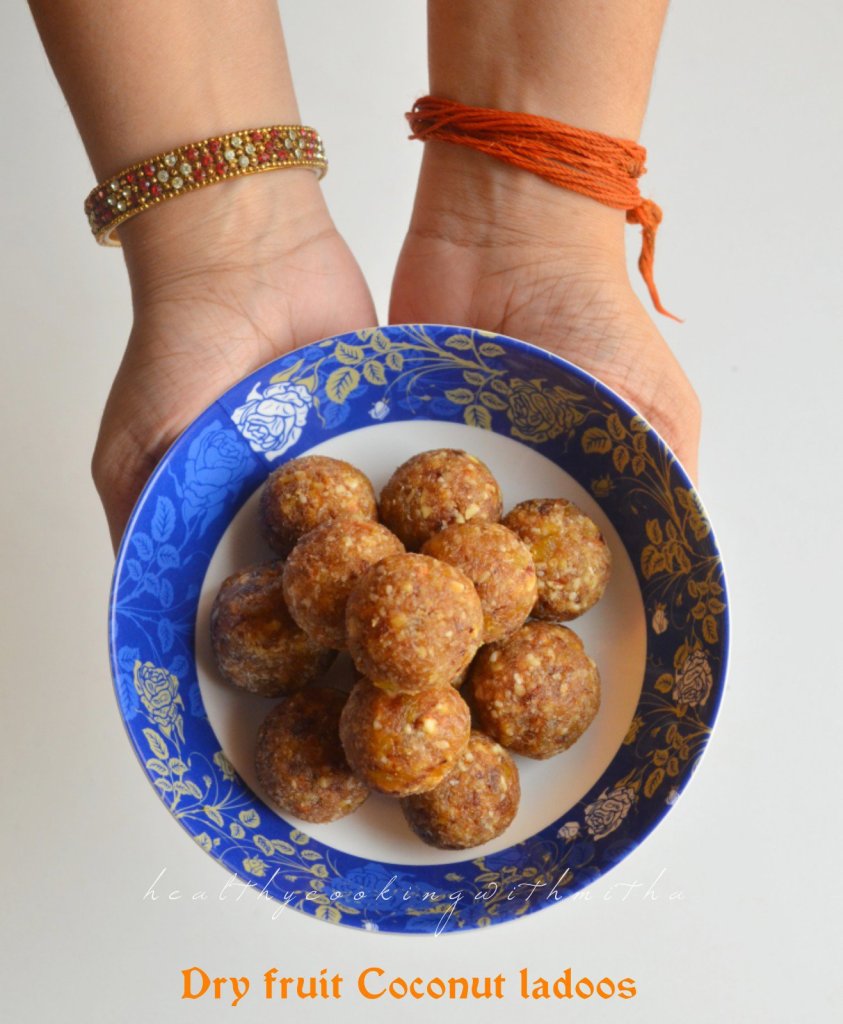
13. Dry fruit Coconut Ladoos: These are a great way to add dry fruits in ladoo form in both your kids’ and your diet. Also free from sugar or jaggery as dates sweetens these ladoos perfectly.

14. Mango Coconut Ladoos : These have to be the tastiest ladoos that I have ever made. Looks so pretty too 😍

15. Godu Phovu / Jaggery sweetened rice flakes – This is the most made sweet in every Konkani household for almost all festivities. So quick to make with very simple ingredients like Poha or thin rice flakes, coconut, jaggery and flavoured with cardamom powder.

In this recipe, I have made Chane usli or seasoned chickpeas with Godu Phovu as it is a very delicious combination.

Recipe here – Godu Phovu

16. Gluten Free Jowar flour ladoos: An easy to make, healthy and tasty ladoos which you can never say are made from Jowar flour.

17. Vegan Coconut Badam Ladoos: Yet another quick and delicious ladoos which combine coconut and almonds beautifully. ❤️

These are the easiest sweet recipes that I have shared. You can check the rest of my healthy desserts like Jaggery Shrikhand, Peanut Ubbattis, Mango mousse, Chocolate Cheesecake, Desi Tiramisu, Bottlegourd jaggery halwa, etc on my Desserts page.

My other compilations:

Oats Recipes Compilation

Healthy Cakes and Cookies recipes Compilation

“No rice” dosa recipes compilation

Variety Idlis Compilation

Happy and healthy cooking! ❤️

Churmundo with jaggery | easy wheat flour jaggery ladoos

Even though I am good at making pedas, ladoos are one sweet I had never attempted much. When I did attempt few months back, it had got such weird shapes 😆 that I thought my hands were not meant to make those perfect, droolworthy round round ladoos.

And guess which ladoos proved me wrong? Our own amchi Churmundos.❤️ Churmundos are usually made with wheat flour and sugar powder but I have used jaggery here. My fondest memory with these ladoos are both my grandmothers making lovingly for me during childhood.

My paternal grandmother or Annama and my aunt Chandriakka still make big boxes of these ladoos and give it to me when I return back to Qatar after vacation. Those ladoos are loaded with love and I eat each bite remembering them.

So this time since we could not visit them, I decided to make them myself (“no matter what shape they turn out!!” was my thought). And imagine my happiness when it turned out so perfect. My husband said it was the best Churmundo he had ever eaten. The kids too loved it very much and it got finished off quickly.

So I thought why not share this easy recipe of Churmundos. I make with jaggery as my family prefers jaggery sweets to sugary ones. Even though I am not very creative, I decorated them like a lamp as Diwali is less than a week away and I am all set for the festival. How do they look? 😬😍

As an after note, how many of you remember the small colourful liquid bindis that we used to decorate as kids during festivals? Don’t these ladoo designs resemble it? It was very unintentional but I was reminded of those bindis after I saw these designs. Such good memories they were. Childhood was definitely special. Happy festive season to all of you! ❤️

RECIPE:

Ingredients: {Makes about 10 to 12 small ladoos}

1 Cup Whole wheat flour/ Atta (I use Pillsbury brand of wheat flour)

3/4 Cup powdered Jaggery

1/4 Cup Ghee (plus 1 Tbsp to fry raisins)

2 Tbsp Raisins or as per your taste

1/4 tsp Cardamom powder

Step by step recipe:

1. Heat 1 Tbsp Ghee in a pan and add raisins. When they plump up, remove into a bowl. Keep aside.

2. In the same pan, melt ghee (don’t make it very hot. Just melt it on low flame.) Add wheat flour and start sauteing on low flame.

3. Initially it will be in small lumps but as you continue sauteing on low flame while patting the lumps using the spatula (as shown in the below picture), it will be a smooth mixture. (This is after about 5 mins of sauteing)

4. Continue sauteing and you will get a wonderful aroma, there will be no raw smell of the flour and the whole mixture will come together as shown below. It takes me exactly 8 mins from start to get the mixture to this stage but might vary depends on your pan and the flame.

5. Remove immediately to the bowl that you added raisins. Also add jaggery powder and Cardamom powder.

6. Mix well using the spatula when still the mixture is hot.

7. Now make ladoos using your hands when the mixture is still warm. If you are finding difficulty in forming the ladoos and they are breaking apart, add little ghee to the mixture and you can easily make ladoos. But the amount of ghee is perfect to make these ladoos and I don’t think more will be required.

8. Serve warm or store in an airtight container.

Notes:

* As it is very quick to make, I make only with 1 Cup of wheat flour at a time which yields me about 11 ladoos. They get finished off by my family within two days. I store it in an airtight container at room temperature.

* Be careful to saute the wheat flour in very low flame. I use electric cooking range and I keep in the flame between medium and low. It took me 8 mins of sauteing on this flame. (tip: keep your favorite songs while sauteing and you won’t even realize that you have sauteed that much 😃)

* Raisins are to taste or can be skipped but gives a good flavour to the ladoos.

* Jaggery powder can be substituted with sugar powder if your family does not like jaggery flavour.

* While binding ladoos if you are unable to form them, add ghee if needed to the mixture and also your palms to get neat ladoos.

* These ladoos are initially very soft but turn firm on keeping at room temperature for little while.

* This is how I make cardamom powder. I remove the seeds of cardamom from the skin. Crush the seeds using mortar pestle into fine powder. Use as needed. I used seeds from 2 cardamoms to get 1/4 tsp powder. (The skin can be added to tea for great flavour.)

Dried Apricot Halwa | Sugar free easy recipe

Before these home bound times, we used to go shopping to the huge supermarkets in the city almost every couple of weeks and me being my daddy’s daughter always used to keep an eye for groceries on offer. So when at a particular time I saw that dried apricots were available for cheap rates, I bought plenty of them promising myself to eat atleast two daily for my eye, heart and bone health (when I get the sudden Josh for self care 😂).

All those promises got forgotten as soon as I reached home 😅 and the apricots started waiting in the freezer (peeking at me whenever I opened the door 😃) keenly to be used. Then last month as I needed more space in my freezer, I took one of the packets out and made this halwa as an experiment.

Imagine my happiness when it came out so delicious. Now every couple of weeks, I make this apricot halwa for dessert and we all enjoy it. So this had to be blogged too and I captured some pictures when I made it last day.

It’s a must try dessert if you have those apricots waiting to be used up or even otherwise. Get them when you go shopping next and make this delicious dessert. Dried apricots contain magnesium, pottasium and are rich in antioxidants which are very good for your eyes, bone and heart health. If consumed during pregnancy, it is very beneficial for the baby.

Hope you all try and love it too. Happy and healthy cooking!

RECIPE:

Ingredients:

About 20 to 25 Dried Apricots (Mine had 23 in a packet)

1/4 Cup Jaggery powder (optional, I added for colour and flavour)

2 Tbsp Ghee

Saffron strands, for garnish (don’t skip this. Adds a wonderful flavour)

Chopped Pistachios as garnish

Step by step recipe:

1. Wash the dried apricots well and soak in water for about an hour in enough water. It will absorb the water and swell in size. Also turns very soft.

2. Now add this to a pan and allow it to come to a boil. Add water about 1/2 Cup at a time when you see that water has been absorbed.

Note: It took me 1 Cup of water to cook the apricots fully. It turns very soft when cooked. Takes about 10 mins.

3. Now mash using a potato masher. You can keep little pieces of the apricots too. We love the little bites in it.

Note: If you feel that you can’t mash the apricots well, then it has not cooked fully. Add little water and cook them fully.

4. Now add ghee and jaggery powder. Mix well till the mixture leaves the sides of the pan.

5. Remove into bowls and garnish with saffron strands and pistachios. Serve warm.

Notes:

* If you are diabetic, you can definitely skip jaggery too from this halwa. It still tastes very sweet and delicious. I add because of the gorgeous colour that it imparts and also we love jaggery flavour.

* Saffron strands makes this halwa taste heavenly and takes it to another level completely. So do take out those saffron strands from your treasure box 😅 for this halwa.

* We love little bites of the dried apricots in our halwa. So I don’t mash them completely. If you like a smooth kind of halwa, you can mash it completely.

Benda Uli/ Bhindi fry/ Spicy Lady’s finger fry

If there is one vegetable that I am not fond of, it is Lady’s finger. My all time favorite veggies are potato, elephant yam, beetroot, carrot ie all underground vegetables 😋. But Mr hubby hates potato and beetroot. So all these years, we have never bought beetroot and rarely use potato except for masala dosa or chapati bhaji. Husband’s food choices replace mine (Kahaani ghar ghar ki, I suppose! 😆)

Now guess which veggie is his favorite? Yes, Lady’s finger 🙄😅. So this lady makes way into our house more than quite often and he makes me eat it saying it is healthy 😬. So I have learnt to cook it in a way that I can atleast bear to eat it.

Benda Uli is commonly made at his place and the only dish he too likes with Bhindi. Though it is made little liquidy, I make it crisp so that it does not turn slimy (which I absolutely dislike). It turns out good and even my kids like it.

Hope you all try and like it as well. Happy and healthy cooking!

RECIPE:

Ingredients:

3 Cups chopped Lady’s finger / Bhindi/ Benda

2 Tbsp Coconut oil

1 medium sized Onion, finely sliced

1 medium sized Tomato, finely chopped

1 tsp Red chilli powder or to taste

Salt to taste

Step by step recipe:

1. This is how I prepare the Lady’s fingers for any curry. Wash them well under running water. Then allow it dry completely. Just keep it as such for little while and it will air dry. Chop off both ends of the Lady’s fingers and then cut into small pieces. Put in a bowl and keep aside.

Note: Ensuring that there is no water in the Lady’s fingers avoids the sliminess in the curry.

2. Now heat oil in a pan and add finely sliced onions. Fry till it turns translucent.

3. Now add tomatoes and fry till it turns soft.

3. Add the chopped Lady’s finger and fry it continually till it cooks. Don’t add water at all or else the curry turns slimy. It will take time but the texture of Lady’s finger will be very crispy and tasty.

5. Now add red chilli powder and salt. Mix well such that everything blends well. Cook for couple of minutes.

6. Remove from flame. Serve with rice meals.

Notes:

* Towards the end of frying, I purposely allow it to get little burnt ( to a little brownish tinge and not to black ). It gives it a very good flavour to the curry.

* For Lady’s finger, the most important part is preparing the vegetable. Wash first and then allow it to dry off completely. This ensures that slimes don’t form while cooking the Lady’s finger.

* Usually Benda Uli is made little liquidy but I prefer this method of cooking it (water free) as it gives crispy and tasty curry.

* Red chilli powder is to taste.

Rava Bhakri /Rullanva Doddaka/ Instant Semolina savory pancakes

I am a huge fan of our age old amchi (Konkani) dishes. They are not only easy to make but very healthy and super delicious too. Also, I am a firm believer that breakfast should be the most filling meal as it gives us energy for the day and keeps us away from snacking often.

This Rava Bhakri is exactly that. Very filling and super tasty too. It’s my go to breakfast when I have forgotten to soak for dosas or idlis. My kids call it “Rullanva bobbo” and demand it whenever they feel hungry. So this “bobbo” becomes their snack too when they come tired after playing. And the best part is, it hardly takes 10 mins from start to finish to make this.

Now that’s how I love my dishes. Less time in the kitchen, yet healthy, kid friendly and delicious. Most Konkanis know this recipe but sharing for those who don’t know. Hope you all try it too. Happy and healthy cooking!

RECIPE:

Ingredients:

2 and 1/2 Cups Semolina (wheat rava, upma rava, sooji)

Approx 3 Cups Water

1/4 Cup Wheat flour (Atta)

1/4 Cup freshly grated Coconut

1/4 Cup Yogurt/ Buttermilk (optional)

2 to 3 Green chillies

1 inch Ginger piece, grated

1 Tbsp Sugar

Salt to taste

Ghee or coconut oil to cook the dosa

Step by step recipe:

1. Take Semolina, wheat flour, sugar, salt and coconut in a mixing bowl.

2. Add yogurt, water, Ginger and green chillies. Mix well and make a lump free batter of thick consistency. (It took me 3 Cups water for 21/2 cups rava. Might vary depending on the brand of rava.)

3. Now heat a dosa pan and add a ladle of dosa batter. Spread it into a thick dosa.

4. Cover and cook till the surface cooks. Add ghee or oil on top.

5. Flip and cook for a minute.

6. Serve hot with butter and pickle.

Notes:

* Rava absorbs a lot of water very quickly. But it varies with the brand of rava. So best is to add water one cup at a time in the beginning and then add little by little to make a batter thicker than dosa batter consistency.

* This batter can be made before hand and refrigerated. I make it at night and refrigerate for breakfast the next day as it saves a lot of time in the morning. Just that the rava absorbs all the water. So it needs and addition of about a cup of water to bring it back to pourable consistency.

* The addition of yogurt or buttermilk is optional but gives a nice tangy flavour to it.

* You can also grind the coconut along with Ginger and green chillies. Then add to the batter but I love the bite of green chillies. So I don’t do that way.

* I don’t even need pickle with this. Butter is an excellent accompaniment to this bhakri.

* You can also add an mashed overripe banana to this batter. Tastes really delicious!

* You can also add grated cucumbers to this to make Instant Cucumber dosas or Thoushe Bhakris.

Banana flower/ Bondi Chutney & Bondi Upkari

Banana flower is very healthy especially for our digestive system and kidney function. So I always try to include it in our meals at least once a week. This chutney is my favourite which my mother used to make regularly.

As good as it is for health, it is also lipsmackingly delicious . We enjoy it with our rice meals and also with dosas. Here’s sharing how my Amma used to make this chutney and also the upkari.

Do try it and you will definitely love it. Happy and healthy cooking! ❤️

RECIPE:

Ingredients:

1/2 a medium sized Banana flower/ Bondi (I took the other half for upkari)

1/2 Cup fresh or desiccated Coconut

2 tsp Oil

1 tsp Mustard seeds

1 tsp Cumin seeds/ Jeera

A sprig of curry leaves

1 tsp Tamarind paste

3 dried Red chillies or to taste

Salt to taste

Step by step recipe:

1. First of all, remove the outer layers of the banana flower along with the small white flowers inside. Just two or three layers will do till you get the inner firm banana flower. Chop it finely and immediately add to a bowl with water.

Note: I got 5 Cups of chopped banana flower in total. Took 2 cups for chutney and 3 cups for upkari.

2. Heat a pan with oil and add mustard seeds, cumin seeds and curry leaves.

3. When mustard seeds splutter, add the drained chopped banana flower to it. Fry well and cook with very little water till it turns soft.

4. Now add coconut and fry till it turns light brown in colour.

5. Allow it to cool. When it cools down, grind it along with red chillies, Tamarind and salt to a smooth paste adding water little by little as needed as it’s a thick chutney.

6. Remove in a bowl and serve with rice meals.

Notes:

* For the upkari or stir fry, Heat oil in a pan and add finely chopped garlic. Fry till garlic turns light brown in colour. Add the drained chopped banana flower and cook till it turns soft adding salt and red chilli powder as it cooks. Garnish with grated coconut on top. {On days that we don’t eat garlic especially during fasting days, I add Hing or asafoetida instead to the seasoning and it tastes delicious too.}

* While discarding the outer layers of the banana flower, discard the two or three hard and outermost ones. Rest are consumable.

* Immediately add the chopped banana flower to water or else it will turn black.

* Cook the banana flower well or else the chutney will have a raw flavour.

* This chutney is thick and can be enjoyed with rice meals or even with dosa.

* If refrigerated, it can last well for two days.

Mango Kesar Peda | Easy Peda recipe

Click on the image to save the recipe on Pinterest

As our most prominent festival Navaratri is approaching, I decided to share some sweet recipes which I make regularly during festive occasions. One among them is this Mango Kesar peda which is our favourite (especially mine as I love mangoes and sweets. So this is a heaven made match for me ❤️❤️)

Navaratri during childhood meant pooja days in Kerala as books were kept in front of Goddess Saraswati for blessings and we would take it on the 10th day ie on Vijaya Dashami day. {I would actually be more happier that pooja days meant no school and no studies too. 😀😀}

After marriage, in my husband’s home, they follow satvik meals all through the 9 days of Navaratri and don’t eat onion or garlic. On Vijaya Dashami day, there is a family get together and we enjoy a “navve javan” or new meal meaning we are celebrating a new beginning. We prepare huge number of dishes and eat them together while chattering our hearts off. {Yes, they all are as talkative as me and I am their leader “Ammi” as they call me! 😀}

We usually take vacations to India during this time to be with the family during “navve javan”. This will be the first year we will be missing it due to Covid situation.

Anyhow, I hope to celebrate the Navaratri days and Vijaya Dashami by making sweets, enjoying simple satvik meals and most importantly remembering Goddess Durga in all her forms. Essentially, celebrate to remember that good always triumphs. So, never let your goodness diminish even in difficult times and keep praying.

So here is the recipe for the peda. Hope you all try and love it too. Happy cooking! Shubh Navaratri and Vijaya Dashami to all of you! 🙏

RECIPE:

Ingredients: {Makes about 12 pedas}

1 1/2 Cups Milk Powder ( full fat milk powder)

1 Cup thick Mango Pulp (fresh or canned) * I use Mother’s recipe brand of Alphonso mango pulp

2 Tbsp Jaggery powder ( can skip if using sweetened mango pulp)

1 Tbsp Ghee

1/4 tsp Cardamom powder (optional)

Saffron strands to garnish on top of the peda

{ I have doubled the measurements in the below pictures and hence the quantity seems so much. It yielded me 24 pedas.}

Step by step recipe:

1. Take milk powder, mango pulp and jaggery powder in a bowl.

2. Mix well using a spatula so that the mixture is free from lumps.

3. Heat ghee in a non stick pan and add this mixture. Keep the flame on medium.

4. Keep stirring on medium flame till the mixture starts to thicken and leaves the sides of the pan. Add cardamom powder and mix well. Takes about 8 to 10 mins.

5. Remove from the flame and allow it to cool completely. Take a small ball of the mixture and press between your palms to bring to the shape of the peda. If you find it difficult to shape them, grease your palms with ghee and they will come out well.

6. Repeat the same with the rest of the mixture. I also made some small pedas for my kids as it looks cute to them. Garnish with saffron strands.

Click on the image to save the recipe on Pinterest

Notes:

* This ratio of ingredients lead to very soft pedas. If you like slightly harder pedas, then reduce mango pulp to 3/4 Cup instead of 1 Cup.

* I used regular milk powder available at grocery stores. I live in Qatar and the brands available here are local to this region. You can use Nestle milk powder or any full fat milk powder.

* The mixture will be very soft when hot. It will turn hard as it cools down. For quicker hardening of the mixture, you can refrigerate the mixture for some time and then form pedas. The pedas will harden as they are kept in room temperature.

* I refrigerate them in an airtight container so that they last well. They last well till 4 days if handled well. Mine got finished off by then.

* I have used both sweetened mango pulp and unsweetened ones to make this. Sweetened mango pulp does not need the addition of jaggery while unsweetened ones requires the little amount of jaggery powder.

* Be careful to stir the mixture on medium flame as high flame can burn the mixture.

* You can also add saffron strands into the mixture but I prefer to garnish as they look pretty.

Update: I am getting many messages about what other option is available for those who don’t have mango pulp. If mango pulp is not available, there is another peda which I make with milk powder and condensed milk. For 1 tin condensed milk ie 397 grams, mix 1 and 1/2 Cups milk powder. Heat ghee and add Kesar. Pour this mixture and cook till it leaves the sides of the pan. Then make pedas. Though it’s not as healthy, tastes very delicious. I have made this peda many times and it comes out perfect each time.

Instant Cucumber Idlis | Thoushe idli

Click on the image to save the recipe on Pinterest

After the Undi with Piyava Gojju recipe which was viewed and tried by so many readers, I realised how much people love our traditional Konkani recipes. So I had to share these Cucumber Idlis or Thoushe Mudho as called in amchi households. They can be made instantly and are so tasty that you can’t stop eating them.

My grandmother and mother used to make them wrapped in banana leaves or turmeric leaves that has an aroma of its own. But since we don’t get them easily here, I make them in idli plates. Even then, while steaming these idlis, the whole house is filled with a heavenly aroma which stays for the whole day.

I love how our Indian breakfasts are so delicious yet healthy. I can never get satisfied by continental breakfasts. Those are for a day or two during vacations and then I am back to craving my Idlis, dosas, puri bhaji and upmas 😅. I am such an Indian food fan!

Hope you all try and love these Idlis as much we do. Happy and healthy cooking!

RECIPE:

Ingredients: { Makes about 22 Idlis}

2 Cups Idli Rava or Rice Rava

1/2 Cup Desiccated coconut or freshly grated coconut

2 Cups grated Cucumber {check notes for details}

1 inch Ginger piece, grated

1 Green chilly or to taste

1 1/2 Cups Water

Salt to taste

Step by step recipe:

1. Keep the steamer or idli cooker ready with water on the stovetop to boil.

2. Wash the Rice rava well twice or thrice till it leaves clear water. Drain the water completely.

3. Add grated Cucumbers, grated ginger and chopped green chilly along with coconut and salt.

4. Mix well adding little by little as need to make a batter. It should be thick yet some water should be there so that the Idlis turn soft.

Note: It took me 1 and half cups of water to get it to right consistency since my cucumbers did not ooze much water. Water depends upon the variety of cucumbers.

5. Add to greased idli plate like I have shown. Leave a little water in each plate along with the idli rava mixture. This ensures you get soft Idlis.

6. Steam for 15 to 20 mins till a knife inserted in the center of the idli comes out clear. Allow to cool slightly.

7. Remove and serve with a chutney of your choice.

Notes:

* Idli Rava or Rice rava is not regular upma rava which is made from wheat.

* I have used English Cucumbers which do not need peeling. I discard the sides and grate as it is. If using Indian cucumbers, do peel them.

* Green chilly can be increased as per taste or even skipped.

* You can also grind coconut, ginger and green chilly and add to the batter. I add as it is because I love the bite of ginger and green chilly in it.

* Do remember to leave a little water in each idli plate. It gives soft Idlis.

* If Idlis get leftover, just refrigerate in an airtight container. Microwave and it gets soft again.

* Drizzle a little coconut oil before serving these Idlis. Tastes heavenly!

* I served these Idlis with Coriander leaves- curry leaves chutney. For that, just grind coconut with ginger, green chillies, coriander leaves, curry leaves, salt and little water to a smooth paste. Season with mustard seeds and curry leaves. Mix well.

* Editing to add: I recently got few pieces of Banana leaves and I made these idlis in it. Took a picture to share with all of you. You can try it too. Just keep a piece of the leaf on the idli mould and add a spoonful of batter. Steam and you will get such aromatic cucumber idlis that you will enjoy them a lot.

* You can check all my Variety Idli Compilation here:

Variety Idli collection of recipes

* Other recipes with Cucumber:

Instant Cucumber dosa / Thoushe Bhakri

Khamang Kakdi / Maharashtra style Cucumber salad

Moong dal Kosambari/ Konkani style salad

Click on the image to save the recipe on Pinterest

Raw banana tawa fry Konkani style | Harve kele polo

My mother suffers from muscular dystrophy in her legs since many years and can’t walk. After years of using walker to support her, now she has to use wheel chair for movement. Even then, she does whatever household chores she can, sitting in the wheelchair like washing dishes, cleaning the house and bathrooms. I really admire her mental strength and I am very much proud of her.

She dedicates her time towards devotion to God by singing bhajans, reading slokas, reading The Bhagavad Gita apart from video calling with us. Whatever good things I have learnt in my life is from her. She’s my best friend, my first and true love and my greatest support. ❤️

I am sharing about her today because this raw banana tawa fry is what she used to make for me as a kid. I used to get amazed by the beauty of this flower shaped dosa and used to stand beside her to see how it comes out.

Now whenever I make this dosa, I remember her a lot. Amma, this post of dedicated to you. Though I may not say it often, I love you a lot. 😘😘

Hope you all try and love this too. Happy and healthy cooking!

RECIPE:

Ingredients: {To make 2 flower shaped dosas}

1 medium sized Raw Banana

2 Tbsp Rice flour / rice powder

1/2 tsp Red chilli powder or to taste

1/4 tsp Asafoetida powder/ Hing

Salt to taste

Oil to cook the dosa

Step by step recipe:

1. Wash well and peel the raw bananas. Cut in circles which are not too thick nor too thin, in medium thickness as shown. Immediately put them in water so that they don’t turn black.

Note: I have also finely chopped the rest of the raw bananas to make stir fry or Upkari. Recipe in notes at the end.

2. Now make a thick paste with rice powder, red chilli powder, hing, salt and little water.

Note: Don’t make it thin as it won’t coat the raw bananas. Add only a Tbsp of water at a time.

3. Now heat a dosa pan. Drain all water from raw bananas. Dip the raw bananas one by one in the batter and place on the pan together in a flower shape.

4. Drizzle oil over it. Cover and cook till the surface cooks well. Do this on medium flame. It will take some time but still raw bananas cook quicker than potatoes. Flip and cook till it cooks completely.

5. Serve hot with rice meals or munch on as an evening snack.

Notes:

* Be careful to not cut the raw bananas too thick as it won’t cook well if done so.

* The batter should be thick or else it won’t coat the bananas well.

* Red chilli powder is to taste. I add less to accommodate my kids’ tastebuds.

* For the raw banana Upkari, heat oil in a pan. Splutter mustard seeds. Add hing and broken red chillies. Add finely chopped raw bananas with very little water. Add salt and cook till the bananas turn soft. Garnish with freshly grated coconut. Remove from flame.

Bhel puri chaat | The easiest chaat ever!

Apart from desserts, chaats are my favourite. I can never get tired of them and they are always my choice when we eat out. Here, we get amazing chaats in Kailash Parbat and their chaat platter is my favourite. ❤️

I must admit though that Bhel puri is not my favourite among chaats. It is my husband’s and kids’ favourite one. Mine is always Masala puri or Sev puri or Dahi puri (Craving for some now as I write this 😭😭😭😭).

But since bhel puri is hands down the easiest chaat ever, we usually make it for our evening snack. It’s not only easy to make but healthy and light on the tummy apart from being tasty too.

So I had to share this with all of you. A must try chaat if you love Bhel puris from outside. It’s super easy to make at home, trust me. Happy and healthy cooking!

RECIPE:

Ingredients: {Serves 2}

2 Cups Bhel/ Kurmura / Charmburo/ Puffed rice

1/4 Cup finely chopped Onion

1/4 Cup finely chopped Tomatoes

2 Tbsp finely chopped Coriander leaves

1/2 tsp Red chilli powder

Salt to taste {I use kaala namak or rock salt}

1/4 Cup Mint Coriander chutney (5 sprigs of coriander leaves, 3 Green chillies, 8 to 10 mint leaves, salt)

2 Tbsp Dates Tamarind chutney {I use Mother’s recipe brand readymade chutney} * check notes to make at home

1 Cup Alu bhujiya or Sev ( I use Haldirams brand )

1/2 Cup Mixture or Namkeen of your choice ( I use Bikaji brand)

Step by step recipe:

1. Dry roast the bhel till it turns crisp. Keep aside till use.

Note: This step is necessary so that the bhel does not turn soggy instantly when chutneys are mixed.

2. Take mint leaves, coriander leaves, green chillies and salt in the mixer.

I used kaala namak or rock salt or pink salt and hence the colour.

3. Grind with little water to a smooth paste. Keep aside.

4. Now get everything ready. Shown below are:

* Finely chopped onions, tomato, coriander leaves, red chilli powder and salt in a mixing bowl.

* Dry roasted Bhel, alu bhujia, Namkeen in another bowl.

* Mint coriander chutney.

* Dates Tamarind chutney.

5. Mix everything well and serve immediately.

Notes:

* Bhel puri chaat has to be served immediately after mixing or it turns soggy. So get your family to sit down for the chaat time and then mix everything.

* The measurements for the green chutney gives 1/2 Cup of the green chutney. Use only how much is necessary as per your spice levels. Since I have to accommodate my kids’ tastebuds, I add only 1/4 Cup.

* Rest of the chutney can be refrigerated for use later. Lasts well for couple of days if handled well.

* I use Mother’s recipe brand of Dates Tamarind chutney. For making it at home, Soak about 6 to 8 dates for 30 mins in warm water and grind along with tamarind and salt to a smooth paste.

* You can add finely chopped green chillies too but I avoid as my kids find it spicy.

* You can check the Karnataka version of Bhel puri which we call Charmbure Upkari here.

* The masala puri chaat I make is very close to chaat stall ones. You can check the recipe here.