Tag Archives: Healthy bakes

Collection of my healthy cake and cookie recipes

Click on the image to save this post on Pinterest

It’s Christmas time and the official “bake at home” time too πŸ˜„. I have been seeing so many wonderful bakes on various Facebook food groups that I am part of and it is really amazing that now, everyone bakes so many varieties at home itself. So I thought I too should compile my healthy cakes and cookies in one page for those who want to bake guilt free goodies even for Xmas (if you are like me πŸ˜€).

For me, Christmas brings back two memories of my childhood. One is my dad bringing me Plum cake from our nearby bakery and I used to wait so eagerly for it. The aroma and flavour of the cake is still in my taste buds that it brings so much nostalgia. 😍

Second memory is singing Christmas carol at school (yes, I used to sing too πŸ˜…). We all used to wear white top and black skirt, practice so much for weeks and finally when standing on the stage singing the choir together with friends, it felt so good. ❀️ Though I don’t have a picture of the carol singing, here is a picture of the dress, which was my favourite as a 12 year old. This is from Amma’s album which is a treasure trove of old memories (love looking at them remembering old times 😍).

A part of the album page for the memory of old style albums. Nothing can replace the pleasure of looking through those albums. ❀️

Though after school, I never sang on stage, I still sing bhajans and songs for my kids when putting them to sleep and record them to send Amma who loves to listen to them. 😍 The best part is I still remember the lyrics and tune of the Christmas carols, much to the amazement of my daughter (she loves Christmas πŸŽ„). So we have been singing carols together, making cards for her friends while baking some goodies to enjoy this season.

Hope you all try some of them too. Happy and healthy Baking! Merry Christmas to all of you in advance! ❀️

Click on the name or image for the recipe.
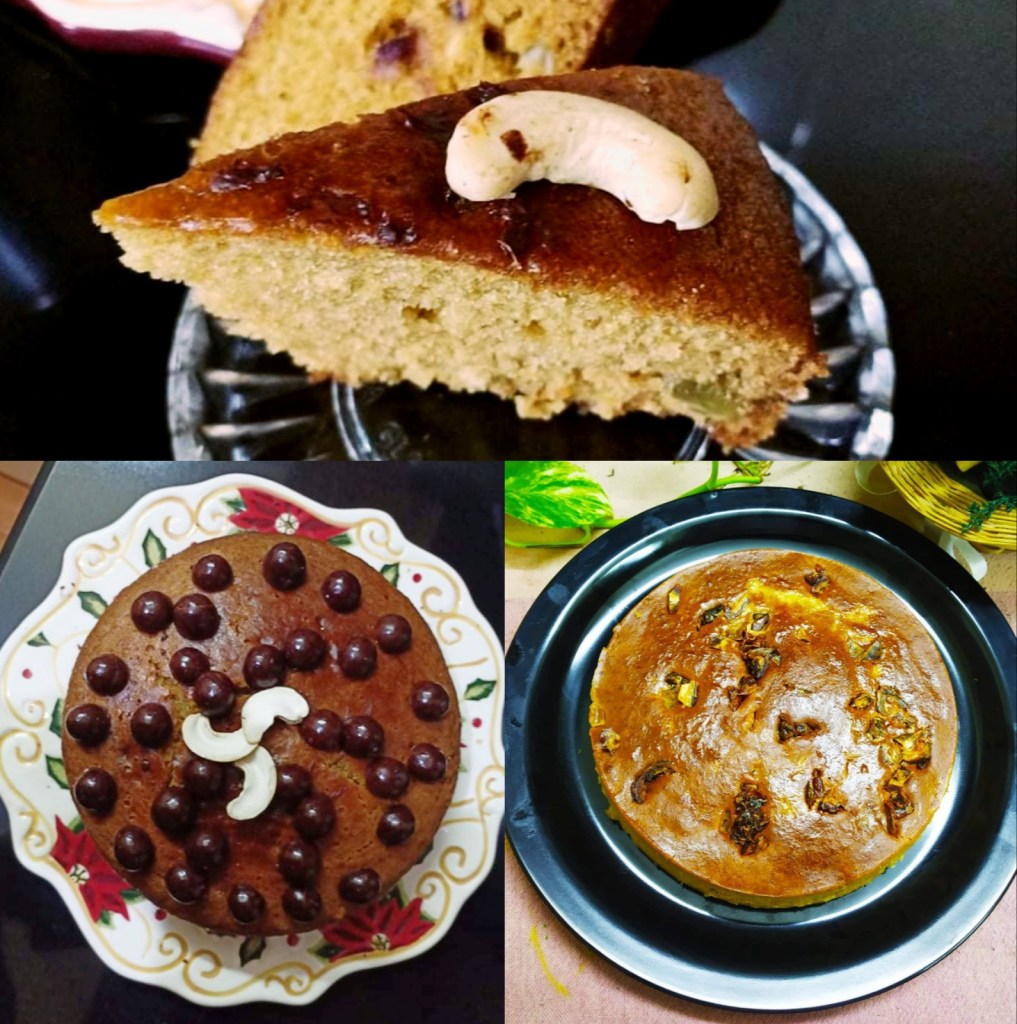
Healthy Cakes:

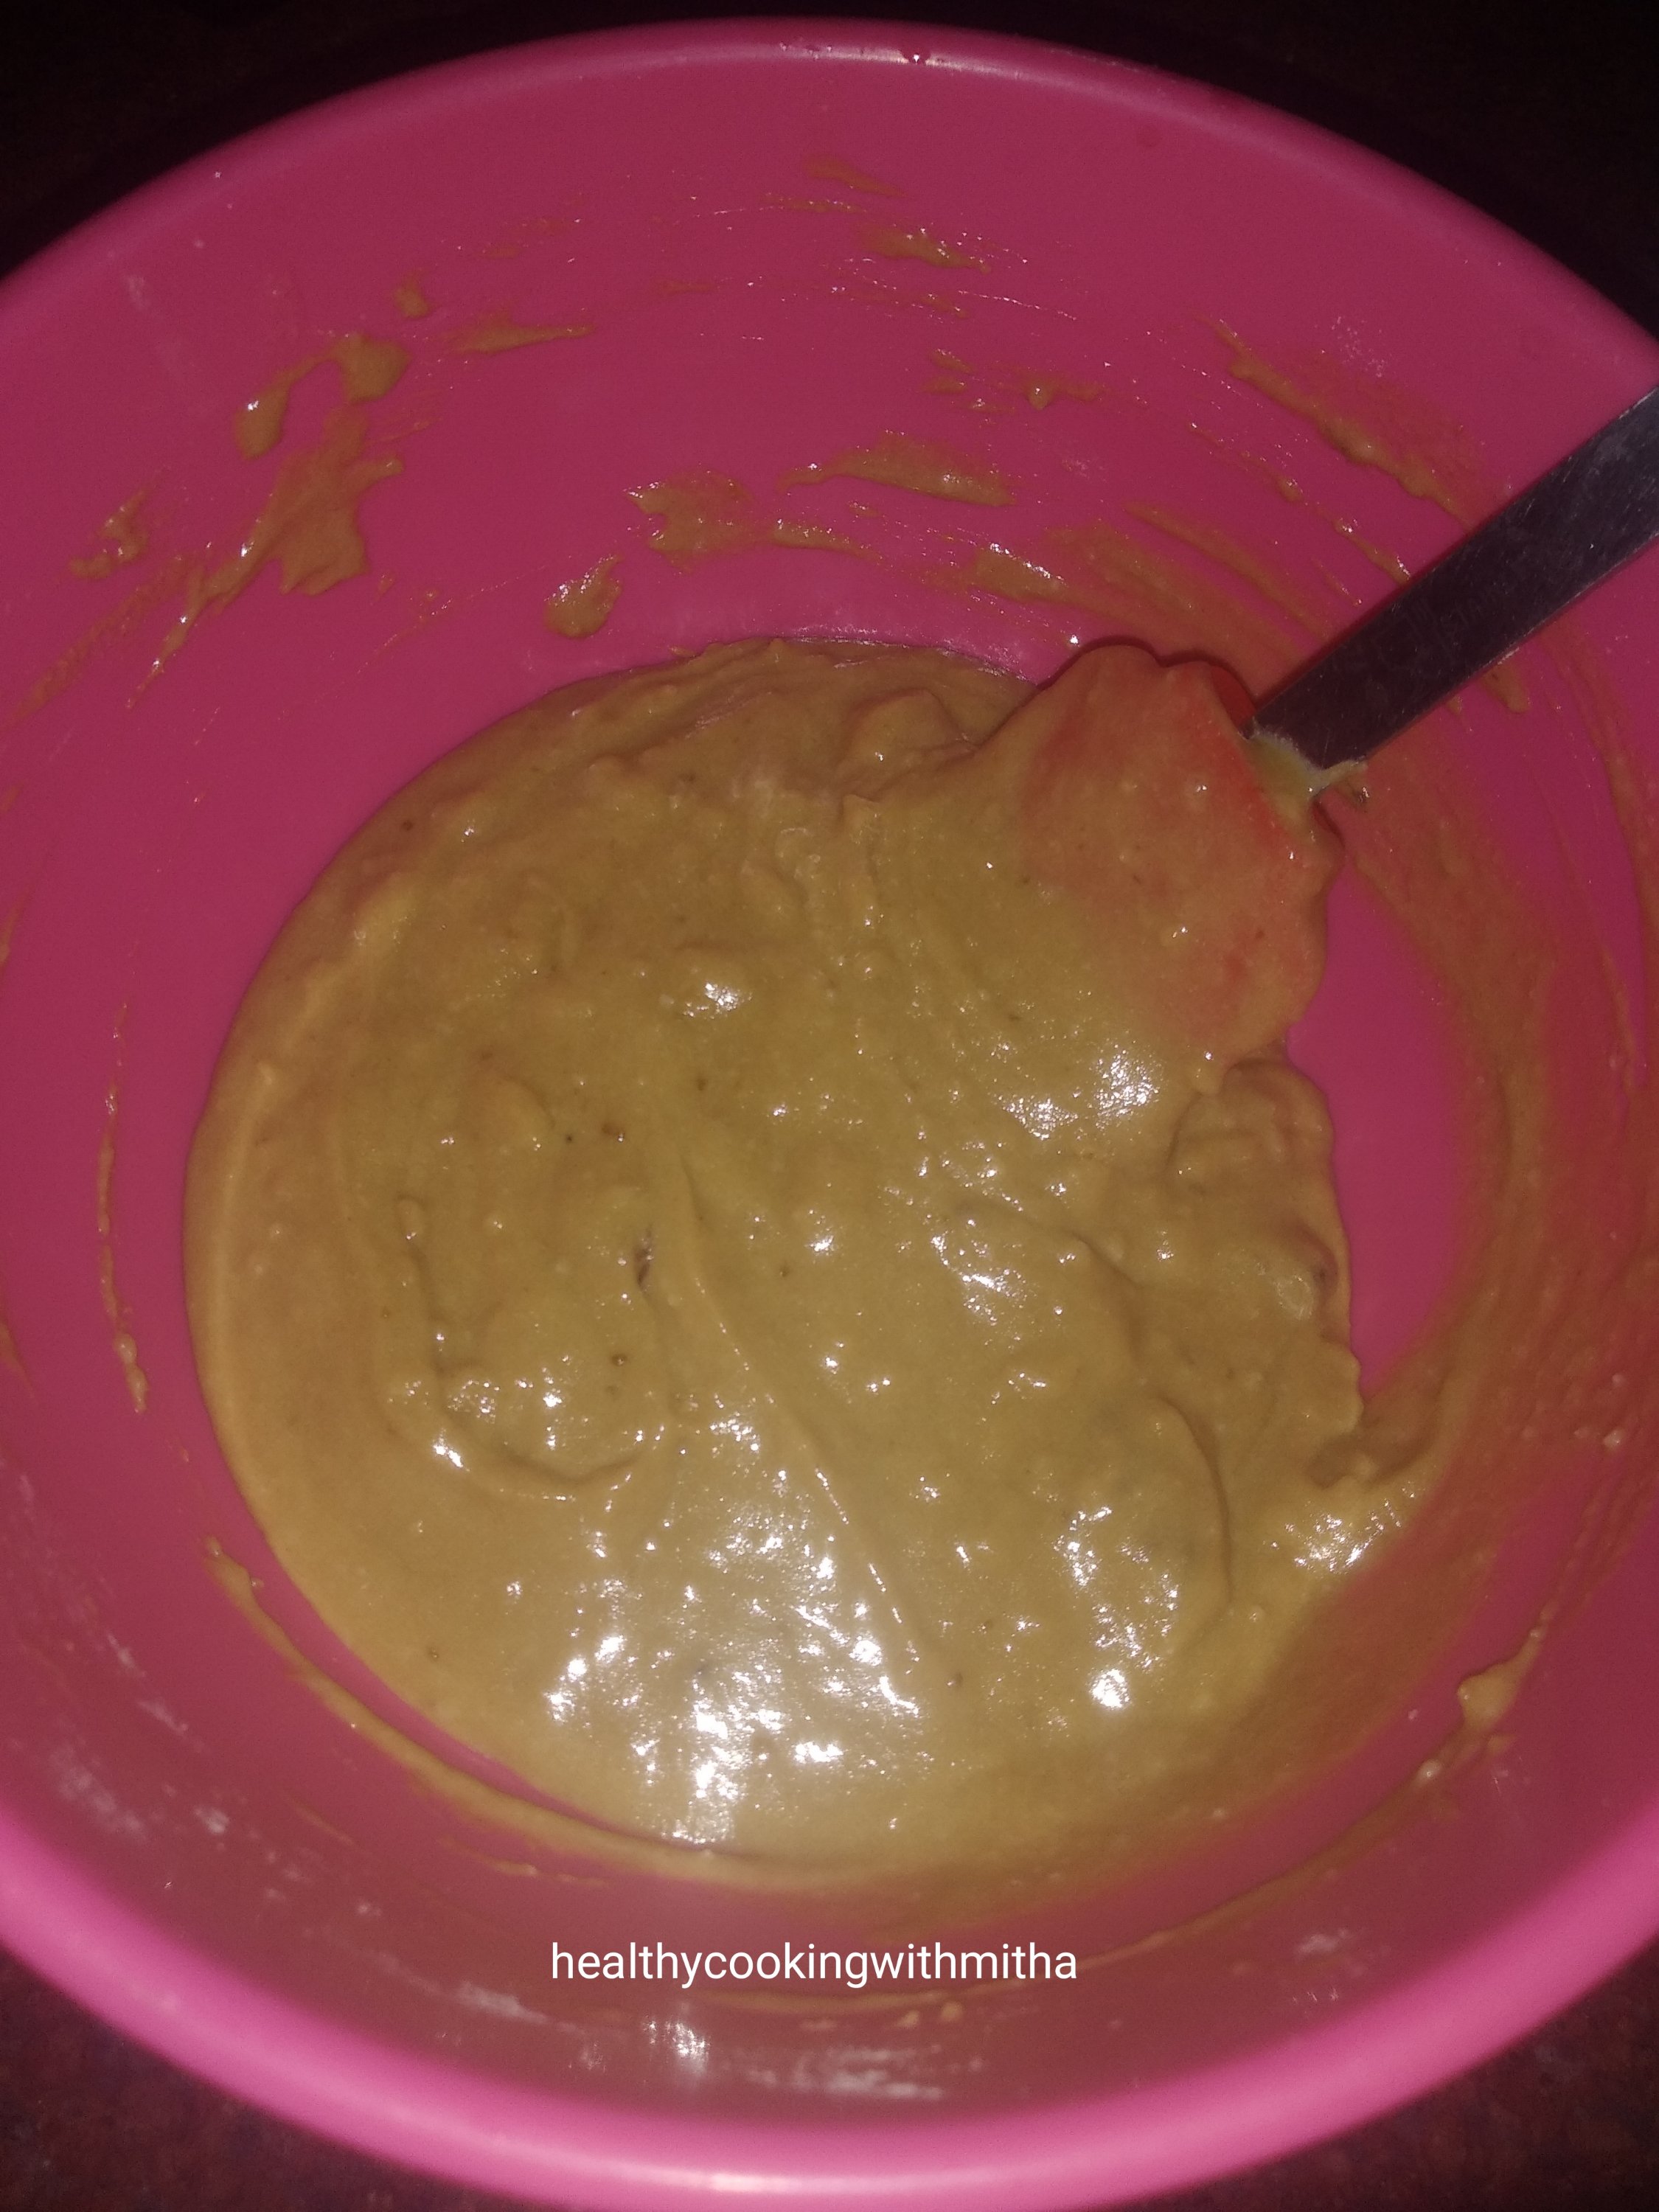
1. Chocolate Banana Cake ( using wheat flour and jaggery ) – A moist and delicious basic chocolate banana cake with easy frosting.

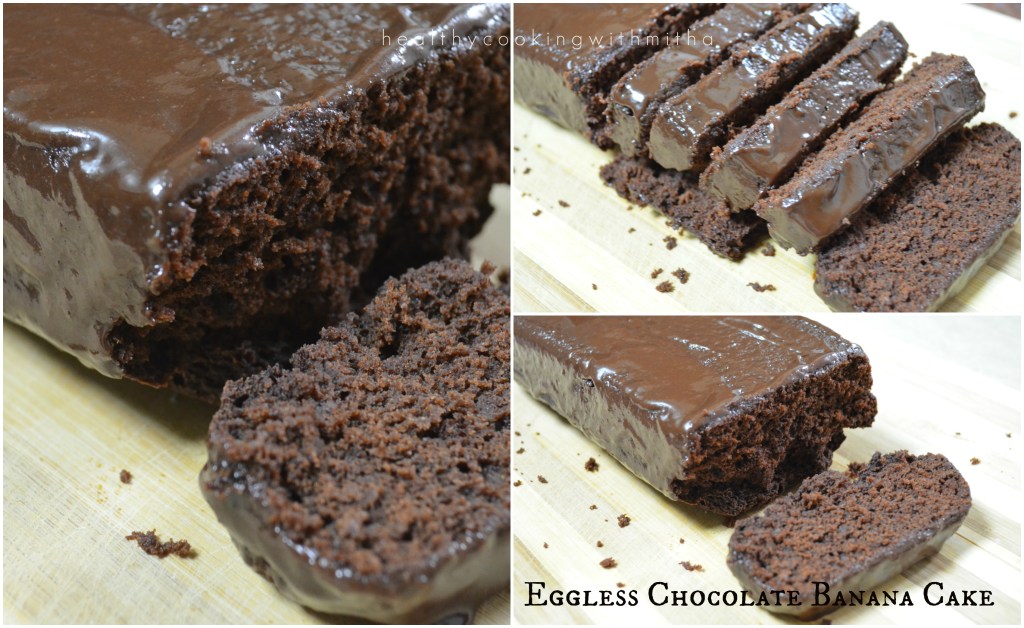
Recipe here – Chocolate Banana Cake ( using wheat flour and jaggery )

2. Ragi Chocolate Cake ( using ragi flour, wheat flour and jaggery ) – My kids and readers favorite cake. You can never say it has Ragi in it. With the frosting, it tastes heavenly.

Recipe here – Ragi Chocolate Cake ( using ragi flour, wheat flour and jaggery )

3. Dates and Oats Cake – My idea to sneak some oats in the cake as well. Because you can never say it has oats in it. Another of my readers’ favorite cakes. Tried and loved by so many.

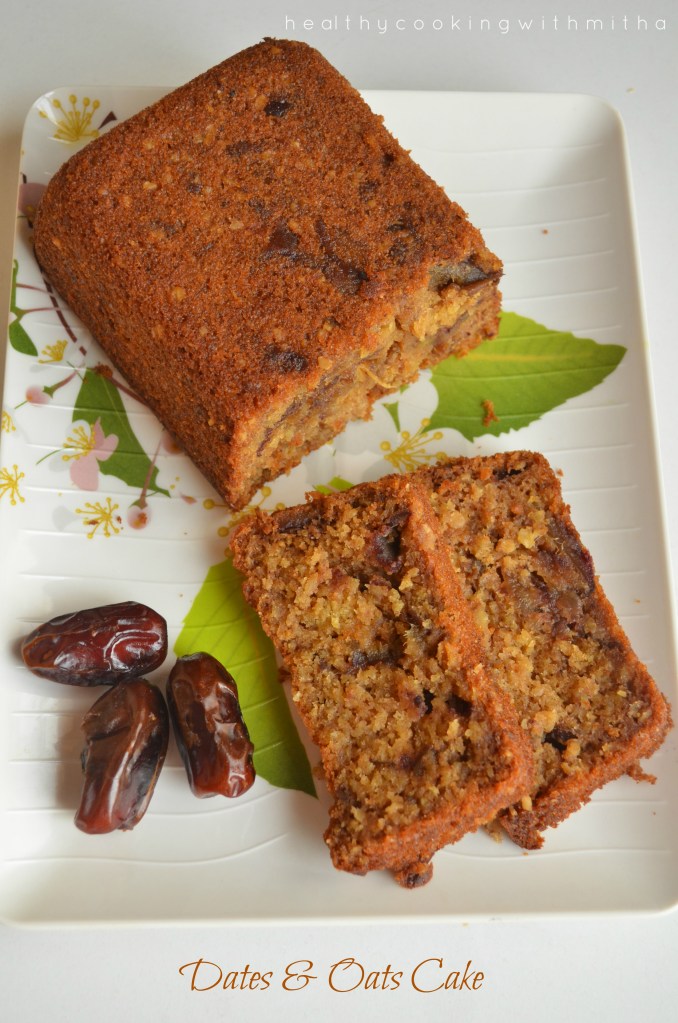
Recipe here – Dates and Oats Cake

4. Mango Ghee Cake – A super soft, moist and oh so delicious cake. My mouth waters whenever I think of this cake 😍

Recipe here – Mango Ghee Cake

5. Dates and Carrot Cake – Sugar free cake – My personal favorite as it is free from sugar or even jaggery can be skipped. Beautifully combines the natural sweetness of dates and carrots. Another of my recipe tried a lot by my readers.

Recipe here – Dates and Carrot Cake – Sugar free cake

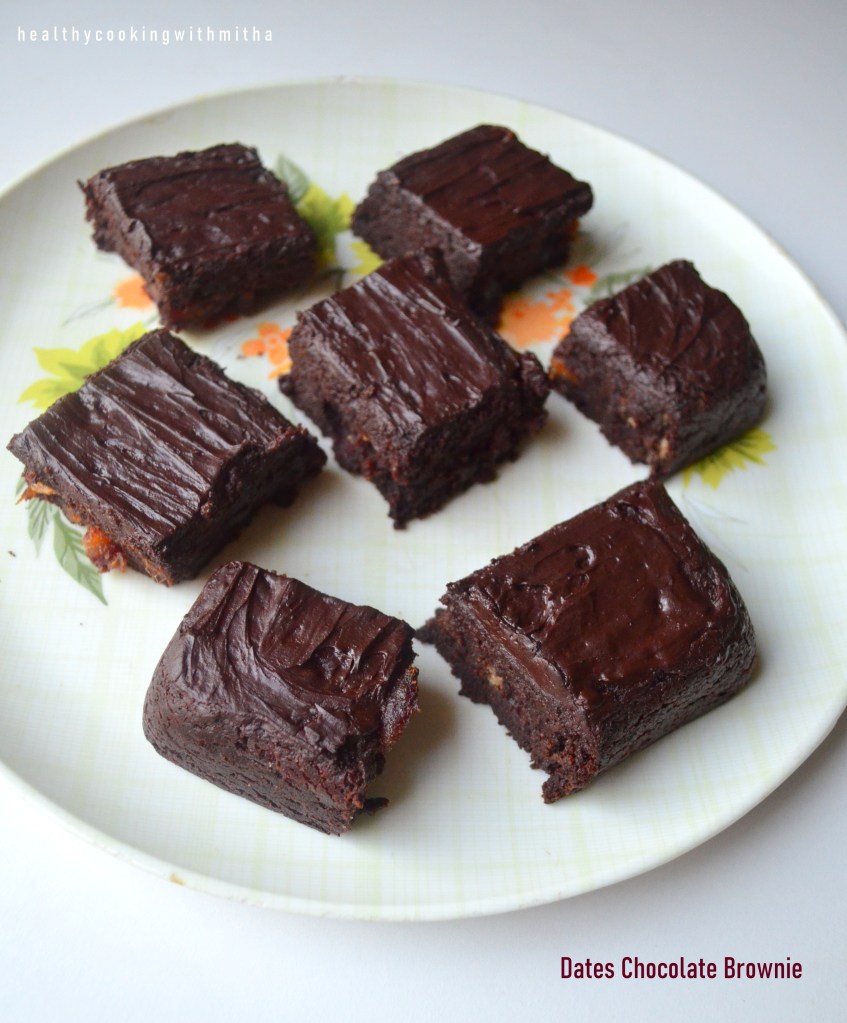
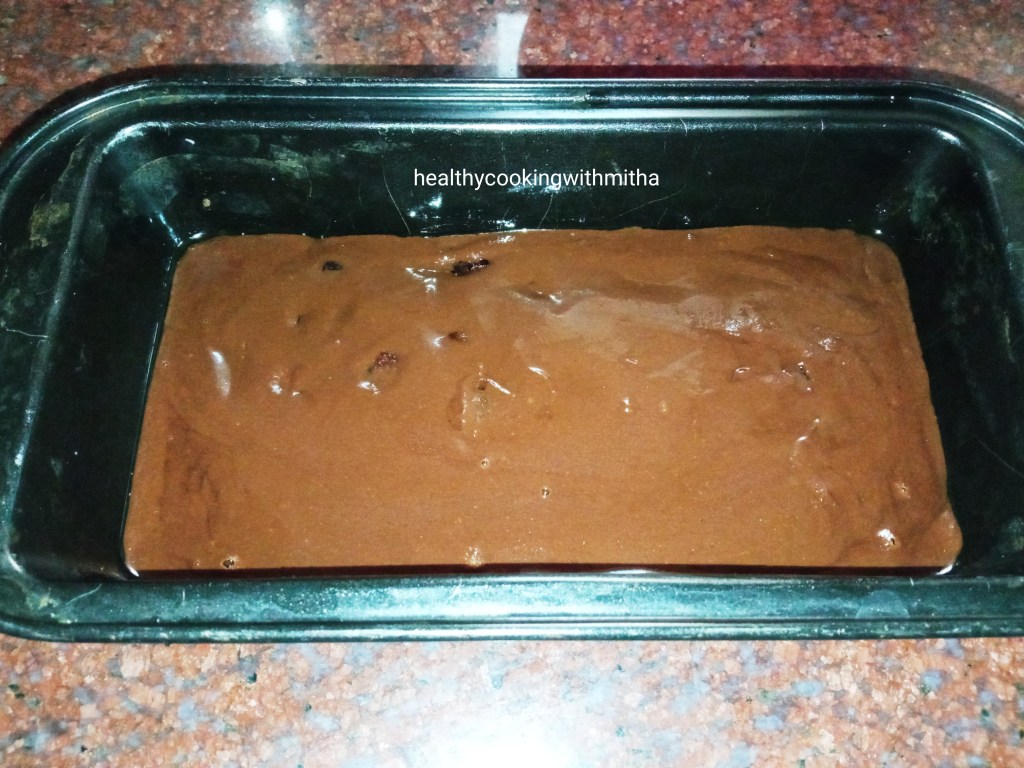
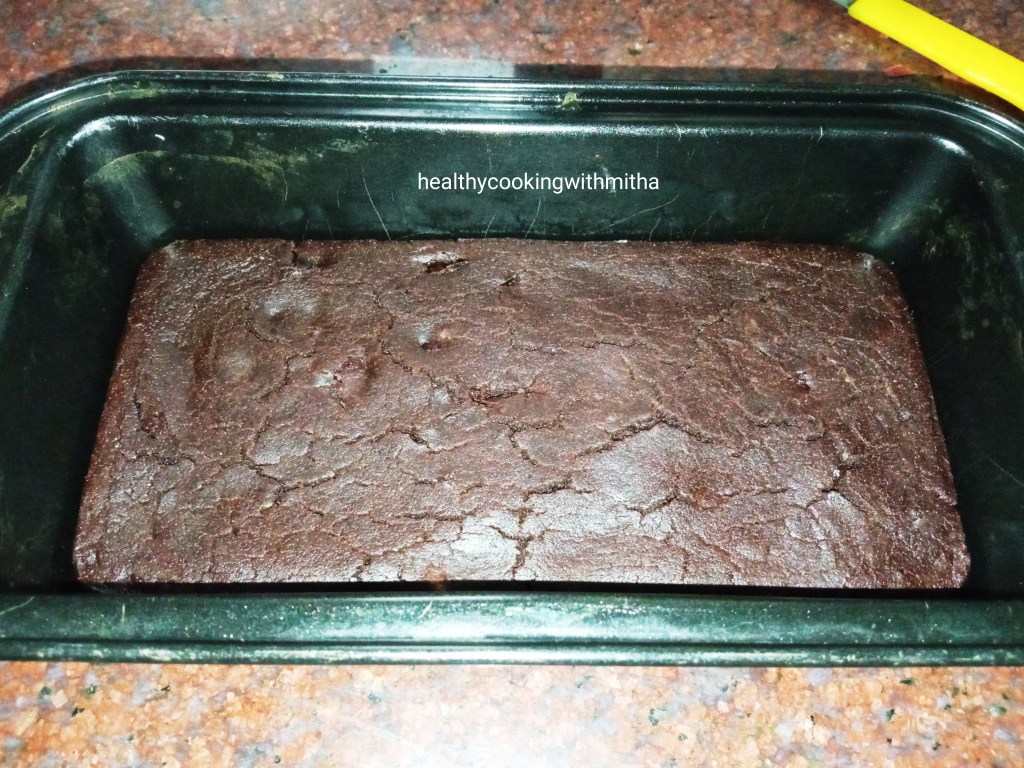
6. Dates Chocolate Brownie – Guilt free indulgence at its best! ❀️ You can also skip dates for plain chocolate brownies.

Recipe here – Dates Chocolate Brownie

7. Mango Rava cupcakes – Easy one bowl recipe to make delicious mango cupcakes which are enjoyed a lot by my kids.

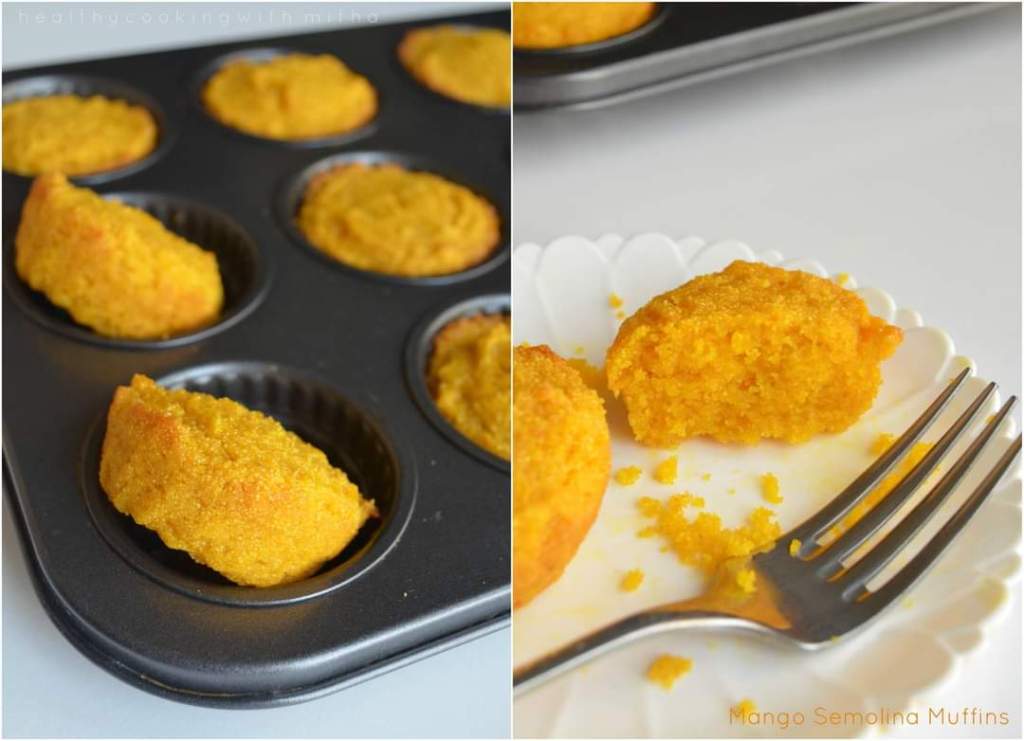
Recipe here – Mango Rava cupcakes

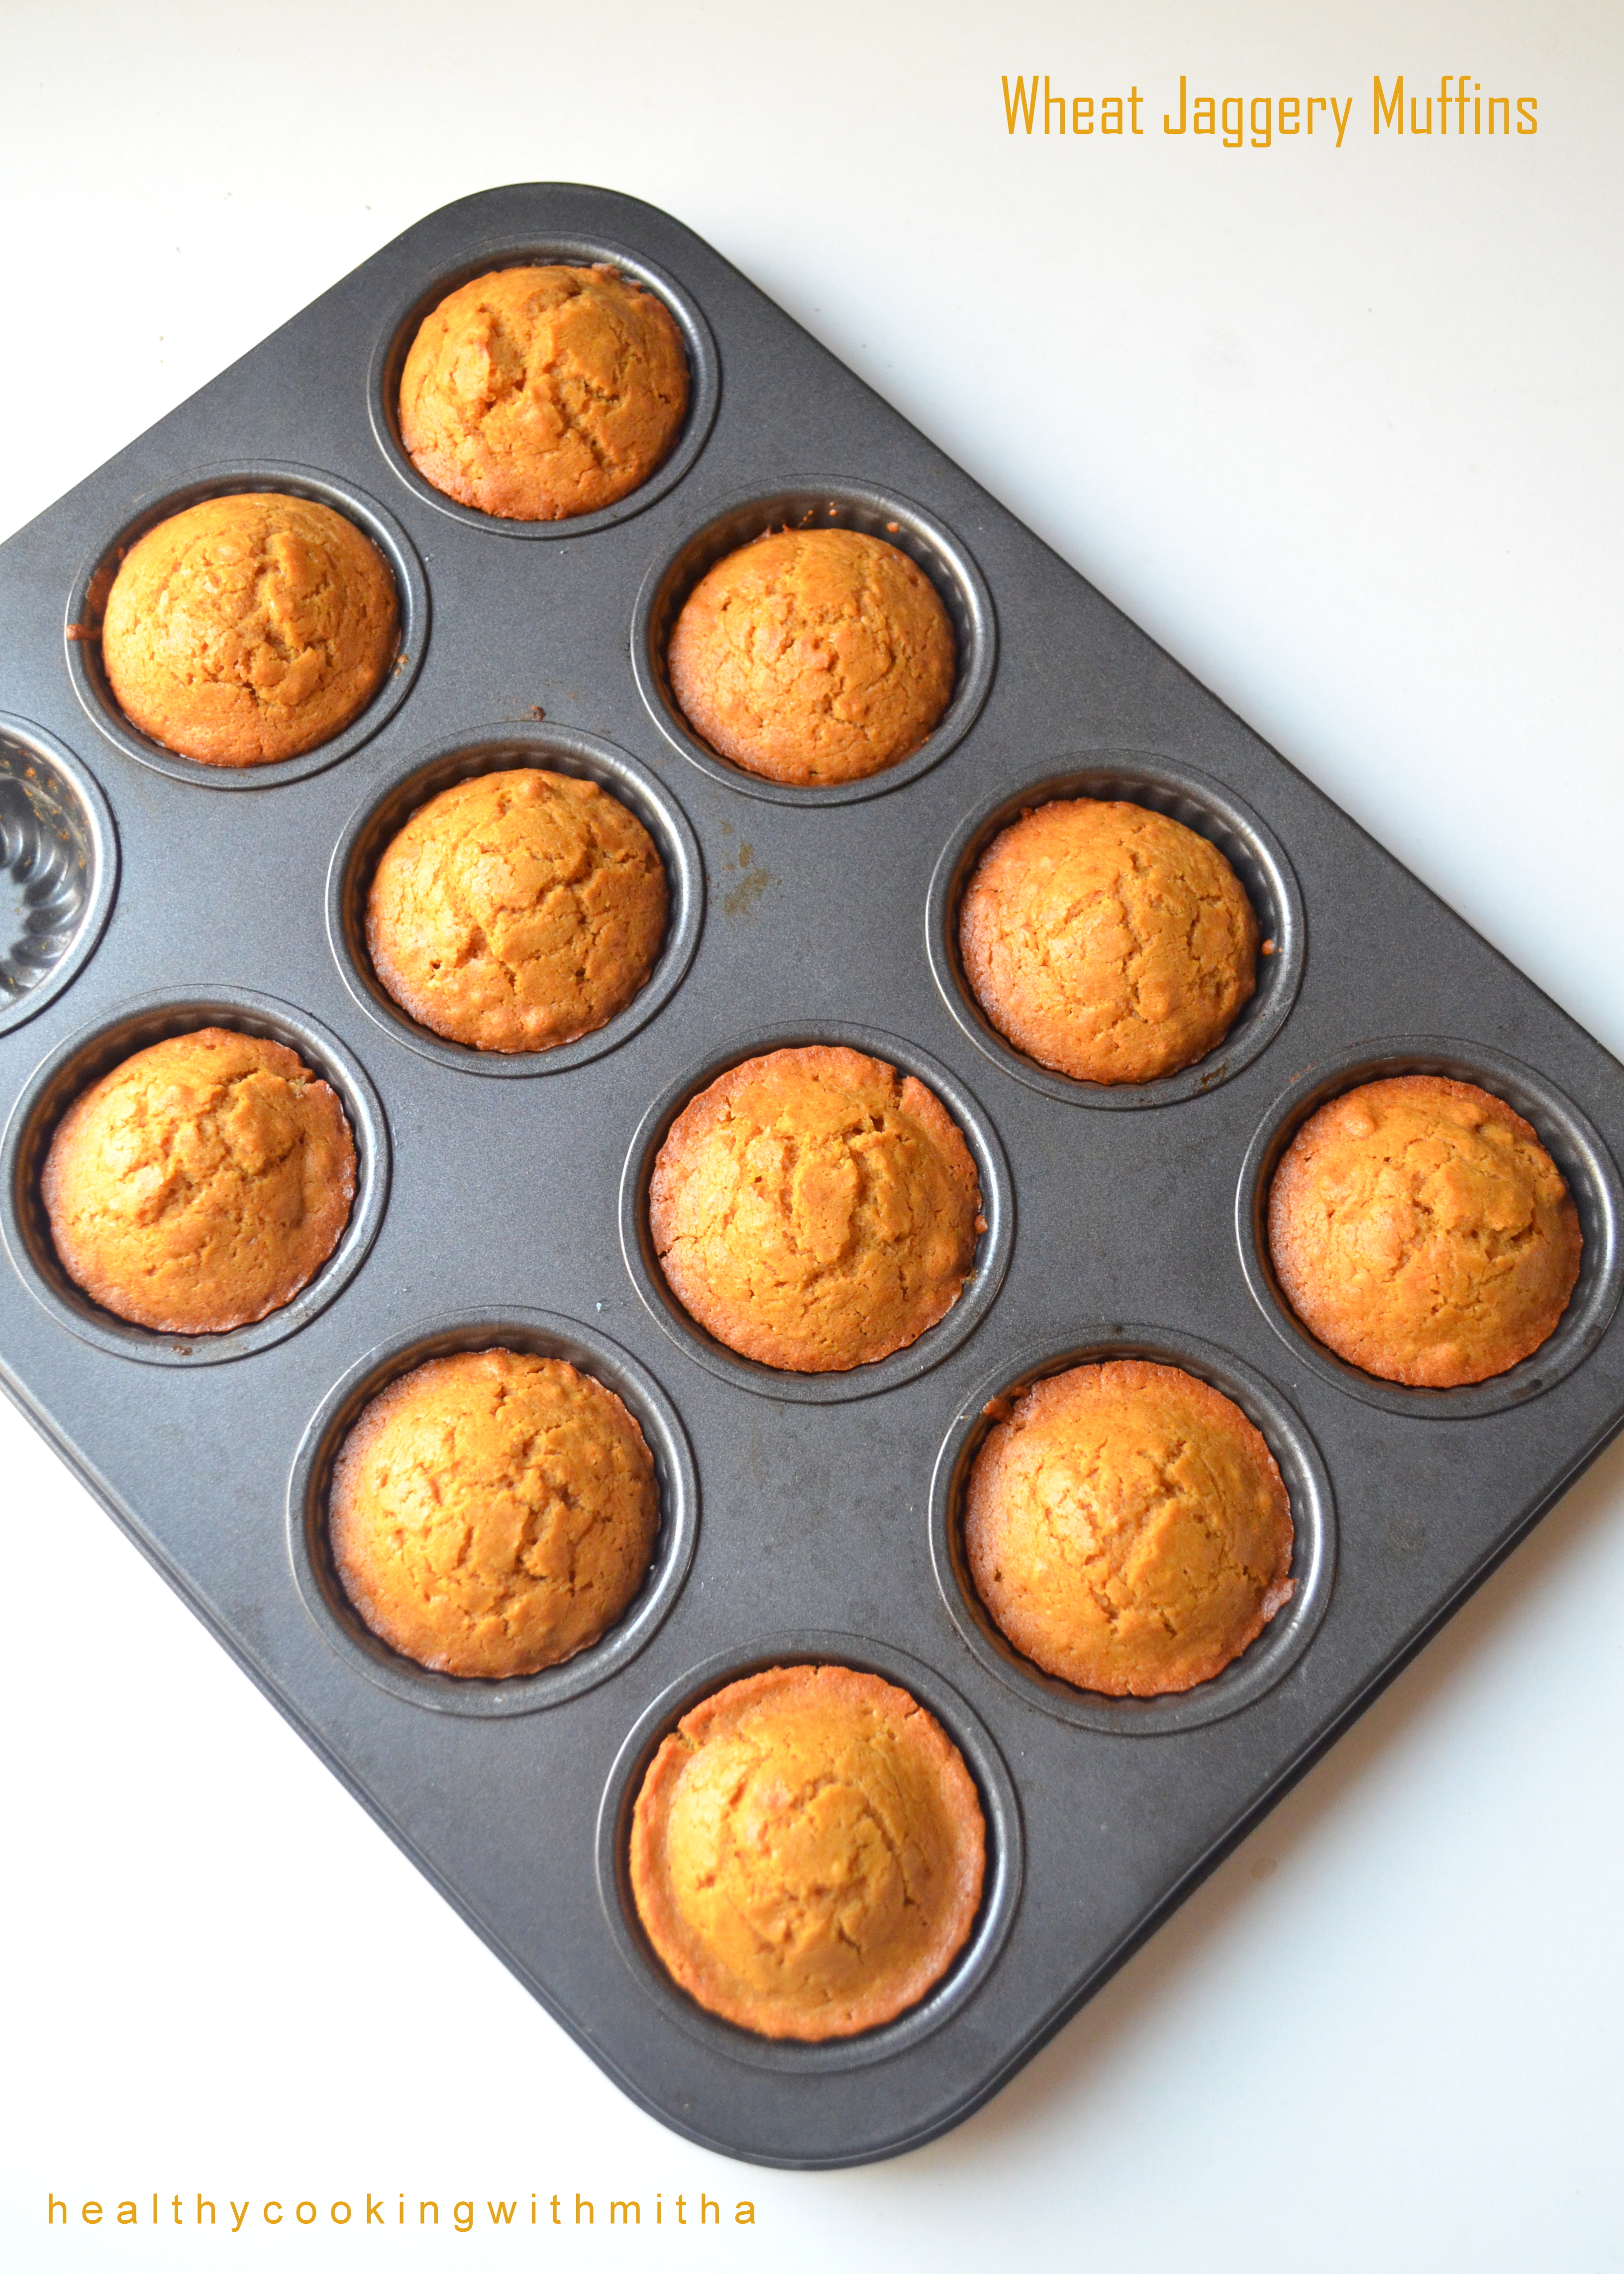
8. Wheat Jaggery Cake – Basic cake to which you can add dried fruits to make a dry fruit cake. Also can make cupcakes with this. Have been making this cake for years now for my kids.

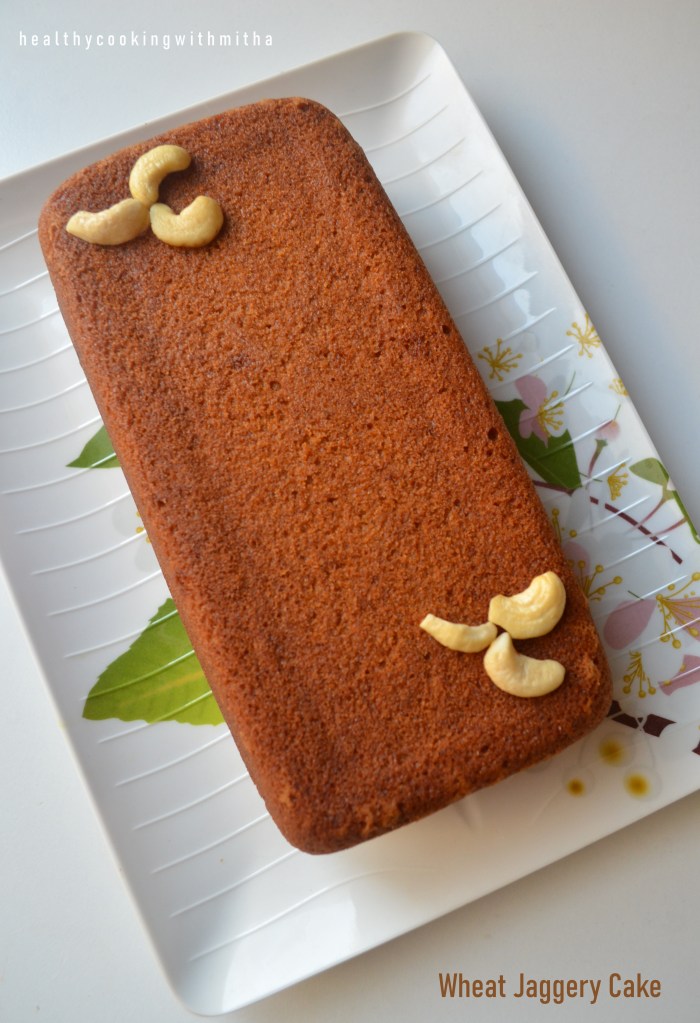
Recipe here – Wheat Jaggery Cake

9. Wheat Chocolate Sponge Cake – You can never say it is made with wheat flour and jaggery. Comes out super soft and delicious. I make cupcakes with this batter regularly for my kids as they love it. ❀️

Recipe here – Wheat Chocolate Sponge Cake/ cupcakes

10. Eggless Banana Rava Cupcakes – This is my go to recipe when I have over ripe bananas. Super easy to make, one bowl recipe which tastes heavenly due to the combination of Rava, banana, Jaggery, ghee and cardamom powder.

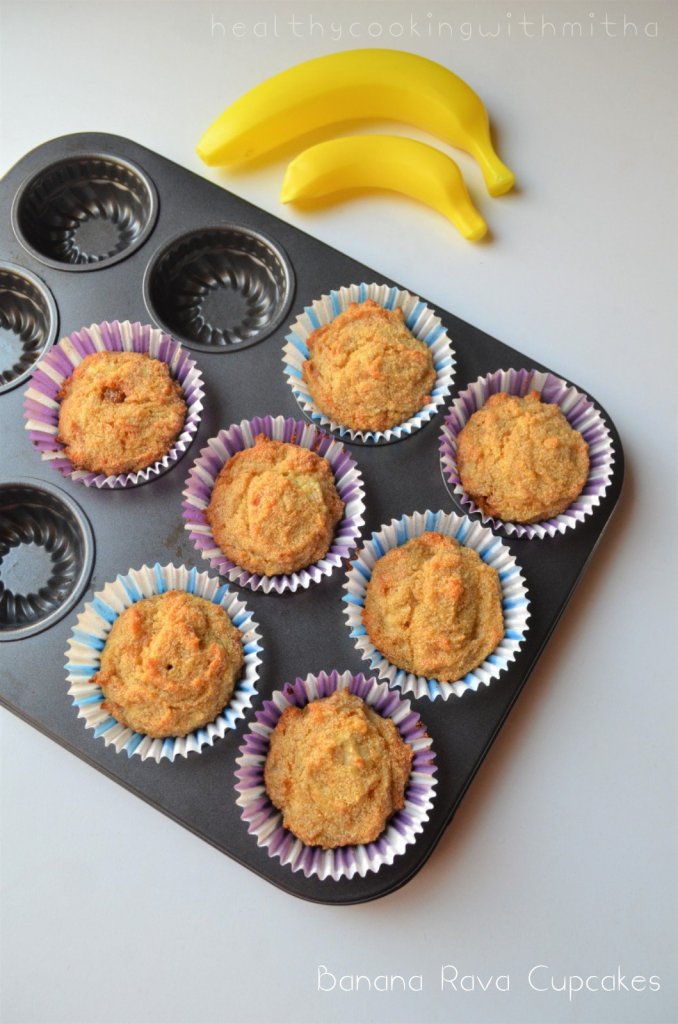
Recipe here – Eggless Rava Banana Cupcakes

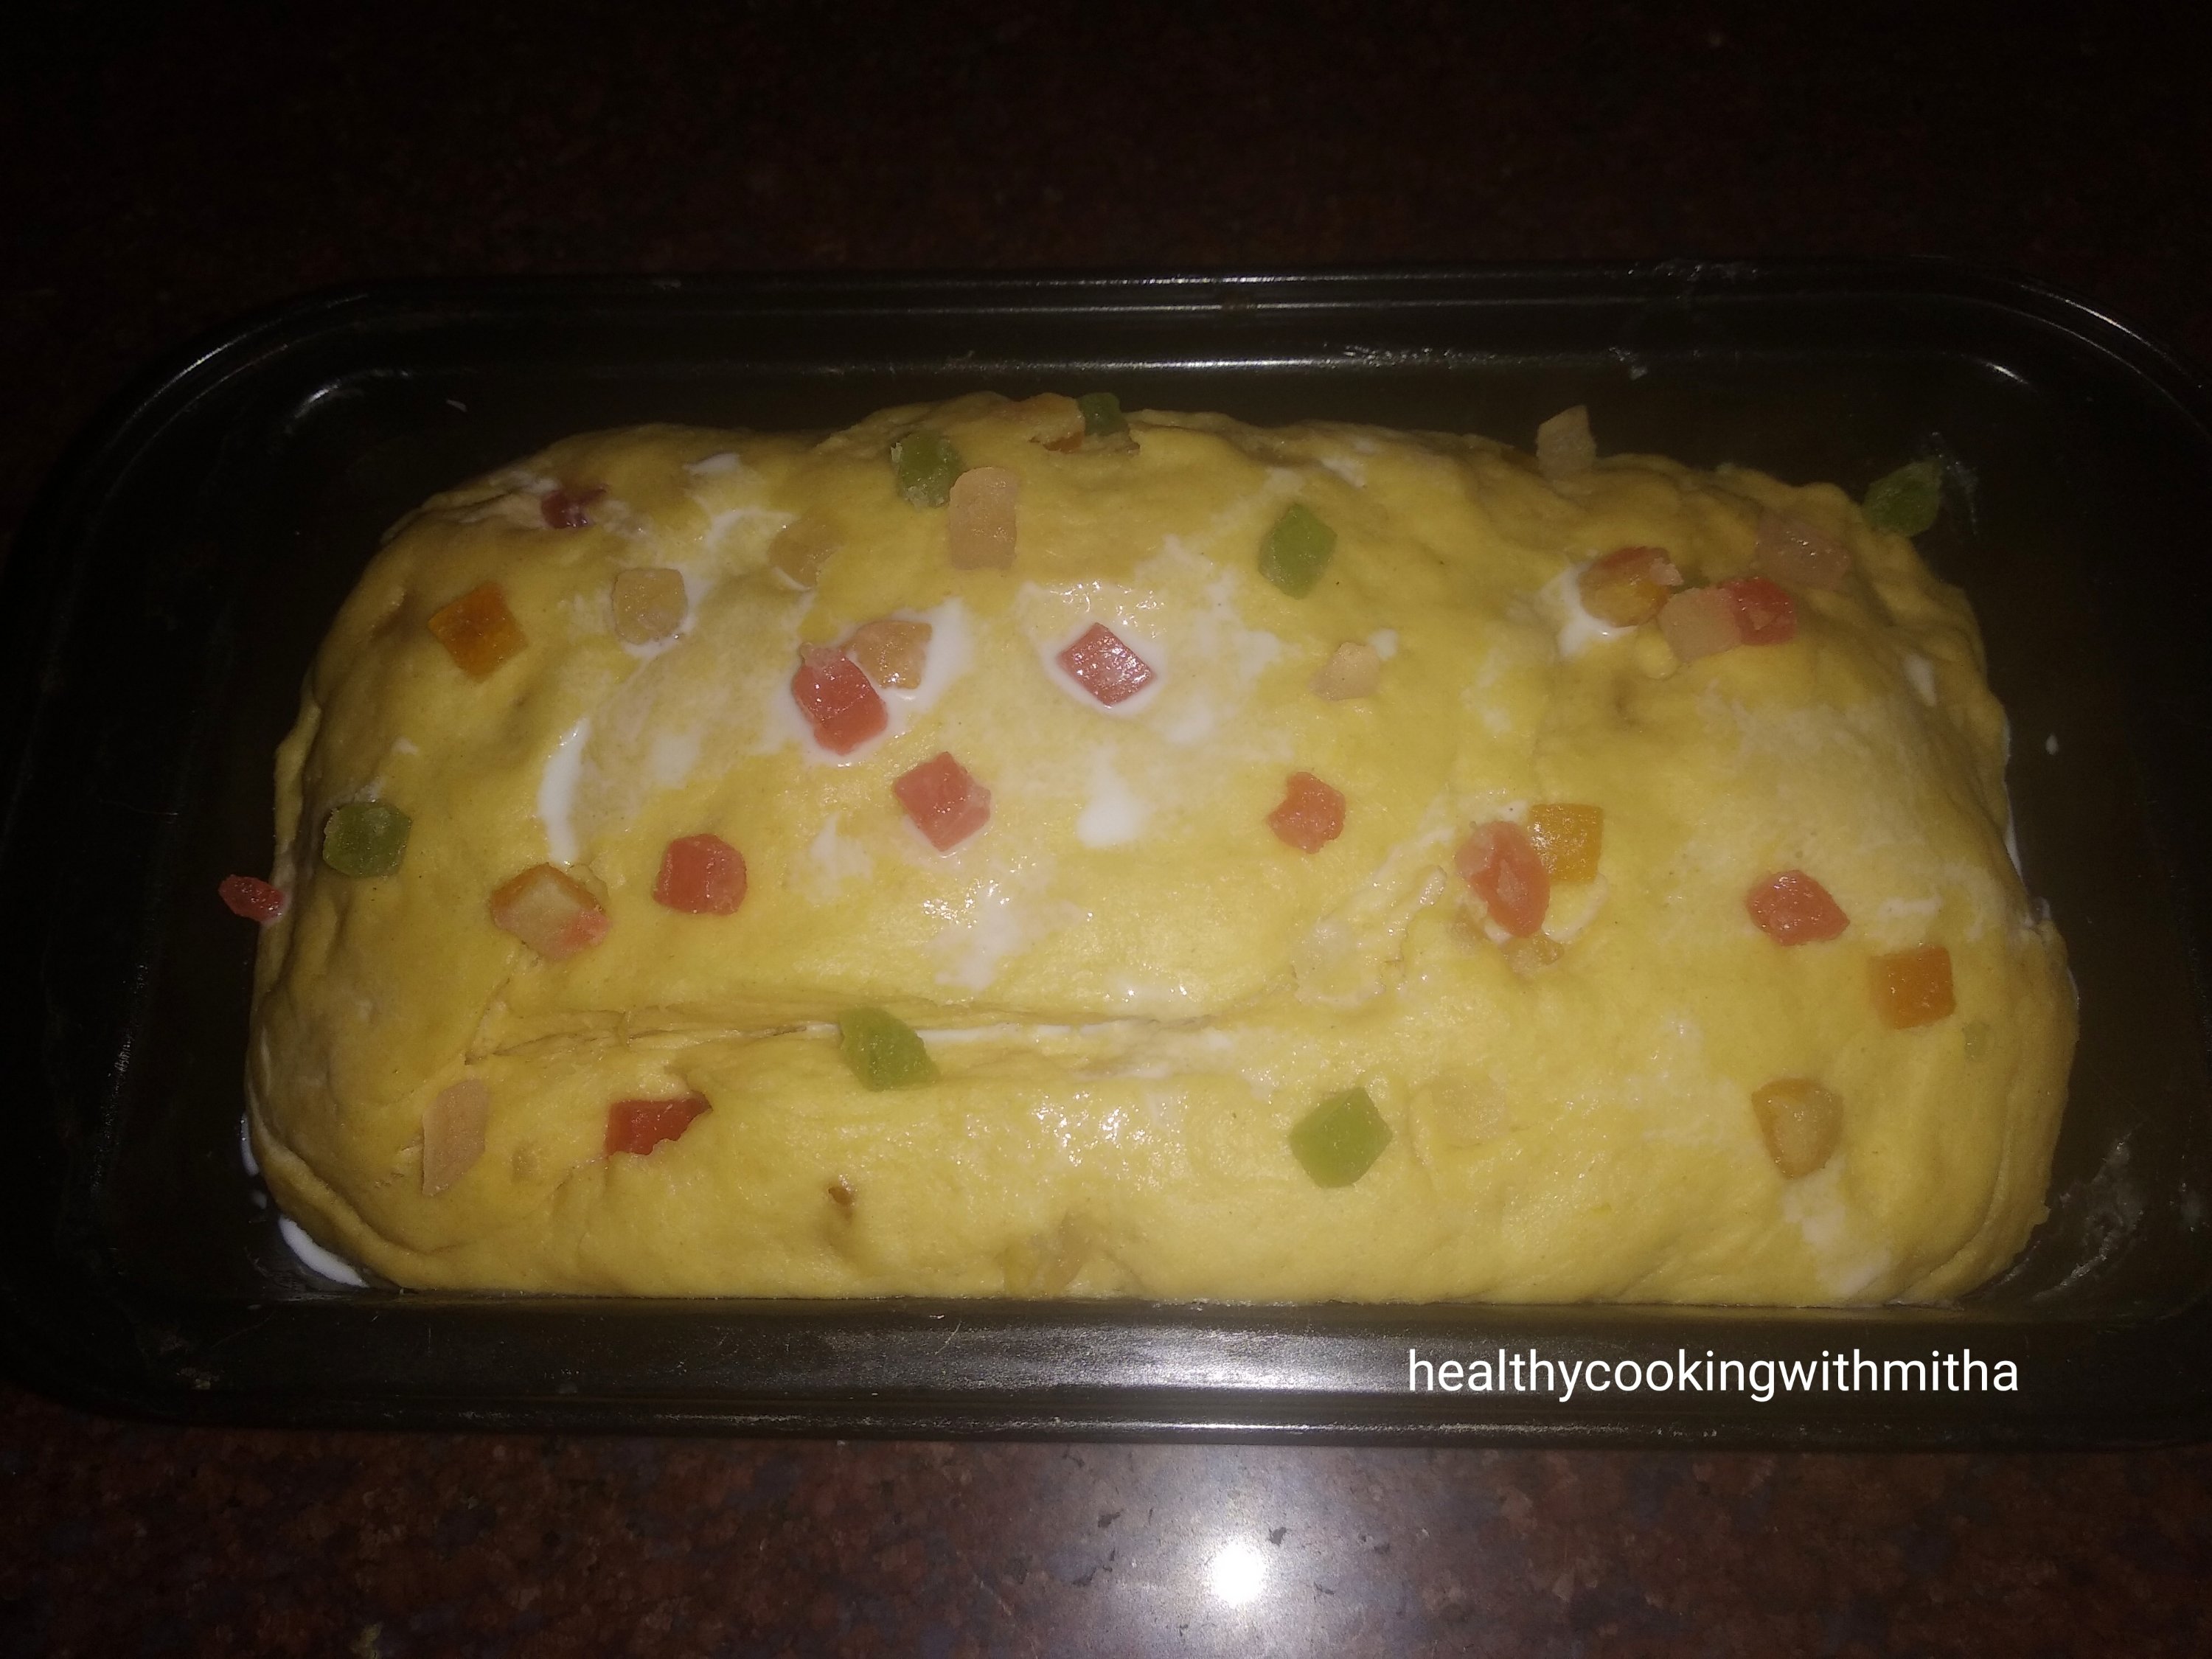
11. Eggless Dry Fruit Cake – A great way to add dry fruits in your kids snack. With the addition of orange juice, this cake tastes absolutely delicious. A regularly made cake at my place.

Recipe here – Eggless, whole wheat Dry Fruit Cake

12. Eggless Wheat Banana Cupcakes: I make these cupcakes for my kids’ evening snack during vacations and also for their tiffin box to school. A great way to finish up those over ripe bananas too. Comes out soft and delicious.

Recipe here – Eggless Wheat Banana Cupcakes

Gluten free Cakes:

Jowar Chocolate Sponge Cake – Gluten free and eggless, this cake baked with Jowar flour is a perfect example of being healthy as well as tasty. Comes out very soft and spongy too..

Recipe hereJowar Chocolate sponge cake

Healthy Cookies:

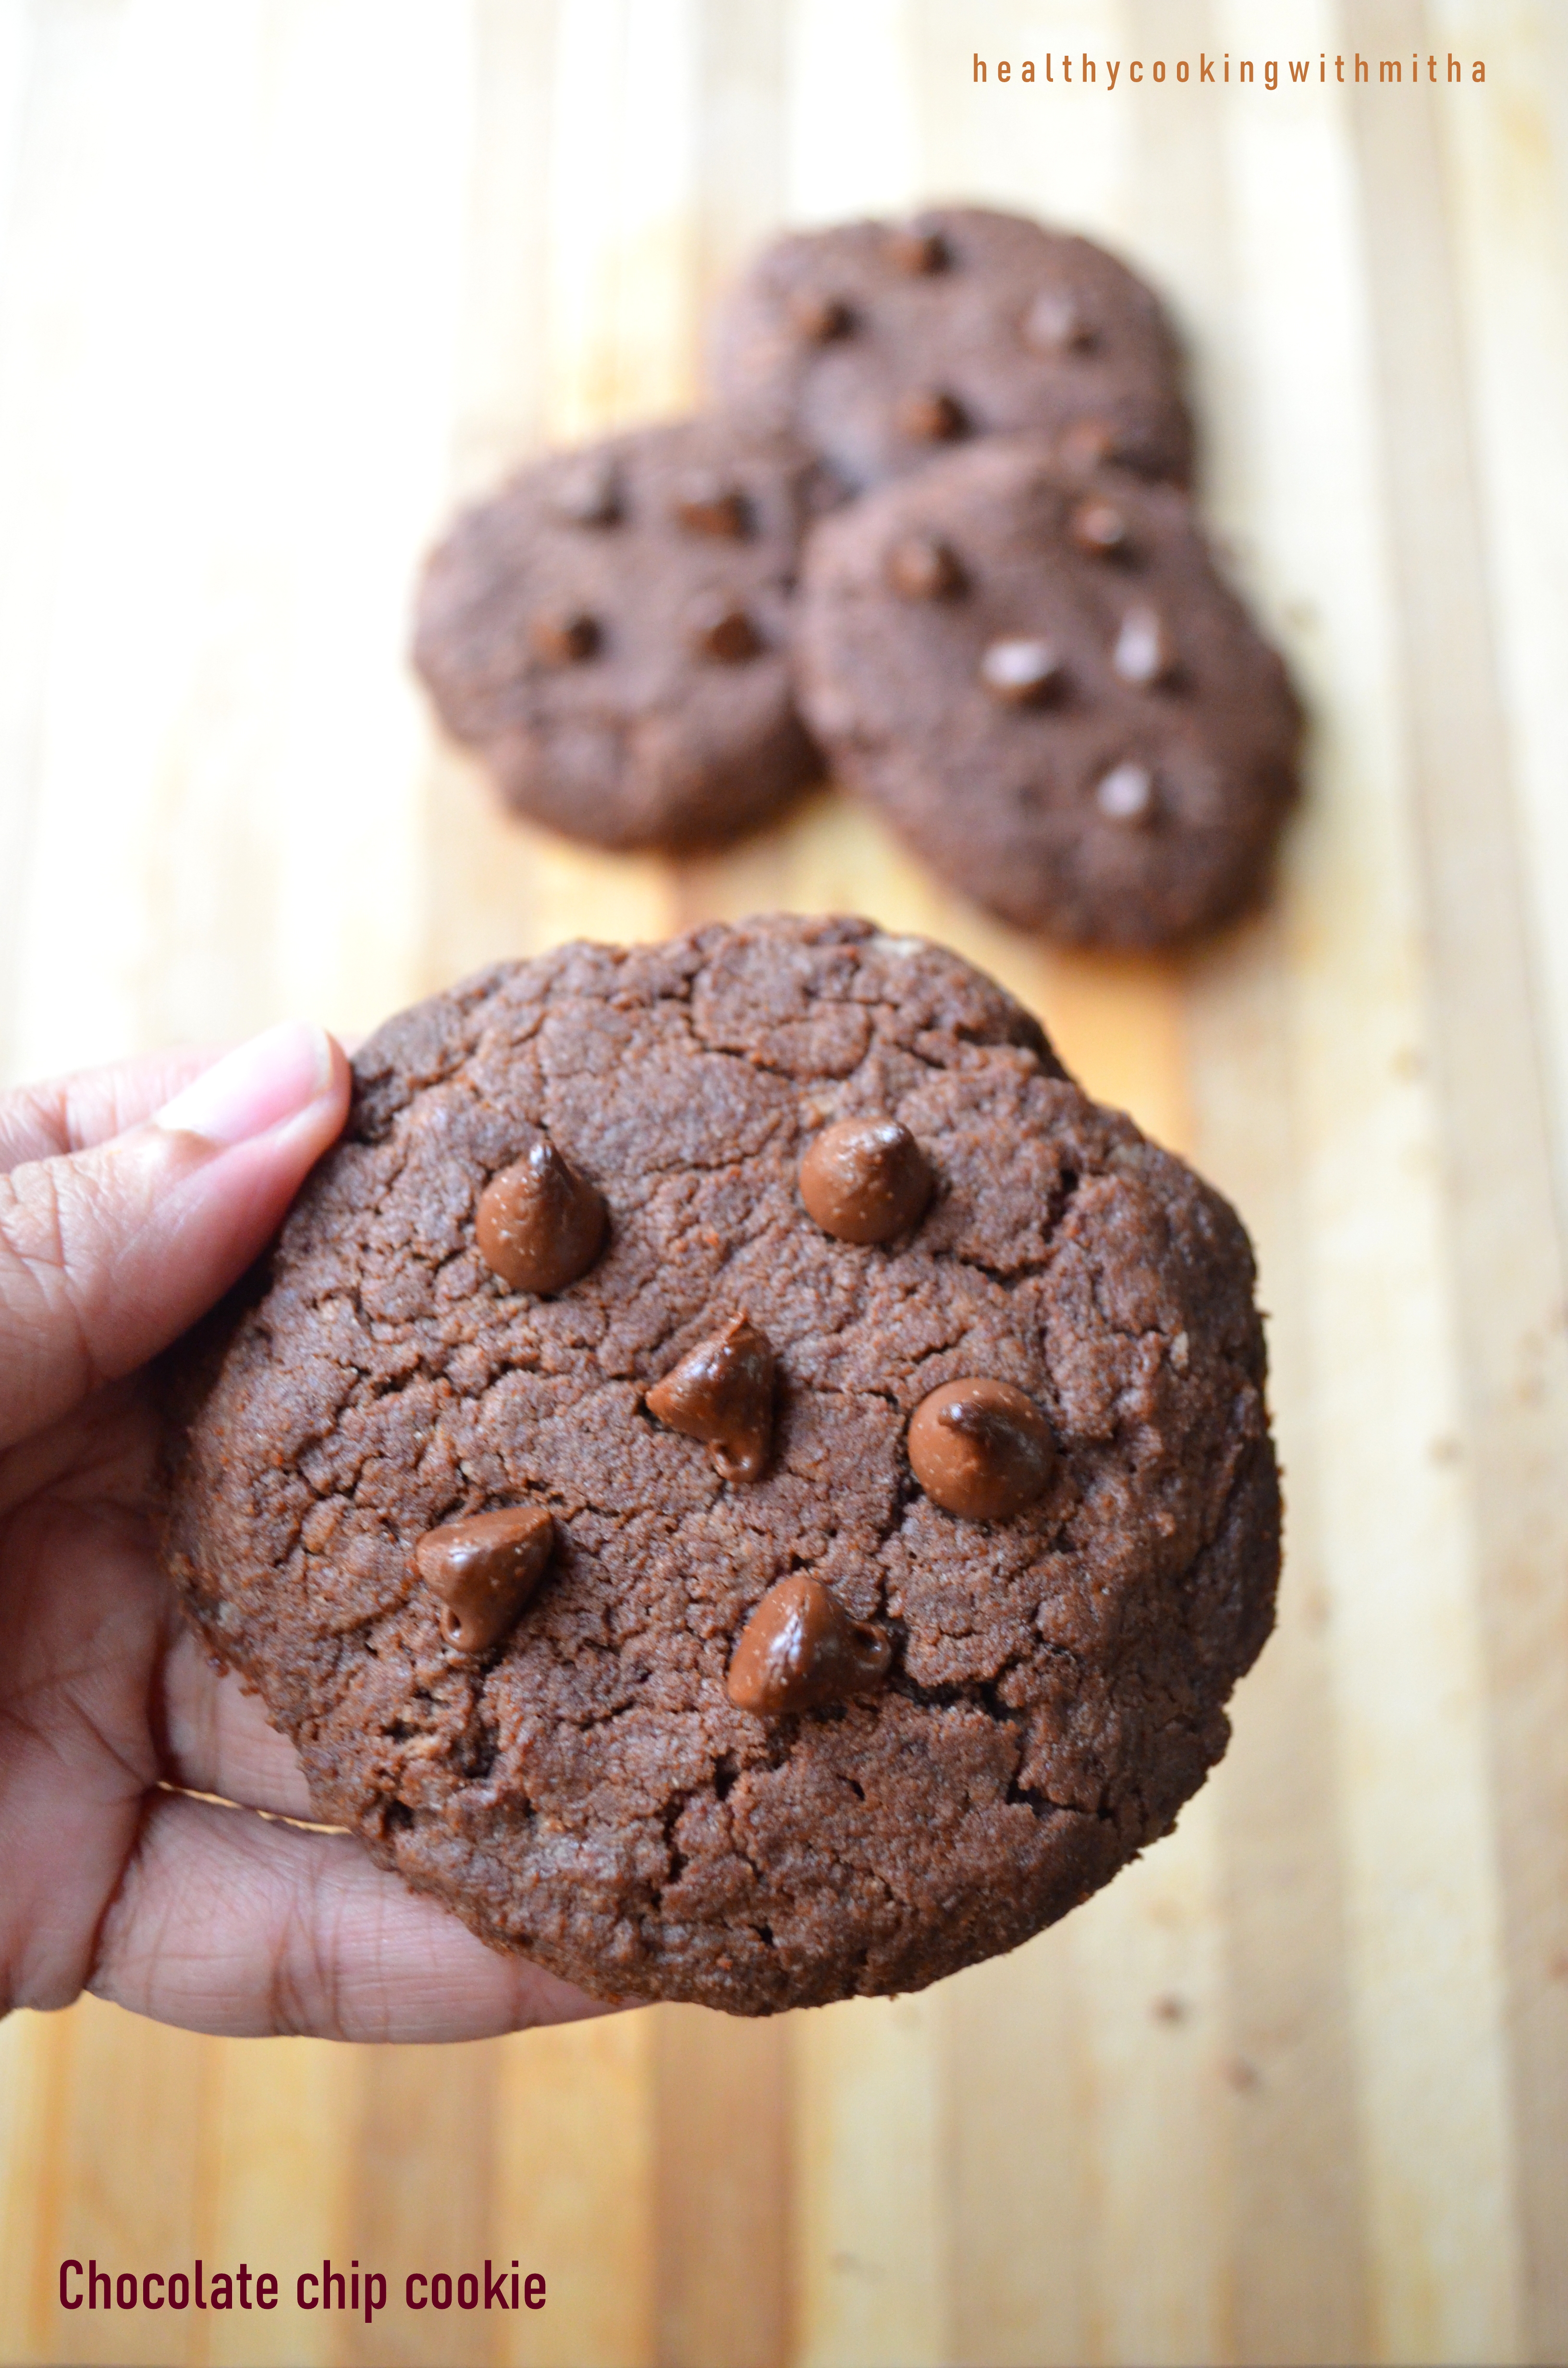
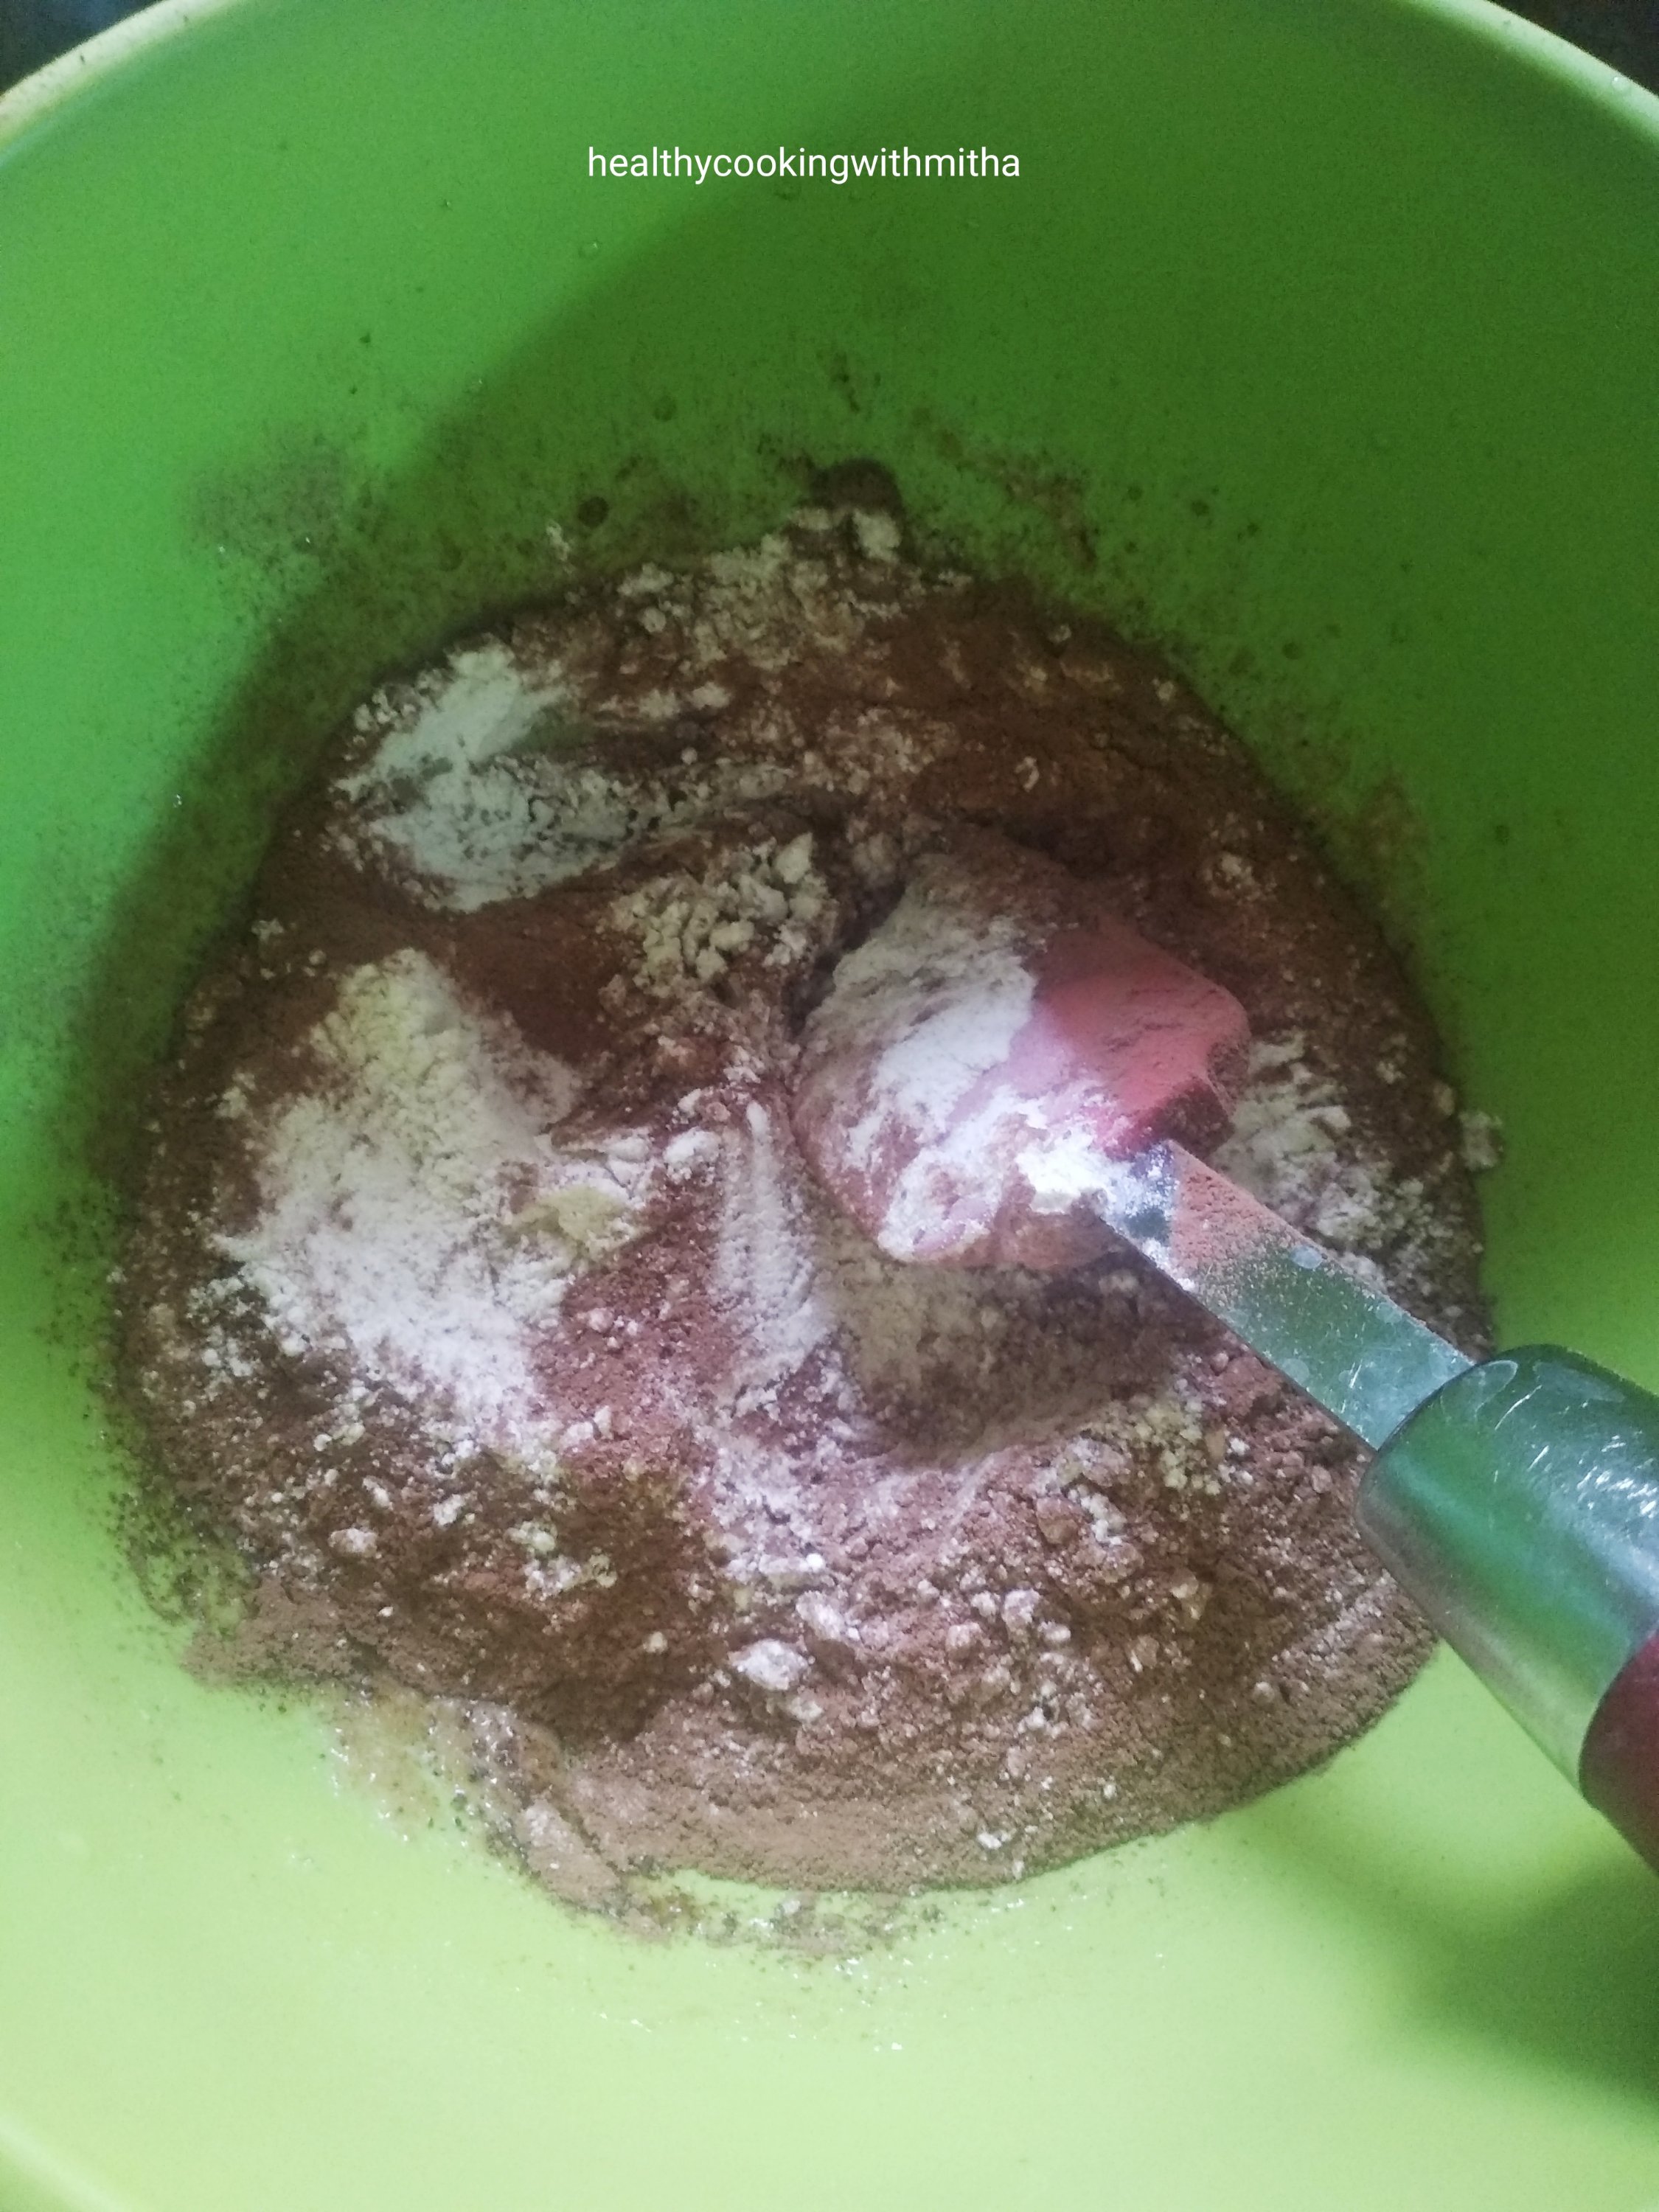
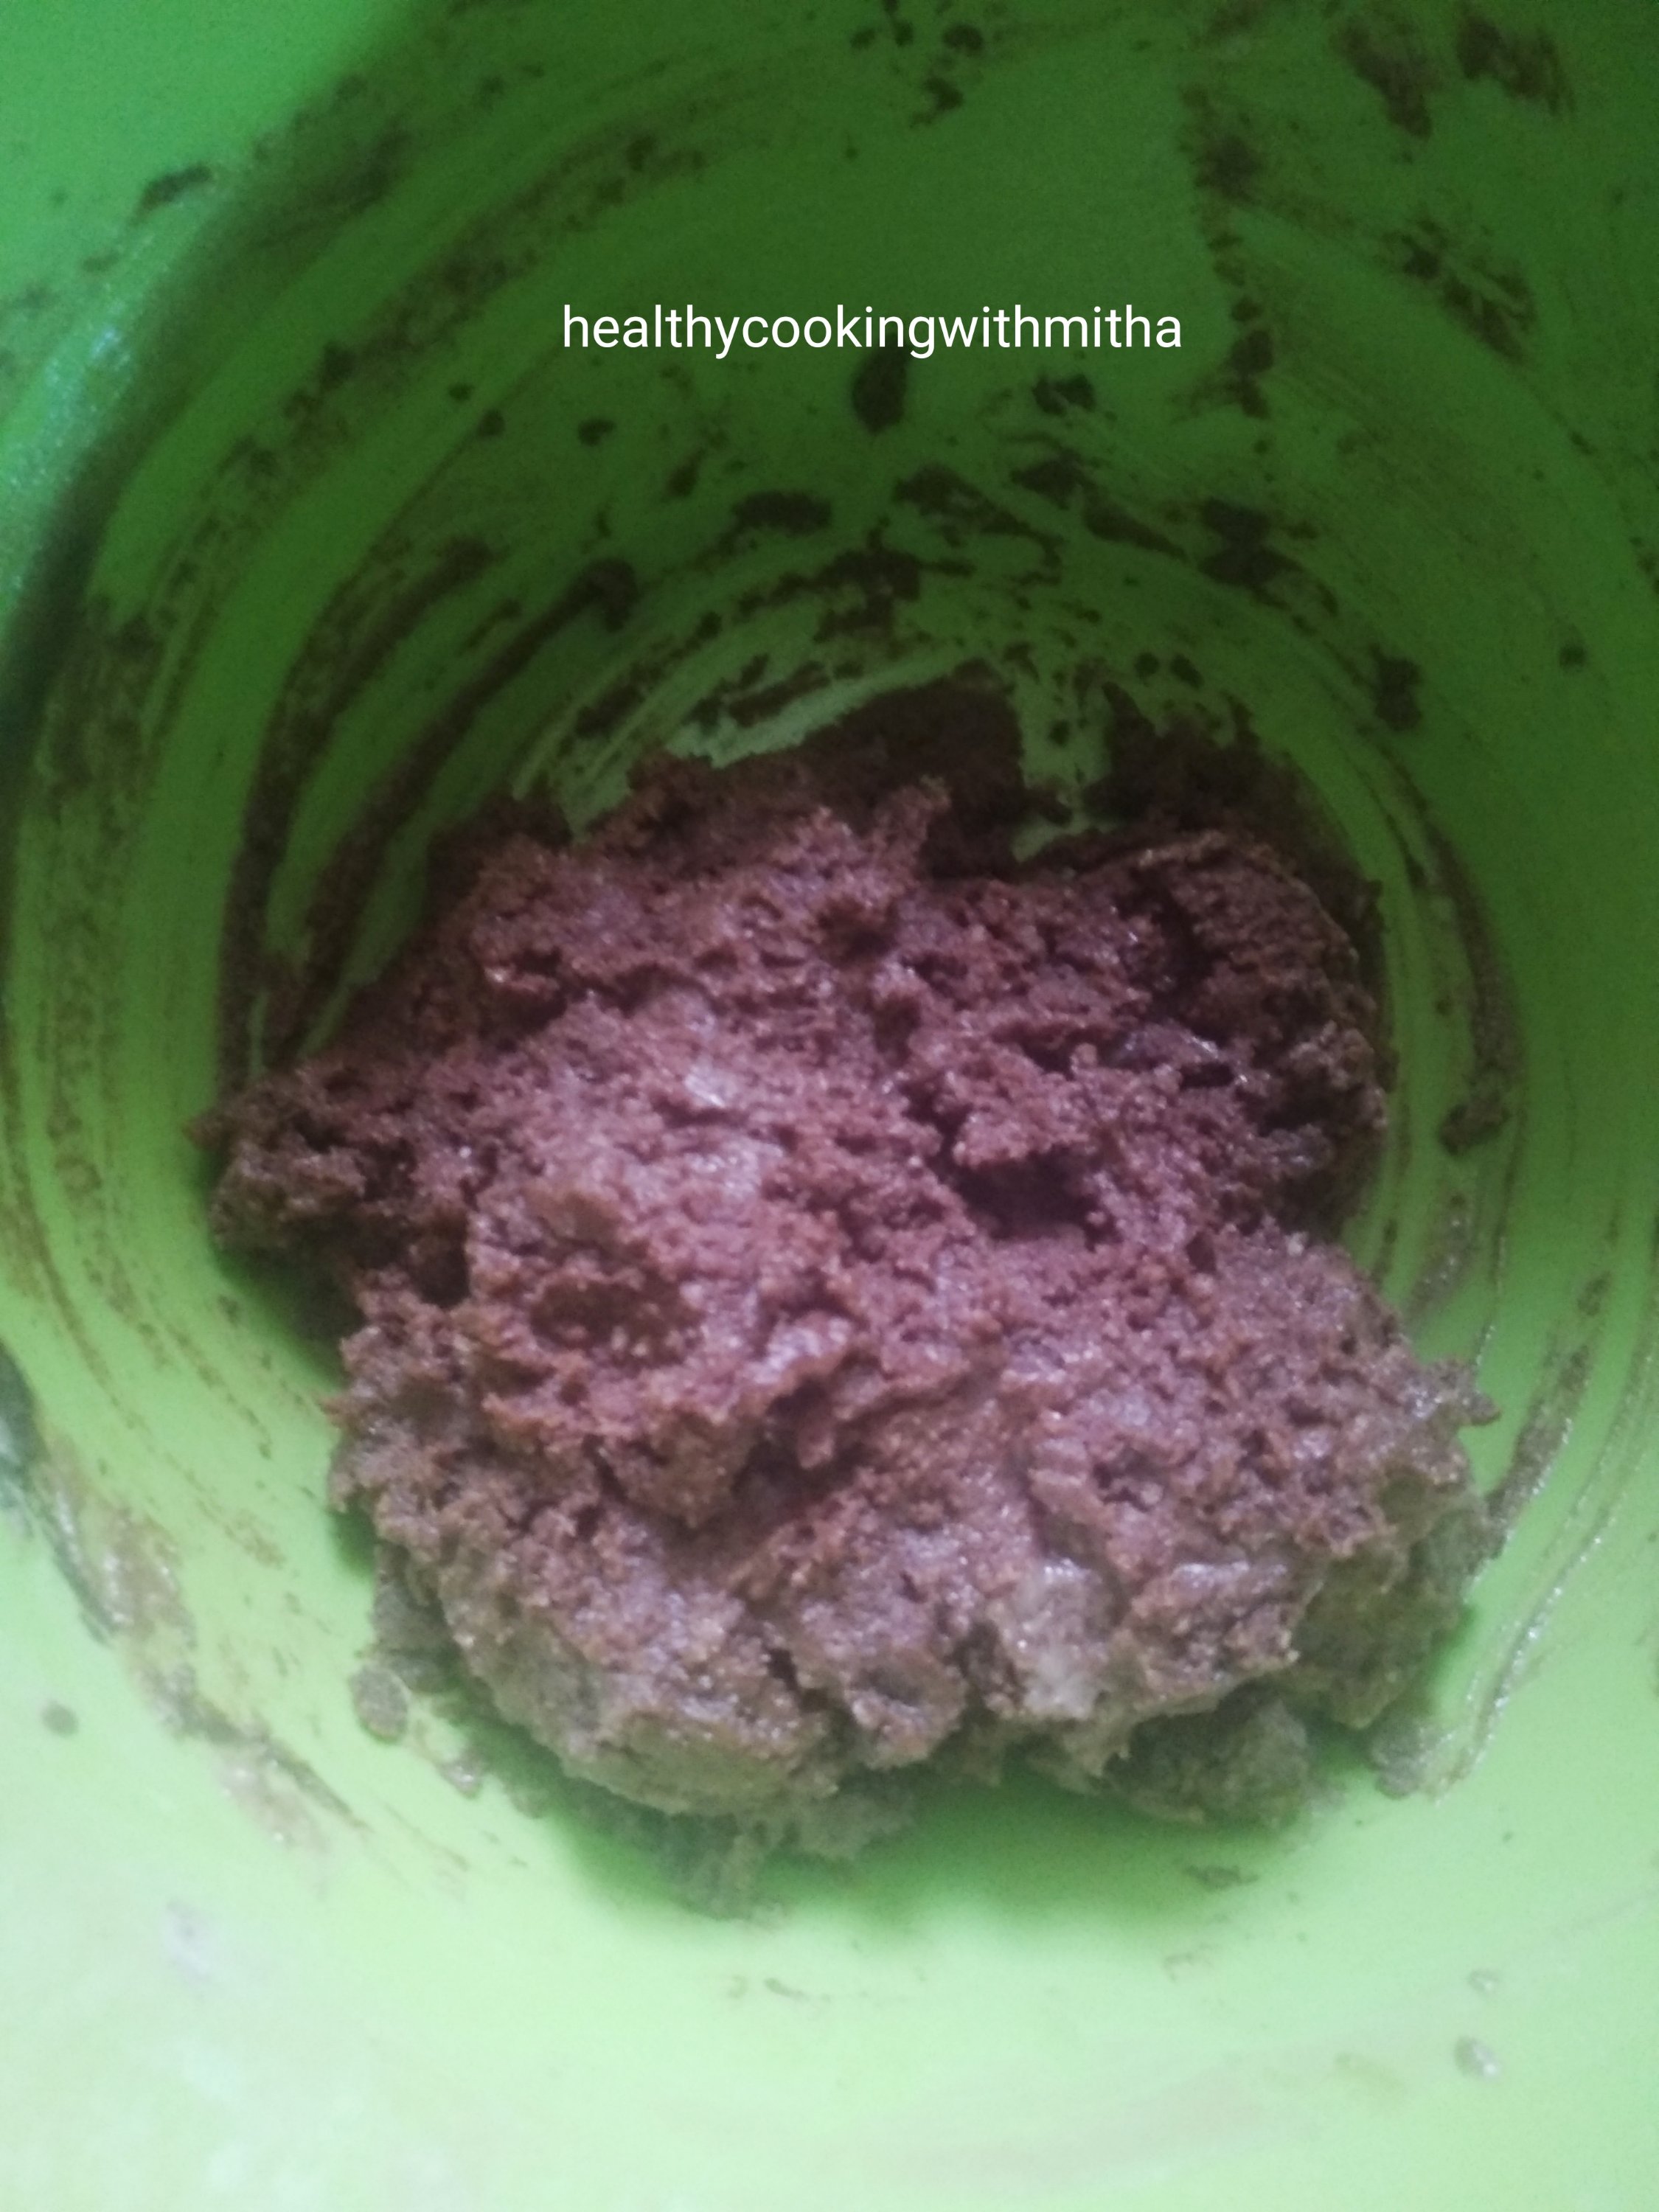
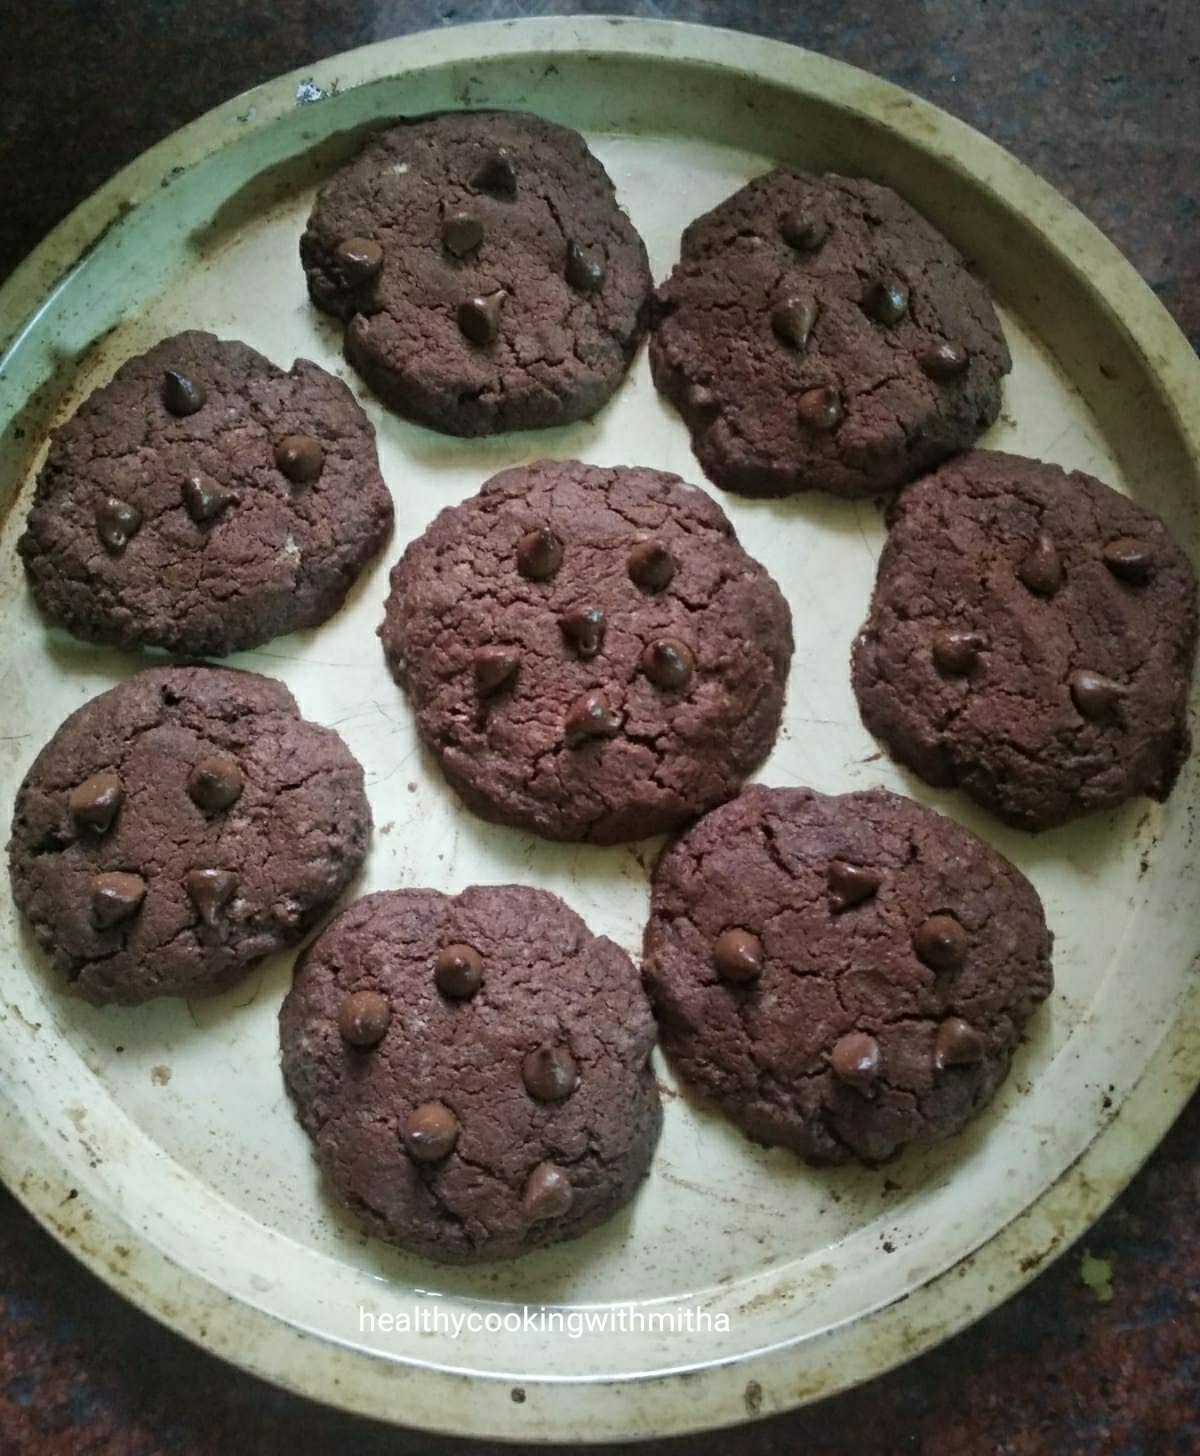
1. Chocolate Chip Cookies ( using wheat flour and jaggery ) – Perfect cafe style cookies at home, only healthier and tastier 😍

Recipe here – Chocolate Chip Cookies

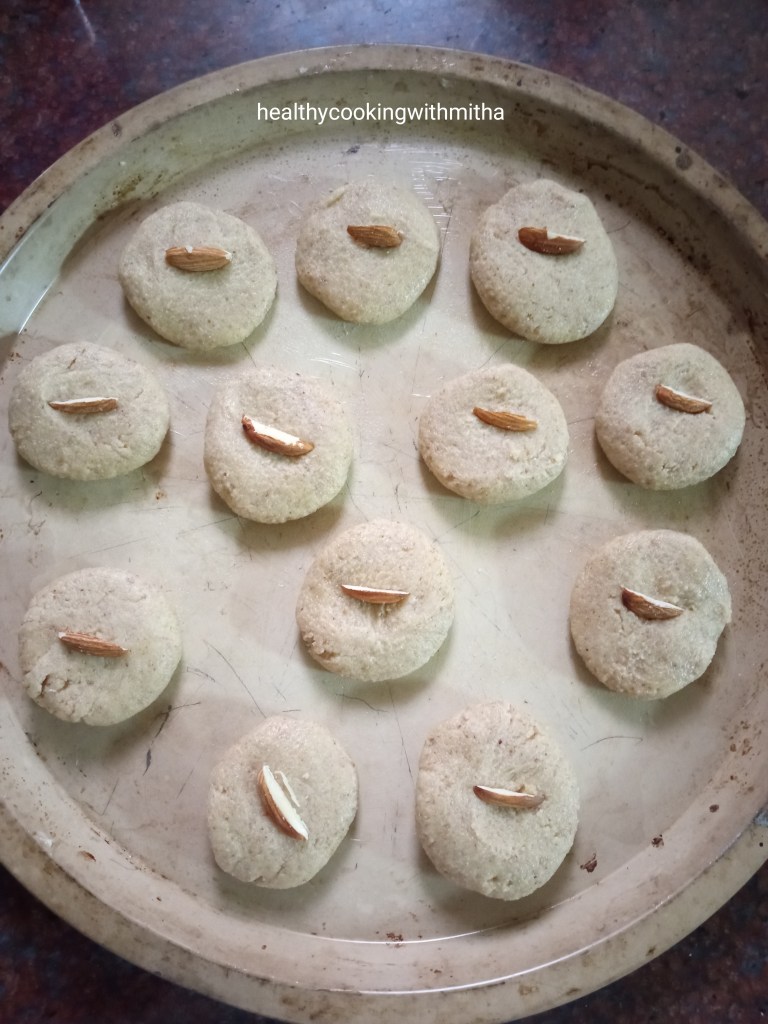
2. Almond Butter Cookies – With basic ingredients and uses no baking soda or powder, these cookies are still very soft and melt in the mouth.

Recipe here – Almond Butter Cookies

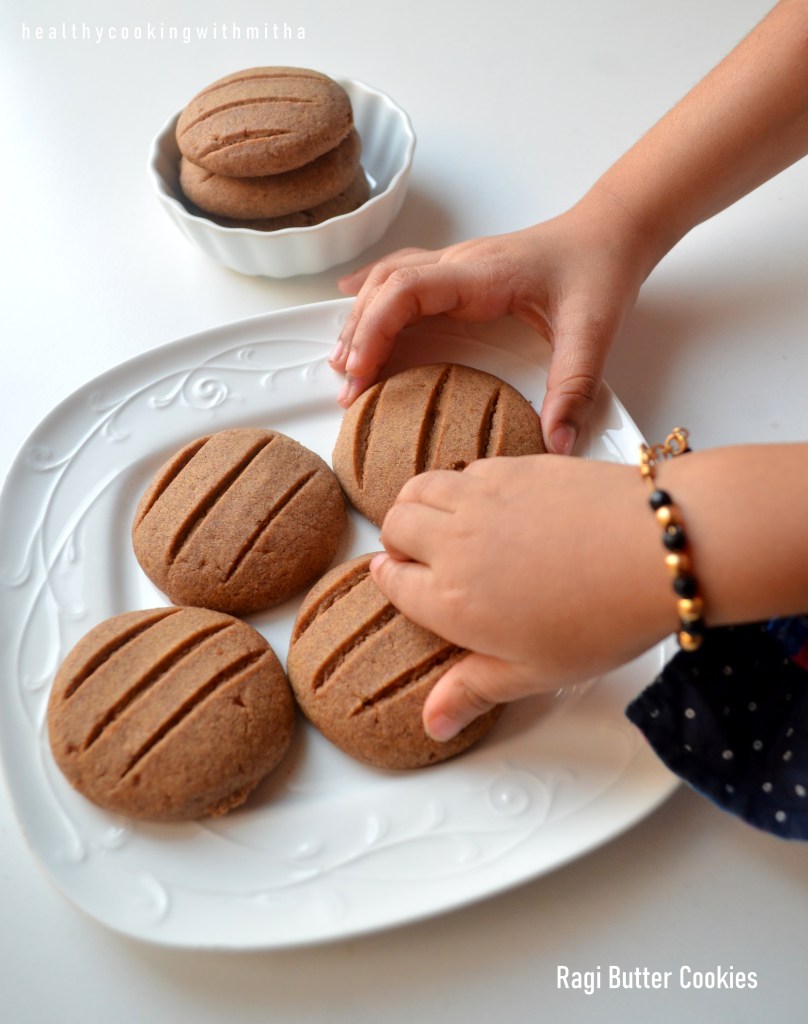
3. Ragi Butter Cookies – Another heavenly cookies with Ragi in it, yet tastes so good that you can’t stop devouring them. My favourite! ❀️

4. Wheat Jaggery Cookies: These easy to make cookies are not only loved by my kids but by their friends too. Comes out so tasty.

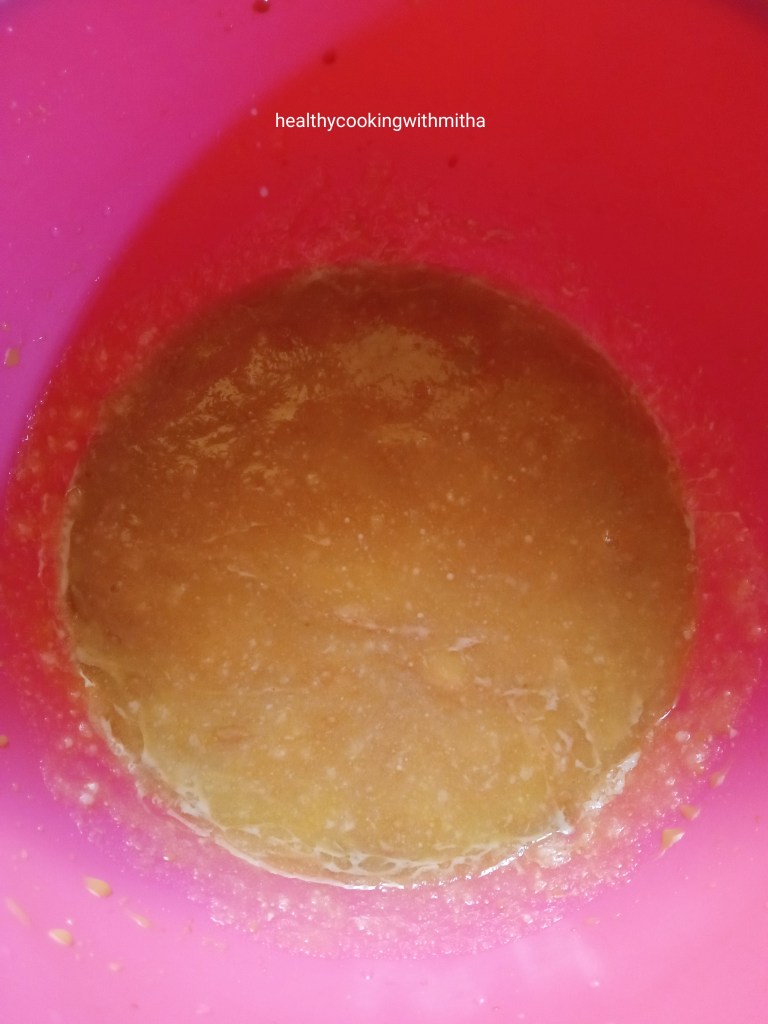
4. Cashew Butter Cookies – Delicious homemade cashew cookies which needs no baking soda or baking powder.

You can check all my other healthy bakes here. Enjoy Baking!!

My other compilations:

* Easy, Healthy Sweets (under 15 mins)

This is another easy, healthy sweet recipes collection that I made last time. You can find the recipes here. They are sweets that can be made under 15 mins.

* Oats Recipes Compilation

* No Rice Dosa recipes Compilation

* Variety Idli recipes Collection

Eggless Whole wheat Jaggery Cake | Tea time cake | Snack idea for kids

When I became a newbie mother in 2015, it was really overwhelming for me as I did not know most things (babies don’t come with manuals πŸ˜„). Though my mother helped me a lot with her experiences, I hardly got time to talk to her in detail then (from talking for hours together on the phone to just few minutes, motherhood changes everything 😬).

So most of the time when my daughter slept, I used to read about nutrition and how babies really don’t need separate purees and porridges. Hence, when she started her solids at 6 months, I gave her whatever we ate (minus sugar and salt till one year) which she accepted without any issues. That is the reason why even now, she accepts almost all kind of foods at 6 years of age and after that, I am now following the same with my 2 year old son too. No purees or baby foods.

When she turned a toddler, I saw how she loved store bought sponge cakes. But somehow, I did not want to give her the maida, oil based sugary ones. So that’s how I started baking wheat flour jaggery ghee cakes in 2016 and that cake has now become both kiddos’ favorite cake. I bake this when they crave for cakes and their happiness while enjoying the cake is worth watching. Here is my daughter presenting a piece of her favorite cake.

This recipe is exactly same as my Cherry Wheat Jaggery muffins recipe. Just skip cherry in it and bake in a cake pan. You get this cake. I am adding this as a separate post so that it is easier for my readers when they search for basic wheat cake.

I also thank my idols Asha Satish Philar mai and Sujatha Umesh mai for skipping cherries from the muffins recipe and baking beautiful cakes. Here are their pictures of the cake.

Hope you all try this cake for your tea time or for your hungry kiddos this vacation. I just baked them yesterday again and the way my kids relish them makes me so happy. Happy and healthy Baking!

Important Note: I understand that wheat flour is also a refined flour but definitely more nutritive than maida/ all purpose flour. Also I know that jaggery has the same calorie count than refined sugar. But it has more nutrition than the bleached sugar and also the flavour is more delicious than sugar. Mainly my kids prefer jaggery than sugar. Finally it’s upto to you to read, be aware and decide.

Sharing the recipe with all of you..

RECIPE:

Ingredients: { 1 Cup = 250 ml }

1 and 1/2 Cups Wheat flour or Atta (I use Pillsbury brand)

1 tsp Baking soda

1/4 tsp Salt

Wet ingredients:

1 Cup Milk, at room temperature

1 Cup powdered Jaggery

1/4 Cup Ghee

1 tsp Vanilla essence

Step by step recipe:

1. Preheat the oven at 180 C for 10 mins.

2. Sieve together wheat flour, baking soda and salt in a bowl.

3. Now mix together milk and jaggery using a whisk till the jaggery melts in the milk. Add ghee and vanilla essence. Mix well using whisk.

4. Slowly add the dry ingredients to the wet ingredients and fold both the ingredients using a spatula just till no flour specks are seen. Do NOT overmix the batter as it can lead to dense cakes.

5. Now add the batter to a greased (with oil or ghee) cake pan and level using spatula. { My loaf pan is of 20 cm in length and 4 cm in width}

6. Bake in the center rack of your OTG ( or if using a microwave conventional mode oven, just keep both rods on option) at 180 C for 25 to 30 mins till a toothpick inserted in the center of the cake comes out clean and not sticky. Mine gets done at 30 mins exactly.

7. Allow it to cool down completely. Loosen the sides using a knife. Invert, slice and serve.

Notes:

* This cake tastes best the next day. So I always bake at night, for the kids to enjoy the next day. Soon after it bakes, the crust with be slightly hard but as it stays at room temperature, the crust turns very soft.

* Ghee can be substituted with melted butter or oil but when using oil, always remember that the cake will have that aroma of the oil.

* Store in an air tight container free from moisture and the cake lasts well for two days at room temperature. After that, refrigerate and microwave before serving.

* If you don’t like eating cakes as it is, top a slice of this cake up with some fresh cream cheese spread. It tastes heavenly, trust me! {Tried and tested by yours truly! 😬}

* While mixing both dry and wet ingredients, make sure you just fold using spatula and don’t over mix the batter. It will lead to dense cakes. Just mix till you can’t see anymore flour specks.

* I get many questions about oven settings. I always bake in the center rack of my OTG with two rods option at the temperature and time varying according to each recipe.

* If you use a conventional microwave oven, just use bake option (or two rods option) at the temperature and time mentioned in the recipe.

* I have used my loaf pan of length 20 cm and width 4 cm. You can use round pan too.

* Timing varies according to each oven. So keep an eye after 20 mins into the baking time. But don’t keep opening the door before that as it will lead to uneven baking.

* You can also bake these as muffins like I did in my Cherry Jaggery Muffins recipe.

I have tried to note down as much points as possible so that it’s easy for you all to follow but if you still have any doubts, either comment here or message me on my Facebook pageΒ Healthy cooking with mitha or on myΒ InstagramΒ handle and I would be happy to help.

Almond Butter Cookies | Easy 4 ingredient healthy recipe using wheat flour and jaggery

Click on the image to save the recipe on Pinterest

When I posted the Ragi Butter Cookies which was my friend Anvy’s recipe, she asked me if I had tried the almond cookies that she had shared on her Insta handle, Homemade by Anvy. I told her I don’t have almond meal with me (it sounded so exotic 😬) but I did have loads of almonds with me (which I had bought to eat daily to increase my memory. Now if anyone would remind me to eat them πŸ˜‚).

So she told me almond meal was nothing but powdered Almonds (my plinggg moment!! 🀣). So I had to try it and imagine my happiness when it came out so good. I already made them thrice in the past week as it tasted so heavenly and since it was so easy to make with only 4 ingredients. Also, never knew homemade almond cookies could turn out so pretty. Could not keep the beauties down. 😍

Click on the image to save the recipe on Pinterest

Off they went into my kids’ “choti bhook waala dabba” (their snack box for mid meal hunger and mine too for my sweet tooth 😬).

Click on the image to save the recipe on Pinterest

It has been only an year since I joined Instagram and as much I like it, there have been times when I wanted to just come out of it as I had a tendency of over sharing stories. Finally, got rid of that habit ( some self control that was πŸ˜„) and now just using instagram to post my recipes while following some amazing accounts like that of Anvy’s.

Thank you so much dear Anvy @homemadebyanvy for yet another great recipe of yours. We absolutely love it! ❀️

Hope you all try it too. You will definitely love it. Happy and healthy baking!

RECIPE: { My 1 Cup = 240 ml }

Ingredients: { Makes about 12 cookies }

100 grams Salted Butter ( 1/4 Cup + 3 Tbsp) (Add a pinch of salt if using unsalted butter)

3/4 Cup Whole wheat flour or Atta

1/2 Cup finely powdered Almonds (or Almond meal)

1/4 Cup Jaggery powder

Sliced Almonds for garnish (optional)

Step by step recipe:

1. Soften butter by keeping it at room temperature for little time. (Do NOT melt it in microwave or so.) Just place it at room temperature till it turns soft. Now add jaggery and mix both together using a spatula till they combine. Also add the finely powdered Almonds.

2. Now add wheat flour and mix using hands till it forms a dough. It will come together and will be slightly sticky. Refrigerate for about 15 mins. It will turn firm.

3. Meanwhile preheat the oven at 180 C for 10 mins. Take small balls of the dough and flatten with your fingers. Place them on a greased (with ghee/butter) oven proof tray leaving space among them as it increases width on baking. Decorate each with slices of almonds.

4. Bake in the preheated oven at 180 degree Celsius (350 – 375 F) for 10 to 14 mins in the center rack of your oven or with both rods on in your conventional oven. Mine gets done at 14 mins.

The colour of the cookies are brown and not the colour above. It is due to the reflection of my kitchen lights that the cookies have a light shade in the picture. I still added it to show how much the cookies increased in width after baking.

5. Remove and allow it to cool completely. As you keep it to rest, it turns hard but not very hard as butter cookies are supposed to be melt in the mouth and on the softer side.

Notes:

* Store the cookies in a dry, air tight container and it lasts well for two to three days. Mine gets finished off by my family before that. Will last longer if handled well, free from moisture.

* They are very soft and break upon touching on warm. As they cool down, they will harden but still not very hard like store bought ones as we have used only butter. The texture is melt in the mouth softer version of cookies.

* These cookies do not need baking soda nor baking powder. They still grow in width during baking process. I too was amazed the first time I tried it as I always thought cookies needed either baking soda or powder.

* Baking time depends on your oven. In some ovens, it can be done at 10 mins while in my OTG, it takes 14 mins. So keep an eye but don’t open the oven door before atleast 10 mins into the baking time. Else it will lead to uneven baking.

* Do refrigerate the dough for atleast 10 to 15 mins as it helps combine the ingredients well and also helps us form cookies well without sticking in our hands.

* Place the cookies in the center rack of your OTG or with both rods on if using microwave with conventional mode oven.

* I have not replaced butter with ghee or oil in this recipe. So can’t say about the outcome.

* For making powdered Almonds, just put the almonds in a mixer and pulse it in regular intervals till it turns into fine powder. Keep checking in between so that it does not leave oil and become a paste.

* Leave space between cookie dough while keeping on the tray as they increase in width as they bake.

* When they fully bake, you can see the surface is free of raw dough and edges are slightly golden in colour. It is enough. You can remove the cookies out of the oven.

* Garnishing with almond slices are optional. Avoid the slices if making for kids less than 2 years as it can be a choking hazard. Else just finely chop and garnish. Anyhow, the cookies tastes good even without it.

* You can check my Healthy Cakes and Cookies compilation.

* For beginners in baking, you can check my Baking Basics for beginners post.

I have tried to note down as much points as possible so that it’s easy for you all to follow but if you still have any doubts, either comment here or message me on my Facebook page Healthy cooking with mitha or on my Instagram handle and I would be happy to help.

Click on the image to save the recipe on Pinterest

Ragi Butter Cookies | easy recipe using Jaggery

Click on the image to save the recipe on Pinterest

The above picture is of “melt in the mouth” Ragi Butter cookies before two storms struck in πŸ˜…. Will come to that later. Right now, I just want to thank my school friend Anvy Susan Thomas who is a great baker ( I am her huge fan! 😍) for this amazing recipe of hers. She has an instagram page homemadebyanvy where she makes us drool with her delicious bakes.

As all of you know, I love baking and I bake atleast one kind of goodies everyday for my family (my daily dose of happiness ❀️). One of my regular bakes are these Ragi Butter cookies which turns out so good that you will never realize you are enjoying a healthy version of cookies. The kids are HUGE fans of it and you can see what I meant by storm strucking in. Here is my 5 year old daughter slowly coming in the frame to grab one of these cookies (storm no 1 πŸ˜‚).

Click on the image to save the recipe on Pinterest

And when she gets her share, how could the little one be left far behind? Here is storm number 2, my two year old son grabbing the cookies. I loved their cute hands on the cookies that it became my favorite picture too. ❀️❀️

Click on the image to save the recipe on Pinterest

These cookies are very easy to bake and turn out too good to be true. You won’t feel like getting cookies from outside once you bake them, that’s for sure. I always believe that it’s best we bake and make everything possible at home since we don’t know what kind of ingredients have gone in store bought ones.

Hence sharing one of my most favorite cookies. I whole heartedly thank my friend Anvy @homemadebyanvy for this recipe. Hope you all try it out too. Happy and healthy baking! ❀️

RECIPE:

Ingredients: { 8 Cookies }

100 grams salted Butter (add a pinch of salt if using unsalted)

1/3 Cup powdered Jaggery

1/2 Cup Ragi flour or Finger millet powder

1/2 Cup Whole wheat flour or Atta

1/2 tsp Baking soda

Step by step recipe:

1. Soften butter by keeping it at room temperature for little time. (Do NOT melt it in microwave or so.) Just place it at room temperature till it turns soft. Now add jaggery and mix both together using a spatula till they combine.

2. Now sieve ragi flour, wheat flour and baking soda over it.

3. Using hands, mix everything well till it forms a dough like shown below. Refrigerate it for 15 to 20 mins.

4. Preheat the oven at 180 C (350 to 375 F) for 10 mins. Make small balls of this dough and flatten with your fingers (like making pedas). Make lines over it with knife as shown. Place over a greased (with butter or ghee) oven proof plate. Keep distance between them as they increase in width as they bake.

5. Bake in the center rack of your OTG or with both rods on if using a conventional mode oven at 180 C (350 – 375 F) for 10 to 12 mins. Mine gets done exactly at 12 mins. Each oven is different. So in some ovens it may take upto 20 mins for it to bake completely. The surface will be smooth to touch and will be dough free. Also will have a golden tinge on the edges.

6. Allow it to cool slightly and enjoy the cookies.

Notes:

* They are very soft when they are right out of the oven but harden as they cool down. So do not keep a lot of time in the oven thinking the cookies are not done yet. Once the surface is free from dough and they are smooth to touch, they are ready to be removed from the oven.

* I used salted Butter for this recipe. Add a pinch of salt to the mixture if using unsalted butter.

* Also, don’t melt the butter. Just soften it by keeping it at room temperature.

* Refrigerating the dough is very important. Please don’t skip it.

* Place the cookies at little distance before baking as they increase in width as you can see from the pictures.

* Do grease the oven proof plate well with ghee or butter so that it does not stick to the plate.

* Bake in the center rack of your OTG or with both rods on if using a conventional mode oven. It is very important for even baking of the cookies.

* Mine gets done exactly at 12 mins. Might vary depending upon your oven. But don’t open the oven door before 8 mins into the baking time or else it will leave to uneven baking.

* Store in an air tight container at room temperature. Mine has never lasted beyond a day as my family finishes it off before that. πŸ˜€

* You may also want to try this Ragi chocolate cake which is my kid’s favourite (and her friends love it as well πŸ˜…). One of the most tried recipe by my readers.

Click on the image to save the recipe on Pinterest

Dates Chocolate Brownie |Eggless, using wheat flour and Jaggery

Click on the image to save the recipe on Pinterest

As my readers know already, I love baking. It gives me some undefinable kind of joy and at times when I just want to hide myself, no longer wanting to talk to anyone (yes, there are days like that even for the talkative me 😬), I enter my baking world. It brings me peace of mind and the result of these delicious bakes too. The kids and their father (who is no less a kid too πŸ˜…) become happy at the sight of these goodies and that makes me happy as well. #bakingishappiness❀️

Coming to these brownies, they are so ultra moist as you can see from the pictures and also incredibly delicious. I wish I could share these with all of you. One of the bakes I am really proud of as it is eggless, uses wheat flour and jaggery instead of maida and sugar and also enriched with the goodness of dates. What’s not to love in these brownies? ❀️

I could not take many pictures as my kids were all set to attack them (πŸ˜…) but when the brownies look so gorgeous, I am sure couple of pictures are more than enough to show how amazing they come out.

Click on the image to save the recipe on Pinterest

I also want to thank my reader Mamta Baliga Shenoy for requesting this recipe. I always make them but did not realize I had not uploaded in the blog. Thanks for the request, Mamta mai which made me add this one. Hope you and all my readers try this recipe. It really comes out amazing. Happy and healthy baking!

RECIPE:

Ingredients: { Makes about 8 brownie squares} ( 1 Cup = 250 ml )

Dry ingredients:

1/2 Cup Wheat flour/ Atta (yes, only half cup is required)

1/2 tsp Baking powder

A pinch of salt

Wet ingredients:

1 Cup Water

1/2 Cup Jaggery powder or grated jaggery

1/3 Cup Cocoa powder

1/4 Cup Ghee (use fully and don’t reduce)

1/2 tsp Vanilla essence

4 Soft variety Dates, finely chopped

For the frosting:

About 35 grams of any chocolate

About 3 Tbsp of Milk

Step by step recipe:

1. Preheat the oven at 180 C for 10 mins. Meanwhile, Sieve half cup of wheat flour, 1/2 tsp baking powder and a pinch of salt into a bowl. Keep aside.

2. Heat 1 Cup water in a pan and melt 1/2 Cup Jaggery in it. Add 1/3 Cup Cocoa powder and whisk well to remove lumps. Now add 1/4 Cup Ghee (don’t reduce the quantity. It is needed for the moistness). Mix well. Let it be very hot and a lump free mixture.

Note: Don’t reduce the water quantity while heating. Just melt the jaggery in the water, add cocoa powder and ghee. Mix once to remove lumps and remove from the flame.

3. Pour into a bowl while it’s still hot. Add vanilla essence and mix well.

4. Now add the dry ingredients mix to the wet ingredients while the wet mixture is still hot. Mix gently till the dry flour specks are not seen. Do not over mix as it leads to dense brownies. Just mix gently till both ingredients blend in.

5. Add chopped dates and mix well. I just cut them with my hands as the dates are so soft (khudri variety). I make 6 pieces from one dates.

6. Mix well and add to a greased loaf pan. (Mine is of size 20 cm length and 4 cm width.) Grease the pan well with ghee. Level using spatula evenly.

7. Bake in the center rack of a preheated oven at 180 C for 30 to 35 mins or till a toothpick inserted in the center comes out clear. Do not over bake as the crust can turn crispy. Mine is an OTG and it gets done exactly at 30 mins.

8. For frosting, soften about 35 grams of chocolate in the microwave. I have used Lindt dark chocolate here as I had it. It took me about 2 mins of microwaving it at full power (I checked every half minute). Depends on your microwave. So keep checking.

9. When it becomes soft, add milk, 1 Tbsp at a time and mix well. It took me 3 Tbsp milk to get a creamy, thick frosting.

10. By then, the brownie would have cooled. Loosen the edges using a knife and invert it onto a plate.

11. Spread the frosting evenly over the brownie.

12. Cut into squares and serve.

Click on the image to save the recipe on Pinterest

Notes:

* Don’t be doubtful about the 1/2 Cup wheat flour required for this recipe. It really requires very less amount of flour. I use Pillsbury brand of wheat flour for all my bakes.

* Sieving or sifting of dry ingredients is very important as it leads to even mixing of ingredients. So don’t skip it.

* Make sure the wet ingredients mix is free of lumps and hot when dry ingredients are mixed in it.

* Do not over mix both the ingredients. Gently fold in and mix till dry flour specks are not seen.

* Always remember to Preheat the oven at 180 C for atleast 10 mins before placing the cake.

* Also, always place the bake in the center rack of the oven in OTG OR with both rods on in microwave with conventional mode oven. This leads to even baking.

* Do not open the oven door till atleast 25 mins into the baking time or else it won’t bake properly.

* Dates are optional and you can bake regular chocolate brownies too with this batter but Dates add an amazing moistness to this brownie.

* Do NOT over bake as the crust can turn crispy. At about 30 to 35 mins, when the toothpick comes out clear, it’s ready to be taken out of the oven.

* I highly recommend frosting this brownie as it tastes heavenly with it.

* I have used Lindt dark chocolate for the frosting as I had it. You could use dairy milk or any other regular chocolate available.

* Refrigerate if it lasts more than a day (mine never does πŸ˜…)

* For those who are new to baking, you can check my Baking basics guide for beginners.

* Find all my healthy cake and cookies recipes – Healthy Cakes and Cookies compilation.

I have tried to note down as much points as possible so that it’s easy for you all to follow but if you still have any doubts, either comment here or message me on my Facebook pageΒ Healthy cooking with mitha or on myΒ InstagramΒ handle and I would be happy to help.

Click on the image to save the recipe on Pinterest

Whole wheat cheesy garlic bread

We have still not started eating from outside much to the surprise of our friends here. But honestly, after learning to cook clean and delicious food at home, we don’t actually feel like ordering from outside. For me, the main turn off is the oil. I am so used to either coconut oil or ghee in my cooking that when I am reminded of the oily restaurant foods (mostly sunflower or some mix of refined oils), I don’t feel like eating out at all. I can’t believe I used to find it tasty. Life has changed so much in every way.

Not only curries, even pizza and garlic bread are homemade now. This Whole wheat Pizza is not only easy to make but tastes so yummilicious apart from being healthier too. I also happened to try cheesy garlic bread sometime back and we all loved it. So it had to be on the blog as well. I made it many times to recheck the recipe (also to devour it 😁) but could not get good clicks as the kids are always in urgency to gobble it up. πŸ˜€

I finally gave up and decided to share these somewhat okay pictures itself on the blog. Don’t go by the picture, it’s really very tasty and much better than outside ones. We absolutely love it. It’s not very difficult to make too if you follow the step by step pictures well.

Hope you all try and love it too. Happy and healthy baking! ❀️

RECIPE:

Ingredients:

1 and 1/2 Cups Whole wheat flour or gehun ka Atta (I use Pillsbury brand)

About 1/2 Cup Water to knead the dough (depends on the flour brand)

1 tsp Instant yeast (or 1 and 1/2 tsp dry active yeast)

1/2 tsp Sugar

1/4 tsp Salt

About 1/2 Cup grated Mozzarella cheese

For the garlic dressing:

2 Tbsp salted Butter (if using unsalted, add salt to this dressing)

5 Garlic pods

2 Tbsp finely chopped Coriander leaves

1 tsp Dried mixed herbs seasoning

Step by step recipe:

1. Take wheat flour, instant yeast, salt and sugar in a mixing bowl.

Note: If using dry active yeast, it needs proofing ie put the yeast along with sugar in lukewarm water and then add to the flour and salt once the yeast has risen (takes about 5 mins).

2. Now add water little by little and form the dough like regular chapati dough – Soft and smooth. No need to knead.

3. Keep for rest covered in a warm place for an hour.

Note: It might not rise much but that’s fine, it will have a yeasty smell to it which shows it has acted in the dough. In cold places, keep for 2 hours since it will take longer for the yeast to act.

4. While it’s kept for rest, prepare the dressing. Melt the butter in a microwave or in a pan. Add finely chopped garlic, coriander leaves and herb seasoning. Also add chilli flakes if you like (I avoid for my kids)

5. Once the dough has finished resting, preheat the oven at 200 C for 10 mins. Take a oven proof plate. Grease with oil and sprinkle dry wheat flour over it. Spread the dough in circle shape over it as shown.

6. Now apply half of the dressing evenly over it.

7. Spread mozzarella cheese evenly over it.

8. Fold and seal the edges as shown.

9. Apply the rest of the dressing over it and make evenly spaced cuts over it till three fourth of the semicircle. (reminds me of maths lessons 😁😁)

10. Bake in the preheated oven at 200 C for 15 mins in the center rack or till the surface turns golden brown in colour.

11. Allow it to cool slightly. Enjoy served with ketchup.

Notes:

* I use Pillsbury wheat flour for all my bakes. Love the flour as it makes the baked goodies perfect.

* There is no need to knead the dough. Just bring them together like chapati dough. That’s enough. But make sure the instant yeast is of good quality. If using dry active yeast, make sure to proof it as mentioned above in the step by step recipe.

* You can grate the garlic if you don’t like garlic bites in your garlic bread. Also add chilli flakes if you like it.

* Don’t keep opening the oven door while baking. Open only after 10 to 12 mins into the baking time. Else it can hinder the baking process.

* Preheating the oven is a very important step. Don’t forget it.

* This tastes best when eaten hot and consumed immediately after baking.

* The dough can be made beforehand and refrigerated to be used within two days.

* This is the same dough that I use for my Whole wheat Pizza which is a regular fare at my house and my kids’ favourite.

Chocolate chip cookies | Soft and melt in the mouth cookies using wheat flour and Jaggery

I am lucky and blessed to have few of my readers who are very encouraging and comment very lovingly. One among them is Rajee D Kurup aunty who is part of the food groups that I am in. She thanks me for the recipes that I post and always asks me to take care and stay safe. It might be a small thing but it means a lot to me. ❀️

So when she requested for a cookie recipe and that too to make for her pregnant daughter in law, I just had to post one soon, just for her. 😍

This recipe belongs to Bake with Shivesh whom I admire a lot for his healthy recipes and mouth watering bakes. Do check his Instagram handle and you are sure to drool.

So here’s presenting a soft cookie which you are sure to fall in love with. Happy and healthy baking!

RECIPE: {Credits : Bake with Shivesh}

Ingredients:

1/2 Cup Ghee

1/2 Cup Jaggery powder/ Cane sugar

1 tsp Vanilla Essence

1 Cup Wheat flour or Atta (I use Pillsbury brand)

1/2 tsp Baking soda

A pinch of Salt

1/4 Cup unsweetened Cocoa powder

1 tbsp Corn flour

1/4 cup Milk

Chocolate chips as required to top the cookies

Step by step recipe:

1. Take sieved jaggery powder, vanilla essence and ghee in a large mixing bowl and mix together using a spatula till it combines well and turns fluffy. (Takes about a minute. Important step to get perfect cookies)

2. Now sieve and add wheat flour, corn flour, baking soda, salt and cocoa powder in the same bowl.

3. Combine well till they mix.

4. Now add milk and mix well till it forms a wet mixture. Refrigerate it for 15 mins.

5. Meanwhile preheat the oven at 180 C for 15 mins. After 15 mins of the mixture resting in the fridge, remove it and placed equal sized balls on a ghee greased oven proof plate at little distance from each other as shown.

Note: It is important to keep distance between the cookies as they expand while baking. Also, use ice cream scoop for scooping the dough for equal sized cookies.

6. Pat each cookie slightly with your fingers and place some chocolate chips on top as desired.

7. Bake in the center rack of the oven at 180 C for 12 to 15 mins. Mine took exactly 15 mins.

Note: Don’t open the oven door before 12 mins into the baking time or uneven temperatures can lead to the cookies not coming out right.

Look at the perfectly baked cookies 😍😍

8. Allow them to cool slightly. Remove and enjoy these soft cookies. Look at the inside. I absolutely loved the texture! ❀️

Notes:

* These cookies don’t turn out crispy but soft and melt in the mouth.

* For slightly crispy cookies, skip corn flour in the recipe.

* Remember to sieve all the dry ingredients to avoid lumps of any flour in the cookie.

* Also grease the oven proof plate very well with ghee so that the cookies don’t stick to the plate. You can use silicon mat or parchment paper instead but I prefer the good old method of greasing.

* Do remember to keep the cookies at a distance before baking as they expand well while baking.

* Use ice cream scoop for even sized cookies.

* You can skip chocolate chips if not available and make plain chocolate cookies.

I have tried to note down as much points as possible so that it’s easy for you all to follow but if you still have any doubts, either comment here or message me on my Facebook pageΒ Healthy cooking with mitha or on myΒ InstagramΒ handle and I would be happy to help.

Whole wheat Tutti frutti Bread | Eggless recipe

Baking is slowly turning from a hobby to a passion for me. In the world of baking, the number of goodies you can make are so many that I don’t think I can ever complete all of them even if I bake all my life. πŸ˜…

But once you fall in love with it, it becomes your best friend ❀️. As I have said before, the immense happiness of baking can only be understood by bakers, be it a home baker like me or a pro baker like many chefs.

I always loved tutti frutti bread as a kid and my dad used to bring it along with regular bread. If people from Cochin remember, this used to come in a small packet from Modern Breads and was so soft and delicious (A precious food memory for me ❀️).

Just look at the slice 😍

And with few attempts, I got this perfect loaf of tutti frutti bread and that too with wheat flour. The texture is super soft and the taste is so yummy that it definitely took me back to my childhood days. Never had I thought I would bake the same as an adult. Life surprises! 😍

This bread is perfect for kids as snacks and if your kids are like mine who demand for food whole day, this bread will be your lifesaver. Also much healthier than store bought bread since it uses wheat flour and no preservatives.

Hope you all try and love it too. Happy and healthy baking!

RECIPE:

Ingredients:

2 Cups whole wheat flour/ Atta { I use Pillsbury brand }

1 Cup Milk (may require a little more depending on the brand of wheat flour)( can also use milk powder+water)

1/4 Cup Tutti frutti

20 grams Butter (keep at room temperature for sometime till it turns soft)

2 Tbsp Custard powder

2 Tbsp Milk powder

2 Tbsp Sugar

2 tsp Instant yeast OR 2 1/2 tsp dry active yeast

1 tsp Salt

Little milk and butter for brushing over the pav

Oil to brush the pan and dough

Step by step recipe:

1. Warm milk in a pan or microwave. It should NOT be very hot or cold. Just lukewarm. Add in sugar and yeast. Mix once and allow to proof (ie keep aside for about 5 mins).

Note: See how well it has proved. If it does not rise like this, it means the yeast is no longer active. Discard and use good quality yeast. Else the bread will turn hard.

2. Now take wheat flour in a large mixing bowl. Add custard powder, milk powder, salt and tutti fruti. Mix once with a spatula.

3. Add the proved yeast to it and form a dough using hands just like you form regular chapati doughs. Now add softened butter.

4. Start kneading till the butter blends well into the dough and keep kneading for about 8 to 10 mins till it forms a soft and smooth dough.

Note: If the dough is hard and dry at this point, add little milk while kneading so that it turns into a soft dough.

5. Apply oil on the surface of the dough and keep covered in a warm place for 1 to 1 1/2 hours till it doubles in size.

Mine almost tripled due to the hot weather here πŸ˜€

6. Now punch lightly and keep this dough in a greased loaf pan. No need to knead the dough before placing.

7. Allow it to rise above the rim of the pan. It took mine 1 hour of resting in a warm place to rise well. Brush the surface with milk and add some tutti fruti on top.

8. Preheat the oven at 200 C for 15 mins and bake the bread at 200 C for 15 to 20 mins or till done in the center rack of the oven. (Insert a toothpick in the center to see if it comes clear.)

9. Brush with butter and allow it to cool completely. I usually keep it to rest overnight and it turns soft by next day morning.

10. Slice and serve.

Notes:

* This tutti frutti bread lasts well for a day at room temperature. After that, you can refrigerate and either microwave or fry in a pan with ghee and enjoy.

* You can skip tutti frutti to make plain whole wheat milk bread.

* Custard powder gives a very good colour and flavour to the bread. But if you don’t have, you can skip it. Same is the case with milk powder. You can skip if not available. It is for flavour too.

* If the dough turns hard even after adding butter, do add more milk and knead into a soft and smooth dough.

* Do proof the yeast even if it is instant yeast. It is to be on the safe side to find if the yeast is still active and so as to not waste the other ingredients.

* Be sure to rise both times well. First time atleast till it doubles in size and second till it doubles again and rises above the rim of the loaf pan (mine is 20 cm * 4 cm).

* Grease the loaf pan with oil or ghee before placing the dough.

* Preheat the oven well and bake till the surface turns golden brown or till a toothpick inserted in the center comes out clean.

* Don’t open the over door before atleast 15 mins into the baking time or else it will lead to uneven temperatures and uneven baking.

* At 15 mins baking time, if the surface is turning black but inside still has to cook (ie if toothpick inserted in the center shows sticky), cover the surface with aluminium foil paper and bake for 5 more mins. This ensures the surface does not turn any more black.

* Don’t forget to brush with milk before baking and brush with butter after baking. This gives a very soft crust.

* Keep it to rest overnight if possible. Else one hour is enough to get good slices. Use serrated knife if you have. It gives perfect slices.

* This recipe is just a modification of my whole wheat Pav recipe which many readers have tried and loved. You can find the recipe here.

I have tried to note down as much points as possible so that it’s easy for you all to follow but if you still have any doubts, either comment here or message me on my Facebook pageΒ Healthy cooking with mitha or on myΒ InstagramΒ handle and I would be happy to help.

Wheat Jaggery Cherry Muffins | Eggless, easy, healthy cupcakes

We are getting fresh cherries here and after eating them as it is and making this Cherry Jaggery compote, it was time to use them in my favourite way – the baking way. The muffins came out beautiful and tasted so delicious that I have already made them thrice this month.

The best part about these muffins is its healthy and uses ingredients like wheat flour, jaggery and cherries. You can enjoy them guilt free. My kids love them as a mid meal snack.

Also, this recipe is great for basic wheat jaggery cupcakes for which I get lots of requests. So just skip cherries and you get plain cupcakes as shown below.

You can give them to babies above 6 months old. I started these healthy muffins for both my kids since 6 months and they love it now, much more than store bought maida ones. Wheat muffins might be denser but definitely flavourful and so tasty.

Hope you all try and love it too. Happy and healthy baking!

RECIPE:

Ingredients:

Dry ingredients:

1 and 1/2 Cups Wheat flour or Atta (I use Pillsbury brand)

1 tsp Baking soda

1/4 tsp Salt

Wet ingredients:

1 Cup Milk, at room temperature

1 Cup powdered Jaggery

1/4 Cup Ghee

1/4 Cup chopped Cherries (fresh or candied)

1 tsp Vanilla essence

A few quartered cherries for garnish (optional)

Step by step recipe:

1. Preheat the oven at 180 C for 10 mins.

2. Sift the dry ingredients together using a sieve in a mixing bowl. Keep aside.

3. Add milk and jaggery in a large mixing bowl. Whisk well to melt jaggery in the milk.

4. Now add ghee, vanilla essence and chopped cherries. Mix well.

5. Now add the dry ingredients to the wet ingredients.

6. Now mix both using a spatula just so that the wheat flour specks are not seen. Do NOT overmix the batter as it will lead to dense cake.

7. Now pour the batter into greased muffin tray till three fourth of the level. Garnish with quartered cherries (optional).

8. Bake in a preheated oven at 180 C for 15 to 20 mins in the center rack of the oven till a toothpick inserted in the center most muffin comes out clear and not wet.

9. Allow it cool. Remove and serve.

Notes:

* This lasts well at room temperature in an air tight container for a day. Then refrigerate and microwave before serving.

* I always use Pillsbury wheat flour for my bakes and they come out perfect and delicious.

* If jaggery is not fine powder, then sieve and add into the milk. Jaggery can be substituted with brown sugar or cane sugar or regular sugar.

* Cherries can be substituted with any berries or you can skip it completely for plain muffins. This is how perfect plain wheat jaggery muffins comes out too.

* Do NOT overmix the batter. Else it will lead to dense muffins. Just mix together so that wheat flour specks are not seen and that is enough.

* Don’t forget to preheat the oven for 10 mins atleast before placing the muffin tray.

* It took my muffins exactly 15 mins to bake perfectly. But it might vary according to your oven. So keep an eye after 12 mins but do NOT open oven door before that.

I have tried to note down as much points as possible so that it’s easy for you all to follow but if you still have any doubts, either comment here or message me on my Facebook pageΒ Healthy cooking with mitha or on myΒ InstagramΒ handle and I would be happy to help.

Dates & Carrot cake | Sugar free

Click on the picture to save the recipe on Pinterest

I love baking during my free time. Especially healthy bakes without sugar and using wheat flour instead of maida. My kids have been eating these cakes since they were babies and love them a lot. So I keep experimenting with different proportions and ingredients.

Dates and carrot cake is a commonly found cake in bakeries specially in Cochin where I have spent 13 years of my life. I used to ask my Aanu (my dad) to bring it for me when he went out to buy groceries. I never thought then that I would bake this cake at home and it would turn out exactly the same taste and texture.

Also this cake uses dates paste as main sweetening agent. So does not need sugar at all. Jaggery can also be skipped if you don’t have an extra sweet tooth. Hence best for people who don’t want any form of refined sugar in their diet.

I feel happy to share my bakes as I am really proud of them. Hope you all try and love it too. Happy and healthy baking!

RECIPE:

Ingredients: { 1 Cup = 240 ml}

Dry ingredients:

1 Cup whole wheat flour/ Gehun ka Atta (I use Pillsbury brand)

1 tsp Baking powder

1 tsp Baking soda

1/2 tsp Salt

Wet ingredients:

1 Cup peeled and grated Carrots

1 Cup Milk (Use 1/2 Cup to soak the dates and 1/2 Cup to add to the mixture)

3/4 Cup Dates (after removing seeds)

1/4 Cup Ghee

1/4 Cup Jaggery powder (Optional)* check notes

Step by step recipe:

1. Soak dates in 1/2 Cup milk for about 30 mins to an hour till it turns soft. Grind the soaked dates and the milk to a smooth paste. After that preheat the oven at 180 C for 10 mins.

2. Sieve together wheat flour, baking powder, baking soda and salt in a bowl. Keep aside.

3. In another bowl, take the dates paste, grated carrots, ghee and jaggery (if using).

4. Mix well using spatula. Now add the dry ingredients to wet ingredients and fold well. Do NOT overmix. Just mix once so that the flour specks are not seen.

5. Now add the rest of the 1/2 Cup milk and mix once.

6. Grease the loaf pan with ghee and pour the batter into the pan. Level using spatula.

7. Bake at 180 C for 30 to 35 mins or till a toothpick inserted in the center comes out clean.

Note: Every oven is different. So keep an eye after 25 mins so that the surface doesn’t turn black.

8. Allow it to cool completely. The top surface may be hard when you touch. It will be super soft as it cools down. Invert, slice and serve.

Notes:

* This cake tastes sweet even without jaggery as it has dates paste and carrots but since my kids have an extra sweet tooth, I add 1/4 Cup Jaggery. You can reduce or completely skip it if you don’t like cakes extra sweet.

* Please see that you divide the 1 Cup milk into two halves. 1/2 Cup milk to soak the dates and 1/2 Cup milk to add to the mixture as last step.

* Grind the dates in the soaked milk itself. Don’t add extra milk or water while grinding.

* My cake takes exactly 30 mins at 180 C. Every oven is different. So keep an eye after 25 mins so that the surface doesn’t turn black.

*Allow the cake to cool completely. The top surface may be hard when you touch. It will be super soft as it cools down.

* Lasts well for couple of days at room temperature if kept in an airtight container and handled well. Tastes even better the next day and the texture turns even softer.

* If you are new to baking, I have written an article combining all notes and pointers that I learnt in my decade long baking journey. You can check that if needed – Baking Basics for Beginners

* You can also check my Healthy Cakes and Cookie recipes Compilation for more healthy baking.

* Dates in cakes taste so heavenly and my Dates Chocolate Brownie and Dates Oats Cake recipes are examples to that.

I have tried to note down as much points as possible so that it’s easy for you all to follow but if you still have any doubts, either comment here or message me on my Facebook pageΒ Healthy cooking with mitha and I would be happy to help. Happy baking!

Click on the picture to save the recipe on Pinterest