Dates Chocolate Brownie |Eggless, using wheat flour and Jaggery

Click on the image to save the recipe on Pinterest

As my readers know already, I love baking. It gives me some undefinable kind of joy and at times when I just want to hide myself, no longer wanting to talk to anyone (yes, there are days like that even for the talkative me 😬), I enter my baking world. It brings me peace of mind and the result of these delicious bakes too. The kids and their father (who is no less a kid too 😅) become happy at the sight of these goodies and that makes me happy as well. #bakingishappiness❤️

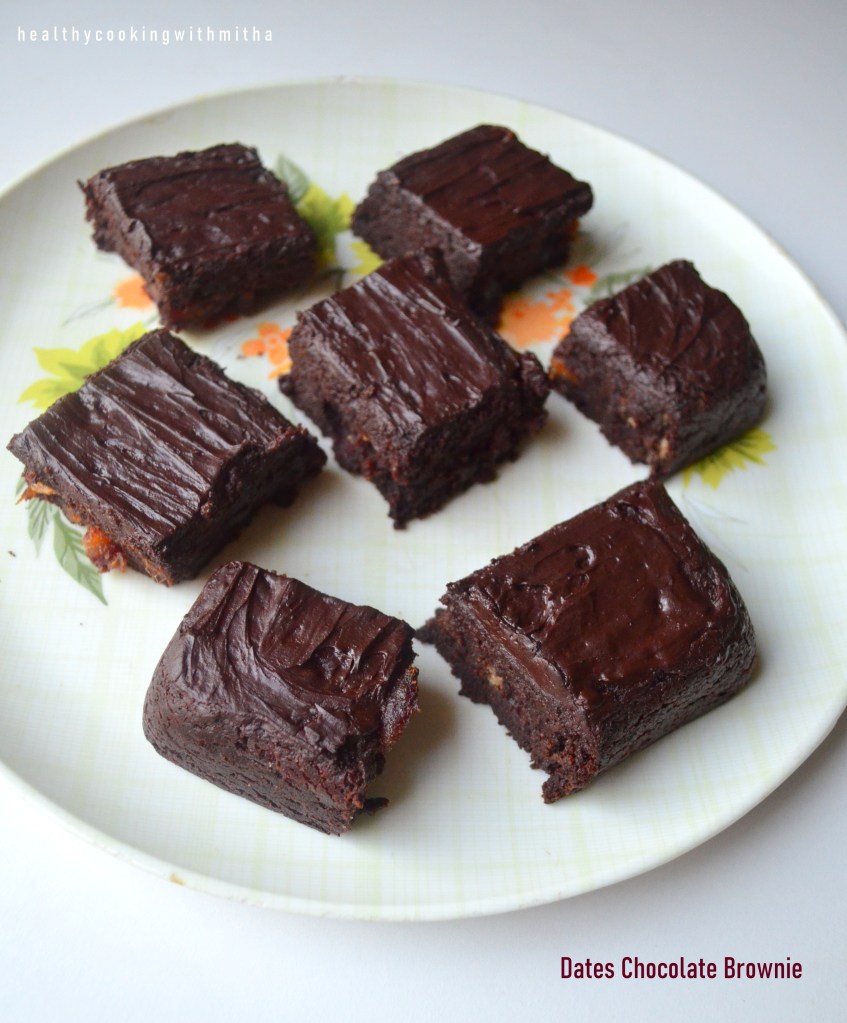
Coming to these brownies, they are so ultra moist as you can see from the pictures and also incredibly delicious. I wish I could share these with all of you. One of the bakes I am really proud of as it is eggless, uses wheat flour and jaggery instead of maida and sugar and also enriched with the goodness of dates. What’s not to love in these brownies? ❤️

I could not take many pictures as my kids were all set to attack them (😅) but when the brownies look so gorgeous, I am sure couple of pictures are more than enough to show how amazing they come out.

Click on the image to save the recipe on Pinterest

I also want to thank my reader Mamta Baliga Shenoy for requesting this recipe. I always make them but did not realize I had not uploaded in the blog. Thanks for the request, Mamta mai which made me add this one. Hope you and all my readers try this recipe. It really comes out amazing. Happy and healthy baking!

RECIPE:

Ingredients: { Makes about 8 brownie squares} ( 1 Cup = 250 ml )

Dry ingredients:

1/2 Cup Wheat flour/ Atta (yes, only half cup is required)

1/2 tsp Baking powder

A pinch of salt

Wet ingredients:

1 Cup Water

1/2 Cup Jaggery powder or grated jaggery

1/3 Cup Cocoa powder

1/4 Cup Ghee (use fully and don’t reduce)

1/2 tsp Vanilla essence

4 Soft variety Dates, finely chopped

For the frosting:

About 35 grams of any chocolate

About 3 Tbsp of Milk

Step by step recipe:

1. Preheat the oven at 180 C for 10 mins. Meanwhile, Sieve half cup of wheat flour, 1/2 tsp baking powder and a pinch of salt into a bowl. Keep aside.

2. Heat 1 Cup water in a pan and melt 1/2 Cup Jaggery in it. Add 1/3 Cup Cocoa powder and whisk well to remove lumps. Now add 1/4 Cup Ghee (don’t reduce the quantity. It is needed for the moistness). Mix well. Let it be very hot and a lump free mixture.

Note: Don’t reduce the water quantity while heating. Just melt the jaggery in the water, add cocoa powder and ghee. Mix once to remove lumps and remove from the flame.

3. Pour into a bowl while it’s still hot. Add vanilla essence and mix well.

4. Now add the dry ingredients mix to the wet ingredients while the wet mixture is still hot. Mix gently till the dry flour specks are not seen. Do not over mix as it leads to dense brownies. Just mix gently till both ingredients blend in.

5. Add chopped dates and mix well. I just cut them with my hands as the dates are so soft (khudri variety). I make 6 pieces from one dates.

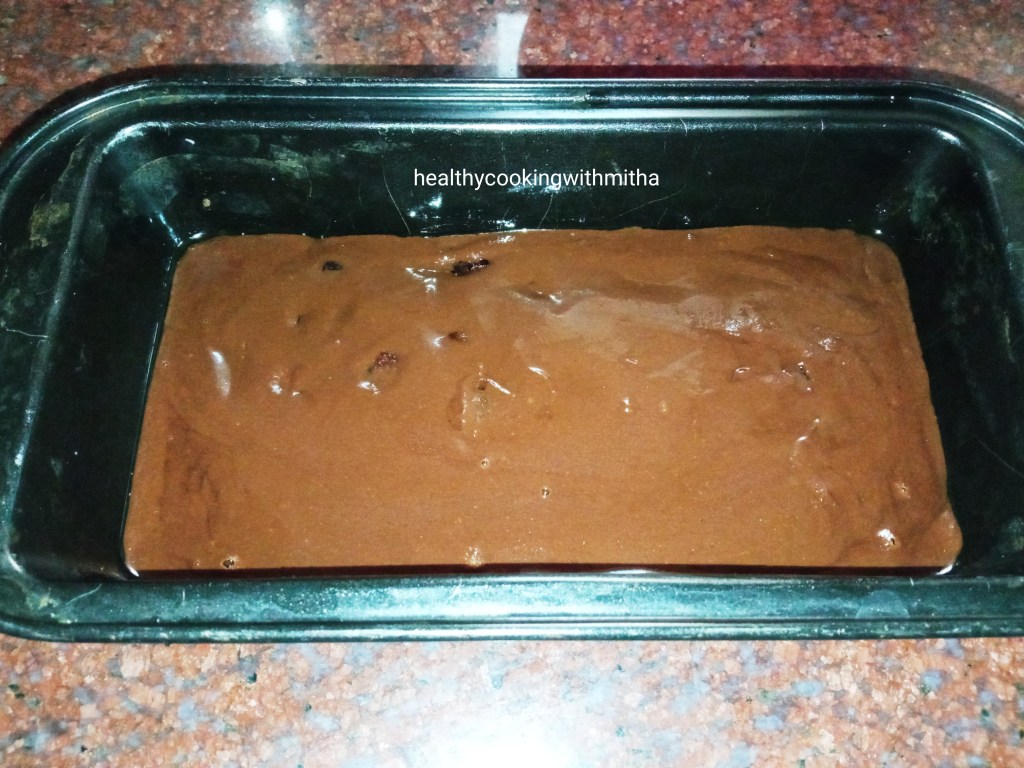
6. Mix well and add to a greased loaf pan. (Mine is of size 20 cm length and 4 cm width.) Grease the pan well with ghee. Level using spatula evenly.

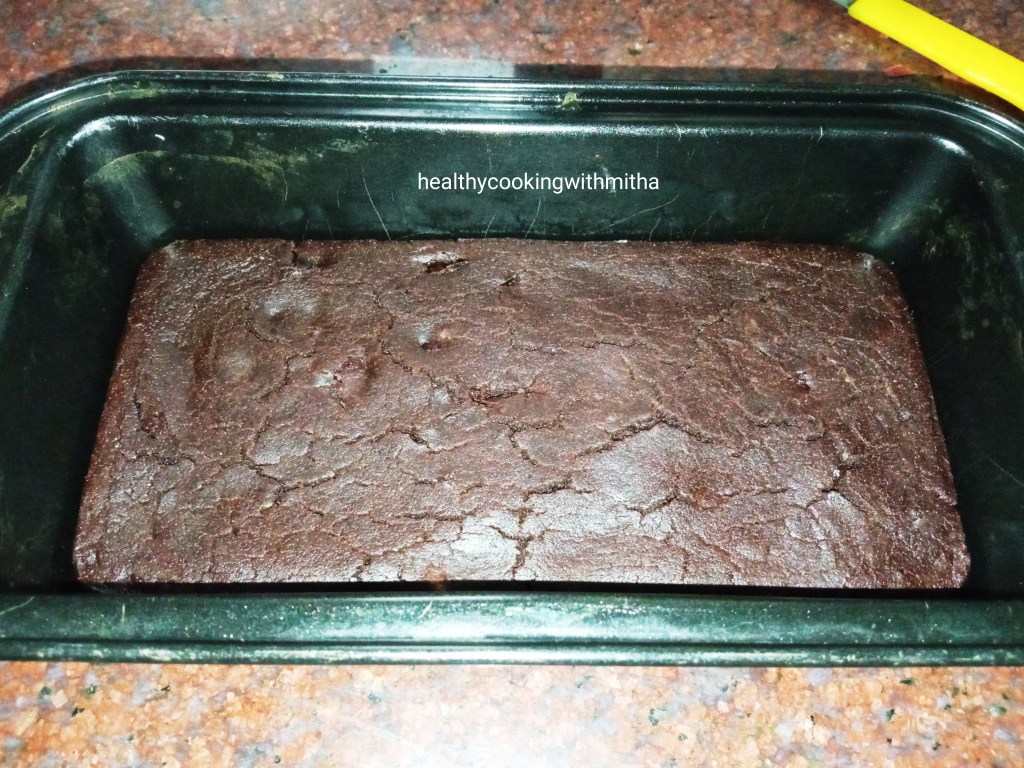
7. Bake in the center rack of a preheated oven at 180 C for 30 to 35 mins or till a toothpick inserted in the center comes out clear. Do not over bake as the crust can turn crispy. Mine is an OTG and it gets done exactly at 30 mins.

8. For frosting, soften about 35 grams of chocolate in the microwave. I have used Lindt dark chocolate here as I had it. It took me about 2 mins of microwaving it at full power (I checked every half minute). Depends on your microwave. So keep checking.

9. When it becomes soft, add milk, 1 Tbsp at a time and mix well. It took me 3 Tbsp milk to get a creamy, thick frosting.

10. By then, the brownie would have cooled. Loosen the edges using a knife and invert it onto a plate.

11. Spread the frosting evenly over the brownie.

12. Cut into squares and serve.

Click on the image to save the recipe on Pinterest

Notes:

* Don’t be doubtful about the 1/2 Cup wheat flour required for this recipe. It really requires very less amount of flour. I use Pillsbury brand of wheat flour for all my bakes.

* Sieving or sifting of dry ingredients is very important as it leads to even mixing of ingredients. So don’t skip it.

* Make sure the wet ingredients mix is free of lumps and hot when dry ingredients are mixed in it.

* Do not over mix both the ingredients. Gently fold in and mix till dry flour specks are not seen.

* Always remember to Preheat the oven at 180 C for atleast 10 mins before placing the cake.

* Also, always place the bake in the center rack of the oven in OTG OR with both rods on in microwave with conventional mode oven. This leads to even baking.

* Do not open the oven door till atleast 25 mins into the baking time or else it won’t bake properly.

* Dates are optional and you can bake regular chocolate brownies too with this batter but Dates add an amazing moistness to this brownie.

* Do NOT over bake as the crust can turn crispy. At about 30 to 35 mins, when the toothpick comes out clear, it’s ready to be taken out of the oven.

* I highly recommend frosting this brownie as it tastes heavenly with it.

* I have used Lindt dark chocolate for the frosting as I had it. You could use dairy milk or any other regular chocolate available.

* Refrigerate if it lasts more than a day (mine never does 😅)

* For those who are new to baking, you can check my Baking basics guide for beginners.

* Find all my healthy cake and cookies recipes – Healthy Cakes and Cookies compilation.

I have tried to note down as much points as possible so that it’s easy for you all to follow but if you still have any doubts, either comment here or message me on my Facebook page Healthy cooking with mitha or on my Instagram handle and I would be happy to help.

Click on the image to save the recipe on Pinterest

Magge Sasam | Konkani style Mangalore Cucumber curry

My husband loves gardening and that’s his most favorite pastime too. He waters the plants atleast 4 times everyday even during the peak summers here in Qatar and waters them as soon as he comes back from work even without entering the house (have to add: even after night shift 😬). That’s his dedication towards plants and I tease him that his first love are his plants and not me. 😅

Couple of years back, he had grown Mangalore Cucumbers out of the seeds that I discarded from store bought ones. The creeper had spread all over the garden and we had a yield of over 50 of them. It was really amazing and even our relatives were surprised to see them grow specially in a desert land like Qatar. All credits go to his green thumb. Here is a picture of some of them.

Since they were so many in number, we shared some with our friends who eat these. I also made Mangalore cucumber sweet dosas or Surnalis but still many were left. That’s when I got the idea of making Magge Sasam just the way we make Kuvale Sasam with Ashgourd. It tasted so yummy that it became a regular at our place and all the magges got over in no time.

So, when I got Mangalore Cucumber from our grocery store last day, I thought I must share this recipe with my readers who have not tried this yet and clicked the pictures of this curry. With my husband on vacation, he too came and held the curry bucket and said it reminded him of the temple meals in our native which we missed this whole year. I loved the click and had to share it here.

Hope you all try and love this curry too. Tastes very good with white rice and lemon pickle. Happy and healthy cooking!

RECIPE:

Ingredients:

1 regular sized Mangalore cucumber/ Magge/ Vellarikka

1/2 tsp Turmeric powder

Salt to taste

For the masala:

1 Cup fresh/ desiccated Coconut

4 Kashmiri long red chillies (OR 4 green chillies)

1 tsp Tamarind paste

1 tsp Mustard seeds (to be spluttered before adding)

For the seasoning:

1 Tbsp Coconut oil

1 tsp Mustard seeds

Few curry leaves

Step by step recipe:

1. Cut both the ends of the mangalore cucumber and peel it’s skin off. Cut and discard it’s core. Chop it into cubes. Now pressure cook with turmeric powder, salt and water enough to soak it till it turns soft. It took two whistles for me in my electric stove top.

2. Take coconut, red chillies, tamarind in a mixer with little water. Grind to a coarse paste.

3. Now heat mustard seeds in a pan (without oil) and allow it to splutter. Add it to the masala.

4. Pulse in the mixer two to three times. No need to grind to smooth paste after adding mustard seeds. Grind to a slightly coarse paste.

5. Now add this mixture to the cooked mangalore cucumber and bring it to boil. Cook for about 10 mins on medium flame. Also check for salt and add if needed.

6. Now heat oil in a pan. Splutter mustard seeds. Add curry leaves and fry for few seconds. Pour the seasoning over the curry. Mix well. Remove from flame.

7. Serve hot with rice meals.

Notes:

* Don’t add a lot of water while pressure cooking the mangalore cucumbers or the curry turns watery. This is a thick curry. So add water only to soak it and pressure cook.

* Also, don’t overcook it. Mine gets done in two whistles on high flame in my electric stove top.

* I make this curry three ways. One is using green chillies alone which turns greenish white in colour. Second is this which I have shared ie using red chillies alone. Third is adding both green and red chillies in equal quantities. Three of these taste different and tasty. You can try the different variations each time for a change.

* Don’t grind the paste to smooth paste. Just add a little water and grind to a semi coarse paste. Also, don’t grind too much after adding the spluttered mustard seeds. Just pulse twice or thrice till it’s crushed.

* Remember that you have added salt while cooking the mangalore cucumber. So add only if needed later.

* This curry makes a good combination with white rice and lemon pickle.

* You can also make this Mangalore cucumber sweet dosas or Surnalis which taste very delicious.

Easy to make, healthy and delicious sweet recipes |Ready in 15 mins sweets

I am in many Facebook food groups and it is now filled with people posting many varieties of sweets along with savories as they are all set to welcome the most favorite festival, Diwali. It makes my heart warm to see the enthusiasm and happiness of everyone in the groups. Many of the members have become so close to me that I feel like they are my own family. Their encouragement for a beginner like me is truly very overwhelming. Thank you to all my readers from food groups. ❤️

This is just a compilation of my easy sweet recipes for people who have not yet made any sweets and want to make atleast one to celebrate the occasion. These get ready in about 15 mins and are healthy along with being kid friendly too. So good for busy mommies like me. Hope you all try and like them.

Wishing all of you a very happy Diwali. May the festival of lights bring happiness in your lives. ❤️

Please click on the name or the picture for the recipe.

1. Easy Coconut Burfi: These are really easy to make which I learned from “The Konkani Saraswat Cookbook” by my dearest Asha Satish Philar mai. It was one of the first sweets that I learnt and even my 5 year old daughter knows to make it.

Recipe here: Easy Coconut Burfi

2. Microwave Mango Coconut ladoos: This is yet another easy recipe which I learned in my initial days of cooking. Hardly takes few minutes to make but tastes really amazing. Do try if you have mango pulp with you and you love coconut.

Recipe here: Microwave Mango Coconut ladoos

3. Jaggery Sheera: One of the most made sweet in my house as it is my family’s favorite. I used to make Sheera with sugar initially but switched to jaggery many years back and have never looked back. Tastes really delicious!

Recipe here: Jaggery Sheera

4. Dry fruit bites: These are sugar free and very tasty along with being very healthy too. My way to feed dry fruits to my kids which are very beneficial to their growing body if consumed regularly in limited quantity.

Recipe here: Dry fruit bites

5. Nendran Banana halwa with Jaggery: This is the easiest version of the halwa which gets ready within 15 mins. Many of my readers have tried and loved this. It is another way to feed this healthy banana to my kids who love this halwa.

Recipe here: Nendran Banana halwa with Jaggery

6. Mango Kesar pedas: The tastiest pedas you can ever make. Very easy too and gets ready within 15 mins. If you have mango pulp, do try this and you won’t regret it. I love how beautiful they look too.

Recipe here: Mango Kesar pedas

7. Dried Apricot Halwa: Something which I tried to finish off my apricots but came so delicious that this has become our favorite. Too easy to be true kind of recipe. Doesn’t it look royal too? 😀

Recipe here: Dried Apricot Halwa

8. Churmundo | Easy wheat flour jaggery ladoos: These are Konkani people’s all time favorite ladoos. I use jaggery instead of sugar though. Tastes so heavenly that we feel at loss of words when devouring them. So quick to make too.

Recipe here: Churmundo | Easy wheat flour jaggery ladoos

9. Peanut Jaggery ladoos: Needs only two ingredients and hardly takes about 10 mins to make. Very tasty and healthy ladoos too.

10. Til Jaggery Burfi : A very tasty, easy to make sweet made from sesame seeds and jaggery.

11. Ragi Jaggery ladoos: Soft, melt in the mouth delicious ladoos made with Ragi or finger millet and jaggery.

12. Poha Sheera – An easy to make unique sweet from rice flakes or beaten rice that I learnt to make recently which we all loved a lot. Tried and loved by my readers too.

13. Dry fruit Coconut Ladoos: These are a great way to add dry fruits in ladoo form in both your kids’ and your diet. Also free from sugar or jaggery as dates sweetens these ladoos perfectly.

14. Mango Coconut Ladoos : These have to be the tastiest ladoos that I have ever made. Looks so pretty too 😍

15. Godu Phovu / Jaggery sweetened rice flakes – This is the most made sweet in every Konkani household for almost all festivities. So quick to make with very simple ingredients like Poha or thin rice flakes, coconut, jaggery and flavoured with cardamom powder.

In this recipe, I have made Chane usli or seasoned chickpeas with Godu Phovu as it is a very delicious combination.

Recipe here – Godu Phovu

16. Gluten Free Jowar flour ladoos: An easy to make, healthy and tasty ladoos which you can never say are made from Jowar flour.

17. Vegan Coconut Badam Ladoos: Yet another quick and delicious ladoos which combine coconut and almonds beautifully. ❤️

These are the easiest sweet recipes that I have shared. You can check the rest of my healthy desserts like Jaggery Shrikhand, Peanut Ubbattis, Mango mousse, Chocolate Cheesecake, Desi Tiramisu, Bottlegourd jaggery halwa, etc on my Desserts page.

My other compilations:

Oats Recipes Compilation

Healthy Cakes and Cookies recipes Compilation

“No rice” dosa recipes compilation

Variety Idlis Compilation

Happy and healthy cooking! ❤️

Peanut Ubbatti | whole wheat jaggery holige

Being homebound since many months now, I truly realize the value of our home town visits which were atleast twice a year. Along with that, I really miss the fun meeting my loved ones, the non stop chatter, going to temples, shopping with my cousin and also (importantly) indulging in sweets without a care in the world. 😅😍

I have been an ardent devotee of sweets since a child and my dad knowing that, spoils me to the core when I visit them. My favourite sweets are brought and stored before I come, all awaiting me to devour them 😬. One among them are Kayi holiges or coconut filled sweet Ubbattis which are a speciality of Udupi Shree Venkateshwara sweets near the famous and our dearest Shri Krishna’s temple.

So, when I miss those holiges, I make chapati dough, fill it with coconut and jaggery to make my own “jugad” kind of holiges 😀 which tastes yummy too. As I started making them, I realized I could make different varieties of it and these peanut Ubbattis came into being. It tasted so good that we make it regularly.

So glad to share this recipe. Hope you all try it for Diwali. It’s as easy as making parathas and hope my step by step recipe along with notes will help you all. Happy and healthy cooking.

Also, wishing my readers a very happy Diwali. May the festival of lights brighten your lives and fill it with happiness. ❤️

RECIPE:

Ingredients: { Makes 5 Ubbattis }

For the outer dough:

2 Cups Wheat flour/ Atta { I use Pillsbury brand }

About 3/4 Cup Water {to knead the dough}

1/4 tsp Turmeric powder or Haldi

Salt to taste

For the inner filling:

1 Cup Peanuts { skin removed }

1/2 Cup Jaggery

2 Tbsp Water

1/4 tsp Cardamom powder

To roll the Ubbatti: Dry wheat flour as needed

Ghee to cook the Ubbatti

Step by step recipe:

1. Add wheat flour, turmeric powder and salt in a bowl. Add water and knead to a soft dough. It took me about 3/4 Cup of water for 2 Cups of flour. Might vary as per your brand. The dough should be soft and smooth. Keep aside.

2. Now take the skinned peanuts in a mixer.

3. Powder it by pulsing it every two rounds. Don’t run the mixer continually as peanuts can leave oil. Just pulse for 4 to 5 times and it will turn into fine powder. If tiny bits of peanuts remain, it’s okay as it gives nice bite to the Ubbatti.

4. Now add jaggery along with water in a pan. Allow jaggery to melt and come to a boil. No need to make it into syrup.

5. Now add the peanut powder and mix once. Switch off the flame after mixing once or the mixture will harden.

6. Transfer it into a plate immediately. Allow it to cool slightly. Don’t cool it completely as it will turn hard. When it is warm, make small balls of it as shown. Also make balls of same size as filling from the wheat dough.

Note: It is important to make both inner and outer balls of equal size so that the Ubbatti turns perfect.

7. Now keep a chapati tawa to heat on the flame. Take a wheat ball and dip in dry wheat flour. Roll to a small Puri (small circle as shown). Keep the inner ball of filling inside.

8. Now take the sides of the wheat dough and cover it over the filling sealing it completely.

9. Roll it using little dry wheat flour to as thin and evenly as possible.

10. Place this over the heated tawa and cook till bubbles appear over the surface. Add ghee over it.

11. Flip and cook for about half a minute adding ghee over that side too.

12. Remove and repeat the same with the rest of the dough.

Notes:

* The water quantity while making the wheat dough can vary with your brand. Just make into a soft and smooth dough. Keep for rest for about 30 mins if you have time. Else it’s fine.

* We get readymade skinned peanuts here and I use that. If you have regular ones, you might need to roast it on low flame, cool it and remove the skin.

* While powdering the peanuts, be careful to not grind continually as it may leave oil. Just pulse and powder it. Even if little bits of peanuts remain, it’s fine. Adds a good crunch to the Ubbattis.

* Don’t make jaggery syrup. Just melt it and bring to a boil.

* Switch off the flame immediately after adding and mixing the peanuts. Else it may turn hard. Also, don’t keep the mixture to cool for long. Make balls when the mixture is still warm.

* Make both the inner and outer dough balls of equal size. Else the Ubbattis may not taste as good or might become like parathas. Making both balls of equal size ensures the outer layer is thin and we get good flavour of the filling.

* As these Ubbattis are kept at room temperature, they turn crisp on the outside but soft on the inside. That’s exactly how we love it. If you love soft Ubbattis, consume them immediately after making it.

* Since it is easy to make, I make it fresh each time. The measurements I have mentioned above yields 5 Ubbattis which are sufficient for us to last a day.

* Also, with the above measurements, I get two balls of wheat dough leftover ie it makes 7 wheat balls. I make chapati with it.

Raw Banana moong curry | Kerala style recipe

I get many messages from my readers about which place I really belong to, as I keep mentioning both Kerala and Karnataka in my write ups. Actually I am from a beautiful village named Katapady near Udupi. When I was 9 years old, we shifted to Ernakulam and thus started my life as a Keralite. After shifting many rental houses, we bought our own house in a place called Elamakkara. It was in midst of many temples and we loved the area very much. That house still brings back many beautiful memories as I did my schooling and college life, spent my pregnancies and days with my newborn babies in that house. Many nostalgic memories to cherish forever. ❤️

My parents shifted back to Udupi two years back and are enjoying themselves in their dream flat which is in midst of nature. You can see so many varieties of birds and butterflies there with every morning welcomed by their chirping. I love chatting with Amma lying on her bed looking at the beautiful birds. Right now I am in Qatar (settled here after marriage since 9 years) and honestly, it feels really homesick not being able to travel even if I want to (not risking with the present situation). Hope next year brings more happiness. ❤️

Coming back to this recipe (got emotionally carried away like always 😅), I had shared a recipe of Sprouted moong methi sukke earlier which I had learned from the Konkani community in Elamakkara. Many of my readers and relatives had tried and loved it so much. So here’s sharing one more recipe which is commonly made by them. They actually use banana stem and whole moong but I replace with raw bananas as stem is not available here.

Hope you all try it and love it too. Happy and healthy cooking!

RECIPE:

Ingredients: { The below measurements serve 5 to 6 people, so halve the quantity of moong and raw banana and adjust chillies if making for 2 people }

2 medium sized Raw Bananas

1 Cup dried whole moong/ green gram

Salt to taste

For the ground masala:

1 Cup Coconut

1 tsp Jeera or Cumin seeds

4 to 5 Green chillies or to taste

1/2 inch Ginger piece

For seasoning:

1 Tbsp Coconut oil

1 tsp Mustard seeds

A sprig of Curry leaves

2 long red chillies

Step by step recipe:

1. * Soak dried moong in atleast double the water overnight or for atleast 8 hours. Drain the water completely. Wash well. Pressure cook with water a little above it’s level for 2 whistles (or as per your cooking range) till it turns soft.

* Also chop both ends of raw Banana. Peel the skin off and finely chop the raw Banana and add to water.

2. Heat oil in a pan. Splutter mustard seeds. Add curry leaves and red chillies. Now add raw bananas and fry for few minutes till it cooks halfway.

3. Now grind coconut, green chillies, Jeera and ginger along with about 1/4 Cup water to a coarse paste. Don’t make a smooth paste.

4. Now add this paste along with salt, cooked moong to the raw bananas and cook together till the raw bananas turn soft. Also add water as needed. This a thick gravy.

5. Serve hot with rice meals.

Notes:

* This curry thickens as you keep it. So add water as much as you like it. We prefer it dry as we eat with matta rice gruel for dinner. Adjust thickness using water.

* You can substitute raw bananas with Banana stem (gabbo) too. That’s how it’s made among Kerala Konkani people.

* Do remember to grind the coconut mixture to a coarse paste to get the best flavour.

* Also add couple of more green chillies if you like spicy curries.

* If you want to make the curry in less quantity, soak only 1/2 Cup moong and use 1 raw Banana in the curry. This will serve 2 people for 1 meal.

* I make Easy Raw Banana tawa fry as an accompaniment with this curry along with rice. The meal turns out very tasty.

* You can also try this Sprouted moong methi sukke. Tastes Amazing!

Kharbas dosa | no fermentation dosa

My husband is on vacation since two weeks now and has been looking out for new recipes to try for me. It has actually made my job easier as I no longer have to think what to cook (which is a huge task in itself 😅). He searches for unique recipes (his current hobby 😀) and sends it to me. I just have to make it (which I don’t mind at all as I love cooking ❤️)

So last week he sent me this recipe of Kharbas dosa which he found in a video. I was amazed as it did not need fermentation at all and even then turned out super crispy. It also came out so tasty that I had to share the recipe with all of you. 😍

Hope you all try and love this dosa too. Our dosa loving family could not get enough of it and I made it again today for them. Happy and healthy cooking! ❤️

RECIPE:

Recipe credits: jyoth youtube channel

Ingredients: {Gives about 12 to 14 dosas}

2 Cups Raw white rice or Idli rice (I use any variety of short grain white rice available here)

1 Cup Urad dal (I used split ones)

2 tsp Methi or Fenugreek seeds

2 tsp Peppercorns or to taste

2 Kashmiri long red chillies

Salt to taste

Ghee or oil to cook the dosa

Step by step recipe:

1. Wash well and soak the rice, Urad dal, Methi along with pepper corns and red chillies for atleast 4 hours.

2. After it gets soaked, drain water completely and add to the mixer jar along with salt.

3. Add about 1 to 1 1/2 Cups water and grind to a smooth paste. Pour into a bowl.

4. Now the batter is ready to make dosas. Heat a dosa pan and pour a ladle of the batter. Spread into a large circle. Cook till the surface looks cooked and the underside turns crispy adding ghee or oil in between..

5. Serve hot with a chutney of your choice.

Notes:

* Methi is a very important ingredient in this dosa as we are not fermenting it. Do not skip Methi.

* The amount of pepper is to taste. If you don’t like pepper, you can skip it but I suggest to add atleast 1 tsp of pepper and 1 red chilly for the great flavour.

* Since I am a huge fan of fermentation as it increases the nutritional value in manifold, I do ferment this dosa batter as well but it makes no change to the texture of the dosa. It is crisp even before fermentation. The taste is also the same. So I suggest if you have time, ferment it for few hours. Else it’s okay as this dosa really does not need fermentation.

* The chutney I make with this dosa is ginger chutney. Just grind coconut with green chillies, ginger and tamarind paste along with salt and water to a fine paste. Pour into a bowl and add little water to bring it to chutney consistency. Season with spluttered mustard seeds and curry leaves in coconut oil.

Churmundo with jaggery | easy wheat flour jaggery ladoos

Even though I am good at making pedas, ladoos are one sweet I had never attempted much. When I did attempt few months back, it had got such weird shapes 😆 that I thought my hands were not meant to make those perfect, droolworthy round round ladoos.

And guess which ladoos proved me wrong? Our own amchi Churmundos.❤️ Churmundos are usually made with wheat flour and sugar powder but I have used jaggery here. My fondest memory with these ladoos are both my grandmothers making lovingly for me during childhood.

My paternal grandmother or Annama and my aunt Chandriakka still make big boxes of these ladoos and give it to me when I return back to Qatar after vacation. Those ladoos are loaded with love and I eat each bite remembering them.

So this time since we could not visit them, I decided to make them myself (“no matter what shape they turn out!!” was my thought). And imagine my happiness when it turned out so perfect. My husband said it was the best Churmundo he had ever eaten. The kids too loved it very much and it got finished off quickly.

So I thought why not share this easy recipe of Churmundos. I make with jaggery as my family prefers jaggery sweets to sugary ones. Even though I am not very creative, I decorated them like a lamp as Diwali is less than a week away and I am all set for the festival. How do they look? 😬😍

As an after note, how many of you remember the small colourful liquid bindis that we used to decorate as kids during festivals? Don’t these ladoo designs resemble it? It was very unintentional but I was reminded of those bindis after I saw these designs. Such good memories they were. Childhood was definitely special. Happy festive season to all of you! ❤️

RECIPE:

Ingredients: {Makes about 10 to 12 small ladoos}

1 Cup Whole wheat flour/ Atta (I use Pillsbury brand of wheat flour)

3/4 Cup powdered Jaggery

1/4 Cup Ghee (plus 1 Tbsp to fry raisins)

2 Tbsp Raisins or as per your taste

1/4 tsp Cardamom powder

Step by step recipe:

1. Heat 1 Tbsp Ghee in a pan and add raisins. When they plump up, remove into a bowl. Keep aside.

2. In the same pan, melt ghee (don’t make it very hot. Just melt it on low flame.) Add wheat flour and start sauteing on low flame.

3. Initially it will be in small lumps but as you continue sauteing on low flame while patting the lumps using the spatula (as shown in the below picture), it will be a smooth mixture. (This is after about 5 mins of sauteing)

4. Continue sauteing and you will get a wonderful aroma, there will be no raw smell of the flour and the whole mixture will come together as shown below. It takes me exactly 8 mins from start to get the mixture to this stage but might vary depends on your pan and the flame.

5. Remove immediately to the bowl that you added raisins. Also add jaggery powder and Cardamom powder.

6. Mix well using the spatula when still the mixture is hot.

7. Now make ladoos using your hands when the mixture is still warm. If you are finding difficulty in forming the ladoos and they are breaking apart, add little ghee to the mixture and you can easily make ladoos. But the amount of ghee is perfect to make these ladoos and I don’t think more will be required.

8. Serve warm or store in an airtight container.

Notes:

* As it is very quick to make, I make only with 1 Cup of wheat flour at a time which yields me about 11 ladoos. They get finished off by my family within two days. I store it in an airtight container at room temperature.

* Be careful to saute the wheat flour in very low flame. I use electric cooking range and I keep in the flame between medium and low. It took me 8 mins of sauteing on this flame. (tip: keep your favorite songs while sauteing and you won’t even realize that you have sauteed that much 😃)

* Raisins are to taste or can be skipped but gives a good flavour to the ladoos.

* Jaggery powder can be substituted with sugar powder if your family does not like jaggery flavour.

* While binding ladoos if you are unable to form them, add ghee if needed to the mixture and also your palms to get neat ladoos.

* These ladoos are initially very soft but turn firm on keeping at room temperature for little while.

* This is how I make cardamom powder. I remove the seeds of cardamom from the skin. Crush the seeds using mortar pestle into fine powder. Use as needed. I used seeds from 2 cardamoms to get 1/4 tsp powder. (The skin can be added to tea for great flavour.)

Moong dal Kosambari | Konkani style seasoned salad

Click on the image to save the recipe on Pinterest.

I have been blogging continually for a week now and my readers must be wondering what kind of energy has got into me 😅. Actually I realized how much time I was wasting in overthinking and felt it was best if I deviate my time towards something productive. So here I am with my son sleeping in my arms completing his evening sleep while I am blogging with my favorite songs in the background on spotify instead of random browsing or feeding my moody thoughts (which are sometimes too much to handle for the sensitive me 😬).

This kosambari is my favorite accompaniment to our rice meals. It is quick to assemble, very healthy with protein rich moong dal and tastes yummy too. People from Karnataka and Konkanis know this as they have grown up eating it at home, in temples and even in weddings.

There are many variations but this is how I make kosambari. It can beat any exotic salad in terms of taste and I am sure will won’t be able to stop eating it. It’s a favorite of my family and I have to make a huge bowl of it. Even then I hardly get to eat couple of spoons of it (my son comes when I eat my dinner and finishes off my share of the kosambari too 😂).

Hope those who don’t know will try and love it. Happy and healthy cooking!

RECIPE:

Ingredients:

1/4 Cup Moong dal

3 English cucumbers ( I use them as Indian ones are rarely available here)

1 Carrot, peeled and grated

3 Green chillies or to taste

3 Tbsp freshly grated coconut

Juice of one Indian lemon

Salt to taste

For seasoning:

1 tsp Coconut oil

1 tsp Mustard seeds

Few curry leaves

A pinch of Hing powder

Step by step recipe:

1. Soak moong dal in almost double the amount of water for about 30 to 45 mins. It will swell in size and when you bite, there will be no rawness in it. Then you can use it. Meanwhile, also wash well and chop cucumbers. Add cucumbers, grated carrot, green chillies and grated coconut in a mixing bowl.

2. When the moong dal is soaked, drain water from it completely and add to this along with salt.. Also heat oil in a pan, splutter mustard seeds and fry curry leaves slightly in it. Add Hing powder too. Then pour the seasoning over this.

3. Finally add lemon juice and mix well.

4. Serve with rice meals or enjoy as it is.

Note:

* Make sure to soak the moong dal well. When you taste and see by 30 mins, you will know whether it has rawness or can be eaten. If you feel it’s still raw, soak for more time. Anyhow, by maximum one hour, it will swell well and will be ready to be added to the salad.

* You can make this with cucumber alone or carrot alone but I love mixing both as it gives a good flavour and looks good too.

* Goes well as an accompaniment with rice and rasam.

Click on the image to save the recipe on Pinterest.

Dried Apricot Halwa | Sugar free easy recipe

Before these home bound times, we used to go shopping to the huge supermarkets in the city almost every couple of weeks and me being my daddy’s daughter always used to keep an eye for groceries on offer. So when at a particular time I saw that dried apricots were available for cheap rates, I bought plenty of them promising myself to eat atleast two daily for my eye, heart and bone health (when I get the sudden Josh for self care 😂).

All those promises got forgotten as soon as I reached home 😅 and the apricots started waiting in the freezer (peeking at me whenever I opened the door 😃) keenly to be used. Then last month as I needed more space in my freezer, I took one of the packets out and made this halwa as an experiment.

Imagine my happiness when it came out so delicious. Now every couple of weeks, I make this apricot halwa for dessert and we all enjoy it. So this had to be blogged too and I captured some pictures when I made it last day.

It’s a must try dessert if you have those apricots waiting to be used up or even otherwise. Get them when you go shopping next and make this delicious dessert. Dried apricots contain magnesium, pottasium and are rich in antioxidants which are very good for your eyes, bone and heart health. If consumed during pregnancy, it is very beneficial for the baby.

Hope you all try and love it too. Happy and healthy cooking!

RECIPE:

Ingredients:

About 20 to 25 Dried Apricots (Mine had 23 in a packet)

1/4 Cup Jaggery powder (optional, I added for colour and flavour)

2 Tbsp Ghee

Saffron strands, for garnish (don’t skip this. Adds a wonderful flavour)

Chopped Pistachios as garnish

Step by step recipe:

1. Wash the dried apricots well and soak in water for about an hour in enough water. It will absorb the water and swell in size. Also turns very soft.

2. Now add this to a pan and allow it to come to a boil. Add water about 1/2 Cup at a time when you see that water has been absorbed.

Note: It took me 1 Cup of water to cook the apricots fully. It turns very soft when cooked. Takes about 10 mins.

3. Now mash using a potato masher. You can keep little pieces of the apricots too. We love the little bites in it.

Note: If you feel that you can’t mash the apricots well, then it has not cooked fully. Add little water and cook them fully.

4. Now add ghee and jaggery powder. Mix well till the mixture leaves the sides of the pan.

5. Remove into bowls and garnish with saffron strands and pistachios. Serve warm.

Notes:

* If you are diabetic, you can definitely skip jaggery too from this halwa. It still tastes very sweet and delicious. I add because of the gorgeous colour that it imparts and also we love jaggery flavour.

* Saffron strands makes this halwa taste heavenly and takes it to another level completely. So do take out those saffron strands from your treasure box 😅 for this halwa.

* We love little bites of the dried apricots in our halwa. So I don’t mash them completely. If you like a smooth kind of halwa, you can mash it completely.

Kanchipuram Idlis

When I get some free time yet don’t want to sit with my phone, I read cookbooks. Reading them is a pleasure of it’s own and I forget the rest of the world and dive into the world of recipes. ❤️

On one such day, I saw a recipe of Kanchipuram idlis in the cookbook “Dakshin Bharat dishes” by Mrs Jaya V Shenoy which is a must have cookbook in every Konkani household. My grandmother and mother refer to the Kannada version of this book while I was lucky enough to be gifted the English version of it by my aunt, Chandriakka during my marriage. It has definitely been the best gift for me. Thank you akka. I always remember you when I read it. ❤️❤️

As I read the recipe for these idlis, I saw that it had baking soda as an ingredient which I try to avoid as much as possible. So I added the naturally fermenting ingredient, Methi which gives soft idlis and also increases the health quotient of the idlis.

The resultant were these super soft, spongy idlis with bites of cashews and chana dal. Also, they turn out so flavourful that you will keep craving for more. We loved it so much that I had to make them again within the week as we could not get enough of it.

These idlis are definitely a welcome change from the regular idlis and can be made occasionally when you are bored of the same old breakfast dishes. Hope you all try and love it like we did. Happy and healthy cooking!

RECIPE:

Ingredients: {Makes about 22 idlis}

1 Cup Raw white rice or Idli rice (I use any variety of small grain white rice available here)

1 Cup Urad dal (I use split ones)

1 tsp Methi or fenugreek seeds

1 Tbsp Chana dal (To be soaked and added into the batter after fermentation)

Salt to taste

For seasoning:

1 tsp Ghee

1/2 tsp Jeera or cumin seeds

6 to 8 broken cashews

A sprig of curry leaves

A pinch of pepper powder

1 to 2 green chillies

Step by step recipe:

1. Wash well and soak the Urad dal along with Methi in atleast twice the amount of water. Wash well and soak the rice separately. I soak both for atleast 4 hours. Once soaked, drain the water completely from it.

2. Grind Urad- Methi with 1 Cup water or as required to a smooth paste. (It took me 1 Cup water to grind it.) Remove into a large vessel.

3. Now grind the rice with little of the leftover Urad batter in the mixer to a little coarse paste (like rava consistency). I did not add additional water at all while grinding rice. Pour into the same bowl and mix both batters adding salt.

4. Ferment the batter overnight or for atleast 8 hours in a warm place.

5. While making idlis, add soaked Chana dal and also prepare the seasoning. Heat ghee in a pan. Add cumin seeds, cashews, pepper powder, curry leaves and green chillies. Fry till cashews turn light brown and add the seasoning to the batter.

Note: I usually soak the Chana dal in double the water for about an hour the previous night. Drain the water and refrigerate to add to the batter the next day. This saves soaking time in the morning.

6. Mix well. Pour into greased idli plates and steam for 20 mins or till done.

7. Enjoy with a chutney of your choice.

Notes:

* Grind the rice to rava consistency. If you grind it smooth, the texture of the idlis may not be as good.

* Methi seeds give these idlis a very soft texture. So don’t skip it.

* To save time in the morning, soak the Chana dal in enough water the previous night for an hour. Drain and refrigerate. Add to the fermented batter while making idlis.

* All ingredients in the seasoning give a good flavour to the idlis. So don’t skip it except green chillies which you can skip if serving small kids. My kids are fine with it though. I remove the chillies and give them.

* This chutney is Hing chutney with red chillies. I just grind coconut with dried kashmiri red chillies, Hing powder and tamarind paste with salt and little water to a smooth paste. Drizzle coconut oil on top or season it with mustard seeds and curry leaves. I don’t season most of my chutneys as my daughter does not like mustard seeds.

Join me in my journey with a foodie husband and hungry kiddos while I make them eat healthy!