Traditional recipes always attract me as I believe in going the age old ways to live a healthy life. Simple, homemade food combined with regular exercise even if brisk walk for atleast 30 mins a day is enough for our good health instead of any diets. Having said that, I do indulge in restaurant food and store bought goodies sometimes (especially sweetsfor the sweet loverin me ❤️) which I believe is necessary too for a change in tastebuds.
But finally, making sweets at home gives me happiness and specially simple and tasty Konkani sweet like this one, which is filling and doubles up as a great evening snack too. I learned to make this from my dear friend Sreeja Shenoy whom I came to know through Facebook food groups. She says she resonates with my feelings in each of my posts and feels close to me (how sweet of her ❤️) while for me, her posts take me back to my days in Kochi as her food is Kerala Konkani style.
So when she posted this broken wheat sannan, I knew I had to try this and saved the post immediately. And how amazing does it come out! So so delicious. Cannot believe this simple sweet can have such an amazing texture and flavour.
Thank you so much Sreeja for this recipe. A definite keeper and will surely be making this whenever I crave for something sweet. My kids loved it a lot too which made it even more special. ❤️
Also, I want to thank you and your sister Ambratha for always encouraging me with your kind words. It means so much to me that I am always filled with gratitude. Much love to both of you. ❤️❤️🙏🙏
Hope you all will try this recipe. Happy and healthy cooking! ❤️
RECIPE:
Ingredients: { Makes about 12 squares of 5 cm each }
1 Cup Broken wheat / Gonva Khan/ Dalia
3/4 Cup Coconut (freshly grated or desiccated)
3/4 Cup Jaggery
Seeds from 2 Cardamom pods
A pinch of Salt
Ghee to grease the bowl
Step by step recipe:
1. Soak 1 Cup Broken wheat for 3 to 4 hours in thrice the quantity of water.
2. Now drain the water completely and add the broken wheat to a mixer. Also add 3/4 Cup Coconut, 3/4 Cup Jaggery and seeds of 2 cardamom pods.
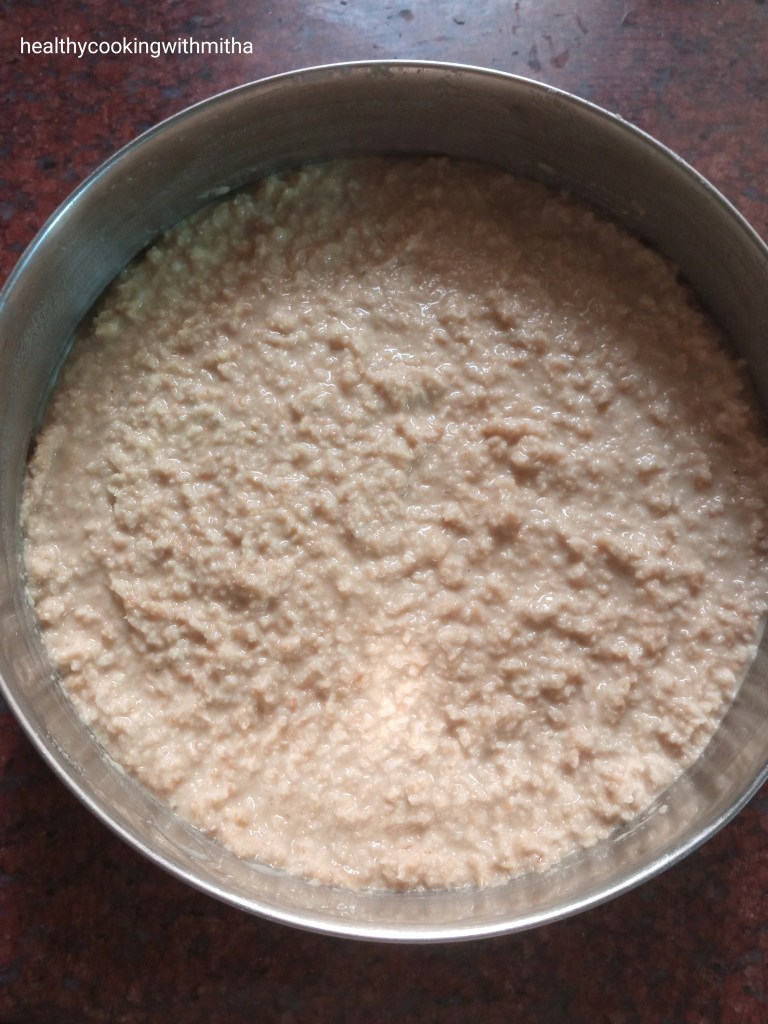
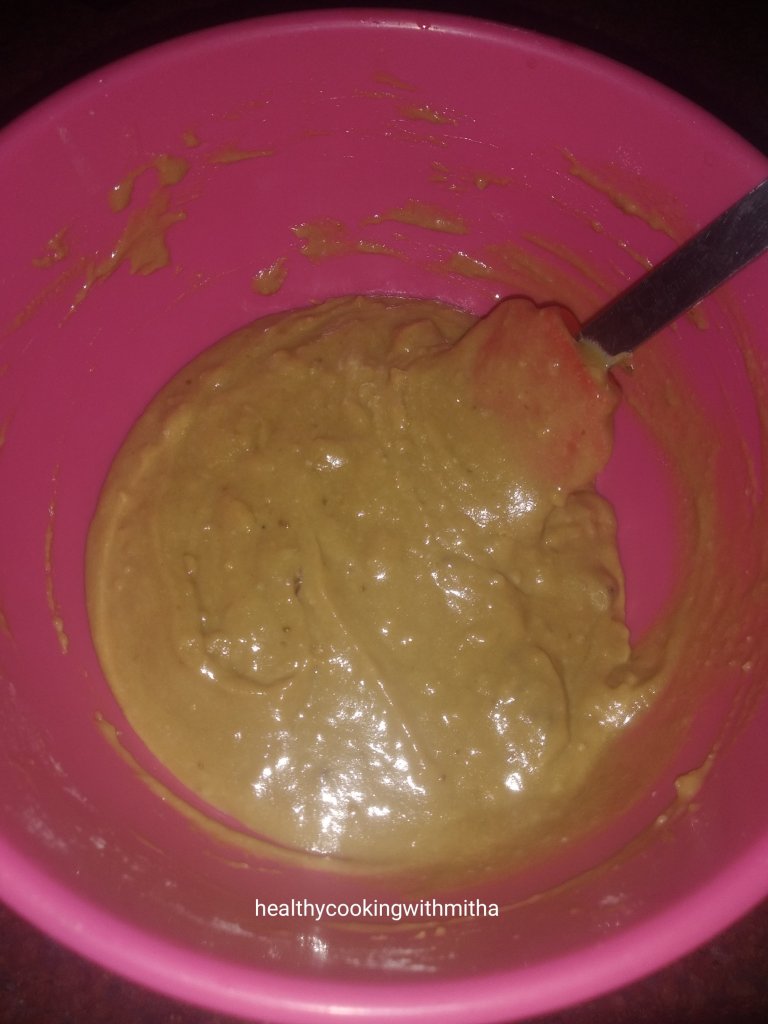
3. Add a pinch of salt and grind to a semi coarse paste. Don’t add water at first while grinding as soaked broken wheat leaves water while grinding. Only if required, add 1 Tbsp at time. It took me about 4 Tbsp to grind it to a thick semi coarse batter.
4. Now grease a vessel with ghee and pour this mixture to the vessel. Level using a spoon and spread evenly. My vessel is of 18 cm diameter.
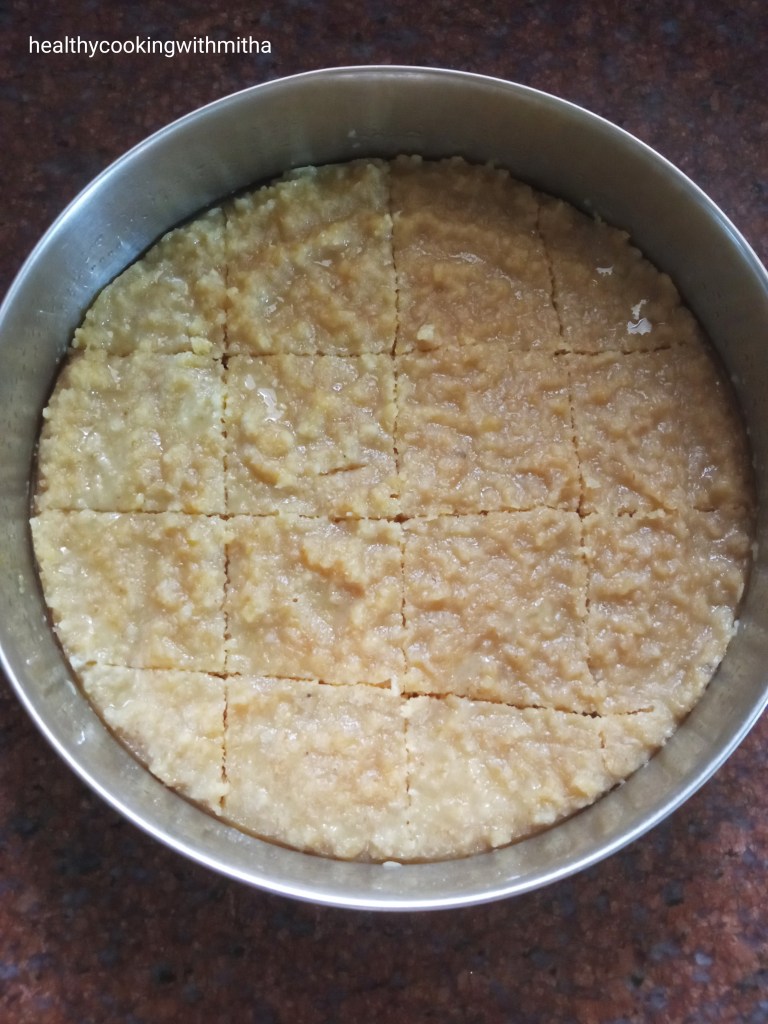
5. Steam for about 20 mins till a knife inserted in the center comes out clear. Cool down. Slice and serve.
Notes:
* I used Patanjali brand of Broken wheat or Dalia.
* Soaking the broken wheat for atleast couple of hours ensures that the broken wheat turns soft and grinds quickly.
* The amount of jaggery can be changed according to your taste.
* You can grind to a smooth paste too but grinding coarsely gives a bite of coconut which tastes delicious.
* It takes me exactly 20 mins to steam. You can check by inserting a knife in the center. If it comes out clear, it’s done.
* Remember to level the mixture evenly in the bowl for it to steam evenly.
* Grease the bowl well with ghee so that the pieces comes out in perfect shapes.
Click on the image to save the recipe on Pinterest
I can’t believe till some time back, I thought making ladoos were the most difficult among sweets. Now, if you give me 15 mins, I can make ladoos for you. 😄 That’s the change which practice has brought in me. Now I can understand the real meaning of “Practice makes a man perfect”. Though not perfect by looks (I am reaching there 😬), these ladoos come out looking like ladoos 😂 and tastes so delicious that my kids love it a lot. So I thought it was worth sharing with all of you.
Hope you all try these healthy and delicious ladoos. Happy and healthy cooking! ❤️
RECIPE:
Ingredients: {Makes about 12 ladoos}
1 Cup Ragi or finger millet powder
3/4 Cup Jaggery powder
1/4 Cup + 2 Tbsp Ghee
2 Tbsp Raisins
Step by step recipe:
1. Heat 2 Tbsp Ghee in a pan and add 2 Tbsp Raisins. Fry till the raisins puff up. Remove to a bowl.
2. Now melt 1/4 Cup Ghee in the pan and add 1 Cup ragi flour. On medium flame, saute the flour in the ghee. Saute till the ghee and ragi flour combines well.
3. Now, keep sauteing on medium flame till the mixture comes together as shown below. It will take about 6 to 8 mins. The mixture turns aromatic and raw smell of the flour goes away.
4. Remove it in the bowl where we had put the raisins. Also add 3/4 Cup jaggery powder.
5. Mix well and allow it to cool slightly. When it still warm, bind to make ladoos. I am attaching some pictures that I took when making these ladoos. Hope it helps all of you.
Keep it in your palm and open close your fingers. Keep doing it till it forms round shape.
6. Repeat the same with the rest of the mixture. Enjoy the ladoos!
Notes:
* Store in a moisture free container at room temperature. Stays well for atleast 2 to 3 days. Mine gets finished off before that.
* Don’t reduce the amount of ghee or you won’t be able to bind the ladoos well.
* Add little ghee to the mixture and on your palms if you find it difficult to form ladoos.
* Do remember to saute the ragi flour well in the ghee so that there is no raw taste in the ladoos.
* These ladoos are very soft when freshly made but turns hard as they cool down and tastes much better when kept for little while.
You can check all recipes with Ragi that I make regularly like Ragi idlis, Ragi dosas, Ragi cake, Ragi cookies, Ragi Malpua in this Ragi recipes collection.
Click on the image to save the recipe on Pinterest
I was supposed to write this blog last night after putting my kids to sleep but their tired mommy fell asleep before them 😅 and so here I am, writing it atleast before they wake up (and the double stormsstart 😁😁). Had a great sleep after long though, with so many dream sessions. I have been a person who gets loads of dreams, about people whom I think of during daytime, about places that I wish to go, some hidden desires which only I know about, all of it gets fulfilled (atleast 😄) in my dreams ❤️. And I remember it even after I wake up. Am I weird or is it the same with all of you too? 😀
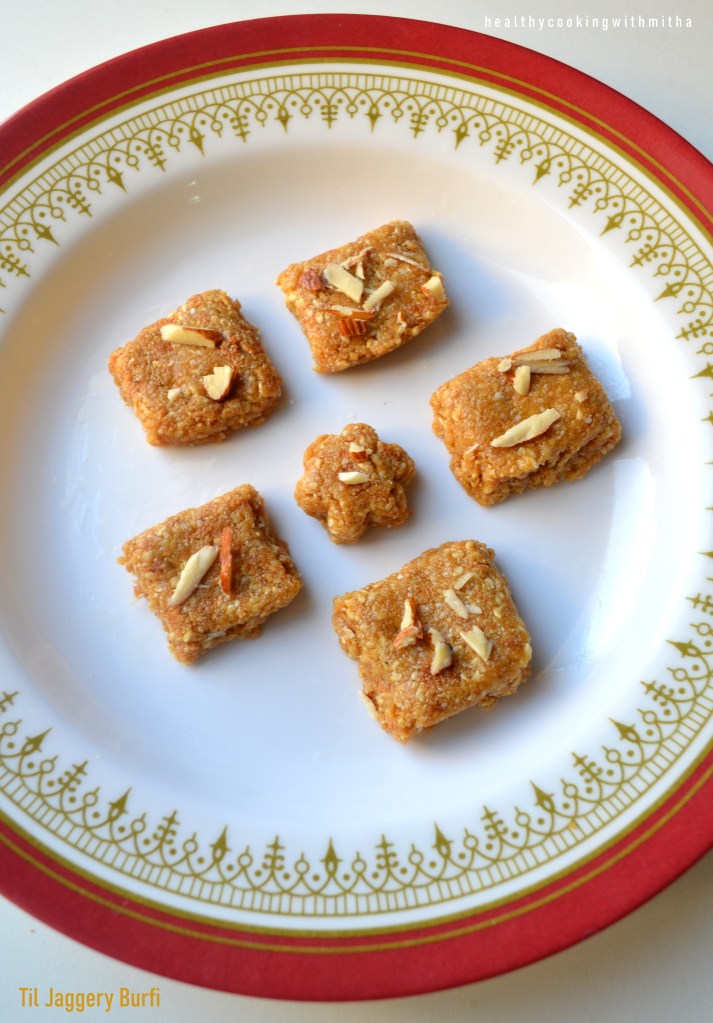
Anyhow, after some heart to heart talk, let me get back to these burfis which I am sharing as it is Makara Sankranthi in two days. Til and Jaggery are important ingredients that people consume on the festival in different forms like ladoos, chikkis, burfis and many other ways. Makara Sankranthi is celebrated all over the country marking the end of winter with the sun starting it’s northward journey or the Uttarayan journey and signifies new beginnings.
I love how each of our festival gives such positive vibes and also the dishes consumed are so healthy. Til and jaggery are both warm foods to the body, also loaded with health benefits, so this festival makes sure we consume it atleast on this day.
Hope you all try this easy to make Burfi which requires only 3 ingredients. I always prefer to make such quick sweets as I don’t like to spend my whole day in the kitchen for sweets. Also, this is very healthy and perfect for the festive occasion as well. Wishing you all a very happy Makara Sankranthi. 🙏🙏
RECIPE:
Ingredients: { Makes about 12 small pieces of burfis}
I usually double this recipe when I make for my family
1 Cup white sesame seeds/ Til
1/2 Cup Jaggery (I use powder)
2 Tbsp Ghee
Sliced almonds for garnish (optional)
Step by step recipe:
1. Roast 1 Cup sesame seeds in a pan on medium flame till it starts browning on the edges. Don’t allow to burn as it can taste bitter. As soon it starts turning brown, remove onto a plate. Allow it to cool. Now powder coarsely in a mixer.
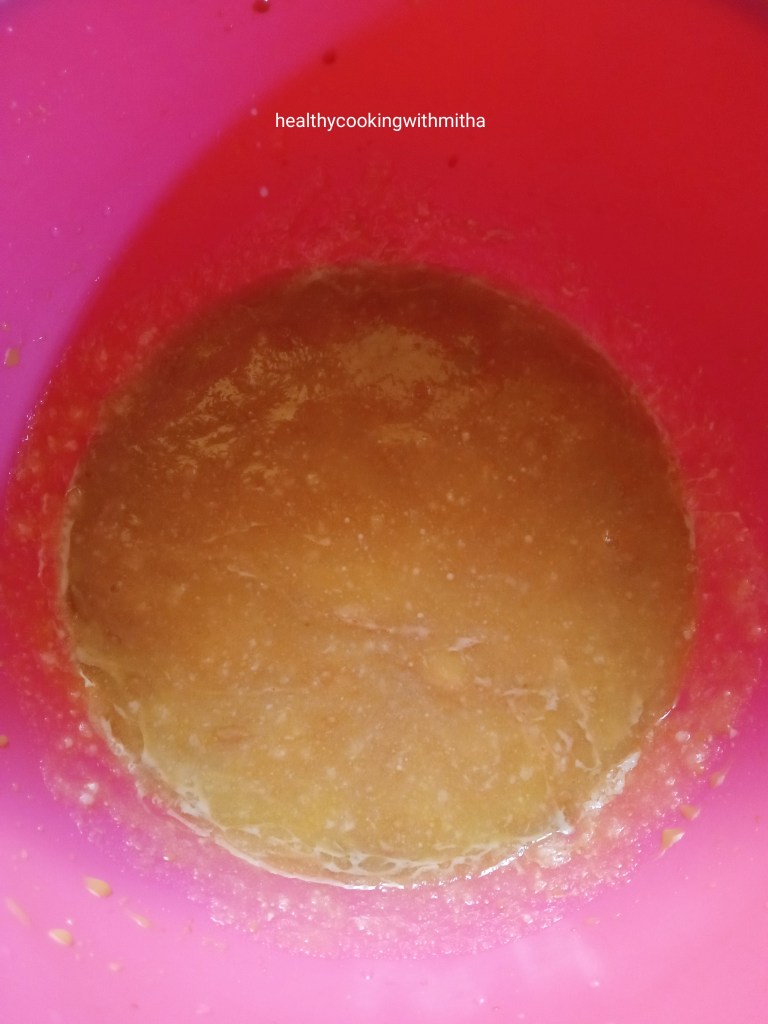
2. Now add 2 Tbsp ghee, 1/2 Cup jaggery and 2 Tbsp water in a pan. Allow jaggery to melt in the water and form bubbles on top like shown.
3. Immediately reduce flame to medium and add the powdered sesame seeds. Mix well continually for about 3 to 5 mins till everything comes together and the mixture leaves the sides of the pan.
4. Keep a plate greased with ghee ready. Pour this mixture and spread evenly using spatula. Allow it to cool.
5. Garnish with almond slices to enhance the beauty of the Burfi. Slice and serve.
Notes:
* Don’t burn the sesame seeds while dry roasting it. Sesame seeds get roasted quite quickly and we have to be very careful while roasting it so that it does not turn black. As soon as it starts turning browning, immediately transfer it to a plate to cool.
* Powder coarsely in the mixer. Gets done very quickly. Don’t grind too much as sesame seeds can leave oil.
* You can skip ghee for a vegan version but ghee adds a wonderful aroma.
* 1/2 Cup Jaggery + 2 Tbsp Water makes a correct ratio. Adding more water can make the burfi turn into halwa. 😀
* Add the sesame seeds powder as soon as you see bubbles forming in the jaggery water. Mix well for few minutes and then remove immediately. Keeping in the hot pan itself can make it form a crisp layer on the bottom.
* This Burfi hardens as you keep it. So don’t worry if it’s soft first. Just slice with knife and keep it to cool. Remove after it hardens.
* You can also add cardamom powder if your want and garnish with any other dry fruits too or just leave it plain.
Click on the image to save the recipe on Pinterest
Click on the image to save the recipe on Pinterest
I am someone who gets emotional and get tears very quickly (no matter how much I show that I am strong from outside 😀) and right now I am having tears of joy in my eyes. The reason is that the blockade which was imposed on Qatar (where I live) by some neighboring countries has been lifted after more than 3 years. It is definitely a happy news for people living here as well as people in those countries as finally things have got normal like before (most importantly many families reuniting ❤️).
It takes me back to the time when this sudden blockade was imposed. We were really worried as we did not have much grocery, veggies or milk as people were stocking up everything. The supermarkets were empty. Milk and milk products which used to come from Saudi and UAE stopped coming. There was utter chaos.
But our King handled everything very well and within few months, we became self sufficient with milk industry doing great production and even fresh veggies being available locally. Really proud of him, the way the situation was managed. 🙌
Now when things have got back to normal, it makes me happy that whatever misunderstanding there was between the countries have been solved and they are back together like before. I don’t belong here and mostly will shift back to India within an year or so, but that does not stop me from being proud of this country and celebrating this happy news. ❤️
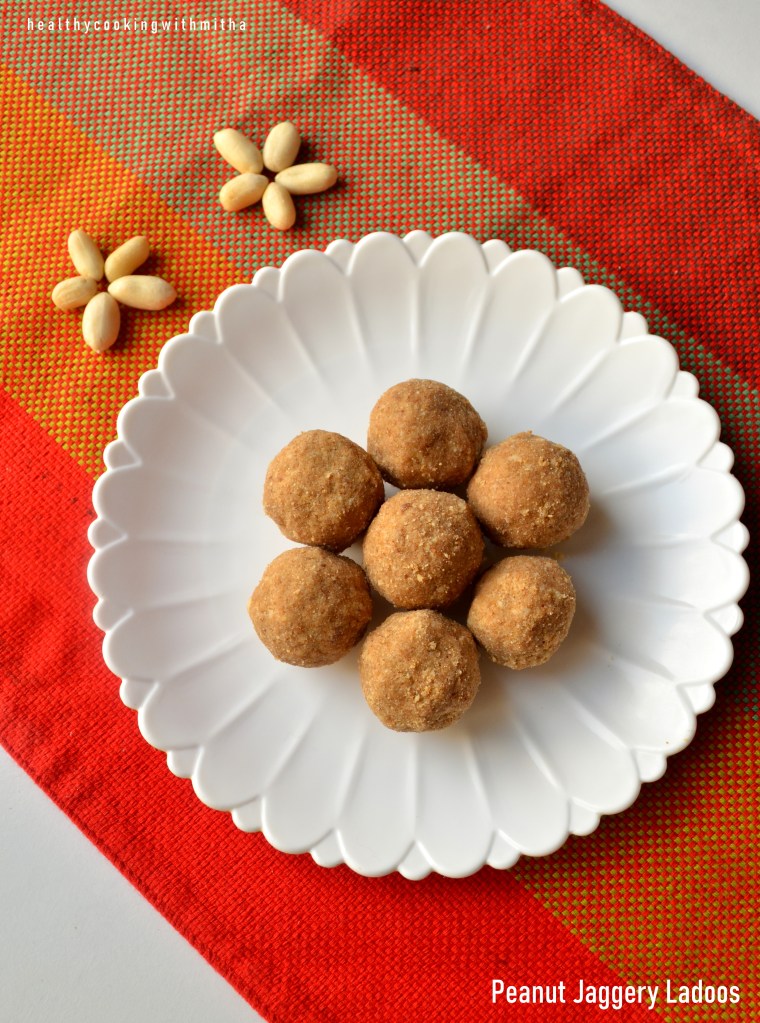
So here’s sharing a very easy 2 ingredient Peanut Ladoo that I learnt from my friend Trupti Rao who is a great cook and someone who encourages me a lot. Thank you so much dear for your amazing recipe. We all loved it a lot. ❤️
Dedicating these ladoos to Qatar 🇶🇦. May this country always be as amazing as it is and more power to our King. 🙌
RECIPE:
Ingredients: {Makes about 10 ladoos}
1 Cup Peanuts
1/2 Cup Jaggery powder
Step by step recipe:
1. Dry roast the peanuts on medium flame till the peanuts get brown spots on it showing it has got roasted. Don’t burn it. Remove as soon as it starts getting brown spots. Allow it to cool.
2. If using peanuts with skin, you need to remove the skin after the peanuts cool down. Since I have used skinned peanuts, I have skipped this step.
3. Add to a mixer along with jaggery powder or grated jaggery.
4. Now grind the mixture,not in one go but pulsing, removing after few seconds and scraping the sides, grinding again and repeating till peanut leaves oil and the mixture turns little wet from powder form. It took me about 5 times of grinding, scraping the sides and grinding again till I got the perfect mixture.
5. Now add to a bowl. Take little quantity of mixture in your hands and form small ladoos by pressing well using your palm and fingers.
6. Do the same with the rest of the mixture.
Notes:
* Store in a moisture free container. Lasts well for couple of days. Mine gets finished off by then.
* If using peanuts with skin, roast, cool, remove skin and then add to the mixer.
* Roast on medium flame only and remove as soon it starts turning brown. Else burnt peanuts will have a bitter after taste in the ladoos.
* Use grated jaggery instead of powdered ones.
* Main part here is grinding it till it turns from powder to slightly wet but not such that peanuts leave oil completely. So just pulse (grind only for few seconds), scrape the sides of the mixer and continue doing so. I usually check if I can form small ladoos. If I can, it means the mixture is ready.
* Learning to bind ladoos takes few attempts to get perfect but once you get the knack of it, it’s very easy. Just take a handful of mixture in your palm and continue pressing while opening and closing your fist giving it the shape.
As I start writing, I can’t believe this year has almost come to an end. 2020 has been a huge life changing year for me. A year which taught me many things. A year where I understood myself more than ever and an unforgettable year for sure. If you ask me why, it is the time I got being home bound , which otherwise was always filled with the chaos of busy life.
Would love to share some positives that this year has brought in my life with all of you.
# Restarted listening to music (my long lost love ❤️), all thanks to my favorite singer Arijit Singh and Spotify which was my best friend all throughout the year. Music is truly healing and I don’t know why I had forgotten it all these years. 2020 can be called the “musical” year of my life for the amount of songs that I have heard this year. 😅
# Found love in birds and nature ❤️. With all the time in the world, I started observing the birds sitting in the backyard and would spend hours there without getting bored looking at them fluttering around. Along with that, I found an amazing Insta handle of our family friend, @mvbhaktha through whom I saw many beautiful varieties of birds. Sharing one of my favorite here. The innocent eyes of the bird is which attracts me the most. 😍
# Got a little more closer to my Krishna by listening to his bhajans and also by reading more about the unconditional true love that Radha had for Krishna. It taught me the way to love truly in life, without any expectations and always praying for the happiness of our loved ones, no matter what happens. ❤️
# There are two youtubers who deserve mention as I spent most parts of these last few months looking at their videos. One is Patrick Micheal and the other is Shivesh Bhatia. Looking at Patrick sing, his magical voice, feeling the lyrics of the song, touches you so emotionally that my eyes welled up many a times listening to him. His singing is definitely very special and I am very happy to have found such a soulful singer. Sharing my playlist here if you like to listen too. It is mostly malayalam and tamil songs though.
# Shivesh Bhatia from “Bake with Shivesh” is a delight to look at and he is a boy with so much knowledge about baking that I am amazed each time. He has been my inspiration to bake and the Chocolate Chip cookies on my blog are his recipe. When I want to divert myself towards something productive, Shivesh videos it is!
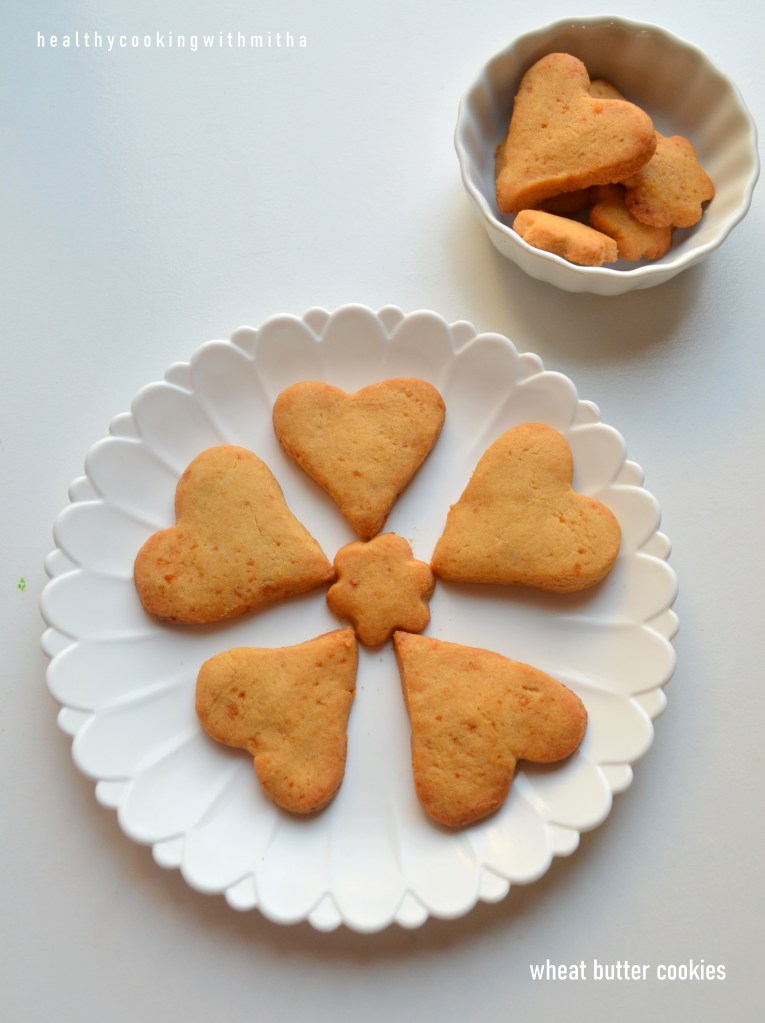
Finally after all the talking about my year (hope it was not boring 😄) , I want to share about these cookies which are not only my kids’ favorite but became my neighbor’s son, Ryan’s favorite too. I had shared some with them for Christmas wondering if they would like it as it is made with wheat flour and jaggery. But when I got a message the next day by Ryan’s mother saying he loved it so much that he is sad that it got over, I felt so happy that he loved it and promised to bake again for him.
So I baked them again for him yesterday and these cookies are definitely special because of that. Ryan gave me a beautiful memory with these cookies forever and I will never forget how much he loves these. Also, it has given me confidence to try more cookies for next year. A new zeal for baking! ❤️
Here’s wishing all of you a very happy new year in advance. Hope you all have a wonderful year ahead filled with love and happiness. Loads of best wishes. Happy and healthy cooking! ❤️
RECIPE:
Ingredients: { Makes about 10 cookies }
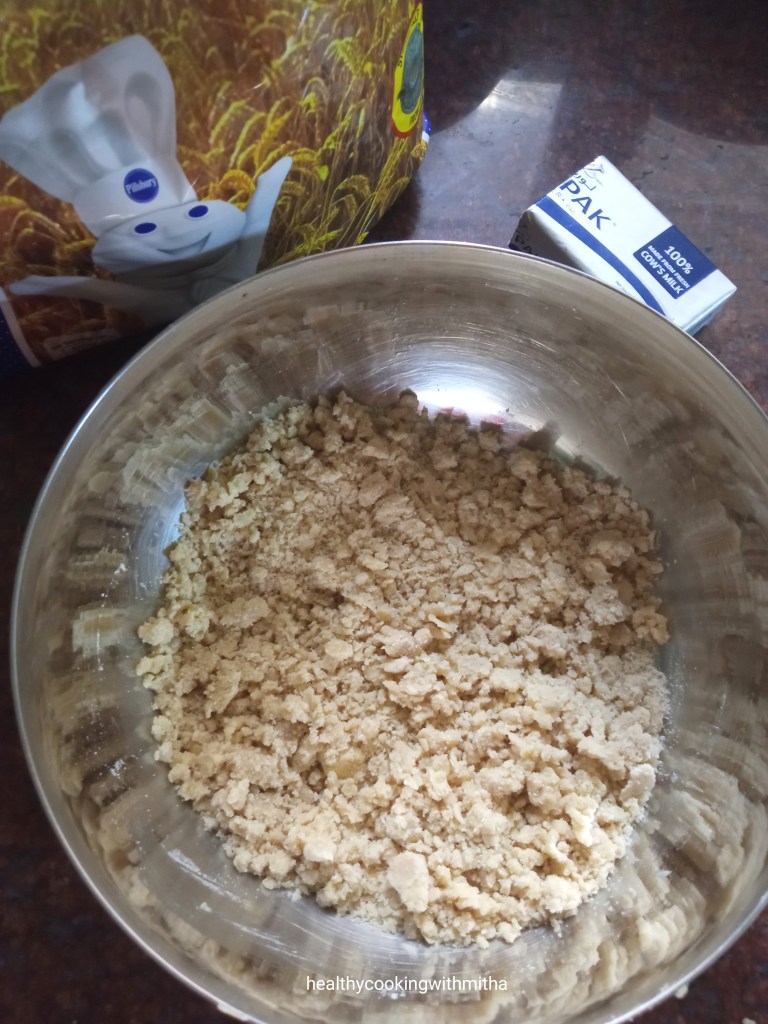
1/2 Cup Wheat flour or Atta (I use Pillsbury brand)
50 grams salted Butter (1/4 Cup)
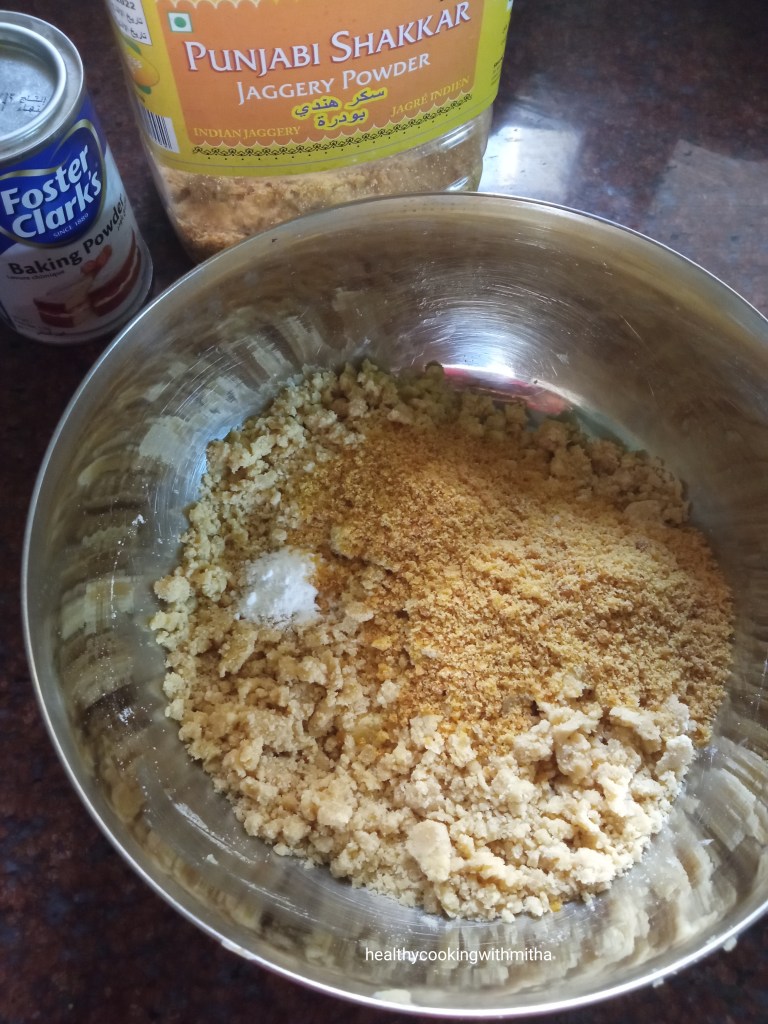
3 Tbsp Jaggery powder
1/2 tsp Baking powder
1 Tbsp Milk
Step by step recipe:
1. Take wheat flour in a bowl. Add cold butter, directly out of the fridge, cut into small cubes into it. Mix with your fingertips till the butter and wheat flour mix well resembling coarse texture. (Make sure there are no large chunks of butter and all the butter has been incorporated well into the wheat flour.)
2. Now add baking powder and jaggery powder to this. Sieve it if the baking powder or jaggery has big granules.
3. Mix once really well. Then add milk and bring the dough together. The dough will be little sticky. Refrigerate this dough for atleast 15 mins.
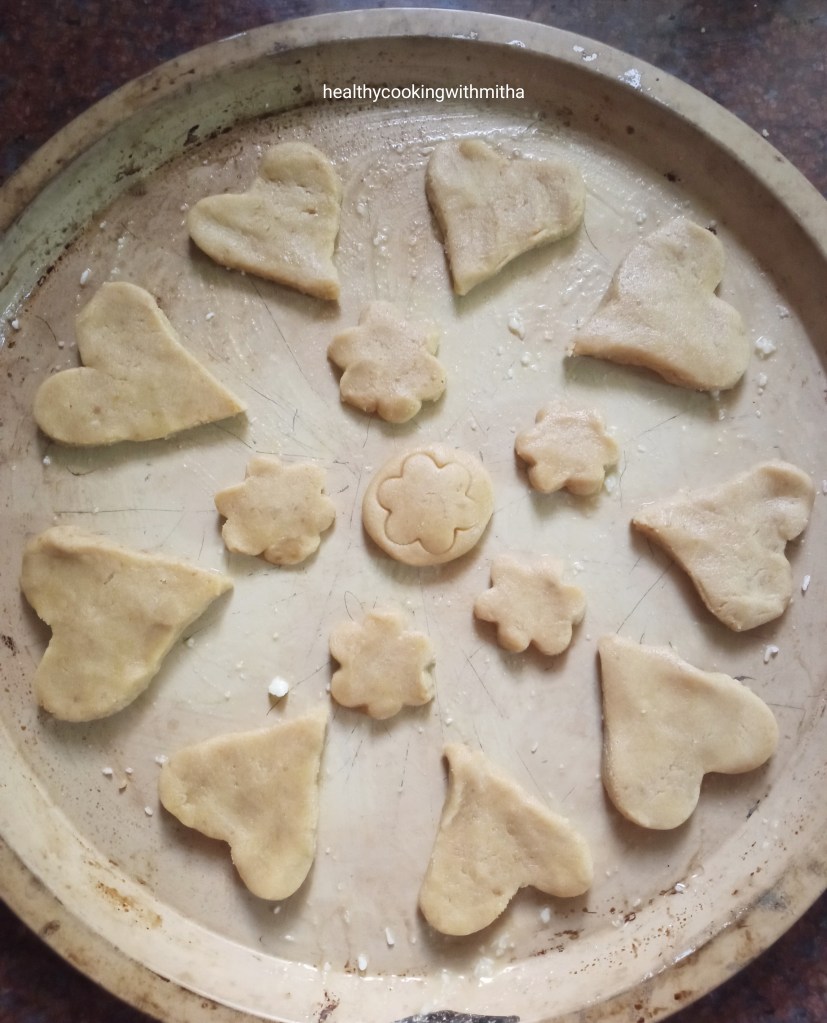
4. Preheat the oven at 180 C for 10 mins. Remove the dough from the fridge and make small balls out of it. Flatten it and cut using cookie cutter into different shapes. Place them on a greased (generously with ghee or butter) oven proof tray.
5. Bake in the center rack of your OTG (or bake mode or with both rods on in your conventional mode oven) at 180 C for 10 to 12 mins. The sides of the cookies will turn slightly brown and the surface will change colour to pale golden. The center surface of the cookies will also be hard and not soft. If you bake more than 12 mins, it will turn crispy.
6. Allow it to cool down. It will harden as it cools. Initially it will be very soft but will turn crispy as it is kept at room temperature. Enjoy the cookies!
Notes:
* Store in a container free from moisture. Will last for 3 to 5 days if handled well.
* I always use only Pillsbury brand of wheat flour for all my cakes, cookies and bread. It gives a great flavour and perfect bakes. Have tried with other brands but it does not give the desired result.
* I used salted butter. Add a pinch of salt if using unsalted butter.
* Don’t melt or soften the butter. Take it directly out of the fridge, cut into small cubes and mix into the wheat flour, crushing the butter with your finger tips. Make sure there are no large chunks of butter left in the mixture.
* Don’t add more milk then mentioned as it can lead to the mixture being very sticky. If by mistake, your mixture has become sticky, refrigerate longer and it will be easier to handle.
* Jaggery powder can be reduced too to make it plain biscuits. The sweetness in this measurement is not much though.
* Refrigerating the dough is very important to give it that firmness so that the dough can be easily handled while shaping them into cookies.
* These cookies turn soft if made in big sizes (like my heart shaped ones) and crispy if made in small sizes (like the flower shaped ones).
* If you have under baked the cookies by mistake (you realize the cookies are breaking after it has cooled down), preheat the oven and bake for 3 to 4 minutes again and it will be firm.
* If you over bake these cookies, they can turn very crispy.
* Best is to keep an eye after 10 mins and take them out when they turn brown at the edges. Remember that since they are small, cookies continue to cook on the tray even after removed from the oven. So best is not to over bake the cookies.
* These are two other cookie recipes which are a huge hit with my readers:
I have tried to note down as much points as possible so that it’s easy for you all to follow but if you still have any doubts, either comment here or message me on my Facebook page Healthy cooking with mitha or on my Instagram handle and I would be happy to help.
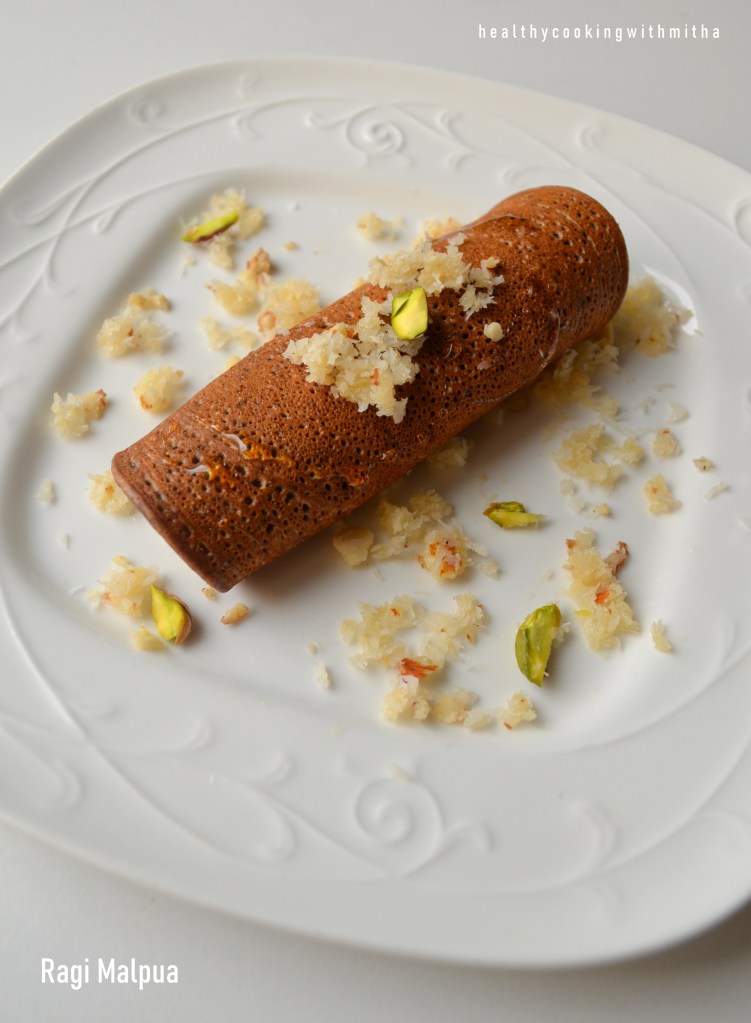
I have already shared a chocolate cake, cookies, idlis and a dosa with Ragi flour. You can check all the recipes here. This recipe of Ragi Malpua was my first post on my old blog and one of my first trials with Ragi flour back in 2013. Now when my kids love it, it makes me very happy (one of my successful experiments 😄).
These little rolls of yumminess comes handy during their “Amma, we are hungry. Give us something right now!” kind of hunger 😂. Yes, as a mother, we always have to be ready as such hunger pangs can strike anytime (proportional to their naughtiness 😬). I quickly make these Ragi malpuas and they enjoy it while playing. Seeing them eat happily is one of the best moments in the day for me. ❤️
I never realized how someone else’s happiness can be more important than mine before becoming a mother. But now, all I think is how to make them happy (even though I do scold them if they get extra naughty 😁) and all my wishes have got replaced by theirs too. My daughter asked me yesterday what wish do I have in life (she was talking about her wish to be a princess 😆😍). I said I no longer wish for anything as nothing is in our hands and all depends on God’s will, but I do wish and pray that all your wishes get fulfilled. She was so happy with that answer that she gave me a tight hug saying thank you. It made my day! 🥰
Both of them fill my heart with their talks, smiles, naughtiness and love. Can’t imagine my life without them. ❤️❤️
Here’s sharing their favorite snack, these Ragi malpuas. Hope you all try and love it too. Happy and healthy cooking! ❤️
RECIPE:
Ingredients: { Makes 3 Malpuas }
4 Tbsp Ragi / Finger millet flour
2 Tbsp Atta/ Wheat flour
1 Tbsp Jaggery
Salt to taste
5 Tbsp Milk
For the filling:
1/4 Cup Desiccated or Fresh Coconut
1 Tbsp Honey or as needed
1 Tbsp finely chopped Dry fruits ( I use a mix of cashews, almonds and pistachios)
1/4 tsp Cardamom powder
Ghee to cook the malpua
Honey and Pistachios for garnish
Step by step recipe:
1. Take ragi flour, wheat flour, jaggery and salt in a bowl.
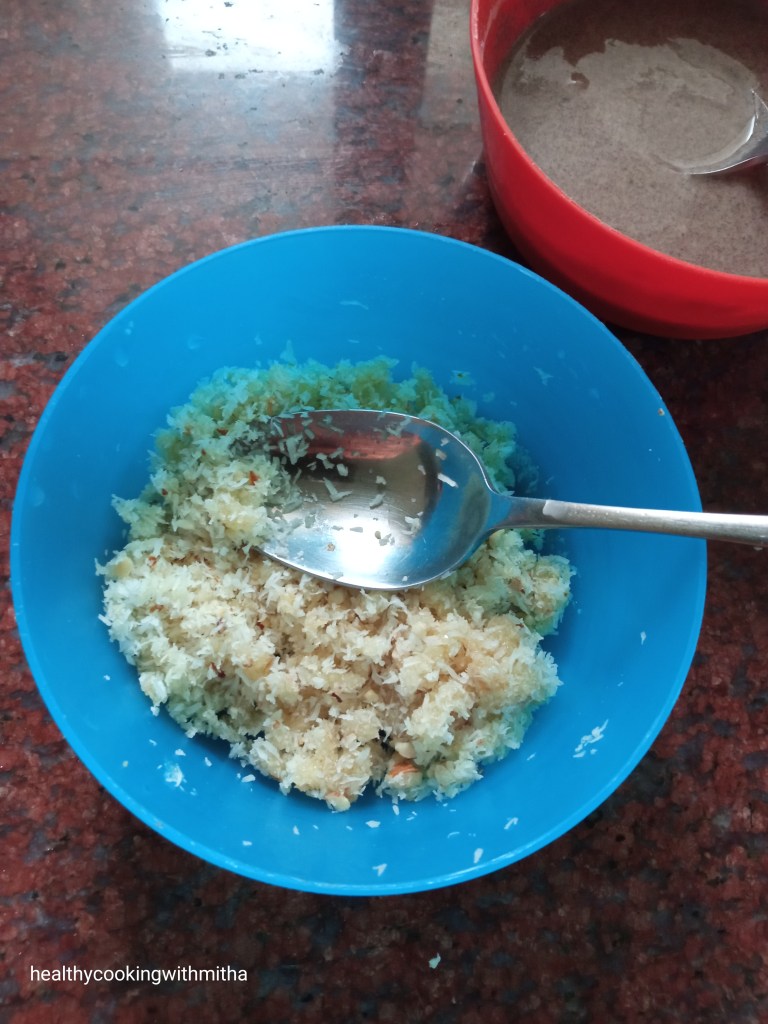
2. Mix it once using a spoon. Now add milk, one spoon at a time and make a thick batter free from lumps. Keep it aside.
3. Now for the filling, take coconut in another bowl. Add honey, finely chopped dry fruits and cardamom powder. Mix well.
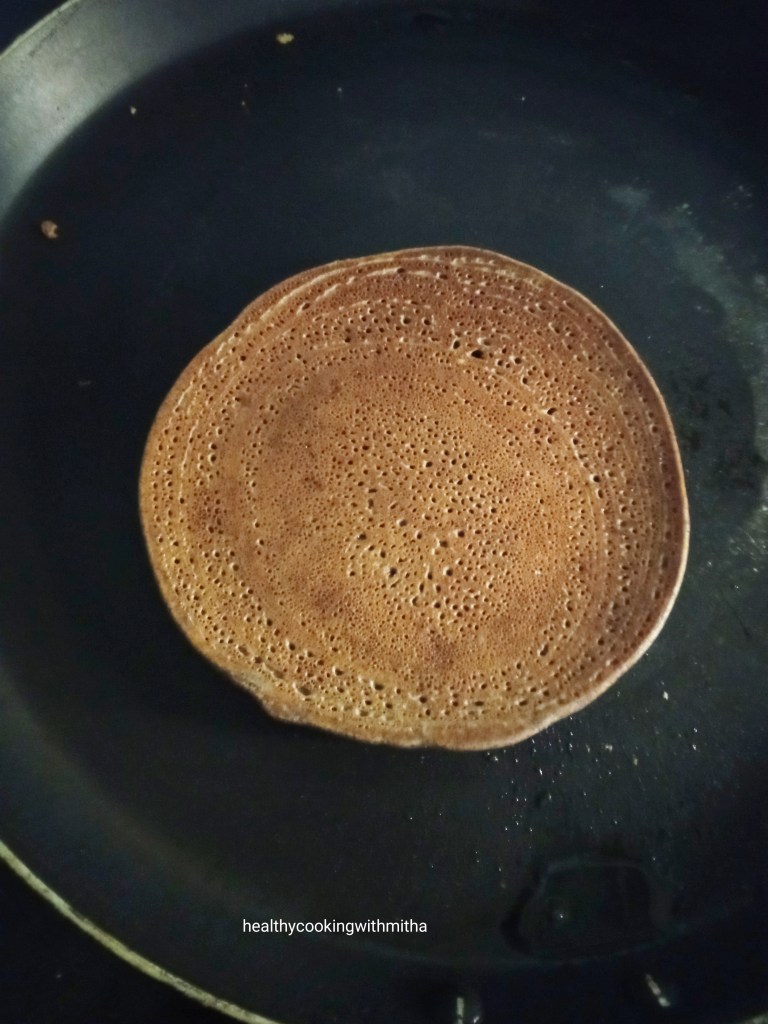
4. Now heat a dosa pan well. Then reduce flame to medium. Add about two spoons of the malpua batter in the center of the pan. Spread in round shape. Add ghee and cook till the surface cooks.
5. Flip and cook for a minute.
6. Remove into a plate and fill with the filling. Roll and serve. Drizzle with honey on top and garnish with chopped pistachios.
Notes:
* I have not skipped wheat flour in this recipe as it needs little wheat flour for that soft yet firm texture.
* You can increase the amount of honey on the filling or jaggery in the batter for more sweet malpuas. I prefer it in this quantity.
* Skip jaggery in the batter if you don’t have much sweet tooth.
* They are best enjoyed as soon as made. Keeping them for little while can make it dry.
* Don’t make the batter very thin. The batter is free flowing yet thick. It took me 5 Tbsp milk for 4 Tbsp Ragi flour and 2 Tbsp wheat flour to get the perfect consistency.
* This snack is really handy as it is healthy as well as tastes delicious. Hardly takes 10 mins to make too.
It’s Christmas time and the official “bake at home” time too 😄. I have been seeing so many wonderful bakes on various Facebook food groups that I am part of and it is really amazing that now, everyone bakes so many varieties at home itself. So I thought I too should compile my healthy cakes and cookies in one page for those who want to bake guilt free goodies even for Xmas (if you are like me 😀).
For me, Christmas brings back two memories of my childhood. One is my dad bringing me Plum cake from our nearby bakery and I used to wait so eagerly for it. The aroma and flavour of the cake is still in my taste buds that it brings so much nostalgia. 😍
Second memory is singing Christmas carol at school (yes, I used to sing too 😅). We all used to wear white top and black skirt, practice so much for weeks and finally when standing on the stage singing the choir together with friends, it felt so good. ❤️ Though I don’t have a picture of the carol singing, here is a picture of the dress, which was my favourite as a 12 year old. This is from Amma’s album which is a treasure trove of old memories (love looking at them remembering old times 😍).
A part of the album page for the memory of old style albums. Nothing can replace the pleasure of looking through those albums. ❤️
Though after school, I never sang on stage, I still sing bhajans and songs for my kids when putting them to sleep and record them to send Amma who loves to listen to them. 😍 The best part is I still remember the lyrics and tune of the Christmas carols, much to the amazement of my daughter (she loves Christmas 🎄). So we have been singing carols together, making cards for her friends while baking some goodies to enjoy this season.
Hope you all try some of them too. Happy and healthy Baking! Merry Christmas to all of you in advance! ❤️
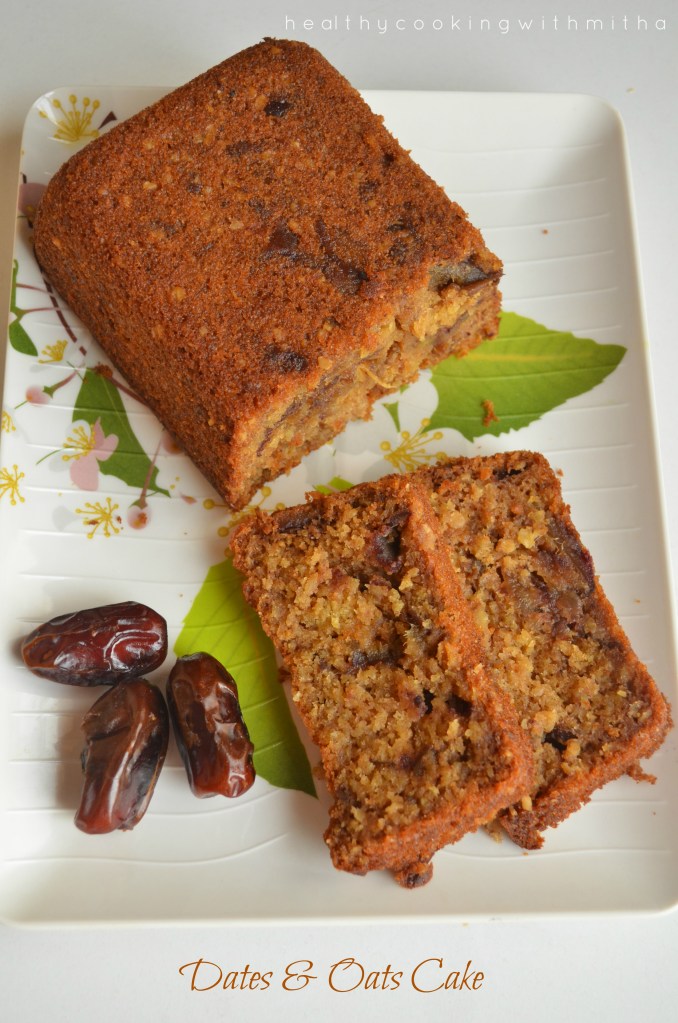
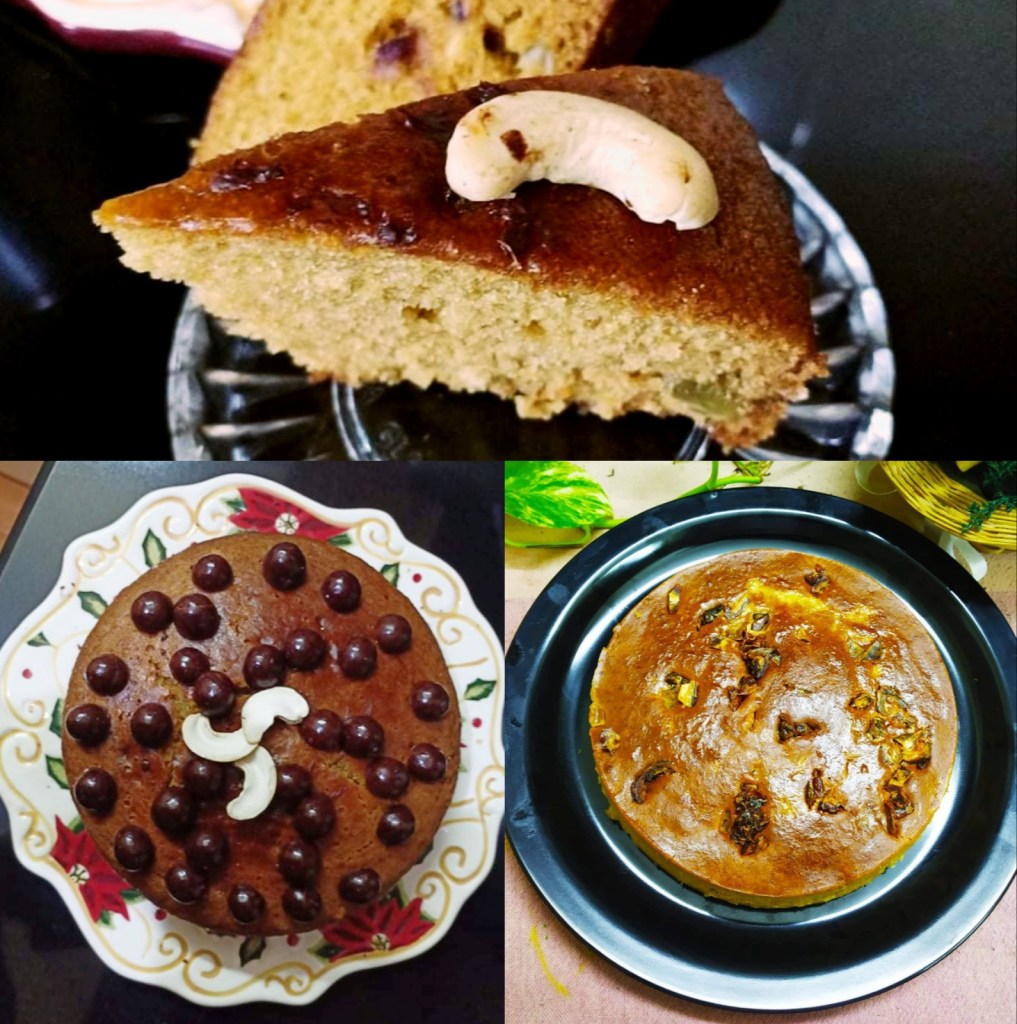
3. Dates and Oats Cake – My idea to sneak some oats in the cake as well. Because you can never say it has oats in it. Another of my readers’ favorite cakes. Tried and loved by so many.
5. Dates and Carrot Cake – Sugar free cake – My personal favorite as it is free from sugar or even jaggery can be skipped. Beautifully combines the natural sweetness of dates and carrots. Another of my recipe tried a lot by my readers.
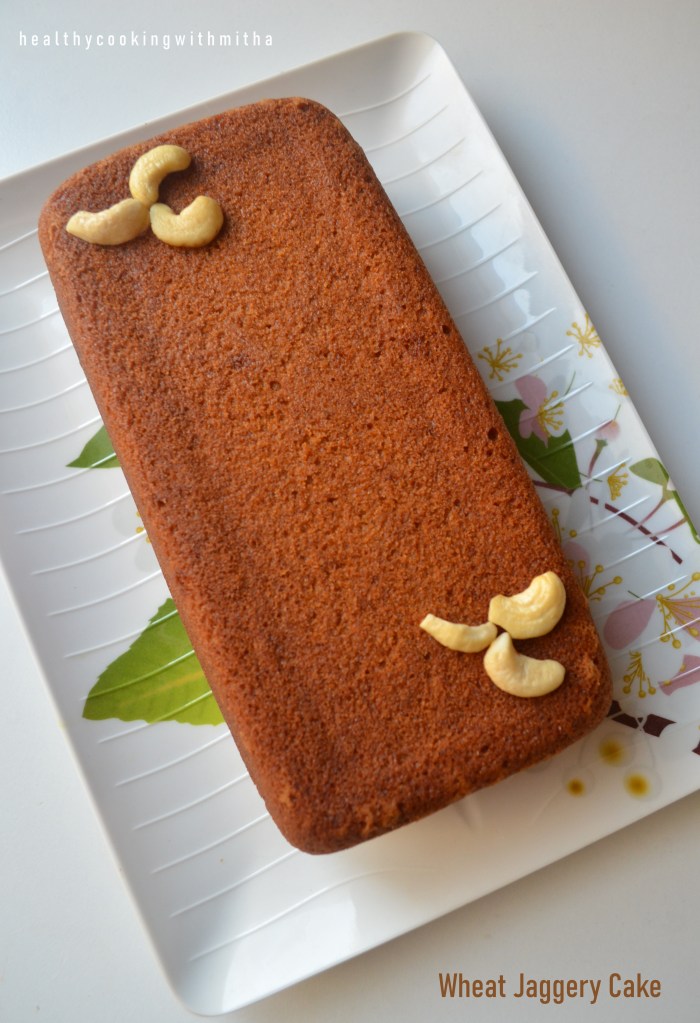
8. Wheat Jaggery Cake – Basic cake to which you can add dried fruits to make a dry fruit cake. Also can make cupcakes with this. Have been making this cake for years now for my kids.
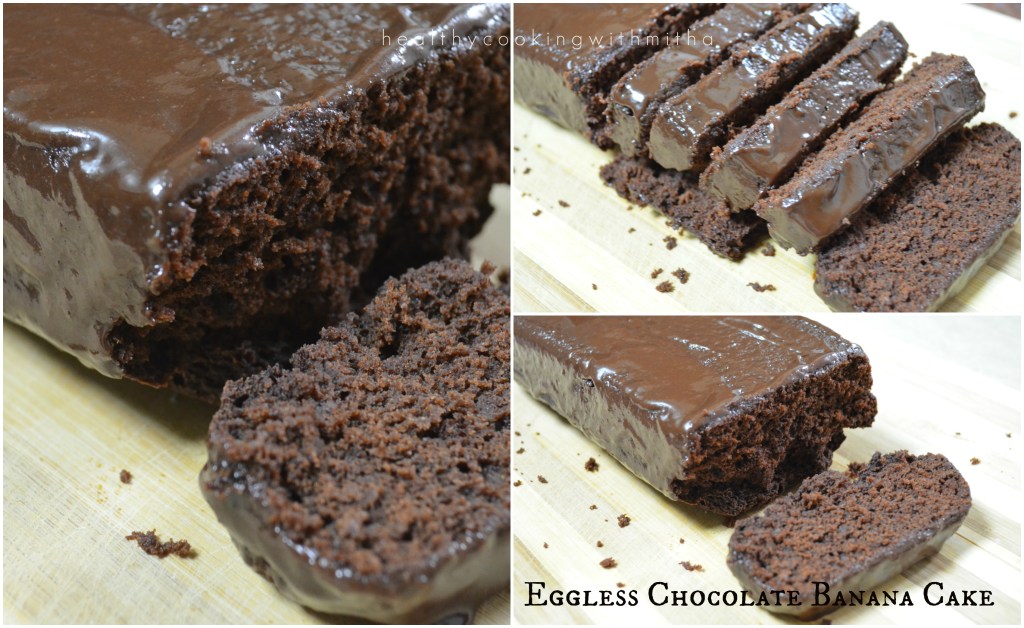
9. Wheat Chocolate Sponge Cake – You can never say it is made with wheat flour and jaggery. Comes out super soft and delicious. I make cupcakes with this batter regularly for my kids as they love it. ❤️
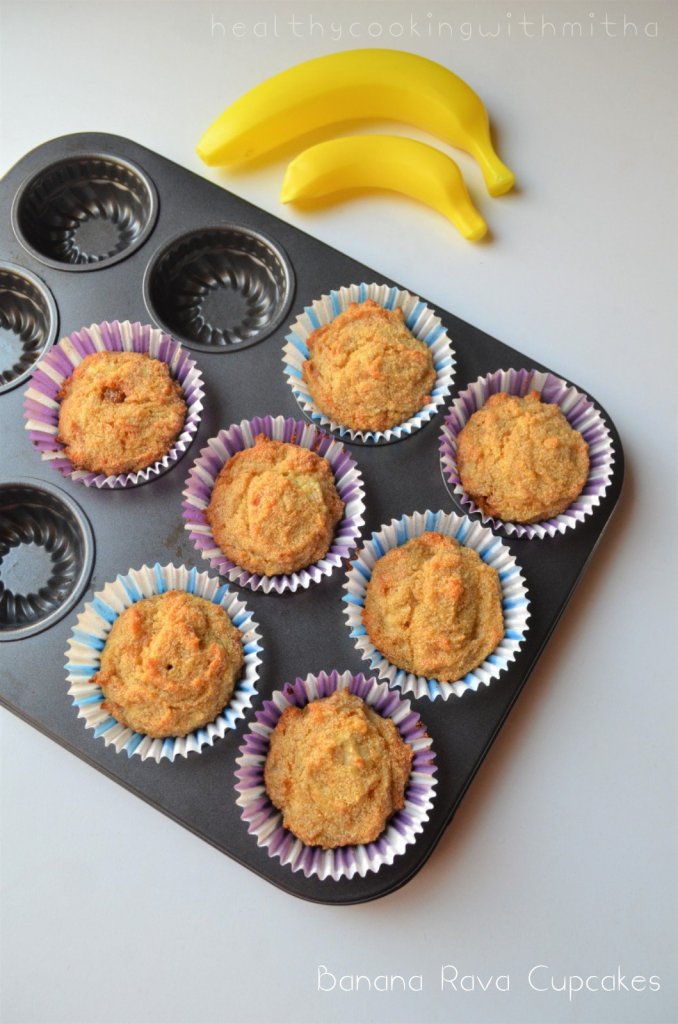
10. Eggless Banana Rava Cupcakes – This is my go to recipe when I have over ripe bananas. Super easy to make, one bowl recipe which tastes heavenly due to the combination of Rava, banana, Jaggery, ghee and cardamom powder.
11. Eggless Dry Fruit Cake – A great way to add dry fruits in your kids snack. With the addition of orange juice, this cake tastes absolutely delicious. A regularly made cake at my place.
12. Eggless Wheat Banana Cupcakes: I make these cupcakes for my kids’ evening snack during vacations and also for their tiffin box to school. A great way to finish up those over ripe bananas too. Comes out soft and delicious.
Jowar Chocolate Sponge Cake – Gluten free and eggless, this cake baked with Jowar flour is a perfect example of being healthy as well as tasty. Comes out very soft and spongy too..
This is another easy, healthy sweet recipes collection that I made last time. You can find the recipes here. They are sweets that can be made under 15 mins.
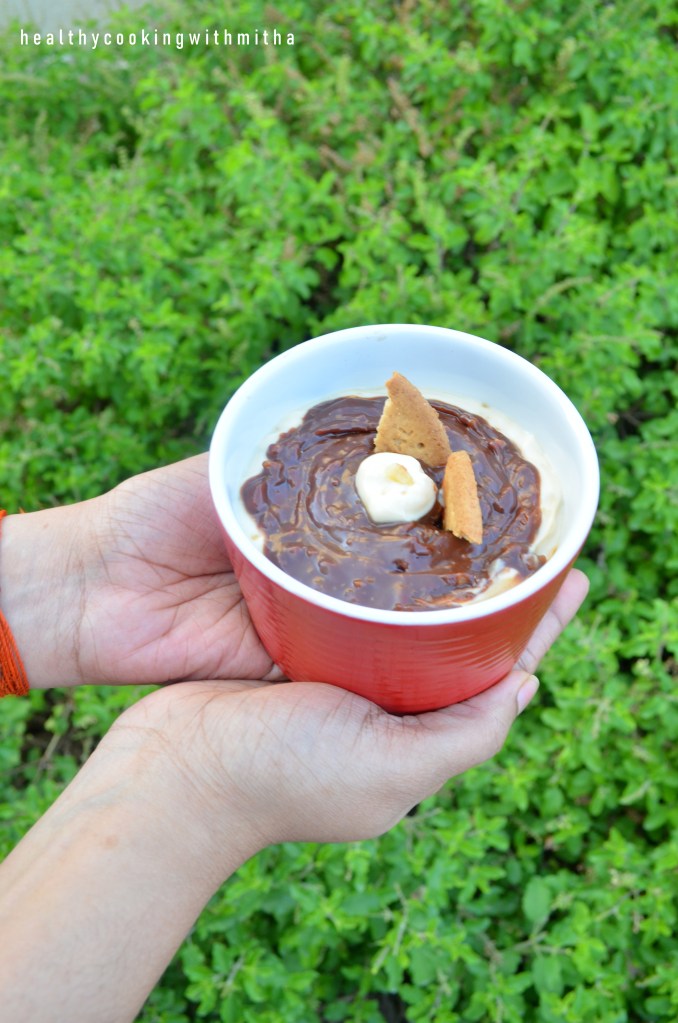
If you are amazed at the above picture, you are not alone. I too have been coming back to look at it every few minutes 😅. Can’t believe my hands holding the pudding over our Tulsi plants could look so beautiful 😂. Have to thank Mr Husband for his idea and also the captures (his plant love speaks!). The Tulsi bushes are also growing so well now due to winters here in Qatar which makes for a perfect backdrop. Doesn’t the pudding look so pretty? 😍
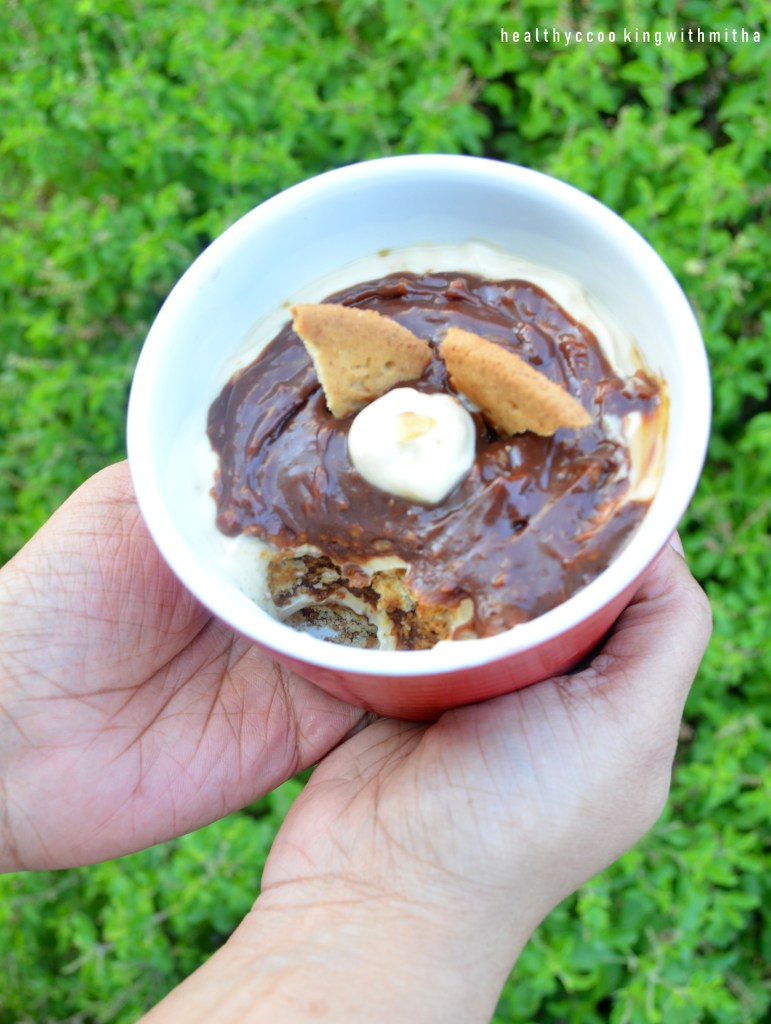
An inside look of the deliciousness 😍
It is Qatar National day on December 18th and I dedicate this simple yet delicious dessert to Qatar 🇶🇦 where I am living since more than 9 years now. Sharing a collage of pictures which I took during my first year here, the 21 year old me, little silly, very naive, a cry baby, super talkative, amazed at the tall buildings, astonished at stylish people, scared of escalators (yes, that’s true 😬) and wondering if I will ever fit in here. 😅
These are two of my favorite places here. The view of the Doha skyline from Corniche with the gleaming blue waters in between and Villagio mall which has a small stream of water flowing right in midst of the mall with a boat taking you for small rides. There is also a park next to this mall which has a beautiful lake where I could just sit for hours looking at the ducks moving around freely (my bird love speaks 😍). There are also the goodies we got during our first visit to the Corniche on National day celebrations. I was as happy as a kid to get these stickers and notepad that I had clicked all this to show Amma. 😀
This country has really seen me changing. From the silly, naive, talkative girl (who wanted to chat with everyone around) to a woman now, who thinks more than she speaks, does not want many people close to her, happy in her own little world. I actually have only a handful of friends apart from my family and very few special ones whom I love to love, in my life. That’s my precious circle and I can do anything for them. 😍 (That’s me and I know only to love to the extreme and nothing less than that. ❤️)
I can go on and on but I guess it’s time to give a break to my thoughts and keep it for the next time. I don’t know how many of you are from Qatar but I wish all my readers from Qatar a very Happy National day 🇶🇦. We residents know how well our King has taken care of this country and it’s people, even in the toughest times of blockade and we are all proud of him. I don’t know how long I would be here but this country will be in my heart forever. 🇶🇦 ❤️
Now to the recipe finally. 😂 Do try this delicious dessert and you are sure to love it. Happy and healthy cooking!
RECIPE:
Ingredients: { Serves 2 }
For Hung curd layer:
2 Cups thick full fat Curd/ Yogurt (tomake about 1 1/2 Cups Hung curd)
1/2 Cup Jaggery powder/ grated Jaggery
For chocolate layer:
About 35 grams Chocolate (I used Lindt. You can use Dairy milk or any other brand.)
1 Tbsp Milk
2 Tbsp finely chopped Walnuts
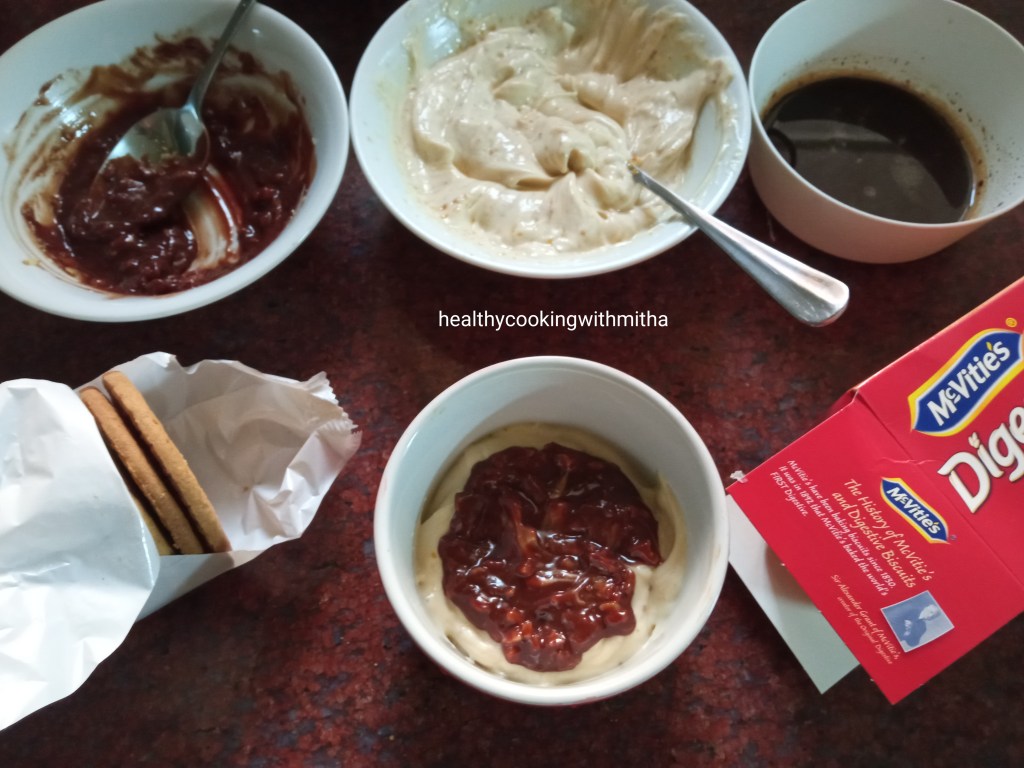
For Biscuit layer:
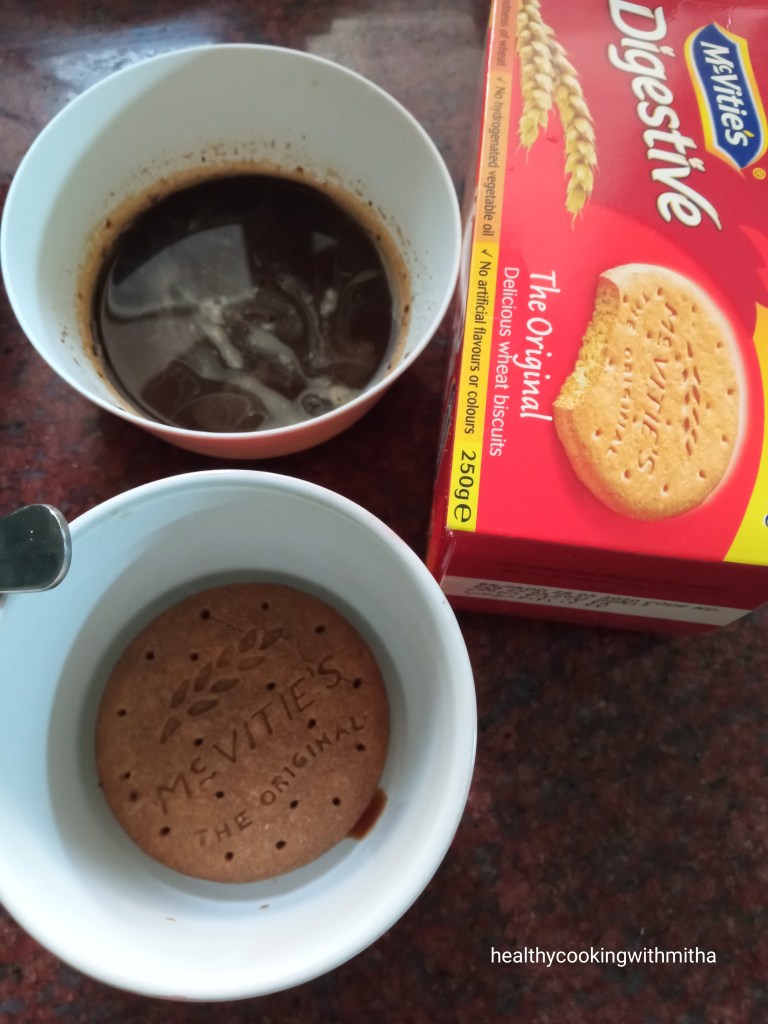
2 to 4 Digestive biscuits (or as needed as per your container.)
1/2 Tbsp Instant coffee powder
2 Tbsp Water
Step by step recipe:
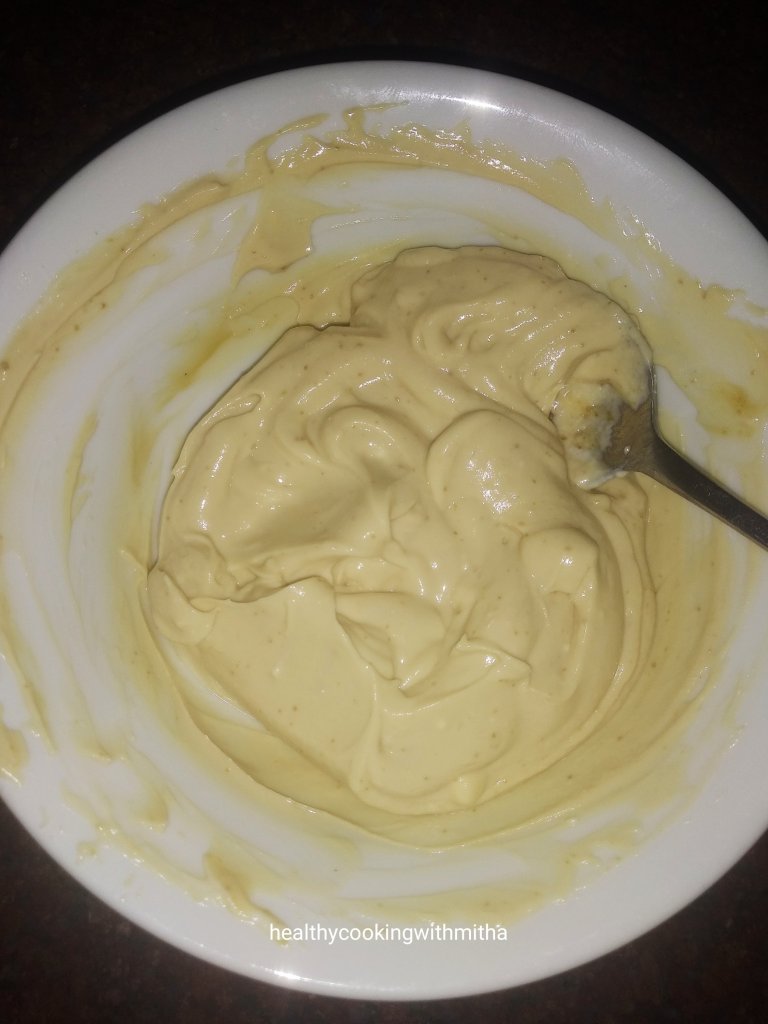
1. Make hung curd using 2 Cups Yogurt. You can see the full step by step pictorial here in my Jaggery Shrikhand recipe. Now, add jaggery powder to it and mix well. (Sieve if jaggery powder contains granules) Keep aside.
This is Jaggery Shrikhand which tastes yummy as it is too! 😍
2. Now take chocolate (your regular chocolate like dairy milk/ galaxy) in a microwave safe bowl. Microwave on high power for 1 to 2 mins till the chocolate turns soft.
3. Add about 1 Tbsp milk to it. Also add finely chopped Walnuts to it. Mix well. Keep aside.
4. Mix instant coffee powder with water till it dissolves. Dip one of the digestive biscuit into it and keep in a bowl.
5. Add a layer of the Jaggery Shrikhand over it.
6. Top it with the melted chocolate- walnut mixture.
7. Again repeat a layer of biscuit dipped in coffee solution, jaggery Shrikhand and melted chocolate- walnut mixture. Garnish with biscuit pieces and a hint of Jaggery Shrikhand. Serve that time itself or chill and serve.
Notes:
* If you don’t have hung curd or don’t know how to make it at home, check my step by step pictorial in the Jaggery Shrikhand recipe. Once you make hung curd, the assembling of this pudding hardly takes 10 mins to make.
* Just make sure you use full fat yogurt which is not very sour.
* Use any biscuits which is available in your house. I wanted to make it healthy, so I used Digestive biscuits. But digestive biscuits dipped in coffee solution does give a wonderful flavour.
* Make sure you don’t add a lot of coffee solution in the pudding or the pudding can turn bitter (once I added a little of leftover coffee solution over it and it had a slight bitter aftertaste.). Just dip the biscuits in the solution and add to the bowl.
Repeat again as much as your bowl as hold. With the measurements I have given, it makes one small bowl of the pudding serving two.
* Walnuts give a wonderful crunch and flavour to the pudding. But you can skip or substitute with other nuts if you don’t have.
* I enjoy this pudding as soon as I make it but if you like it chilled, you can refrigerate for an hour. It also helps the layers set very well and turns firm.
* I sometimes add a layer of sliced bananas to this making it a Banana chocolate pudding.
* Makes for a great make ahead dessert for parties. A lot healthier than whipping cream and sugar based puddings too. You won’t know the difference too as hung curd gives it that creamy flavour.
When I became a newbie mother in 2015, it was really overwhelming for me as I did not know most things (babies don’t come with manuals 😄). Though my mother helped me a lot with her experiences, I hardly got time to talk to her in detail then (from talking for hours together on the phone to just few minutes, motherhood changes everything 😬).
So most of the time when my daughter slept, I used to read about nutrition and how babies really don’t need separate purees and porridges. Hence, when she started her solids at 6 months, I gave her whatever we ate (minus sugar and salt till one year) which she accepted without any issues. That is the reason why even now, she accepts almost all kind of foods at 6 years of age and after that, I am now following the same with my 2 year old son too. No purees or baby foods.
When she turned a toddler, I saw how she loved store bought sponge cakes. But somehow, I did not want to give her the maida, oil based sugary ones. So that’s how I started baking wheat flour jaggery ghee cakes in 2016 and that cake has now become both kiddos’ favorite cake. I bake this when they crave for cakes and their happiness while enjoying the cake is worth watching. Here is my daughter presenting a piece of her favorite cake.
This recipe is exactly same as my Cherry Wheat Jaggery muffins recipe. Just skip cherry in it and bake in a cake pan. You get this cake. I am adding this as a separate post so that it is easier for my readers when they search for basic wheat cake.
I also thank my idols Asha Satish Philar mai and Sujatha Umesh mai for skipping cherries from the muffins recipe and baking beautiful cakes. Here are their pictures of the cake.
Hope you all try this cake for your tea time or for your hungry kiddos this vacation. I just baked them yesterday again and the way my kids relish them makes me so happy. Happy and healthy Baking!
Important Note: I understand that wheat flour is also a refined flour but definitely more nutritive than maida/ all purpose flour. Also I know that jaggery has the same calorie count than refined sugar. But it has more nutrition than the bleached sugar and also the flavour is more delicious than sugar. Mainly my kids prefer jaggery than sugar. Finally it’s upto to you to read, be aware and decide.
Sharing the recipe with all of you..
RECIPE:
Ingredients: { 1 Cup = 250 ml }
1 and 1/2 Cups Wheat flour or Atta (I use Pillsbury brand)
1 tsp Baking soda
1/4 tsp Salt
Wet ingredients:
1 Cup Milk, at room temperature
1 Cup powdered Jaggery
1/4 Cup Ghee
1 tsp Vanilla essence
Step by step recipe:
1. Preheat the oven at 180 C for 10 mins.
2. Sieve together wheat flour, baking soda and salt in a bowl.
3. Now mix together milk and jaggery using a whisk till the jaggery melts in the milk. Add ghee and vanilla essence. Mix well using whisk.
4. Slowly add the dry ingredients to the wet ingredients and fold both the ingredients using a spatula just till no flour specks are seen. Do NOT overmix the batter as it can lead to dense cakes.
5. Now add the batter to a greased (with oil or ghee) cake pan and level using spatula. { My loaf pan is of 20 cm in length and 4 cm in width}
6. Bake in the center rack of your OTG ( or if using a microwave conventional mode oven, just keep both rods on option) at 180 C for 25 to 30 mins till a toothpick inserted in the center of the cake comes out clean and not sticky. Mine gets done at 30 mins exactly.
7. Allow it to cool down completely. Loosen the sides using a knife. Invert, slice and serve.
Notes:
* This cake tastes best the next day. So I always bake at night, for the kids to enjoy the next day. Soon after it bakes, the crust with be slightly hard but as it stays at room temperature, the crust turns very soft.
* Ghee can be substituted with melted butter or oil but when using oil, always remember that the cake will have that aroma of the oil.
* Store in an air tight container free from moisture and the cake lasts well for two days at room temperature. After that, refrigerate and microwave before serving.
* If you don’t like eating cakes as it is, top a slice of this cake up with some fresh cream cheese spread. It tastes heavenly, trust me! {Tried and tested by yours truly! 😬}
* While mixing both dry and wet ingredients, make sure you just fold using spatula and don’t over mix the batter. It will lead to dense cakes. Just mix till you can’t see anymore flour specks.
* I get many questions about ovensettings. I always bake in the center rack of my OTG with two rods option at the temperature and time varying according to each recipe.
* If you use a conventional microwave oven, just use bake option (or two rods option) at the temperature and time mentioned in the recipe.
* I have used my loaf pan of length 20 cm and width 4 cm. You can use round pan too.
* Timing varies according to each oven. So keep an eye after 20 mins into the baking time. But don’t keep opening the door before that as it will lead to uneven baking.
I have tried to note down as much points as possible so that it’s easy for you all to follow but if you still have any doubts, either comment here or message me on my Facebook page Healthy cooking with mitha or on my Instagram handle and I would be happy to help.
Click on the image to save the recipe on Pinterest
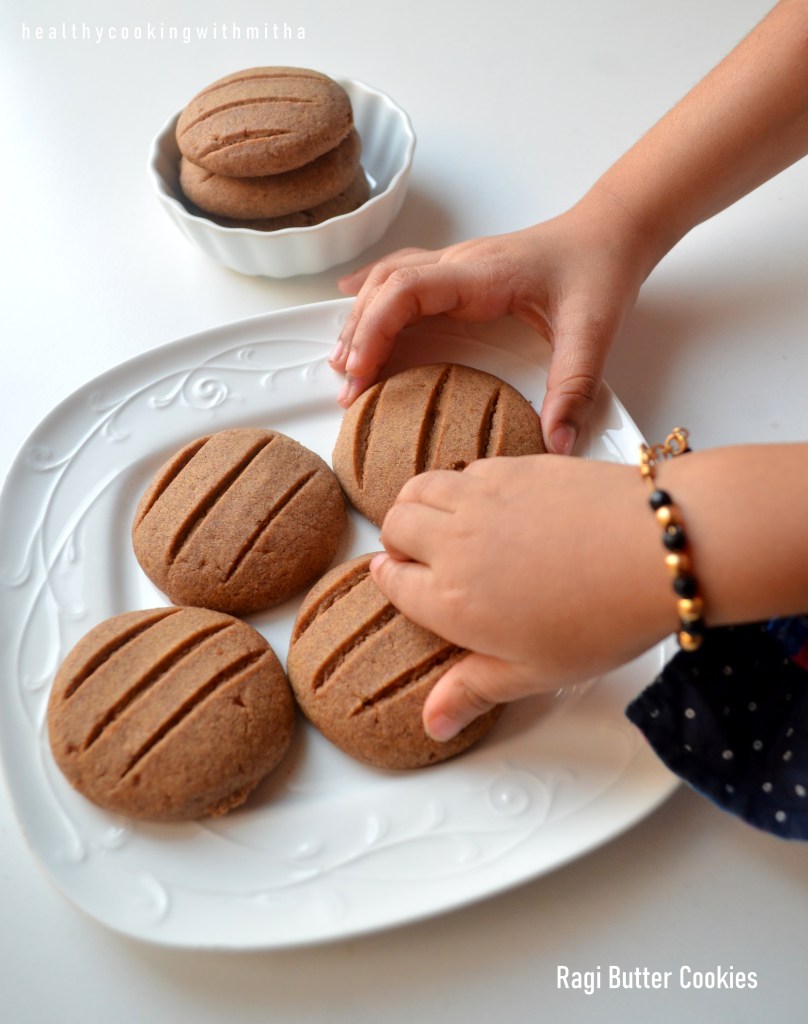
When I posted the Ragi Butter Cookies which was my friend Anvy’s recipe, she asked me if I had tried the almond cookies that she had shared on her Insta handle, Homemade by Anvy. I told her I don’t have almond meal with me (itsounded so exotic 😬) but I did have loads of almonds with me (which I had bought to eat daily to increase my memory. Now if anyone would remind me to eat them 😂).
So she told me almond meal was nothing but powdered Almonds (my plinggg moment!! 🤣). So I had to try it and imagine my happiness when it came out so good. I already made them thrice in the past week as it tasted so heavenly and since it was so easy to make with only 4 ingredients. Also, never knew homemade almond cookies could turn out so pretty. Could not keep the beauties down. 😍
Click on the image to save the recipe on Pinterest
Off they went into my kids’ “choti bhook waala dabba” (their snack box for mid meal hunger and mine too for my sweet tooth 😬).
Click on the image to save the recipe on Pinterest
It has been only an year since I joined Instagram and as much I like it, there have been times when I wanted to just come out of it as I had a tendency of over sharing stories. Finally, got rid of that habit ( some self control that was 😄) and now just using instagram to post my recipes while following some amazing accounts like that of Anvy’s.
Thank you so much dear Anvy @homemadebyanvy for yet another great recipe of yours. We absolutely love it! ❤️
Hope you all try it too. You will definitely love it. Happy and healthy baking!
RECIPE: { My 1 Cup = 240 ml }
Ingredients: { Makes about 12 cookies }
100 grams Salted Butter ( 1/4 Cup + 3 Tbsp) (Add a pinch of salt if using unsalted butter)
3/4 Cup Whole wheat flour or Atta
1/2 Cup finely powdered Almonds (or Almond meal)
1/4 Cup Jaggery powder
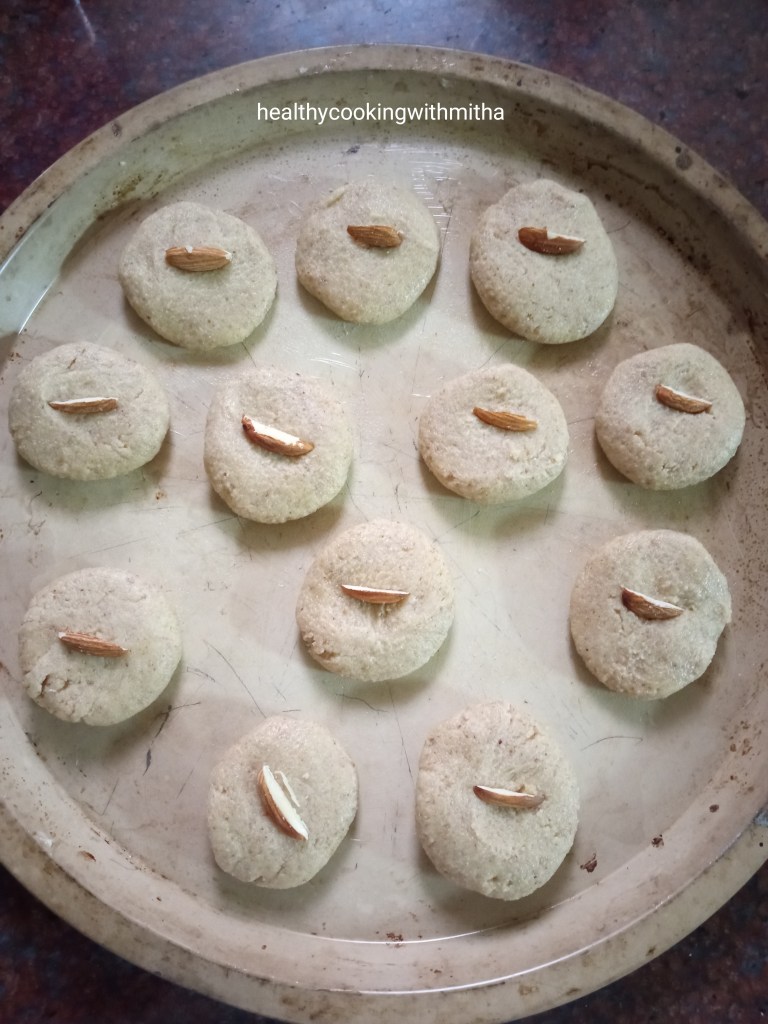
Sliced Almonds for garnish (optional)
Step by step recipe:
1. Soften butter by keeping it at room temperature for little time. (Do NOT melt it in microwave or so.) Just place it at room temperature till it turns soft. Now add jaggery and mix both together using a spatula till they combine. Also add the finely powdered Almonds.
2. Now add wheat flour and mix using hands till it forms a dough. It will come together and will be slightly sticky. Refrigerate for about 15 mins. It will turn firm.
3. Meanwhile preheat the oven at 180 C for 10 mins. Take small balls of the dough and flatten with your fingers. Place them on a greased (with ghee/butter) oven proof tray leaving space among them as it increases width on baking. Decorate each with slices of almonds.
4. Bake in the preheated oven at 180 degree Celsius (350 – 375 F) for 10 to 14 mins in the center rack of your oven or with both rods on in your conventional oven. Mine gets done at 14 mins.
The colour of the cookies are brown and not the colour above. It is due to the reflection of my kitchen lights that the cookies have a light shade in the picture. I still added it to show how much the cookies increased in width after baking.
5. Remove and allow it to cool completely. As you keep it to rest, it turns hard but not very hard as butter cookies are supposed to be melt in the mouth and on the softer side.
Notes:
* Store the cookies in a dry, air tight container and it lasts well for two to three days. Mine gets finished off by my family before that. Will last longer if handled well, free from moisture.
* They are very soft and break upon touching on warm. As they cool down, they will harden but still not very hard like store bought ones as we have used only butter. The texture is melt in the mouth softer version of cookies.
* These cookies do not need baking sodanor baking powder. They still grow in width during baking process. I too was amazed the first time I tried it as I always thought cookies needed either baking soda or powder.
* Baking time depends on your oven. In some ovens, it can be done at 10 mins while in my OTG, it takes 14 mins. So keep an eye but don’t open the oven door before atleast 10 mins into the baking time. Else it will lead to uneven baking.
* Do refrigerate the dough for atleast 10 to 15 mins as it helps combine the ingredients well and also helps us form cookies well without sticking in our hands.
* Place the cookies in the center rack of your OTG or with both rods on if using microwave with conventional mode oven.
* I have not replaced butter with ghee or oil in this recipe. So can’t say about the outcome.
* For making powdered Almonds, just put the almonds in a mixer and pulse it in regular intervals till it turns into fine powder. Keep checking in between so that it does not leave oil and become a paste.
* Leave space between cookie dough while keeping on the tray as they increase in width as they bake.
* When they fully bake, you can see the surface is free of raw dough and edges are slightly golden in colour. It is enough. You can remove the cookies out of the oven.
* Garnishing with almond slices are optional. Avoid the slices if making for kids less than 2 years as it can be a choking hazard. Else just finely chop and garnish. Anyhow, the cookies tastes good even without it.
I have tried to note down as much points as possible so that it’s easy for you all to follow but if you still have any doubts, either comment here or message me on my Facebook page Healthy cooking with mitha or on my Instagram handle and I would be happy to help.
Click on the image to save the recipe on Pinterest
Advertisements
Join me in my journey with a foodie husband and hungry kiddos while I make them eat healthy!