Tag Archives: Jaggery

Ragi Butter Cookies | easy recipe using Jaggery

Click on the image to save the recipe on Pinterest

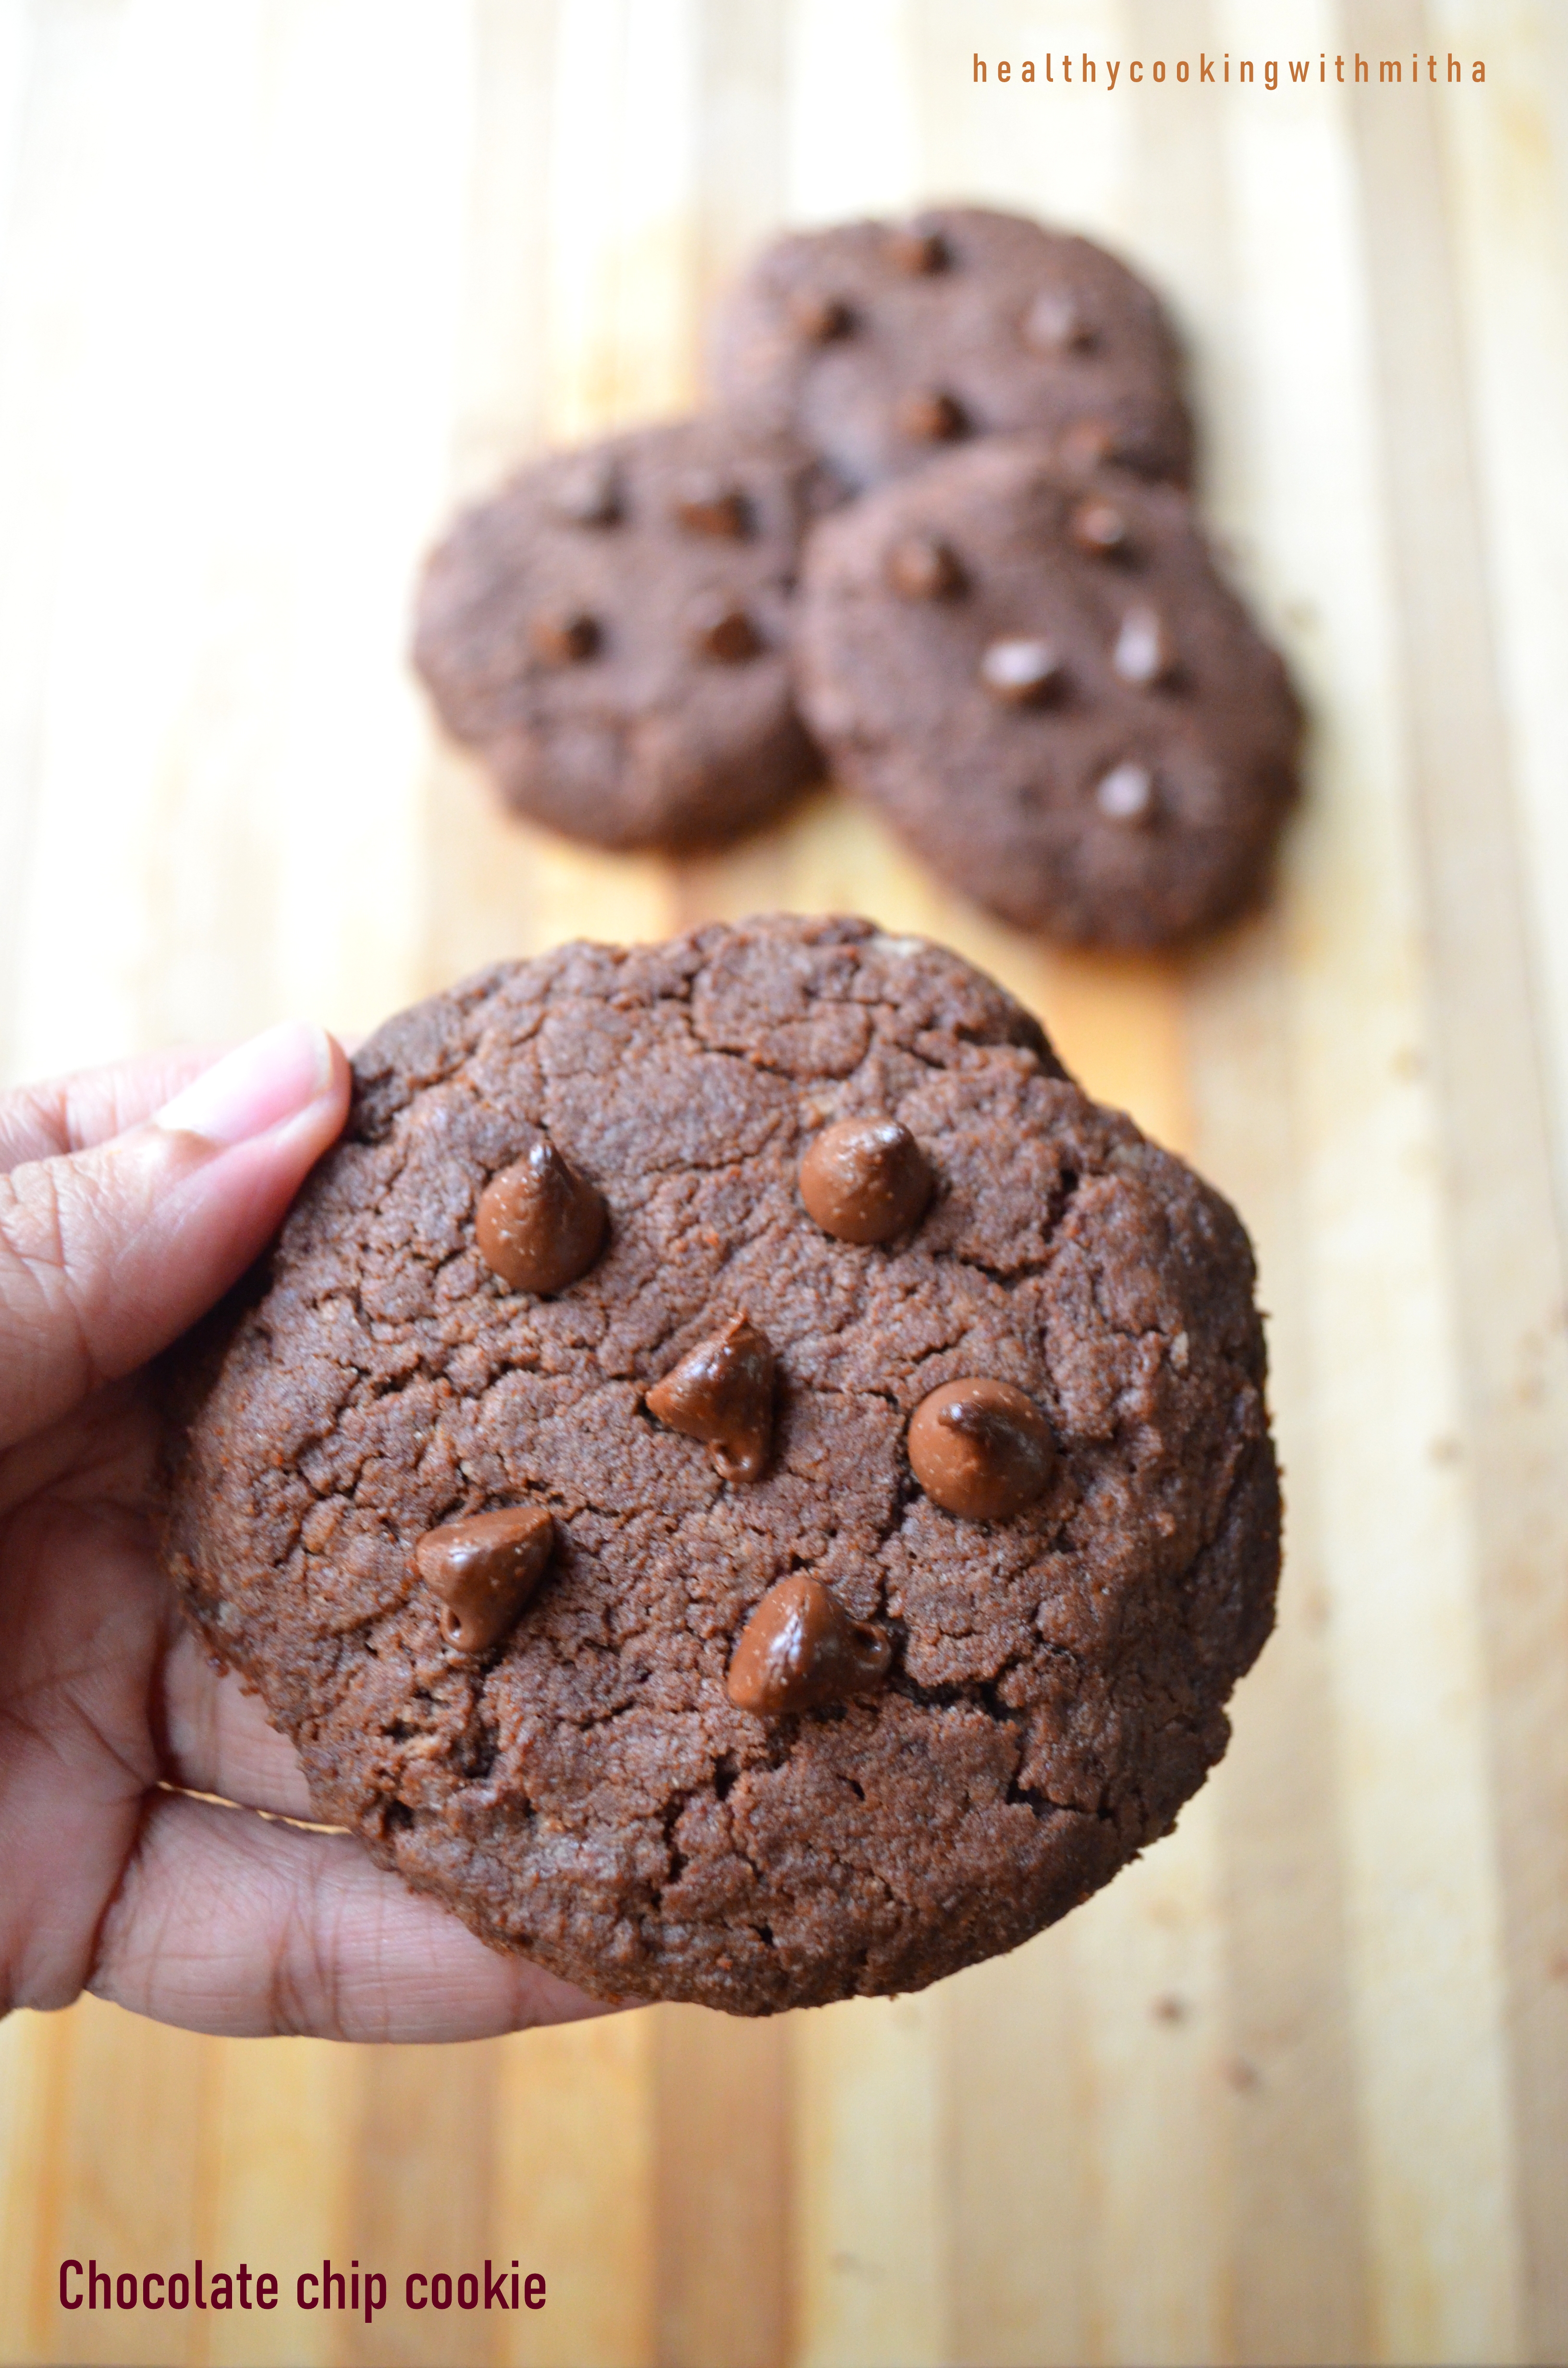
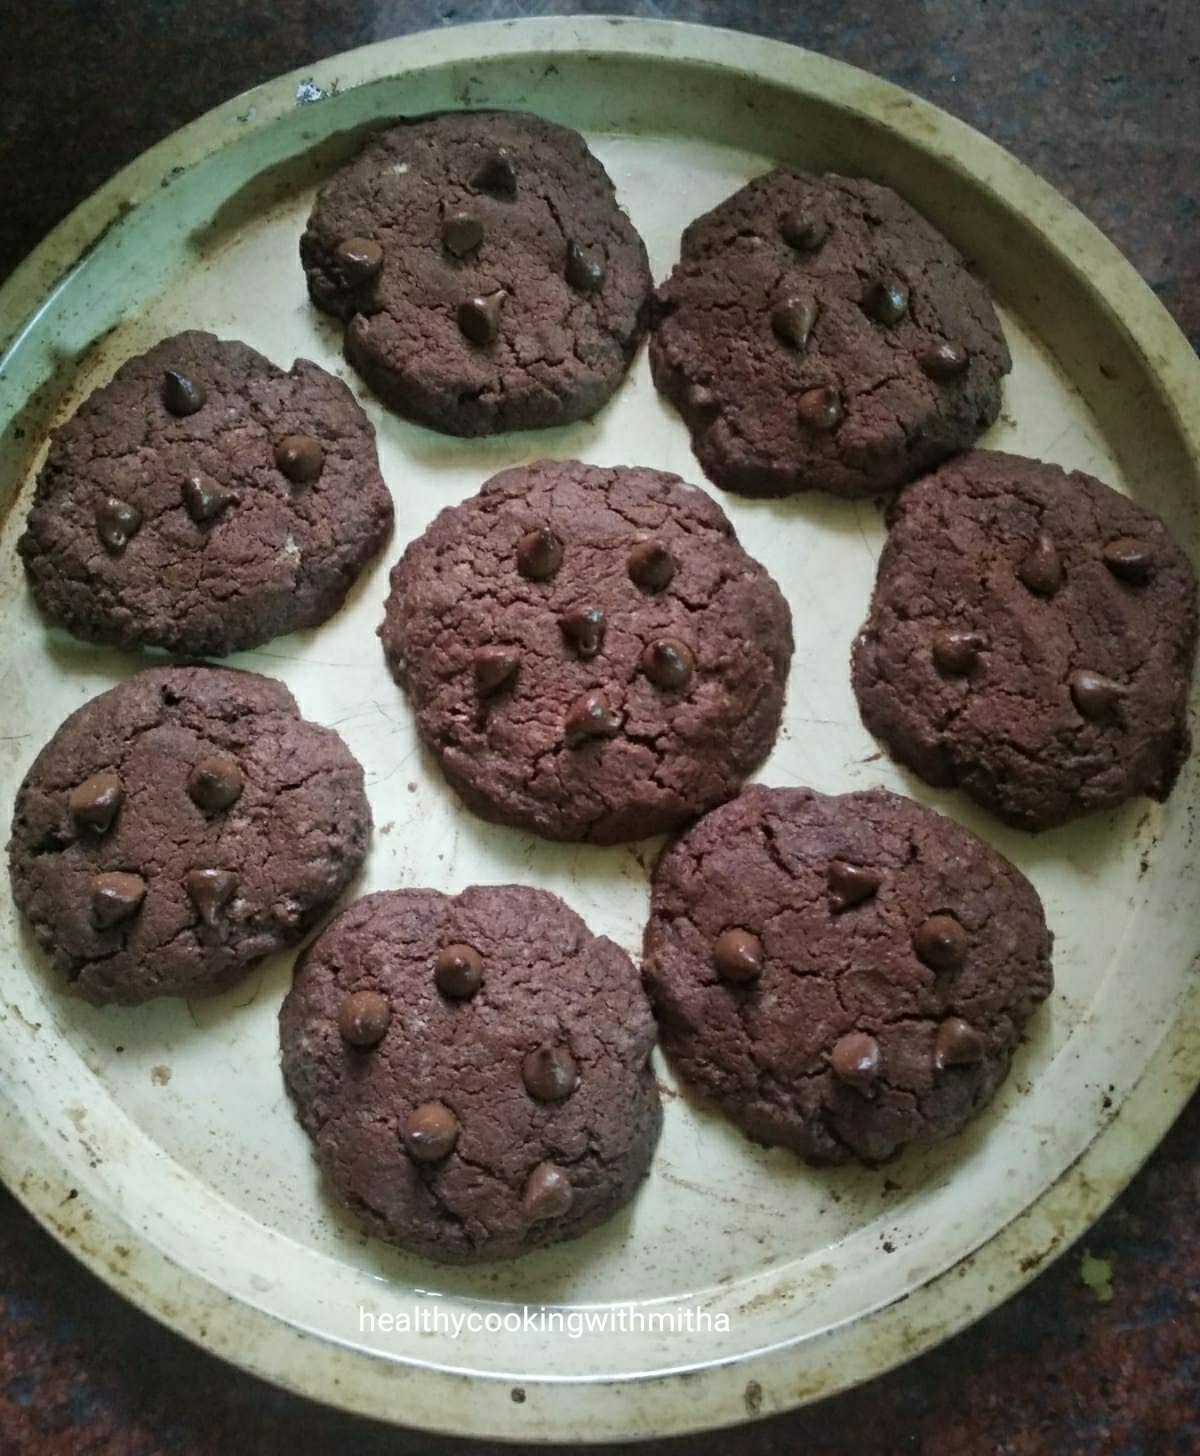
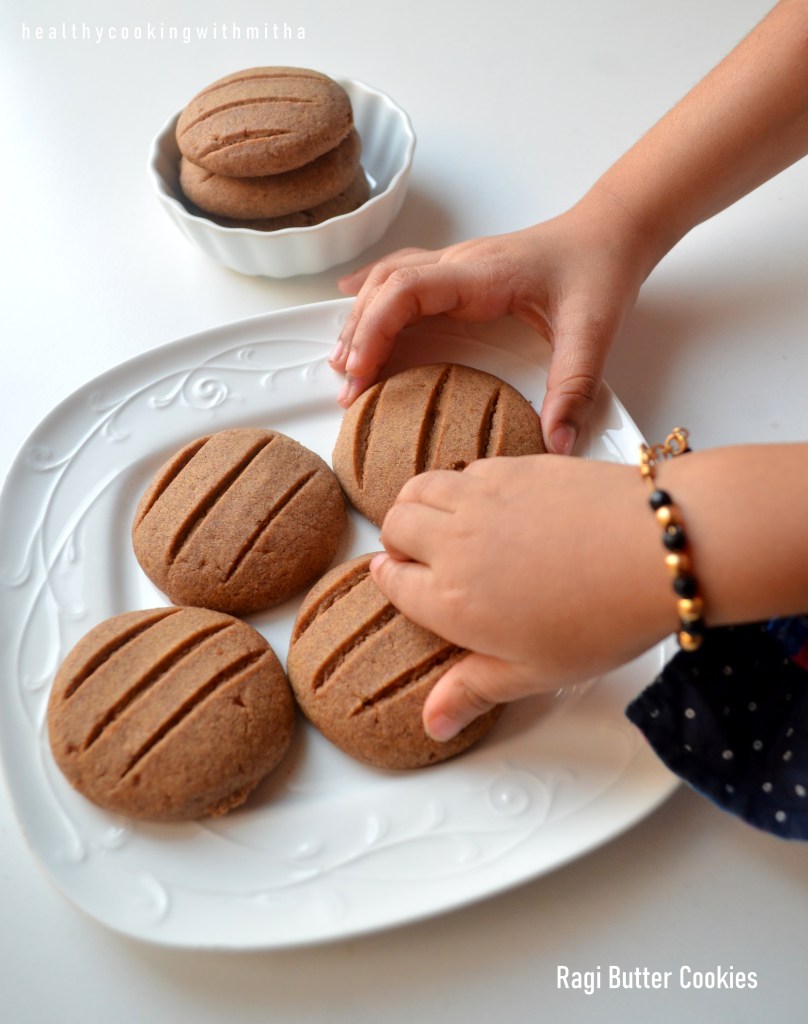
The above picture is of “melt in the mouth” Ragi Butter cookies before two storms struck in 😅. Will come to that later. Right now, I just want to thank my school friend Anvy Susan Thomas who is a great baker ( I am her huge fan! 😍) for this amazing recipe of hers. She has an instagram page homemadebyanvy where she makes us drool with her delicious bakes.

As all of you know, I love baking and I bake atleast one kind of goodies everyday for my family (my daily dose of happiness ❤️). One of my regular bakes are these Ragi Butter cookies which turns out so good that you will never realize you are enjoying a healthy version of cookies. The kids are HUGE fans of it and you can see what I meant by storm strucking in. Here is my 5 year old daughter slowly coming in the frame to grab one of these cookies (storm no 1 😂).

Click on the image to save the recipe on Pinterest

And when she gets her share, how could the little one be left far behind? Here is storm number 2, my two year old son grabbing the cookies. I loved their cute hands on the cookies that it became my favorite picture too. ❤️❤️

Click on the image to save the recipe on Pinterest

These cookies are very easy to bake and turn out too good to be true. You won’t feel like getting cookies from outside once you bake them, that’s for sure. I always believe that it’s best we bake and make everything possible at home since we don’t know what kind of ingredients have gone in store bought ones.

Hence sharing one of my most favorite cookies. I whole heartedly thank my friend Anvy @homemadebyanvy for this recipe. Hope you all try it out too. Happy and healthy baking! ❤️

RECIPE:

Ingredients: { 8 Cookies }

100 grams salted Butter (add a pinch of salt if using unsalted)

1/3 Cup powdered Jaggery

1/2 Cup Ragi flour or Finger millet powder

1/2 Cup Whole wheat flour or Atta

1/2 tsp Baking soda

Step by step recipe:

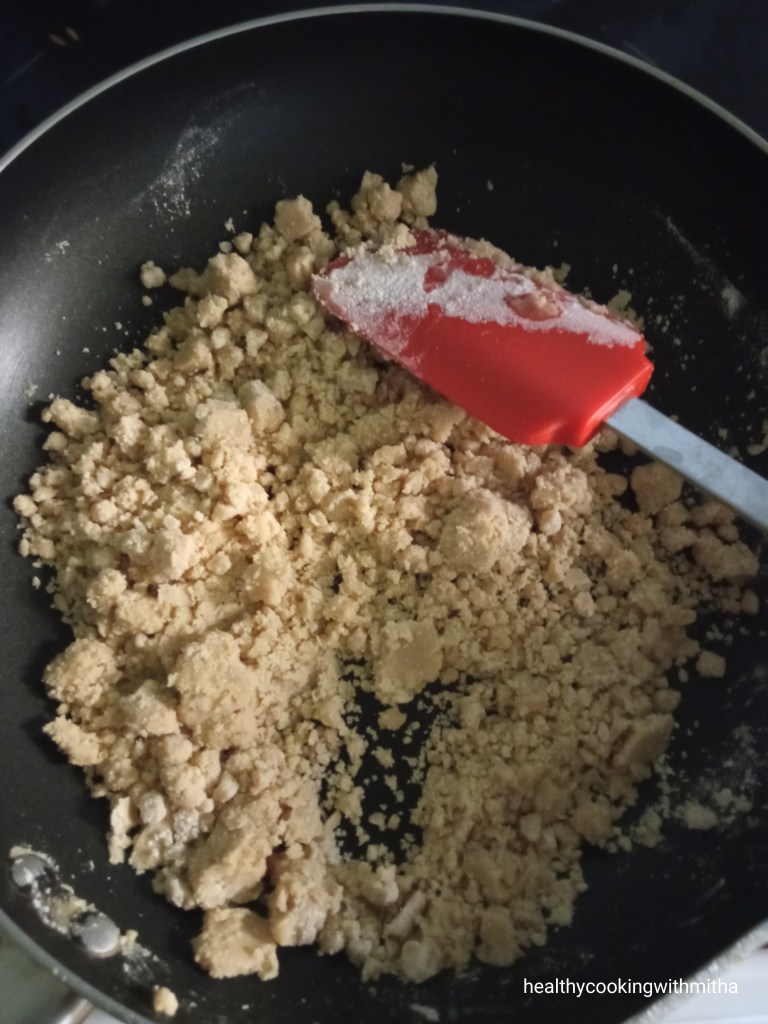
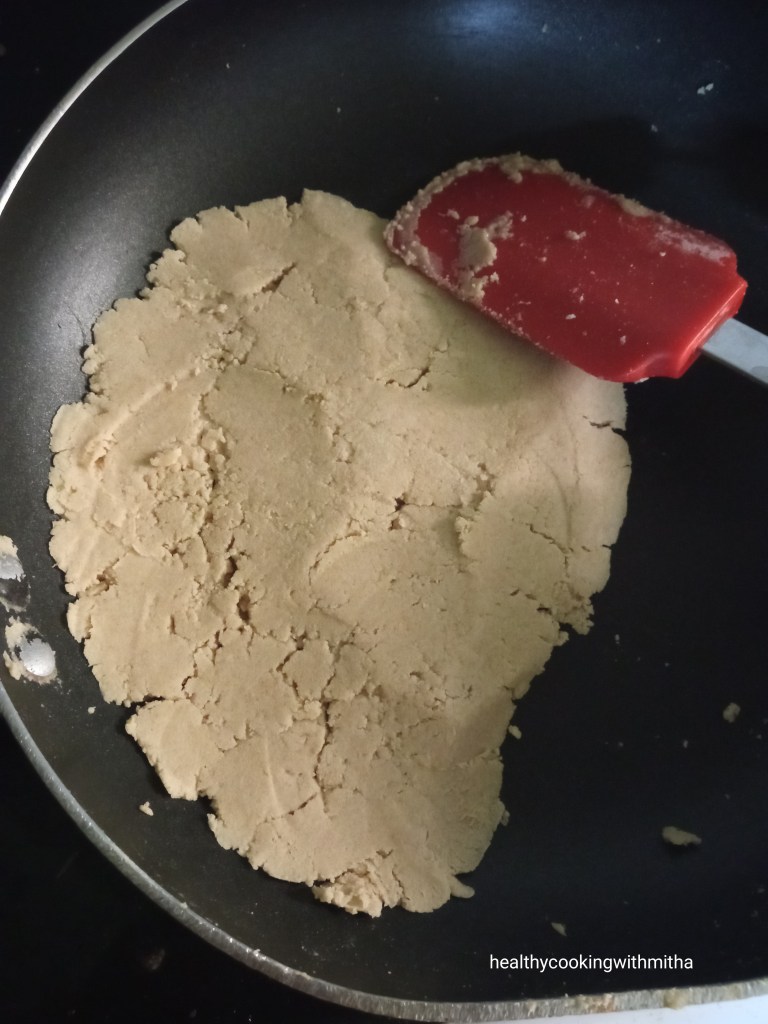
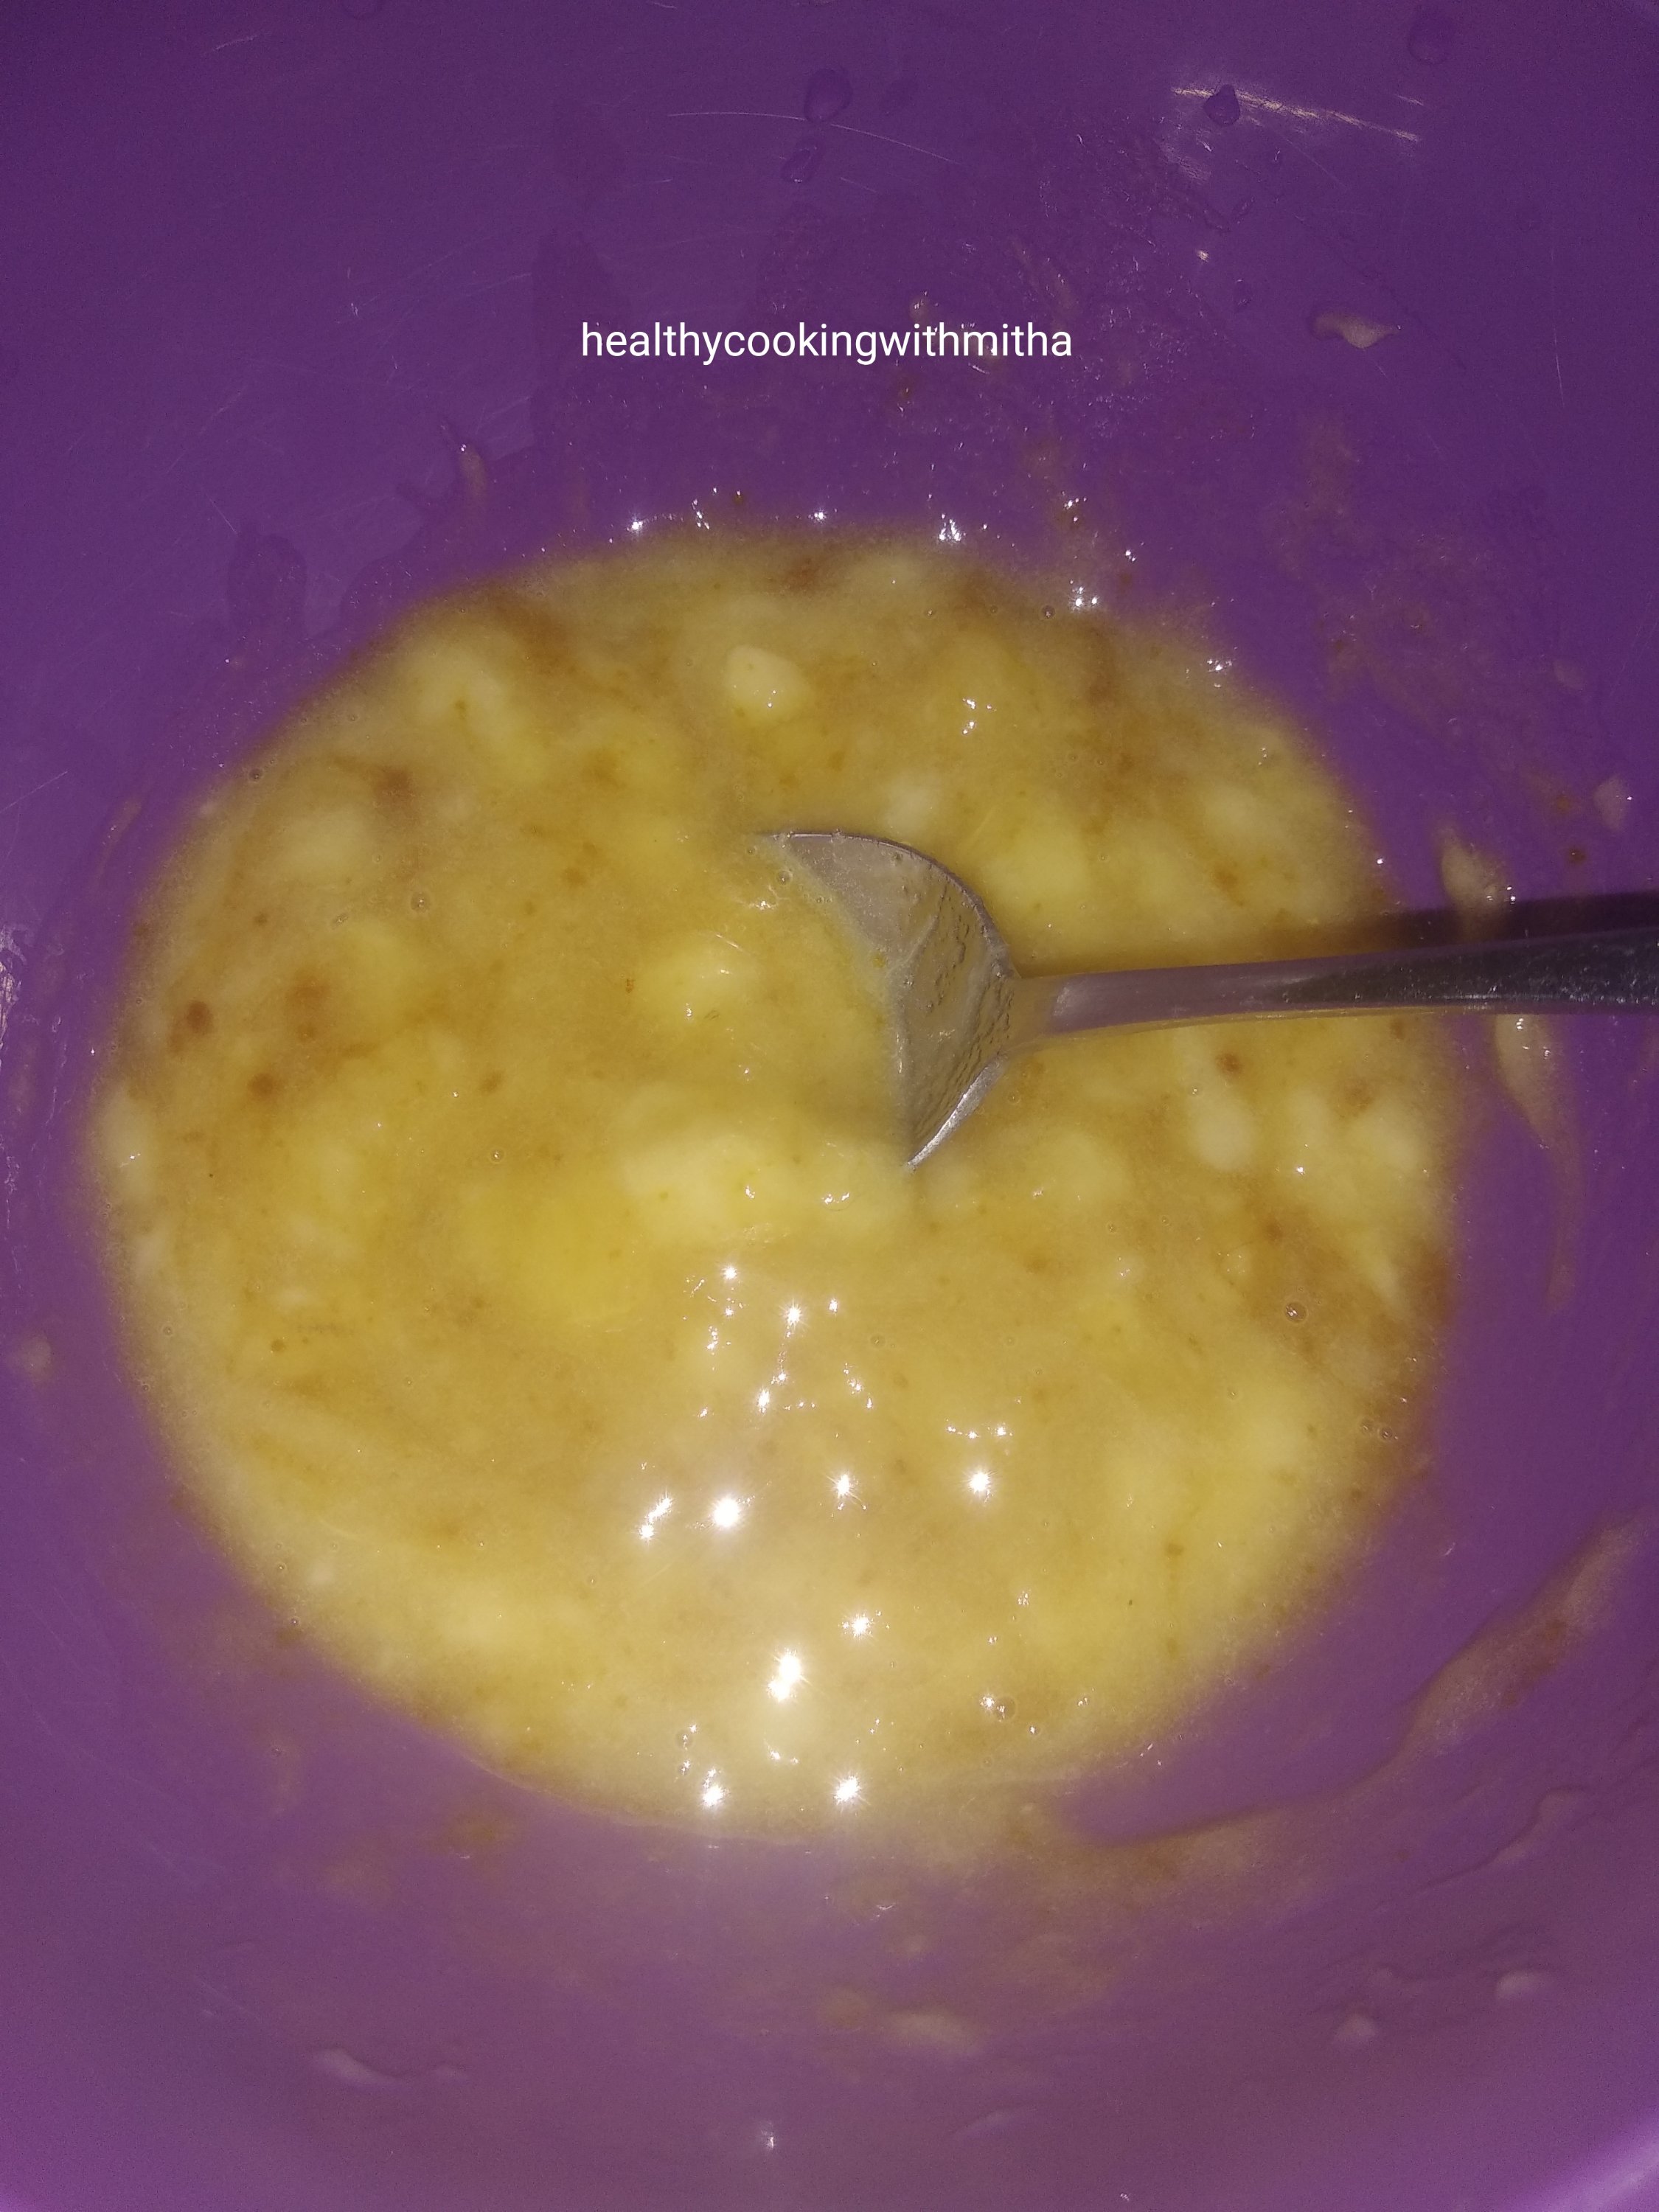
1. Soften butter by keeping it at room temperature for little time. (Do NOT melt it in microwave or so.) Just place it at room temperature till it turns soft. Now add jaggery and mix both together using a spatula till they combine.

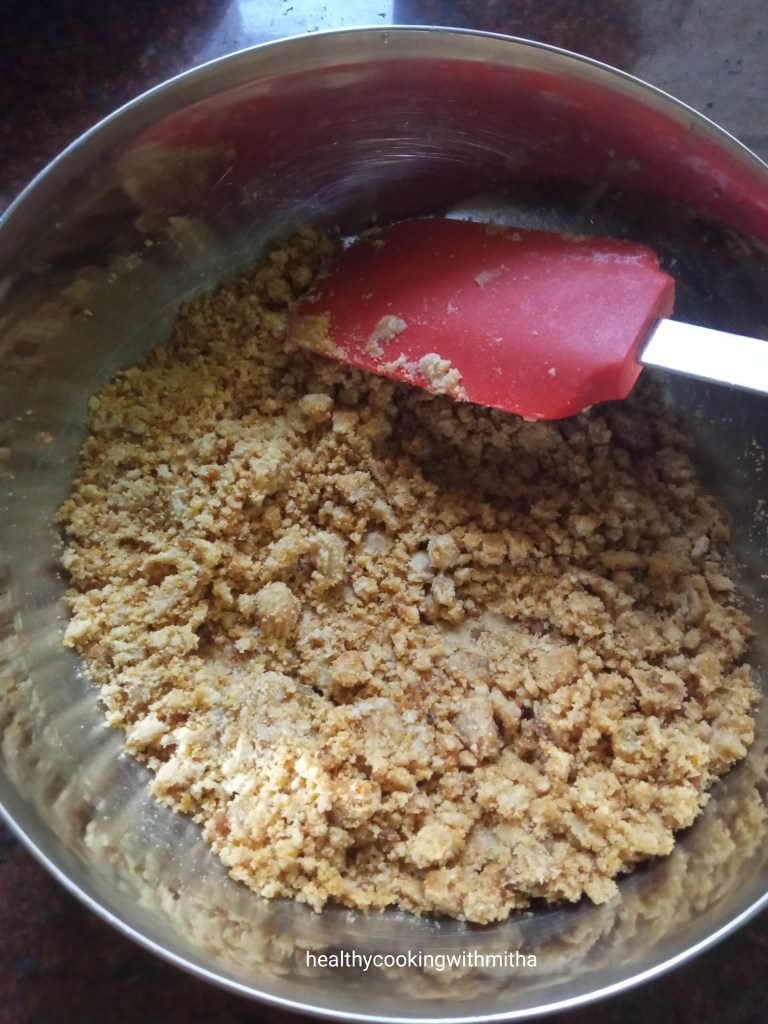
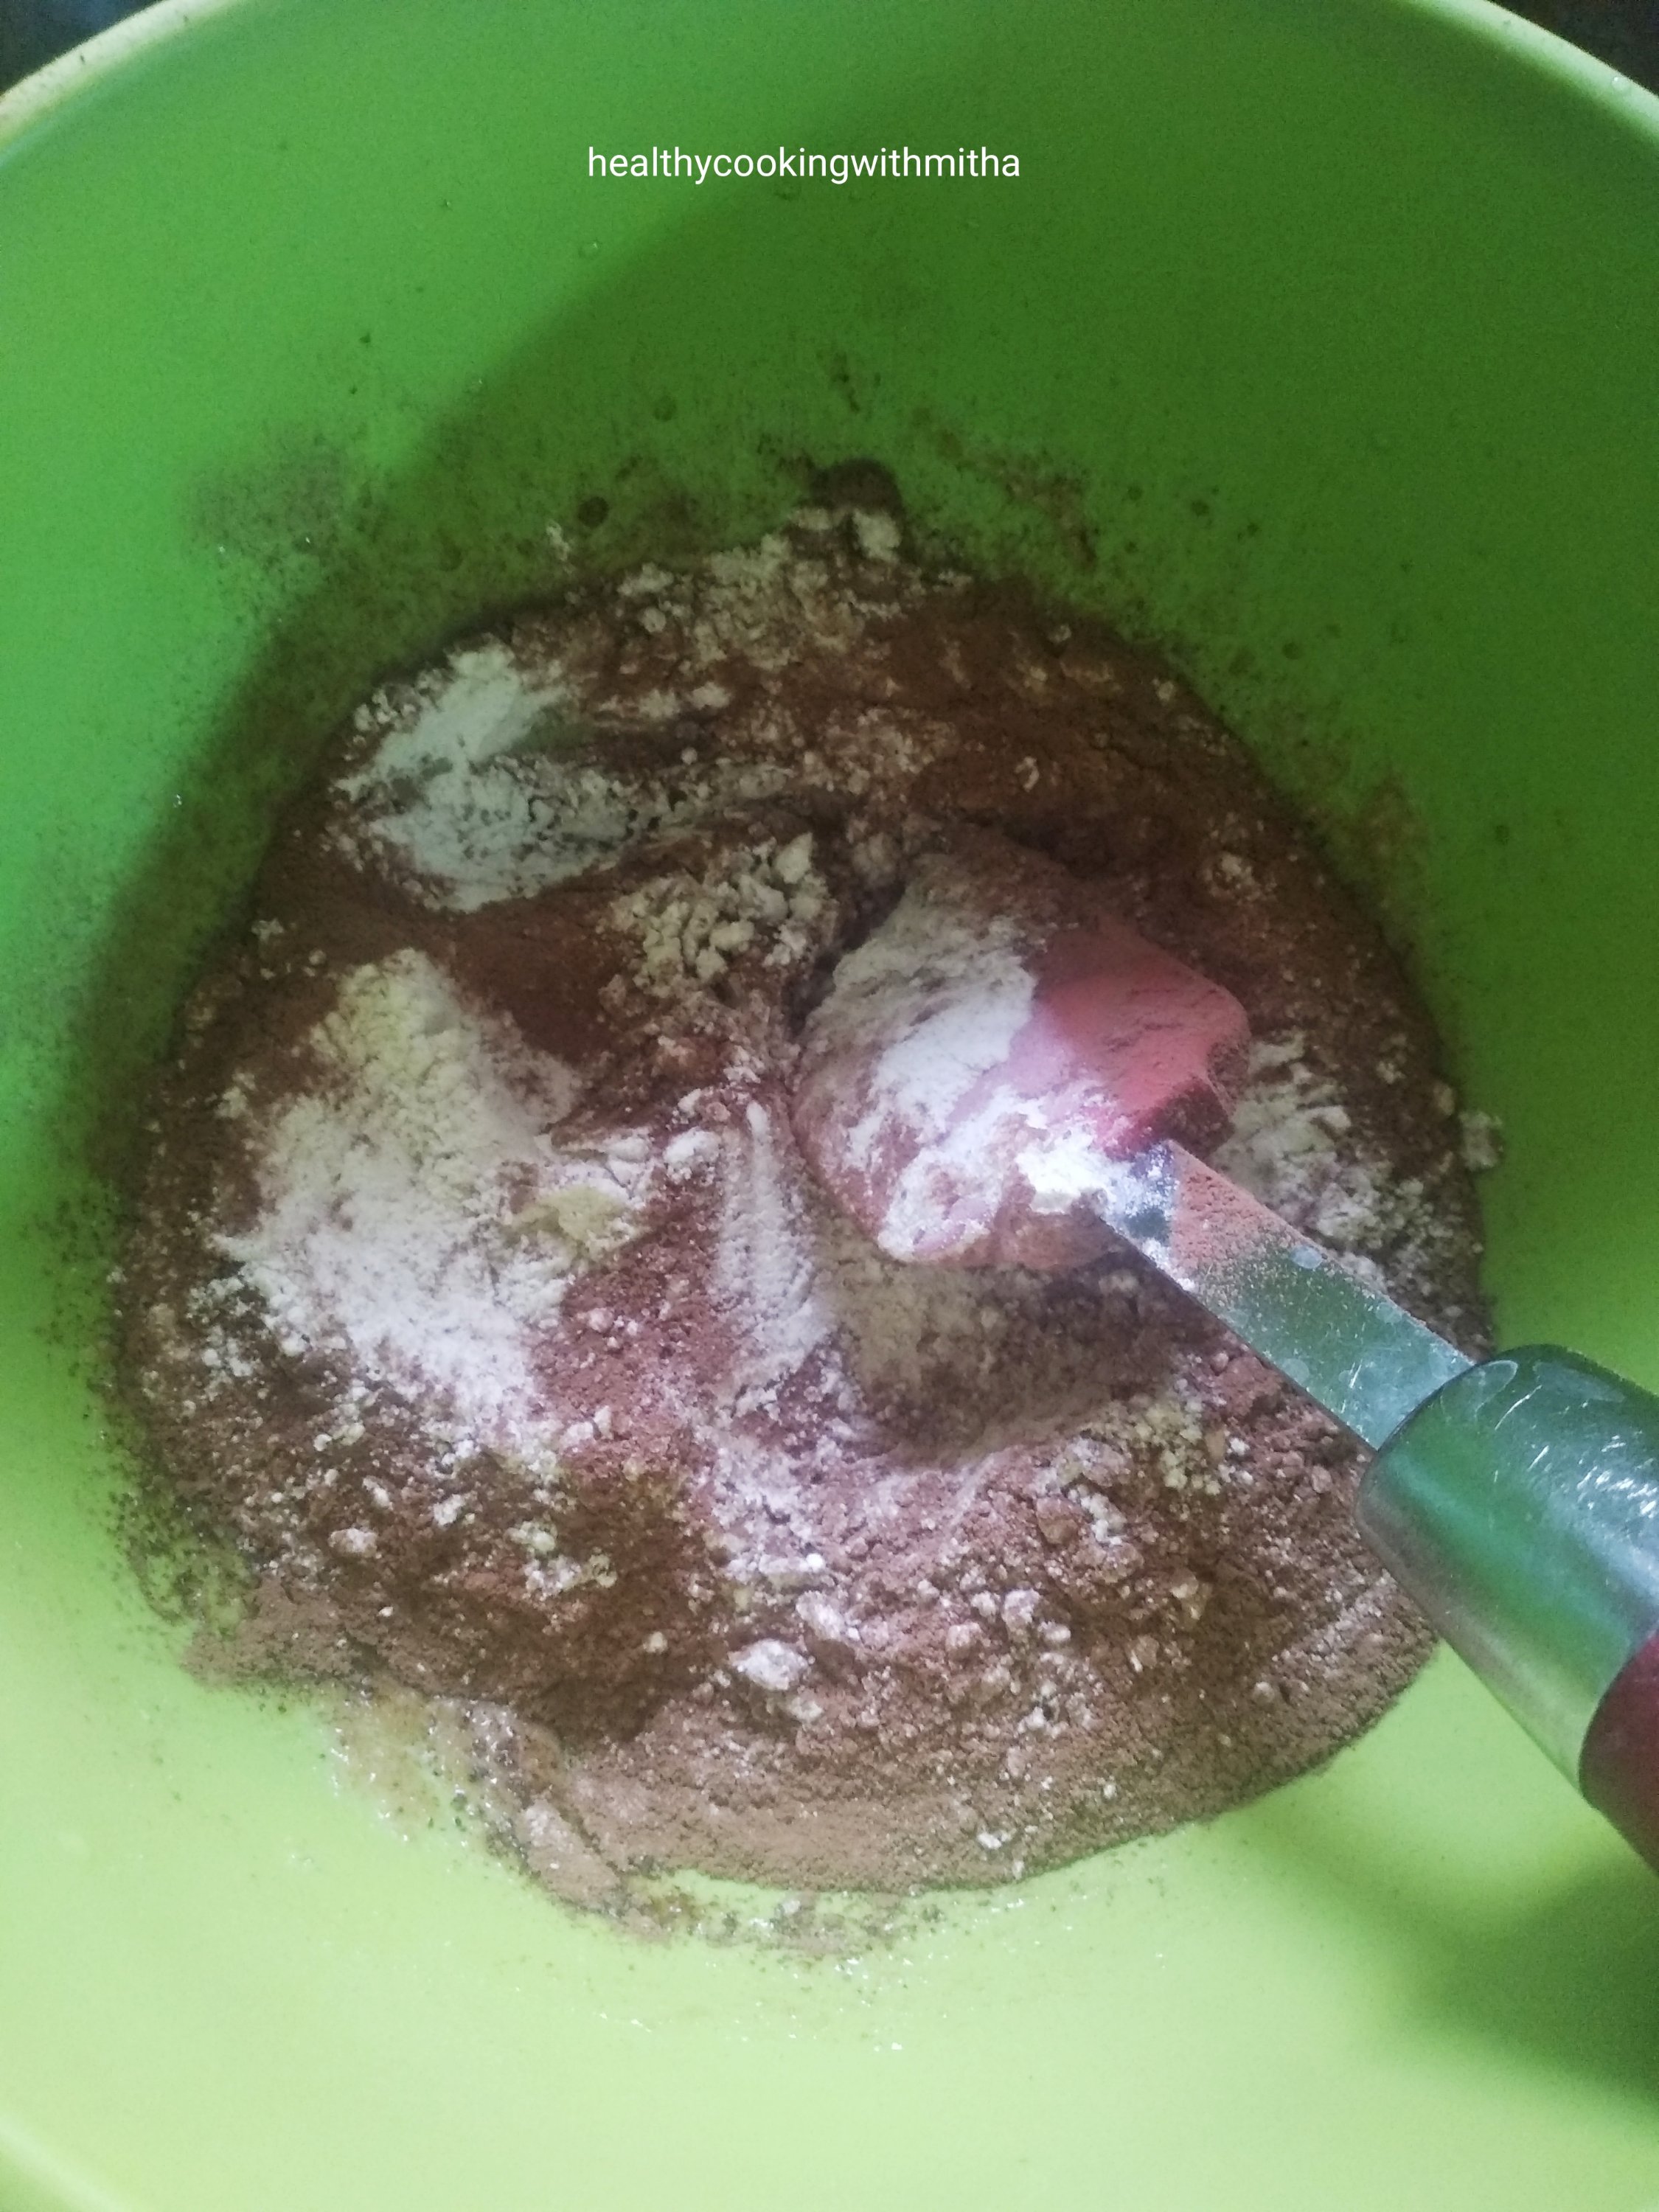
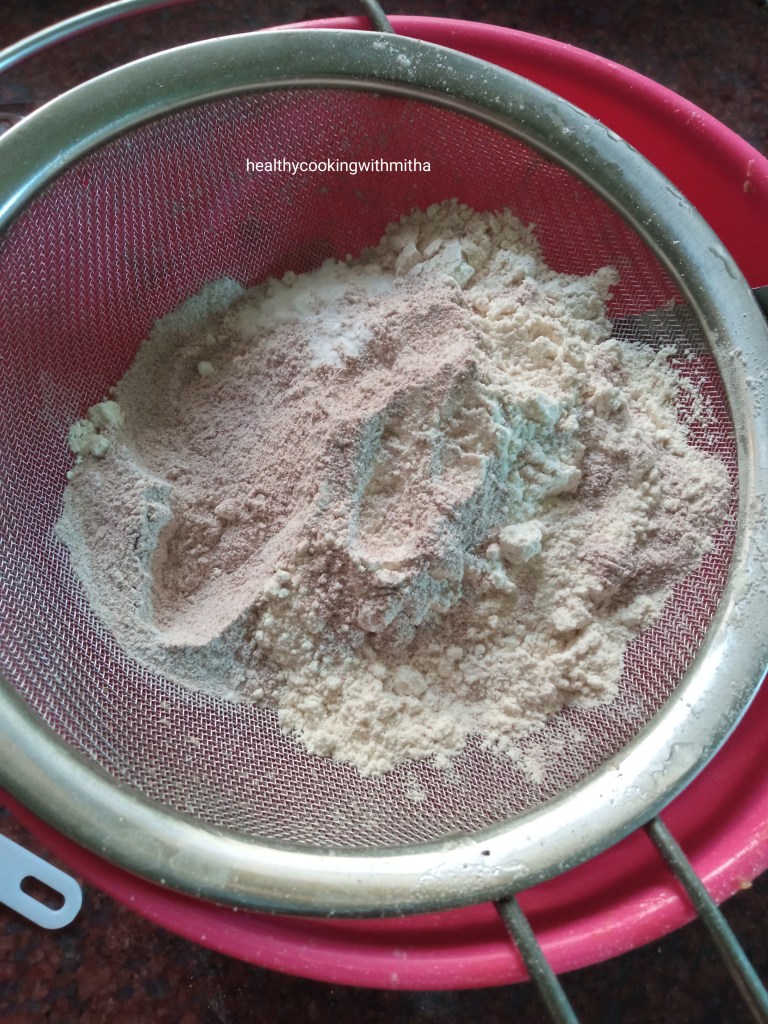
2. Now sieve ragi flour, wheat flour and baking soda over it.

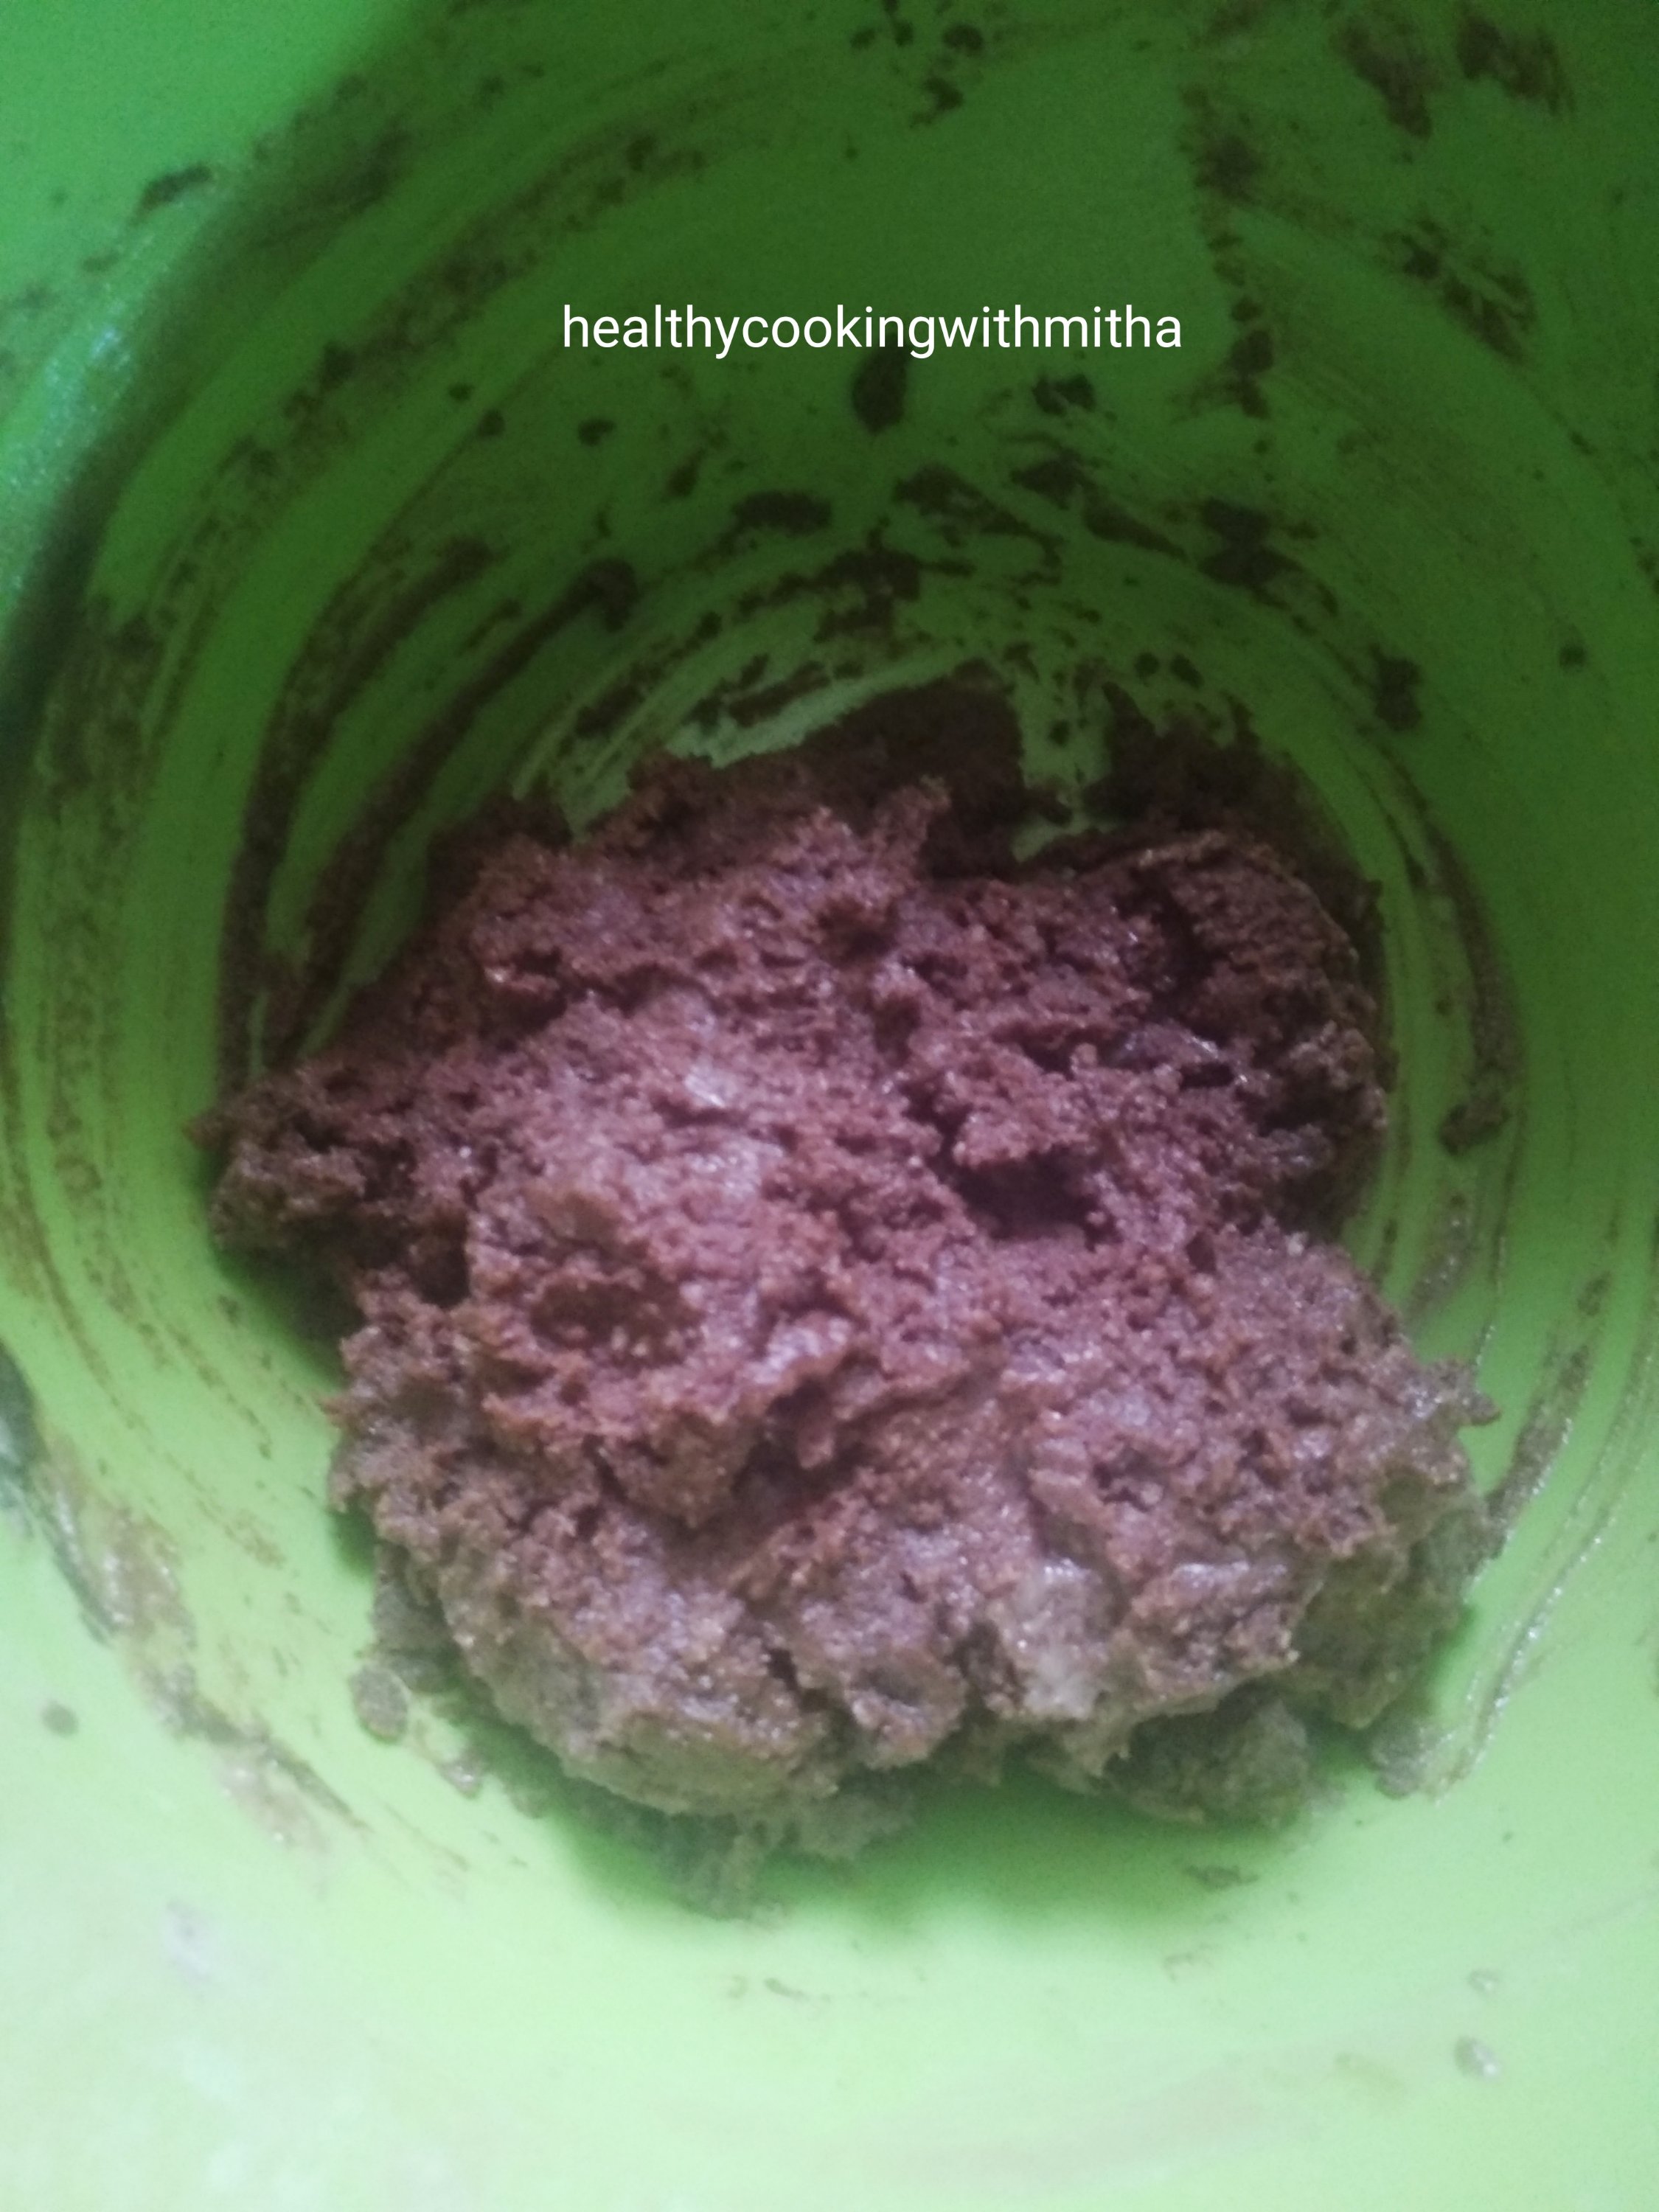
3. Using hands, mix everything well till it forms a dough like shown below. Refrigerate it for 15 to 20 mins.

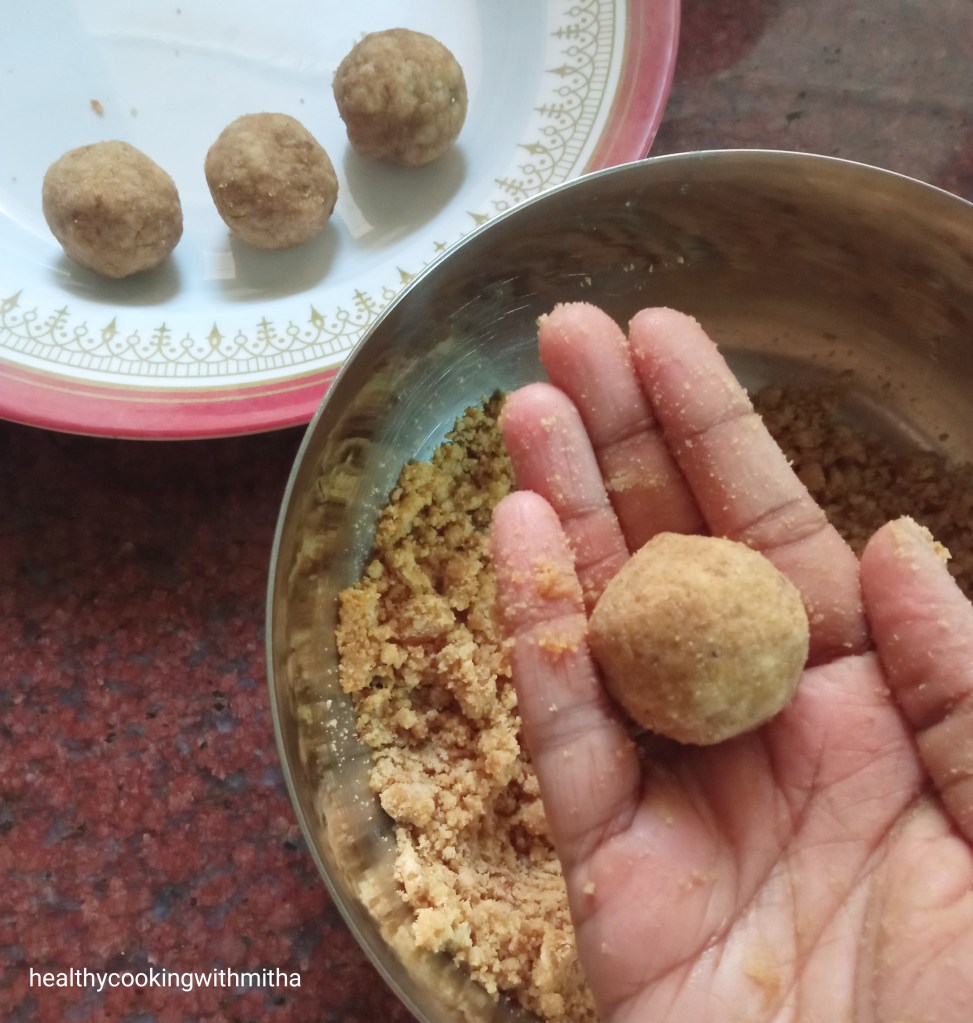
4. Preheat the oven at 180 C (350 to 375 F) for 10 mins. Make small balls of this dough and flatten with your fingers (like making pedas). Make lines over it with knife as shown. Place over a greased (with butter or ghee) oven proof plate. Keep distance between them as they increase in width as they bake.

5. Bake in the center rack of your OTG or with both rods on if using a conventional mode oven at 180 C (350 – 375 F) for 10 to 12 mins. Mine gets done exactly at 12 mins. Each oven is different. So in some ovens it may take upto 20 mins for it to bake completely. The surface will be smooth to touch and will be dough free. Also will have a golden tinge on the edges.

6. Allow it to cool slightly and enjoy the cookies.

Notes:

* They are very soft when they are right out of the oven but harden as they cool down. So do not keep a lot of time in the oven thinking the cookies are not done yet. Once the surface is free from dough and they are smooth to touch, they are ready to be removed from the oven.

* I used salted Butter for this recipe. Add a pinch of salt to the mixture if using unsalted butter.

* Also, don’t melt the butter. Just soften it by keeping it at room temperature.

* Refrigerating the dough is very important. Please don’t skip it.

* Place the cookies at little distance before baking as they increase in width as you can see from the pictures.

* Do grease the oven proof plate well with ghee or butter so that it does not stick to the plate.

* Bake in the center rack of your OTG or with both rods on if using a conventional mode oven. It is very important for even baking of the cookies.

* Mine gets done exactly at 12 mins. Might vary depending upon your oven. But don’t open the oven door before 8 mins into the baking time or else it will leave to uneven baking.

* Store in an air tight container at room temperature. Mine has never lasted beyond a day as my family finishes it off before that. 😀

* You may also want to try this Ragi chocolate cake which is my kid’s favourite (and her friends love it as well 😅). One of the most tried recipe by my readers.

Click on the image to save the recipe on Pinterest

Dates Chocolate Brownie |Eggless, using wheat flour and Jaggery

Click on the image to save the recipe on Pinterest

As my readers know already, I love baking. It gives me some undefinable kind of joy and at times when I just want to hide myself, no longer wanting to talk to anyone (yes, there are days like that even for the talkative me 😬), I enter my baking world. It brings me peace of mind and the result of these delicious bakes too. The kids and their father (who is no less a kid too 😅) become happy at the sight of these goodies and that makes me happy as well. #bakingishappiness❤️

Coming to these brownies, they are so ultra moist as you can see from the pictures and also incredibly delicious. I wish I could share these with all of you. One of the bakes I am really proud of as it is eggless, uses wheat flour and jaggery instead of maida and sugar and also enriched with the goodness of dates. What’s not to love in these brownies? ❤️

I could not take many pictures as my kids were all set to attack them (😅) but when the brownies look so gorgeous, I am sure couple of pictures are more than enough to show how amazing they come out.

Click on the image to save the recipe on Pinterest

I also want to thank my reader Mamta Baliga Shenoy for requesting this recipe. I always make them but did not realize I had not uploaded in the blog. Thanks for the request, Mamta mai which made me add this one. Hope you and all my readers try this recipe. It really comes out amazing. Happy and healthy baking!

RECIPE:

Ingredients: { Makes about 8 brownie squares} ( 1 Cup = 250 ml )

Dry ingredients:

1/2 Cup Wheat flour/ Atta (yes, only half cup is required)

1/2 tsp Baking powder

A pinch of salt

Wet ingredients:

1 Cup Water

1/2 Cup Jaggery powder or grated jaggery

1/3 Cup Cocoa powder

1/4 Cup Ghee (use fully and don’t reduce)

1/2 tsp Vanilla essence

4 Soft variety Dates, finely chopped

For the frosting:

About 35 grams of any chocolate

About 3 Tbsp of Milk

Step by step recipe:

1. Preheat the oven at 180 C for 10 mins. Meanwhile, Sieve half cup of wheat flour, 1/2 tsp baking powder and a pinch of salt into a bowl. Keep aside.

2. Heat 1 Cup water in a pan and melt 1/2 Cup Jaggery in it. Add 1/3 Cup Cocoa powder and whisk well to remove lumps. Now add 1/4 Cup Ghee (don’t reduce the quantity. It is needed for the moistness). Mix well. Let it be very hot and a lump free mixture.

Note: Don’t reduce the water quantity while heating. Just melt the jaggery in the water, add cocoa powder and ghee. Mix once to remove lumps and remove from the flame.

3. Pour into a bowl while it’s still hot. Add vanilla essence and mix well.

4. Now add the dry ingredients mix to the wet ingredients while the wet mixture is still hot. Mix gently till the dry flour specks are not seen. Do not over mix as it leads to dense brownies. Just mix gently till both ingredients blend in.

5. Add chopped dates and mix well. I just cut them with my hands as the dates are so soft (khudri variety). I make 6 pieces from one dates.

6. Mix well and add to a greased loaf pan. (Mine is of size 20 cm length and 4 cm width.) Grease the pan well with ghee. Level using spatula evenly.

7. Bake in the center rack of a preheated oven at 180 C for 30 to 35 mins or till a toothpick inserted in the center comes out clear. Do not over bake as the crust can turn crispy. Mine is an OTG and it gets done exactly at 30 mins.

8. For frosting, soften about 35 grams of chocolate in the microwave. I have used Lindt dark chocolate here as I had it. It took me about 2 mins of microwaving it at full power (I checked every half minute). Depends on your microwave. So keep checking.

9. When it becomes soft, add milk, 1 Tbsp at a time and mix well. It took me 3 Tbsp milk to get a creamy, thick frosting.

10. By then, the brownie would have cooled. Loosen the edges using a knife and invert it onto a plate.

11. Spread the frosting evenly over the brownie.

12. Cut into squares and serve.

Click on the image to save the recipe on Pinterest

Notes:

* Don’t be doubtful about the 1/2 Cup wheat flour required for this recipe. It really requires very less amount of flour. I use Pillsbury brand of wheat flour for all my bakes.

* Sieving or sifting of dry ingredients is very important as it leads to even mixing of ingredients. So don’t skip it.

* Make sure the wet ingredients mix is free of lumps and hot when dry ingredients are mixed in it.

* Do not over mix both the ingredients. Gently fold in and mix till dry flour specks are not seen.

* Always remember to Preheat the oven at 180 C for atleast 10 mins before placing the cake.

* Also, always place the bake in the center rack of the oven in OTG OR with both rods on in microwave with conventional mode oven. This leads to even baking.

* Do not open the oven door till atleast 25 mins into the baking time or else it won’t bake properly.

* Dates are optional and you can bake regular chocolate brownies too with this batter but Dates add an amazing moistness to this brownie.

* Do NOT over bake as the crust can turn crispy. At about 30 to 35 mins, when the toothpick comes out clear, it’s ready to be taken out of the oven.

* I highly recommend frosting this brownie as it tastes heavenly with it.

* I have used Lindt dark chocolate for the frosting as I had it. You could use dairy milk or any other regular chocolate available.

* Refrigerate if it lasts more than a day (mine never does 😅)

* For those who are new to baking, you can check my Baking basics guide for beginners.

* Find all my healthy cake and cookies recipes – Healthy Cakes and Cookies compilation.

I have tried to note down as much points as possible so that it’s easy for you all to follow but if you still have any doubts, either comment here or message me on my Facebook page Healthy cooking with mitha or on my Instagram handle and I would be happy to help.

Click on the image to save the recipe on Pinterest

Easy to make, healthy and delicious sweet recipes |Ready in 15 mins sweets

I am in many Facebook food groups and it is now filled with people posting many varieties of sweets along with savories as they are all set to welcome the most favorite festival, Diwali. It makes my heart warm to see the enthusiasm and happiness of everyone in the groups. Many of the members have become so close to me that I feel like they are my own family. Their encouragement for a beginner like me is truly very overwhelming. Thank you to all my readers from food groups. ❤️

This is just a compilation of my easy sweet recipes for people who have not yet made any sweets and want to make atleast one to celebrate the occasion. These get ready in about 15 mins and are healthy along with being kid friendly too. So good for busy mommies like me. Hope you all try and like them.

Wishing all of you a very happy Diwali. May the festival of lights bring happiness in your lives. ❤️

Please click on the name or the picture for the recipe.

1. Easy Coconut Burfi: These are really easy to make which I learned from “The Konkani Saraswat Cookbook” by my dearest Asha Satish Philar mai. It was one of the first sweets that I learnt and even my 5 year old daughter knows to make it.

Recipe here: Easy Coconut Burfi

2. Microwave Mango Coconut ladoos: This is yet another easy recipe which I learned in my initial days of cooking. Hardly takes few minutes to make but tastes really amazing. Do try if you have mango pulp with you and you love coconut.

Recipe here: Microwave Mango Coconut ladoos

3. Jaggery Sheera: One of the most made sweet in my house as it is my family’s favorite. I used to make Sheera with sugar initially but switched to jaggery many years back and have never looked back. Tastes really delicious!

Recipe here: Jaggery Sheera

4. Dry fruit bites: These are sugar free and very tasty along with being very healthy too. My way to feed dry fruits to my kids which are very beneficial to their growing body if consumed regularly in limited quantity.

Recipe here: Dry fruit bites

5. Nendran Banana halwa with Jaggery: This is the easiest version of the halwa which gets ready within 15 mins. Many of my readers have tried and loved this. It is another way to feed this healthy banana to my kids who love this halwa.

Recipe here: Nendran Banana halwa with Jaggery

6. Mango Kesar pedas: The tastiest pedas you can ever make. Very easy too and gets ready within 15 mins. If you have mango pulp, do try this and you won’t regret it. I love how beautiful they look too.

Recipe here: Mango Kesar pedas

7. Dried Apricot Halwa: Something which I tried to finish off my apricots but came so delicious that this has become our favorite. Too easy to be true kind of recipe. Doesn’t it look royal too? 😀

Recipe here: Dried Apricot Halwa

8. Churmundo | Easy wheat flour jaggery ladoos: These are Konkani people’s all time favorite ladoos. I use jaggery instead of sugar though. Tastes so heavenly that we feel at loss of words when devouring them. So quick to make too.

Recipe here: Churmundo | Easy wheat flour jaggery ladoos

9. Peanut Jaggery ladoos: Needs only two ingredients and hardly takes about 10 mins to make. Very tasty and healthy ladoos too.

10. Til Jaggery Burfi : A very tasty, easy to make sweet made from sesame seeds and jaggery.

11. Ragi Jaggery ladoos: Soft, melt in the mouth delicious ladoos made with Ragi or finger millet and jaggery.

12. Poha Sheera – An easy to make unique sweet from rice flakes or beaten rice that I learnt to make recently which we all loved a lot. Tried and loved by my readers too.

13. Dry fruit Coconut Ladoos: These are a great way to add dry fruits in ladoo form in both your kids’ and your diet. Also free from sugar or jaggery as dates sweetens these ladoos perfectly.

14. Mango Coconut Ladoos : These have to be the tastiest ladoos that I have ever made. Looks so pretty too 😍

15. Godu Phovu / Jaggery sweetened rice flakes – This is the most made sweet in every Konkani household for almost all festivities. So quick to make with very simple ingredients like Poha or thin rice flakes, coconut, jaggery and flavoured with cardamom powder.

In this recipe, I have made Chane usli or seasoned chickpeas with Godu Phovu as it is a very delicious combination.

Recipe here – Godu Phovu

16. Gluten Free Jowar flour ladoos: An easy to make, healthy and tasty ladoos which you can never say are made from Jowar flour.

17. Vegan Coconut Badam Ladoos: Yet another quick and delicious ladoos which combine coconut and almonds beautifully. ❤️

These are the easiest sweet recipes that I have shared. You can check the rest of my healthy desserts like Jaggery Shrikhand, Peanut Ubbattis, Mango mousse, Chocolate Cheesecake, Desi Tiramisu, Bottlegourd jaggery halwa, etc on my Desserts page.

My other compilations:

Oats Recipes Compilation

Healthy Cakes and Cookies recipes Compilation

“No rice” dosa recipes compilation

Variety Idlis Compilation

Happy and healthy cooking! ❤️

Peanut Ubbatti | whole wheat jaggery holige

Being homebound since many months now, I truly realize the value of our home town visits which were atleast twice a year. Along with that, I really miss the fun meeting my loved ones, the non stop chatter, going to temples, shopping with my cousin and also (importantly) indulging in sweets without a care in the world. 😅😍

I have been an ardent devotee of sweets since a child and my dad knowing that, spoils me to the core when I visit them. My favourite sweets are brought and stored before I come, all awaiting me to devour them 😬. One among them are Kayi holiges or coconut filled sweet Ubbattis which are a speciality of Udupi Shree Venkateshwara sweets near the famous and our dearest Shri Krishna’s temple.

So, when I miss those holiges, I make chapati dough, fill it with coconut and jaggery to make my own “jugad” kind of holiges 😀 which tastes yummy too. As I started making them, I realized I could make different varieties of it and these peanut Ubbattis came into being. It tasted so good that we make it regularly.

So glad to share this recipe. Hope you all try it for Diwali. It’s as easy as making parathas and hope my step by step recipe along with notes will help you all. Happy and healthy cooking.

Also, wishing my readers a very happy Diwali. May the festival of lights brighten your lives and fill it with happiness. ❤️

RECIPE:

Ingredients: { Makes 5 Ubbattis }

For the outer dough:

2 Cups Wheat flour/ Atta { I use Pillsbury brand }

About 3/4 Cup Water {to knead the dough}

1/4 tsp Turmeric powder or Haldi

Salt to taste

For the inner filling:

1 Cup Peanuts { skin removed }

1/2 Cup Jaggery

2 Tbsp Water

1/4 tsp Cardamom powder

To roll the Ubbatti: Dry wheat flour as needed

Ghee to cook the Ubbatti

Step by step recipe:

1. Add wheat flour, turmeric powder and salt in a bowl. Add water and knead to a soft dough. It took me about 3/4 Cup of water for 2 Cups of flour. Might vary as per your brand. The dough should be soft and smooth. Keep aside.

2. Now take the skinned peanuts in a mixer.

3. Powder it by pulsing it every two rounds. Don’t run the mixer continually as peanuts can leave oil. Just pulse for 4 to 5 times and it will turn into fine powder. If tiny bits of peanuts remain, it’s okay as it gives nice bite to the Ubbatti.

4. Now add jaggery along with water in a pan. Allow jaggery to melt and come to a boil. No need to make it into syrup.

5. Now add the peanut powder and mix once. Switch off the flame after mixing once or the mixture will harden.

6. Transfer it into a plate immediately. Allow it to cool slightly. Don’t cool it completely as it will turn hard. When it is warm, make small balls of it as shown. Also make balls of same size as filling from the wheat dough.

Note: It is important to make both inner and outer balls of equal size so that the Ubbatti turns perfect.

7. Now keep a chapati tawa to heat on the flame. Take a wheat ball and dip in dry wheat flour. Roll to a small Puri (small circle as shown). Keep the inner ball of filling inside.

8. Now take the sides of the wheat dough and cover it over the filling sealing it completely.

9. Roll it using little dry wheat flour to as thin and evenly as possible.

10. Place this over the heated tawa and cook till bubbles appear over the surface. Add ghee over it.

11. Flip and cook for about half a minute adding ghee over that side too.

12. Remove and repeat the same with the rest of the dough.

Notes:

* The water quantity while making the wheat dough can vary with your brand. Just make into a soft and smooth dough. Keep for rest for about 30 mins if you have time. Else it’s fine.

* We get readymade skinned peanuts here and I use that. If you have regular ones, you might need to roast it on low flame, cool it and remove the skin.

* While powdering the peanuts, be careful to not grind continually as it may leave oil. Just pulse and powder it. Even if little bits of peanuts remain, it’s fine. Adds a good crunch to the Ubbattis.

* Don’t make jaggery syrup. Just melt it and bring to a boil.

* Switch off the flame immediately after adding and mixing the peanuts. Else it may turn hard. Also, don’t keep the mixture to cool for long. Make balls when the mixture is still warm.

* Make both the inner and outer dough balls of equal size. Else the Ubbattis may not taste as good or might become like parathas. Making both balls of equal size ensures the outer layer is thin and we get good flavour of the filling.

* As these Ubbattis are kept at room temperature, they turn crisp on the outside but soft on the inside. That’s exactly how we love it. If you love soft Ubbattis, consume them immediately after making it.

* Since it is easy to make, I make it fresh each time. The measurements I have mentioned above yields 5 Ubbattis which are sufficient for us to last a day.

* Also, with the above measurements, I get two balls of wheat dough leftover ie it makes 7 wheat balls. I make chapati with it.

Churmundo with jaggery | easy wheat flour jaggery ladoos

Even though I am good at making pedas, ladoos are one sweet I had never attempted much. When I did attempt few months back, it had got such weird shapes 😆 that I thought my hands were not meant to make those perfect, droolworthy round round ladoos.

And guess which ladoos proved me wrong? Our own amchi Churmundos.❤️ Churmundos are usually made with wheat flour and sugar powder but I have used jaggery here. My fondest memory with these ladoos are both my grandmothers making lovingly for me during childhood.

My paternal grandmother or Annama and my aunt Chandriakka still make big boxes of these ladoos and give it to me when I return back to Qatar after vacation. Those ladoos are loaded with love and I eat each bite remembering them.

So this time since we could not visit them, I decided to make them myself (“no matter what shape they turn out!!” was my thought). And imagine my happiness when it turned out so perfect. My husband said it was the best Churmundo he had ever eaten. The kids too loved it very much and it got finished off quickly.

So I thought why not share this easy recipe of Churmundos. I make with jaggery as my family prefers jaggery sweets to sugary ones. Even though I am not very creative, I decorated them like a lamp as Diwali is less than a week away and I am all set for the festival. How do they look? 😬😍

As an after note, how many of you remember the small colourful liquid bindis that we used to decorate as kids during festivals? Don’t these ladoo designs resemble it? It was very unintentional but I was reminded of those bindis after I saw these designs. Such good memories they were. Childhood was definitely special. Happy festive season to all of you! ❤️

RECIPE:

Ingredients: {Makes about 10 to 12 small ladoos}

1 Cup Whole wheat flour/ Atta (I use Pillsbury brand of wheat flour)

3/4 Cup powdered Jaggery

1/4 Cup Ghee (plus 1 Tbsp to fry raisins)

2 Tbsp Raisins or as per your taste

1/4 tsp Cardamom powder

Step by step recipe:

1. Heat 1 Tbsp Ghee in a pan and add raisins. When they plump up, remove into a bowl. Keep aside.

2. In the same pan, melt ghee (don’t make it very hot. Just melt it on low flame.) Add wheat flour and start sauteing on low flame.

3. Initially it will be in small lumps but as you continue sauteing on low flame while patting the lumps using the spatula (as shown in the below picture), it will be a smooth mixture. (This is after about 5 mins of sauteing)

4. Continue sauteing and you will get a wonderful aroma, there will be no raw smell of the flour and the whole mixture will come together as shown below. It takes me exactly 8 mins from start to get the mixture to this stage but might vary depends on your pan and the flame.

5. Remove immediately to the bowl that you added raisins. Also add jaggery powder and Cardamom powder.

6. Mix well using the spatula when still the mixture is hot.

7. Now make ladoos using your hands when the mixture is still warm. If you are finding difficulty in forming the ladoos and they are breaking apart, add little ghee to the mixture and you can easily make ladoos. But the amount of ghee is perfect to make these ladoos and I don’t think more will be required.

8. Serve warm or store in an airtight container.

Notes:

* As it is very quick to make, I make only with 1 Cup of wheat flour at a time which yields me about 11 ladoos. They get finished off by my family within two days. I store it in an airtight container at room temperature.

* Be careful to saute the wheat flour in very low flame. I use electric cooking range and I keep in the flame between medium and low. It took me 8 mins of sauteing on this flame. (tip: keep your favorite songs while sauteing and you won’t even realize that you have sauteed that much 😃)

* Raisins are to taste or can be skipped but gives a good flavour to the ladoos.

* Jaggery powder can be substituted with sugar powder if your family does not like jaggery flavour.

* While binding ladoos if you are unable to form them, add ghee if needed to the mixture and also your palms to get neat ladoos.

* These ladoos are initially very soft but turn firm on keeping at room temperature for little while.

* This is how I make cardamom powder. I remove the seeds of cardamom from the skin. Crush the seeds using mortar pestle into fine powder. Use as needed. I used seeds from 2 cardamoms to get 1/4 tsp powder. (The skin can be added to tea for great flavour.)

Broken Wheat sweet khichdi | Gonva Khana Khichidi

Usually, I don’t time my recipes according to festivals as my blogging depends on the time I get after my household works along with taking care of two kids. But this time it is different. With the encouragement I got from my readers for my previous posts, this sweet recipe is definitely worth spending my sleep time on, just to post for Vijaya Dashami. Thank you readers! Without you to read this, I will never be motivated to write. ❤️

The significance of Vijaya Dashami has two stories from the Indian mythology. One is the killing of Ravana by Lord Rama and the second is the killing of Mahishasura by Goddess Durga, both of which are celebrated on this auspicious day signifying the victory of righteousness and goodness over evil.

My heartfelt prayers to God on this occasion is to not allow the bad qualities in me take over the good qualities at any moment and also let me not hurt anyone knowingly or unknowingly. As I write this, I know it is difficult as we are all humans and make mistakes. But if we continue praying, God will definitely help us overcome everything in life. We just need to leave everything to him and trust him. As my Amma says, do good and be good, that’s all we can do. Whatever has to happen, will happen according to God’s will and we can’t change it. Once we understand this, we are at peace.

On this spiritual (and a “letting out my heart” 😁) note, I would like to wish all of you a very happy Dussehra or Vijaya Dashami. Hope you all try this easy sweet which is loved in my family. May the sweetness always remain in your lives and may it be filled with happiness.

RECIPE:

Ingredients:

1 Cup Broken wheat/ Gonva Khan/ Daliya/ Lapsi

1 Cup Jaggery (powder or grated)

About 4 Cups hot Water

1/2 Cup thick Coconut milk *check notes

2 Tbsp Ghee

About 8 to 10 Cashews

About 2 Tbsp Raisins

1/2 tsp Cardamom powder

Step by step recipe:

1. Heat ghee in a pan and add cashews and raisins. Fry till the cashews turn light brown and raisins plump up.

2. Add broken wheat and roast for a minute.

3. Now, add 2 Cups hot water (at first) and cook till it absorbs all the water. Then, add 1 Cup hot water and 1 Cup more if needed, along with 1/2 Cup coconut milk.

4. Cook till the broken wheat turns soft and swells.

(Took 4 Cups water for me in total for 1 Cup broken wheat. Might vary depending upon the variety of broken wheat.)

5. Now add jaggery and mix well.

6. Keep stirring and cook till the mixture leaves the sides of the pan. Add cardamom powder.

7. Remove and serve hot with banana slices as garnish if you have.

Notes:

* The only time consuming part while making this khichdi is for the broken wheat to cook fully. Add 2 Cups of hot water first and then 1 Cup each time while checking if the broken wheat is cooked or not.

* When it cooks fully, it will swell in size and you can no longer see it white grain like but will be very soft.

* For me, 1:4 ratio of broken wheat: hot water worked perfectly to get soft yet thick texture of khichdi. If you like a little thin texture of Khichdi, then you can increase the water content.

* I add this khichdi to a plate and cut into squares. It cools down and sets, giving perfect slices. You can serve that way too if you like.

* Coconut milk gives it the richness in taste. I make Coconut milk using coconut milk powder. You can use fresh coconut milk as well.

Mango Kesar Peda | Easy Peda recipe

Click on the image to save the recipe on Pinterest

As our most prominent festival Navaratri is approaching, I decided to share some sweet recipes which I make regularly during festive occasions. One among them is this Mango Kesar peda which is our favourite (especially mine as I love mangoes and sweets. So this is a heaven made match for me ❤️❤️)

Navaratri during childhood meant pooja days in Kerala as books were kept in front of Goddess Saraswati for blessings and we would take it on the 10th day ie on Vijaya Dashami day. {I would actually be more happier that pooja days meant no school and no studies too. 😀😀}

After marriage, in my husband’s home, they follow satvik meals all through the 9 days of Navaratri and don’t eat onion or garlic. On Vijaya Dashami day, there is a family get together and we enjoy a “navve javan” or new meal meaning we are celebrating a new beginning. We prepare huge number of dishes and eat them together while chattering our hearts off. {Yes, they all are as talkative as me and I am their leader “Ammi” as they call me! 😀}

We usually take vacations to India during this time to be with the family during “navve javan”. This will be the first year we will be missing it due to Covid situation.

Anyhow, I hope to celebrate the Navaratri days and Vijaya Dashami by making sweets, enjoying simple satvik meals and most importantly remembering Goddess Durga in all her forms. Essentially, celebrate to remember that good always triumphs. So, never let your goodness diminish even in difficult times and keep praying.

So here is the recipe for the peda. Hope you all try and love it too. Happy cooking! Shubh Navaratri and Vijaya Dashami to all of you! 🙏

RECIPE:

Ingredients: {Makes about 12 pedas}

1 1/2 Cups Milk Powder ( full fat milk powder)

1 Cup thick Mango Pulp (fresh or canned) * I use Mother’s recipe brand of Alphonso mango pulp

2 Tbsp Jaggery powder ( can skip if using sweetened mango pulp)

1 Tbsp Ghee

1/4 tsp Cardamom powder (optional)

Saffron strands to garnish on top of the peda

{ I have doubled the measurements in the below pictures and hence the quantity seems so much. It yielded me 24 pedas.}

Step by step recipe:

1. Take milk powder, mango pulp and jaggery powder in a bowl.

2. Mix well using a spatula so that the mixture is free from lumps.

3. Heat ghee in a non stick pan and add this mixture. Keep the flame on medium.

4. Keep stirring on medium flame till the mixture starts to thicken and leaves the sides of the pan. Add cardamom powder and mix well. Takes about 8 to 10 mins.

5. Remove from the flame and allow it to cool completely. Take a small ball of the mixture and press between your palms to bring to the shape of the peda. If you find it difficult to shape them, grease your palms with ghee and they will come out well.

6. Repeat the same with the rest of the mixture. I also made some small pedas for my kids as it looks cute to them. Garnish with saffron strands.

Click on the image to save the recipe on Pinterest

Notes:

* This ratio of ingredients lead to very soft pedas. If you like slightly harder pedas, then reduce mango pulp to 3/4 Cup instead of 1 Cup.

* I used regular milk powder available at grocery stores. I live in Qatar and the brands available here are local to this region. You can use Nestle milk powder or any full fat milk powder.

* The mixture will be very soft when hot. It will turn hard as it cools down. For quicker hardening of the mixture, you can refrigerate the mixture for some time and then form pedas. The pedas will harden as they are kept in room temperature.

* I refrigerate them in an airtight container so that they last well. They last well till 4 days if handled well. Mine got finished off by then.

* I have used both sweetened mango pulp and unsweetened ones to make this. Sweetened mango pulp does not need the addition of jaggery while unsweetened ones requires the little amount of jaggery powder.

* Be careful to stir the mixture on medium flame as high flame can burn the mixture.

* You can also add saffron strands into the mixture but I prefer to garnish as they look pretty.

Update: I am getting many messages about what other option is available for those who don’t have mango pulp. If mango pulp is not available, there is another peda which I make with milk powder and condensed milk. For 1 tin condensed milk ie 397 grams, mix 1 and 1/2 Cups milk powder. Heat ghee and add Kesar. Pour this mixture and cook till it leaves the sides of the pan. Then make pedas. Though it’s not as healthy, tastes very delicious. I have made this peda many times and it comes out perfect each time.

Wheat Banana pancakes | Snack idea for kids

My daughter gets attracted by fancy names and few months back, she came to me saying “Amma, I want pancakes!”. She had seen it in some video. I told her pancakes are nothing but our dosas, just sweet version of it like our amchi Surnalis. She just would not accept it and wanted me to make the original pancakes for her.

So, I had to look up for pancake recipe (since I had never made nor eaten it before) but found it rather unhealthy with maida (which we never buy) and sugar. So I substituted it with wheat flour and jaggery. It came out very well and she was very happy to see it. ❤️

From that day onwards, when she’s hungry, she asks me to make these pancakes. I have improvised it by adding bananas to it too as it helps me finish off the over ripe bananas (who stare at me to use them up 😁) and also makes the pancakes more nutritious.

My 2 year old son too loves it a lot and it fills my heart with happiness when I see them eating together dipping the little pancakes in honey and eating with their tiny hands. Beautiful memories which will be in me forever. ❤️

Hope you all try and love these pancakes too. Happy and healthy cooking!

RECIPE:

Ingredients: {Makes about 18 to 20 small pancakes}

2 Cups Whole wheat flour/ Atta

1 Cup mashed overipe Bananas

1/4 Cup Milk

1 Tbsp Jaggery powder (optional)

1/4 tsp Baking soda (skip if making for kids aged less than one year) * check notes

Salt to taste

Step by step recipe:

1. Add the mashed bananas and jaggery powder in a bowl. Mix well.

2. Sieve wheat flour, baking soda and salt in the same bowl.

3. Add milk and water to form a smooth, thick, lump free batter of slightly thick consistency.

4. Heat a flat pan and when it gets hot, pour the batter using a spoon onto the pan making small pancakes as shown.

5. Cover and cook on medium flame till the surface cooks. Add ghee over it.

Note: Be careful to cook on medium flame as high flame can cause the pancake to turn black underneath due to bananas.

6. Flip gently and cook for couple of minutes.

7. Remove and serve with bananas, butter and honey.

Notes:

* I make these pancakes without baking soda too and my kids love it that way as well. They don’t turn fluffy but turn out very soft like dosas.

* You can skip bananas if you don’t have. It comes out like regular pancakes.

* You can skip jaggery if the bananas are very sweet. Use overripe bananas for best results.

* I make sweet dosas similar to this. Just mix together wheat flour, jaggery and salt with water and make a slightly thick batter. Good for quick to make evening snacks for kids.

* For kids, cook the pancakes in ghee and serve with butter and honey with bananas on the side. It’s very filling and they are sure to love it too.

* Do cook these pancakes in medium flame and not high flame as it can cause it to turn black underneath.

Chocolate chip cookies | Soft and melt in the mouth cookies using wheat flour and Jaggery

I am lucky and blessed to have few of my readers who are very encouraging and comment very lovingly. One among them is Rajee D Kurup aunty who is part of the food groups that I am in. She thanks me for the recipes that I post and always asks me to take care and stay safe. It might be a small thing but it means a lot to me. ❤️

So when she requested for a cookie recipe and that too to make for her pregnant daughter in law, I just had to post one soon, just for her. 😍

This recipe belongs to Bake with Shivesh whom I admire a lot for his healthy recipes and mouth watering bakes. Do check his Instagram handle and you are sure to drool.

So here’s presenting a soft cookie which you are sure to fall in love with. Happy and healthy baking!

RECIPE: {Credits : Bake with Shivesh}

Ingredients:

1/2 Cup Ghee

1/2 Cup Jaggery powder/ Cane sugar

1 tsp Vanilla Essence

1 Cup Wheat flour or Atta (I use Pillsbury brand)

1/2 tsp Baking soda

A pinch of Salt

1/4 Cup unsweetened Cocoa powder

1 tbsp Corn flour

1/4 cup Milk

Chocolate chips as required to top the cookies

Step by step recipe:

1. Take sieved jaggery powder, vanilla essence and ghee in a large mixing bowl and mix together using a spatula till it combines well and turns fluffy. (Takes about a minute. Important step to get perfect cookies)

2. Now sieve and add wheat flour, corn flour, baking soda, salt and cocoa powder in the same bowl.

3. Combine well till they mix.

4. Now add milk and mix well till it forms a wet mixture. Refrigerate it for 15 mins.

5. Meanwhile preheat the oven at 180 C for 15 mins. After 15 mins of the mixture resting in the fridge, remove it and placed equal sized balls on a ghee greased oven proof plate at little distance from each other as shown.

Note: It is important to keep distance between the cookies as they expand while baking. Also, use ice cream scoop for scooping the dough for equal sized cookies.

6. Pat each cookie slightly with your fingers and place some chocolate chips on top as desired.

7. Bake in the center rack of the oven at 180 C for 12 to 15 mins. Mine took exactly 15 mins.

Note: Don’t open the oven door before 12 mins into the baking time or uneven temperatures can lead to the cookies not coming out right.

Look at the perfectly baked cookies 😍😍

8. Allow them to cool slightly. Remove and enjoy these soft cookies. Look at the inside. I absolutely loved the texture! ❤️

Notes:

* These cookies don’t turn out crispy but soft and melt in the mouth.

* For slightly crispy cookies, skip corn flour in the recipe.

* Remember to sieve all the dry ingredients to avoid lumps of any flour in the cookie.

* Also grease the oven proof plate very well with ghee so that the cookies don’t stick to the plate. You can use silicon mat or parchment paper instead but I prefer the good old method of greasing.

* Do remember to keep the cookies at a distance before baking as they expand well while baking.

* Use ice cream scoop for even sized cookies.

* You can skip chocolate chips if not available and make plain chocolate cookies.

I have tried to note down as much points as possible so that it’s easy for you all to follow but if you still have any doubts, either comment here or message me on my Facebook page Healthy cooking with mitha or on my Instagram handle and I would be happy to help.

Desi Tiramisu | Easy, eggless, healthy using hung curd and jaggery

Twice a week when my husband is on his day shift, he eats his lunch at his company’s “restaurant”. He calls it canteen but I call it restaurant because of the wonderful spread they put out which sounds so scrumptious especially for me as I love buffets.

So he comes back home and gives details of what he ate there (much to my dismay 😅) which includes starters, variety salads, main course dishes and my favourite part – Desserts 😍. Tiramisu is one among them and my mouth waters when I hear it. If it was before, we would have gone out and enjoyed it, but now since everything is homemade, even the famous dessert had to made at home too.

And imagine my happiness when it turns out so delicious that all my cravings got satiated. I referred a lot of recipes online and understood that many had made Tiramisu using hung curd. So I made it even healthier by using jaggery and digestive biscuits.

Main point is all these ingredients are easily available as compared to the original Tiramisu where most are exotic ingredients.

So hope you all try and love it too. Happiness is definitely indulging in this delicious Tiramisu! ❤️

RECIPE:

Ingredients:

3 Cups Hung Curd

2 Cups thick Custard

3/4 Cup powdered Jaggery or Cane sugar

For the biscuit layer:

Approx 12 Whole wheat Digestive biscuits

4 tsp Instant coffee powder mixed with 2 Tbsp water (or as needed)

For dusting: 2 tsp Cocoa powder or grated chocolate

Step by step recipe:

1. For making hung curd, follow the stepwise pictorial that I have shared here.

2. For making custard, follow the instructions given in the packet of custard powder. In my packet it said, take 500 ml of milk and boil it with 2 Tbsp of sugar. Mix 2 Tbsp Custard powder with 2 Tbsp Milk so that it is free from lumps. Then add the boiling milk to the custard paste while whisking well (off the flame). Then heat the mixture on low flame till the custard turns very thick. Cool it completely. This gave me 2 Cups of thick Custard.

3. For the Tiramisu, take hung curd, the cooled custard and sieved jaggery powder (remember to sieve) in a bowl.

Note: Check how thick I have made the custard. It should resemble hung curd texture. Only then you will get a perfect tiramisu.

4. Mix well using a spatula so that they are combined well. Keep aside.

5. Now mix together instant coffee powder with water to make a coffee solution. Dip the digestive biscuits one by one and arrange in a rectangular pan as shown.

6. Keep two layers of biscuits in the bottom most layer so that it gives a good base while cutting the Tiramisu. Now layer with the hung curd mixture.

7. Again layer with biscuits dipped in coffee solution.

I did not waste the broken biscuit too 😅

8. Again layer with the hung curd mixture. Refrigerate overnight or for about 10 to 12 hours to get perfectly set Tiramisu.

9. After it sets, dust with cocoa powder using a sieve and serve. Too delicious for words! ❤️

Notes:

* Be careful to get the texture of the hung curd and Custard really thick. Else you won’t get perfect texture of Tiramisu.

* Although regular Tiramisu uses cream, sugar and mascarpone cheese, we found hung curd, custard and jaggery combination works superbly well and gives such a delicious Tiramisu which is a lot healthier too.

* Also substituting with digestive biscuits makes it so healthy and undoubtedly tasty too. Don’t forget to dip it in instant coffee solution.

* The layers are: Biscuit layer 1, Biscuit layer 2, Hung curd layer 1, Biscuit layer 3, Hung curd layer 2. After chilling cocoa powder dusting or chocolate gratings.

* I usually make this at night and it sets perfectly by next day afternoon.

* The slices are not super perfect but the taste and texture is. I can guarantee you will love it. We just could not have enough of it. So delicious! Just look at the layers. 😍

I have tried to note down as much points as possible so that it’s easy for you all to follow but if you still have any doubts, either comment here or message me on my Facebook page Healthy cooking with mitha or on my Instagram handle and I would be happy to help.