Tag Archives: wheat flour

Peanut Butter Cookies |Eggless, whole wheat, easy

Click on the picture to save the recipe on Pinterest

Finally after many months of break, I am back with blogging. Had been to India for vacation and after that, my kids were home as it was their summer holidays. Once school started, my daughter had her half yearly exams ( which seems like my exams 😂). Now that it’s over, I feel free and can sit at peace to write when the kids go to school.

During my visit to India, I got few ingredients which are not easily available here in Qatar (atleast I have not found it in supermarkets) – Coconut Sugar, Palm Sugar and sugar free peanut butter. Once I returned to my kitchen, I have been using them in my cooking and love how natural it tastes as compared to refined sugar.

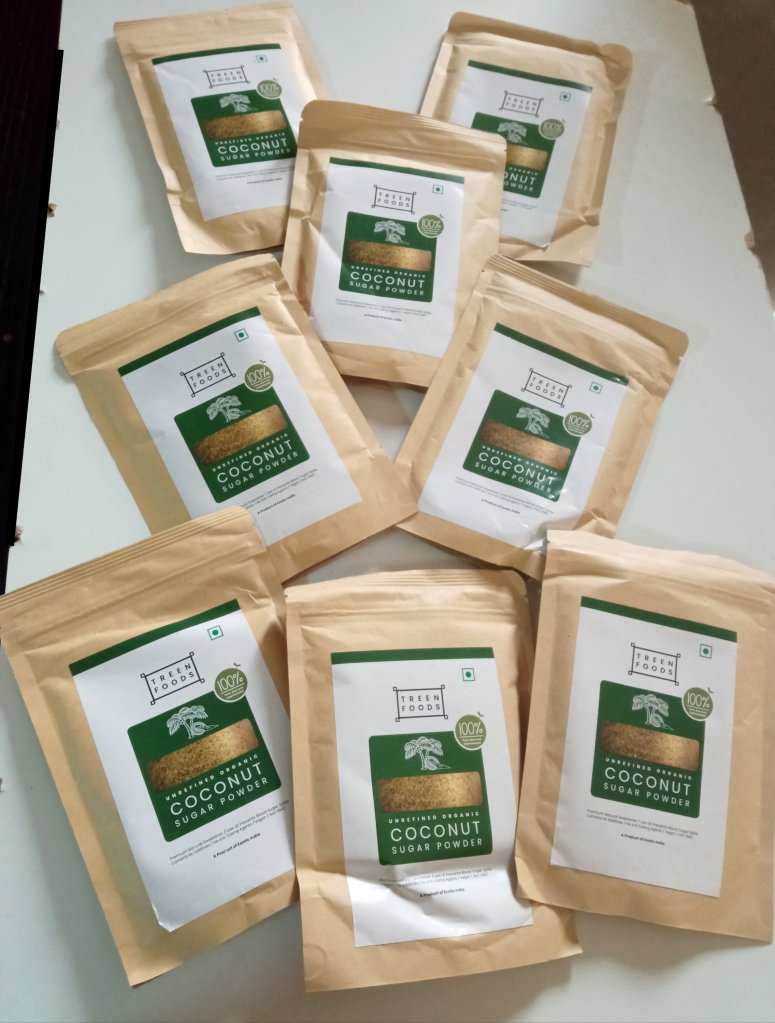
You can see my coconut sugar haul here from Treen foods . Love their sustainable packaging too in environment friendly paper.

The man behind this brand, Mr Brijesh Sereno explains about their Coconut Sugar and how it is different from others,

A Unique gentle processing method ensures nutrient retention, cleanliness, consistency, and enhanced absorbability for a pure and effective product.

Crisp Note on Health benefits of Coconut Sugar :  In addition to vitamins and minerals like iron, zinc, calcium, and potassium, coconut sugar contains inulin, a prebiotic fiber that supports a healthy gut microbiome, contributing to strengthened immunity.

At first I used it in my wheat pancakes substituting jaggery with coconut sugar and the kids loved it a lot. So I went ahead and started using it in baking too. Since I had requests for peanut butter cookies from my readers, I decided to use coconut sugar in these cookies too and it felt so good to see the cookies taste heavenly.

I have been baking Peanut butter cookies with coconut sugar regularly now and thought it’s high time I share the recipe with all of you too. Hope you all try and love it as well. Happy and healthy baking ❤️

RECIPE: 1 Cup = 240 ml

Ingredients: { Makes about 14 cookies }

1 Cup Whole wheat flour ( atta )

1/2 Cup sugar free Peanut Butter

3/4 Cup Coconut Sugar ( or Jaggery powder or brown sugar or cane sugar)

75 grams or 5 Tbsp Salted Butter

1/2 tsp Baking soda

* 2 Tbsp Milk, only if needed

Step by step recipe:

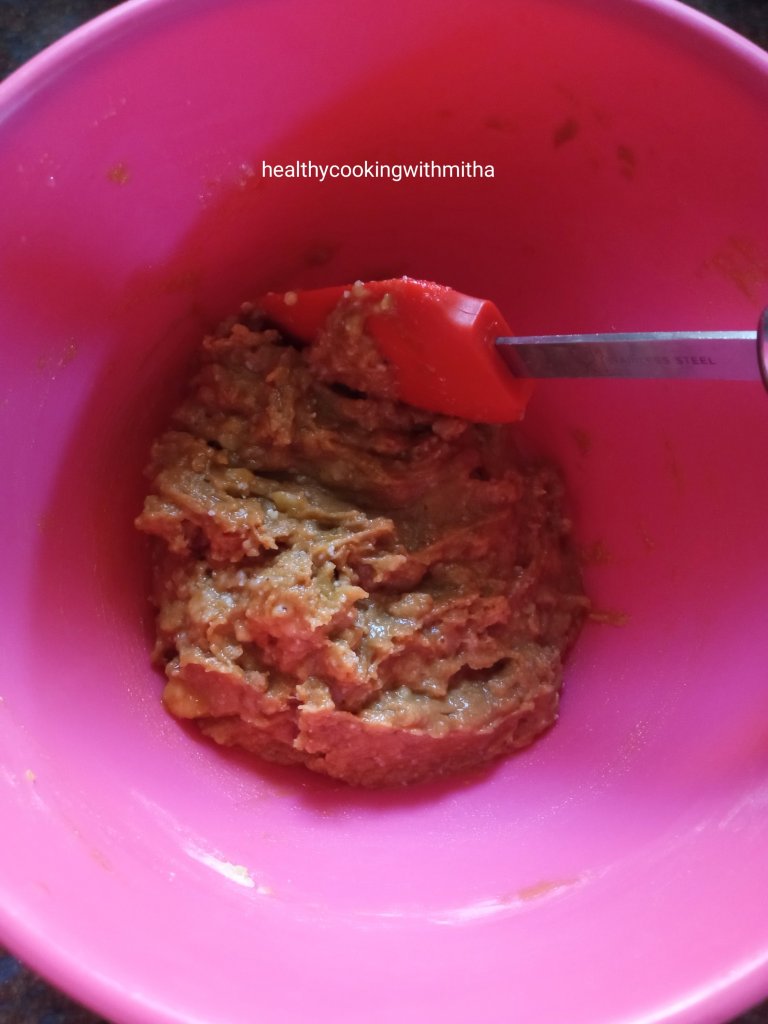
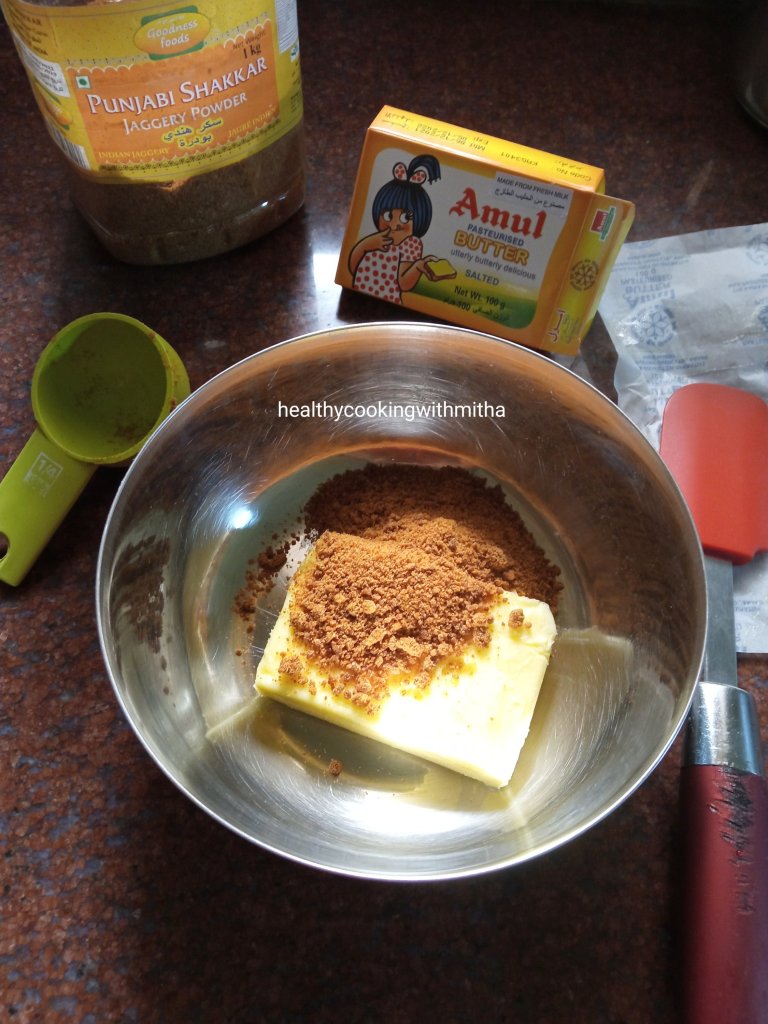
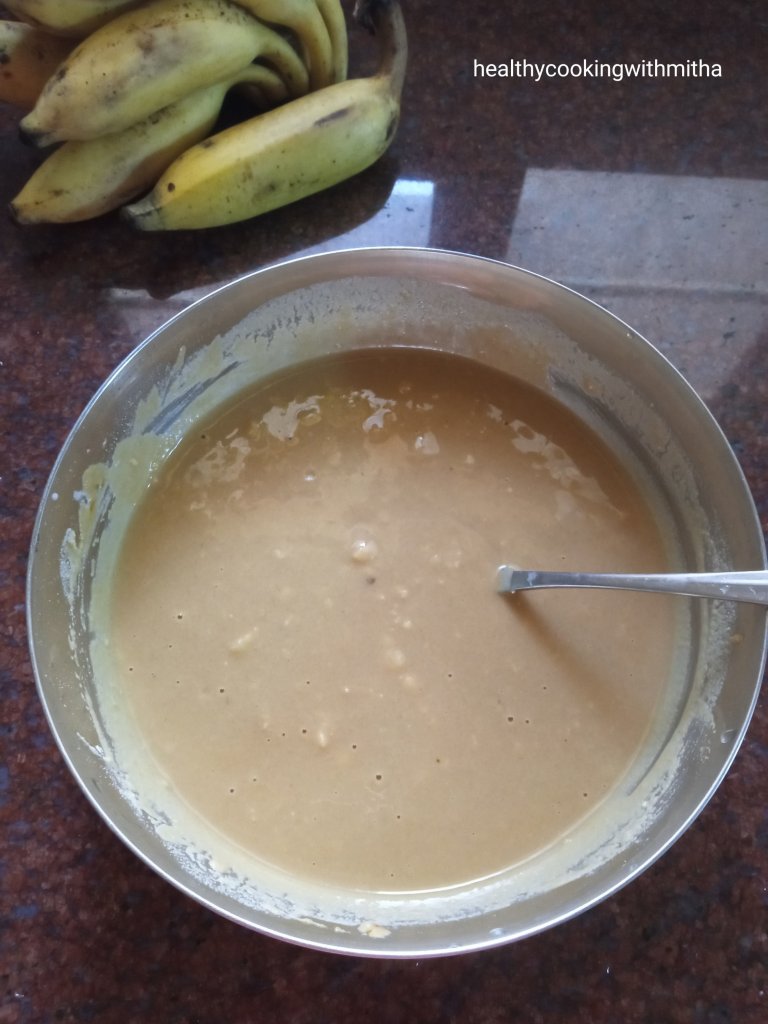
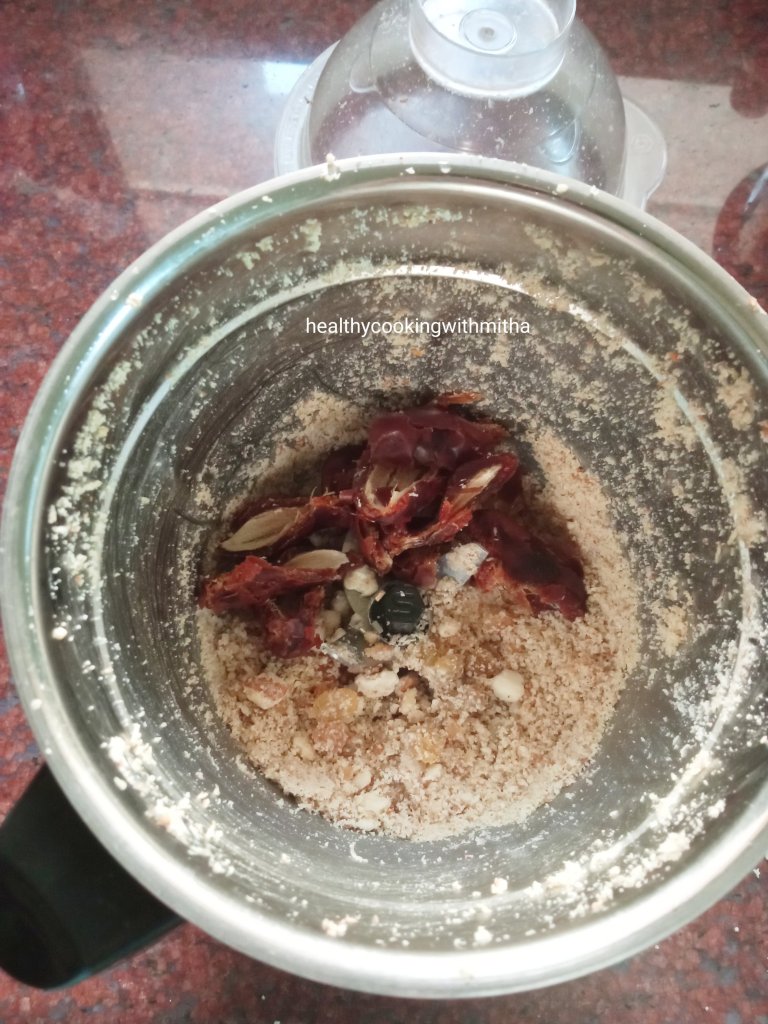
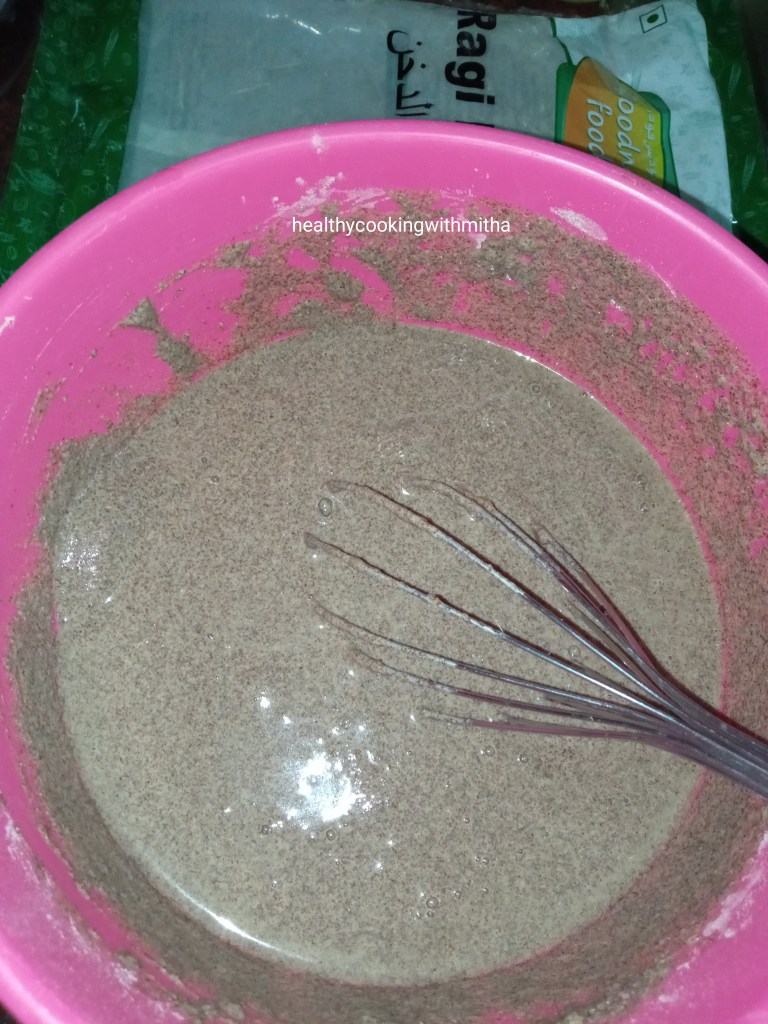
1. Keep butter at room temperature for a while till it turns soft. Don’t melt it. Just let it turn soft at room temperature. Now add peanut butter and coconut sugar to this.

2. Now mix together well with a spatula till the butter mixes well with peanut butter and coconut sugar.

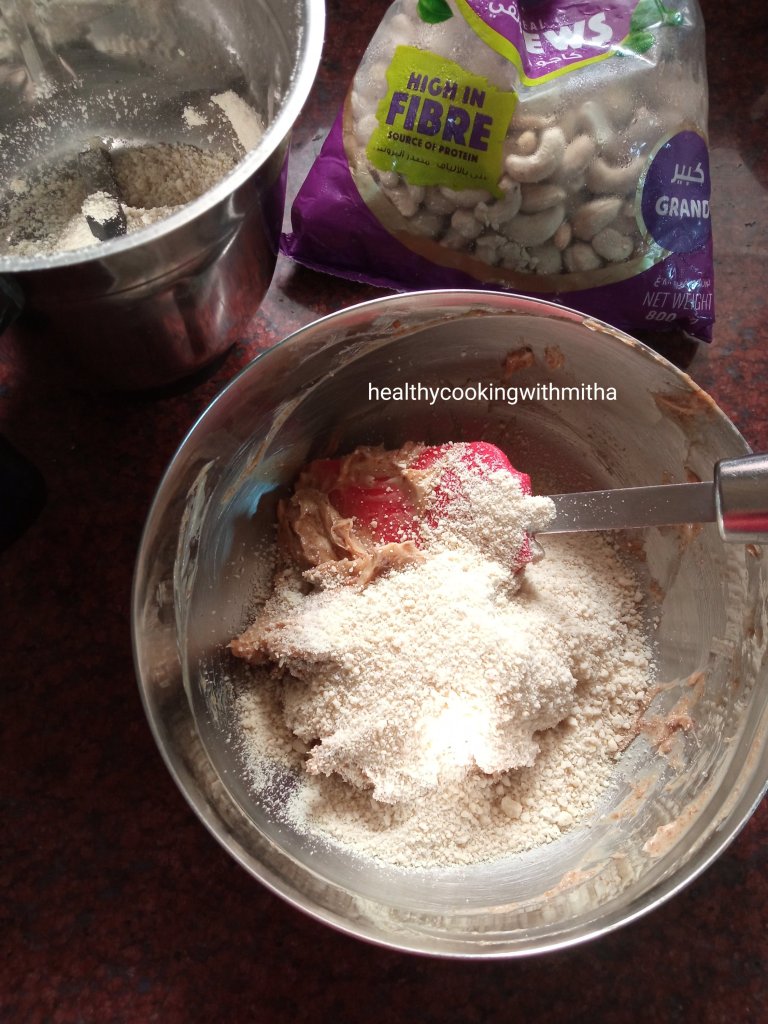
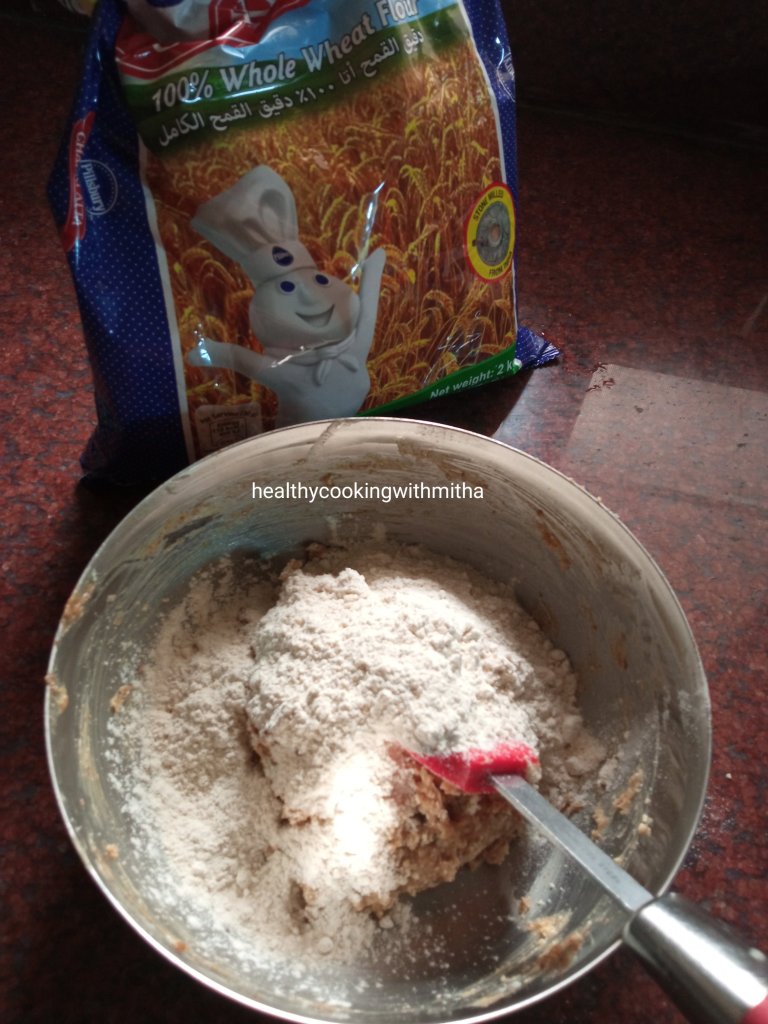
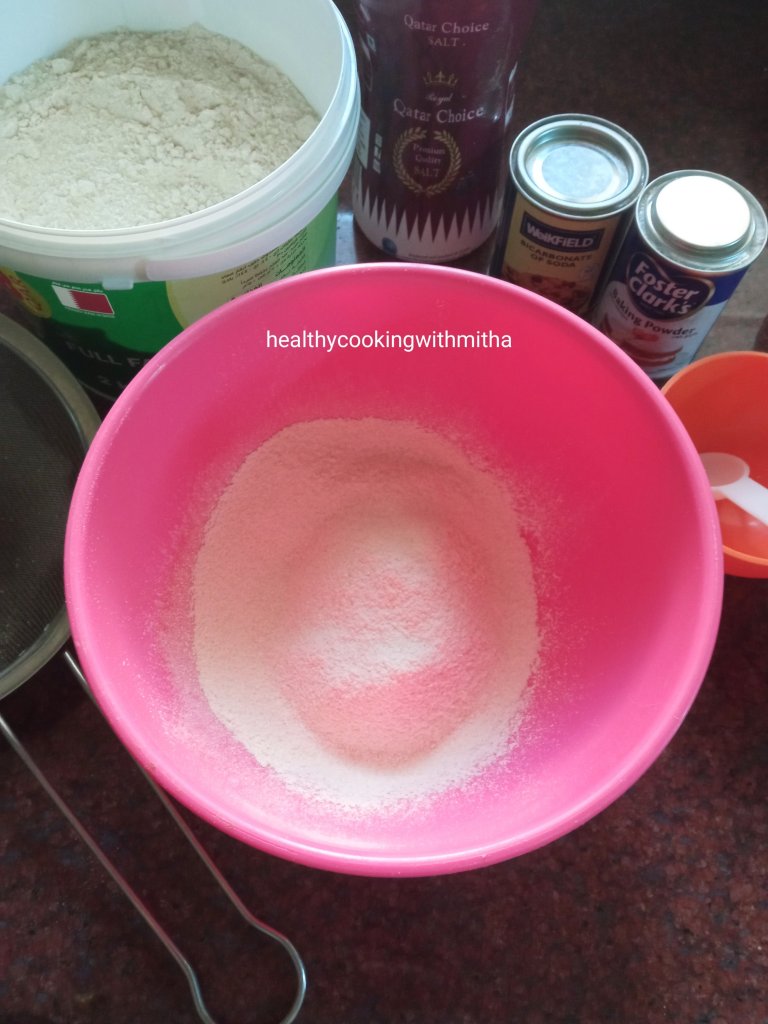
3. Now sieve wheat flour and baking soda into this mixture.

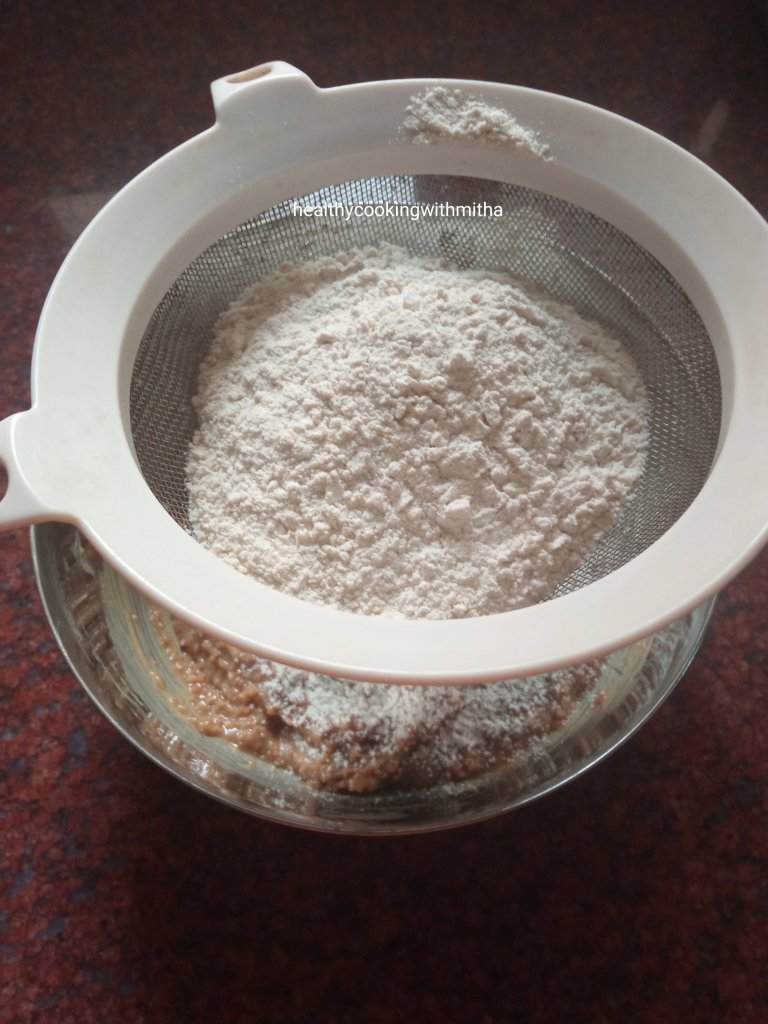
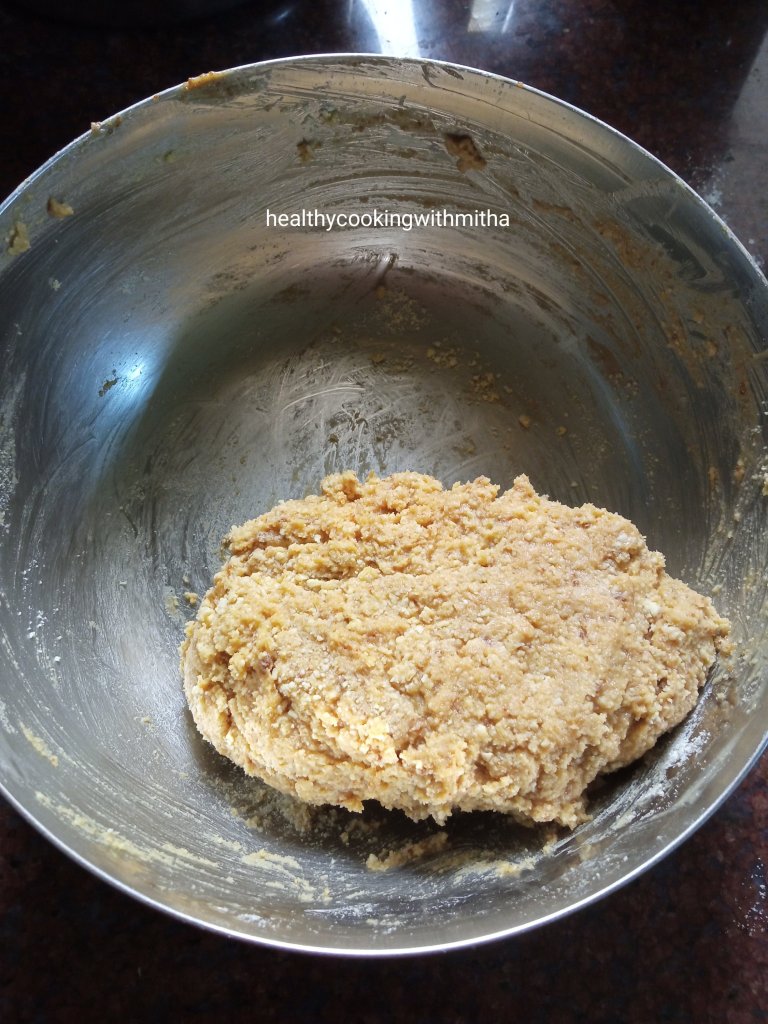
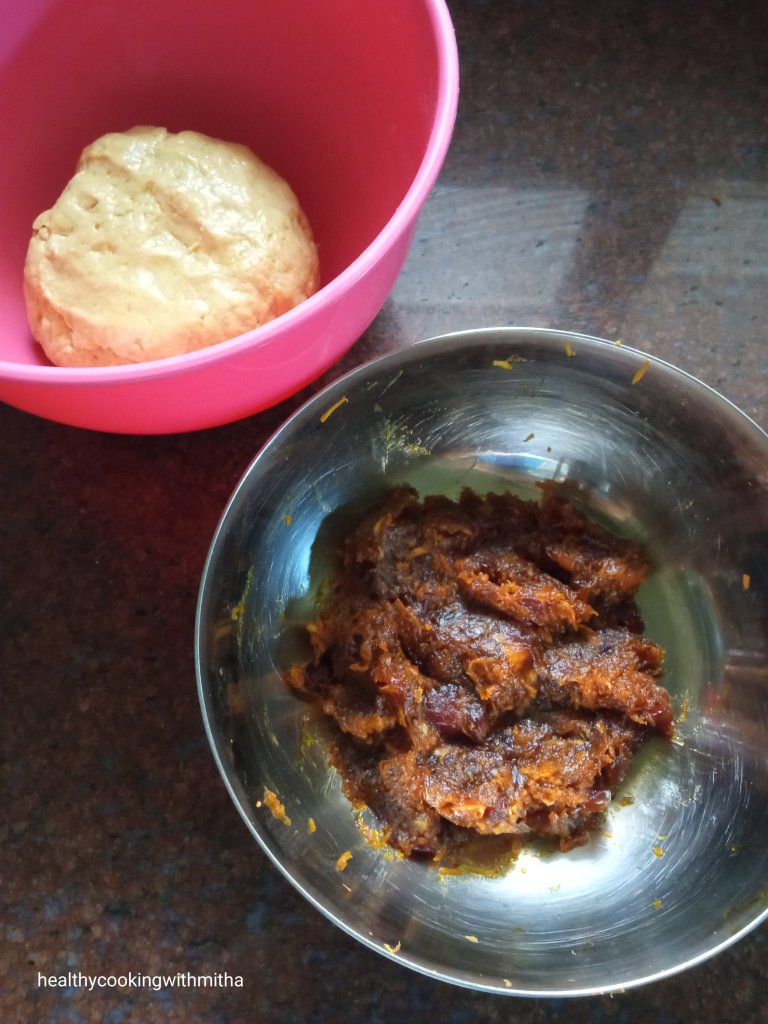
4. Mix well with hands or use a spatula till it forms a soft dough. At this stage, if the dough is hard, add one to two Tbsp of milk to make it soft. Else if it is soft and sticky, let it be that way. We have to refrigerate it anyhow.

5. Refrigerate the mixture covered for about 10 mins.

6. Now preheat the oven at 180 C for 10 mins.

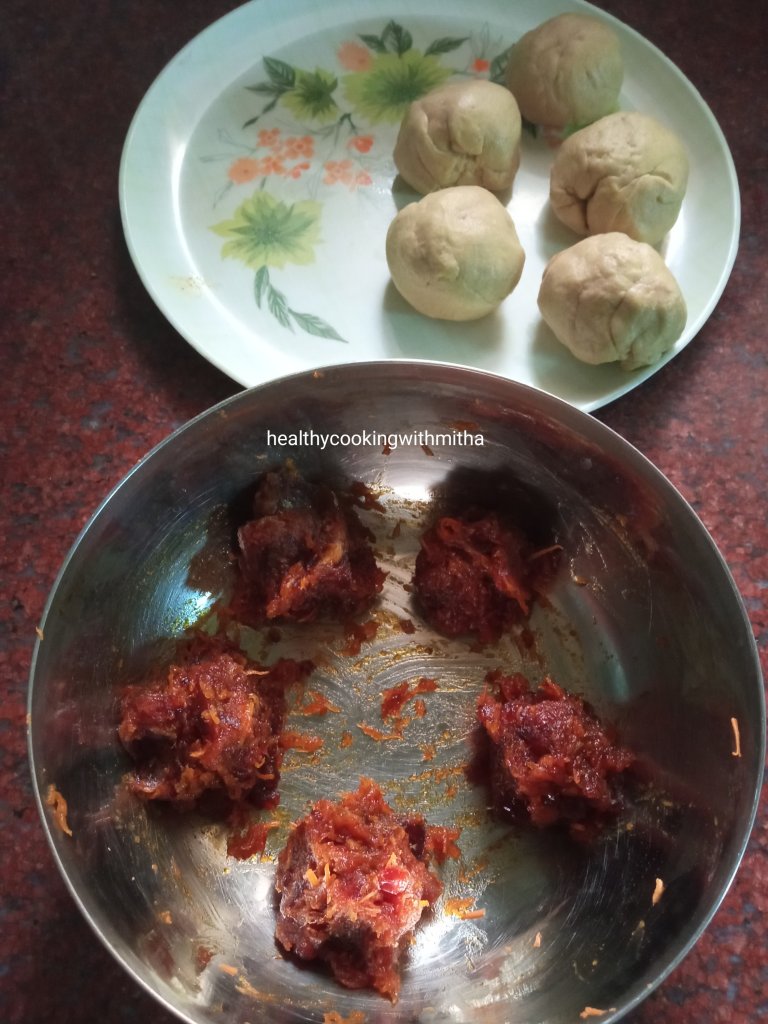
7. Meanwhile line a baking tray with parchment paper (baking paper) and take small portions of the cookie dough, form balls using palm, then place them equidistant, keeping enough place for them to expand.

While placing, just press lightly using fingers and then make marks using fork as shown.

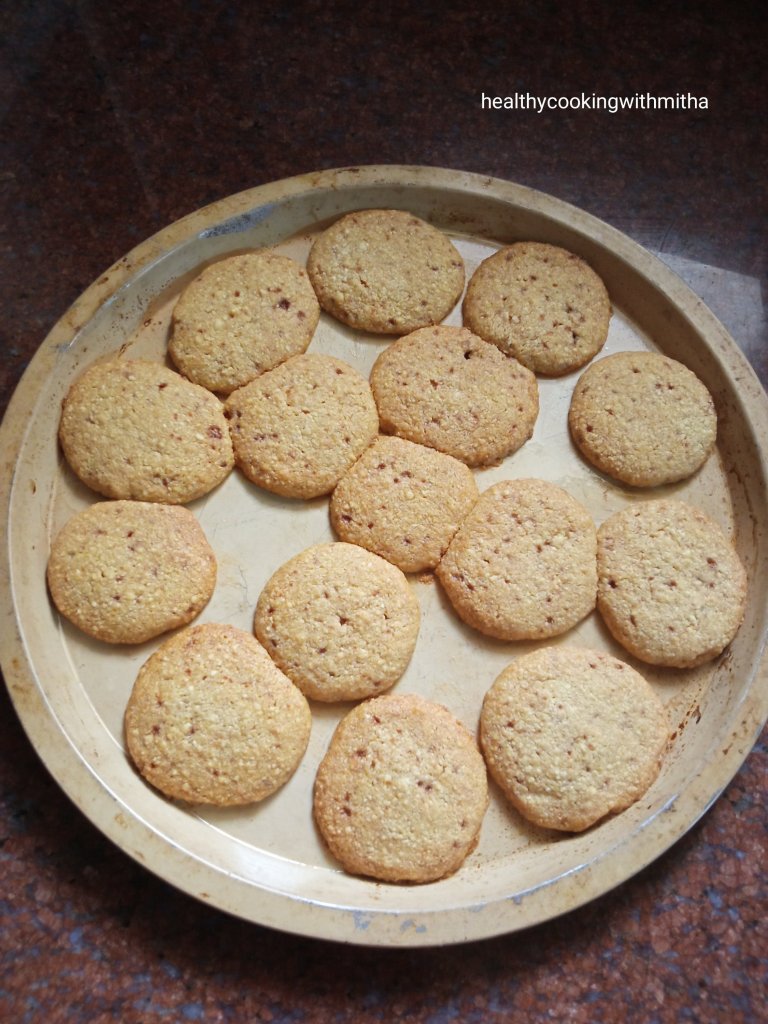
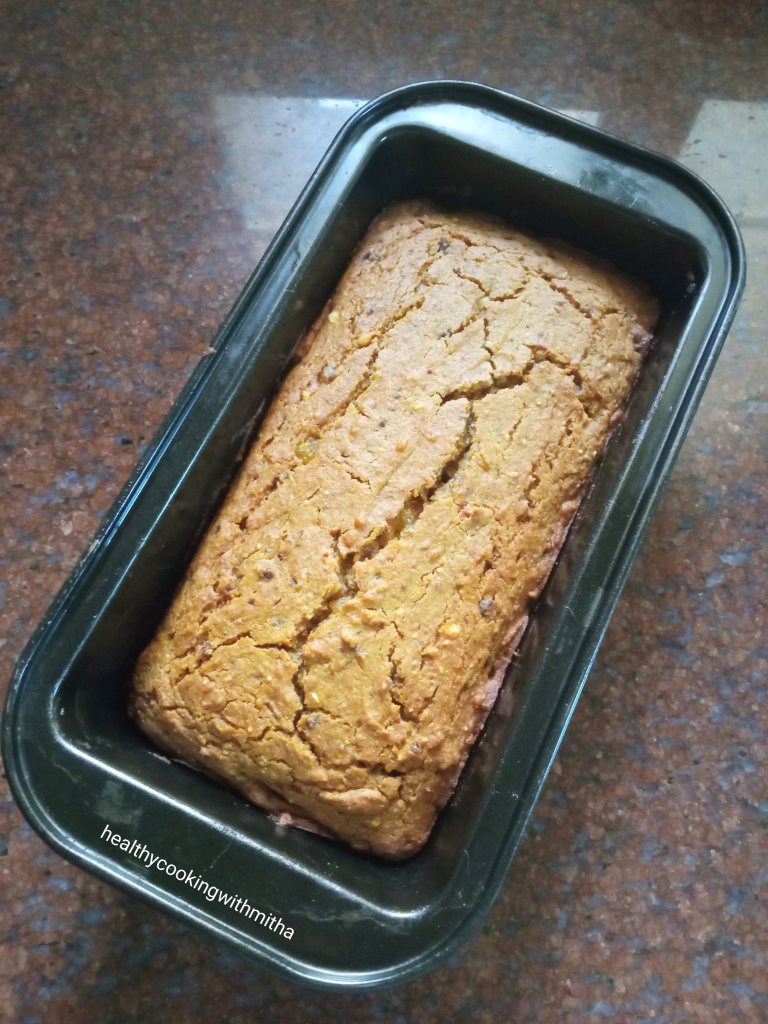
8. Bake at 180 C for 10 mins in the center rack of the oven with both rods turned on. Keep an eye after 8 mins as every oven is different. Once the center turns slightly hard, edge of the cookie starts turning dark brown, the cookie is done.

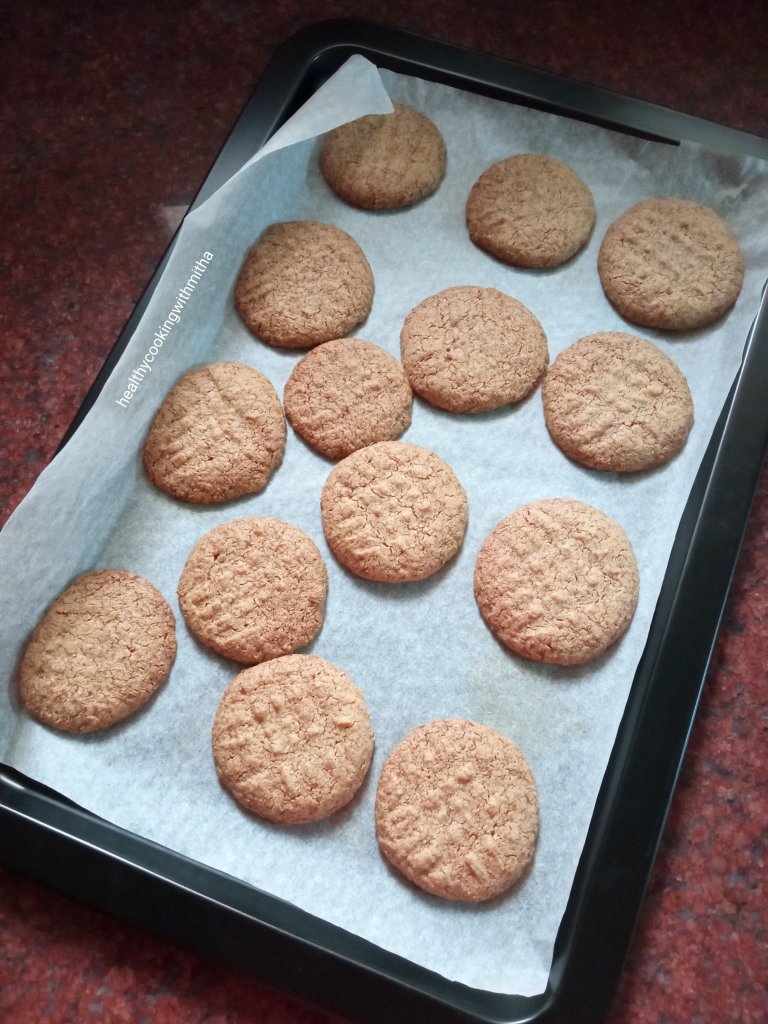
9. Allow it to cool completely. It will harden as it cools and turn crisp. The texture of this cookie is similar to biscuit. Store it in a container and enjoy the cookies.

Notes:

* I used sugar free Pintola brand creamy peanut butter which I got from Amazon when I visited India. Loved how even without sugar, it tasted so yum as a spread. In these cookies too, the peanut butter adds such a wonderful flavour.

* The best advantage about using sugar free peanut butter is that you can use the sweetener of your choice in these cookies. I have used Organic Coconut sugar from Treen foods which I ordered from their website https://treenfoods.com/. I have been using this unrefined sugar for many months now and love its flavour and also how healthier it is as compared to refined sugar.

* You can substitute coconut sugar with jaggery powder or brown sugar in this recipe.

* As mentioned in the step by step recipe, add milk only if needed. If peanut butter has liquid content in it, the mixture will not be dry and you won’t need to add milk in it.

* Do refrigerate the cookie dough for atleast 10 mins so that it becomes easy to make cookies.

* Space the cookies a little far from each other as they spread while baking. You can check my picture and see how I have spaced them.

* The baking time can range from 8 to 12 mins depending on your oven. So keep an eye after 8 mins. Once the colour of the cookie turns dark brown and the edges turn crisp, the cookies are done.

* If you are new to baking, you can read my article on Baking for Beginners. It covers all my tips and tricks for newbie home bakers.

* You can also check my Healthy Cakes and Cookie recipes Compilation for more healthy baking.

* Other Cookies that I bake regularly with wheat flour are:

* Cafe style Chocolate chip cookies

* Ragi Butter Cookies

* Basic Wheat Jaggery Cookies

* Almond Butter Cookies

* Cashew butter cookies

Click on the picture to save the recipe on Pinterest

Mooli Paratha | Easy Radish Paratha

Click on the image to save the recipe on Pinterest

As I have already mentioned in my last post of Methi Theplas , during Winter in Qatar ie from October to March, most residents here grow many veggies and flowers in their garden. It’s a delight to see the greenery in front of all houses, specially where we live as it’s away from the main city.

Along with my husband who loves gardening, we are lucky to have neighbours who grow and share their produce with us too. One among the veggies that grows well here is white Radish. Look at these freshly plucked ones given to me by my neighbour who grew it with love. 💚

And as usual, whenever I get any veggie, I first see how it can be fed to my kids in a way that they like it. After my success with Methi Theplas and Bottlegourd Theplas, I decided to add these radishes as stuffing into parathas and imagine my happiness when it got gobbled away by both my little rabbits. 😍😍

So nowadays, whenever I get radish, I make these Mooli Parathas with it and as it tastes same like Paneer Parathas, kids never realize, it’s a vegetable that’s going inside them.

I had to share this with all of you and hence clicked photos when I made it recently. Hope you all try and like it. Happy and healthy cooking ❤️

RECIPE:

Ingredients: { Makes about 6 Parathas}

(1 Cup = 240 ml)

2 Cups Whole Wheat flour/ Atta

3 medium sized white Radishes (3/4 Cup gratings)

2 Tbsp finely chopped Coriander leaves

1/4 tsp Turmeric powder (haldi powder)

1/2 tsp Cumin powder (jeera powder)

1/2 tsp Garam Masala powder

1 tsp Red chilli powder

Salt to taste

Ghee to cook the parathas

Step by step recipe:

1. Peel the radishes and grate it finely as shown.

2. Add salt and keep it aside for about 10 mins. It will leave all the water content.

3. Now squeeze the radish gratings and add to another bowl. Don’t discard the water. We will knead dough in it.

4. Now to the radish gratings, add coriander leaves, turmeric powder, jeera powder, Garam Masala powder, red chilli powder and salt. Mix well.

5. In the radish water, add wheat flour and knead a soft dough similar to chapati dough. Add extra water if needed to knead the dough. No need to add salt as we have already added to radish.

Now both the outer dough and inner filling is ready. Keep the Chapati dough for rest for about an hour before making parathas. Till then, it’s best to refrigerate the filling in case it leaves water.

6. To make Parathas, divide the chapati dough into equal, medium sized balls. Take one of the ball and dip it in dry wheat flour. Roll it into a small sized thick chapati and add a spoon of filling inside, in the center as shown.

7. Cover it by folding the edges and sealing it using the dough in the sides.

8. Dip again in dry wheat flour and roll as thin as possible, ensuring that you don’t give much pressure as the filling can come outside.

9. Now heat a pan/ tawa and place the paratha over it. Fry both sides using ghee till it browns and cooks well.

10. Serve with raita, chutney or pickle. Tastes so yum!

Notes:

* Remember to add salt and keep the radish gratings for atleast 10 mins so that all the water gets let out and you don’t get a soggy filling.

* Don’t discard the water and knead the wheat flour in it so as to not waste the nutrients in the radish water.

* While keep the dough to rest, refrigerate the filling so that it does not leave out water. In case, you feel the mixture is wet, you can add little crumbled paneer so that it absorbs the extra moisture from the filling.

* You can add the masalas which you like to the filling. I like which my family prefers. You can also add finely chopped green chillies to the filling.

* You can also check my other Paratha/ Thepla recipes:

Alu Paratha

Bottlegourd Theplas

Methi Theplas

Click on the image to save the recipe on Pinterest

Eggless Wheat Banana Cupcakes | Healthy muffins | Easy recipe

Click on the image to save the recipe on Pinterest

I have been baking cakes and cupcakes with wheat flour, jaggery and ghee since many years now and I am happy to say that my kids too have got so much used to this flavour that they love it much more than store bought maida based cupcakes. I bake them for their school tiffin box and also as an evening snack before they go out to play. ❤️

Now that they are at home whole day (demanding for food quite often 😅), my cooking has also increased and while I was about to make these banana cupcakes, I realized I had not shared the recipe on the blog. So quickly took some pictures and here I am writing this recipe while they are enjoying the cupcakes. ❤️

Cinnamon gives a wonderful aroma and flavour to these cupcakes and that makes these cupcakes super tasty too. They come out so soft too and you can never say it does not have eggs in it.

Hope you all try these delicious, filling cupcakes too and I am sure you will love it too. Happy and healthy baking! ❤️

RECIPE:

Ingredients: { Makes 6 medium sized muffins }

1 Cup = 240 ml

Dry Ingredients:

1 Cup Whole Wheat flour / Atta

1/4 tsp Cinnamon powder (or Vanilla essence)

1/4 tsp Baking soda

A pinch of salt

Wet Ingredients:

1/4 Cup Mashed Bananas ( I took 2 small overripe Indian bananas)

1/2 Cup Jaggery powder

1/4 Cup Water

1/4 Cup Ghee

1 tsp Vinegar (or lemon juice)

Step by step recipe:

1. Sift together using a sieve 1 Cup wheat flour, 1/4 tsp Cinnamon powder, 1/4 tsp Baking soda and a pinch of salt. Keep aside.

Note: If using Vanilla essence, you can mix with wet ingredients.

2. In another mixing bowl, take 1/4 Cup mashed bananas, 1/2 Cup Jaggery powder, 1/4 Cup Water, 1/4 Cup Ghee and 1 tsp Vinegar. Mix very well using a spatula.

Note: I mashed two overripe Indian bananas and got 1/4 Cup of mashed bananas. Even if you use three Indian bananas, it’s fine. Cupcakes will come out well. Just take care to mash really well.

3. Now add the dry ingredients mix to the wet ingredients mix and fold using the spatula. Do NOT overmix. Just mix so that you don’t see any dry flour specks in the mixture.

4. Preheat the oven at 180 C for 10 to 15 mins in the center rack of the oven. If using microwave convection oven, choose the option of turning both rods on.

5. Meanwhile line the muffin pan with liners or just grease well with ghee or butter. Add a spoonful or two of the batter into each mold.

6. Bake at 180 C for 18 to 20 mins. Mine gets done exactly at 18 mins. Keep an eye after 15 mins into baking time so that the cupcakes don’t turn brown on the surface. Allow them to cool and then enjoy!

Note: To check if done, insert a toothpick in the center most cupcake. If it comes out clear or with tiny crumbs and is not wet, then the cupcakes are well baked. If it comes out wet, bake for few minutes more.

Click on the image to save the recipe on Pinterest

Notes:

* These cupcakes lasts well at room temperature for a day. Just keep in a moisture free container. After a day, refrigerate it and then microwave for few seconds before consuming.

* I have used 1/4 Cup mashed Bananas to 1/2 Cup mashed Bananas in this recipe and it does not make much difference. It depends on how many overripe bananas I have. If I have two, I add two and if I have three, I add all three. Just make sure to not increase the quantity more than 1/2 Cup though.

* I recommend using Cinnamon powder for this recipe as it gives such a wonderful aroma and flavour. But if you don’t have, you can use vanilla essence or even Cardamom powder too.

* Always remember to sieve the dry ingredients to get soft muffins, specially when using whole wheat flour.

* Ghee can be substituted with melted butter, Jaggery can be substituted with brown sugar or regular sugar and Vinegar can be substituted with lemon juice, all of same quantity.

* Don’t overmix both the dry and wet ingredients. Just mix well once. Overmixing can lead to hard muffins.

* Preheating the oven before placing the muffin pan is a very important step. Don’t forget it. Preheat at 180 C for 10 to 15 mins.

* Bake in the center rack of OTG or with both rods on in a microwave convection oven. Keep an eyes after 15 mins into baking time but don’t keep opening oven door before that. Mine gets done exactly at 18 mins in OTG.

* To check if done, insert a toothpick in the center most cupcake. If it comes out clear or with tiny crumbs and is not wet, then the cupcakes are well baked. If it comes out wet, bake for few minutes more.

* You can give this to kids as evening snack or in their tiffin box for a filling, tasty treat.

For more Healthy cakes, cupcakes and cookies recipes, you can check my collection:

Healthy Cakes, Cupcakes and Muffins

For Baking tips for Beginners, you can check:

Baking Tips for Beginners

More recipes with Bananas like Banana pancakes, Banana Rava Cupcakes, Chocolate banana cake:

Banana recipes Collection

Bottlegourd Thepla | Lauki/ Dudhi Thepla

Click on the image to save the recipe on Pinterest

The house is silent now, till afternoon, when my kids come back from school. I am utilizing this alone time to write this interesting, very healthy and super tasty Bottlegourd thepla recipe which I learned sometime back. Once the kids return from school, all they say is “Amma, Potta Bhook!” meaning “Mom, I am hungry!” in Konkani. 😁

So I have to keep something ready for them so that I can feed them as quick as I can. And it should be filling as well. Else in another 30 mins, it’s the same dialogue again. 😄 So, in my search for healthy snack recipes, I found this Bottlegourd Thepla which I tried one day for the hungry siblings. 😍😍

Both of them literally had a fight till the last bite while I had the last laugh as they did not realize they were eating bottlegourd too in it. 😁 Seriously speaking, you can never say it is made of bottlegourd. The taste of these soft theplas are heavenly to say the least. ❤️

So now, bottlegourd is bought weekly in our grocery shopping to specially make these theplas and I had to share the recipe with all of you too. ❤️

Bottlegourd ❤️

Do try them for a change from the regular food that we make and you are sure to be a fan of Bottlegourd theplas too. Happy and healthy cooking! ❤️

RECIPE:

Ingredients: { 1 Cup = 240 ml }

Makes about 4 Theplas

1 Cup Whole Wheat flour/ Atta

1/2 Cup peeled, cored and grated Bottlegourd/ Lauki / Dudhi / Sorekai / Chorakaa

1/2 inch Ginger piece, grated

3 Tbsp Coriander leaves, chopped

1/4 tsp Turmeric powder

1/2 tsp Red chilli powder

1 tsp Coriander powder

1 tsp Garam masala powder

Salt to taste

1 to 2 Tbsp Yogurt/ Curd or as needed

Dry wheat flour as needed while rolling

Oil or Ghee to cook the Theplas

Step by step recipe:

1. Peel, core and grate Bottlegourd. I took half of one medium sized Bottlegourd and got 1/2 Cup gratings.

2. Add it to a mixing bowl. Add wheat flour. Then add grated ginger, chopped coriander leaves, turmeric powder, red chilli powder, Garam masala powder, coriander powder and salt.

3. Mix well using hands. Bottlegourd will release it’s water and the dough will be moist.

4. Now add 1 Tbsp Yogurt and mix well to form a dough.

Note: This step is very important as if you add more yogurt, the dough will be wet and you won’t be able to roll the theplas. Add only as much as to form a dough. In case by mistake you add more yogurt, just add more wheat flour to form a non sticky dough.

5. Coat the dough with few drops of any kind of oil so that the dough becomes non sticky.

6. Now divide into equal sized dough balls. Flatten and dip into dry wheat flour. Roll as thin as you can.

Note: The shape will not be perfect round due to grated bottlegourd in it but it’s fine. Just dip into as much dry wheat flour as needed and roll.

7. Now fry both sides on a hot tawa applying oil or Ghee on either sides, cooking the Thepla really well till it turns golden brown in colour.

8. Serve hot with mango or lemon pickle. ❤️

Notes:

* Hot theplas with pickle taste the best but you can also make ahead and keep as these last for two to three days. A perfect travel food made regularly by Gujaratis.

* Do a taste test by eating a small bite of the bottlegourd before grating to see if it’s bitter. I have never found a bitter one but I have heard some do taste bitter. So I always taste before grating.

* You can also add finely chopped green chillies to thepla dough but since I make for my kids, I add only little red chilli powder.

* Knead the dough only using the moisture from bottlegourd and yogurt. Don’t add water while kneading.

* The ratio of 1/2 Cup grated bottlegourd to 1 Cup wheat flour and 1 Tbsp Yogurt gives a very soft Thepla but is slightly tricky while rolling. If you are not good at rolling, you can increase the quantity of wheat flour to 1 1/2 Cups wheat flour. The texture will be similar to rotis though.

* While rolling, use ample amount of dry wheat flour which helps in rolling easily. If using less, the dough will stick to the rolling platform.

* I used ghee to fry the theplas. You can use oil too.

* A simple mango pickle tastes the best with this Thepla. You can also make coriander chutney or raita too.

* I regularly make this Bottlegourd Halwa which tastes really delicious. You can try it as well.

Click on the image to save the recipe on Pinterest

Cashew Butter Cookies | Using wheat flour and Jaggery

Click on the image to save the recipe on Pinterest

Hello dear readers, I am back after a very long break. I know I have been taking many breaks now and then but I also know you all will understand me. I had travelled to India, to my hometown Udupi in Karnataka, last month which was after a period of 2.5 years and had a wonderful time with my Amma along with my dearest family members. ❤️

After coming back to Qatar, my kids started school, with my son joining kindergarten too. I miss the kids specially my son a lot as he was always stuck to me (fevicol ka jod 😄) but as they say, we have to accept whatever life brings and I have got accostomed to his absence in the mornings too (though I get teary eyed each time he leaves 😁 #motherhood).

When he comes back though, I get smothered with hugs and kisses from him which compensates for everything 😍😍. My daughter comes a little later and then an hour goes by with her narrating what happened at school. Her stories remind me of my younger self who used to tell each and everything to my mother after she came back from work. ❤️

When they are at school, I cook or bake something special just to see their excitement and the way they enjoy it. 😍 That’s how I baked these Cashew Butter Cookies which both the kids loved a lot.

These cookies are healthier as compared to store bought ones and very tasty too. Once you get the trick on how to make it well, it’s very easy and hardly takes 30 mins to bake a batch of cookies.

Hope you all try and love these cookies. Do let me know if any doubts and it will be a pleasure to help. Happy and healthy baking! ❤️

RECIPE: { My 1 Cup = 250 ml }

Ingredients: { Makes about 15 cookies }

100 grams Salted Butter ( 1/4 Cup + 3 Tbsp) (Add a pinch of salt if using unsalted butter)

3/4 Cup Whole wheat flour or Atta

1/2 Cup finely powdered Cashews ( + 2 to 3 Tbsp if needed)

1/4 Cup Jaggery powder

Step by step recipe:

1. Soften butter by keeping it at room temperature for little time. (Do NOT melt it in microwave or so.) Just place it at room temperature till it turns soft. Now add jaggery powder.

2. Combine both well with a spatula till jaggery powder blends with the butter.

3. Add cashew powder and mix well using the spatula.

4. Now add wheat flour.

5. Combine well to form a non sticky dough. At this step, if needed add extra cashew powder or wheat flour if the dough is very sticky. The dough should not be very hard but should not be sticky too. It sometimes takes me extra 2 Tbsp of cashew powder to get non sticky dough. Depends on your wheat flour/ butter brand.

6. Cover and refrigerate the dough for 10 to 15 mins so that the dough becomes firm. After that Preheat the oven for 180 C for 10 minutes in the center rack of the oven.

7. Now make roundels using your palm and place on a greased (with butter or ghee) oven proof plate. Grease your palm too if needed.

8. After the oven finishes pre heating, place this plate in the center rack of the oven and bake at 180 C for 12 to 15 mins. My cookies get done at 14 mins.

9. When done, the cookies turn slightly brown at the edges and are hard to touch in the center. If the cookies look underdone, bake for couple of mins more.

10. Once baked, allow the cookies to cool completely. As they cool down, they start getting firmer but these cookies are more on the soft side and not the crispy kind of cookies. Enjoy soft, melt in the mouth homemade cookies! ❤️

Notes:

* Store the cookies in a dry, air tight container and it lasts well for two to three days. Mine gets finished off by my family before that. Will last longer if handled well, free from moisture.

* They are very soft and break upon touching on warm. As they cool down, they will harden but still not very hard like store bought ones as we have used only butter. The texture is melt in the mouth softer version of cookies.

* These cookies do not need baking soda nor baking powder. They still grow in width during baking process. I too was amazed the first time I tried it as I always thought cookies needed either baking soda or powder.

Baking time depends on your oven. In some ovens, it can be done at 10 mins while in my OTG, it takes 14 mins. So keep an eye but don’t open the oven door before atleast 10 mins into the baking time. Else it will lead to uneven baking.

* Do refrigerate the dough for atleast 10 to 15 mins as it helps combine the ingredients well and also helps us form cookies well without sticking in our hands.

* Place the cookies in the center rack of your OTG or with both rods on if using microwave with conventional mode oven.

* I have not replaced butter with ghee or oil in this recipe. So can’t say about the outcome.

* I use Pillsbury brand of wheat flour for my bakes and it works very well for me.

* For making powdered Cashews, just put the cashews in a mixer and pulse it in regular intervals till it turns into fine powder. Keep checking in between so that it does not leave oil and become a paste.

* Leave space between cookie dough while keeping on the tray as they increase in width as they bake.

* When they fully bake, you can see the surface is free of raw dough and edges are slightly golden in colour. It is enough. You can remove the cookies out of the oven.

* Cashews can be replaced with Almonds like in these Almond Butter Cookies.

* You can check my Healthy Cakes and Cookies compilation for more cookies and cake recipes.

* For beginners in baking, you can check my Baking Basics for beginners post.

I have tried to note down as much points as possible so that it’s easy for you all to follow but if you still have any doubts, either comment here or message me on my Facebook page Healthy cooking with mitha or on my Instagram handle and I would be happy to help.

Click on the image to save the recipe on Pinterest

Instant Sweet Appo | Wheat Jaggery appe | Easy Sweet Paniyaram | Godu Appo

Click on the image to save the recipe on Pinterest

The bowl of sweet appes that you can see above has been finished off by my sweet 3 year old son as I write this. After I made it and gave him one, he took a bite and asked me innocently, “mmm yummy Amma, ye hotel?” 😄. I felt very happy and like a chef that my son found the appes so good that he thought they were from hotel. 😍

He wanted more and finally ate the whole bowl of it. My heart filled up as a mother by seeing him eat happily and I wanted to share my happiness with all of you too as soon as possible. So, sat to write down this blog now itself. ❤️

These appes were one among the first I learnt to make when I got the Appe pan as we have grown up eating them. My kids love it a lot and I make it regularly for them as a tasty snack. It’s so quick to make yet fills up their tummies in a healthy way. ❤️

I also want to share a glimpse of my kitchen counter with all of you today seeing which makes me very happy each day. I love arranging it and love to keep the house clean. Took this picture to send my Amma and felt like sharing with you all too. A peek into my kitchen and my favorite place in the house. 😍

The popsicle molds are my recent purchase and I am loving making new varieties of fruit popsicles each day for the kids. Their excitement while enjoying them is one of a kind. 😍 Will share the recipes when I find time. ❤️

Hope you all loved reading this blog. Do try these appes and I am sure you will love them. Happy and healthy cooking! ❤️

RECIPE:

Ingredients: { Makes about 24 small sized appos }

1 Cup Wheat flour (Chapati Atta)

1/2 Cup Jaggery powder or to taste

2 to 3 Tbsp freshly grated Coconut

A pinch of Salt

1/4 tsp Cardamom powder

1/2 Cup Milk

1/2 to 3/4 Cup water (to make the batter)

1 small Indian Banana (1/4 Cup mashed banana)

Ghee to cook the appos

Step by step recipe:

1. Take 1 Cup wheat flour, 1/2 Cup Jaggery powder, about 2 Tbsp freshly grated coconut, salt and Cardamom powder in a mixing bowl.

2. Add 1/2 Cup Milk and water (1/4 Cup each time) to make a slightly thick lump free batter. It takes about 1/2 Cup to 3/4 Cup water to make this batter depending on the brand of wheat flour and how much water it absorbs. The consistency should be neither very thin nor very thick. It should be thicker than dosa batter.

3. Now add the mashed banana to the batter. Mix well. I add 1 small Indian Banana which is 1/4 Cup when mashed.

4. Now heat the Appe pan and when it becomes hot, reduce the flame to medium. Now add a drop of ghee in each of the holes of the pan. Add one spoonful of batter in each of them. Don’t keep the flame on high as the appes may turn black in colour. Always keep the flame on medium to get golden coloured appes.

5. Cover and cook for a minute or till the surface looks slightly cooked.

6. Flip and cook for a minute again.

7. Serve them warm or at room temperature. Tastes so yum! 😍

Click on the image to save the recipe on Pinterest

Notes:

* You can skip banana if you don’t have but trust me, these appes taste really heavenly with the banana flavour and the slight bite of bananas in them.

* If you are not adding bananas, you will need to add a pinch of baking soda to help the appos fluff up. I don’t like to use soda and hence I add bananas everytime while making appos.

* This is how I make Wheat banana pancakes too. So you can use appe batter to make pancakes.

* The measurements I have shared above works very well for me. You can add or reduce jaggery, coconut and milk as per your taste.

* Always cook the appes in medium flame for perfect golden coloured appes.

* I also make Mixed dal Appes which comes out delicious. You can check the recipe here.

Dry fruit Cake | Eggless, whole wheat | Kids’ healthy snack box idea

Click on the image to save the recipe on Pinterest

It has been so long that I have posted a cake recipe, in fact the last one was in February which was this delicious Chocolate Sponge cake. The cake is so amazing that I have been making it regularly, mostly as cupcakes for my kids. It is also a great snack box option for my daughter who’s school has started regularly now (after months of online classes, my butterfly is happy to be flying again 😄).

Apart from chocolate cake and other cakes, I have also learned to make this healthy Dry fruit Cake which she takes to school and my 3 year old son too enjoys it as his morning snack. In fact I made it again today on their request and decided to take step by step pictures to share the recipe with all of you too. 😍

My son could not wait for me to complete taking pictures and he came to take a slice. I captured the moment and it came out so cute. Those tiny hands. 😍

Click on the image to save the recipe on Pinterest

He gobbled up two slices of the cake and the rest of them are waiting for my daughter to come back from school. It’s her favorite and I am sure she will be very happy to see it. ❤️

Hope you all try and love this cake too. They are a great way to add the healthy dry fruits in the kids’ diet and since it has wheat flour and ghee along with the nuts, they are filling too. Specially great for the winters now. I have also been making these easy Sesame seeds Burfi and Dry fruits ladoo for them which you can try as well. Happy and healthy cooking! ❤️

RECIPE:

Makes a single loaf cake in a loaf pan of length 20 cm and width 7 cm

Ingredients:

Dry Ingredients: { 1 Cup = 240 ml }

1 Cup Whole wheat flour (Regular Chapati atta)

1 tsp Baking powder

1 tsp Baking soda

1/4 tsp Salt

Wet Ingredients:

1 Cup Mixed nuts, raisins and dates (I take about 10 cashews, 10 Almonds, some raisins and 5 seedless dates which make a total of 1 Cup)

1 Cup Orange Juice (I use freshly squeezed)

1/4 Cup Jaggery powder

1/4 Cup Ghee

Step by step recipe:

1. Sieve together 1 Cup wheat flour, 1 tsp baking powder, 1 tsp baking soda, 1/4 tsp salt into a mixing bowl.

2. Take mixed nuts and raisins in a mixer. Deseed dates and halve them (Fine chop them if they are not very soft. It helps when you pulse later in the mixer). Keep aside.

3. Coarsely powder the nuts and raisins together using Pulse mode of the mixer. Don’t grind at one go or you will get a paste. Just pulse few times till the nuts turn into coarse powder. Now add the deseeded dates to it.

4. Pulse again till the dates blend together and it forms a coarse mixture as shown. (Small pieces of dates left in the mixture is fine. Gives a great bite in the cake.) Note that this mixture is in powder form and not paste. Pulse the mixer few times to get this. Don’t grind all at once as the nuts leave oil and the mixture becomes a paste.

5. Now preheat the oven at 180 C for 10 mins.

6. Meanwhile take this dry fruit mixture in a mixing bowl, along with jaggery powder and ghee. Keep orange juice ready too.

7. Add orange juice and mix well. Remember to sieve the orange juice if using fresh ones so that it does not have the pulp.

8. Now add the dry ingredients to the wet Ingredients. Mix well using light hands till you don’t see any dry flour specks. Don’t overmix or you will get a dense cake. Just few mixes till you don’t see dry flour is enough.

9. Add to a greased cake pan. I grease my pan with ghee. The size of my loaf pan is 20 cm length and 7 cm width. Using a spatula, flatten the surface.

10. Bake in a preheated oven at 180 C for 30 mins. Might take between 25 to 35 mins depending on your oven type. Keep an eye after 25 mins. Don’t keep opening the oven door before that. Using a skewer or toothpick, insert in the center of the cake. If it comes out clear or with dry crumbs, it is done. If it comes out wet, keep again for 5 mins and check again.

11. Allow it to cool for sometime. Once cooled, loosen the edges of the cake using a knife and invert onto a plate.

Click on the image to save the recipe on Pinterest

12. Slice and serve. Store in a moisture free container.

Notes:

* This cake lasts well at room temperature for a day. Mine gets over within that time but if yours lasts, you can refrigerate it. Microwave for few seconds before serving if needed.

* I always use Pillsbury wheat flour and it works well for all my bakes. Recently though I started baking with Lulu brand of wheat flour and they come out great as well. This particular bake was with Lulu wheat flour and I was happy to see the cake come out soft and tasty.

* I have used freshly squeezed and sieved orange juice for this cake. It enhances the flavour of the cake so much. You can use store bought ones too.

* Regarding the mixed nuts, raisins and dates, as I have mentioned above, I have used about 10 cashews, 10 Almonds, few raisins and 5 dates. This made 1 Cup. You can use other nuts too if you like but I prefer this combination. Don’t skip dates though as it adds to the sweetness of the cake.

* You can also finely chop all the nuts and dates but I prefer coarsely powdering it as my kids don’t like the bite of nuts in their cakes.

* I have used 1/4 Cup Jaggery powder. It makes the cake sweet like bakery ones. You can skip if you want to make it completely sugar free and also substitute with brown sugar if you want.

* I always use ghee or butter in my bakes as I make it mainly for my kids. So, not sure about the texture and flavour if oil is used instead.

* Don’t overmix the dry and wet Ingredients. Mix slowly with light hands till the mixture is free from dry flour specks.

* My cake gets done exactly at 30 mins. Since each oven type is different, please keep an eye on the cake after 35 mins. Mine is an OTG. In microwave convection oven, the time required to bake will be less. So keep an eye after 20 mins into the baking time.

* This cake is very soft and slightly moist due to the orange juice and dates. So be careful while slicing it and start slicing only after it cools completely. Else it can break apart as it’s very soft in texture.

* If you are new to baking, I have written an article combining all notes and pointers that I learnt in my decade long baking journey. You can check that if needed – Baking Basics for Beginners

* For all my healthy bake recipes – Healthy Cakes, Cookies and Breads

* This cake was an inspiration from my Sugar free Dates Carrot Cake which uses milk instead of orange juice and grated carrots instead of nuts.

* Dates in cakes taste so heavenly and my Dates Chocolate Brownie and Dates Oats Cake recipes are examples to that.

I have tried to note down as much points as possible so that it’s easy for you all to follow but if you still have any doubts, either comment here or message me on my Facebook page Healthy cooking with mitha and I would be happy to help. Happy baking!

Click on the image to save the recipe on Pinterest

Paneer Kathi Roll | Paneer Frankie | Paneer wrap

Click on the image to save the recipe on Pinterest.

If there is one event here in Qatar that I used to wait eagerly for (pre corona times), it is the Qatar International Food Festival or QIFF as it is called. My first visit to the QIFF was in 2016. It was held in one of my favorite parks here, the MIA park which is in a picturesque location. I love to sit there, just admiring the beauty and calmness of the gleaming blue waters 🌊. And enjoying food there made it extra special. That first experience of QIFF at MIA park was the best one till date. ❤️

Being vegetarians (who love Indian food ❤️) actually takes away the point of going to an “international” food festival (the irony 😁) but there were so many options from Indian restaurants that we got spoilt with choices. It was like finding all the famous Indian restaurants from Qatar in one place and you get to choose their best dishes from the menu. In short, Foodie heaven! 😍

After that, we made a point to go to the QIFF every year, for some variety chaats, north Indian platters, south Indian delicacies, sweets, ice creams and juices, hovering from stall to stall (basically rummaging into all the veg options 😂😂). I know it sounds like a lot of food but these food festivals make me go crazy and I forget all the healthy eating for a while (Sorry but not sorry, Mr Diet 😅😅).

The last food festival we visited was held in November 2019 which was a street food festival. The chef at the live counter of Desi Dhaba restaurant making hot Jalebis fried in ghee was the highlight of the event for the sweet lover in me. Look at how delicious the Jalebis were! 😍 My mouth waters as I think about it. 😋

Another unforgettable food memory with these food festivals is the Paneer Kathi Rolls from Zaffran cafe stalls. I never missed it and it is the most delicious kathi rolls I have ever eaten. ❤️

Click on the image to save the recipe on Pinterest.

So since due to Covid, it has been more than an year of no food festivals (😭), I decided to recreate those Paneer Kathi Rolls at home and how amazing did it come out. Never knew making them at home was so easy. My kiddos too loved it so much that they could not stop saying “mmmmm yummyyyyy 😍😍” (gone ditto after me 🤣🤣 exactly how I can’t stop saying it when I eat something yummy, not caring for anyone else in the world. 😂)

So I thought I must share this yumminess of a recipe with you all too. Makes a filling evening snack or even a meal in itself. Also a great way to finish your leftover rotis. Hope you all try and like it. Happy and healthy cooking! ❤️

RECIPE:

Ingredients: { Makes 5 to 6 Rolls }

For the Roti:

2 Cups wheat flour

Salt to taste

Water as needed

For the Paneer filling:

200 grams Paneer cubes

1 Tbsp thick Curd/ Yogurt

1 tsp Tomato ketchup

1/2 tsp Cumin powder

1/2 tsp Garam masala powder

1/4 tsp Turmeric powder

Salt to taste

For the Salad:

1 medium sized Onion, thinly sliced

1/4 a medium sized Capsicum, thinly sliced

Salt to taste

1/2 tsp Vinegar or Lemon juice

For Chutney:

Check the detailed recipe here

Ghee while making the rotis and pan frying paneer

Step by step recipe:

1. Take wheat flour and salt in a bowl. Add water and form a firm yet soft dough like that while making rotis. Keep aside.

2. Now take paneer cubes in a bowl. Add yogurt, ketchup, cumin powder, Garam masala powder, Turmeric powder and salt.

3. Mix well.

4. Now heat 2 tsp ghee in a frying pan and roast the paneer cubes on medium flame till the cubes get browned on all sides. Keep flipping as they turn brown each side.

5. Remove from the flame and keep aside. Also make the green chutney.

6. Take sliced onions and capsicums in a bowl. Add salt and vinegar. Mix well. Now the things ready for filling are ready.

7. Make roti like you make regularly. I make it almost like a square so that it’s easier to roll. Place in a plate. Spread with a spoon of the chutney. In the center, keep the paneer pieces are shown. Top with the salad.

8. Roll and serve!

Click on the image to save the recipe on Pinterest.

Notes:

* I make this roasted gram dal coriander leaves chutney for the roll. You can make regular Coriander leaves chutney for it too. Just remember to make the chutney thick and not liquidy as we have to spread it.

* You can add more veggies into the salad filling. I just keep it simple as I don’t want to overfill the rotis.

* Be careful to roast the marinated paneer on medium flame. Else due to Yogurt, it can turn black.

* You can also add red chilli powder to the marinate to make the paneer filling more spicy. I don’t add as I make for my kids too.

* These rolls are the best way to finish leftover rotis in a delicious and unique way. Also great for lunch box. Just make the chutney very thick if making for lunch box.

Click on the image to save the recipe on Pinterest.

Dates and Carrot Ubbatti | whole wheat Dates Carrot Puranpoli

Click on the image to Pin the recipe on Pinterest.

Sometimes you listen to a song and the lyrics plus music is so beautiful that you can’t help but listen to it on repeat. Same happened with me today. As I sat down to have my lunch, as usual, checked my youtube subscriptions and saw that a new song has been released by T Series – Rab Manneya from the movie Koi Jaane na. I started listening to it without much thought but the song got me so much hooked to it that I have heard it so many times till now and was even compelled to add to my spotify playlist. ❤️

Such were the words, “Tu maane ya na maane dildaara, asaan te tenu rab manneya” which means, even if you agree or not, I consider you as God. I don’t know if any of you have felt it but some people come to your life, change it in a beautiful way and then your perspective towards life changes completely. Such people are God sent angels and they leave their mark on our life forever. Having felt the presence of beautiful souls like that in my life, I can say it’s one of the most precious feelings in the world. ❤️

And this can be said the same about these Dates Carrot Ubbattis. The outer dough is plain and normal but when filled with the sweetness of dates and carrots makes it into a super delicious dish. Just like how the beautiful people fill our life with happiness. 😍 #mithastheories 😅

These ubbattis were my idea after successfully combining dates and Carrot in cake and halwa making it sugar free. So thought why not make Ubbattis with the same filling. It came out so delicious that my husband says I can sell them. 😂😂 My kids too loved them a lot and I hardly got two bites when I made for the first time.

So thought I should share with all of you too and what better time to share right before Ugadi, our new year. Here’s wishing all my readers a very Happy Ugadi and Vishu on 13th and 14th respectively. May this festival bring loads of happiness in your lives. ❤️

RECIPE:

Ingredients: { Makes 5 Ubbattis }

For the outer dough:

2 Cups Whole wheat flour/ Atta

1/4 tsp Turmeric/ Haldi powder

Salt to taste

For the filling:

10 Soft Dates (I used Khudri variety)

1 Cup grated Carrots

1/4 Cup Jaggery powder (optional)*read notes

1 Tbsp Ghee

1/2 tsp Cardamom powder

Ghee as needed while cooking the ubbattis

Step by step recipe:

1. Take wheat flour, turmeric powder and salt in a bowl. Add water and form a soft dough. Coat with little oil or ghee so that the surface does not turn dry. Keep aside.

2. Deseed and finely chop the dates. 10 dates gave me 3/4 Cup of chopped dates.

3. Heat ghee in a frying pan and add grated carrots. Fry till the raw smell goes away and the carrots change colour.

4. Now add the chopped dates and jaggery powder. Mix well for about 5 mins till the mixture leaves the sides of the pan and dates turns very soft. The whole mixture should be almost like a paste. Mash the softened dates with the spatula.

5. Now add to a bowl. Mix in cardamom powder.

6. Divide both mixtures into equal portions.

7. Heat a frying pan. Roll the outer dough using dry flour to small round shape. Keep the filling inside.

8. Cover the filling by bringing all the outer dough together like shown below. Add dry flour.

9. Roll into a circle as thin as possible.

10. Fry both sides using ghee.

11. Repeat the same with the rest of the dough and filling. Serve the ubbattis warm with ghee.

Click on the image to Pin the recipe on Pinterest.

Notes:

* I get one extra ball of outer dough with the measurements with which I make normal chapati.

* The variety of dates I used were very soft. If the dates you use are hard, soak them in hot water for 30 mins and then use once they become soft.

* Jaggery is optional if you want to make the ubbattis sugar free. The dates and carrots give it the needed sweetness. I add as I love my ubbattis a tad sweeter.

* Since they are made with wheat flour, the ubbattis are not as soft as maida ones but definitely very tasty and taste like sweet parathas.

* Here are two other recipes where Dates and Carrot come together beautifully and make delicious sugar free dishes.

Dates and Carrot Cake , eggless and whole wheat

Dates and Carrot Halwa, healthier version of carrot Halwa but definitely tasty too

* Also, this is one more whole wheat Ubbatti that I make always – Peanut Ubbatti

* This is the compilation of my 15 mins healthy sweet recipes.

Ragi Set Dosas | “No rice” soft dosas

Click on the image to save the recipe on Pinterest

When I had posted the Ragi Urad idli recipe, I had got many queries about if it can be made as dosas too. Though I do make dosas with that batter, there is a way I make my Ragi dosas which come out as soft as restaurant style set dosas and I thought it was high time I share it too.

If not for my readers who continually keep asking me queries and request for recipes, I will not be inspired to post them. Most of my day passes in household chores while juggling between two kids, one seeking my attention to draw for her ( my daughter 😬) while the other clinging to me like fevicol ( my son 😄). The only thing that keeps my sanity are these daily shlokas, bhajans and songs which I have made as playlists on youtube and keep them in the background whole day. They give me strength in my motherhood battles and otherwise too. Music is really my life. ❤️

So here is the most requested dosa by my readers. They come out very soft and my kids are huge fans of it. My daughter used to call it chocolate dosa as a toddler and even now, in spite of knowing it’s ragi, still calls it the same. 😃 Ragi is a very healthy millet and this is one of the best ways to include it in your diet. Happy and healthy cooking!

Click on the image to save the recipe on Pinterest

RECIPE:

Ingredients: { Makes about 20 dosas }

3 Cups Ragi flour / Finger millet powder/ Nachni ka atta

1 Cup Urad dal (I use split ones)

1/2 Cup Poha/ flattened rice (thick or thin, white or brown)

Salt to taste

Ghee or oil to cook the dosa

Step by step recipe:

1. Wash well and soak Urad dal for about 4 hours. Drain water completely. Add about 1 Cup water and 1/2 Cup poha (washed) and grind to a smooth paste. Add to a large preferably steel vessel.

2. Now take ragi flour in another bowl. Add water, 1 cup at a time and whisk well to remove lumps. It takes me 3 Cups water to 3 Cups Ragi flour for it to come to a thick batter.

3. Add this to the Urad dal batter. Add salt and mix well using hands. Cover and keep at room temperature for fermentation for 8 to 12 hours. Might take longer during winters.

Love the fermented batter 😍

4. Heat a dosa pan and pour a ladle of the batter on the center of the pan. No need to spread this dosa. Cover and cook one side first adding ghee or oil.

Sorry for the dull picture. Kitchen lights 😬

5. Flip and cook the other side too. Remove and repeat the same with the rest of the batter too.

Notes:

* You can store the rest of the batter in the refrigerator and use it the next day. The texture of the dosas are soft even the next day.

* You can use thick or thin Poha, brown or white poha, does not make any difference. It gives it the softness in the dosas.

* If due to any reason you can’t eat poha, just skip it and add 1 tsp Methi instead along with Urad dal. Grind it to smooth paste. It will give soft dosas too.

* For making idlis, you can check this Ragi Urad Idli recipe. Comes out very well.

* I served these dosas with Hing Chutney. Just grind 1 Cup Coconut with a pinch of Hing powder, 4 long red chillies, 1 tsp Tamarind paste, salt and water to a smooth paste. You can season the chutney using mustard seeds and curry leaves if needed.

Other Ragi dishes that I make regularly:

Instant Ragi Rava dosa

Instant Ragi Idlis

Ragi Urad Idli

Ragi Ela Ada – Steamed Ragi sweet snack

Ragi Butter cookies

Eggless Ragi Chocolate Cake

Ragi Malpuas

Ragi Jaggery ladoos

Click on the image to save the recipe on Pinterest