Instant Oats Appo / Oats Vegetable Paniyaram / Gluten free recipe

Click on the picture to save the recipe on Pinterest

If there is one ingredient that is always available at my house, it’s Oats. My son loves Oats Vegetable Bhakri and my daughter loves Instant Oats Idli. Both these dishes can be quickly made within 30 mins and is a great help when kids demand for food ( When Ammaaa, hungryyy calls come unexpectedly 😁).

Similar is this Oats appo which I make regularly for my son when he comes back from school. Though I have shared all the recipes that I make with oats on my Oats recipes Collection page, this one recipe was long pending. So today when I made it, I thought of sharing it here too.

This is one delicious appo with bites of onion, capsicum, green chillies and carrot, crispy on the outside and soft inside. Do try it for breakfast or evening snack. If you don’t have appe pan, you can make small dosas with this batter too, like little bhakris. Comes out delicious as well. You will surely love it. Happy and healthy cooking ❤️

RECIPE:

Ingredients: { Makes around 21 small appos }

1 Cup = 240 ml

1 Cup Instant Oats ( I use saffola or quaker brand )

1 Tbsp Rice flour

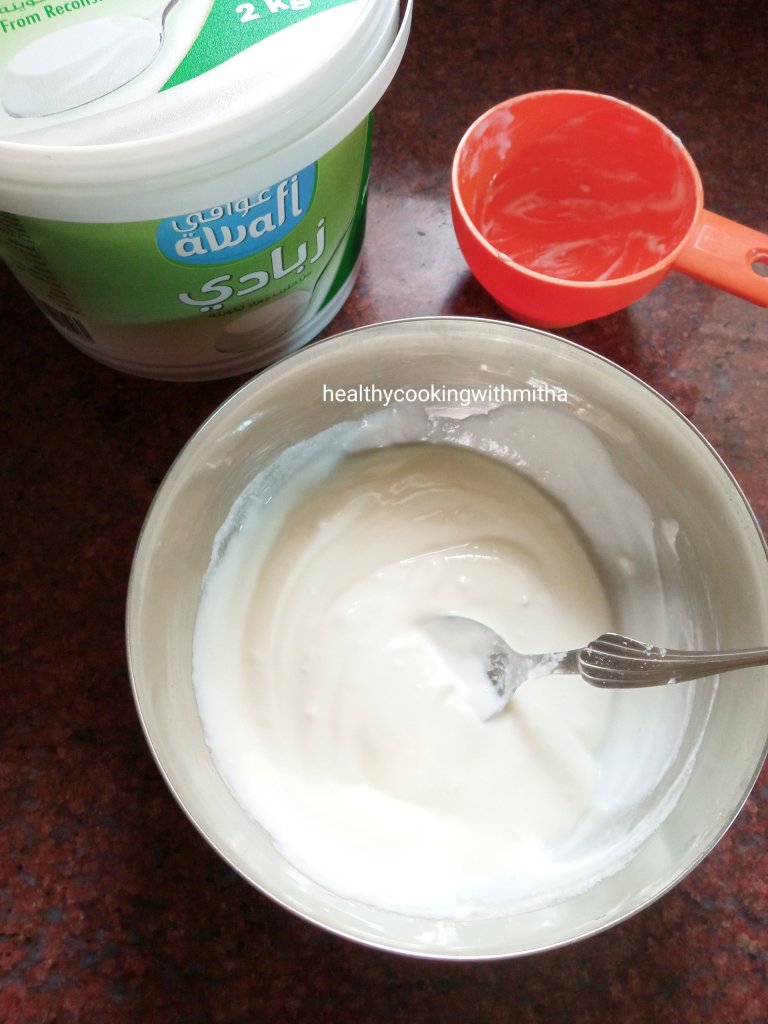
1/2 Cup Curd or Yogurt

Approx 1/2 Cup Water

1/4 Cup finely chopped Onion

1/4 Cup finely chopped Capsicum

1/4 Cup finely grated Carrot

3 finely chopped Green chillies or to taste

2 Tbsp finely chopped Coriander leaves

1/4 tsp Turmeric powder

Salt to taste

Oil or Ghee to cook the appos

Step by step recipe:

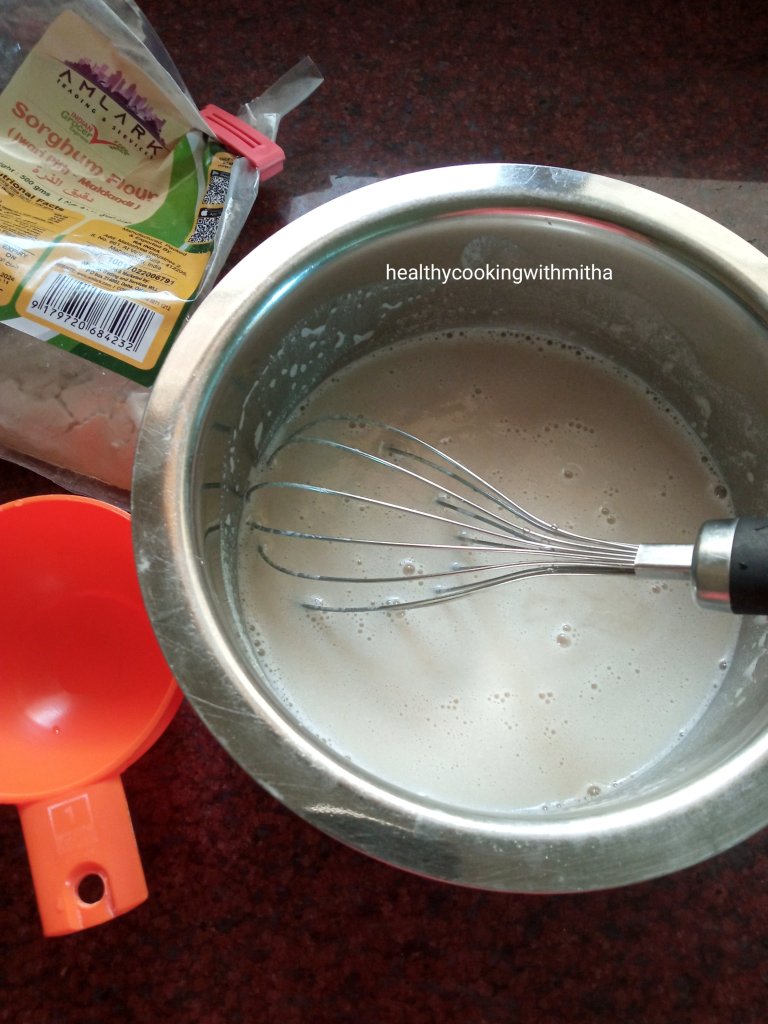
1. Take instant oats, rice flour, turmeric powder and salt in a bowl. Add yogurt.

2. Add water, little by little to make a thick batter. For 1 Cup Oats, it takes 1/2 Cup Curd and 1/2 Cup Water for me. But will change according to the brand of oats and the consistency of Curd. Just make a thick batter and not thin one.

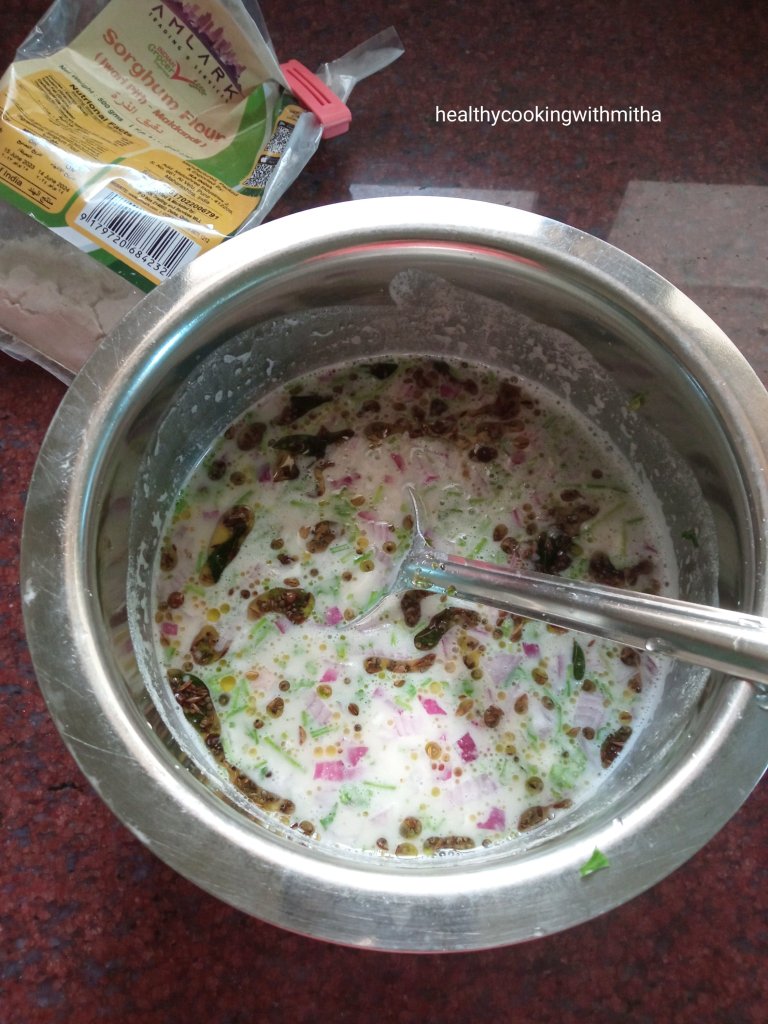
3. Now add finely chopped onion, capsicum, carrot, green chillies and coriander leaves.

4. Mix well. Batter is ready to make appos instantly.

5. Heat the appo pan or Paniyaram pan and when hot, reduce the flame to medium. Now add ghee or oil on the holes of the pan. Now add a spoonful of batter into each of the holes. Don’t overfill the holes.

6. Now cover and cook on medium to low flame till the surface cooks. Now add little ghee or oil and flip over the appos carefully. Cook again till the inside cooks well and underside turns crisp.

7. Remove and serve with a chutney of your choice.

Notes:

* I serve with Coconut chutney or Hing chutney. Here I have served with Hing chutney. Just grind together 1 Cup Coconut with 3 Red chillies, A pinch of Hing, 1 tsp Tamarind paste, salt and water to smooth paste.

Click on the picture to save the recipe on Pinterest

* Two important points with these appos are:

1. Don’t make a thin batter. It should be thick.

2. While making appos, make sure to add only less batter in each hole and cook on medium to low flame so that the appos cook till the inside. Also when you flip, tap slightly so that the under surface gets crisp.

* Use a skewer or the backside of a small spoon to check if the appos are done from inside. If it comes out wet, cook again on low flame. Once done, the skewer will come out dry.

* If you don’t have appe pan, you can make small dosas with this batter too, like little bhakris. Comes out delicious as well.

* As we are not adding any gluten in the form or Rava or semolina, nor are we adding baking soda, these appos won’t be extra big or fluffy but they are still soft inside and crispy outside. Tastes really delicious due to veggies inside it.

* More Appo recipes that you can try:

Mixed Dal Appo/ Paniyaram

Godu Appo / Instant Wheat flour Banana Paniyaram

* I regularly make different kinds of dishes using Oats like Dosa, Idli, Bhakri, Paratha and Cake. You can check them in my Oats recipe compilation page.

Oats recipes Collection

Dudde Upkari | Konkani style Pumpkin stir fry

Click on the picture to save the recipe on Pinterest

I have been sharing many Konkani recipes on the blog which have been loved by all of you. So nowadays when I cook something from our amchi cuisine which is loved a lot by us, I immediately take pictures to share on the blog, even if it’s a very simple dish like this Pumpkin upkari.

Mostly all our upkaris or stir fries are very simple with mustard seeds, curry leaves, green chillies or red chillies in seasoning with hing or garlic or onion seasoning. This particular stir fry is my most favorite with jaggery added that enhances the taste a lot. The simplicity is what makes it extra special and I can eat it as it is, even without rice. 😍

We are getting locally grown pumpkin in Qatar and it’s flavour and texture is amazing. Very quick to cook and super tasty. So I have been making this upkari almost every week. Also it’s one of the healthiest vegetable too. Hope you all try and love this delicious upkari. Happy and healthy cooking ❤️

RECIPE:

Ingredients: 1 Cup = 240 ml

1 medium sized Pumpkin ( about 4 cups chopped)

3 Green chillies

1 to 2 Tbsp Jaggery or to taste

For seasoning:

2 Tbsp Coconut Oil

1 tsp Mustard seeds

A sprig of Curry leaves

A pinch of Hing/ Asafoetida

Salt to taste

Freshly grated Coconut for garnish

Step by step recipe:

1. Wash well, remove the core, peel the skin of the pumpkin. Chop into bite sized cubes as shown in the picture.

2. Heat oil in a pan, add mustard seeds, hing, curry leaves and green chillies. Let mustard seeds splutter.

3. Now add the chopped pumpkin pieces along with salt. Mix well.

Cover and cook on medium flame. Don’t add much water while cooking as pumpkin releases its own water as it cooks. If needed, that is if you feel it’s sticking in the bottom of the pan, add just a spoonful of water.

4. Pumpkin cooks very quickly and within 5 mins, you will see that it has turned soft. Now add jaggery.

5. Mix well. Cover and cook on low flame for 5 more mins or till the pumpkin pieces turn very soft. Now garnish with freshly grated coconut. Check for salt/ jaggery. Done. 🙂

6. Enjoy dudde upkari with pej (matta rice gruel) and Kosambari or with rice and rasam.

Click on the picture to save the recipe on Pinterest

Notes:

* You can use any variety of Pumpkin for this upkari. I use the local one available in Qatar.

* Some people don’t peel the pumpkin but I love it when peeled.

* Hing and jaggery are very important to give flavour to the upkari. So please don’t forget it. You can add jaggery, less or more, as per your taste.

* Don’t add much water while cooking this upkari as pumpkin releases its own water. Just add a spoon in the beginning if you feel pumpkin is sticking to the pan. Once you cook it covered on medium flame, it will start turning soft and release water.

* More recipes with Pumpkin:

Instant Pumpkin Idlis (Dudde kadamb)

Orange flavoured Pumpkin soup (Narangi Shorba)

* You can check all my Konkani recipes here:

Konkani recipes collection

Easy Jowar flour Ladoos with Jaggery |Sorghum millet ladoos | Gluten free

Please click on the picture to save the recipe on Pinterest

I always make few sweets for Deepavali as we have our friends come over to wish us and they bring homemade goodies with them. It feels so happy to share our sweets and joy during festivals, specially during Deepavali where our houses are lit with lamps and lights.

Today is the last weekday here being Thursday and the next two days, my kids are at home. When they are home, my whole day gets busy cooking, with their studies and listening to them (Amma life 😀). So I decided to make the ladoos this afternoon, when the house was silent 😁 and took step by step pictures to share it with all of you. I was amazed to see how many of you liked the Instant Jowar flour Dosa recipe even though it was very simple. Hence I felt this simple recipe will be very useful to you too, during this festive season.

Jowar flour is a very tasty flour and is healthy too. I am trying to include it more in our diet and I am glad that my kids love it too. Hope you all try and love it as well. Happy and healthy cooking ❤️ Wishing all of you a very happy Deepavali. May this festival of lights bring loads of love and happiness in your lives. 🪔

RECIPE:

1 Cup = 240 ml

Ingredients: { Makes around 20 medium sized ladoos }

2 Cups Jowar flour / Sorghum millet flour

1 and 1/2 Cups Jaggery powder

1/4 Cup Ghee (plus 1/2 Tbsp to fry raisins and cashews)

10 to 12 Cashews

10 to 12 small golden raisins

Step by step recipe:

1. Heat 1/2 (half) Tbsp ghee in a pan and add finely chopped cashews and small raisins. Fry on low flame till raisins swell up and cashew bits turn golden. Remove in a bowl.

2. Now heat 1/4 Cup Ghee and add 2 Cups Jowar flour to it. Make sure the flame is medium to low, else the flour can burn. Saute the flour for about 5 to 8 mins till a nice aroma starts coming. Break the lumps using spatula while sauteing.

3. Once the aroma starts coming, saute for few more minutes (about 2 to 3 mins) till the mixture looks like in the below picture. That is when you press using spatula, it should hold shape.

4. Remove from flame and when it’s still warm, add jaggery powder and the fried cashews/raisins.

5. Now mix well till the jaggery powder blends with the jowar flour into a uniform mixture.

6. Start forming ladoos using your hands by taking a small size mixture in your palm as shown.

7. Open and close your fingers while shaping the ladoos in your palm. It is actually very easy to shape these ladoos and they hold shape quickly but if you find it difficult, you can add a little more ghee to shape the ladoos.

8. Repeat the same with all the mixture and the ladoos are ready to be enjoyed ❤️

Notes:

* Store it in a moisture free container. I usually store in a steel box.

* The ratio of ghee to jowar flour to jaggery works perfect for me. You can reduce jaggery powder if needed but I feel this much sweetness is necessary for these ladoos.

* You can skip cashews and raisins if you don’t like it or add more chopped nuts if you like.

* Important step is sauteing of the flour. Make sure the flame is medium to low and saute till the flour turns aromatic and starts holding shape. Don’t keep on high flame as it may burn the flour.

* If you find it difficult to bind the ladoos, you can add more ghee into the mixture or grease your hands with ghee. I do not do both as it was quite easy to bind the ladoos.

* You can also check the other ladoos I make:

* Wheat flour Jaggery Ladoos ( Churmundo)

* Ragi Jaggery ladoos

* Dry fruit Coconut ladoos

* Peanut Jaggery Ladoos

* Mango Coconut Ladoos

* Coconut Badam Ladoos

* I have compiled some of my easiest sweet recipes. They are all sweets that can be made within 15 mins. Hope it will be helpful for you.

Easy Sweets Collection

* Other dishes with Jowar flour that I make regularly:

* Jowar flour Idli

* Jowar flour Dosa

* Instant Jowar flour Dosa

* Jowar Vegetable Bhakri

Click on the picture to save the recipe on Pinterest

Instant Jowar flour Dosa | Easy Sorghum millet dosa

Click on the picture to save the recipe on Pinterest

I have been going completely crazy this cricket season rekindling all my childhood memories of watching the world cup with my parents and brother. My kids are wondering what happened to Amma 😄 when I shout “India, India” while cheering for our team. 😍 Right now when Virat Kohli finally made his 49th ODI century which I was eagerly waiting for, that too on his birthday today, I wanted to write it in my blog to share my happiness here.

Amongst all this, I don’t feel like cooking at all and am glued to the TV, not wanting to miss any 4 or 6 when our team bats and not wanting to miss any wickets by our amazing bowlers. 😍 But since I am still a mother 😄, I have to cook and that’s when this instant dosa comes handy. I have been making Instant Jowar dosa since few months now and my kids love it.

It becomes a quick snack when they come back from school. Also a very filling breakfast, easy to make and healthy too. Hope you all try and love it too. Do let me know if any doubts and it will be a pleasure to help. Happy and healthy cooking ❤️

RECIPE:

1 Cup = 240 ml

Ingredients: { Makes about 10 to 12 dosas }

2 Cups Jowar flour/ Sorghum millet flour

Salt to taste

About 3 to 3 1/4 cups water

1 medium sized Onion

3 Green chillies

1/4 Cup finely chopped Coriander leaves

For seasoning:

1 Tbsp Ghee or Oil

1 tsp Mustard seeds

1 tsp Cumin seeds/ Jeera

1 tsp whole Peppercorns

Few curry leaves

Step by step recipe:

1. Take 2 Cups Jowar flour in a vessel and add 3 Cups water. Mix using a whisk to remove lumps and make a smooth batter. Add salt and mix well. (Adding one cup of water at a time helps in less lumps in the batter)

Batter consistency is thinner than regular dosa batter

2. Now add finely chopped onion, Coriander leaves and green chillies into the batter.

Also prepare seasoning in a small pan by heating ghee, splutter mustard seeds, add cumin seeds, pepper and curry leaves. Fry for few seconds. Remove from flame.

3. Mix the seasoning into the batter. Batter is ready to make dosas instantly.

4. Heat a good quality non stick pan or a well seasoned cast iron pan. It’s important for the dosas to come out easily as it’s thin dosas. Add about two ladles of the batter into the pan, making sure the flame is high. Start adding the batter in the edges of the pan and then add in the middle.

This is the first dosa from the batter. It looked a little thick. So I added 1/4 Cup water more to the batter.
Now the dosas are perfect 😍

5. Allow it to cook on high flame till the surface cooks completely and edges turn crisp. If needed, you can turn the flame to medium if the dosas turn black underneath. Add ghee or oil on the edges of the dosa. Now fold and remove from flame.

6. Dosa is ready to enjoy with a chutney of your choice. Repeat the same with the rest of the batter.

Click on the picture to save the recipe on Pinterest

Notes:

* I have never refrigerated this batter. So don’t know how it will be if refrigerated. Since it’s easy to make, I make fresh batter each time and use it up the same day. You can keep the batter at room temperature for few hours though. It won’t spoil. I sometimes make the batter in the morning and use it as evening snack.

* For me, 2 Cups Jowar flour and 3 1/4 Cups water yields perfect batter. Depending on your flour brand , it might vary a little for you.

* I keep a little batter separate without green chillies for the kids.

* A good quality non stick pan or well seasoned cast iron pan is necessary for the dosas to come out perfectly.

* If the dosas come out thick and you prefer it that way, you can still make it but cook it both sides. For thin dosas, only one side cooking with suffice.

* Other dishes that I make with Jowar flour regularly:

Jowar dosa with Urad dal

Jowar Idli

Jowar Vegetable Bhakri

* You can also try all my “no rice” dosas which includes instant varieties of dosas and also millet based ones.

“No rice” Dosas Compilation

Kuvale Puli Koddel | Ash Gourd spicy, sour, sweet coconut curry | Konkani recipe

Click on the picture to save the recipe on Pinterest

I recently got a comment on my Surna Koot (elephant yam pickle) post from a really sweet reader who said she was pleasantly surprised to find a Konkani recipe on my blog. She had been following me for my baking recipes but never knew I was a Konkani too, just like her. All thanks to Mr Google for bringing up my Soorna Koot recipe and and connecting me with more of my Konkani family. ❤️

Even though I post many kind of recipes, what we eat regularly are dishes from our cuisine as that’s what comforts us the most. The flavours always takes us back to our childhood, those festive lunches together with family and the divine temple meals. Nothing can compare with the simple, soulful meals that are served at temples. ❤️

One dish that always reminds me of festivals and temple meals is Puli Koddel. This curry is a burst of flavours as you can see from the ingredient list itself and every bite is truly heavenly. ❤️

I know many of my Konkani friends already know the recipe and there might be changes in each of your recipe too but here’s sharing how I make it. Hope it is helpful to atleast some of you. Happy and healthy cooking ❤️

RECIPE:

Ingredients: ( 1 Cup = 240 ml )

1 medium sized Ash Gourd/ Kuvale/ Kumbalakayi/ Kumbalanga/ Petha (can replace with Mangalore cucumber or Bottle Gourd)

For masala:

1 Tbsp Coconut oil

1 Cup Coconut gratings

1 Tbsp white Sesame seeds/ Til

1 Tbsp Raw rice (uncooked)

1/2 Tbsp Coriander seeds

1 tsp Cumin seeds/ Jeera

1 tsp Mustard seeds

1 tsp Fenugreek seeds/ Methi

5 to 6 Dry Red chillies or to taste

1/2 Tbsp Tamarind paste or to taste

2 Tbsp Jaggery or to taste

A pinch of Asafoetida/ Hing

For seasoning:

1 Tbsp Coconut oil

1 tsp Mustard seeds

A sprig of Curry leaves

Salt to taste

Step by step recipe:

1. Wash and peel the Ash gourd. Remove the core. Now cut the white portion into bite sized pieces as shown.

2. Add to a bowl or pressure cooker with water just enough for it to immerse. Cook till it turns soft.

3. Meanwhile heat coconut oil in a pan and add in the order, mustard seeds, cumin seeds, fenugreek seeds, Coriander seeds, raw rice, sesame seeds, Red chillies and coconut gratings. Roast till the coconut turns brown in colour. Make sure the flame is medium to low as we don’t want to burn the spices. Remove from flame. Allow to cool.

4. When it cools down, add to a mixer along with tamarind paste, hing and jaggery. Grind to a smooth paste.

5. Now in a pan, combine the masala and the cooked Ash gourd pieces. Allow it to come to a boil on high flame and then cook on medium flame for about 10 mins so that the Ash gourd pieces absorb the masala. Also add salt. Check for the jaggery and tamarind paste. If needed, add more. Also adjust thickness by adding little water if necessary.

6. Now prepare seasoning by heating coconut oil, adding mustard seeds, allowing it to splutter, add curry leaves. When it turns crisp, remove from flame, pour over the curry.

7. Puli Koddel is ready to be enjoyed with rice and papad. For Konkanis reading this, we have it with Ukde sheeth ani batate happolu. Heavenly meal ❤️

Click on the picture to save the recipe on Pinterest

Notes:

* As mentioned above, you can replace Ash Gourd with Mangalore cucumber ( Magge) or even Bottle Gourd (Gardudde). I do it when Ash gourd is not available.

* Even Ash gourd is available in different varieties and the one shown in the picture is what I used here. You can use any variety for this curry.

* The rice used in the masala is raw rice. Please don’t use cooked rice.

* Roast the ingredients on medium to low flame and don’t burn it. Else the taste of the curry will not be good.

* Red chillies, jaggery and tamarind measurements can change as per your individual preference. If you like it more sweet, you can add more jaggery, else one Tbsp will be enough. Same is for tamarind too.

* I have been sharing many Konkani recipes on the blog. Will share some of my favorites below.

* Tendle Kajjubi Upkari (ivy gourd cashew stir fry)

* Surna Koot (elephant yam pickle)

* Mashinga palle Sannamudho (drumstick leaves idli)

* Sambarpalli Chutney (ajwain leaves chutney)

* Magge Sasam (Mangalore cucumber curry)

* Muga Dali Kosambari (Moong dal salad)

* Chane usli/ Godu Phovu

* Undi – Piyava Gojju

* Thoushe mudho (cucumber idli)

* Thoushe Bhakri ( cucumber dosa)

* Surnali ( sweet spongy dosa )

* Magge Surnali ( Mangalore cucumber sweet dosa)

* Batat Phovu

Peanut Butter Cookies |Eggless, whole wheat, easy

Click on the picture to save the recipe on Pinterest

Finally after many months of break, I am back with blogging. Had been to India for vacation and after that, my kids were home as it was their summer holidays. Once school started, my daughter had her half yearly exams ( which seems like my exams 😂). Now that it’s over, I feel free and can sit at peace to write when the kids go to school.

During my visit to India, I got few ingredients which are not easily available here in Qatar (atleast I have not found it in supermarkets) – Coconut Sugar, Palm Sugar and sugar free peanut butter. Once I returned to my kitchen, I have been using them in my cooking and love how natural it tastes as compared to refined sugar.

You can see my coconut sugar haul here from Treen foods . Love their sustainable packaging too in environment friendly paper.

The man behind this brand, Mr Brijesh Sereno explains about their Coconut Sugar and how it is different from others,

A Unique gentle processing method ensures nutrient retention, cleanliness, consistency, and enhanced absorbability for a pure and effective product.

Crisp Note on Health benefits of Coconut Sugar :  In addition to vitamins and minerals like iron, zinc, calcium, and potassium, coconut sugar contains inulin, a prebiotic fiber that supports a healthy gut microbiome, contributing to strengthened immunity.

At first I used it in my wheat pancakes substituting jaggery with coconut sugar and the kids loved it a lot. So I went ahead and started using it in baking too. Since I had requests for peanut butter cookies from my readers, I decided to use coconut sugar in these cookies too and it felt so good to see the cookies taste heavenly.

I have been baking Peanut butter cookies with coconut sugar regularly now and thought it’s high time I share the recipe with all of you too. Hope you all try and love it as well. Happy and healthy baking ❤️

RECIPE: 1 Cup = 240 ml

Ingredients: { Makes about 14 cookies }

1 Cup Whole wheat flour ( atta )

1/2 Cup sugar free Peanut Butter

3/4 Cup Coconut Sugar ( or Jaggery powder or brown sugar or cane sugar)

75 grams or 5 Tbsp Salted Butter

1/2 tsp Baking soda

* 2 Tbsp Milk, only if needed

Step by step recipe:

1. Keep butter at room temperature for a while till it turns soft. Don’t melt it. Just let it turn soft at room temperature. Now add peanut butter and coconut sugar to this.

2. Now mix together well with a spatula till the butter mixes well with peanut butter and coconut sugar.

3. Now sieve wheat flour and baking soda into this mixture.

4. Mix well with hands or use a spatula till it forms a soft dough. At this stage, if the dough is hard, add one to two Tbsp of milk to make it soft. Else if it is soft and sticky, let it be that way. We have to refrigerate it anyhow.

5. Refrigerate the mixture covered for about 10 mins.

6. Now preheat the oven at 180 C for 10 mins.

7. Meanwhile line a baking tray with parchment paper (baking paper) and take small portions of the cookie dough, form balls using palm, then place them equidistant, keeping enough place for them to expand.

While placing, just press lightly using fingers and then make marks using fork as shown.

8. Bake at 180 C for 10 mins in the center rack of the oven with both rods turned on. Keep an eye after 8 mins as every oven is different. Once the center turns slightly hard, edge of the cookie starts turning dark brown, the cookie is done.

9. Allow it to cool completely. It will harden as it cools and turn crisp. The texture of this cookie is similar to biscuit. Store it in a container and enjoy the cookies.

Notes:

* I used sugar free Pintola brand creamy peanut butter which I got from Amazon when I visited India. Loved how even without sugar, it tasted so yum as a spread. In these cookies too, the peanut butter adds such a wonderful flavour.

* The best advantage about using sugar free peanut butter is that you can use the sweetener of your choice in these cookies. I have used Organic Coconut sugar from Treen foods which I ordered from their website https://treenfoods.com/. I have been using this unrefined sugar for many months now and love its flavour and also how healthier it is as compared to refined sugar.

* You can substitute coconut sugar with jaggery powder or brown sugar in this recipe.

* As mentioned in the step by step recipe, add milk only if needed. If peanut butter has liquid content in it, the mixture will not be dry and you won’t need to add milk in it.

* Do refrigerate the cookie dough for atleast 10 mins so that it becomes easy to make cookies.

* Space the cookies a little far from each other as they spread while baking. You can check my picture and see how I have spaced them.

* The baking time can range from 8 to 12 mins depending on your oven. So keep an eye after 8 mins. Once the colour of the cookie turns dark brown and the edges turn crisp, the cookies are done.

* If you are new to baking, you can read my article on Baking for Beginners. It covers all my tips and tricks for newbie home bakers.

* You can also check my Healthy Cakes and Cookie recipes Compilation for more healthy baking.

* Other Cookies that I bake regularly with wheat flour are:

* Cafe style Chocolate chip cookies

* Ragi Butter Cookies

* Basic Wheat Jaggery Cookies

* Almond Butter Cookies

* Cashew butter cookies

Click on the picture to save the recipe on Pinterest

Tendle Kajjubi Upkari | Ivy gourd – Cashewnut stir fry Konkani style

Click on the image to save the recipe on Pinterest

Having grown up now (though I would love to be a child 😍), I realize how much my food choice has changed over the years. From loving hotel food as a kid to now, loving all the dishes that were made at home by my Amma and Grandma, recreating them in my kitchen and remembering my childhood memories with the dishes, I have come a long way. ❤️

Even though I still like to enjoy restaurant dishes occasionally, my comfort will always be the simple dishes that I make daily. We have pej or matta rice gruel for dinner and any kind of stir fry or upkari (as we call in Konkani) is a must with it.

So whenever I get good ivy gourd, I make this tendle kajjubi upkari which is an alternative to the famous Konkani dish called Tendle Bibbe upkari which is made with Bibbo or Fresh Cashews. They are available during our new year festival or Ugadi and in every Konkani household, either Bibbe upkari or Tendle Bibbe upkari is made.

Since I live in Qatar and we don’t get fresh cashews here, I make this upkari with regular cashews and it tastes delicious too. I made it yesterday and decided to share this easy recipe with all of you too. I know Konkanis already know this easy recipe but I am sure it will be new to atleast some of my readers.

So here’s sharing the recipe. Hope you all try and love this yummy dish. Happy and healthy cooking! ❤️

RECIPE:

Ingredients:

1 1/2 Tbsp Coconut Oil

1 tsp Mustard seeds

A sprig of Curry leaves

3 Green chillies

About 20 Ivy Gourds/ Tindora/ Tendle (2 Cups sliced)

3/4 to 1 Cup Cashews (regular ones)

Salt to taste

2 Tbsp freshly grated Coconut for garnish

Step by step recipe:

1. Wash ivy gourds well, then chop off the ends and slice them as shown. You can slice one ivy gourd into 6 long pieces.

2. Heat oil in a pan, add mustard seeds, allow it to splutter. Now add curry leaves and green chillies. Fry for few seconds.

3. Now add the sliced ivy gourds and cashews together. Mix well.

4. Add little water ( about 1/4 cup) along with salt. Cover and cook on medium flame for about 10 mins. Check in between if the water has evaporated. Add little more if needed.

5. Once the ivy gourds change colour to light green and turns soft along with cashews turning soft too, the upkari is done. If water is remaining in the stir fry, just keep the flame on high and fry till the mixture turns dry. Now garnish with freshly grated Coconut. Done 🙂

6. Serve with rice meals or with congee (pej/rice gruel). Tastes so yum ❤️

Click on the image to save the recipe on Pinterest

Notes:

* The ratio of ivy gourd to cashew is upto you. We love cashew in this upkari. So I add 1 Cup for 2 Cups sliced ivy gourd. You can also add just a handful. Tastes good even then.

* Remember to cook both the ivy gourd and cashews till soft. Ivy gourd takes time to cook, so keep the flame on medium, add little by little water and cook till it changes to light green and soft.

* We Konkanis make this with Bibbo or fresh, tender Cashewnuts during our New year festival called Ugadi. But since I live in Qatar and am here during Ugadi, I make it with cashews.

* You can check all my Konkani recipes here:

All Konkani Recipes

Ragi Ela Ada | Steamed Finger Millet snack | Vegan, Gluten free and Oil free

Click on the image to save the recipe on Pinterest

Kids’ schools have started after Eid holidays and days have started flying again. Waking up early, preparing their snack boxes, sending them to school, morning walk, cleaning the house, relaxing till they come back and after that hearing about their day at school, teaching them, walking again in the evening while they play outside, finally preparing for their next day at school and putting them to sleep.

Days are super busy but I would not want it any other way. I have realized being busy is actually great than sitting idle and overthinking. So it’s a blessing in disguise for me. ❤️

In midst of this, is cooking which I love and which brings me happiness. I listen to bhajans and songs while cooking which makes it so peaceful. Music is truly therapeutic. ❤️

Apart from breakfast, lunch and dinner, there is one meal of the day which is most difficult for me – Snack time. Finding a quick, healthy and tasty snack which the kids also love is very hard. So when I tried this Ragi ada inspired by my Kochi memories of the regular ada and it came out so well that we all loved it, I knew I had to share it with all of you too. ❤️

I don’t know why some people think Ragi is bitter. Ragi is such a tasty millet and I use it regularly in my cooking. It is tasty and very healthy too. Have shared all the recipes that I make using Ragi in the notes section towards the end. Do try and I think if you follow the recipe well, adapt it in your cooking, in few days, you will love Ragi too, just like we do. ❤️

Happy and healthy cooking ❤️

RECIPE:

Ingredients: { to make about 5 adas }

1 Cup = 240 ml

Banana leaves to make the ada

To make outer covering:

1 Cup Ragi flour ( finger millet powder)

Salt to taste

Approx 1 Cup hot water

To make inner filling:

3/4 Cup Jaggery

3/4 Cup freshly grated Coconut

1/4 tsp Cardamom powder

Step by step recipe:

1. Dry roast Ragi flour ( do NOT add oil while roasting) on medium flame till you get an aroma of the flour and it changes colour to a darker tone.

Note: Even if you have roasted ragi flour with you, dry roast for few minutes as it enhances the flavour a lot.

2. Transfer it to a bowl. Add salt.

3. Now add hot water, little by little. Mix as you add water.

4. As you add hot water, little by little, after mixing, the dough will look like this. Do NOT add water after this.

5. Now the dough will be warm. Using hands, mix together to form a smooth and soft dough.

6. Now make the inner filling. Take coconut and jaggery in a pan. Heat it together on medium flame till the jaggery melts and coconut will stick to jaggery. Remove from flame. Add Cardamom powder. Mix well.

7. Now cut the banana leaf into rectangle pieces as shown. Clean it with water and wipe it dry.

Also divide the ragi dough into equal sized balls. If you have taken 1 Cup (240 ml) of Ragi flour, you will get 5 balls.

8. Take a ball of ragi dough and spread it using slightly wet fingers as thin as possible.

9. Take a spoonful of the filling and place it on one half side. Spread it on the half side using spoon as shown in the image below.

10. Fold the banana leaf while closing both the halves as shown.

11. Seal the edges of the dough using fingers so that the filling does not come out.

12. Repeat the same with the rest of the dough balls. Place it on a idli steamer.

13. Steam for 20 to 25 mins on high flame till the ada cooks thoroughly. Remove from flame. Allow it to cool for 5 mins.

14. Now peel off the banana leaf, discard it and enjoy the warm Ragi ela adas. 😍

Click on the image to save the recipe on Pinterest

Just look at the inside of the ada. Sweet, juicy and so delicious 😍

Click on the image to save the recipe on Pinterest

Notes:

* As you can see from the above picture, the ada is of the right thickness and also steamed fully. This is due to spreading the dough thin over the banana leaf and also steaming for atleast 20 mins.

* Even if you have roasted ragi flour with you, dry roast for few minutes to get perfect aromatic ragi adas.

* Do use only hot water while preparing the dough. It took me around 1 Cup hot water for 1 Cup Ragi flour. Add only 1/4 Cup at a time and mix well till you get the dough as in step number 4. Then mix using hands to form a smooth dough.

* Don’t add a lot of water while making dough. It will be difficult to spread if dough is too soft.

* For 1 Cup Ragi flour, 3/4 Cup coconut and 3/4 Cup jaggery made the right filling for me. If you add a lot of filling, it will be difficult to seal the edges. So add only a spoonful to cover half of the ada.

* I have not made this without banana leaves. So can’t say the alternative to it. Spreading the dough on the leaf is easy and the ada turns aromatic too. So try to get the leaves if you can.

* These adas are best eaten soon after they are steamed but tastes yummy even after few hours too. So you can carry it in tiffin box and during travel too.

* A similar recipe with coconut jaggery filling is this Kerala style Nendrapazham nirachathu or stuffed Nendran Bananas..

Nendrapazham nirachathu

* I make many dishes using Ragi flour. You can check the recipes here:

Instant Ragi Rava dosa

Ragi Set Dosas

Instant Ragi Idlis

Ragi Urad Idlis

Ragi Malpuas/ Ragi Pancakes

Ragi Jaggery Ladoos

Ragi Butter cookies

Eggless Ragi Chocolate Cake

Beetroot Raita

Click on the image to save the recipe on Pinterest

Here’s welcoming my favorite veggie as a child – Beetroot into the blog ❤️ I have never posted a recipe with beetroot before as my husband used to dislike it so much that we hardly bought it. Even if we bought it after my hundred requests 😁, it used to go into only two dishes:

* Amma’s Carrot Upkari, where carrot is replaced with beetroot, like how my Amma made and is my favorite dish with Beetroot.

* Restaurant style Vegetable Kurma, where I add Beetroot too which gives it a delicious flavour due to the coconut masala.

But still it was rare as he still did not like the flavour of beetroot at all. 😔

Then one day, I tried this Beetroot Raita as a quick side dish for Pulao and everything changed 😍 He said it’s the best dish he had ever tasted with beetroot and now he himself gets the veggie to make this raita (Happy me ❤️)

And the kids? Yes, they too love it for it’s Gorgeous colour and enjoy dipping it in their parathas and theplas.

So, finally our love – hate relationship with Beetroot turned into love, much to my delight, all due to this delicious raita. ❤️

Hope you all try it and love it too. It’s a very easy recipe. Happy and healthy cooking ❤️

RECIPE:

Ingredients: (Serves 2)

1 Cup Yogurt/ Curd

3/4 Cup grated Beetroot (half a medium beetroot)

1 small sized Onion, finely chopped

1 Green chilly

2 Tbsp Coriander leaves

1 tsp Cumin powder / Jeera powder

1/2 tsp Chaat masala

Salt to taste

Step by step recipe:

1. Take yogurt in a bowl and mix with a spoon till it becomes creamy in texture and lump free.

2. Now add all the ingredients – peeled and grated Beetroot, finely chopped onion, green chilly and coriander leaves, jeera powder, Chaat masala and salt.

3. Mix well. Done 🙂

4. Serve with Pulao or with any meals. I also serve it with parathas or theplas and it tastes delicious. ❤️

Click on the image to save the recipe on Pinterest

Notes:

* I have used homegrown mint leaves in the presentation above which I fine chop and add to the raita sometimes. So if you have mint leaves, you can add it as well ( about 5 to 6 leaves).

* The yogurt we get here is thick. If you get watery curd, sieve it to make it thick and then add other ingredients.

* Alternately if you like slightly thin raita, you can adjust the consistency as you like.

* Chaat masala can be substituted with amchoor or dry mango powder.

Makes a great combination with:

* Easy Vegetable Biriyani

* Soya Chunks Pulao

* Amma’s Carrot Pulao

* Mooli Paratha

* Methi Thepla

* Bottlegourd Theplas

* Masala Oats Paratha

* Drumstick leaves Aloo Roti

Idli Usli | Idli Upma | Seasoned leftover idlis

Click on the image to save the recipe on Pinterest

As a kid, whenever my Anama (grandmother) or Amma made idlis, I would ask them to keep some extra to make idli usli as breakfast for next day. The super soft hing flavoured idli usli with bites of green chillies in it was, is and will always be one among my most favorite breakfast. Childhood nostalgia. ❤️

Now in my kitchen, where I am the manager 😂😂, I purposely make a whole batch of idlis extra just to savour idli usli the next day. My family too likes it ( Thank God! 😁), so two days breakfast is set when I make idlis.

Even though I make it every couple of weeks, it never occured to me that I could share this easy recipe with all of you too. But yesterday when I was about to make it, the idlis in my steel case looked so beautiful that as I admired it, I thought why not share this recipe on the blog too. If it helps even one of you, I will be very happy. ❤️

So here’s me sharing this super easy, quick and very tasty recipe of Idli Usli, Konkani style. Hope you all try it and remember me while enjoying it. Happy and healthy cooking! ❤️

RECIPE:

The Idlis used here are : Mallige idlis

Ingredients:

About 10 to 15 Leftover idlis (depends on how much you have)

1/4 tsp Hing/ Asafoetida

1 tsp Sugar

Salt to taste (be mindful as idlis already have salt)

For seasoning:

2 Tbsp Coconut oil

2 tsp Mustard seeds

2 tsp Cumin seeds/ Jeera

2 tsp Urad dal

A sprig of Curry leaves

3 to 4 Green chillies

Freshly grated Coconut for garnish

Step by step recipe:

1. Leftover idlis : I keep them in the refrigerator the previous night. Since they are cold and slightly hard, it’s easy to crumble them. You can also use idlis that are at room temperature. Fresh idlis need to be cooled completely before making usli.

2. Crumble them using hands as shown in the picture. Add salt ( be mindful as idlis already have salt) , sugar and hing.

3. Mix everything well and evenly with hands. Keep aside. 

4. Heat coconut oil in a pan. Add mustard seeds. Allow it to splutter. Now add cumin seeds, urad dal, curry leaves and green chillies. Fry on medium flame till urad dal turns brown.

5. Now add the crumbled idlis and mix well on medium flame. Cover and keep for 5 mins.

6. Garnish with freshly grated coconut and serve hot. Done 🙂

Click on the image to save the recipe on Pinterest

Notes:

* If you don’t have leftover idlis, you can make the same recipe using Thick Poha. Only addition is peanuts in the seasoning which needs to be fried till crisp. Rest recipe is same. I make this regularly for a light and tasty evening snack. In Konkani it is called Phova Usli.

* I make regular idlis using this recipe of Mallige idlis. They come out super soft and very tasty.

* Since I love Idli Usli, I make an extra batch of Mallige idlis and refrigerate. Next day morning for breakfast, I make Idli usli.

* In this recipe, you can adjust the seasoning according to how many idlis you have leftover. I even make the usli when I have 6 to 8 idlis. It serves two people.

* Do remember to add less salt as idlis already have salt in them. Hing gives a wonderful aroma in the usli. So don’t skip it. Sugar gives a good balance in flavours too. Just a little is enough.

* You can also check these seasoned breakfast recipes that I make often:

Chow Chow Bath (Upma and Sheera)

Batat Phovu

Muga Dali usli

Chane Usli – Godu Phovu

Kobi Pohe

Bhajjil Phovu

Undi – Piyava Gojju

* You can also check different varieties of Idlis in my Variety Idlis collection.

Join me in my journey with a foodie husband and hungry kiddos while I make them eat healthy!