Tag Archives: Instant

Collection of “no rice” dosa recipes

Click on the image to Pin the post on Pinterest

My regular readers know how much my kids love dosas. So much that anyday you come to my home, you will find dosa batter ready, either fermenting or in the fridge (and if you don’t find it, don’t worry, I can magically make some instant dosas for you too 😍). It is also very handy for those sudden hunger demands by the kids, especially my son who feels very hungry after his evening nap and says, “Amma, bobbo jayi.” (I want dosa in baby Konkani 🀩)

We have a little game after he wakes up where he being held in my arms, shows me the way to the kitchen and points to what he wants to eat. I purposely do a little wiggly kind of walk (the never growing child in me πŸ˜…) to make him laugh and that brightens him up. Then it finally ends in him pointing to dosa batter bowl. So I always have any one variety of dosa batter ready for him (my little “bobbo” lover boy ❀️).

My readers also love the dosa recipes that I post and always request for more “no rice” dosa recipes. So I decided to finally compile all my dosas which don’t contain rice and I was surprised to find that I had so many of them. This is one compilation I enjoyed making as it was like playing treasure hunt with my blog. πŸ˜‚ Hunting dosa recipes without rice which is indeed no less a treasure for my readers requesting for it (sorry for the poor joke 😬).

Anyhow, hope this is useful to all of you. Happy and healthy cooking! Enjoy dosa making! (That rhymed!) πŸ˜„

Instant “no rice” Dosas/ Bhakris:

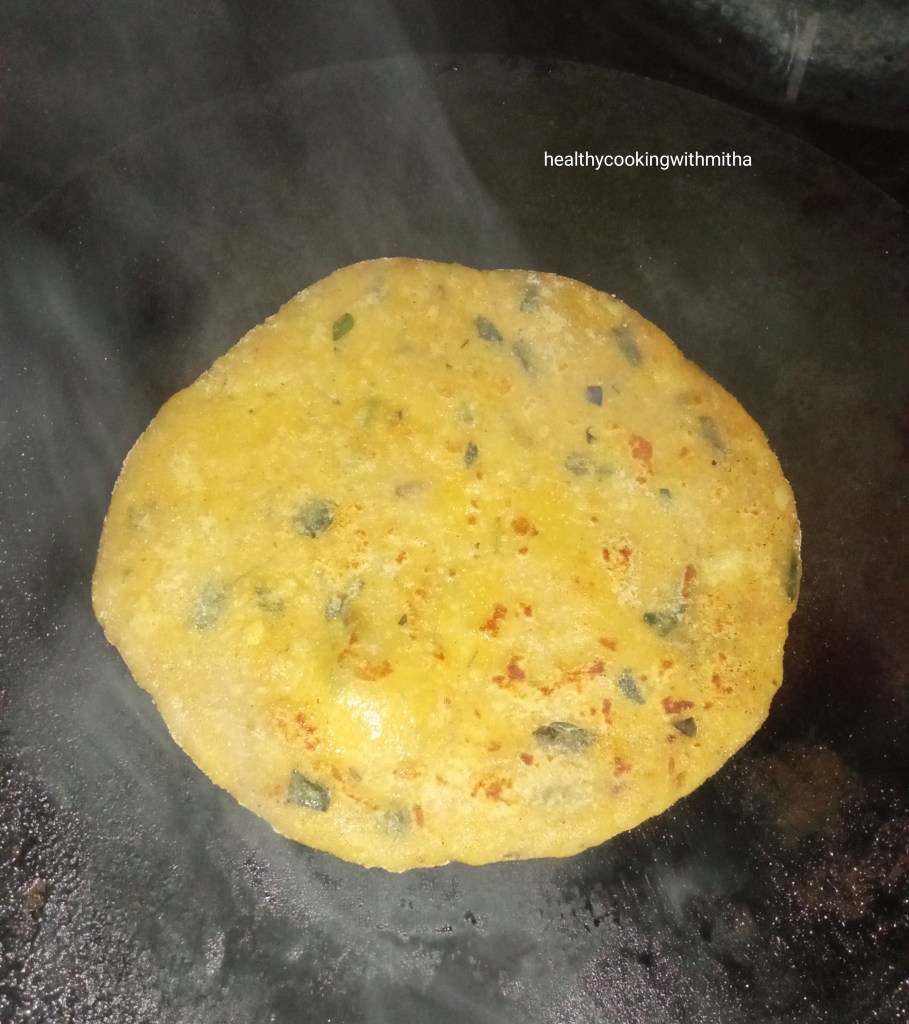
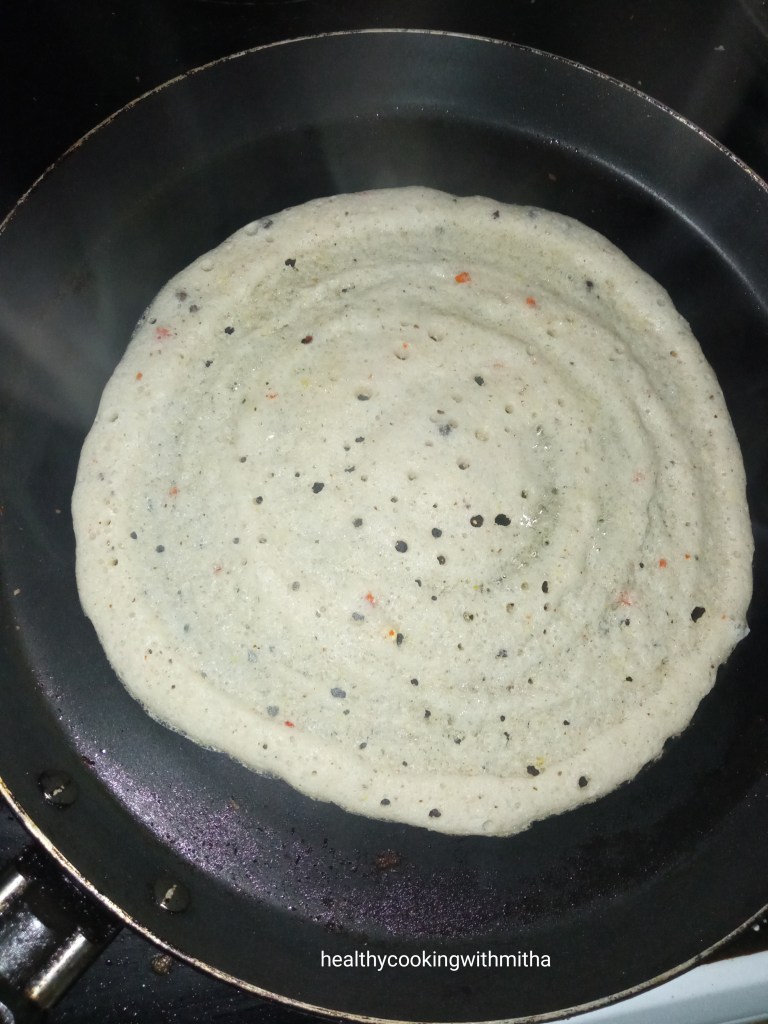
1. Rava Bhakri/ Instant Semolina dosas: These are one of the oldest variety of Konkani breakfasts and my family favorite too. If I forget to soak for regular dosas, Rava Bhakri it is for breakfast the next day. Also makes for a quick snack option. Tastes oh so heavenly with butter. ❀️

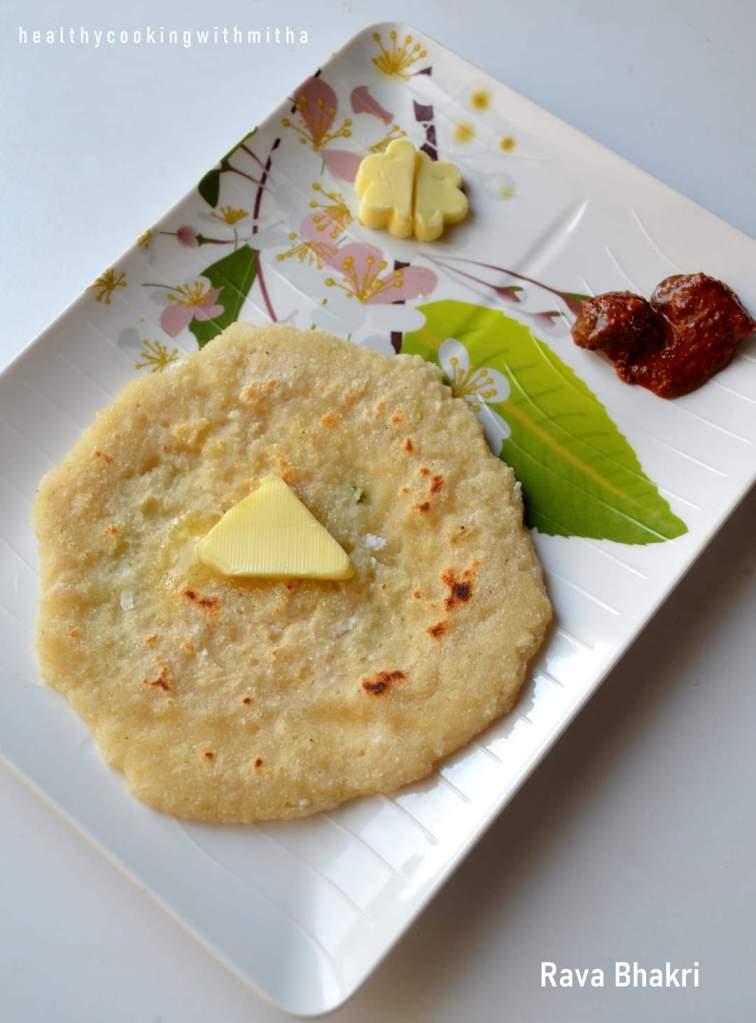
Recipe here: Rava Bhakri/ Instant Semolina dosas

2. Instant Cucumber dosas: This is a variation to rava bhakri with the addition of grated cucumbers which makes it even aromatic and healthy along with being super delicious. When I have to finish off those leftover cucumbers, I make these dosas.

Recipe here: Instant Cucumber dosas

3. Eggless Tomato Omelette: Being from a vegetarian family, the only Omelette we knew as a kid was this eggless Tomato Omelette which Amma made with loads of love. She always made sure I got the omelette with the maximum number of tomato pieces in it. 😍

Recipe here: Eggless Tomato Omelette

4. Instant Oats Vegetable Bhakri: This is our favorite evening snack and is super filling too. Best way to get oats and veggies in our diet. Add loads of green chillies and coriander leaves. Tastes super yummy with butter and simple coconut chutney. ❀️

Recipe here: Instant Oats Vegetable Bhakri

5. Instant Oats Poha dosas: A soft yet delicious dosa which can be made instantly yet tastes like regular dosas. Awesome combination with sambar making it a complete meal in itself.

Recipe here: Instant Oats Poha dosas

6. Instant Jowar Vegetable Bhakri: These Bhakris contain a mix of radish, carrots, cucumbers along with Jowar flour but still comes out so tasty. A very healthy and filling evening snack that I make always. You can make them as thalipeet too.

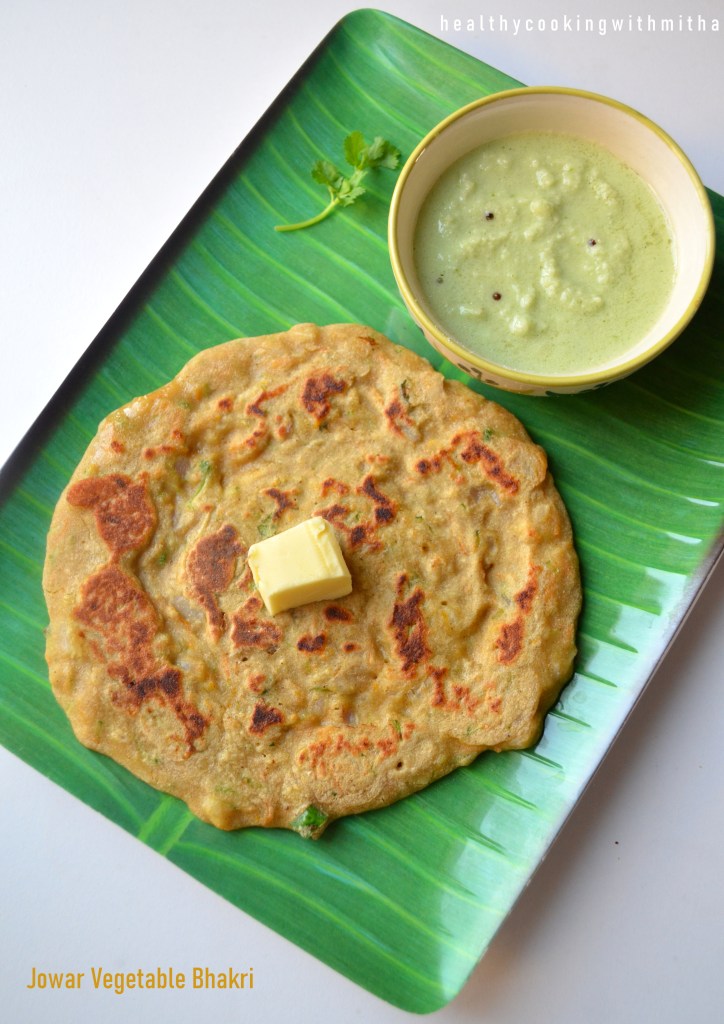
Recipe here: Instant Jowar Vegetable Bhakri

Dosas which don’t need fermentation:

1. Moong sprouts and Oats dosas: My kids don’t eat sprouts as it is, so this is my way to include sprouts in their diet in their favorite way, the dosa way! πŸ˜„ The way our brain works overtime in motherhood. πŸ˜‚πŸ˜‚ Turns out so delicious too! No fermentation required makes it very easy too.

Recipe here: Moong sprouts and Oats dosas

2. Masoor dal dosas: One of the most tried and loved recipe by my readers. Try masala dosa with this and it tastes amazing. ❀️

Recipe here: Masoor dal dosas

“No rice” Dosas with millet flours:

1. Ragi Set Dosas: A dosa that I make atleast weekly once to include the wonder millet, Ragi in our diet. Turns out so soft and delicious. My daughter calls it “chocolate” dosas since she was a baby and even now at almost 6 years. 😍

Recipe here: Ragi Set Dosas

2. Urad – Jowar flour dosas: I feel this is the best way to include Jowar flour in our diet. Yet another weekly once breakfast in my house as kids love it. Kids food preferences rule in my house. πŸ˜€

Recipe here: Urad – Jowar flour dosas

“No rice” dosas with Whole Millets

1. Bajra Moong dal dosa: This is the crispiest dosa that I have ever made and you can never say it does not have rice in it. Also combines the goodness of Bajra with moong dal.

Recipe here: Bajra Moong dal dosa

2. Little Millet dosa: A very healthy yet tasty dosa with Little millet. Great idea to include this variety of millet in your diet.

Recipe here: Little Millet dosa

Other “no rice” dosa recipes:

1. Oats mixed dal dosas: A dosa for which I have got many compliments from readers for making them so evenly and also for the gorgeous colour. One of my readers have even commented that it looks machine made and there’s magic in my hands that it has been crafted to perfection. πŸ˜€ So these dosas are indeed very special for me. ❀️

Recipe here: Oats mixed dal dosas

2. Broken wheat Mixed dal dosas: These are one of my recent additions on the blog but tried and loved by so many of my readers. They loved how healthy yet tasty it turns out without missing rice in the dosa at all.

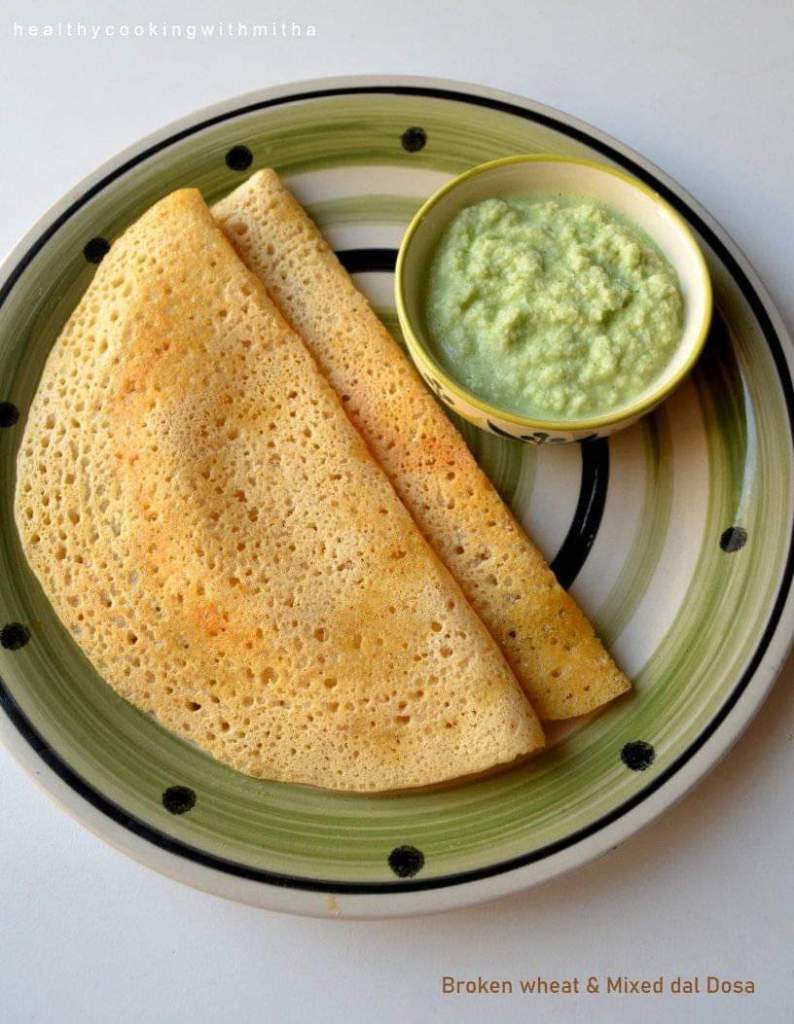
Recipe: Broken wheat Mixed dal dosas

3. Urad whole moong dosas: These are my favorite because I can make both idlis and dosas with this batter. Also a great way to include whole moong in my kids’ diet as they don’t eat moong as it is.

Recipe here: Urad whole moong dosas

4. Urad wheat flour dosas: This was my last recipe that I posted on the blog. Learnt it from my friend Vinanti and have turned out to be my kids’ favorite. They eat more dosas (touchwood!) when I make them. I absolutely love the gorgeous colour that it turns out. ❀️

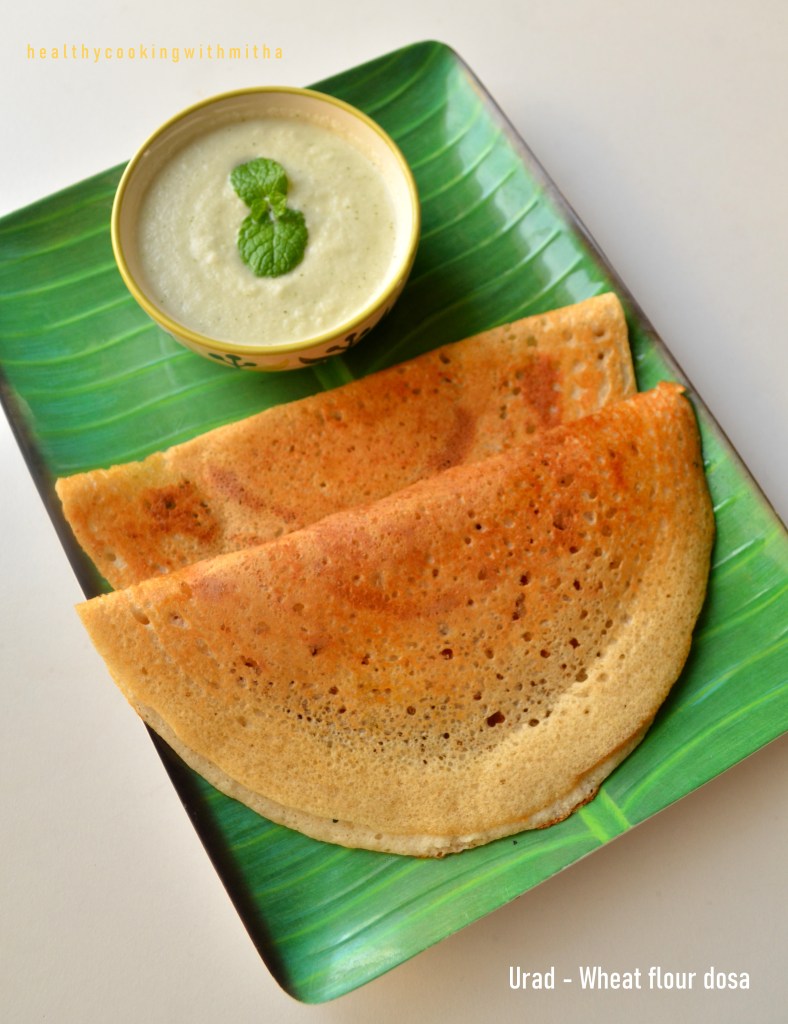
Recipe here: Urad wheat flour dosas

5. Barley Urad dosas: These dosas are so soft and delicious, you could never say it has the healthy Barley grain in it. One of the most regularly made dosas in my house lately.

Recipe here: Barley Urad dosas

You can check all my dosa recipes here: DOSA CORNER

You can check all my idli recipes here: IDLI STAND

I have made two other recipe collections. You can check them out.

Oats recipes Collection:

Healthy Cakes and Bakes:

Healthy sweets that can be made under 15 mins:

Ragi Malpua | Quick sweet idea | Healthy snack for kids

I have already shared a chocolate cake, cookies, idlis and a dosa with Ragi flour. You can check all the recipes here. This recipe of Ragi Malpua was my first post on my old blog and one of my first trials with Ragi flour back in 2013. Now when my kids love it, it makes me very happy (one of my successful experiments πŸ˜„).

These little rolls of yumminess comes handy during their “Amma, we are hungry. Give us something right now!” kind of hunger πŸ˜‚. Yes, as a mother, we always have to be ready as such hunger pangs can strike anytime (proportional to their naughtiness 😬). I quickly make these Ragi malpuas and they enjoy it while playing. Seeing them eat happily is one of the best moments in the day for me. ❀️

I never realized how someone else’s happiness can be more important than mine before becoming a mother. But now, all I think is how to make them happy (even though I do scold them if they get extra naughty 😁) and all my wishes have got replaced by theirs too. My daughter asked me yesterday what wish do I have in life (she was talking about her wish to be a princess πŸ˜†πŸ˜). I said I no longer wish for anything as nothing is in our hands and all depends on God’s will, but I do wish and pray that all your wishes get fulfilled. She was so happy with that answer that she gave me a tight hug saying thank you. It made my day! πŸ₯°

Both of them fill my heart with their talks, smiles, naughtiness and love. Can’t imagine my life without them. ❀️❀️

Here’s sharing their favorite snack, these Ragi malpuas. Hope you all try and love it too. Happy and healthy cooking! ❀️

RECIPE:

Ingredients: { Makes 3 Malpuas }

4 Tbsp Ragi / Finger millet flour

2 Tbsp Atta/ Wheat flour

1 Tbsp Jaggery

Salt to taste

5 Tbsp Milk

For the filling:

1/4 Cup Desiccated or Fresh Coconut

1 Tbsp Honey or as needed

1 Tbsp finely chopped Dry fruits ( I use a mix of cashews, almonds and pistachios)

1/4 tsp Cardamom powder

Ghee to cook the malpua

Honey and Pistachios for garnish

Step by step recipe:

1. Take ragi flour, wheat flour, jaggery and salt in a bowl.

2. Mix it once using a spoon. Now add milk, one spoon at a time and make a thick batter free from lumps. Keep it aside.

3. Now for the filling, take coconut in another bowl. Add honey, finely chopped dry fruits and cardamom powder. Mix well.

4. Now heat a dosa pan well. Then reduce flame to medium. Add about two spoons of the malpua batter in the center of the pan. Spread in round shape. Add ghee and cook till the surface cooks.

5. Flip and cook for a minute.

6. Remove into a plate and fill with the filling. Roll and serve. Drizzle with honey on top and garnish with chopped pistachios.

Notes:

* I have not skipped wheat flour in this recipe as it needs little wheat flour for that soft yet firm texture.

* You can increase the amount of honey on the filling or jaggery in the batter for more sweet malpuas. I prefer it in this quantity.

* Skip jaggery in the batter if you don’t have much sweet tooth.

* They are best enjoyed as soon as made. Keeping them for little while can make it dry.

* Don’t make the batter very thin. The batter is free flowing yet thick. It took me 5 Tbsp milk for 4 Tbsp Ragi flour and 2 Tbsp wheat flour to get the perfect consistency.

* This snack is really handy as it is healthy as well as tastes delicious. Hardly takes 10 mins to make too.

* You can check all my Ragi recipes here.

Almond Butter Cookies | Easy 4 ingredient healthy recipe using wheat flour and jaggery

Click on the image to save the recipe on Pinterest

When I posted the Ragi Butter Cookies which was my friend Anvy’s recipe, she asked me if I had tried the almond cookies that she had shared on her Insta handle, Homemade by Anvy. I told her I don’t have almond meal with me (it sounded so exotic 😬) but I did have loads of almonds with me (which I had bought to eat daily to increase my memory. Now if anyone would remind me to eat them πŸ˜‚).

So she told me almond meal was nothing but powdered Almonds (my plinggg moment!! 🀣). So I had to try it and imagine my happiness when it came out so good. I already made them thrice in the past week as it tasted so heavenly and since it was so easy to make with only 4 ingredients. Also, never knew homemade almond cookies could turn out so pretty. Could not keep the beauties down. 😍

Click on the image to save the recipe on Pinterest

Off they went into my kids’ “choti bhook waala dabba” (their snack box for mid meal hunger and mine too for my sweet tooth 😬).

Click on the image to save the recipe on Pinterest

It has been only an year since I joined Instagram and as much I like it, there have been times when I wanted to just come out of it as I had a tendency of over sharing stories. Finally, got rid of that habit ( some self control that was πŸ˜„) and now just using instagram to post my recipes while following some amazing accounts like that of Anvy’s.

Thank you so much dear Anvy @homemadebyanvy for yet another great recipe of yours. We absolutely love it! ❀️

Hope you all try it too. You will definitely love it. Happy and healthy baking!

RECIPE: { My 1 Cup = 240 ml }

Ingredients: { Makes about 12 cookies }

100 grams Salted Butter ( 1/4 Cup + 3 Tbsp) (Add a pinch of salt if using unsalted butter)

3/4 Cup Whole wheat flour or Atta

1/2 Cup finely powdered Almonds (or Almond meal)

1/4 Cup Jaggery powder

Sliced Almonds for garnish (optional)

Step by step recipe:

1. Soften butter by keeping it at room temperature for little time. (Do NOT melt it in microwave or so.) Just place it at room temperature till it turns soft. Now add jaggery and mix both together using a spatula till they combine. Also add the finely powdered Almonds.

2. Now add wheat flour and mix using hands till it forms a dough. It will come together and will be slightly sticky. Refrigerate for about 15 mins. It will turn firm.

3. Meanwhile preheat the oven at 180 C for 10 mins. Take small balls of the dough and flatten with your fingers. Place them on a greased (with ghee/butter) oven proof tray leaving space among them as it increases width on baking. Decorate each with slices of almonds.

4. Bake in the preheated oven at 180 degree Celsius (350 – 375 F) for 10 to 14 mins in the center rack of your oven or with both rods on in your conventional oven. Mine gets done at 14 mins.

The colour of the cookies are brown and not the colour above. It is due to the reflection of my kitchen lights that the cookies have a light shade in the picture. I still added it to show how much the cookies increased in width after baking.

5. Remove and allow it to cool completely. As you keep it to rest, it turns hard but not very hard as butter cookies are supposed to be melt in the mouth and on the softer side.

Notes:

* Store the cookies in a dry, air tight container and it lasts well for two to three days. Mine gets finished off by my family before that. Will last longer if handled well, free from moisture.

* They are very soft and break upon touching on warm. As they cool down, they will harden but still not very hard like store bought ones as we have used only butter. The texture is melt in the mouth softer version of cookies.

* These cookies do not need baking soda nor baking powder. They still grow in width during baking process. I too was amazed the first time I tried it as I always thought cookies needed either baking soda or powder.

* Baking time depends on your oven. In some ovens, it can be done at 10 mins while in my OTG, it takes 14 mins. So keep an eye but don’t open the oven door before atleast 10 mins into the baking time. Else it will lead to uneven baking.

* Do refrigerate the dough for atleast 10 to 15 mins as it helps combine the ingredients well and also helps us form cookies well without sticking in our hands.

* Place the cookies in the center rack of your OTG or with both rods on if using microwave with conventional mode oven.

* I have not replaced butter with ghee or oil in this recipe. So can’t say about the outcome.

* For making powdered Almonds, just put the almonds in a mixer and pulse it in regular intervals till it turns into fine powder. Keep checking in between so that it does not leave oil and become a paste.

* Leave space between cookie dough while keeping on the tray as they increase in width as they bake.

* When they fully bake, you can see the surface is free of raw dough and edges are slightly golden in colour. It is enough. You can remove the cookies out of the oven.

* Garnishing with almond slices are optional. Avoid the slices if making for kids less than 2 years as it can be a choking hazard. Else just finely chop and garnish. Anyhow, the cookies tastes good even without it.

* You can check my Healthy Cakes and Cookies compilation.

* For beginners in baking, you can check my Baking Basics for beginners post.

I have tried to note down as much points as possible so that it’s easy for you all to follow but if you still have any doubts, either comment here or message me on my Facebook page Healthy cooking with mitha or on my Instagram handle and I would be happy to help.

Click on the image to save the recipe on Pinterest

Drumstick leaves Aloo Roti | Easy snack and lunch box idea

Finding healthy evening snacks are the most difficult for me as most of the snack ideas that are available online are deep fried ones or with bread. Though I bake my own wheat bread and we enjoy it with fresh cream cheese spread, still I have to think of varieties each day to feed my kids who get bored very quickly. πŸ˜€

I am also sorry that I always write about my kids. It’s because all my recipe ideas are inspired by what they like and I keep making the dishes they absolutely love. ❀️ Hope it is helpful to mothers like me who want to make their kids eat healthy yet get run out of ideas.

These rotis were found on a day when I had leftover drumstick leaves potato curry and I had to make something quick for the kids. I just added wheat flour and made rotis with it. The kids loved it so much that it has now become a regular in our place whenever I get drumstick or Methi leaves (best way to get leaves in their tiny tummies 😍😍).

This is very filling, yet tasty and very healthy. Best part is it stays soft after many hours. So you can give for lunch box too. Hope you all try and love it too. Happy and healthy cooking! ❀️

RECIPE:

Ingredients: { Makes 5 Rotis }

1 Tbsp Ghee

1 tsp Jeera/ Cumin seeds

1 Cup mashed Potatoes (Pressure cook potatoes till soft, peel and mash well)

1/4 Cup Drumstick leaves / Moringa leaves

1/4 tsp Turmeric powder

1/2 tsp Red chilli powder

1/2 tsp Garam masala powder

2 Cups Wheat flour

1/2 Cup Water

Salt to taste

Ghee to cook the rotis

Step by step recipe:

1. Heat ghee in a pan (I use my iron kadhai for this recipe.). Add Jeera. Fry little and add mashed potatoes along with drumstick leaves, Turmeric powder, Garam masala powder, red chilli powder and salt. Mix everything well and cook for two mins.

2. Allow it to cool. Then add wheat flour and water to make a smooth dough. You can add a pinch of salt to this if needed.

3. Make small balls of this dough, dust in dry wheat flour and spread using a rolling pin into rotis of medium thickness (slightly thicker than chapatis).

4. Cook on a hot tawa and use ghee while frying both sides.

5. Remove from flame and serve with mint chutney and curd.

Notes:

* I serve this with Pudina Lehsun chutney and curd. Makes a great combination.

* You can substitute drumstick leaves with Methi or fenugreek leaves too.

* I make and keep these in a steel container and it stays soft even after many hours. So really good idea for lunch boxes.

* The dough also can be made beforehand and refrigerated in an airtight container. Lasts well for a day.

* I add 1/4 Cup leaves to 1 Cup mashed potatoes and 2 cups wheat flour. You can increase the quantity of leaves if you want. I find this ratio good for my kids as the taste is not very overpowering while it gives them the nutrition too.

* You can also check the spicy idlis with drumstick leaves which we Konkanis call Mashinga palle sannamuddo.

* Do try these rotis or your regular parathas with Pudina Lehsun chutney. Tastes amazing.

* One more snack idea which is very filling and my kids’ favorite are these Masala Oats Parathas. Very delicious!

Ragi Butter Cookies | easy recipe using Jaggery

Click on the image to save the recipe on Pinterest

The above picture is of “melt in the mouth” Ragi Butter cookies before two storms struck in πŸ˜…. Will come to that later. Right now, I just want to thank my school friend Anvy Susan Thomas who is a great baker ( I am her huge fan! 😍) for this amazing recipe of hers. She has an instagram page homemadebyanvy where she makes us drool with her delicious bakes.

As all of you know, I love baking and I bake atleast one kind of goodies everyday for my family (my daily dose of happiness ❀️). One of my regular bakes are these Ragi Butter cookies which turns out so good that you will never realize you are enjoying a healthy version of cookies. The kids are HUGE fans of it and you can see what I meant by storm strucking in. Here is my 5 year old daughter slowly coming in the frame to grab one of these cookies (storm no 1 πŸ˜‚).

Click on the image to save the recipe on Pinterest

And when she gets her share, how could the little one be left far behind? Here is storm number 2, my two year old son grabbing the cookies. I loved their cute hands on the cookies that it became my favorite picture too. ❀️❀️

Click on the image to save the recipe on Pinterest

These cookies are very easy to bake and turn out too good to be true. You won’t feel like getting cookies from outside once you bake them, that’s for sure. I always believe that it’s best we bake and make everything possible at home since we don’t know what kind of ingredients have gone in store bought ones.

Hence sharing one of my most favorite cookies. I whole heartedly thank my friend Anvy @homemadebyanvy for this recipe. Hope you all try it out too. Happy and healthy baking! ❀️

RECIPE:

Ingredients: { 8 Cookies }

100 grams salted Butter (add a pinch of salt if using unsalted)

1/3 Cup powdered Jaggery

1/2 Cup Ragi flour or Finger millet powder

1/2 Cup Whole wheat flour or Atta

1/2 tsp Baking soda

Step by step recipe:

1. Soften butter by keeping it at room temperature for little time. (Do NOT melt it in microwave or so.) Just place it at room temperature till it turns soft. Now add jaggery and mix both together using a spatula till they combine.

2. Now sieve ragi flour, wheat flour and baking soda over it.

3. Using hands, mix everything well till it forms a dough like shown below. Refrigerate it for 15 to 20 mins.

4. Preheat the oven at 180 C (350 to 375 F) for 10 mins. Make small balls of this dough and flatten with your fingers (like making pedas). Make lines over it with knife as shown. Place over a greased (with butter or ghee) oven proof plate. Keep distance between them as they increase in width as they bake.

5. Bake in the center rack of your OTG or with both rods on if using a conventional mode oven at 180 C (350 – 375 F) for 10 to 12 mins. Mine gets done exactly at 12 mins. Each oven is different. So in some ovens it may take upto 20 mins for it to bake completely. The surface will be smooth to touch and will be dough free. Also will have a golden tinge on the edges.

6. Allow it to cool slightly and enjoy the cookies.

Notes:

* They are very soft when they are right out of the oven but harden as they cool down. So do not keep a lot of time in the oven thinking the cookies are not done yet. Once the surface is free from dough and they are smooth to touch, they are ready to be removed from the oven.

* I used salted Butter for this recipe. Add a pinch of salt to the mixture if using unsalted butter.

* Also, don’t melt the butter. Just soften it by keeping it at room temperature.

* Refrigerating the dough is very important. Please don’t skip it.

* Place the cookies at little distance before baking as they increase in width as you can see from the pictures.

* Do grease the oven proof plate well with ghee or butter so that it does not stick to the plate.

* Bake in the center rack of your OTG or with both rods on if using a conventional mode oven. It is very important for even baking of the cookies.

* Mine gets done exactly at 12 mins. Might vary depending upon your oven. But don’t open the oven door before 8 mins into the baking time or else it will leave to uneven baking.

* Store in an air tight container at room temperature. Mine has never lasted beyond a day as my family finishes it off before that. πŸ˜€

* You may also want to try this Ragi chocolate cake which is my kid’s favourite (and her friends love it as well πŸ˜…). One of the most tried recipe by my readers.

Click on the image to save the recipe on Pinterest

Brinjal Rava fry on tawa and Upkari

Even though my kids eat almost everything that I cook ( touchwood!), my 5 year old daughter is slightly choosy when it comes to vegetables. So my mommy brains have to work overtime to make her eat some of the veggies. πŸ˜…

Brinjal is a vegetable she won’t eat if I make a regular curry with it (wish I could capture her face and show you all when she hears it’s brinjal curry for dinner πŸ˜‚). I don’t blame her at all as I myself never used to eat any vegetable as a kid except for a few chosen ones like potato, elephant yam and beetroot. So I can totally understand her. πŸ˜ƒ

But once I happened to make these rava fries for a change and she absolutely loved it. So now I make it regularly even as an evening snack. She loves munching on it and I am happy that a healthy vegetable is filling her with nutrition.

Hope you all will try this as well. Happy and healthy cooking! ❀️

RECIPE:

Ingredients:

3 small variety Brinjals or 1 large Purple Brinjal

1/4 tsp Turmeric powder

A pinch of Hing or Asafoetida

Salt to taste

1/4 Cup Rava or Semolina (or as needed)

1 tsp Red chilli powder

Step by step recipe:

1. Wash the brinjals well and chop off the stem. Slice brinjals thinly for the rava fry and finely chop for upkari. Add both into separate bowls of water.

2. Now drain water and add Turmeric powder, Hing and salt. Mix well.

3. In a plate, take rava and mix red chilli powder in it. Roll the brinjal slices one by one over the rava mix.

4. Heat tawa and place these onto the tawa. Drizzle coconut oil while cooking both sides on medium flame till it turns brown in colour and the brinjal turns soft.

5. Serve with rice meals.

Notes:

* For Brinjal Upkari, fry about 4 to 5 finely chopped Garlic pods in oil till it turns brown and add finely chopped brinjal to it. Add red chilli powder and salt. Cook till it turns soft. Don’t add water at all.

* For the rava fry, slice brinjals very thinly. It helps them cook easily and also turns crispy.

* You can make this with any variety of brinjals.

Carrot Kismuri | Konkani style salad

Click on the image to save the recipe on Pinterest

Most days, our dinner is just ukde pej (matta rice cooked soft, eaten with its gruel) and couple of accompaniments to go with it. As much as it may seem from my posts that I cook a lot, our daily meals are very simple and basic.

One of the reason why I don’t (or rather can’t) cook elaborate meals are my kids who hardly give me time in the kitchen (I know it’s hard to believe πŸ˜€). My son pulls my dress (he literally roams around behind me with his fingers clutching my dress πŸ˜‚ #fevicolkajod πŸ˜…) asking me to play football with him while my daughter who loves colouring asks me to draw something for her to colour (One is making me a footballer and the other, an artist 😬😬).

But my time passes very well and both the activities are so good to calm the mind. Never knew drawing is such a stress reliever. And about football, try playing it with a two year old who knows only to laugh when you kick the ball. It’s such precious source of happiness that I can’t thank God enough for blessing me with both of them. ❀️

And on days when they don’t leave me to cook at all, this carrot kismuri or Konkani style salad is our accompaniment for the day. Very quick to make, hardly taking 10 mins and tastes heavenly with pej and some pickle to go with it. The kids love it very much which makes it a perfect side dish for busy days.

Hope you all try and love it too. Happy and healthy cooking!

RECIPE:

Ingredients:

2 large Carrots, peeled and grated (about 2 Cups grated carrots)

3 Green chillies or to taste

1/4 Cup freshly grated Coconut

3 Tbsp finely chopped Coriander leaves

Juice from 1 1/2 Indian lemons

Salt to taste

For seasoning:

1 tsp Coconut oil

1/2 tsp Mustard seeds

A pinch of Hing or asafoetida

One sprig of curry leaves

Step by step recipe:

1. Take the grated carrots in a large mixing bowl. Add grated coconut, green chillies, salt and lemon juice.

2. Now heat oil in a pan and splutter mustard seeds, add Hing and curry leaves. Fry till curry leaves turn crisp. Pour seasoning over the carrots. Mix everything well. Done!

3. It’s really that simple. Serve along with white rice and rasam or matta rice gruel with some pickle. Trust me, it tastes delicious!

Notes:

* You can add finely chopped onions to this too but I skip as after a while, it starts smelling. If made without onions, I can make even couple of hours beforehand and keep at room temperature.

* Some people add a tsp of Urad dal to the seasoning but I prefer only mustard seeds in it.

* If you add soaked moong dal and cucumbers to this, it becomes Kosambari which is another accompaniment that I make regularly. You can check the recipe here.

Click on the image to save the recipe on Pinterest

Mashinga palle sannamuddo | Drumstick leaves spicy idlis Konkani style

I love cooking alone in the kitchen and look for the time when my kids are super busy with their naughtiness, then sneak myself into the kitchen to cook. When I cook, some dishes bring back such beautiful nostalgic memories that they bring so much happiness in my heart. Memories are really a wonderful way to relive those precious moments which can never come back but will be a treasure in us forever, bringing us joy when we think of them. ❀️

Sannamudhos were regularly made by my grandmother and I used to wait for it to be steamed to enjoy them as soon as it came out of the pedavan or steamer with coconut oil. Even now, when I make them, I eat them the same way just to relive those childhood memories. Here is a glimpse of the sannamudhos from the pedavan which my father had gifted me many years back when I was coming here to Qatar. Love it so much. Also, see how cute it looks. 😍

Here, even though we live in Industrial area, the residents have planted many variety of trees and one among them is drumstick tree. My husband plucks the leaves from a large tree near our house and I make sannamudhos as soon as I get them. The aroma of these idlis are one of it’s kind. The whole house smells heavenly when it steams. ❀️

Hope you all try and love them. Drumstick leaves are very healthy and medicinal. So I always try to add it regularly in our diet. Konkanis know this recipe but sharing for those who are new to it. Happy and healthy cooking! ❀️

RECIPE:

Ingredients: {Makes about 13 idlis}

2 Cups Drumstick leaves/ Moringa leaves/ Mashinga pallo

1 Cup Idli Rava/ Rice Rava

Salt to taste

For the masala paste:

1/2 Cup fresh or desiccated Coconut

1 tsp Tamarind paste

5 to 6 Kashmiri long red chillies or to taste (fried in 1 tsp oil)

Coconut oil to grease the idli plates

Step by step recipe:

1. Remove the leaves from the stems. Add to a bowl. Wash well. Drain and keep aside.

2. Take idli rava in a bowl. Wash well, drain and keep aside.

3. Now grind together coconut, fried red chillies and tamarind paste with little water to a smooth paste. Add this to the idli rava mixture.

4. Add about 1/2 Cup water (I wash the mixer and add that water.) to form a thick batter. Add salt and mix well.

5. Now mix in the drumstick leaves. It is a thick mixture just like how it is shown below.

6. Grease idli moulds with coconut oil and add the mixture evenly in the moulds.

7. Steam for 20 to 25 minutes or till a knife inserted in the center of the idli comes out clear.

Just love this pedavan or steamer gifted to me by my dad 😍

8. Enjoy it piping hot with coconut oil or with rice and dalitoy or rasam. Makes such an heavenly combo!

Notes:

* You can substitute drumstick leaves with Methi leaves or finely chopped palak leaves. This sannamudho can be made adding only onion or a mix of onion plus cabbage too.

* I add two cups of leaves for 1 Cup of idli rava. You can reduce the amount of leaves if you don’t have that much available but this quantity gives an amazing aroma as well as flavour to these idlis.

* The amount of red chillies I have mentioned is apt for us as the idlis turn out medium spicy. If you like them more spicy, then you can also add chilli powder before you mix in the leaves.

* Do steam them well atleast for 20 mins on high flame, else there can be rawness in the idli rava.

* Idli rava absorbs water when kept for a while. So if you keep the mixture to rest, it will absorb all the water and you might need to add a little more water to bring it to thick consistency. If steamed immediately, only 1/2 Cup water is needed.

* These idlis are traditionally had with rice and any curry like dalitoy (Konkani style dal) or rasam. You can also enjoy them as it is but don’t forget to dip in it coconut oil or drizzle over it for that heavenly flavour.

Peanut Ubbatti | whole wheat jaggery holige

Being homebound since many months now, I truly realize the value of our home town visits which were atleast twice a year. Along with that, I really miss the fun meeting my loved ones, the non stop chatter, going to temples, shopping with my cousin and also (importantly) indulging in sweets without a care in the world. πŸ˜…πŸ˜

I have been an ardent devotee of sweets since a child and my dad knowing that, spoils me to the core when I visit them. My favourite sweets are brought and stored before I come, all awaiting me to devour them 😬. One among them are Kayi holiges or coconut filled sweet Ubbattis which are a speciality of Udupi Shree Venkateshwara sweets near the famous and our dearest Shri Krishna’s temple.

So, when I miss those holiges, I make chapati dough, fill it with coconut and jaggery to make my own “jugad” kind of holiges πŸ˜€ which tastes yummy too. As I started making them, I realized I could make different varieties of it and these peanut Ubbattis came into being. It tasted so good that we make it regularly.

So glad to share this recipe. Hope you all try it for Diwali. It’s as easy as making parathas and hope my step by step recipe along with notes will help you all. Happy and healthy cooking.

Also, wishing my readers a very happy Diwali. May the festival of lights brighten your lives and fill it with happiness. ❀️

RECIPE:

Ingredients: { Makes 5 Ubbattis }

For the outer dough:

2 Cups Wheat flour/ Atta { I use Pillsbury brand }

About 3/4 Cup Water {to knead the dough}

1/4 tsp Turmeric powder or Haldi

Salt to taste

For the inner filling:

1 Cup Peanuts { skin removed }

1/2 Cup Jaggery

2 Tbsp Water

1/4 tsp Cardamom powder

To roll the Ubbatti: Dry wheat flour as needed

Ghee to cook the Ubbatti

Step by step recipe:

1. Add wheat flour, turmeric powder and salt in a bowl. Add water and knead to a soft dough. It took me about 3/4 Cup of water for 2 Cups of flour. Might vary as per your brand. The dough should be soft and smooth. Keep aside.

2. Now take the skinned peanuts in a mixer.

3. Powder it by pulsing it every two rounds. Don’t run the mixer continually as peanuts can leave oil. Just pulse for 4 to 5 times and it will turn into fine powder. If tiny bits of peanuts remain, it’s okay as it gives nice bite to the Ubbatti.

4. Now add jaggery along with water in a pan. Allow jaggery to melt and come to a boil. No need to make it into syrup.

5. Now add the peanut powder and mix once. Switch off the flame after mixing once or the mixture will harden.

6. Transfer it into a plate immediately. Allow it to cool slightly. Don’t cool it completely as it will turn hard. When it is warm, make small balls of it as shown. Also make balls of same size as filling from the wheat dough.

Note: It is important to make both inner and outer balls of equal size so that the Ubbatti turns perfect.

7. Now keep a chapati tawa to heat on the flame. Take a wheat ball and dip in dry wheat flour. Roll to a small Puri (small circle as shown). Keep the inner ball of filling inside.

8. Now take the sides of the wheat dough and cover it over the filling sealing it completely.

9. Roll it using little dry wheat flour to as thin and evenly as possible.

10. Place this over the heated tawa and cook till bubbles appear over the surface. Add ghee over it.

11. Flip and cook for about half a minute adding ghee over that side too.

12. Remove and repeat the same with the rest of the dough.

Notes:

* The water quantity while making the wheat dough can vary with your brand. Just make into a soft and smooth dough. Keep for rest for about 30 mins if you have time. Else it’s fine.

* We get readymade skinned peanuts here and I use that. If you have regular ones, you might need to roast it on low flame, cool it and remove the skin.

* While powdering the peanuts, be careful to not grind continually as it may leave oil. Just pulse and powder it. Even if little bits of peanuts remain, it’s fine. Adds a good crunch to the Ubbattis.

* Don’t make jaggery syrup. Just melt it and bring to a boil.

* Switch off the flame immediately after adding and mixing the peanuts. Else it may turn hard. Also, don’t keep the mixture to cool for long. Make balls when the mixture is still warm.

* Make both the inner and outer dough balls of equal size. Else the Ubbattis may not taste as good or might become like parathas. Making both balls of equal size ensures the outer layer is thin and we get good flavour of the filling.

* As these Ubbattis are kept at room temperature, they turn crisp on the outside but soft on the inside. That’s exactly how we love it. If you love soft Ubbattis, consume them immediately after making it.

* Since it is easy to make, I make it fresh each time. The measurements I have mentioned above yields 5 Ubbattis which are sufficient for us to last a day.

* Also, with the above measurements, I get two balls of wheat dough leftover ie it makes 7 wheat balls. I make chapati with it.

Kharbas dosa | no fermentation dosa

My husband is on vacation since two weeks now and has been looking out for new recipes to try for me. It has actually made my job easier as I no longer have to think what to cook (which is a huge task in itself πŸ˜…). He searches for unique recipes (his current hobby πŸ˜€) and sends it to me. I just have to make it (which I don’t mind at all as I love cooking ❀️)

So last week he sent me this recipe of Kharbas dosa which he found in a video. I was amazed as it did not need fermentation at all and even then turned out super crispy. It also came out so tasty that I had to share the recipe with all of you. 😍

Hope you all try and love this dosa too. Our dosa loving family could not get enough of it and I made it again today for them. Happy and healthy cooking! ❀️

RECIPE:

Recipe credits: jyoth youtube channel

Ingredients: {Gives about 12 to 14 dosas}

2 Cups Raw white rice or Idli rice (I use any variety of short grain white rice available here)

1 Cup Urad dal (I used split ones)

2 tsp Methi or Fenugreek seeds

2 tsp Peppercorns or to taste

2 Kashmiri long red chillies

Salt to taste

Ghee or oil to cook the dosa

Step by step recipe:

1. Wash well and soak the rice, Urad dal, Methi along with pepper corns and red chillies for atleast 4 hours.

2. After it gets soaked, drain water completely and add to the mixer jar along with salt.

3. Add about 1 to 1 1/2 Cups water and grind to a smooth paste. Pour into a bowl.

4. Now the batter is ready to make dosas. Heat a dosa pan and pour a ladle of the batter. Spread into a large circle. Cook till the surface looks cooked and the underside turns crispy adding ghee or oil in between..

5. Serve hot with a chutney of your choice.

Notes:

* Methi is a very important ingredient in this dosa as we are not fermenting it. Do not skip Methi.

* The amount of pepper is to taste. If you don’t like pepper, you can skip it but I suggest to add atleast 1 tsp of pepper and 1 red chilly for the great flavour.

* Since I am a huge fan of fermentation as it increases the nutritional value in manifold, I do ferment this dosa batter as well but it makes no change to the texture of the dosa. It is crisp even before fermentation. The taste is also the same. So I suggest if you have time, ferment it for few hours. Else it’s okay as this dosa really does not need fermentation.

* The chutney I make with this dosa is ginger chutney. Just grind coconut with green chillies, ginger and tamarind paste along with salt and water to a fine paste. Pour into a bowl and add little water to bring it to chutney consistency. Season with spluttered mustard seeds and curry leaves in coconut oil.